

Page 1
Getting Started
This chapter will explain the set-up and connection procedures for your
projector, including inf ormation pertaining to basic adjustments and
interfacing with peripheral equipment.
Powering Up The Projector
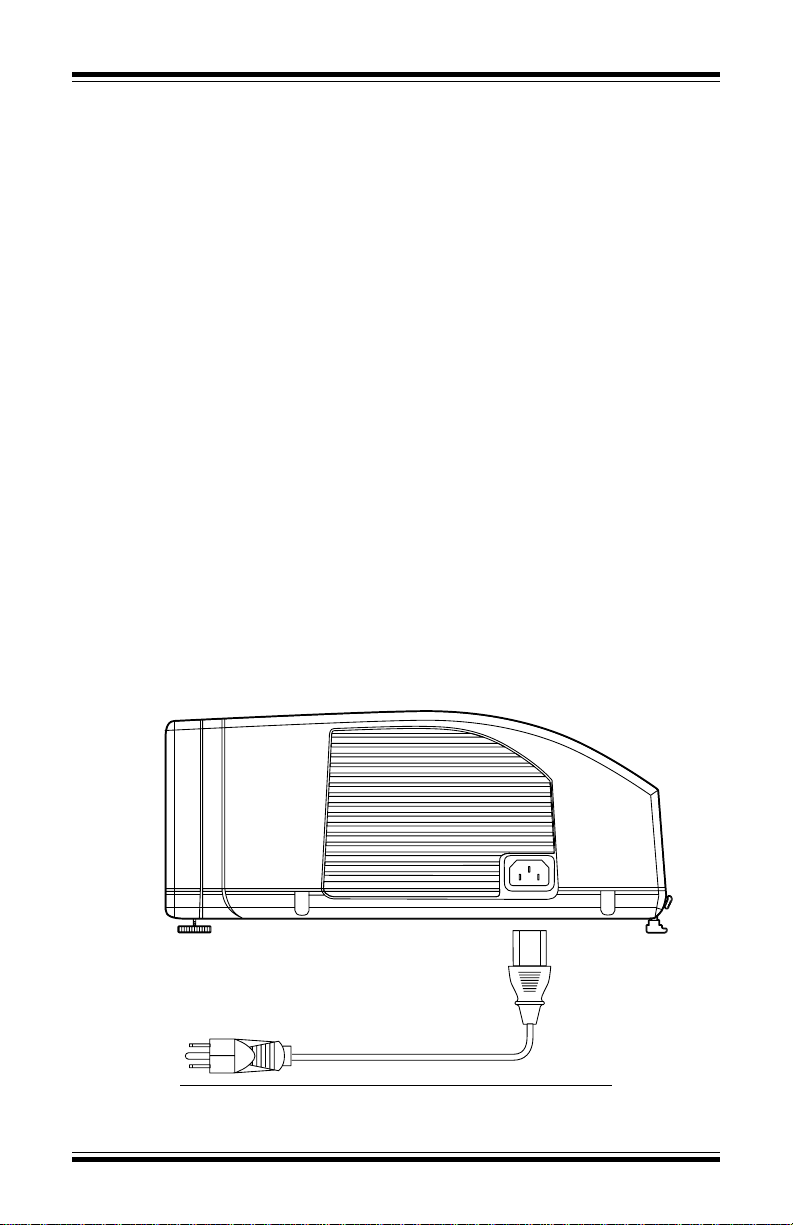
Insert the power cord into the AC input socket of y our projector, as
shown in Figure 1. Connect the other end of the power cord to an AC
outlet.
Upon connecting to power , the projector will enter the
Lamp Age LED , the Lamp Status LED and the P ower On/Standb y LED
will flash on then off then on again. The f an will turn on and the lamp
will light. During this time the projector keypad and the remote control
will be inactive. After approximately 12 seconds the remote control
and the projector keypad will become active and all projector functions
will become accessible.
Live State*
the
*For an explanation of the projectors operational states see page A-4 in
the appendix.
Figure 1: P ower Connection
Lightware L-1020 Projector User’s Guide
1
Page 2
Getting Started
Connecting to an IBM Compatible Desktop PC.
Set the resolution of your computer display to XGA (1024x768) or
lower.
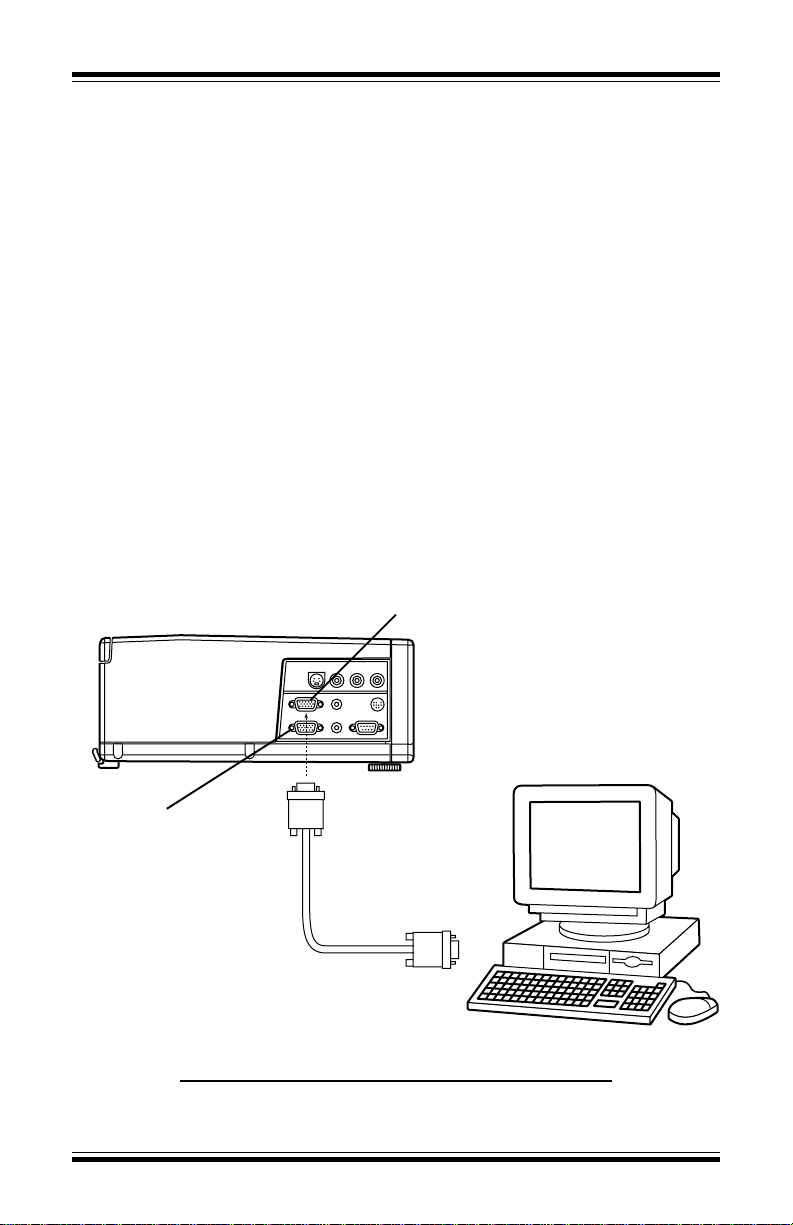
Disconnect the PC monitor cable from the computer monitor output
connection on your computer .
Connect the supplied 15 pin V GA signal cable to y our projector
Computer In
Connect the other end of the cable to the monitor output connection of
your computer.
Note: If you wish to view your computer and projected images
connector as shown in figure 2.
simultaneously , use the 15-pin HD gender changer to connect
the computer monitor cable to the projector
Monitor Out
connector.
Computer In
Monitor Loop Through
Connector
2
Lightware L-1020 Projector User’s Guide
Figure 2: PC Desktop Connection
Page 3
Connecting to an IBM Compatible Laptop PC
Set the resolution of your laptop display to XGA (1024x768) or lower .
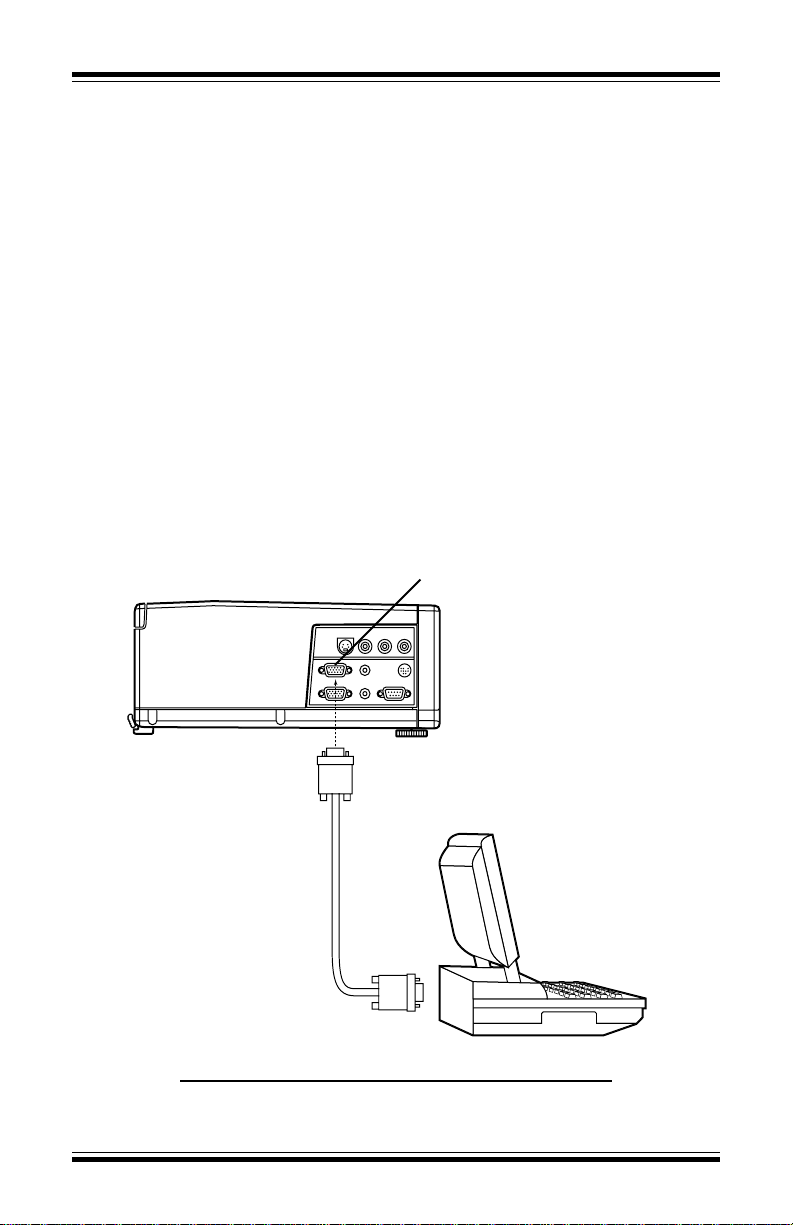
Connect the supplied 15 pin V GA signal cable to y our projector
Computer In
Connect the other end of the cable to the external monitor output
connector of your computer .
Activate the laptop’ s e xternal monitor (VGA) port. This is usually
accomplished using the Fn key in conjunction with one of the function
keys (Fn+F4 for example).
Note: See page A-15 in the appendix for a list of laptop manufacturers
as shown in figure 3.
and the methods they use to activate the laptop’ s e xternal
monitor port.
Computer In
Figure 3: PC Laptop Connection
Lightware L-1020 Projector User’s Guide
3
Page 4
Getting Started
Connecting to a Mac Desktop Computer
If your Mac has a separate V GA output port, connect the supplied 15
pin V GA cab le to that output port and connect the other end of the
VGA cab le to the
In the Mac O/S control panel, set the mirroring option to ON and
designate the external monitor as the active monitor . F or more
information on the mirroring function see page A-13 in the appendix.
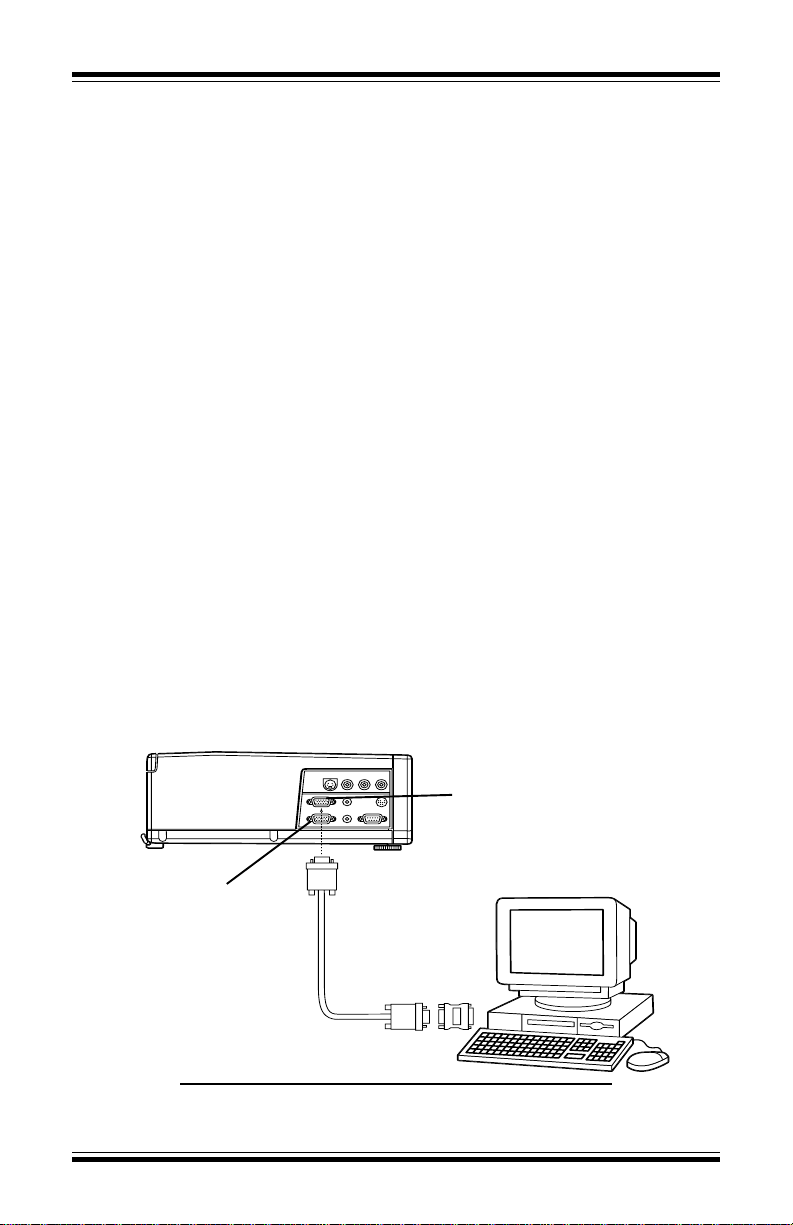
If your Mac does not have a separ ate VGA output port, then disconnect the monitor cable from the computer monitor output connector
and connect the Mac adapter (available upon request) to the monitor
output connector on the computer as shown in figure 4. Connect the
supplied V GA cab le to the output side of the Mac adapter . Set the dip
switches on the Mac adapter to match the output requirements of your
Mac. See page A-11 in the appendix for help in setting the dip
switches.
Note: If you wish to view your computer and projected images simulta-
neously , you can use the built-in monitor loop-through connection of the projector to connect to your Mac monitor . Connect
the Mac loop-through adapter (available upon request) to the
projector
cable to the output side of the loop-through adapter .
Monitor In
Monitor Out
connector on the projector.
connector. Connect your Mac monitor
Monitor Out Connector
4
Lightware L-1020 Projector User’s Guide
Computer In
Figure 4: Mac Desktop Connection
Page 5
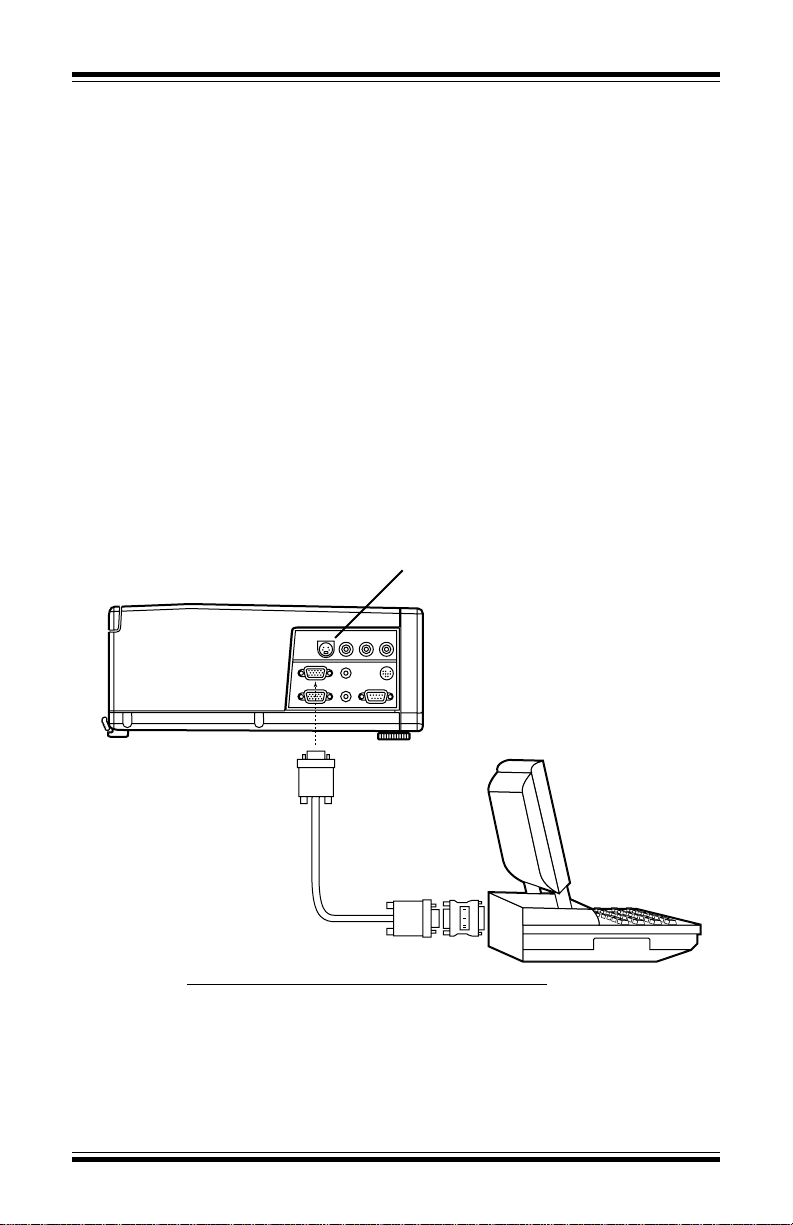
Connecting to a Mac Laptop Computer
Connect the Mac adapter (available upon request*) to the laptop
external monitor output port. Connect the supplied VGA cab le to the
output side of the Mac adapter shown in figure 5. Connect the other
end of the V GA cable to the L-1020
switches on the Mac adapter to match the output requirements of
your Mac. See page A-11 in the appendix for help in setting the dip
switches.
Different models of Mac Computers have different requirements for
using an external monitor. F or more information on connecting to an
external monitor or projector see page A13 in the appendix.
Monitor In
Computer In
connector. Set the dip
Figure 5: Mac Laptop Connection
*To request a Mac adapter, call Lightware technical support at
1-800-445-9396.
Lightware L-1020 Projector User’s Guide
5
Page 6
Getting Started
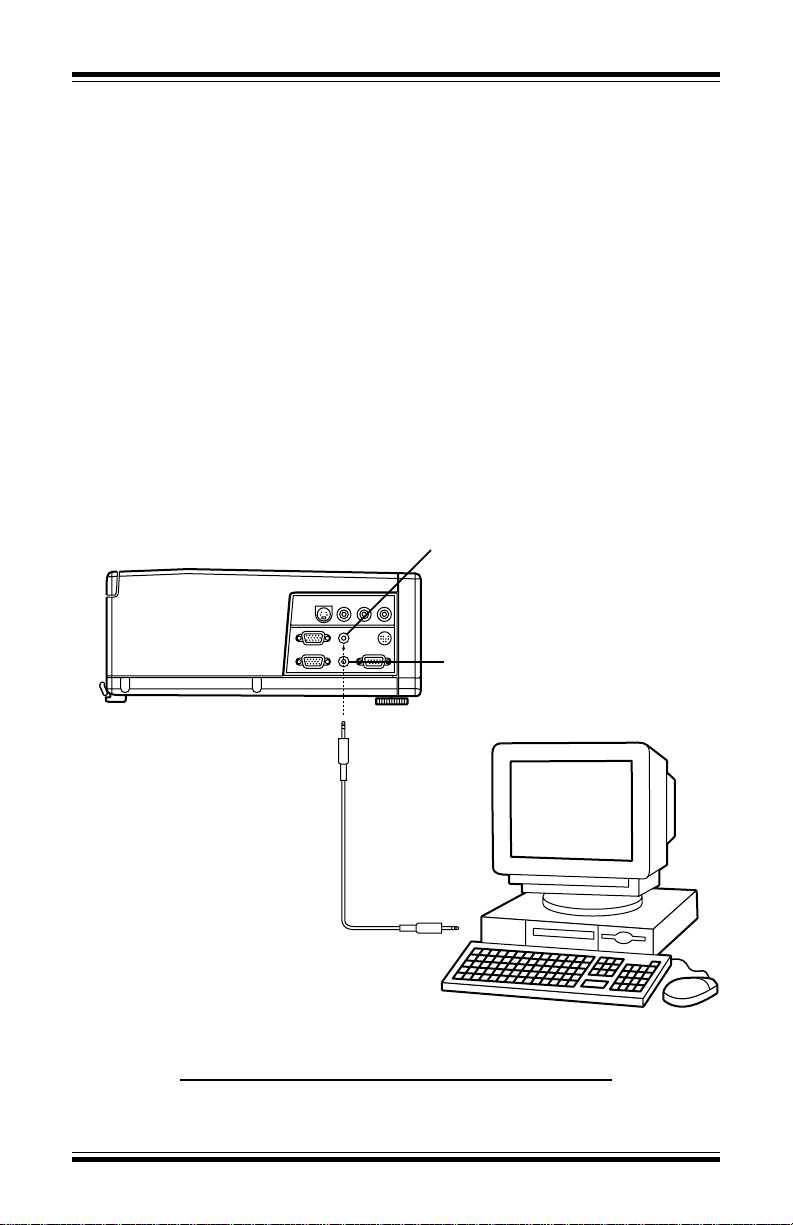
Connecting to Computer Audio
There are separate audio input connections for computer and VCR on
your Lightware L-1020.
To connect to your computer audio output, plug one end of the supplied stereo-audio cable (3.5mm male connectors on each end) into
the audio output jack of your desktop computer or the speaker output
jack of your laptop. Connect the other end of the stereo audio cable to
the computer
6.
The L-1020 has the capability of providing an audio signal to powered
external speakers via the 3.5mm
Audio In
jack of the Lightware L-1020 as shown in figure
Audio Out
jack.
Audio in
Audio Out
Figure 6: Audio Connection
6
Lightware L-1020 Projector User’s Guide
Page 7
Connecting to a Video Player
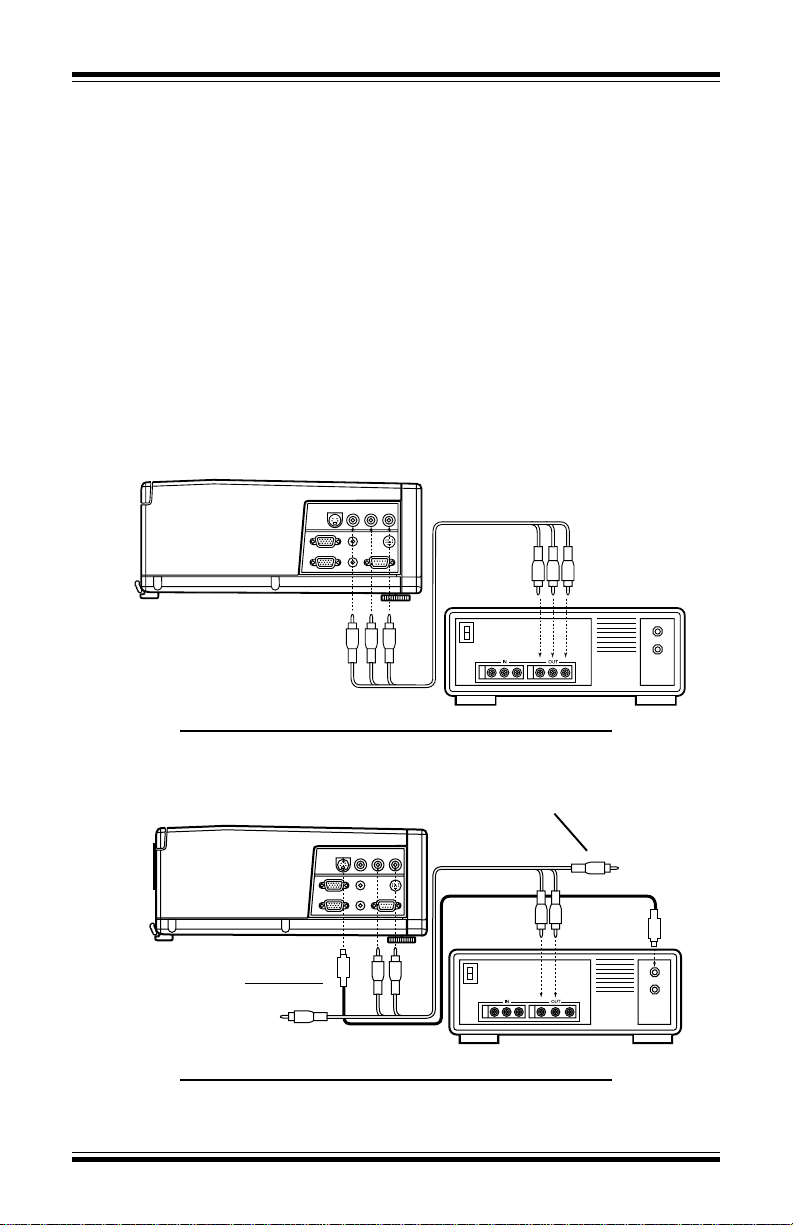
The L-1020 accepts both composite video and S-video inputs from a
video player as well as stereo audio inputs.
Use the three wire composite video/stereo-audio cable, shipped with
your projector , to connect to your video pla yer video and audio outputs
as shown in figure 7. The color coded red and white connectors are for
audio and the yellow connector is for composite video.
If you are using an S-video source instead of composite, the composite video cable will remain unused, as shown in figure 8.
Figure 7: A udio / Video Connections
Unused Video Cable
S-Video Cable
Figure 8: S-video Connection
Lightware L-1020 Projector User’s Guide
7
Page 8
Getting Started
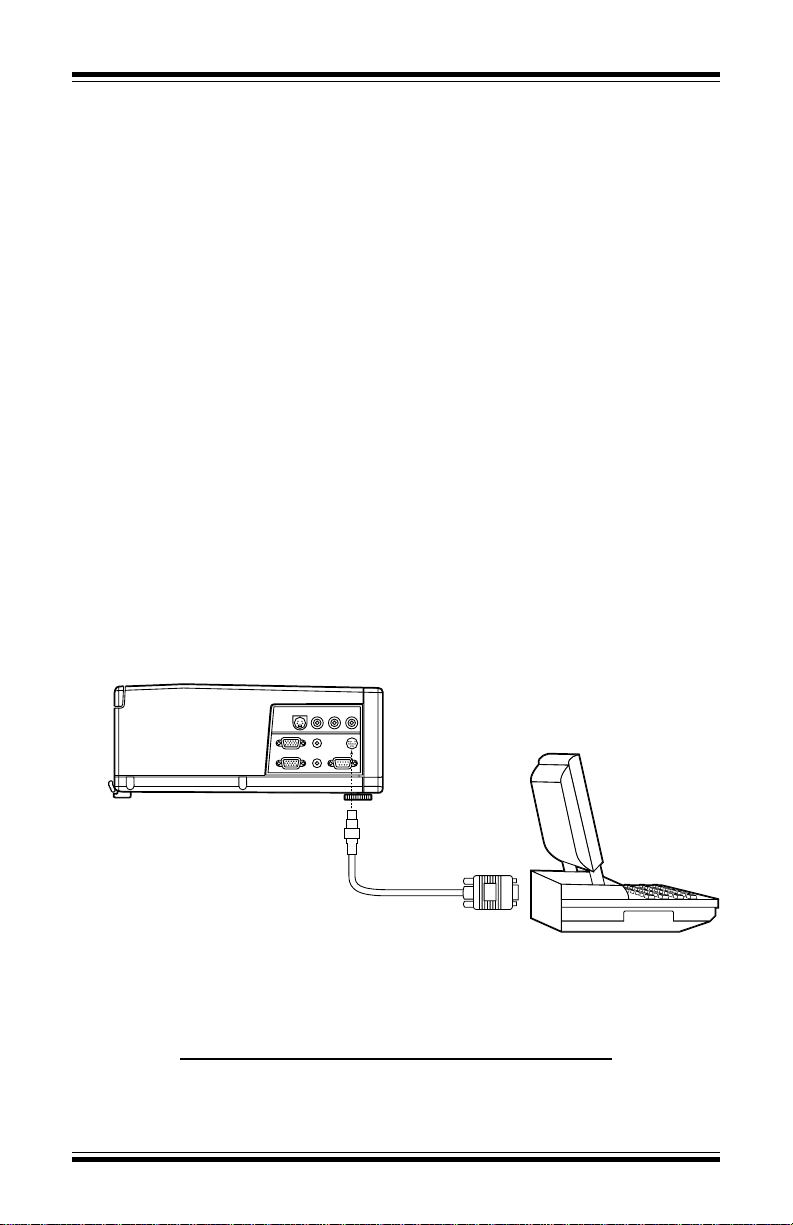
Connecting the Remote Mouse
T o control your computer mouse from the projector’ s remote control,
use the following procedure:
1. Turn off your computer.
2. Disconnect the standard mouse from the mouse port on your
computer.
3. Connect the remote mouse interface cable between the 9 pin DIN
of the projector and the appropriate mouse connector (serial, PS2,
ADB) on your computer , as shown in figure 9.
4. Make sure that your projector is connected to power and then
power up your computer .
For most applications the above procedure is all that is required. If
you are encountering difficulty , please refer to
Remote Mouse
Note: ADB adapters for Macintosh computers are available upon
request at no charge. Contact your dealer or Lightware at 1-800445-9396.
on page A-8 in the appendix.
Configuring Y our
Figure 9: Remote Mouse Connection
8
Lightware L-1020 Projector User’s Guide
Page 9

Operating the Projector
This chapter describes how to operate your projector . It includes inf ormation on how to adjust the projector , use the remote control, and how to
access and use the on-screen menus.
Powering up the Projector
Be sure the projector is properly connected to power and the projector
is in the
Sleep
state
*.
Press the
Live
takes approximately 30 seconds to reach full brightness.)
The projector uses a group of default settings at startup. These
default settings can be modified through choices made in the menus.
See page17
The default settings provide an on-screen Startup logo for the first five
seconds and then select the data input source. If no data source is
present the projector will select a video player input source. If no
input source is detected, the image projected will default to the Startup
logo. If no Startup logo was selected in the features menu then the
screen will be blank.
Caution: Ultra High Pressure lamps need to be in a stable condition
prior to turning them on or off. To pr otect the lamp and the
projector , Lightware has designed pr otective delays into the
power up and power down cir cuitry . After first turning on the
lamp, a 30 second timer prevents prematurely turning it off. After
turning off the lamp, a 60 second timer prevents turning it on
prematurely . Please do not attempt to b ypass these delays.
*for more information on the operational states of the L-1020, see
Operational States
Tip:
Po wer On/Standby
state* with the lamp on and the fan at high speed. (The lamp
button and the projector will enter the
Menus.
on page A-4 in the appendix.
If you are connected to a laptop and are not projecting an image you
may hav e not properly activated the e xternal video output port. See
Laptop External Video Port Activation on page A-15 in the appendix
.
Lightware L-1020 Projector User’s Guide
9
Page 10
Operating the Projector
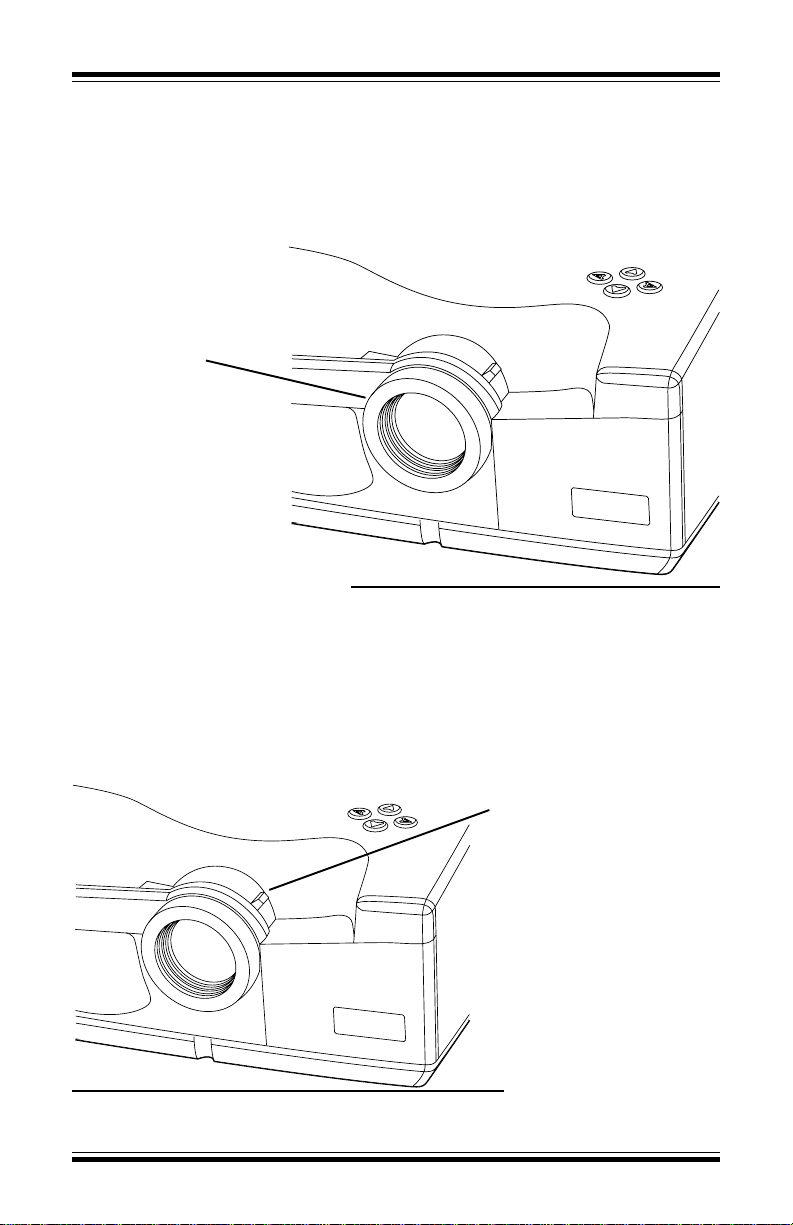
Adjusting Focus
To adjust focus, rotate the focus ring, as shown in figure 10, until the
image is clear.
Focus Ring
Figure 10: Focus Adjust
Adjusting Image Size
To adjust the size of the projected image, move the zoom ring tab ,
shown in figure 11, until the image is the desired size. For a chart
showing distance to screen vs image size refer to page A-21 in the
appendix.
Zoom Ring Tab
Figure 11: Image Size Adjust
10
Lightware L-1020 Projector User’s Guide
Page 11
Adjusting Height
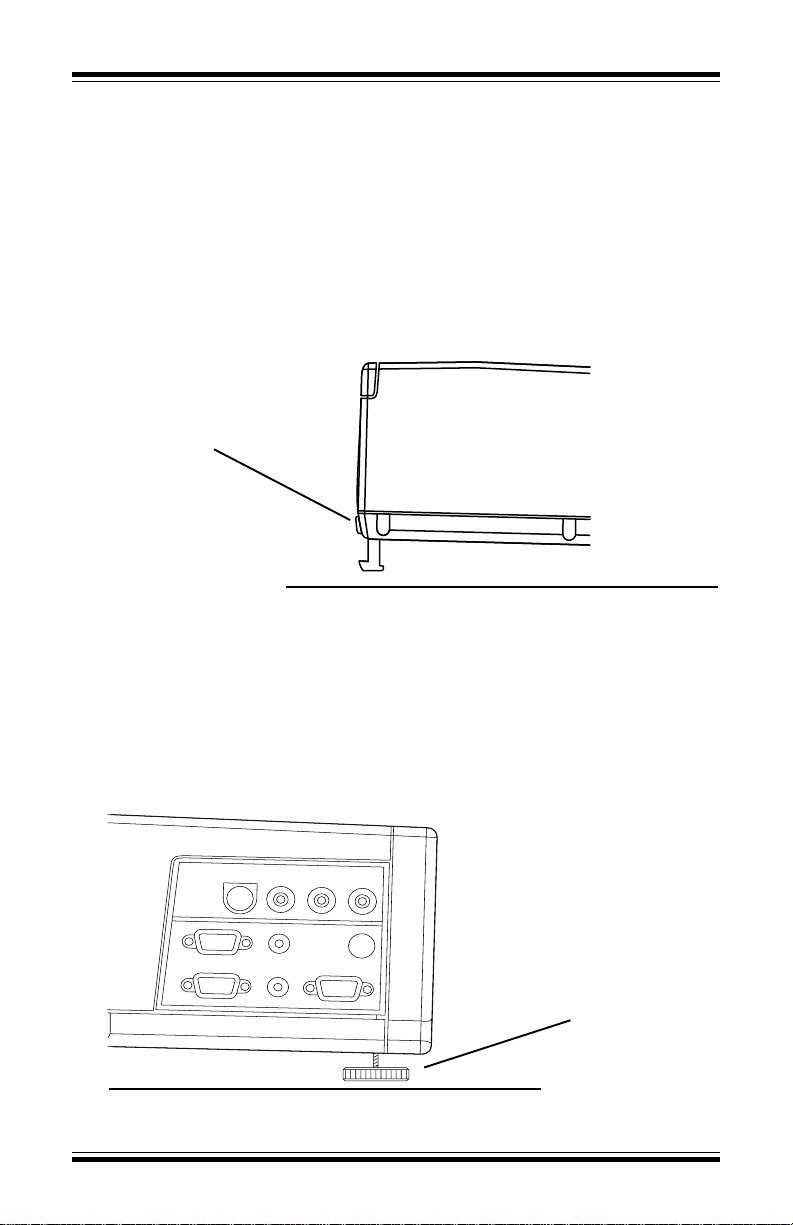
T o adjust the height of the front of the projector , Lightw are has provided a quick-release elevator foot under the front center of the
projector. T o set the appropriate projector height, press the release
mechanism shown in figure 12, and lift the front of the projector. Once
the appropriate height is reached, let go of the release mechanism to
lock the elevator foot in place.
Elevator Foot Release
Figure 12: F ront Ele vator F oot Adjust
Adjusting Level
T o adjust the le v el of the projector, Lightware has pro vided an adjustable elev ator f oot on each rear corner. To set the level, rotate the foot
of the appropriate rear corner, as shown in figure 13, until the projected
image is level.
Leveling Foot
Figure 13: Projector Level Adjust
Lightware L-1020 Projector User’s Guide
11
Page 12

Operating the Projector
Remote Control
The wireless remote control is similar to those used for TV's and
VCR's. It allows you to set up and adjust the projector image and to
conduct interactive presentations.
The projector control buttons on the remote control give you instant
access to all projector functions.
The built in joystick and mouse buttons allow remote control of the
computer mouse with all of the functionality of your standard computer
mouse.
Configuring your remote mouse with appropriate drivers and the use of
simultaneous remote mouse and laptop pointer are discussed in
Configuring Your Remote Mouse
on page A-8 in the appendix.
Curtain
On/Standby
Source
4 Directional
Select Keys
On Screen
Menus
Computer Mouse
Control
Left Mouse
Button
12
Lightware L-1020 Projector User’s Guide
Freez e
Zoom Out
Zoom In
Pointer
Audio Controls
Drag & Drop
Right Mouse Button &
Remote Backlight
Figure 14: Remote Control
Page 13

Remote Functions
The following describes the various projector functions available from
the remote control. Those functions also available from the projector
keypad are noted.
On/Standby
Press the
On/Standby
button, on the remote control or
the projector keypad, to cause the projector to change the
fan speed to high and turn the lamp on (
Live*
state). If the
projector lamp has been on for more than 30 seconds,
pressing it again will slow the fan speed to standby and
turn off the lamp (
Standby*
state). If the lamp has been
on for less than 30 seconds the projector will enter the
StandbyP ending*
state and the
Po wer On/Standby
button
on the projector keypad will flash pending transition to the
Live
state.
*For more information on the operational states of the projector
see
Operational States
on page A-4 in the appendix.
Source
Press the
Source
button on the remote control or the
projector keypad to toggle the input to the projector
through the available input sources i.e . computer, composite video and S-video. If there are no other activ e
input sources connected an error message will appear for
5 seconds indicating the lack of an additional signal
source and the source selection will remain where it is.
Directional Select Keys
The
Directional Select Keys
on the remote control or the
projector keypad provide the following functions:
l
Menu navigation and selection
l
Projected image positioning
l
Pan around a zoomed or cropped image .
l
Pointer mo vement
l
Slide control adjust
l
Curtain operation
Lightware L-1020 Projector User’s Guide
13
Page 14

Operating the Projector
Remote Functions (continued)
Menu
Press the
keypad to activate the on-screen main menu. Pushing it
once more will de-activate the on-screen main menu.
Curtain
Press the
curtain on the entire projected display . You can then
reveal portions of the display by using the arro w k eys to
slide the curtain down, up, right, or left.
Freeze
Press the
the projected image. Press the
transition to another source to return the projector to
normal display operation.
Menu
key on the remote control or the projector
Curtain
Freeze
key on the remote control to ov erla y a
button on the remote control to freeze
Freeze
button again or
Tip:
You can use the Freeze button to hold an image on the projected
screen while you are making changes to your presentation or checking
your notes on your computer screen. Once the adjustments are
made, simply press the freeze button again to return to your presentation.
14
Zoom
Press the
display to zoom in on the center of the projected image.
Zoom will magnify the image up to 8 times in 19 steps.
Continued pressing of the
display to the normal size.
While in the zoom mode use the
the zoom window around the full screen.
Lightware L-1020 Projector User’s Guide
Zoom In
key on the remote control to cause the
Zoom Out
key will return the
Directional Keys
to move
Page 15

Pointer
Press the
arrow shaped pointer in the center of the screen. The
Directional Select keys are used to move the pointer
around the screen.
Audio Controls
Press the + key on the remote control to increase the
volume of the audio . Press the - key on the remote
control to decrease the volume of the audio. Press the
Mute
Remote Backlight
Press and hold the
control for several seconds to activate the backlight for
the remote control buttons.
Computer Mouse Control
Use the
computer mouse in a manner similar to the standard
mouse control used on most computers.
Pointer
key to mute the audio.
Joystick
key on the remote control to produce an
Right Mouse
on the remote control to control the
button on the remote
Right Mouse Button
The
Right Mouse
in a manner similar to the standard right mouse button
control on most computers.
Left Mouse Button
The
Left Mouse
a manner similar to the standard left mouse button control
on most computers.
Lightware L-1020 Projector User’s Guide
button on the remote control functions
button on the remote control functions in
15
Page 16
Operating the Projector
Projector Control Panel
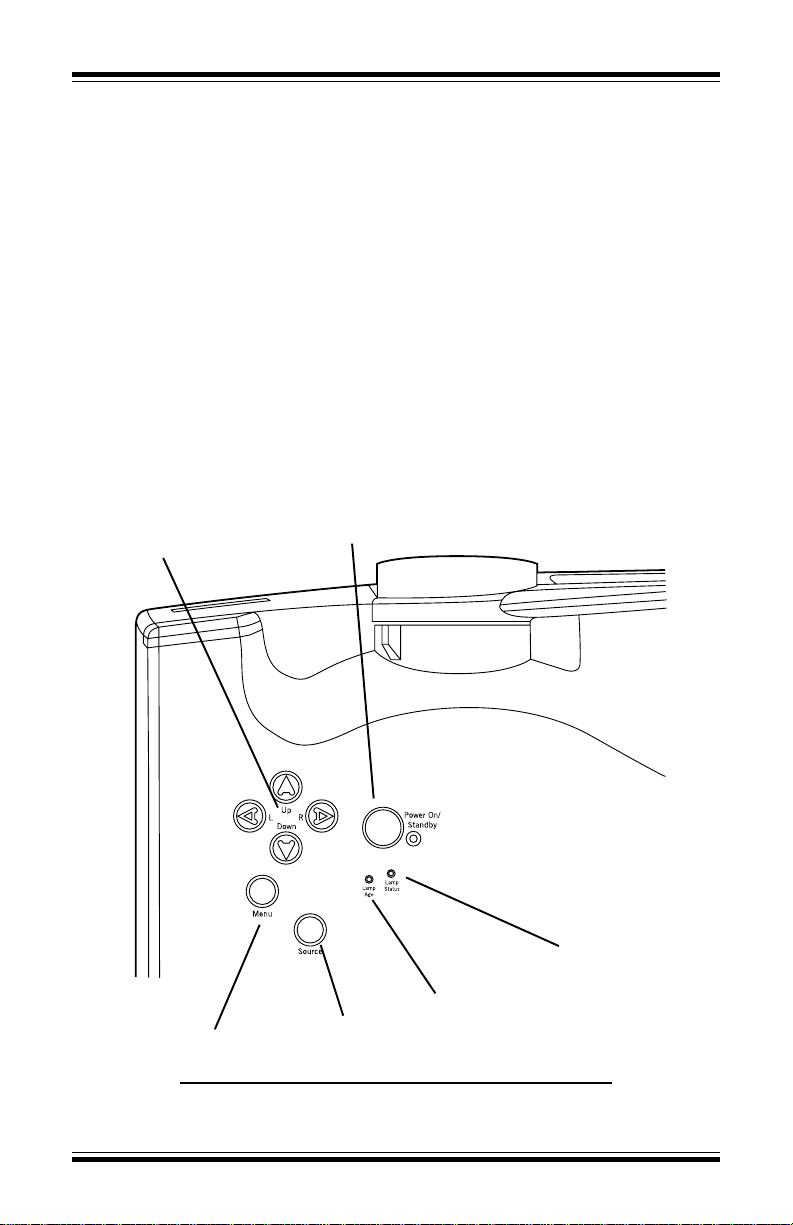
Figure 15 shows the layout of the L-1020 keypad controls.
The Lamp Age LED and the Lamp Status LED provide information on
the condition of the High Intensity Discharge Lamp.
The lamp conditions indicated by the LED’ s are as follo ws:
Lamp Status LED
Green - No Fault
Red - Lamp Failed
Lamp Age LED
Green - Less than 100% of Lamp Life
Amber - 100% of Lamp Life
Red - 150% of Lamp Life
Power On/Standby
Directional Arrows
16
Lamp Age LED
Menu
Source
Figure 15: L-1020 K e ypad
Lightware L-1020 Projector User’s Guide
Lamp Status LED
Page 17
Menus
Menu Operation
Press the
Menu
button on the remote control or on the projector’s
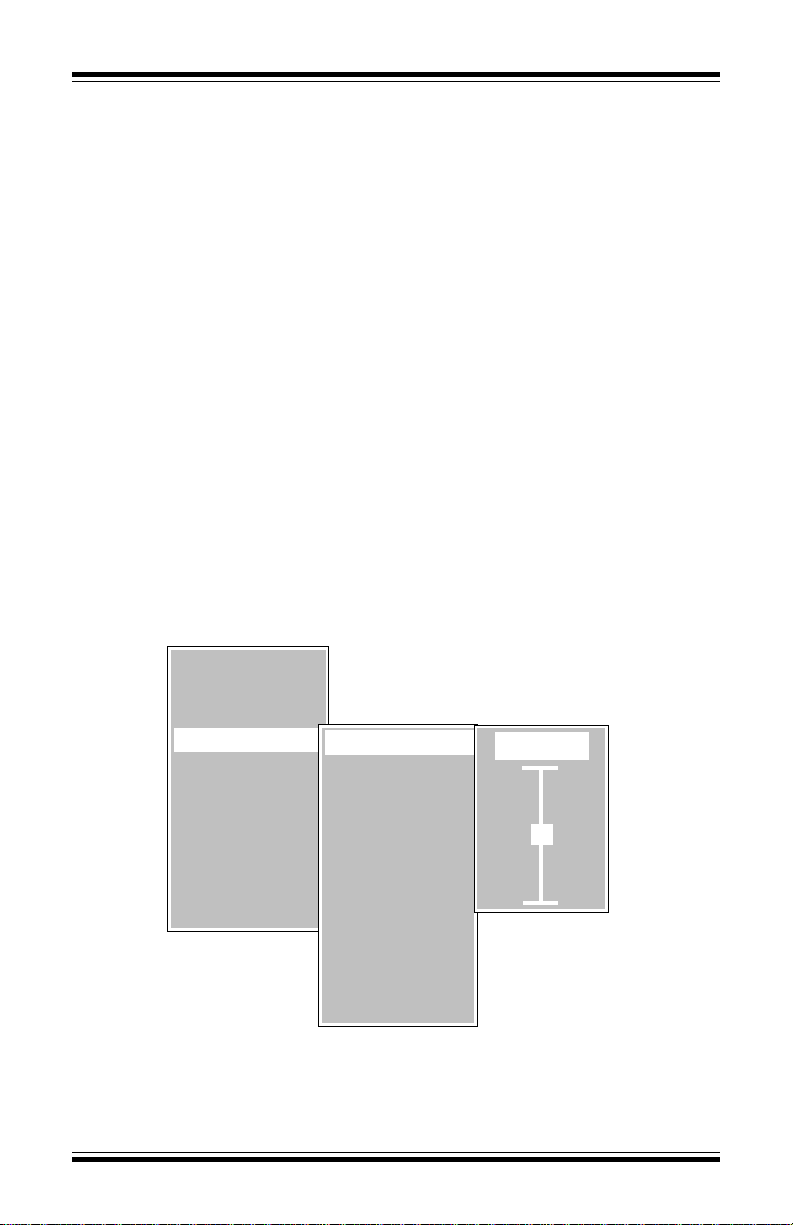
control panel to bring up the on-screen main menu and the sub-menu
for the highlighted selection. Each main menu item has an associated
sub-menu. Press the Up or
Down
arrow keys on the remote control to
highlight a menu item. Highlighting the menu item brings up the submenu for that selection. Use the
Right
arrow key to move to the sub-
menu.
The sub-menus provide all of the choices that relate to the main menu
selection. Press the Up or
then press the
Right
Down
keys to highlight your choice and
arrow key to bring up either a slide control that
will adjust the level or value of that choice or a second sub-menu that
will provide the final selections. A typical example of each is shown
below .
Any changes or adjustments made are saved when the projector is
powered down. The L-1020 will remember the configuration settings
for the last ten signal sources used with the projector and recall those
settings whenever one of those devices is detected.
Help
Audio
Picture
Source
Features
Custom Modes
Service
Reset
Main Menu
4
4
Frequency
4
Tracking
4
Contrast
4
Brightness
4
Sharpness
4
Room Light
4
Color
Tint
Reset
4
4
4
4
4
4
4
4
4
Frequency
+
0
-
Slide Control
Sub Menu
Lightware L-1020 Projector User’s Guide
17
Page 18

Operating the Projector
For those menus with a reset function, highlight Reset and use the
right arrow to move to the Reset sub-menu. While in the Reset sub-
menu press the down arrow to reset the functions in that menu.
Select Reset in the Main menu to reset values in the Main menu as
follows:
l Audio - Resets all values in the audio menu.
l Picture - Resets all values in the picture menu.
l Source
l Features - Resets Compression, Ceiling Mount, Rear Projec-
- Resets to Computer as first choice.
tion, it does not reset Language, Startup Logo and Curtain.
l Custom Modes - Reset clears any saved custom modes.
l Service
-
No Service menu items are reset.
18
Lightware L-1020 Projector User’s Guide
Page 19
Audio Menu
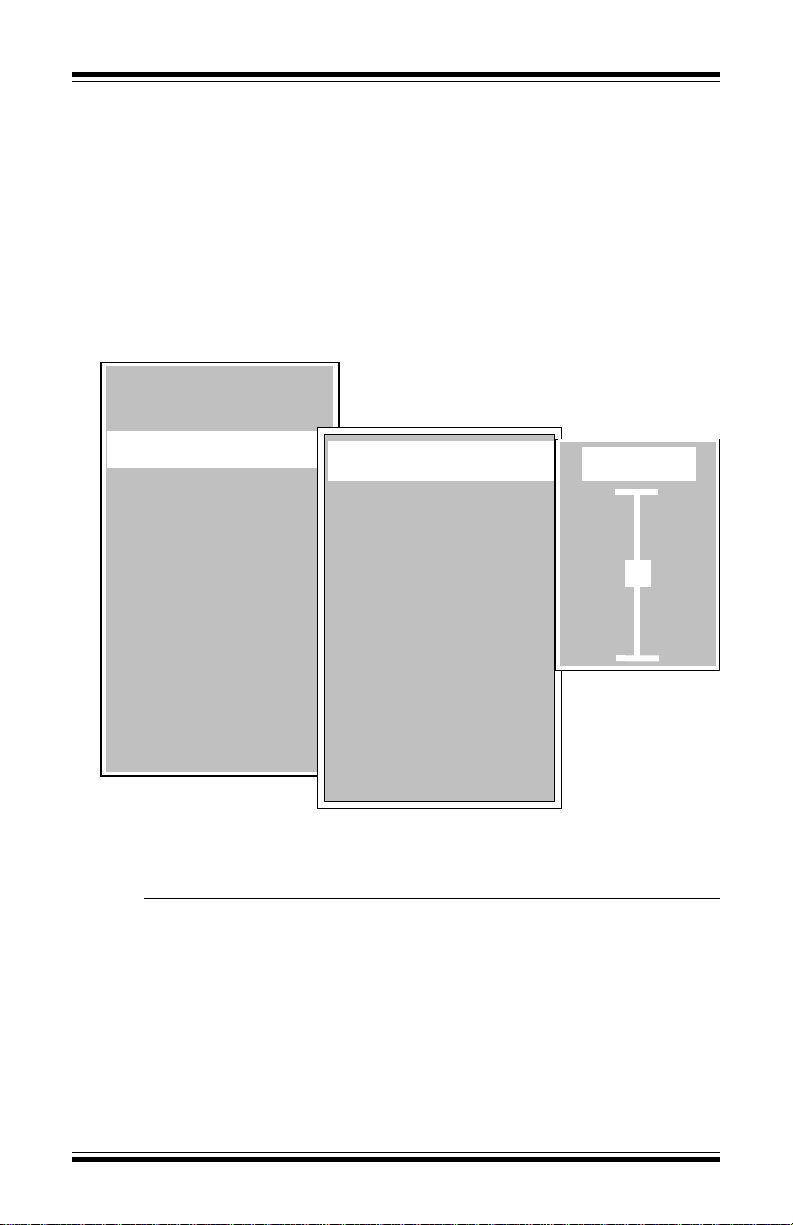
To access the Audio menu from the Main menu, use the Up or
arrows on the remote control or projector to highlight Audio in the Main
menu. Use the
In the Audio menu, use the Up or
that you wish to select. F or Volume, Bass, Treble and Balance a Slide
Rule will appear as shown below . F or the Stereo Mode, Mute and
Reset
functions, sub-menus will appear .
Help
Audio
Picture
Source
Features
Custom Modes
Service
Reset
Right
arrow to move to the sub-menu for the selection.
Down
arrows to highlight the function
4
Volume
4
4
4
4
Bass
Treble
Stereo Mode
4
4
4
4
4
Mute
4
Balance
4
Reset
Down
Volume
+
3
-
Volume
Choose Volume to produce a Slide Rule control.
l Press the
l Press the
level.
Lightware L-1020 Projector User’s Guide
Up
arrow key to increase the volume level.
Down
arrow key to decreas the volume
19
Page 20

Operating the Projector
Bass
Choose Bass to produce a Slide Rule control.
l Press the
l Press the
Treble
Choose Treble to produce a Slide Rule control.
l Press the
l Press the
Stereo Mode
Choose Stereo Mode to produce a menu with the following
choices. Use the Up or
the following.
l Mono: Mixes contents of right and left channels.
l Linear Stereo: Normal stereo without any extra
l Pseudo Stereo: Creates “like stereo” effect from
l Spatial Stereo: Simulates “3D space” feeling from
Up
Down
level.
Up
Down
level.
processing.
mono source.
stereo source.
arrow key to increase the bass level.
arrow key to decrease the bass
arrow key to increase the treble level.
arrow key to decrease the treble
Down
arrow keys to select one of
20
Lightware L-1020 Projector User’s Guide
Page 21

Balance
Choosing Balance will produce a slide-rule that will allow
you to adjust the left-right balance between the stereo
speakers.
Mute
Reset
l Use the
Up
arrow to move the sound balance to the
right.
l Use the
Down
arrow to move the sound balance to
the left.
Choose Mute to produce a menu with the following
choices. Use the Up or
Down
arrow keys to make a
selection.
l On
l Off (default)
Choose Reset to produce a menu that will allow you to
make the following choices. Pressing the
Down
arrow
will activate the reset function which will reset all audio
functions to factory default.
l No Reset
l Reset
Lightware L-1020 Projector User’s Guide
21
Page 22
Operating the Projector
Picture Menu
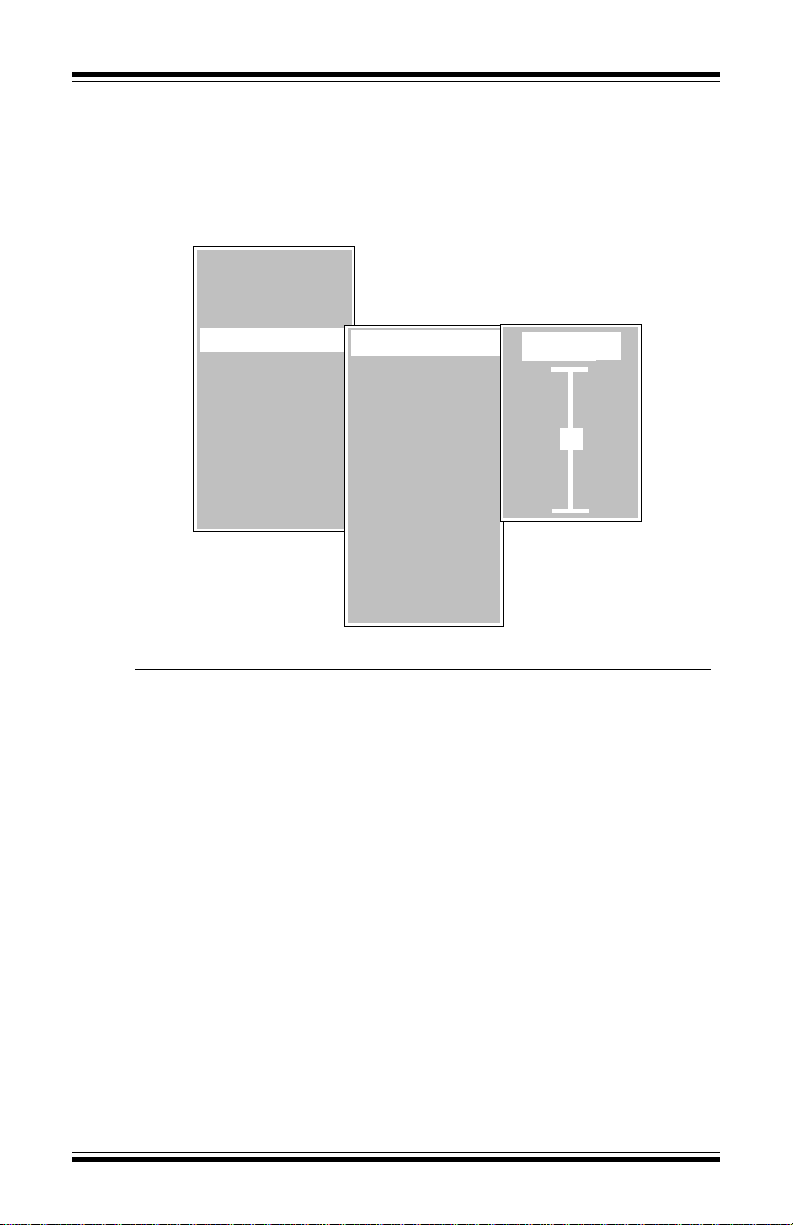
The Picture menu provides a series of choices that determine how the
projected image will appear on screen.
Select Picture from the main menu to produce the following sub menu.
Help
Audio
Picture
Source
Features
Custom Modes
Service
Reset
4
4
4
4
4
4
4
4
Frequency (Data Only)
The L-1020 is automatically set to the optimum frequency
based on the detected data input signals. In some cases
however manual frequency adjustment may be required.
The Frequency adjustment acts as a horizontal size
control matching the clock frequency of the projector to
that of the computer. A misadjusted frequency will cause
evenly spaced dark v ertical lines or distortions to appear
on the projected image. Use the slide rule control to
adjust the frequency until the lines spread apart and
finally disappear.
After you have completed the Frequency adjustment,
continue on to the Tracking adjustment described below.
Frequency
Tracking
Contrast
Brightness
Sharpness
Room Light
Color
Tint
Reset
4
4
4
4
4
4
4
4
4
Frequency
+
0
-
22
Select Frequency to produce a Slide Rule control.
l Press the
l Press the
Lightware L-1020 Projector User’s Guide
Up
arrow key to increase frequency.
Down
arrow key to decrease frequency.
Page 23

Tip:
For Windows 95 users the best screen to use when adjusting frequency is the Windows shut down screen. To access this screen,
click on the Start button on the task bar and click on shut down.
When the frequency adjustment is completed, click on no and return
to your active screen.
T racking (Data Only)
The L-1020 is automatically set to the optimum tracking
value based on the detected data input signals. In some
cases however manual tracking adjustment may be
required.
The Tracking adjustment is used to remove the last
indications of noise or shaded areas that remain on the
screen after completing the Frequency adjustment. No
Tracking
adjustment should be made until the Frequency
adjustment is checked. It may be necessary to adjust the
Frequency and Tracking a few times to correctly match
the projector to the computer.
Select Tracking to produce a slide rule control.
l Press the
l Press the
Up
arrow key to increase tracking level.
Down
arrow key to decrease the tracking
level.
Contrast
Select Contrast to produce a slide rule control.
l Press the
l Press the
Up
arrow key to increase the contrast level.
Down
arrow key to decrease the contrast
level.
Lightware L-1020 Projector User’s Guide
23
Page 24

Operating the Projector
Brightness
Select Brightness to produce a slide rule control.
l Press the
Up
level.
l Press the
Down
level.
Sharpness (Video Only)
Select Sharpness to produce a slide rule control.
l Press the
Up
level.
l Press the
Down
level.
Room Light
Room Light allows you to compensate for differences in
room lighting conditions. Each Room Light value sets the
optimum levels of brightness, contrast and color saturation to compensate for different lighting conditions.
arrow key to increase the brightness
arrow key to decrease the brightness
arrow key to increase the sharpness
arrow key to decrease the sharpness
24
Select Room Light to produce the menu choices shown
below .
Press the Up or
l Dark Room
l Normal
l Bright Room
Lightware L-1020 Projector User’s Guide
Down
arrow key to make your selection.
Page 25

Color (Video Only)
Select Color to produce a slide rule control.
l Press the
l Press the
level.
Tint (Video Only)
Select Tint to produce a slide rule control.
l Press the
l Press the
green.
Reset
Choose Reset to reset all picture functions to factory
default.
l No Reset
l Reset
Up
arrow key to increase the color level.
Down
arrow key to decrease the color
Up
arrow key to make the tint more red.
Down
arrow key to make the tint more
Lightware L-1020 Projector User’s Guide
25
Page 26
Operating the Projector
Source menu
The Source menu allows you to choose between a computer source or
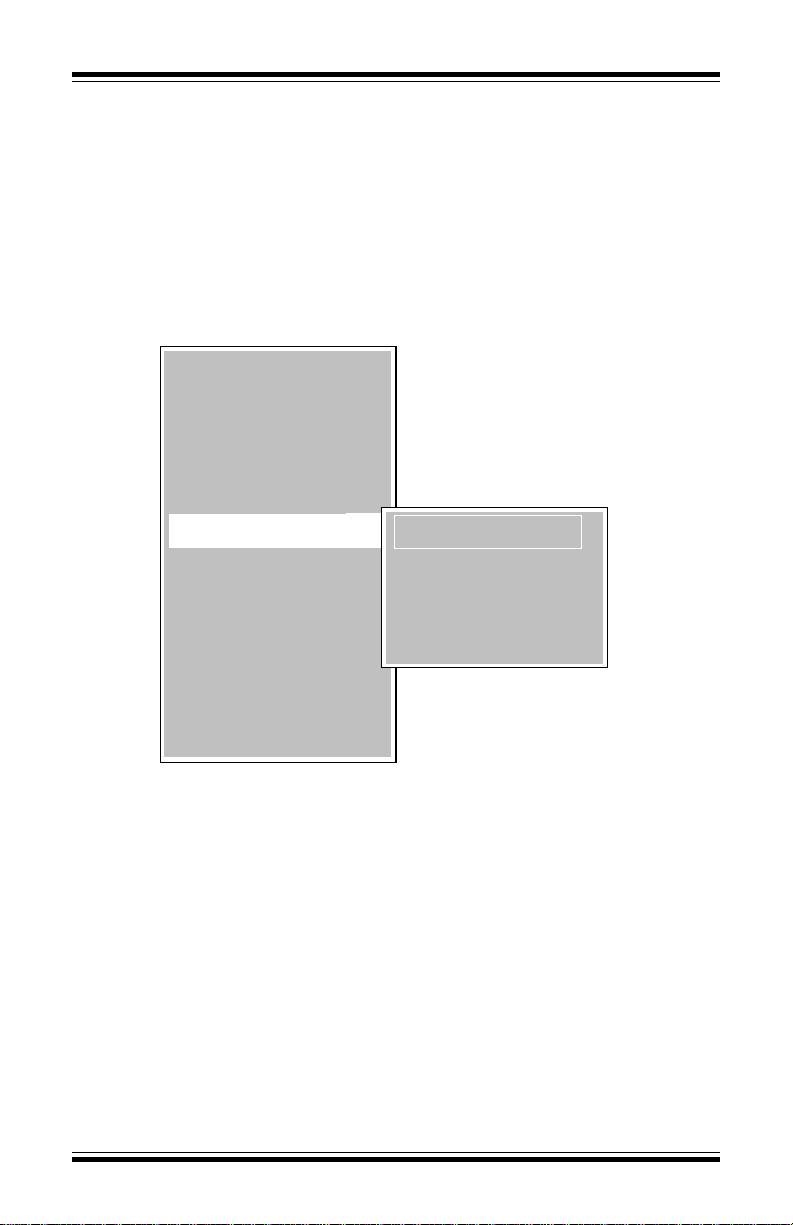
one of two separate video player sources.
Choose Source to produce a menu to choose among
Composite Video or S-Video. Use the Up or
the selection.
Down
Computer,
arrow keys to make
Help
Audio
Picture
Source
Features
Custom Modes
Service
Reset
Note: If a computer or video source is not detected a screen will
appear with the message that either the TV/VCR or Computer
Source was not detected.
4
4
4
4
4
4
4
Computer
Composite
Video
26
Lightware L-1020 Projector User’s Guide
Page 27
Features Menu
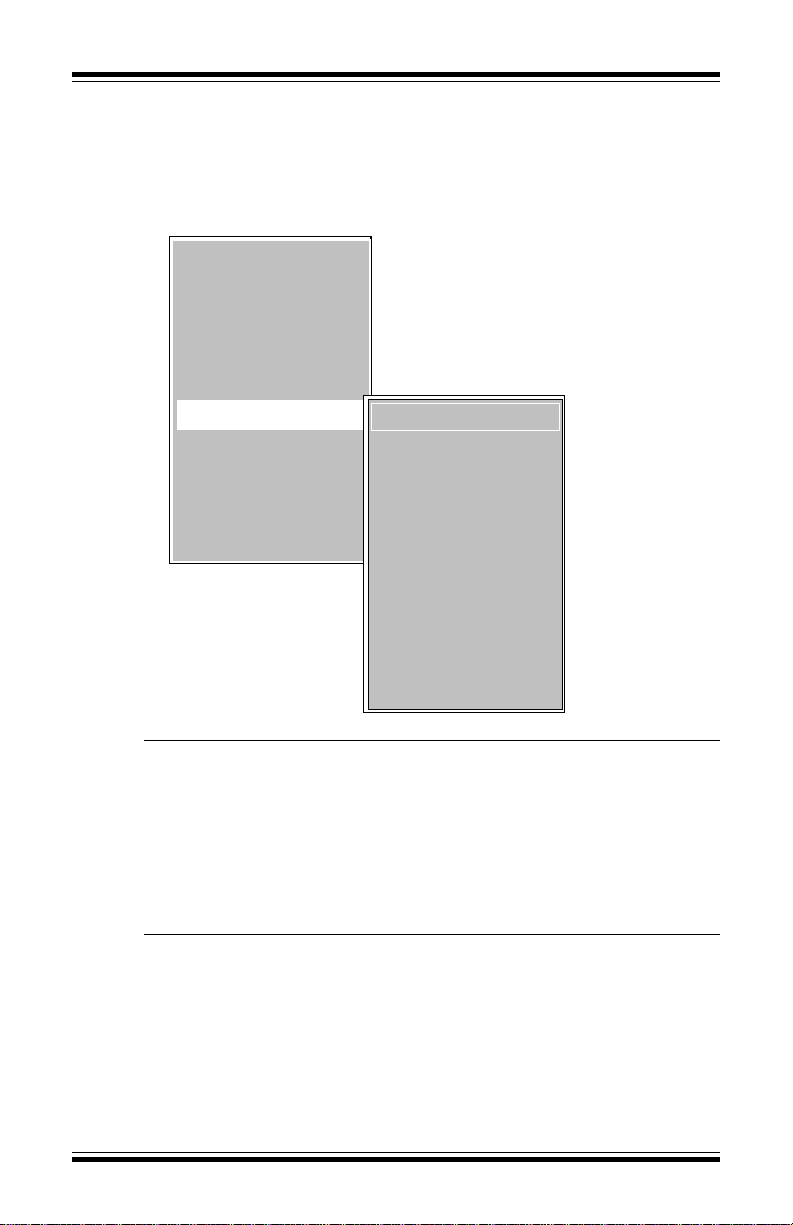
Select the Features option, from the Main menu to preset your style
preferences for the projected displa y.
Help
Audio
Picture
Source
Features
Custom Modes
Service
Reset
Language
Select Language to view the on-screen menus in one of
the six following languages: English, French, German,
Spanish, Italian or Chinese.
4
4
4
4
Language
4
Startup Logo
4
Curtain Style
4
PAL-M
4
Compression
Ceiling Mount
Rear Projection
Reset
4
4
4
4
4
4
4
4
4
4
4
Press the Up or
Startup Logo
Select Startup Logo to produce a menu to choose the
logo that will be projected during startup.
Use the Up or
l Default Logo
l Custom Logo
l Off
Lightware L-1020 Projector User’s Guide
Down
arrow key to select the language.
Down
arrow keys to make your selection.
27
Page 28

Operating the Projector
Note: Instructions for loading custom logos into the projector memory
are on page A-3 in the appendix.
Curtain Style
Select Curtain Style to choose what the curtain will look
like. The choices are listed belo w .
Use the up and down arrow keys to make a selection.
l Red
l Green
l Blue
l Yellow
l Cyan
l Magenta
l Black
l White
l Logo (Startup Logo)
28
P AL-M
The default setting for PAL-M is disabled. To enab le PALM choose Enable from the sub menu. The menu choices
are shown below .
l Enable
l Disable
Compression
Select Compression to produce a menu to set the default
mode for image resolutions SXGA and abov e. The menu
choices are shown below . Enable will configure an SXGA
image to fit the XGA screen. Disable provides a 1024x768
window of the SXGA screen.
Use the arrow keys to move around the SXGA screen.
l Enable
l Disable
Lightware L-1020 Projector User’s Guide
Page 29

Ceiling Mount
Select Ceiling Mount to vertically reverse the projected
image for upside down ceiling mount of the projector .
Selecting Ceiling Mount will produce the following choices.
Use the Up or
l Off
l On
Rear Projection
Select Rear Projection to horizontally reverse the projected image for rear projection.
Selecting Rear Projection will produce the choices shown
below .
Use the Up or
l Off
l On
Reset
Select Reset to access the reset function. Press the
Down
arrow to activate the reset function which will reset
all Features functions to factory default.
Down
arrow keys to make a selection.
Down
arrow keys to make a selection.
l No Reset
l Reset
Lightware L-1020 Projector User’s Guide
29
Page 30

Operating the Projector
Custom Modes Menu
The L-1020 can be used with many different video sources in many
different environments. Custom Modes allows the user to save four
different user configurations. The parameters that will be sa v ed as a
custom mode are as follows:
Frequency T racking
V ertical Position Horizontal Position
Contrast Brightness
Room Light Zoom Setting
Tint Color
Sharpness
To save a Custom Mode f or an input device , select Custom Modes in
the Main menu. Use the
Use the
which the mode will be saved. Use the
next sub-menu. Highlight Set to Current to save the present configuration.
Up
or
Down
Right
arrow key to move to the sub-menu.
arrow keys to highlight the mode number under
Right
arrow key to move to the
The saved Custom Mode is saved with and takes priority over the ten
saved modes whenever that device is detected.
Help
30
Audio
Picture
Source
Features
Custom Modes
Service
Reset
Lightware L-1020 Projector User’s Guide
4
4
4
4
4
4
4
4
Mode 1
Mode 2
Mode 3
Mode 4
Reset
4
4
4
4
4
4
Page 31

Mode 1
Mode 2
Mode 3
Mode 4
Select Mode 1 to display a sub-menu that lists the
following options:
l Active
l Inactive
l Set to Current
Select Mode 2 to display a sub-menu that lists the
following options:
l Active
l Inactive
l Set to Current
Select Mode 3 to display a sub-menu that lists the
following options:
l Active
l Inactive
l Set to Current
Select Mode 4 to display a sub-menu that lists the
following options:
l Active
l Inactive
l Set to Current
Reset
Select Reset to access the reset function. Press the
Down
arrow to activate the reset function which will reset
all Custom Modes functions to Inactive.
l No Reset
l Reset
Lightware L-1020 Projector User’s Guide
31
Page 32
Operating the Projector
Service Menu
Choose Service from the Main menu to provide information on projec-
tor life, lamp life software version and some useful test patterns.
Use the Up or
This will produce the sub-menu shown below . Use the
key to move to that menu. Use the Up or
selections in the sub menu.
Help
Audio
Picture
Source
Features
Custom Modes
Service
Reset
Down
arrow keys to highlight Service in the Main menu.
Down
arrow keys to make
4
4
4
4
4
4
Info
4
Lamp Life
4
Lamp Timer
Projector Life
4
Right
arrow
32
Test Pattern
Lightware L-1020 Projector User’s Guide
Page 33

Info
Select Info to display information on the version number
of the embedded projector firmware.
Lamp Life
Select Lamp Life to display the number of hours left in the
life of the High Intensity Discharge lamp.
LampTimer
Select Lamp Timer to access a menu that will reset the
lamp life timer after installing a new High Intensity Discharge lamp. Press the
function which will reset the lamp timer to zero.
l No Reset
l Reset
Down
arrow to activate the Reset
Projector Life
Select Projector Life to provide information on total
projector usage.
Lightware L-1020 Projector User’s Guide
33
Page 34

Test P attern
Test Pattern provides a selection of patterns that will help
evaluate the condition of the projector . Selecting Test
Pattern will provide a menu with the following choices.
Use the Up or
l Pattern 1
l Pattern 2
l Pattern 3
l Solid Red
l Solid Green
l Solid Blue
l Solid White
l Solid Black
l Ramp Red
l Ramp Green
l Ramp Blue
l Ramp Grey
l Cycle Color
l Off
Down
arrows to make a selection.
34
Reset
Choosing Reset mode will produce a menu that will allow
you to make the following choices. Pressing the
arrow will activate the Reset function which will reset all of
the functions of the service menu to factory default.
l No Reset
l Reset
Lightware L-1020 Projector User’s Guide
Down
 Loading...