

Page 1
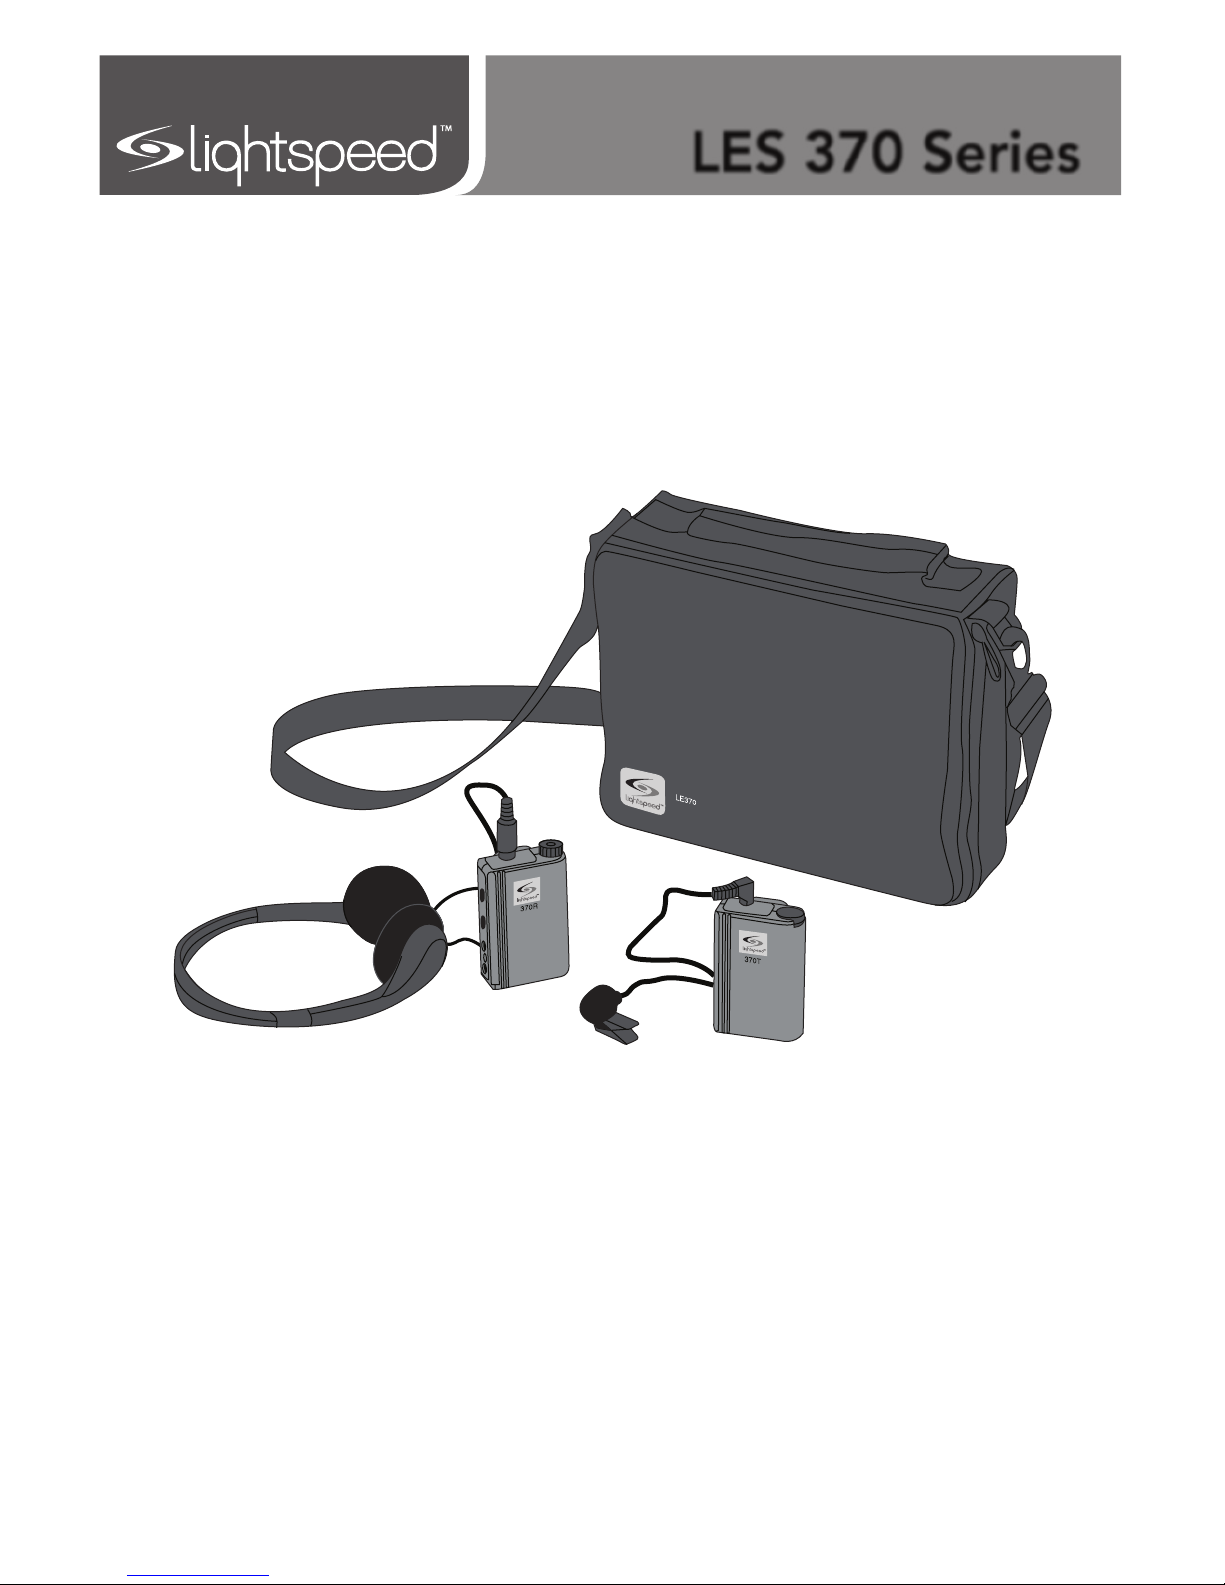
User Manual
LES 370 Series
Personal FM System
Page 2

Page 3

TABLE OF CONTENTS
SECTION 1: 4 System Components and Unpacking
Overview 6 LES 370R Receiver Controls / Functions
7 LES 370T Transmitter Controls / Functions
SECTION 2: 8 Step 1. Battery Charging
Set-up & Use
8 Step 2. Transmitter Set-up
9 Step 3. Receiver Set-up
9 Step 4. Battery Replacement
SECTION 3: 10 MICROPHONES
Optional Accessories 10 Lapel Microphone
10 Lavaliere Microphone
11 Headset Microphone
SECTION 4: 12 Troubleshooting Guide
Troubleshooting 13 Tips to Maintain Optimal Audio Performance
SECTION 5: 14 Warranty Statement
Warranty &
FCC Notice
15 FCC Notice
Page 4
4
1. Overview 2. Setup & Use
3. Optional
Accessories
4. Troubleshooting
5. Warranty &
FCC Notice
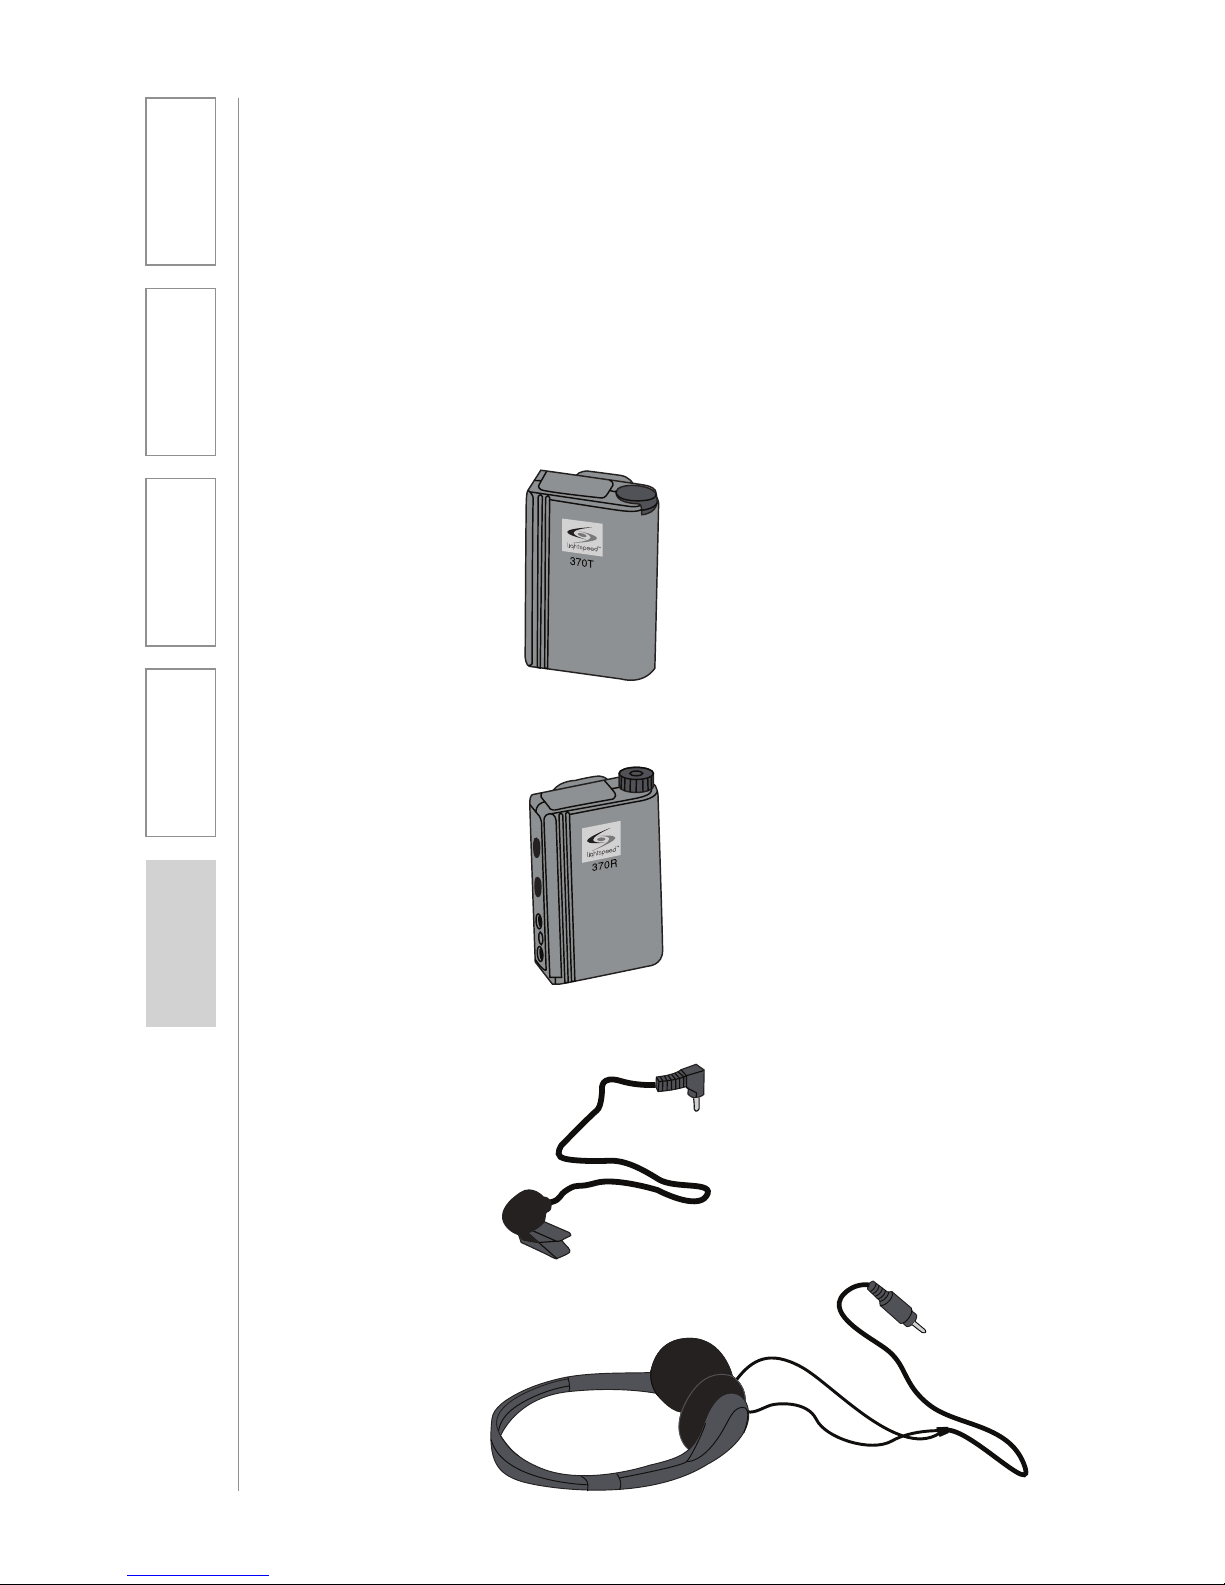
370R Receiver
SECTION 1:
OVERVIEW
SYSTEM COMPONENTS AND UNPACKING
The standard configuration of the LES 370 Series will contain:
Lapel Microphone
Headphones
370T Transmitter
Page 5
5
1. Overview 2. Setup & Use
3. Optional
Accessories
4. Troubleshooting
5. Warranty &
FCC Notice
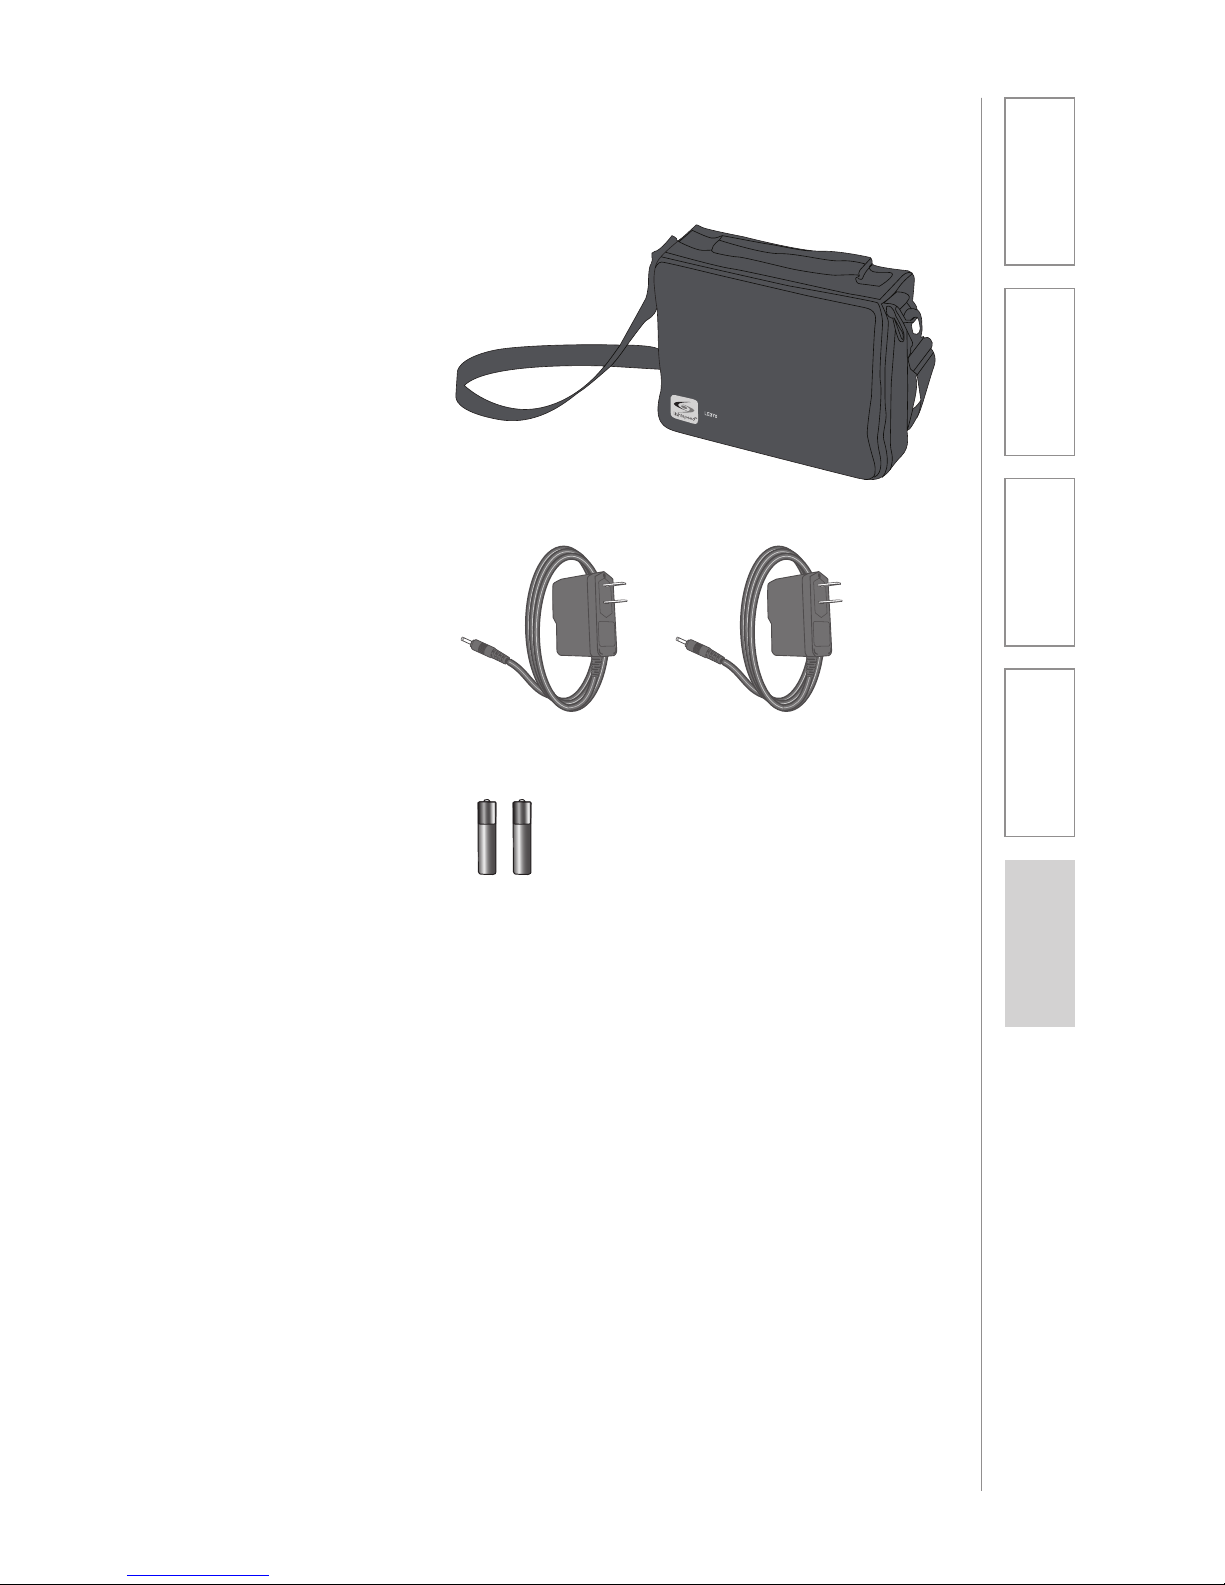
SYSTEM COMPONENTS AND UNPACKING
CONT’D
2 NiMH Rechargeable
Batteries (installed)
2 Battery Chargers
Carry Case
Lightspeed Personal FM Systems enhance instructor voice information presented
to students, whether children or adults, with learning or sensory difficulties.
A teacher or coach wearing the 370T Transmitter with a lapel, optional lavaliere
or optional headset microphone can communicate privately to a student wearing
the 370R Receiver and headphones from anywhere in the classroom, gym,
cafeteria, playground, or on the sports field. The instructor’s voice is amplified
and delivered directly to the ears of the student.
Since the Lightspeed LES 370 is a wireless system, both the teacher and the
student can move freely and still communicate with crystal clarity at distances of
up to 300 feet.
Working within the 216-217 MHz Assistive Listening band, the LES 370 has two
frequencies built in. Utilizing two quartz crystals, the LES 370 can operate on
one of two frequencies by changing channels with a slide switch. (A frequency is
a special segment of the “airwaves” designed by the Federal Communications
Commission so that the Transmitter can “talk“ to the Receiver.)
The LES 370 operating frequencies correspond with the frequencies that Phonak
uses in their MicroLinkTM systems. If properly matched, the LES 370 may be used
with matching Phonak system frequencies.
Page 6
6
1. Overview 2. Setup & Use
3. Optional
Accessories
4. Troubleshooting
5. Warranty &
FCC Notice
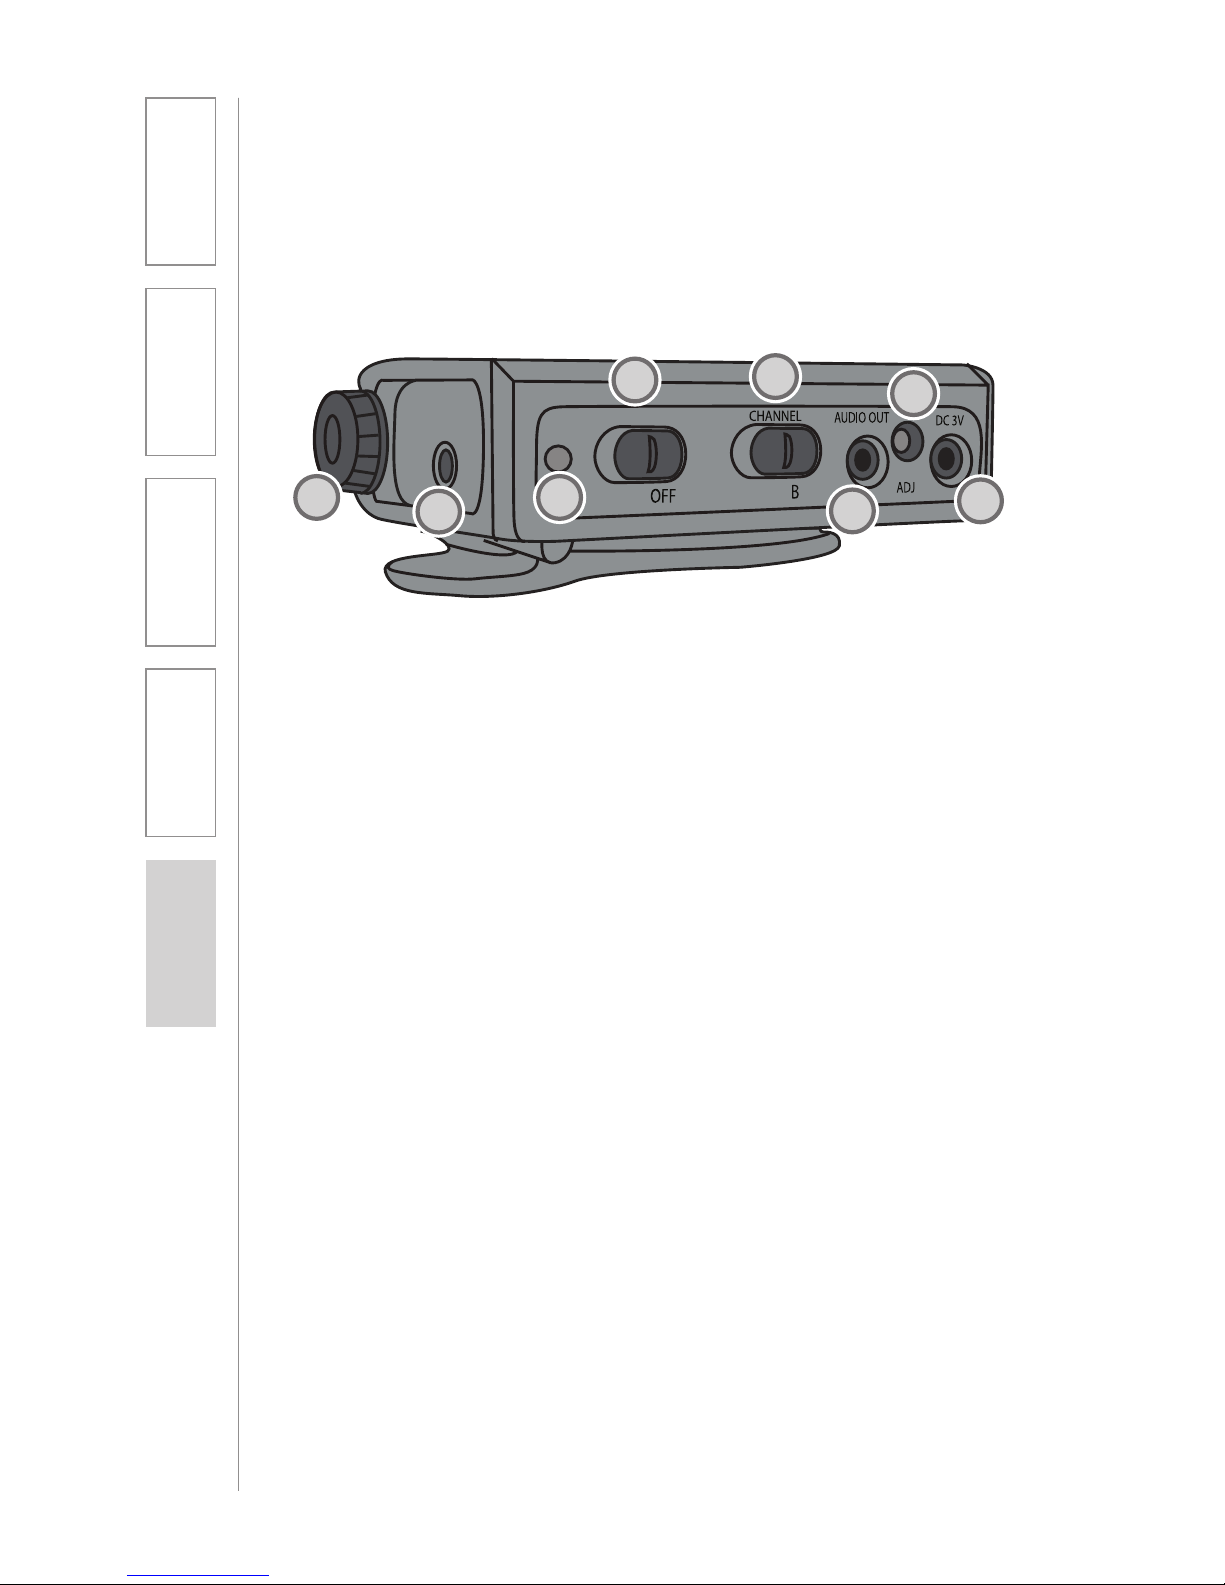
LES 370R RECEIVER CONTROLS/FUNCTIONS
1. LISTENER VOLUME KNOB:
Increase or decrease headphone
sound by turning this knob. Level
is increased by turning the knob
clockwise.
2. EARPHONE JACK: Plug your
headphones or earphones into
this jack to transmit the sound
received from the transmitter to
the listener’s ear. This jack accepts
a 3.5 mm (1/8 inch) mini-plug; any
standard stereo headphones may
be used.
3. POWER LIGHT: When power is
switched to the ON position, this
red LED indicator will light.
4. POWER SWITCH: Slide switch to
the left to turn power ON; slide
switch to the right to turn power
OFF.
5. CHANNEL SELECTOR: This
slide switch is used to change the
operating channel on the Receiver.
The Transmitter must be set to the
same channel (A or B) to send a
signal to this Receiver.
6. AUDIO OUT: This is used to
connect the 370 Receiver to a
computer rather than listener
headphones. This jack accepts
a 2.5 mm mini-plug. The level is
adjustable from 0 to 10 millivolts
with the Audio output Adjust (see
below).
7. AUDIO OUT ADJUST: This
functions similar to a volume
control for the Audio out feature.
Output level is increased by
turning this control clockwise using
a small screwdriver.
8. DC 3V CHARGING JACK: This
jack is used to recharge the battery
while installed in the Receiver
using one of the Battery Chargers
included in your system.
POWER
ON
A
1
4
5
6
7
8
2
2
3
Page 7
7
1. Overview 2. Setup & Use
3. Optional
Accessories
4. Troubleshooting
5. Warranty &
FCC Notice
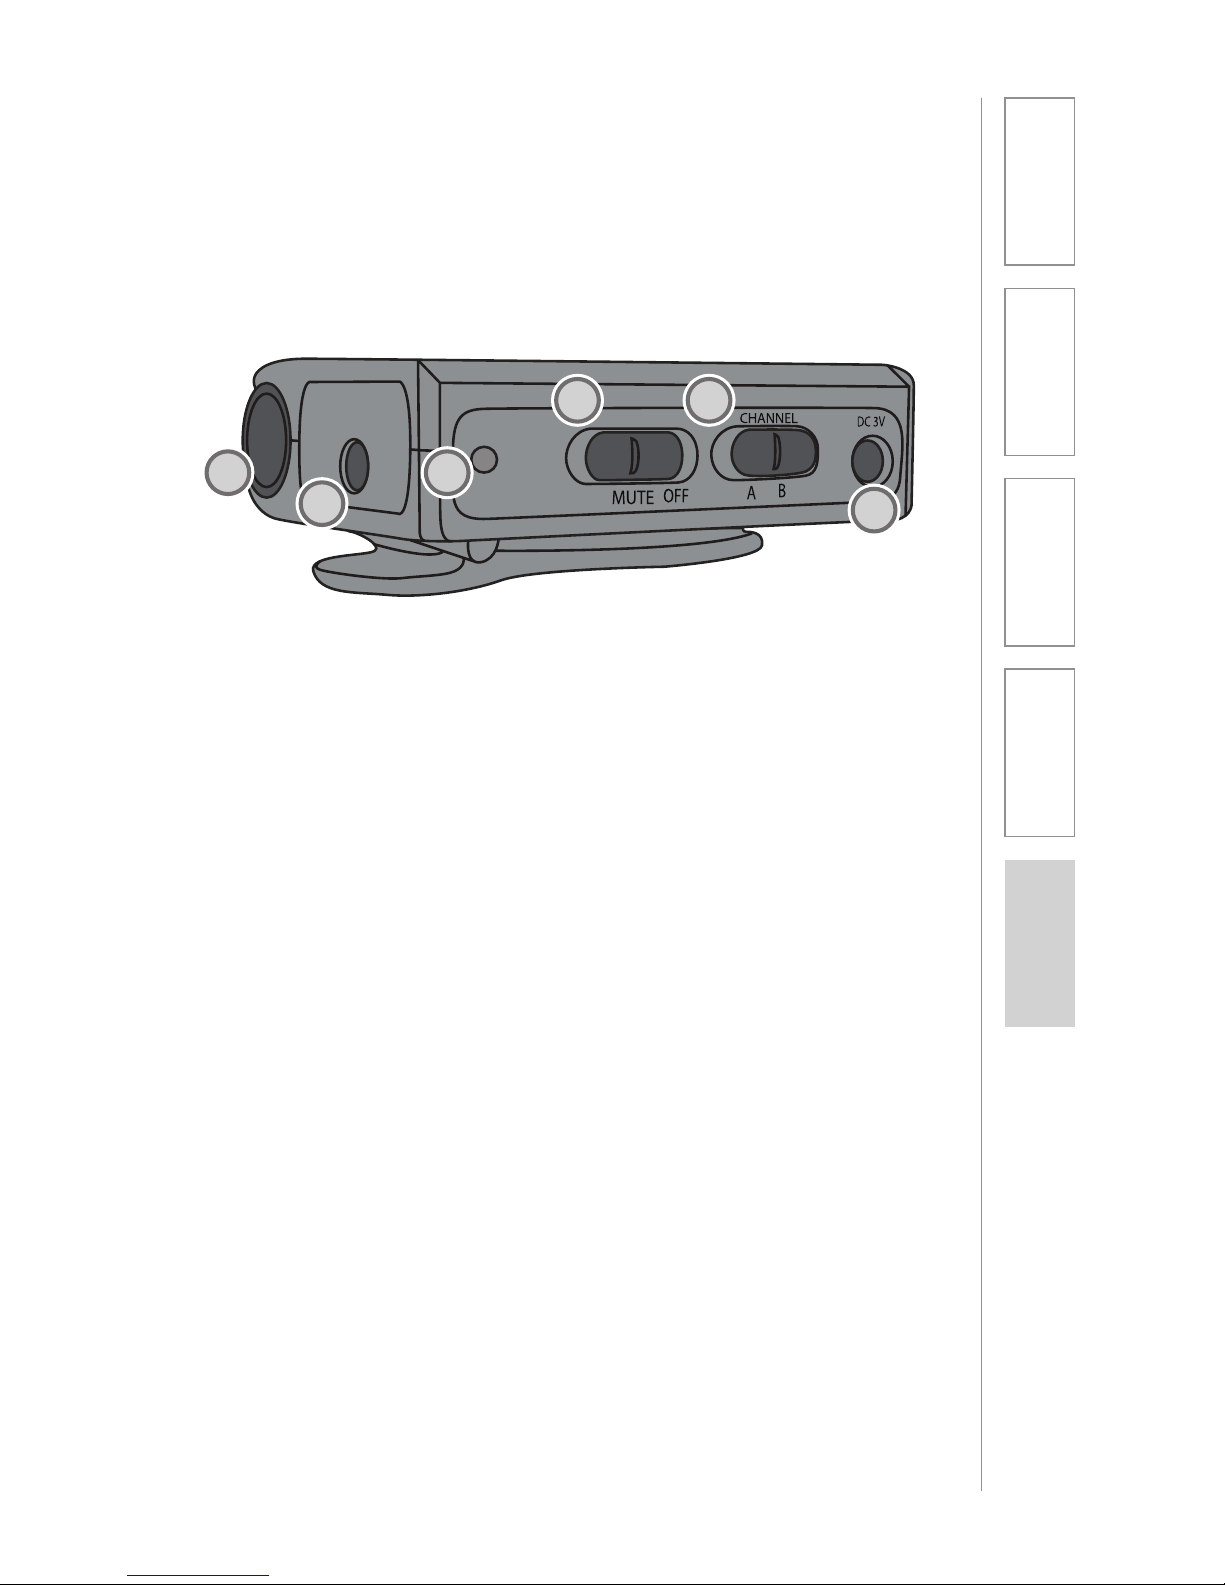
POWER
ON
1. TEACHER VOLUME KNOB:
Turning this knob increases or
decreases output volume. Turn
clockwise to increase volume of
the teacher’s voice signal.
2. MIC JACK: Insert your
microphone plug securely into this
jack. This jack accepts a 3.5 mm
mini-plug if you are connecting
another audio input signal.
3. POWER LIGHT: When power is
switched ON, the red LED will
light.
4. POWER/MUTE SWITCH: This
switch has three positions, ON,
MUTE and OFF. Slide switch all
the way left to turn power ON;
slide switch all the way right to
turn power OFF. The center MUTE
position turns the microphone off
without turning the Transmitter
power off.
5. CHANNEL SELECTOR SWITCH:
This switch is used to change
between channel A and B.
Remember, the Receiver must be
set on the same channel (A or B).
6. DC 3V CHARGING JACK: Use
this jack and one of the enclosed
Battery Chargers to recharge the
battery while it is installed in the
Transmitter.
LES 370T TRANSMITTER CONTROLS/
FUNCTIONS
1
2
3
6
54
Page 8

8
1. Overview 2. Setup & Use
3. Optional
Accessories
4. Troubleshooting
5. Warranty &
FCC Notice
Your system will work best with fully charged batteries each day. Batteries last
longest (up to three years) when charged each night. It’s best if batteries are
not drained completely before charging. When you first receive your system,
charge the batteries overnight.
SECTION 2:
SET-UP & USE
1. BATTERY CHARGING
2. TRANSMITTER SET-UP
1. Use only the BC 370 Battery
Chargers (included) to charge the
batteries.
2. Plug the Battery Charger into a
standard 120-volt electrical outlet.
3. After the Transmitter and Receiver
are turned OFF, insert the charging
cord into the DC 3V charging jack.
The green LED on the charger will
light.
4. Let the Transmitter and Receiver
batteries charge for 8 hours.
CAUTION: Discharging NiMH
batteries until no charge remains can
reduce battery life and with continued
discharging to fail. Recharging the
NiMH batteries in this product every
day will extend their life.
approximately mid-way. You
may need to adjust this later,
dependent on the teacher’s voice
volume and the student’s hearing
needs.
6. Slide power switch all the way left
to the ON position. (Avoid the
center, MUTE position.)
7. Transmitter can be worn clipped to
a pocket or belt.
1. Slide power switch all the way right
to OFF.
2. Plug the microphone cable plug
securely into the MIC jack on top
of the Transmitter. Be sure plug is
seated all the way into the jack.
3. Select the desired channel (A or B)
on the side of the Transmitter. This
must match the channel on the
Receiver you are using.
4. Position microphone according to
type selected. (See Microphones
in the Control & Function section.)
5. Rotate the volume knob to
Page 9
9
1. Overview 2. Setup & Use
3. Optional
Accessories
4. Troubleshooting
5. Warranty &
FCC Notice
LES 370 systems are available with eight different frequencies in four pairs.
Multiple Receivers will operate from one Transmitter, providing that all Receivers
are frequency and channel-selected to match the Transmitter.
If you are experiencing interference on channel A, switch the Transmitter and
Receiver to channel B.
The frequency numbers listed below correspond with MicroLink™ frequency
channels. Frequencies are paired as follows:
No 1 216.0125 & No 9 216.2125
No 12 216.2875 & No 18 216.4375
No 64 216.5875 & No 72 216.7875
No 77 216.9125 & No 80 216.9875
3. RECEIVER SET-UP
5. Rotate Receiver volume control to
mid-point. You may need to adjust
this once the system is operational,
dependent on the teacher’s voice
volume and the student’s hearing
needs.
6. Slide the power switch to ON, and
adjust volume. The Transmitter
may be clipped to a belt or
pocket.
1. Slide power switch to OFF.
2. Plug headphone plug securely into
EARPHONE jack on the top of the
Receiver.
3. Check that the channel switch is
set to the same channel (A or B) as
the Transmitter.
4. Put on the headphones, checking
for correct/comfortable fit and
placement over ears.
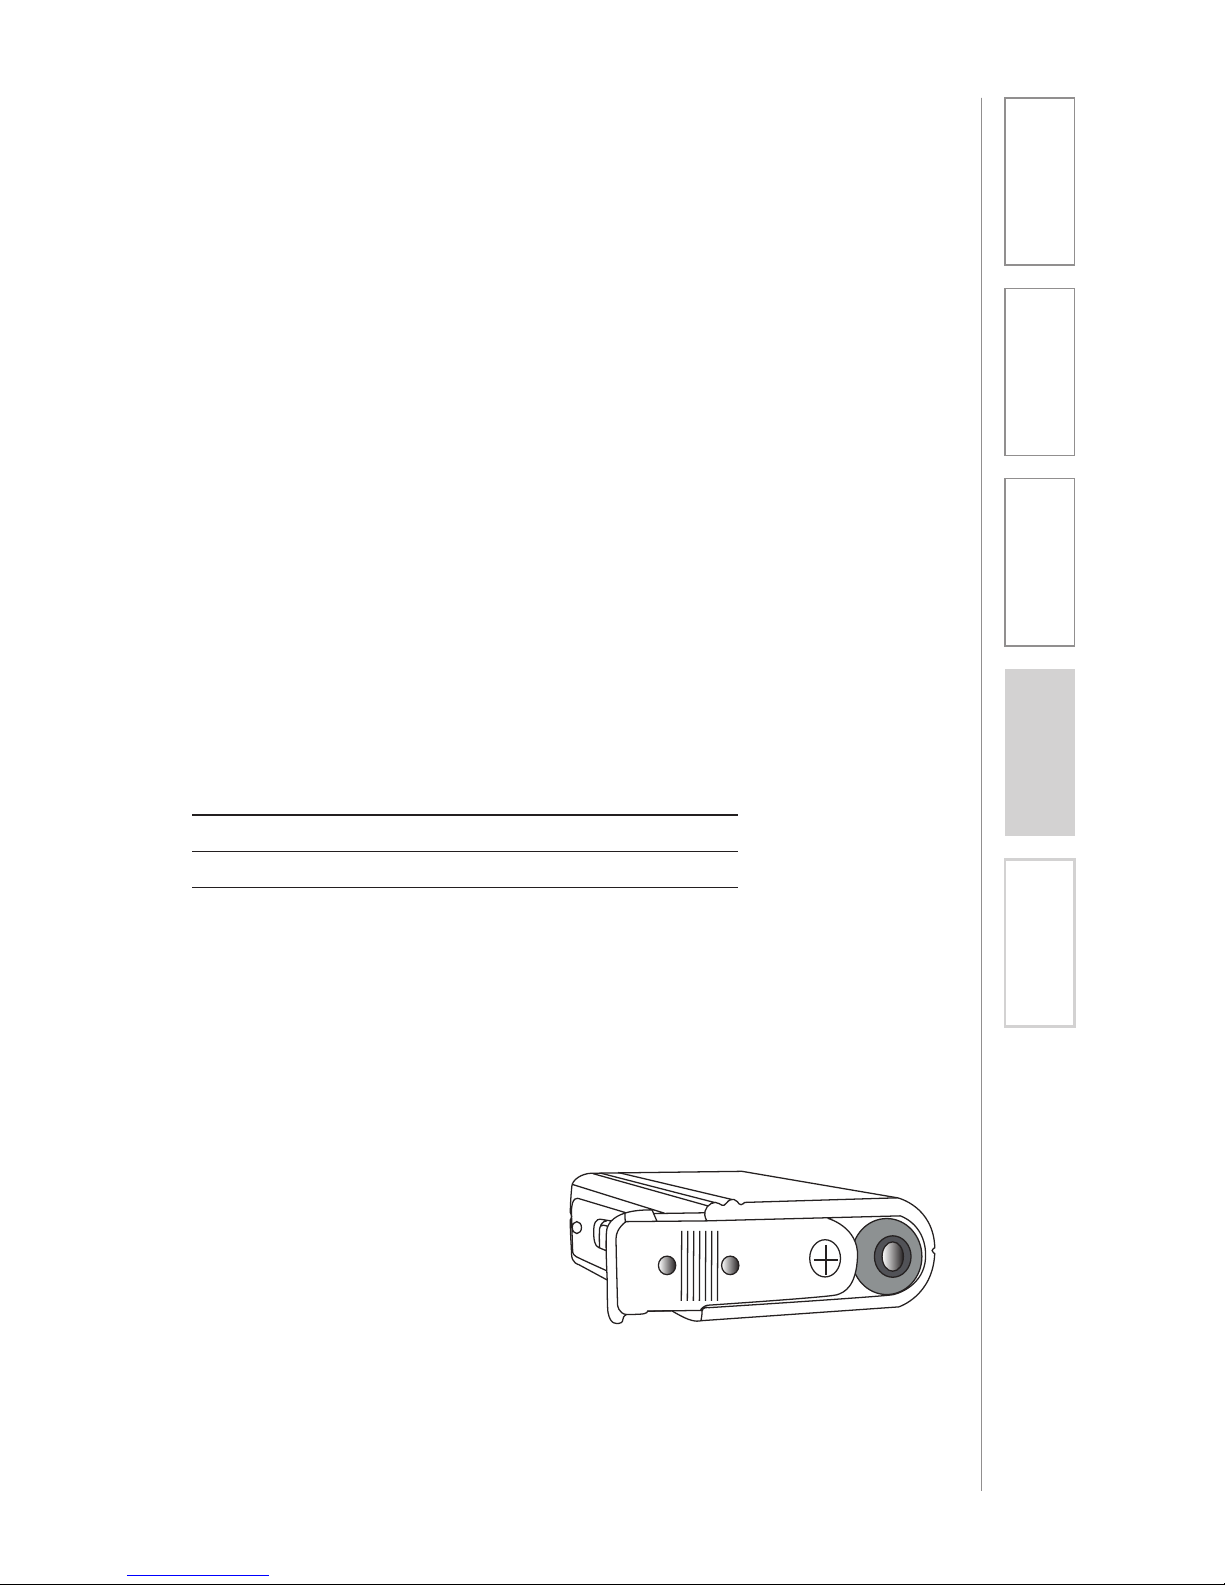
4. BATTERY REPLACEMENT
To access the rechargeable battery
for replacement, push down at the
ribbing on the bottom and slide the
cover off. This will expose the plus (+)
end of the battery. Slide the battery
out, replace with a new NiMH “AA”
battery. Observe polarity, the plus
(+) end should be showing when
installed. Slide cover back into place.
Page 10
10
1. Overview 2. Setup & Use
3. Optional
Accessories
4. Troubleshooting
5. Warranty &
FCC Notice
SECTION 3:
OPTIONAL ACCESSORIES
MICROPHONES
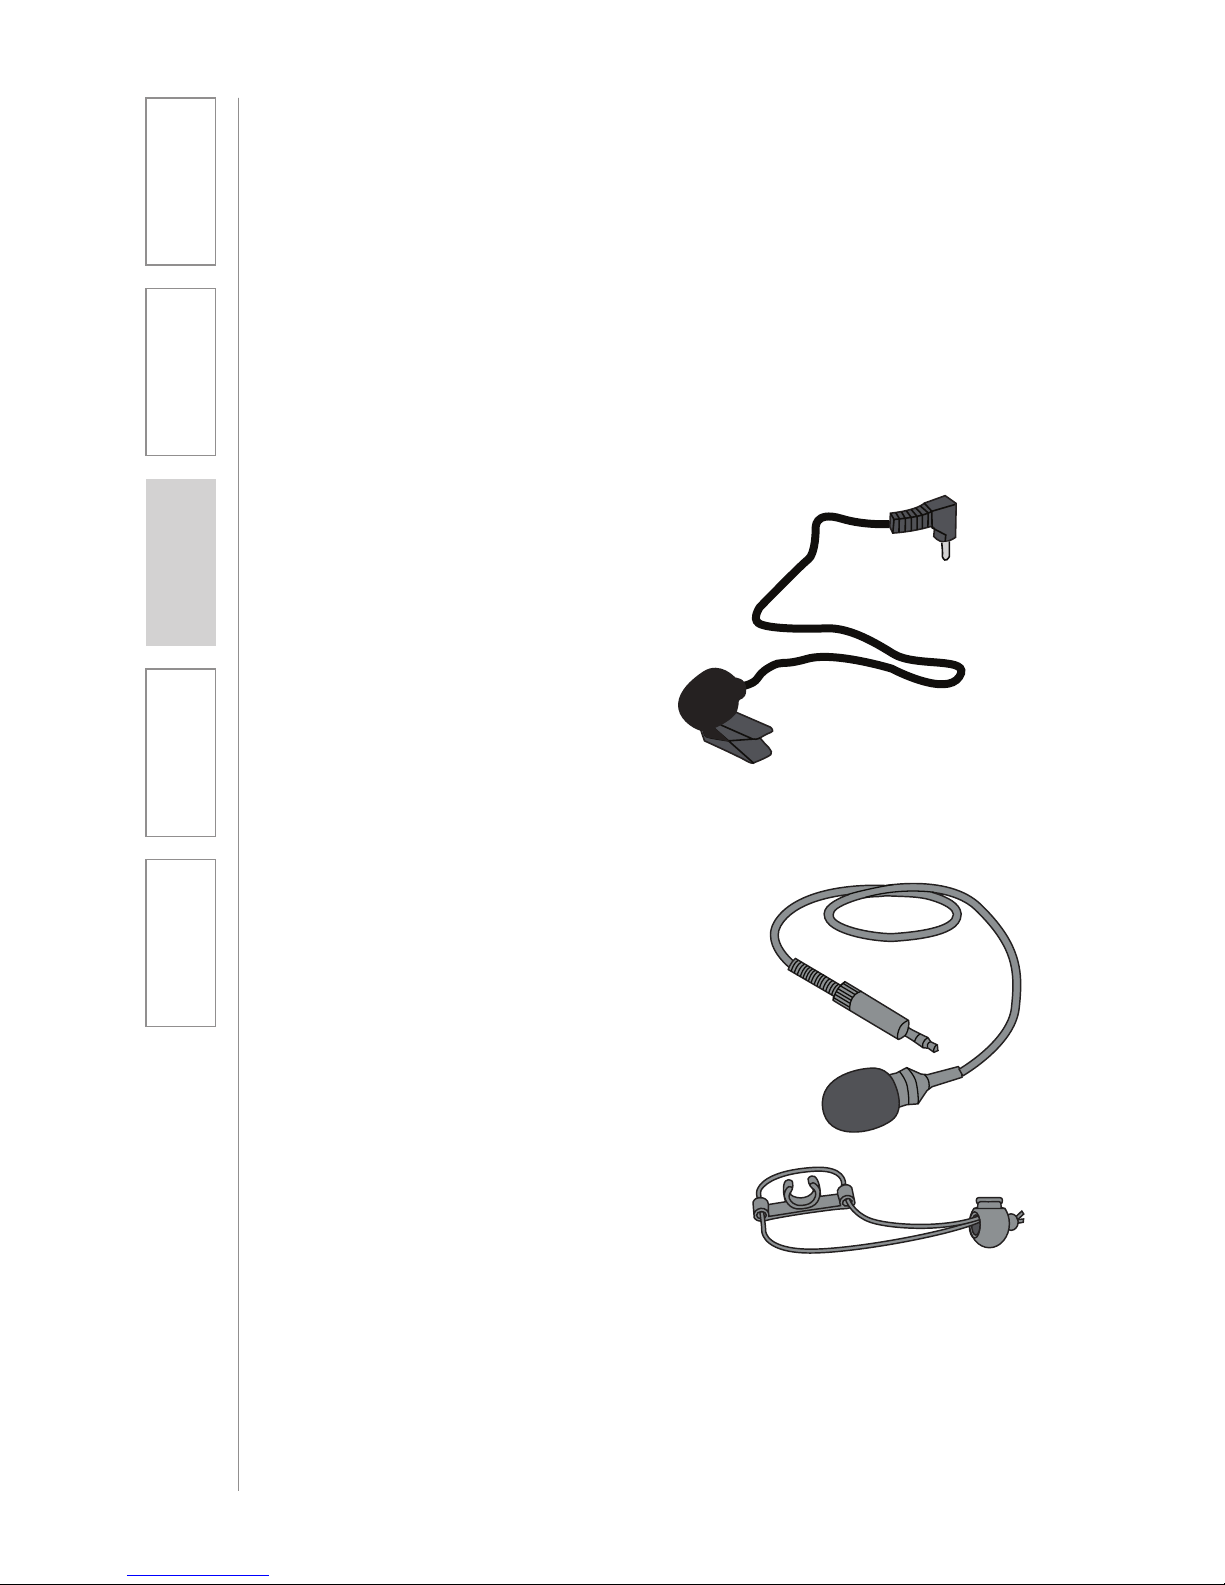
Lapel Microphone
This microphone is standard
with most LES 370 systems. Best
performance is achieved when the
microphone clip is attached to your
clothing, two to four inches below
your chin.
Lavaliere Microphone
The lavaliere microphone is
worn on an adjustable cord with
the microphone resting on your
collarbone. Adjust the cord length by
squeezing the adjuster together and
then sliding it up or down the cord
until the microphone rests against the
collar bone.
Lightspeed offers three different microphones for use with the LES 370 system:
Page 11
11
2. Setup & Use
3. Optional
Accessories
1. Overview 4. Troubleshooting
5. Warranty &
FCC Notice
MICROPHONES CONT’D
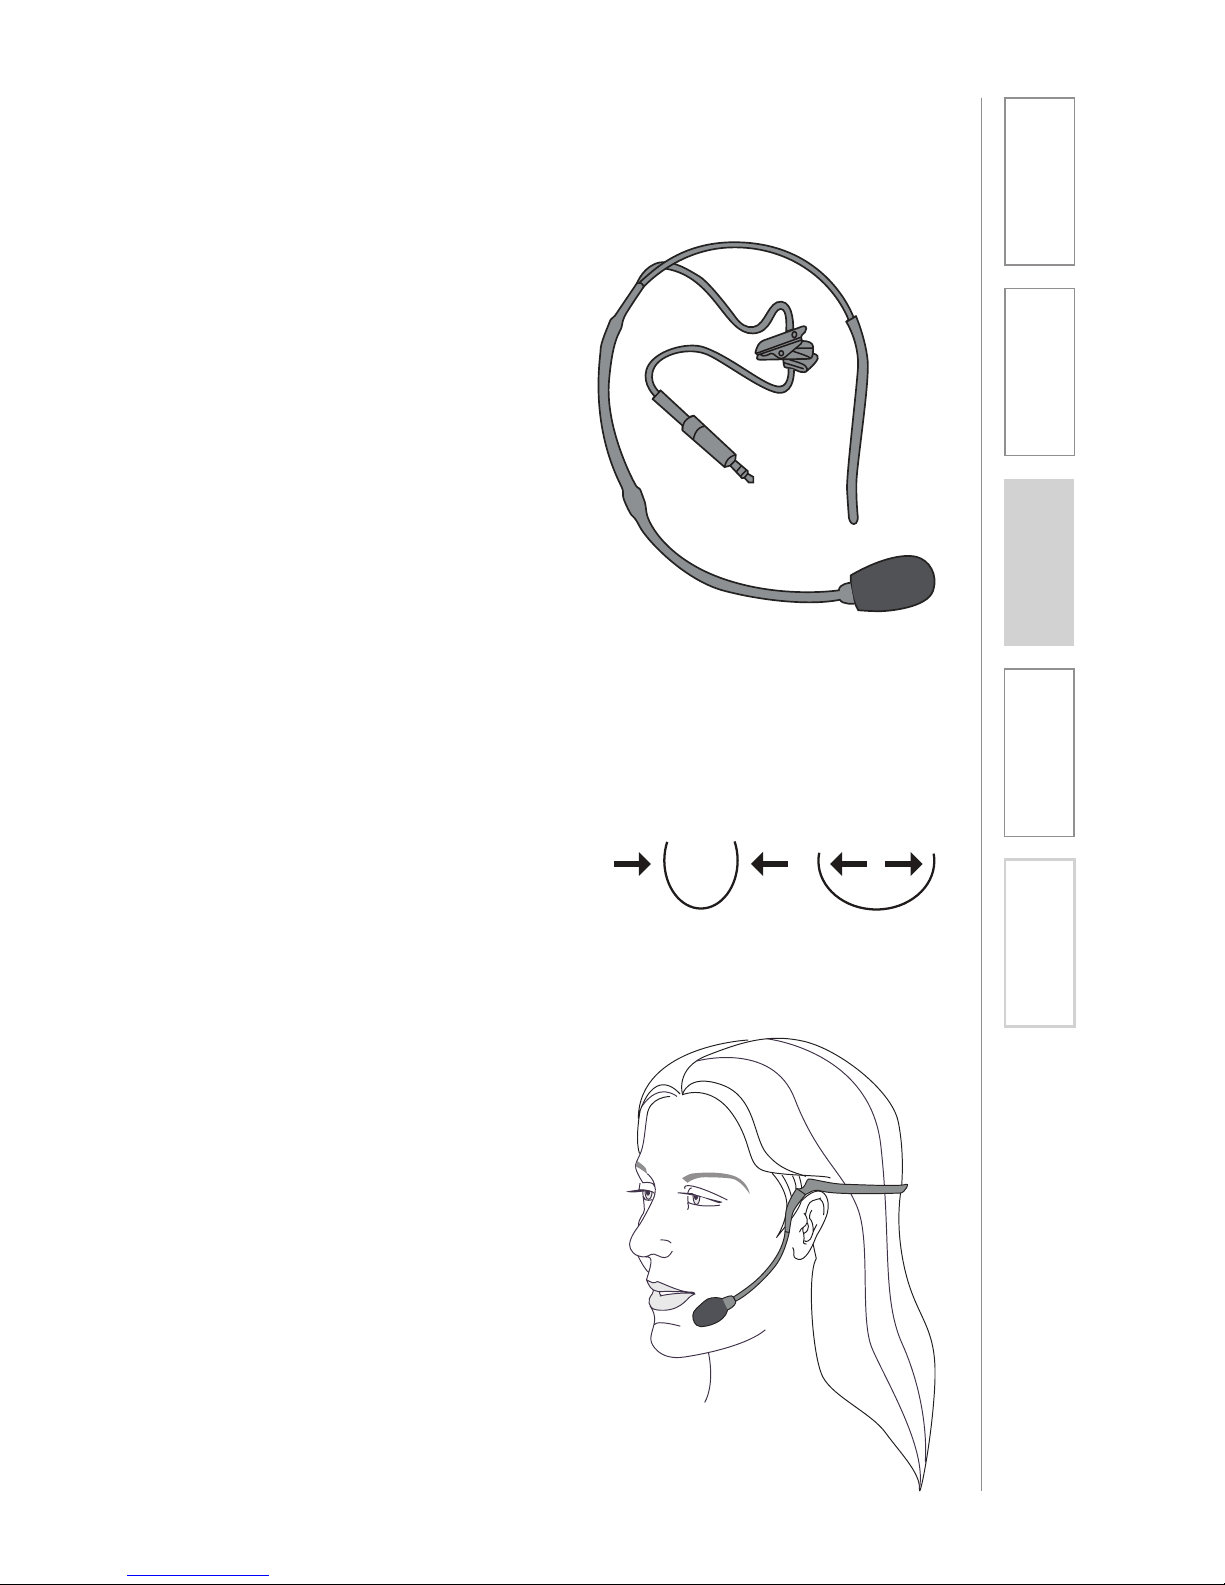
Headset Microphone
Position and fit the TK-250 noisecancelling headset as shown here.
Hold the TK-250 headset microphone
on the sides of the U-shaped band.
Slide the headband onto your head
from behind and set it on the tops of
your ears, as if you were putting a pair
of glasses on backwards.
The microphone boom, running from
the top of your ear to your mouth,
ideally follows the curve of your face
and jaw, just below your line of sight.
For best performance position the
microphone one inch in front of your
chin and not directly in front of your
mouth. Bend the flexible boom until
good mic placement is achieved.
To adjust the headband to fit around
your head, grip each side of the
band, holding it in a U-shape. Flex it
inwards to tighten or pull it outward
to loosen. The band itself is virtually
unbreakable.
Cord placement can be individual,
depending on what is most
comfortable for you. Many people
prefer to wear it at the back with the
transmitter in a back pocket or on
the back of your belt so there is no
interference with hand movements.
Tighten Loosen
Page 12

12
1. Overview 2. Setup & Use
3. Optional
Accessories
4. Troubleshooting
5. Warranty &
FCC Notice
BATTERY CHECK:
• Conrmbatteriesarecharged
each night. With proper charging,
batteries can last three school
years.
• ConrmchargingLEDisONwhile
charging.
• ConrmTransmitterandreceiver
are turned OFF while charging.
PROBLEM: Hearing Static
SOLUTION: Follow these steps to
eliminate static.
• TestTransmitterwithafully
charged “AA” battery. (A good
quality regular alkaline AA” battery
may be used for testing.) Do
not attempt to charge alkaline
batteries. System damage may
result.
• Conrmmicrophoneplug
is inserted securely into the
Transmitter MIC jack.
• Checkbatterycontacts.Cleanif
necessary.
• Ifstaticoccursonlywhenwiggling
the mic cord, determine whether
the static is coming from the cable
or the transmitter jack by firmly
holding the plug into the jack and
moving the cord along its length.
• Ifyouhaveaccesstoanother
microphone, try it in your
Transmitter. If it works, your
original microphone may need
repair. If the system checks out
okay, and you still hear some
occasional static or popping,
you may be experiencing radio
frequency interference (RFI). If you
think it may be RFI, try switching
the channel to the other frequency
and see if the interference goes
away. Confirm that your frequency
is not being duplicated by another
wireless FM system within the
building. Continued RFI may
require exchanging your system
with one with a different frequency.
PROBLEM: Low Volume
SOLUTION: Follow these steps to
eliminate low volume.
• CheckvolumelevelonReceiver
and adjust as necessary. Clockwise
adjustment of the volume knob will
increase volume.
• Ifvolumeistoolow,checktobe
sure that the batteries are properly
charged in the Transmitter and
Receiver.
PROBLEM: Sound fades in and out
(drop out)
SOLUTION: Follow these steps to
maintain audio.
• TestTransmitterwithafully
charged “AA” battery. You can
use a regular alkaline “AA”
battery if you are uncertain of the
rechargeable battery’s condition.
• Makesurethebatteryinthe
Receiver is properly charged as
well. For testing purposes, you
may use a new alkaline “AA”
battery.
Please go through this checklist before calling Lightspeed’s Service Department.
Note: Most problems are directly related to low battery power. Check battery
and charger function first.
SECTION 4:
TROUBLESHOOTING
COMMON PROBLEMS AND SOLUTIONS
Page 13

13
1. Overview 2. Setup & Use
3. Optional
Accessories
4. Troubleshooting
5. Warranty &
FCC Notice
TRANSMITTER CARE:
• Cleaningthemicrophonejackand
battery contacts will help ensure
that your system gives you years of
reliable operation.
• Werecommendusinga
“deoxidizer” or contact cleaner
every two or three months.
BATTERY MAINTENANCE & CARE:
• Batteriesshouldnotbe
discharged completely. Before
storing for extended periods of
time, batteries should be fully
charged and then removed from
the charger. (Charging takes
approximately eight hours.)
PROBLEM: No sound from
headphones
SOLUTION: Follow these steps to
produce sound from headphones.
• ChecktheReceivervolumelevel.
• ConrmtheTransmitterand
Receiver have matching
frequencies. (A with A or B with B.)
• Conrmthemicrophoneplug
is securely inserted into the
Transmitter MIC jack.
• ConrmtheTransmitterpower
switch is turned ON and that its
power LED is lit. Confirm that it is
not set in the MUTE position.
• Conrmthattheteachervolume
knob is turned up sufficiently by
turning clockwise.
• ConrmthattheReceiveristurned
on and that the power LED is lit.
• Conrmthatthereareoperational
headphones plugged into the
headphone jack.
TIPS TO OBTAIN OPTIMUM AUDIO
PERFORMANCE
If you review these instructions and still have questions, write down the
serial number and model number of your system and call Lightspeed
Technical Services at 800.732.8999, 5 a.m. – 5 p.m., PST.
COMMON PROBLEMS AND SOLUTIONS
CONT’D
Page 14

14
1. Overview 2. Setup & Use
3. Optional
Accessories
4. Troubleshooting
5. Warranty &
FCC Notice
The Lightspeed LES 370 Series
Listening Enhancement System is
guaranteed against malfunction
due to defects in materials and
workmanship for a period of one
year from purchase. Microphones
and batteries are guaranteed
for one year. The product will be
repaired or replaced at Lightspeed’s
option during the warranty period.
Warranty does not extend to finish,
appearance, or malfunctions due to
abuse or misuse. Repairs performed
by any other entity than Lightspeed
will void this guarantee. Your Service
Department (800.732.8999, 7 a.m. – 5
p.m. PST) will handle all your repair/
replacement needs.
WARRANTY
Our Service Department (800.732.8999, 5 a.m. – 5 p.m., PST) will handle all your
repair/replacement needs.
SECTION 5:
WARRANTY & FCC
NOTICE
Page 15

15
1. Overview 2. Setup & Use
3. Optional
Accessories
4. Troubleshooting
5. Warranty &
FCC Notice
This device complies with part 15 of
the FCC Rules. Operation is subject
to the following two conditions: (1)
This device may not cause harmful
interference, and (2) this device must
accept any interference received,
including interference that may cause
undesired operation.
Changes or modifications not
expressly approved by the party
responsible for compliance could
void the user’s authority to operate
this equipment.
This equipment has been tested and
found to comply with the limits of
a Class B Digital Device, pursuant
to Part 15 of the FCC Rules. These
limits are designed to provide
reasonable protection against
harmful interference in a residential
installation.
This equipment generates, uses and
can radiate radio frequency energy
and, if not installed and used in
accordance with the instruction may
cause harmful interference to radio
communication. However, there is no
guarantee that interference will not
occur in a particular installation.
If this equipment does cause harmful
interference to radio or television
reception, which can be determined
by turning the equipment off and
on, the user is encouraged to try to
correct the interference by increasing
the separation between the
transmitter and receiver.
FCC NOTICE
Page 16

Lightspeed TECHNOLOGIES
11509 SW HERMAN ROAD / TUALATIN, OR 97062
TOLL FREE: 800.732.8999 / PHONE: 503.684.5538 / FAX: 503.684.3197
Lightspeed-TEK.COM
MN0256US01-1
 Loading...