

Page 1
Welcome
Congratulations on your purchase of the SunRay-S Pro lighting system.
Please inspect the packaging of your product to verify that there was no
damage during shipping.
Periodically refer to the website for instruction revisions.
~@
Hot Tip Important Caution
Look for these symbols to help identify special information.
Caution - Caution - Caution
We hope you have a wonderful underwater experience with Light & Motion
equipment. To increase your enjoyment and the life span of your new gear
please take an extra minute to review common errors which will result in
equipment damage or destruction.
• Never transport or ship the housing with the camcorder inside.
This may damage your camcorder.
• Never leave your equipment in the rinse bucket, it may be damaged by other
equipment.
• If a product is flooded, immediately rinse it with fresh water. Most nonelectrical parts will be salvageable if not corroded by salt water.
O w n e r ’s M a n u a l
www.uwimaging.com
SunRay-S Pro Lighting System
Page 2
4
Getting Started
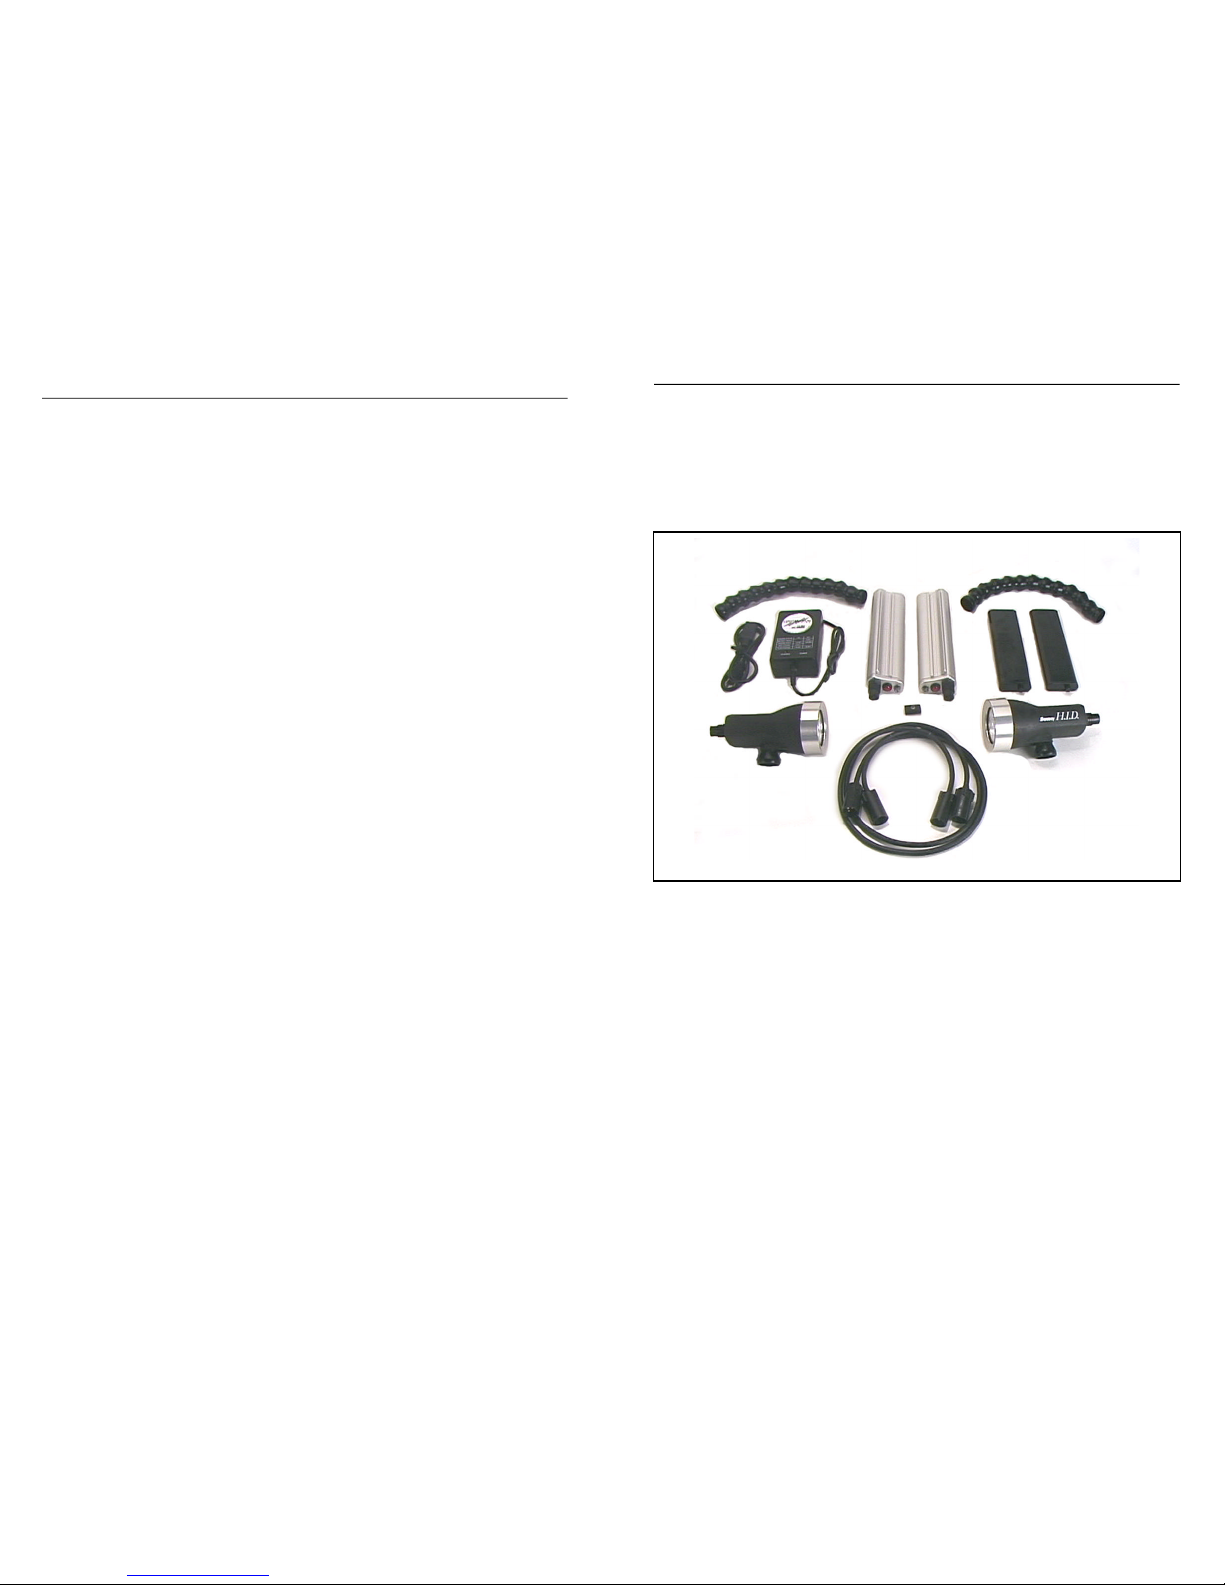
Pictured below are the components of the SunRay Pro-S lighting system.
Take a moment to familiarize yourself with each part for later identification
and use.
Battery Pods
HID light heads
Charger and
electrical cord
Light Arms
Pod Locker and Light Cable
NiMH Batteries
Table of Contents
Getting Started . . . . . . . . . . . . . . . . . . . . . . . . . . . . . . . . . . . . . . . . . . . . . . . . . . . . . .4
Charging Batteries . . . . . . . . . . . . . . . . . . . . . . . . . . . . . . . . . . . . . . . . . . . . . . . . . . .5
Installing Batteries . . . . . . . . . . . . . . . . . . . . . . . . . . . . . . . . . . . . . . . . . . . . . . . . . . .5
Removing Batteries . . . . . . . . . . . . . . . . . . . . . . . . . . . . . . . . . . . . . . . . . . . . . . . . . . .6
Mounting Battery Pods . . . . . . . . . . . . . . . . . . . . . . . . . . . . . . . . . . . . . . . . . . . . . . .6
Installing and Using QuickConnects . . . . . . . . . . . . . . . . . . . . . . . . . . . . . . . . . . . .6
Assembly with Universal Mounts . . . . . . . . . . . . . . . . . . . . . . . . . . . . . . . . . . . . . . .7
Connecting Battery Pod to Light . . . . . . . . . . . . . . . . . . . . . . . . . . . . . . . . . . . . . . . .8
Light Operation . . . . . . . . . . . . . . . . . . . . . . . . . . . . . . . . . . . . . . . . . . . . . . . . . . . . . .8
Post Dive Cleaning . . . . . . . . . . . . . . . . . . . . . . . . . . . . . . . . . . . . . . . . . . . . . . . . . . .9
Storage . . . . . . . . . . . . . . . . . . . . . . . . . . . . . . . . . . . . . . . . . . . . . . . . . . . . . . . . . . . . .9
O-ring Care and Maintenance . . . . . . . . . . . . . . . . . . . . . . . . . . . . . . . . . . . . . . . . .10
Other Maintenance . . . . . . . . . . . . . . . . . . . . . . . . . . . . . . . . . . . . . . . . . . . . . . . . . .10
Return Products for Care . . . . . . . . . . . . . . . . . . . . . . . . . . . . . . . . . . . . . . . . . . . . .11
Contact Light & Motion . . . . . . . . . . . . . . . . . . . . . . . . . . . . . . . . . . . . . . . . . . . . . .11
3
Page 3
Removing Batteries
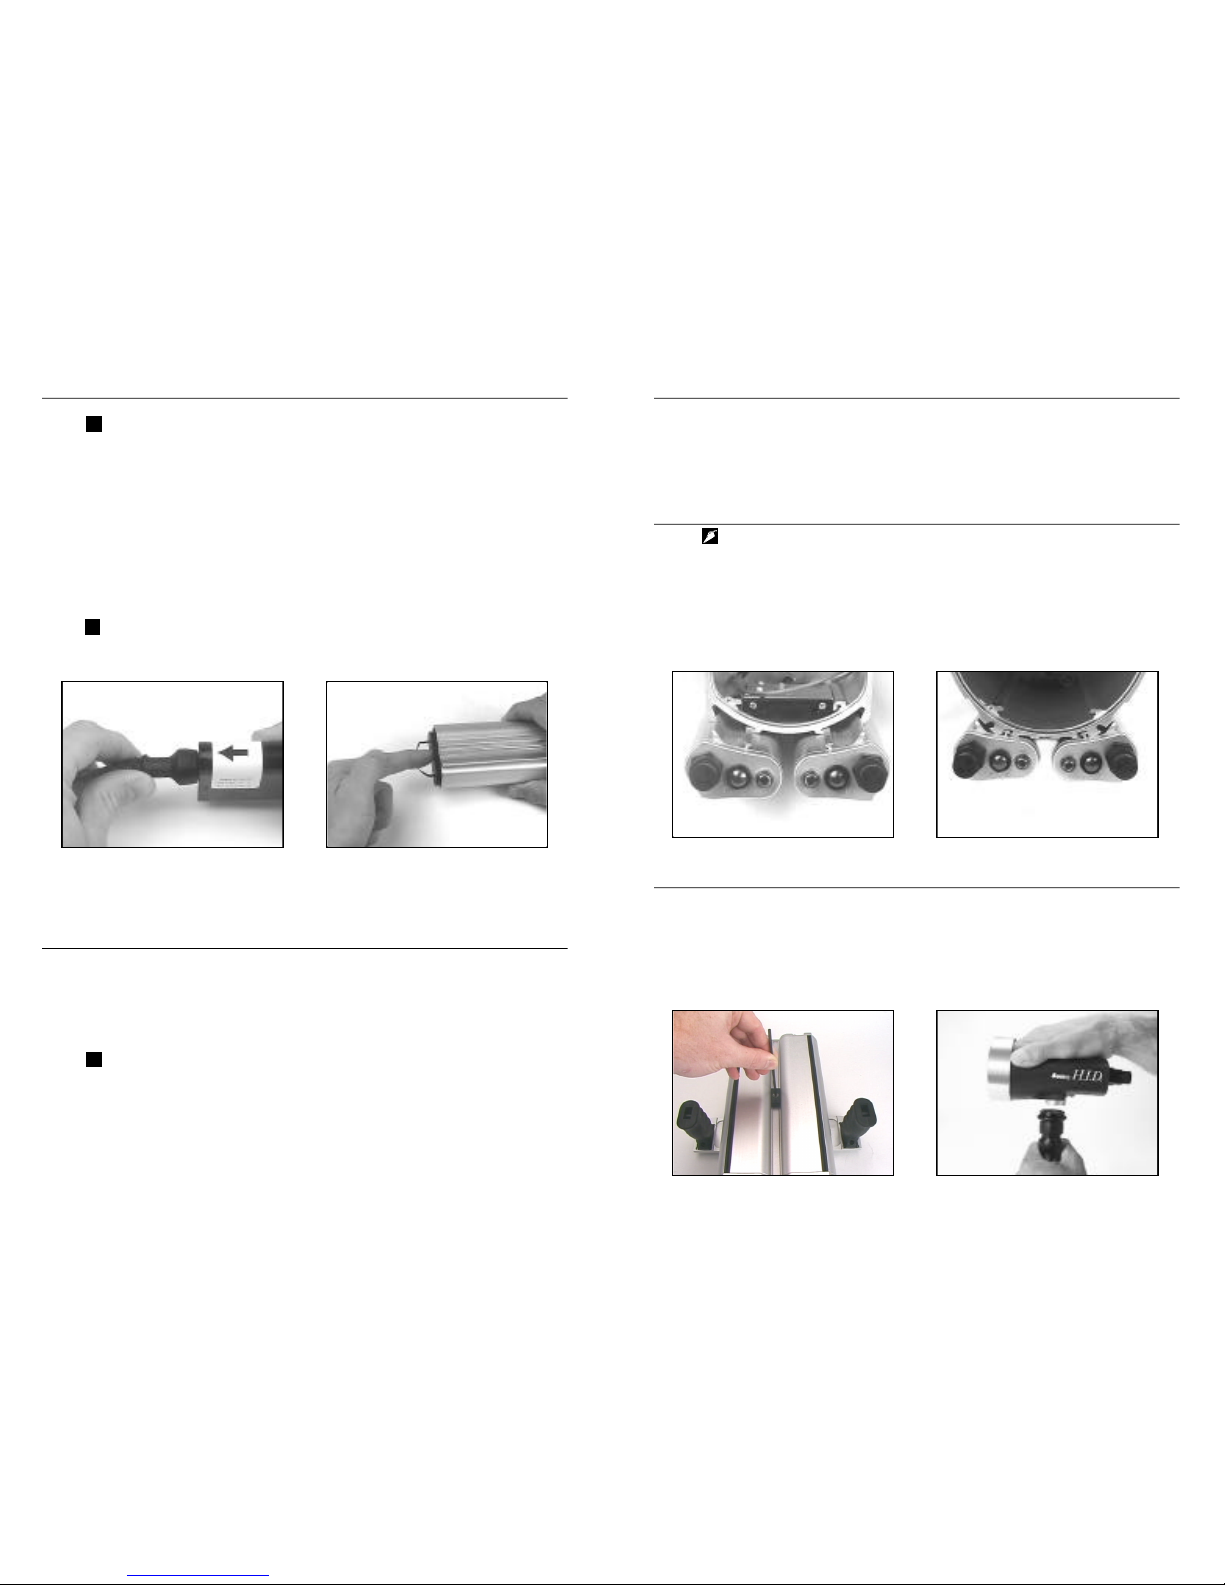
1) Rotate latch at the front of the pod counter-clockwise 1/8 turn or until it
stops.
2) Pull the front cap off the pod.
3) Pull the battery from the pod using removal strap (Refer Fig. 3 & 4).
Mounting Battery Pods
Battery Pods can be mounted prior to installing batteries
into pods.
1) Remove the rear plate or monitor back of the housing.
2) Slide the battery pods into housing channels (Refer fig. 3 & 4).
3) Insert Pod Locker between the pods and tighten using 1/8” allen wrench
(Refer fig. 5). Do not over tighten.
Installing and Using QuickConnects
Depending on which housing you purchased and if you purchased SunRay Pro-
S Lights separately, you may need to install QuickConnects to the housing,
light, or light arm or all three. If your housing and light system already has
QuickConnects attached or has universal mounts, skip ahead to the
appropriate section for light system assembly
6
(Fig. 3 - BlueFin and Mako alignment) (Fig. 4 - StingRay alignment)
(Fig. 5) (Fig. 6)
5
Charging Batteries
Due to shipping, batteries charge states will vary. It is
recommended that you charge your Mini TC batteries
when they are received.
1) The charger can accept an electrical range of 100 - 240v and 50 - 60hz.
2) The charger has two LED lights, one green and one yellow.
Green LED illuminates when charger is receiving power.
Yellow LED is illuminated when charging and blinking when charge is
complete.
3) To attach charger to battery, align arrow on charger connector with arrow on
battery label and push together until connectors seat. (Refer fig. 1)
Charge time for the 10.8v fast charger is approximately 1.5
hours.
Installing Batteries
1) Slide the battery back into the pod with the contact end inserted first so that
the connector will align with the socket inside the pod. (Refer fig. 2)
2) Servicing the o-rings (See o-ring maintenance).
3) Replace the front cap onto the pod.
Insure that the removal strap attached to the battery does
not interfere with the seal when the end cap is attached to
the pod
4) Turn the knob on the end cap clockwise 1/8 turn until it stops. The endcap
will now be locked into place. The endcaps are specific to the left and right
pods.
(Fig. 1) (Fig. 2)
@
@
~
Page 4
7
Mounting Light Head QuickConnect
1) Remove the attached arm mount using a 1/8 allen wrench.
2) Align QuickConnect details with slots on light head.
3) Tighten Socket Cap Screw to secure mount to light head.
Mounting QuickConnect Base
1) Remove arm base using 5/32 allen wrench.
2) Attach QuickConnect and tighten Socket Cap Screw.
Attaching Light Arm to Light and Housing
1) Align arm mounts into slots on light or housing base.
2) Push slightly and rotate clockwise. Arm should click into place.
Removing Light Arm from Light Head and Housing (Refer Fig. 6)
1) Pull lock ring away from light or housing and rotate counter-clockwise.
Assembly with Universal Mounts
Mounting Arm to Housing
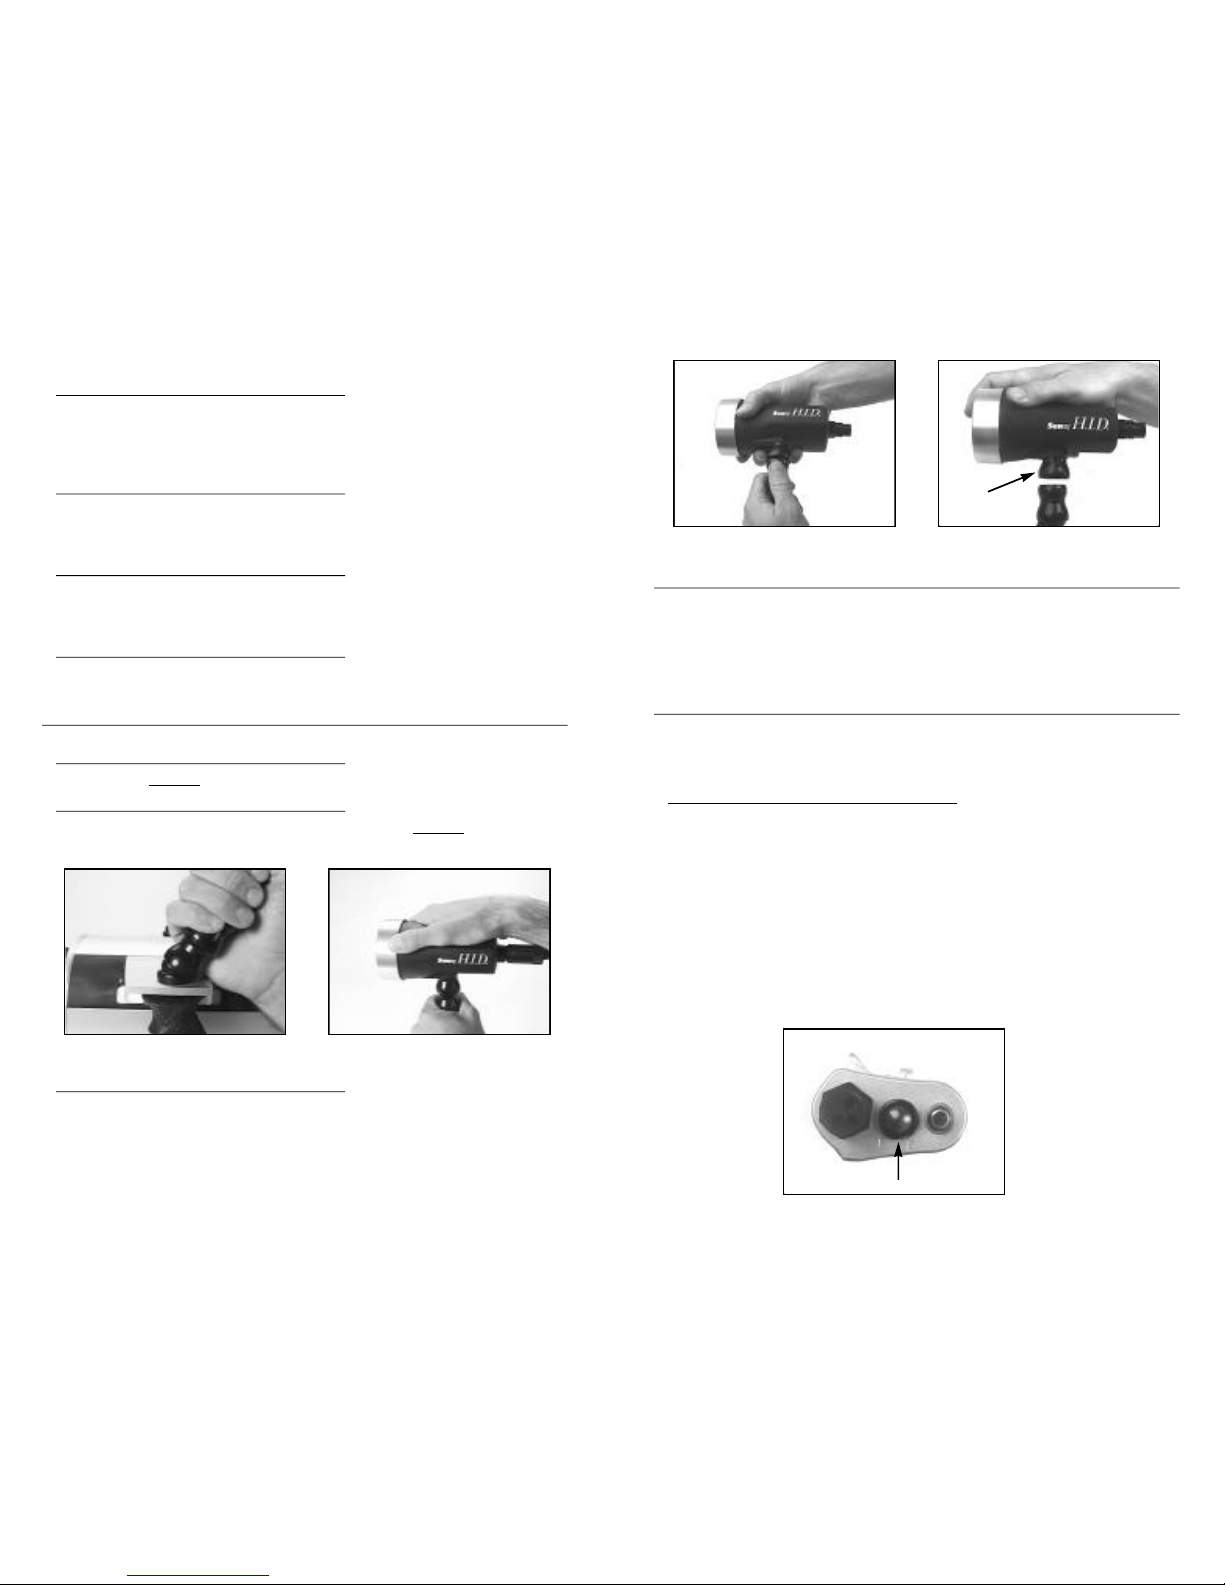
Press arm FIRMLY into base until arm snaps into place (Refer fig. 7).
Mounting Arm to Light Heads
Align top of arm with arm light head base and press FIRMLY together. Arm
should snap into position. (Refer fig. 8).
Removing Arm from Light Heads
To remove light head from arm, “break” the arm at the upper most joint.
Applying pressure on the Light Arm and not the Light Head (Refer fig. 9). Do
not apply pressure to the Light Head Base (Refer fig. 10). Doing so may cause
the Base to break from the Light Head damaging the light.
(Fig. 7) (Fig. 8)
8
Connecting Battery to Light Head
1) Plug in the cable connectors on pod.
2) Tighten the locking sleeves by rotating clockwise until tight.
1) Plug in the cable connectors on the Light Head
2) Tighten the locking sleeves by rotating clockwise until tight.
Light Operation
Before you turn on the lights, verify that the mode selector (flat position
of black ring around red power button) is set to the P setting.
Operation with Mako housing
If your Mako is equipped with a Monitor Back, the SunRay-S Pro lights can
also be operated from the Smart Grip controls.
Operation from Smart Grips
1) Activate initial power up by pressing the Pod Power Button. (Refer Fig 11).
After initial power up lights may be controlled using LIGHT button on the
Smart Grip controls.
2) Turn off lights by pressing the LIGHT button.
Operation from Battery Pods
1) Turn on light by pressing the Power Button on the rear cap (Refer Fig 11).
2) Turn off light by pressing the Power Button on the rear cap.
(Fig. 9) (Fig. 10)
(Fig. 11)
Power Button
Light Head
Base
Page 5

10
O-ring care & maintenance
O-rings are the critical component that keeps water out of the equipment
and the electrical components dry. Routinely inspect o-rings and replace
at least once per year. If your o-rings become unusable, contact the Light
& Motion Service department for an o-ring replacement kit.
Follow these steps for proper o-ring function.
1) The sealing system used on the front cap incorporates one o-ring. This is the
most critical area of the battery pod for maintenance and should be inspected
before every dive.
2) Make sure the battery pod o-ring and the mating surface on the inside of the
main housing are clean from grit, hair, lint and anything that could
potentially breach the o-ring seal.
3) After frequent diving or if o-rings or grooves appear dirty, remove o-rings
and clean the grooves. To remove o-rings, use finger pressure or the rounded
edge of a plastic card to lift the o-ring out of the groove.
Never use a metal object to remove an o-ring. It will cause
damage to the o-ring.
4) To check o-rings for damage, place the o-ring between the middle and index
finger and thumb. Then pull the o-ring through your fingers, feeling for any
debris or wear.
5) If o-rings are dirty, it is best to replace them. Washing dirty o-rings with soap
and water is not recommended. Soap breaks down the lubricants and will
compromise the integrity of the seal.
6) Properly greased o-rings will help maintain sealing integrity and minimize
o-ring degradation. Use enough grease to lubricate the o-ring thoroughly, but
not so much that it will attract additional debris.
7) Clean the groove with a lint free swab or the folded edge of a paper towel.
Other Maintenance
• Apply a light film of o-ring grease to cables and connectors to prevent premature degradation.
• We highly recommend a factory annual service to maintain proper operation
of your SunRay Lights.
• If a battery pod is flooded, immediately remove the battery, and rinse the
pod with fresh water. Most non-electrical parts will be salvageable if not
corroded by salt water.
~
Operation with BlueFin housing
Pro lights can be operated either by the Pod Power Button or from the Smart
Grip controls.
Operation from Smart Grips
1) Activate initial power up by pressing the Pod Power Button. (Refer Fig 11).
After initial power up lights may be controlled using LIGHT button on the
Smart Grip controls.
2) Turn off lights by pressing the LIGHT button.
Operation from Battery Pods
1) Turn on light by pressing the Power Button on the rear cap (Refer Fig 11).
2) Turn off light by pressing the Power Button on the rear cap.
Operation with StingRay housing
1) Turn on light by pressing the red button on the rear cap (Refer Fig 11).
2) Turn off light by pressing the Power Button on the rear cap.
Operation with other brand housing
Light & Motion light systems can be adapted to fit most underwater video
housings regardless of manufacturer. At the time of purchase, if this was the
intent, you received the correct mounting hardware. Contact the Light &
Motion service department if parts are needed or for specific assembly
instructions.
1) Turn on light by pressing the red button on the rear cap (Refer Fig 11).
2) Turn off light by holding the red button down for three seconds.
Post dive cleaning
1) After each dive, you should dunk the lights and pods in fresh water.
2) Press the red button to flush out any water.
3) After you are geared down and completely dried off, simply towel dry the
lights in a safe dry place.
Do not leave your lights in the rinse bucket with other
equipment. Underwater gear has been known to be
damaged by jostling against other products.
Storage
After diving remove your batteries and charge them. Leaving your batteries
discharged will significantly reduce the life of the battery. Store as you would
any other valuable piece of electronic equipment.
9
~
Page 6

Light & Motion
300 Cannery Row • Monterey, CA 93940
(831) 645-1525 • Fax (831) 375-2517
www.uwimaging.com
905-0115-B
Returning Products for Care
We highly recommend a factory annual service to
maintain proper operation of your SunRay lights.
1) Before returning your Light & Motion product for care, please call or email
our service department for a RMAnumber.
2) Ship your product pre-paid freight with the return number printed on the
outside of the box. It is recommended that you keep your shipper’s tracking
number until the product is returned to you.
Contact Light & Motion
Sales / Service Department:
831-645-1525 • Fax (831) 375-2517
Mail:
Light & Motion
300 Cannery Row
Monterey, CA 93940
E-mail:
World Wide Web:
www.uwimaging.com
European Service Center:
Attn: Steve Mawle
The New House Jubilee Lane
Milton under Wynchwood
Chipping Norton 0X7 6EP England
441993832396 (ph.)
441993832707 (fax)
[email protected]
11
 Loading...