

Page 1
O w n e r ’ s M a n u a l
www.uwimaging.com
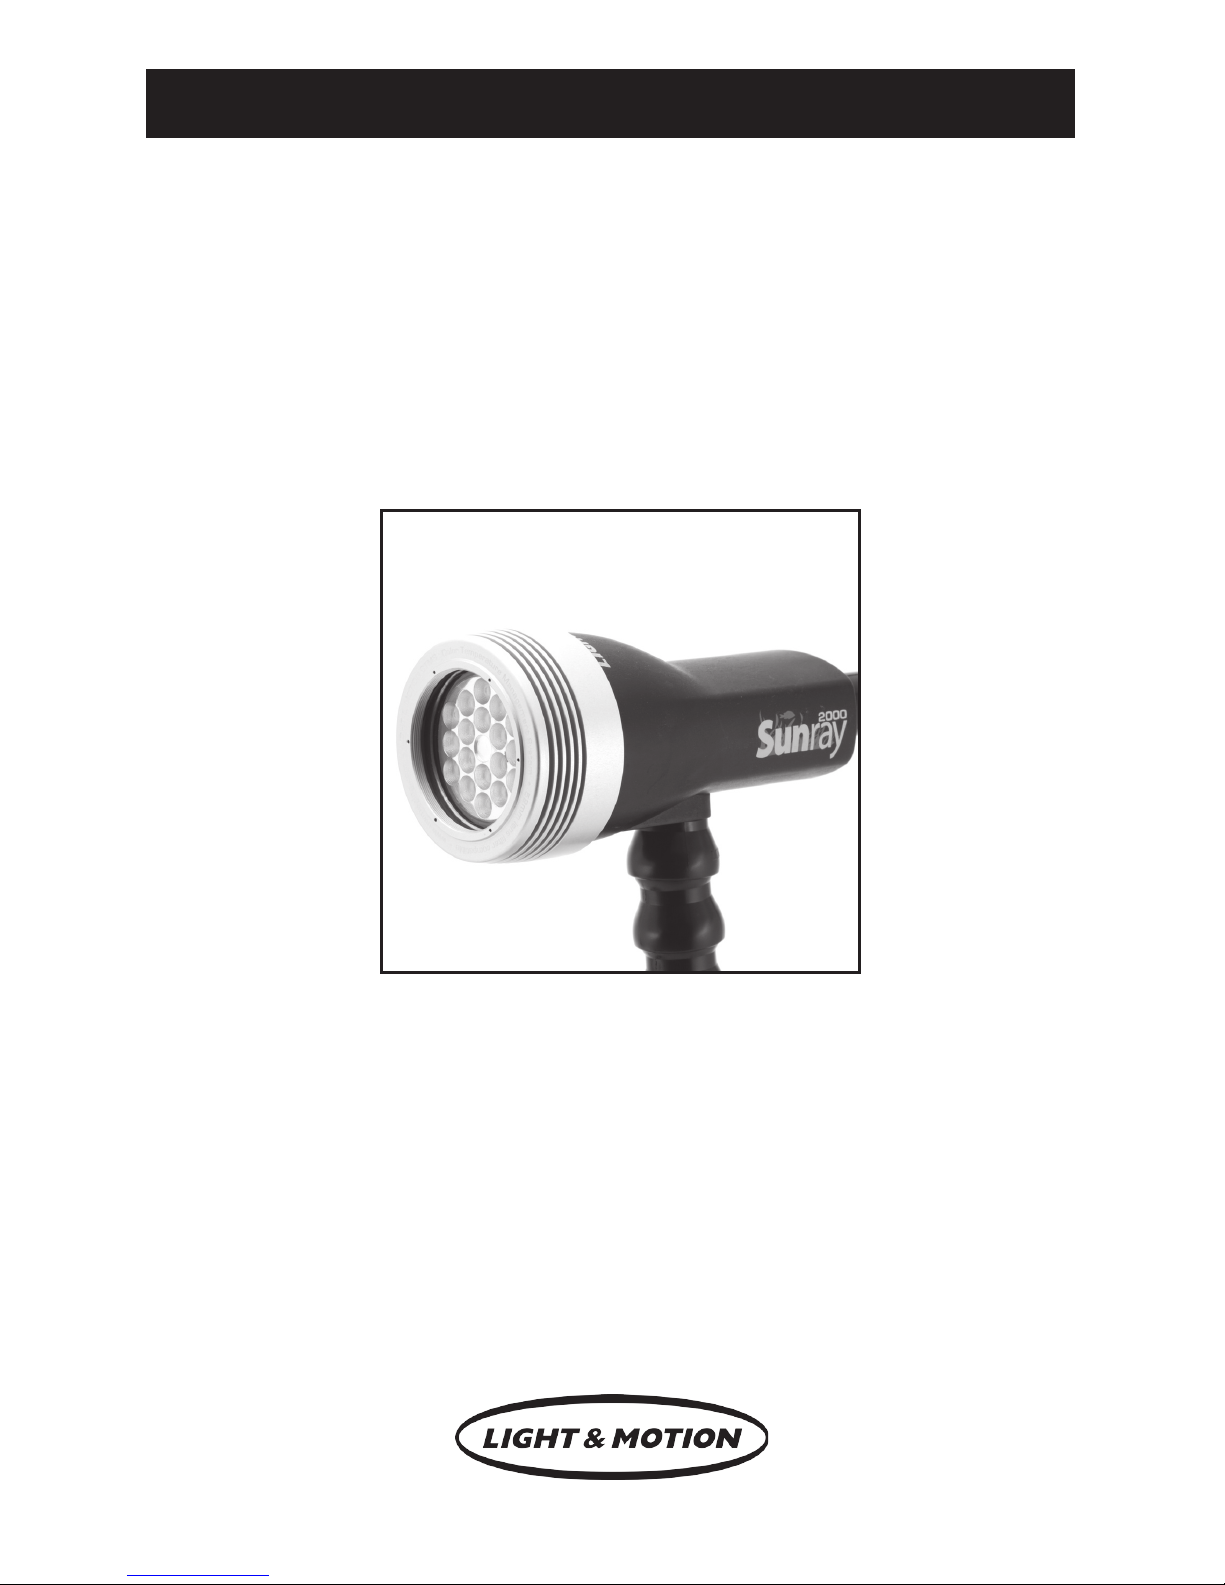
Sunray 2000
LED Lighting System
Page 2

Page 3

2
Standard Warranty
Light & Motion provides a limited warranty to the original purchaser for the
Sunray 2000 LED Light System against all defects in original workmanship
and material, under normal use and service, for one year from the date of
purchase with the following exceptions: Batteries are warranted for 90 days,
and battery chargers are only warranted for use in the US and Canada. Using
a battery charger in conjunction with a voltage converter is NOT considered
normal use, and chargers will not be warranted under such conditions.
Light & Motion will not be liable for any further loss, damages, or expenses,
including incidental or consequential damages directly or indirectly arising
from the sale or use of this product. Products not manufactured by Light &
Motion, such as strobes and strobe arms, are not covered under the Light &
Motion warranty. These products are covered by the Terms and Conditions
set forth by their respective manufacturers.
Page 4

Welcome
Congratulations on your purchase of the Sunray 2000 LED light system.
Please inspect the packaging of your product to verify that there was no damage
during shipping.
Periodically refer to http://www.uwimaging.com for instruction revisions.
Caution - Caution - Ca u tion - C a utio n
To increase your enjoyment and the life span of your equipment please take
an extra minute to review common errors which will result in equipment
damage or destruction.
• Always remove batteries from battery pods before storage
or travel. Failure to do so may inadvertently power-on the
lighting system and possibly cause heat damage.
• Check the operation of all your equipment several weeks prior to your trip.
If maintenance or repair is necessary, then time is available for both shipping
and repair scheduling.
• If a battery pod is flooded, immediately remove the battery. POD: rinse
with fresh water (good) or rubbing alcohol (better). Shake vigorously, towel
dry, and leave the pod where it can drain excess moisture. BATTERY: Dry
the battery off, blow any water out of the connectors, and then shake the
battery to remove remaining moisture. If there is water inside the
battery do not attempt to use it again. If the battery seems damp
inside, allow it to dry for at least 24 hours, away from flammable items.
Then, on land, charge the battery and test your lights before attempting
another dive.
Caution: The Sunray 2000 LED Lighting System is designed for use underwater.
Prolonged operation in air may cause the outer surfaces of the light to become
hot. Light & Motion recommends that you limit the operation of the Sunray light
out of the water to less than two minutes.
3
Wa r ning • Wa r n i n g • Wa rning • Wa r ning
Wa r ning • Wa r n i n g • Wa rning • Wa r ning
Page 5

4
@ ~
,
Hot Tip Important Caution
Look for these symbols to help identify special information:
Table of Contents
Getting Started. . . . . . . . . . . . . . . . . . . . . . . . . . . . . . . . . . . . . . . . . . . . . . . . . . . .5
Charging Batteries . . . . . . . . . . . . . . . . . . . . . . . . . . . . . . . . . . . . . . . . . . . . . . . . .5
Installing Batteries . . . . . . . . . . . . . . . . . . . . . . . . . . . . . . . . . . . . . . . . . . . . . . . . .6
Removing Batteries . . . . . . . . . . . . . . . . . . . . . . . . . . . . . . . . . . . . . . . . . . . . . . . .6
Mounting Battery Pods . . . . . . . . . . . . . . . . . . . . . . . . . . . . . . . . . . . . . . . . . . . . .6
Mounting Arm to Housing. . . . . . . . . . . . . . . . . . . . . . . . . . . . . . . . . . . . . . . . . . .7
Mounting Arm to Light Heads. . . . . . . . . . . . . . . . . . . . . . . . . . . . . . . . . . . . . . . .7
Removing Arm from Light Heads . . . . . . . . . . . . . . . . . . . . . . . . . . . . . . . . . . . . .7
Connecting Battery to Light Head . . . . . . . . . . . . . . . . . . . . . . . . . . . . . . . . . . . .7
Light Operation . . . . . . . . . . . . . . . . . . . . . . . . . . . . . . . . . . . . . . . . . . . . . . . . . . .8
Light Operation with Bluefin Housing. . . . . . . . . . . . . . . . . . . . . . . . . . . . . . . . . .8
Light Operation with Stingray Housing. . . . . . . . . . . . . . . . . . . . . . . . . . . . . . . . .8
Light Operation with Other Housing Brands . . . . . . . . . . . . . . . . . . . . . . . . . . . .9
Post-Dive Cleaning. . . . . . . . . . . . . . . . . . . . . . . . . . . . . . . . . . . . . . . . . . . . . . . . .9
Storage . . . . . . . . . . . . . . . . . . . . . . . . . . . . . . . . . . . . . . . . . . . . . . . . . . . . . . . . . .9
Other Maintenance . . . . . . . . . . . . . . . . . . . . . . . . . . . . . . . . . . . . . . . . . . . . . . . .9
Return Products for Care . . . . . . . . . . . . . . . . . . . . . . . . . . . . . . . . . . . . . . . . . .10
Contact Light & Motion. . . . . . . . . . . . . . . . . . . . . . . . . . . . . . . . . . . . . . . . . . . .10
Page 6
Getting Started
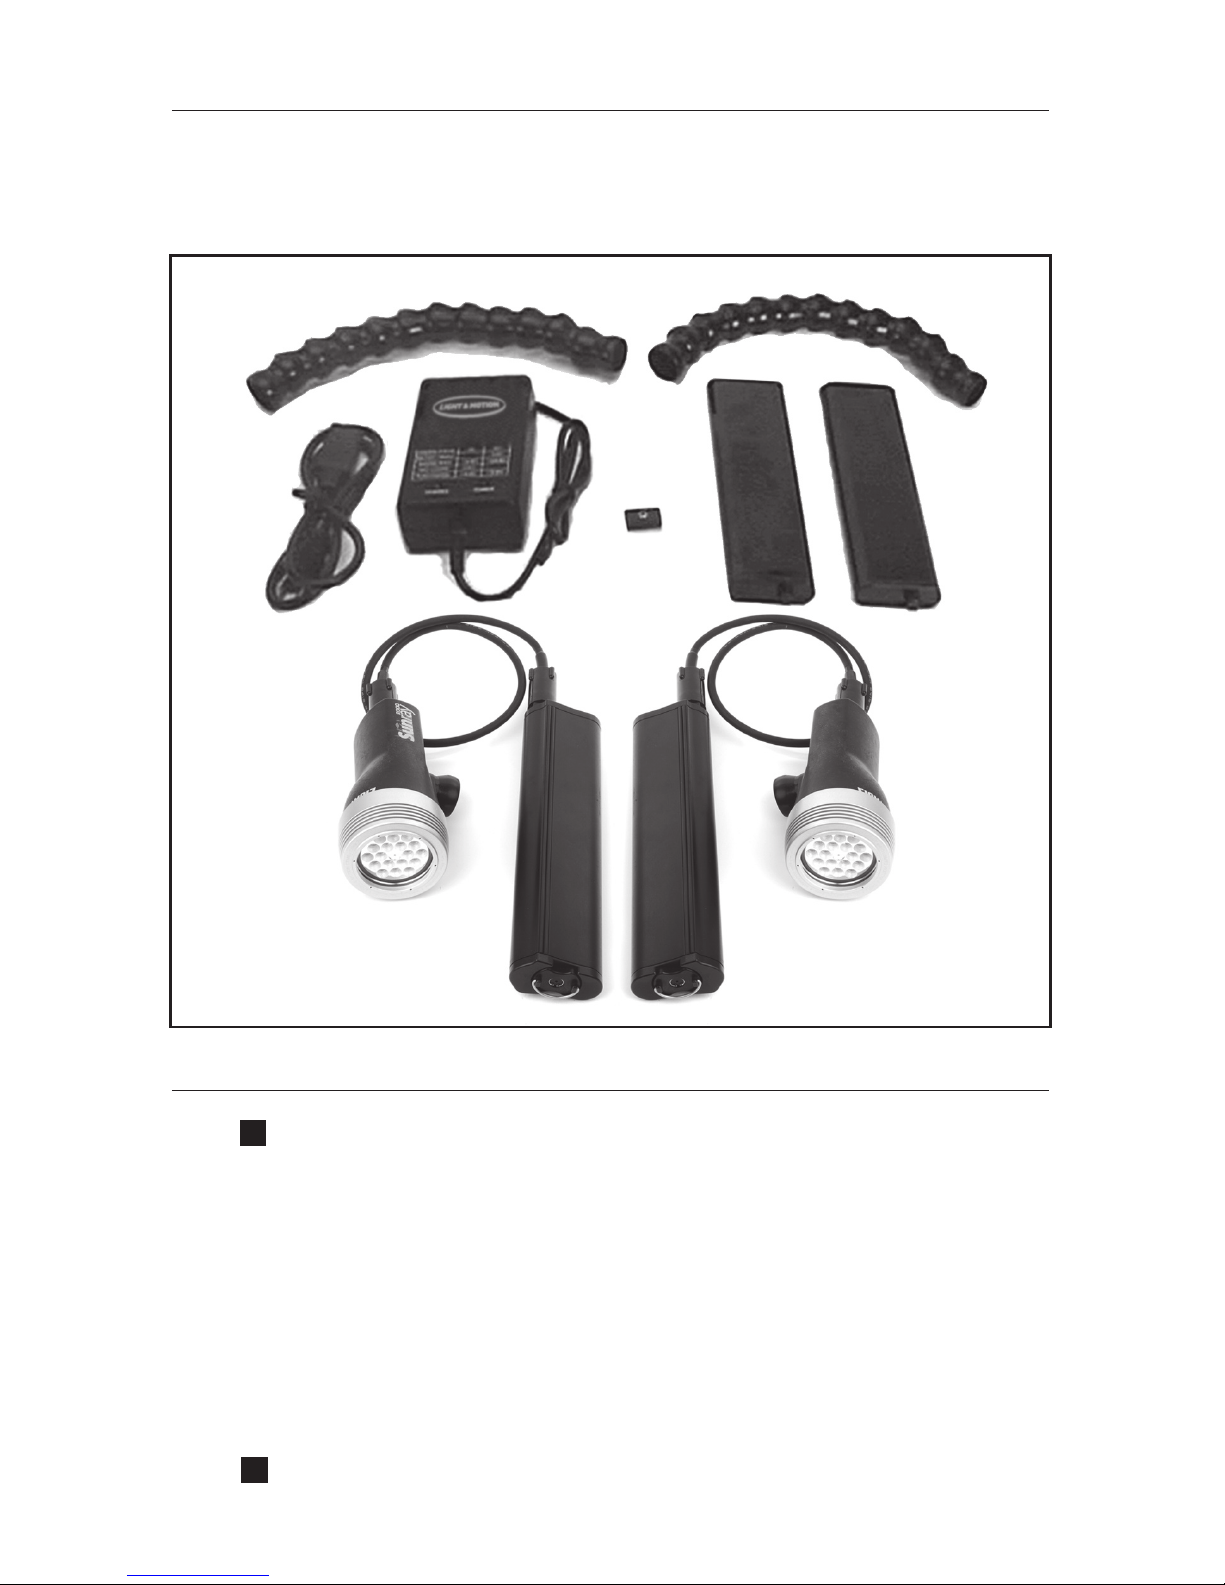
Pictured below are the components of the Sunray 2000 LED lighting system.
Take a moment to familiarize yourself with each part for later identification
and use.
Charging Batteries
Due to shipping, batteries charge states will vary. It is recommended
that you charge your batteries when they are received.
1. The charger can accept an electrical range of 100 - 240v and 50 - 60hz.
2. The charger has two LED lights.
Left LED illuminates when charging a NiMH battery.
Right LED is illuminated orange when charging and green when the
charging cycle is complete.
3. To attach charger to battery, align arrow on charger connector with arrow
on battery and push together until connectors seat. (Refer fig. 1)
Charge time for the Multi-Chem fast charger is 1.5 hours.
@
@
5
Sunray 2000 LED Light Heads
NiMH Batteries
Sunray 2000 LED Light System
Battery Pods
Pod Locker
Charger and
Electrical Cord
Light Arms
Page 7
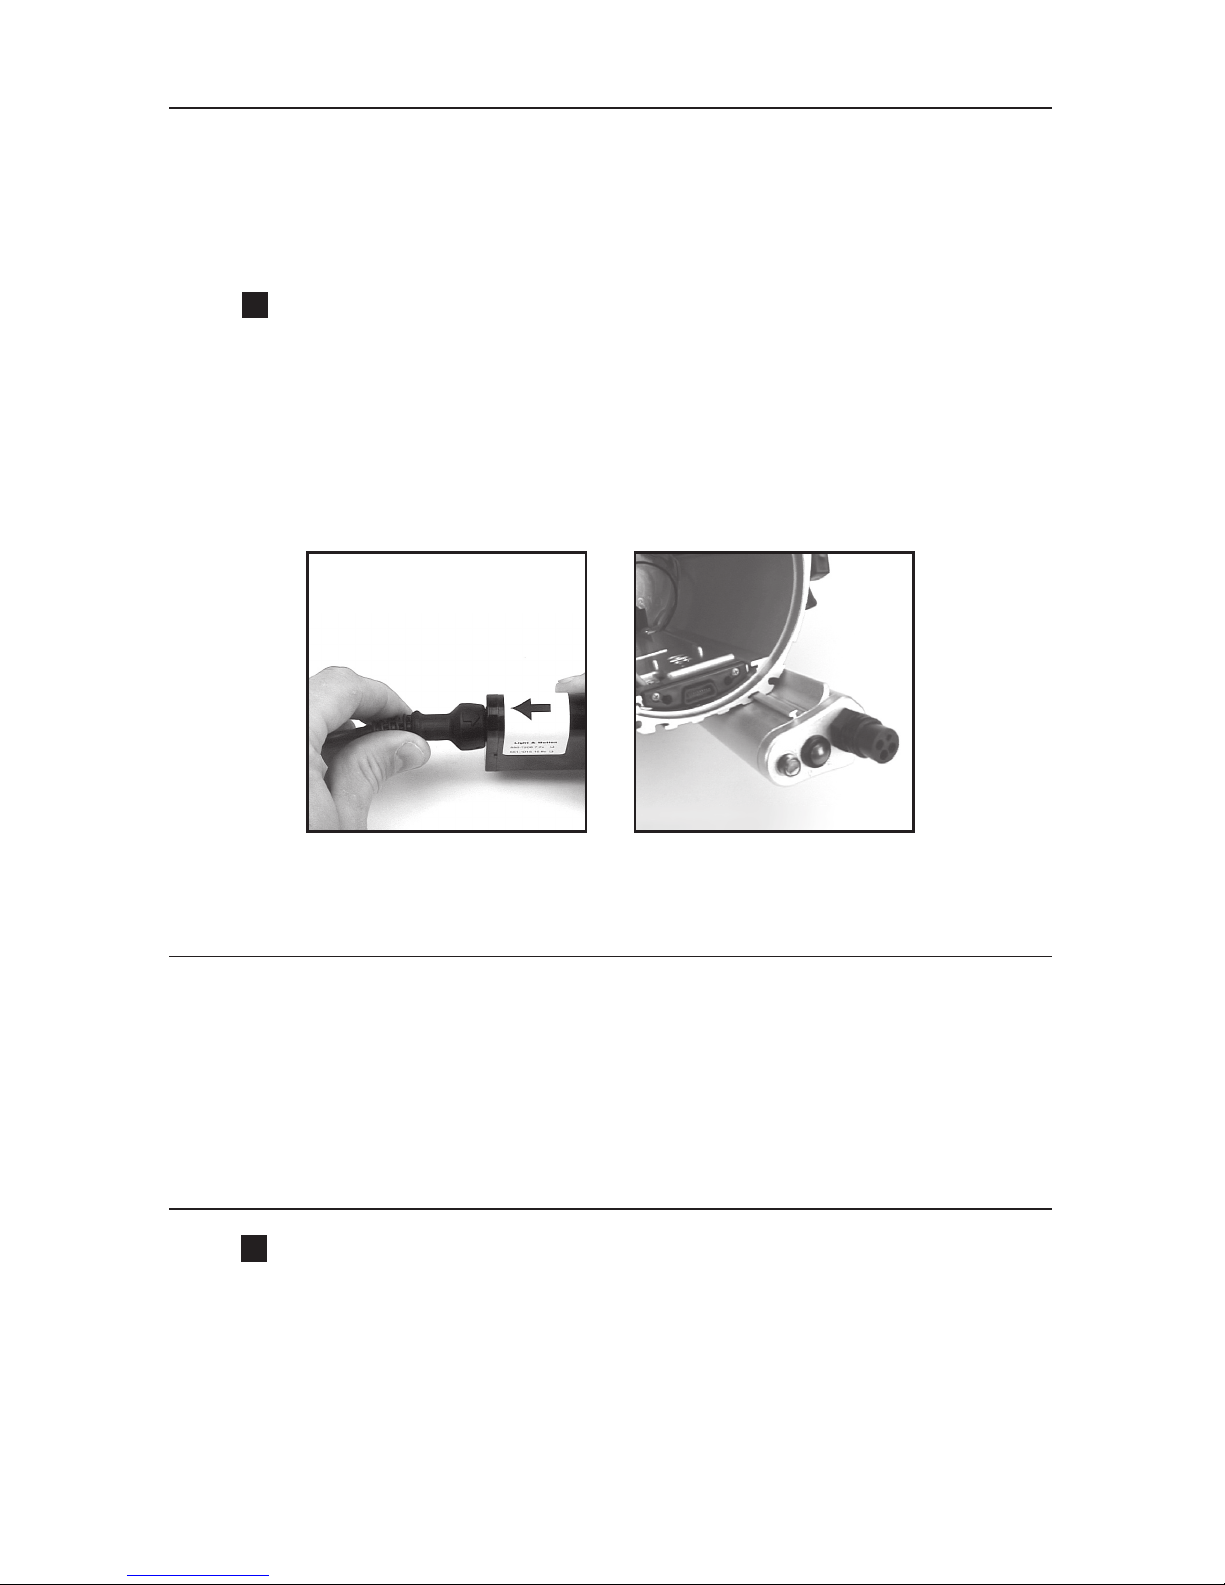
(Fig. 1)
6
Installing Batteries
1. Slide the battery back into the pod with the contact end inserted first so
that the connector will align with the socket inside the pod. (Refer fig. 1)
2. Service the O-rings (See O-ring maintenance).
3. Replace the front cap onto the pod.
Insure that the removal strap attached to the battery does not
interfere with the seal when the end cap is attached to the pod
4. Turn the knob on the end cap clockwise 1/8 turn until it stops. The
endcap will now be locked into place. Note that endcaps are specific to
the left and right pods.
~
Removing Batteries
1. Rotate latch at the front of the pod counter-clockwise 1/8 turn or
until it stops.
2. Pull the front cap off the pod.
3. Pull the battery from the pod using removal strap.
Mounting Battery Pods
Battery Pods can be mounted prior to installing batteries into pods.
1. Remove the rear plate or monitor back of the housing.
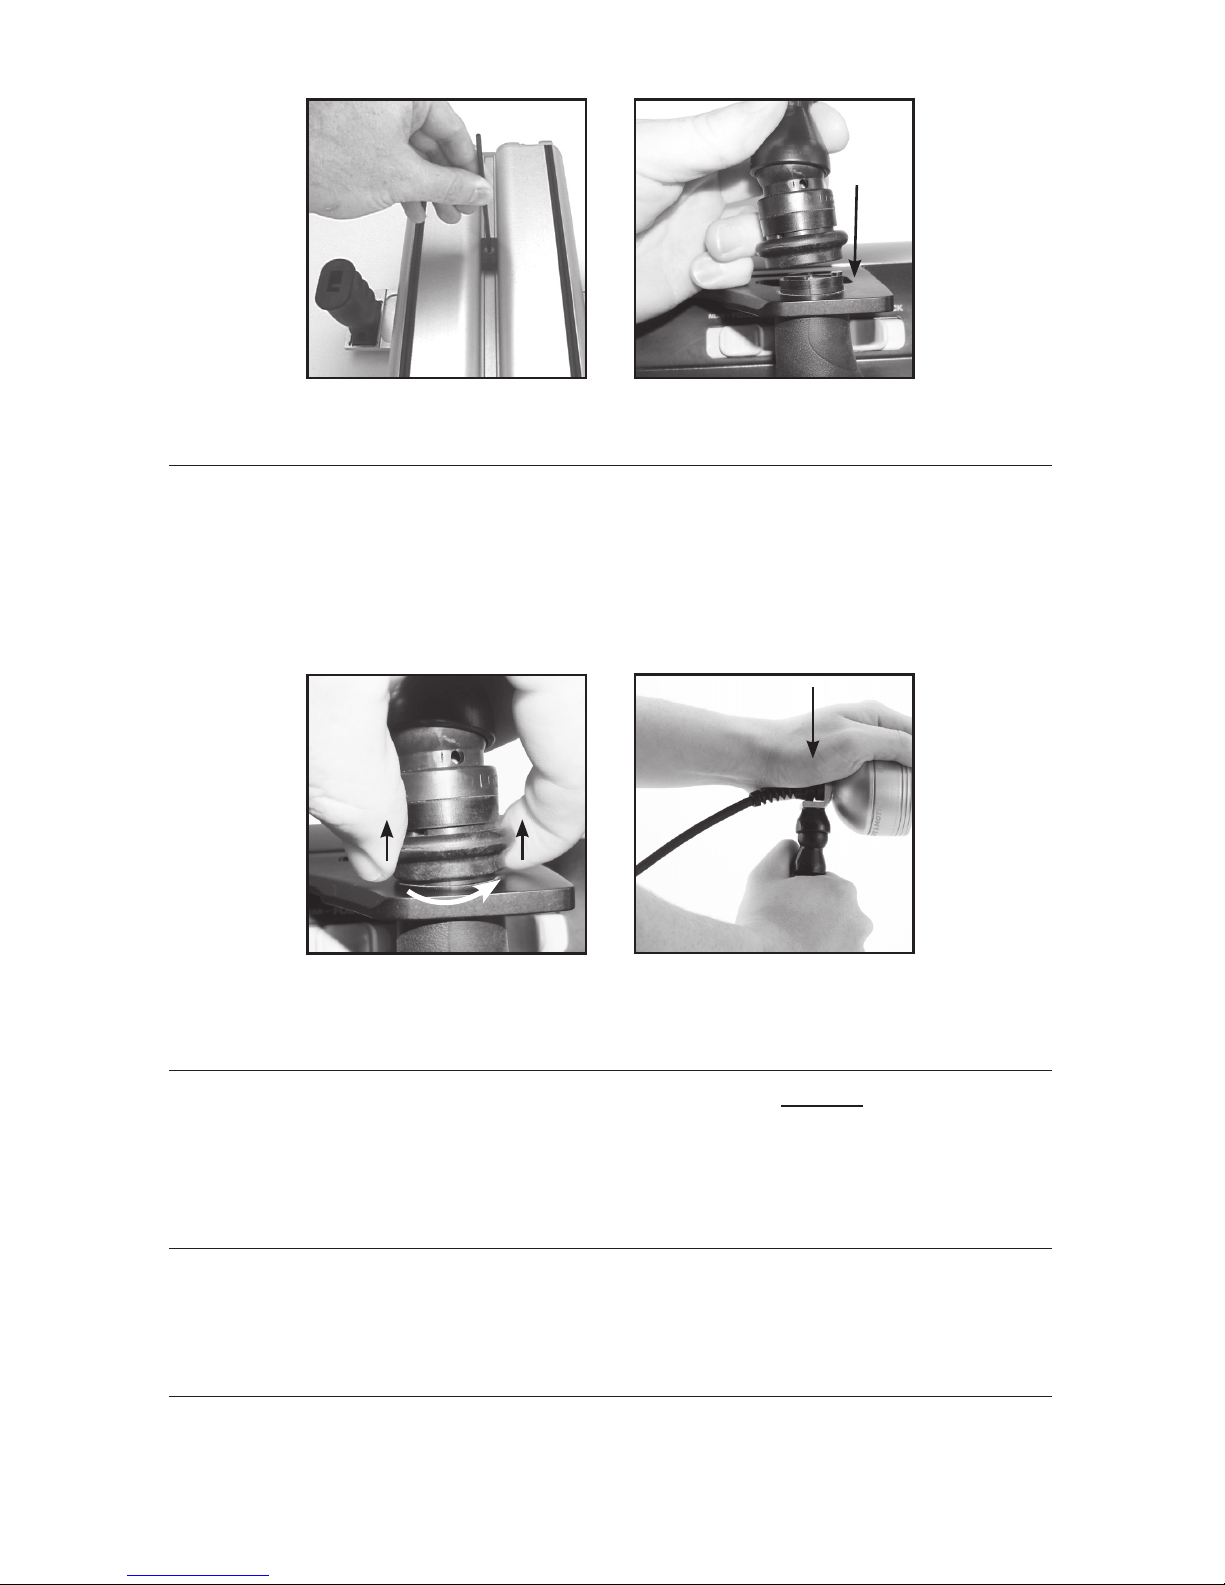
2. Slide battery pods into channels along bottom of housing (Refer fig. 2).
3) Insert Pod Locker between the pods and tighten using 1/8” allen wrench.
DO NOT OVER TIGHTEN (Refer fig. 3 on next page).
@
(Fig. 2)
Page 8
Mounting/Removing Light Arms
To attach the arm to the base, place the arm on the base squarely, gently pushing
down and rotating arm until you hear a audible click (Refer fig. 4). Remove arm by
gently lifting the ring at the base of the arm upward with your thumb and forefinger
while rotating the arm itself. The arm will release after 30-degrees of rotation in
either direction (Refer fig. 5).
(Fig. 3)
(Fig. 4)
(Fig. 5)
7
Mounting Light Arms to Light Heads
Align top of arm with arm light head base and press FIRMLY together. Arm
should snap into position. (Refer fig. 6).
Removing Light Arms from Light Heads
To remove light head from arm, “break” the arm at the upper most joint.
Connecting Batteries to Light Heads
1. Plug in the light connectors on pod.
2. Tighten the locking sleeves by rotating clockwise until tight.
(Fig. 6)
Page 9
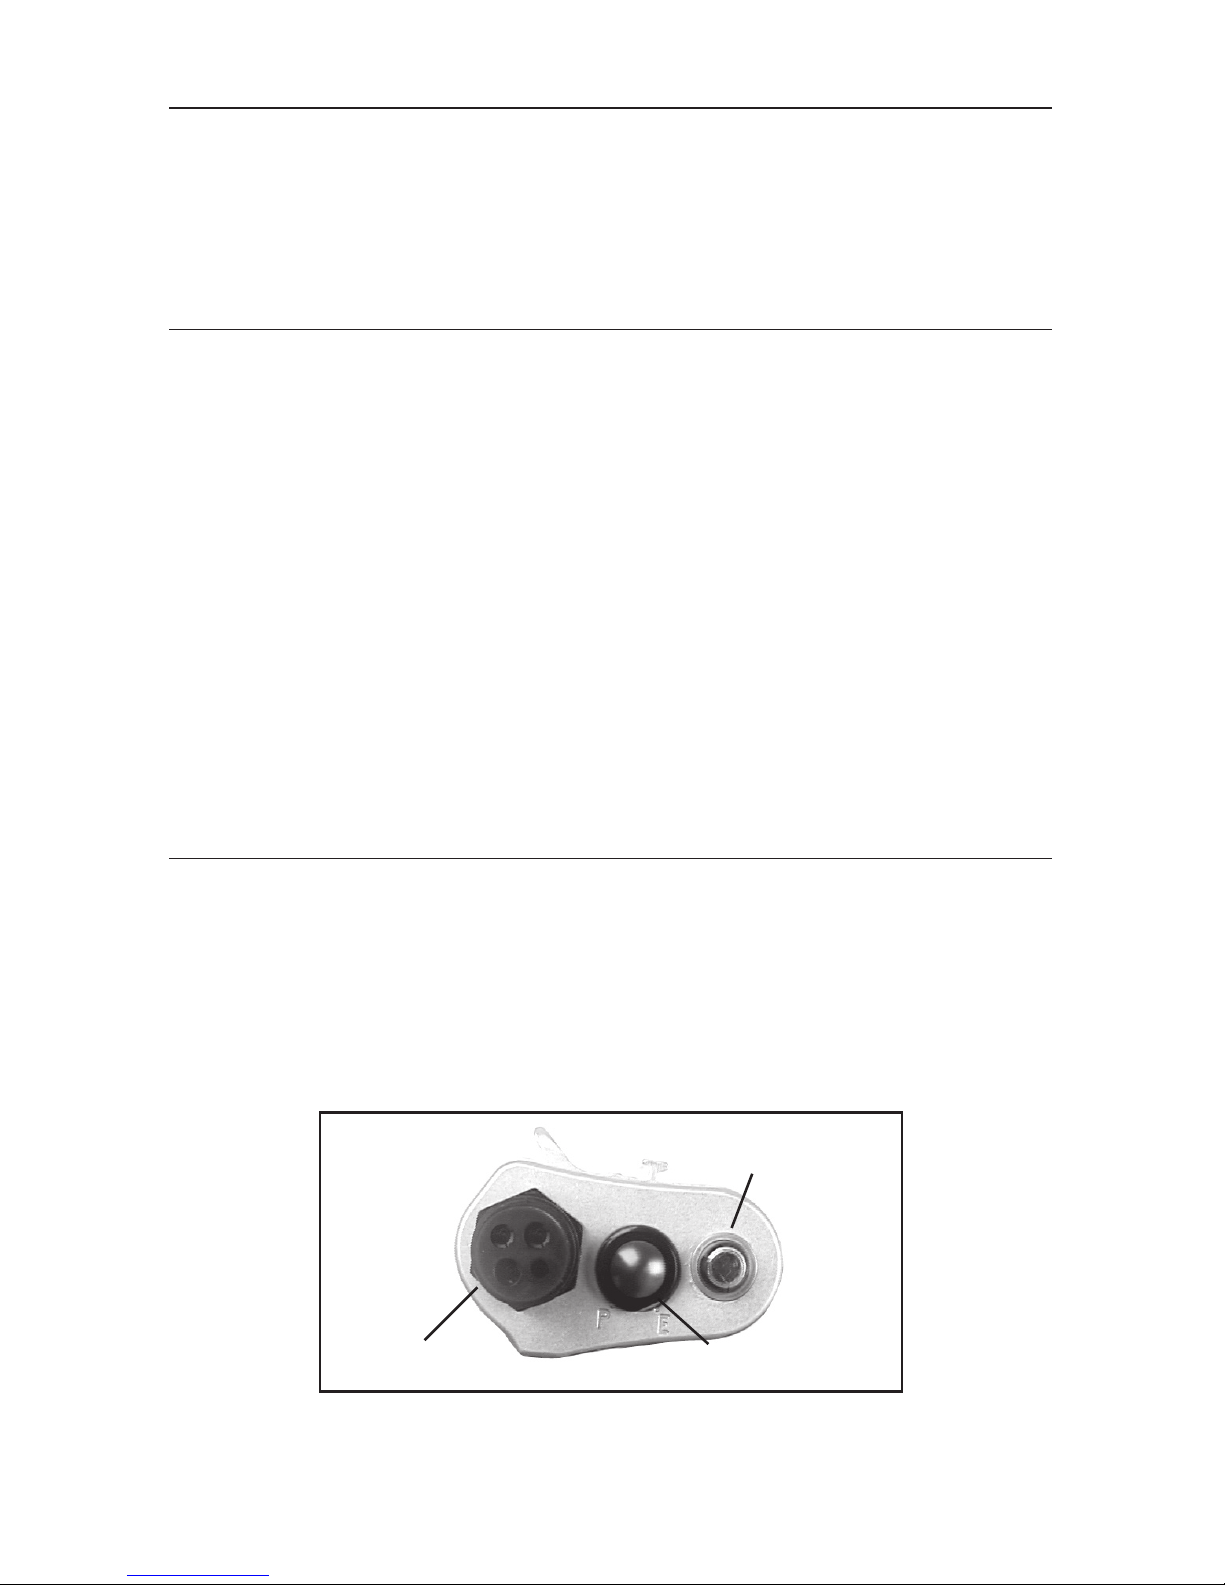
Light Operation
After initial power-up the LED Receiver will flash a green light. This indicates
the battery pod is ready to receive IR signals from the housing. IR controls are
only available with housings that feature Smart Grips.
Operation with Bluefin Housing
Sunray LED lights can be operated either by the Pod Power Button or from
the Smart Grip controls.
Operation from Smart Grips
1. Activate initial power up by pressing the Pod Power Button. (Refer Fig 7).
2. Use the LIGHTS button to cycle through power settings.
3. Turn off lights by pressing and holding the LIGHT button for three
seconds.
Operation from Battery Pods
1. Turn on light by pressing the Power Button on the rear cap (Refer Fig 7).
2. Press the red button again to change the light output level.
3. Turn off light by holding the red button down for three seconds
Operation with Stingray Housing
1. Turn on light by pressing the red button on the rear cap. (Refer Fig 7).
2. Press the red button again to change the light output level.
3. Turn off lights by pressing and holding the red button for three seconds.
(Fig. 7)
8
LED Receiver
Power Button (red)
Light Connector
Page 10

Operation With Other Brands of Video Housing
1. Turn on light by pressing the red button on the rear cap (Refer Fig 7).
2. Press the red button again to change the light output level.
3. Turn off light by holding the red button down for three seconds.
Post-Dive Cleaning
1. After each dive, you should dunk the lights and pods in fresh water.
2. Press the red button to flush out any salt water.
3. After you are geared down and completely dried off, simply towel dry the
lights in a safe dry place.
Do not leave your lights in the rinse bucket with other
equipment. Video lights have been damaged by jostling
against other products.
Storage
After diving remove your batteries and charge them. Leaving your batteries
discharged will significantly reduce the life of the battery. The lighting system
requires no special storing instructions. Store as you would any other
valuable piece of electronic equipment.
Other Maintenance
• CLEAN THE CONNECTORS!!! — Pay special attention to the condition of
the connectors at the end of the cables. Equally important is the female
receptacle in the battery pod. These metal connectors should “shine like a
new penny”.
• Apply a light film of O-ring grease to cables and connectors to prevent
premature degradation.
~
9
Page 11

Returning Products for Care
We highly recommend a factory annual service to maintain proper
operation of your Sunray 2000 LED lights.
1. Before returning your Light & Motion product for care, please call or email
our service department for a RMA number.
2. Ship your product pre-paid freight with the return number printed on
the outside of the box. It is recommended that you keep your shipper’s
tracking number until the product is returned to you.
Warning: Do not ship your camera inside the housing Shipping
companies may drop your system from up to three feet which could
damage your camera.
Contact Light and Motion
Sales & Support:
Phone (831) 645-1525
Fax (831) 375-2517
Mail:
Light & Motion
300 Cannery Row
Monterey, CA 93940
E-mail:
World Wide Web:
www.uwimaging.com
Fish Eye Productions
Attn: Steve Mawle
Unit 5 Vanguard Trading Estate
Britania Rd
Chesterfield
S402TZ
England
Tel. +44 (0)1246 216016
Fax. +44 (0)1246 563785
www.fep.co.uk
European Service Center
~
,
10
Page 12

300 Cannery Row • Monterey, CA 93940
(831) 645-1525 • Fax (831) 375-2517
www.uwimaging.com
905-0281-A
 Loading...