

LightHeaded 20346, 20348, 20343, 20345 Assembly Instruction Manual
“Montgomery” LightHeaded™ Headboard
www.LightHeadedBeds.com
Model #20346 Twin size, Espresso
Model #20348 Twin size, Satin White
07-23-2015
1168366
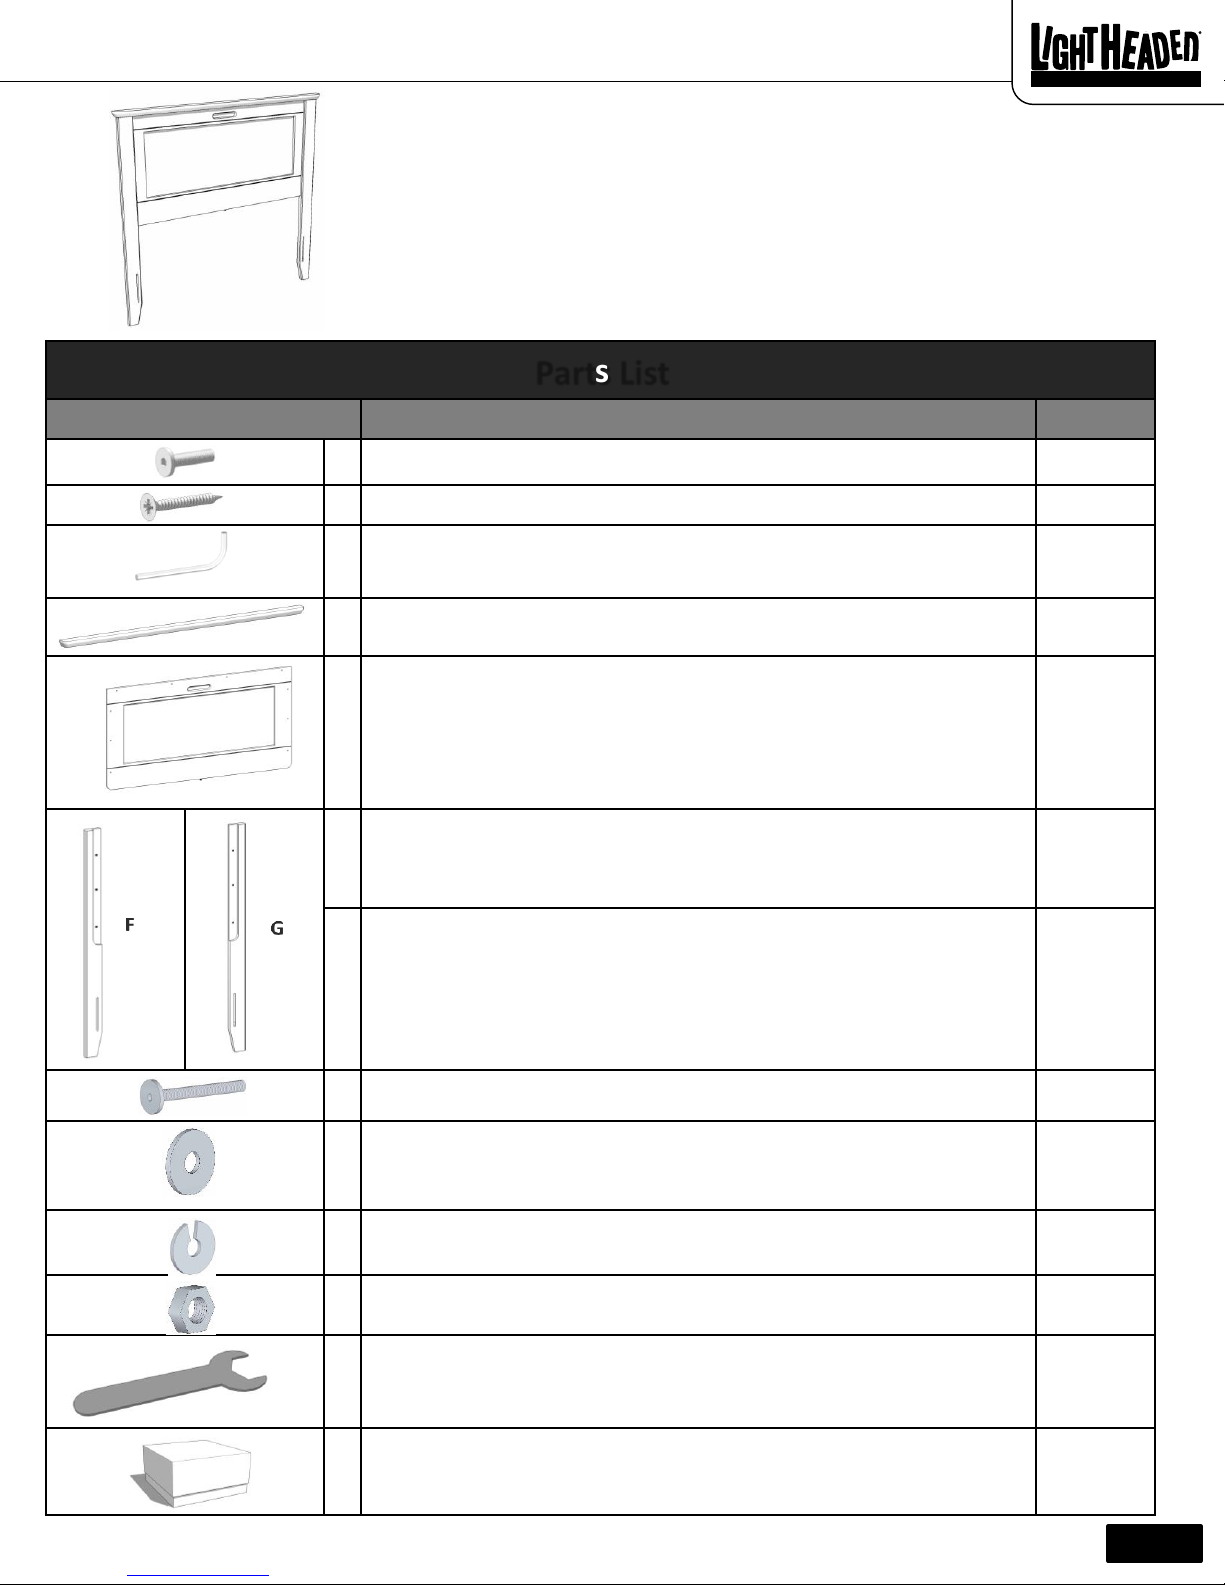
Parts List
Part Description Quantity
A
3/4” long machine screw (Part# 80000648)
6
B
Wood screw (Part# 80000650)
4
C
Allen wrench (Part# 80000651)
1
D
Headboard Caprail (Part# 80000652 Espresso, Part# 8000653 Satin White)
1
E
Headboard Center Panel (Part# 80000654, Espresso; Part# 80000655, Satin
White) ships with LightHeaded™ lighting component kit already installed.
1
F
Right headboard leg (Part# 80000668 Espresso; Part# 80000669 Satin White)
1
G
Left headboard leg (Part# 80000670 Espresso; Part# 80000671 Satin White)
1
H
Bed frame assembly hardware – Bolt (Part# 80000672 )
4
I
Bed frame assembly hardware – Metal Washer (Part# 80000673 )
8
J
Bed frame assembly hardware – Metal Lock Washer (Part# 80000674 )
4
K
Bed frame assembly hardware – Hex Nut (Part# 80000675 )
4
L
Wrench (Part #80000680 )
1
M
LightHeaded™ TechBox (Contains remote control, power cord, User Guide, and
most importantly your $20 coupon code for LightHeaded™ Beds.com) (Part#
80000152)
1
• Layout all of the parts listed below.
• Save all packing materials until assembly is complete to avoid
accidentally discarding smaller parts or hardware.
• You will need a Phillips head screw driver (not included).
• Your LightHeaded™ Headboard is designed to be used with a free
standing metal bed frame (not included).
Page 1
Before you begin:

“Montgomery” LightHeaded™ Headboard
www.LightHeadedBeds.com
Model #20346 Twin size, Espresso
Model #20348 Twin size, Satin White
07-23-2015
1168366
Step 1
1. From the top of your LightHeaded™ headboard remove the protective packing material
and discard.
2. The LightHeaded™ Beds patented energy efficient LED Light Guided Panel has been pre-
installed in your headboard with the acrylic cover and starter HeadLight Image already in
place.
3. Please refer to your LightHeaded™ Lighting User Guide in the TechBox (M) for information
on how to power up your light, insert images, and trouble shoot. Please be sure to look for
your remote control and $20 coupon for LightHeadedBeds.com in your TechBox (M).
Step 2
1. Carefully lay the headboard center panel (G) face down on
a soft surface (like a rug or carpet).
2. Align 3 threaded inserts in left and right headboard legs
(F,G) with holes in headboard center panel.
3. From the back of the headboard center panel (G), use
allen wrench (C) to tighten machine screws (A) through
holes (3 per side) in headboard center panel into threaded
inserts in headboard legs (F, G).
1. Secure headboard caprail (F) to headboard center panel
(G) with 4 wood screws (B) using a Phillips head screw
driver (not included).
Step 3
E
F
Page 2
A
C
 Loading...