

LightHeaded 20165, 20161, 20269 Assembly Instructions Manual
“Edgewood” LightHeaded™ Bed
Assembly Instructions
Part Description Quantity
Model #20165Twin size, Cheshire Cherry
Model #20269Twin size, Black
Model #20161 Twin size, White
Before you begin:
www.LightHeadedBeds.com
12/07/2015
• Consider enlisting a family member or friend to help; it will make assembly easier,
faster, and more fun.
• Layout all of the parts listed below.
• Save all packing materials until assembly is complete to avoid accidentally
discarding smaller parts or hardware.
• You will need a Phillips head screw driver (not included)
PartssList
Blister Pack EQA
EPY
EPZ
EPM
EQC
EPN
EQB
EPO
Contains the hardware required to assemble your new Lightheaded Bed
Cam-lock
Cam-bolt
Wood screw
Fender washer (2 extra)
LightHeaded™ headboard panel—ships with LightHeaded™ lighting component
kit already installed.
Caprail
Right headboard leg
1
8
8
24
4
1
1
1
EPP
EPQ
EPR
EPS
EPT
EPU
1168348 C
Left headboard leg
Footboard
Right side rail
Left side rail
Roll-out slats (12 pieces of wood connected with nylon straps)
LightHeaded™ TechBox (contains remote control, power cord, instructions for
use and image changing, and your coupon code for $20) (see separate
LightHeaded™ Lighting Assembly Instructions)
1
1
1
1
1
1
Page 1
“Edgewood” LightHeaded™ Bed
Assembly Instructions
Model #20165Twin size, Cheshire Cherry
Model #20269Twin size, Black
Model #20161 Twin size, White
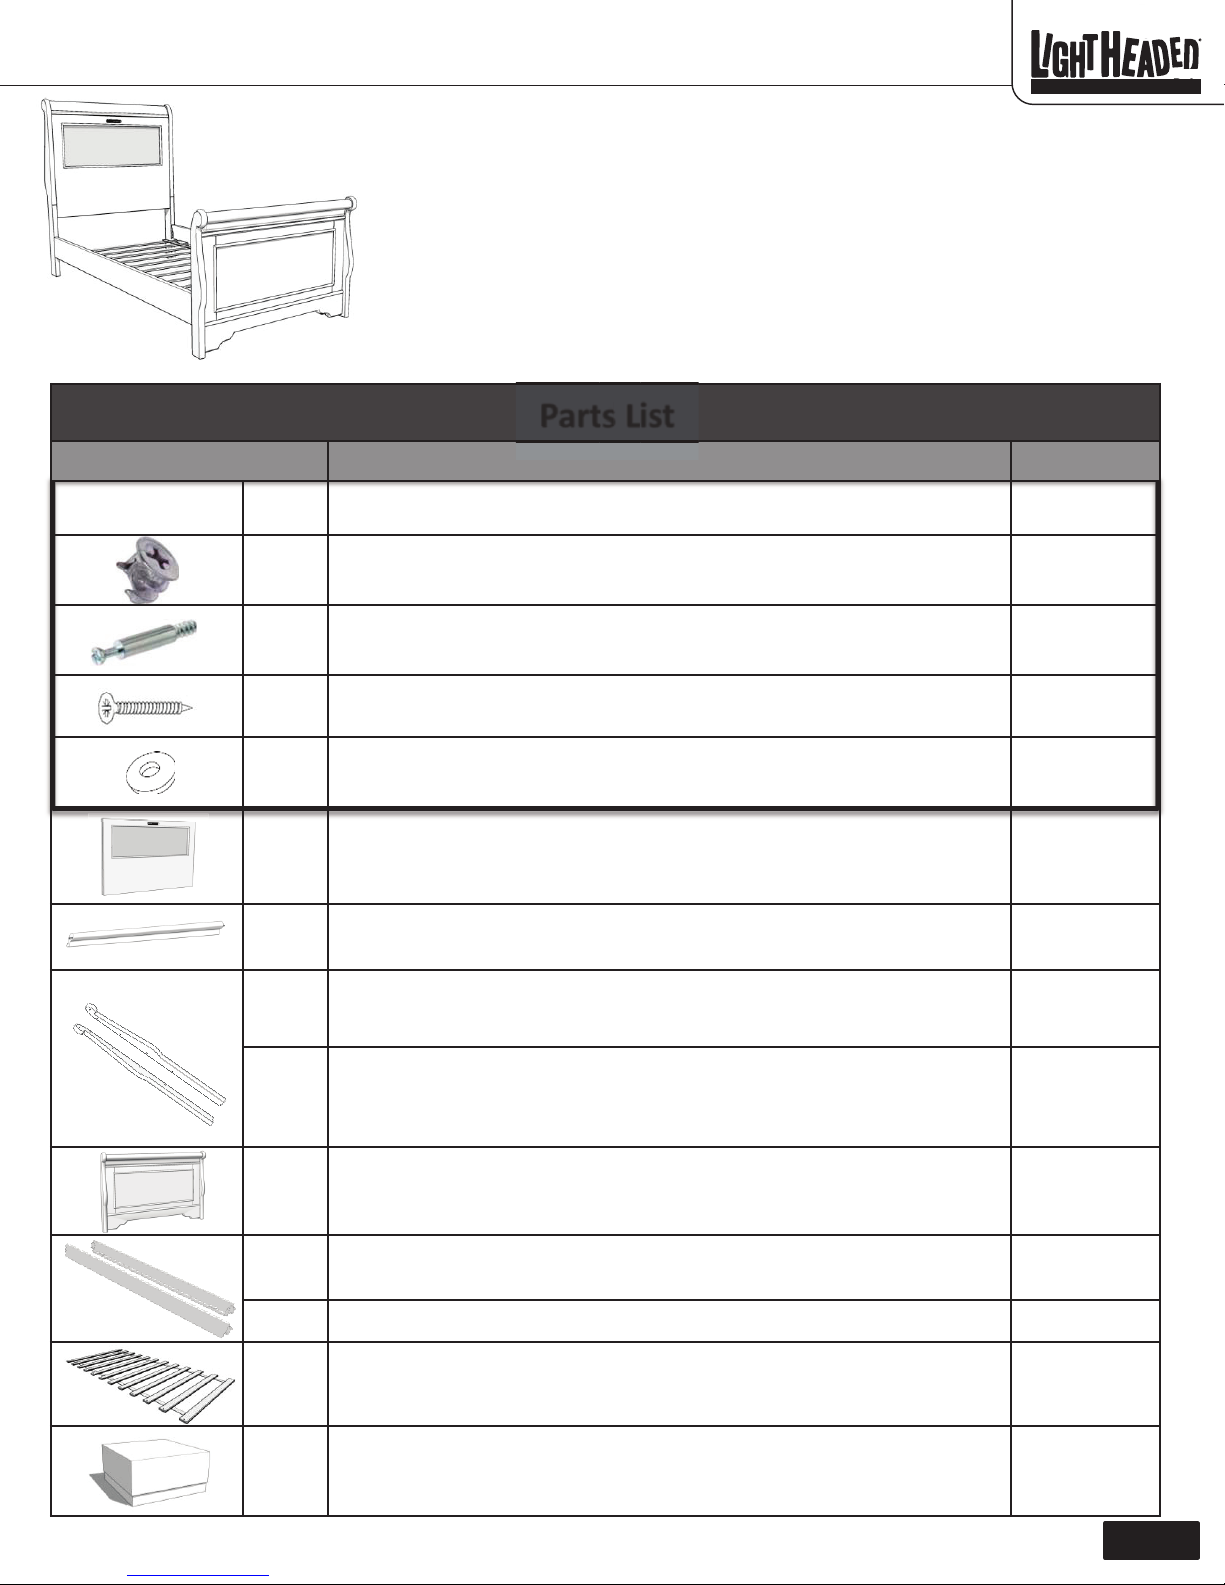
Step 1
1. On a soft surface, carefully lay your LightHeaded™ headboard panel (EPN) face
down. Above the open top lay the caprail (EQB) so that the large surface points
toward the front of the headboard (see illustration).
2. Insert 4 cam-locks (EPY) into the holes on the back of the headboard panel on
left and right edge (do not insert into the center hole). Point the arrows on the
back of the cam-locks toward the corresponding cam-bolts on the legs.
3. Lay the legs (EPO, EPP) down so that the threaded inserts and holes are pointing
toward the headboard panel.
4. Screw 4 cam-bolts (EPZ) into the plastic threaded inserts on the inside of each leg
(EPO, EPP).
5. Place one washer (EQC) over each pin at the ends of the caprail. Line up the pin
on the end of the caprail (EQB) with the inside of the right leg. At the same time
line up the cam-locks with the cam-bolts. If the cam-bolts do not go into the
holes, check to make sure the arrow on the cam-lock is pointed toward the bolt.
Do not tighten the cam-locks yet.
6. Repeat step 5 with the left leg.
7. Once you have both legs and the caprail connected to the headboard panel, use
a Phillips head screwdriver (not included) to tighten the cam-locks.
EPO
EQC
EQB
EPN
www.LightHeadedBeds.com
12/07/2015
EQC
EPP
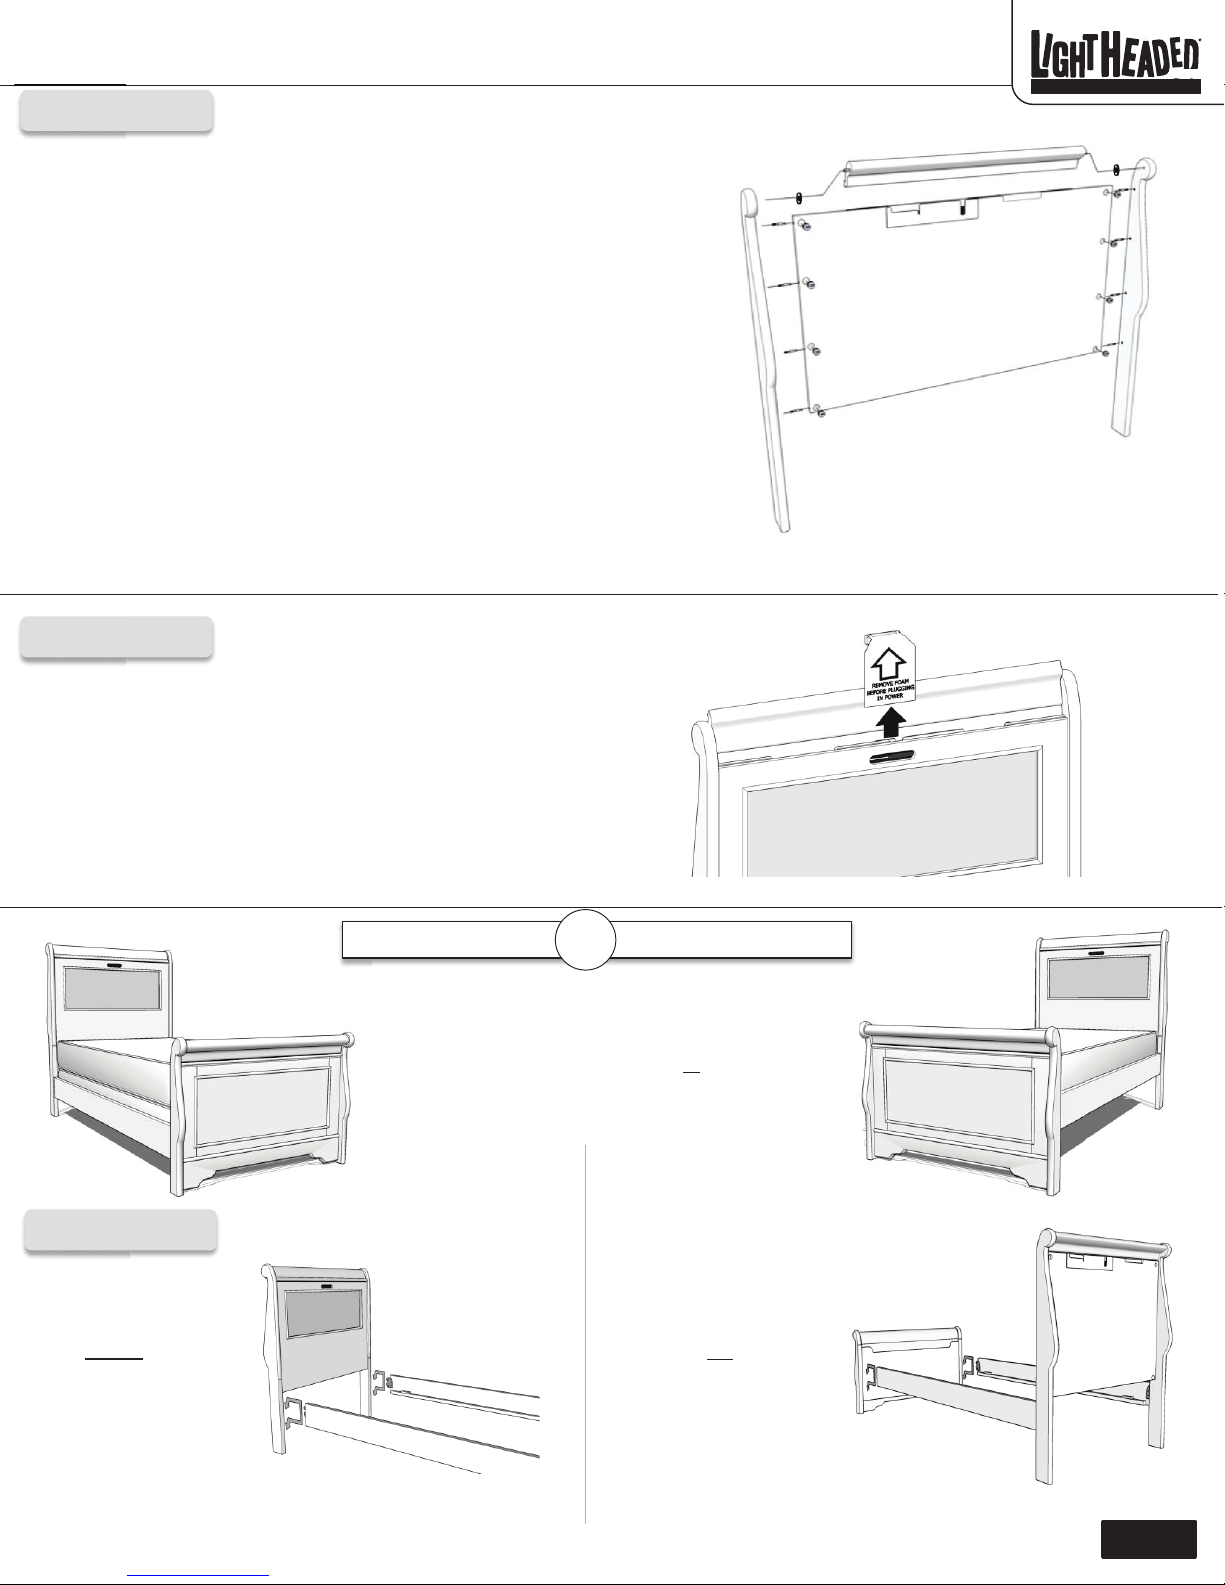
Step 2
1. Open the caprail of your LightHeaded™ headboard (EQB), then remove
the protective foam insert and attached paper and discard.
2. Your LightHeaded™ light component is pre-assembled in your
headboard and ready to use. Please refer to your LightHeaded™ Lighting
Assembly Instructions in the TechBox (EPU) for information on how to
connect power to your light, insert LightHeaded™ Images, and trouble
shoot, if necessary.
Box Spring & Mattress
It’s your choice!
Your LightHeaded™ bed can be assembled to
use a box spring and mattress set or
only. Don’t worry, you can change it at any time
with a couple simple steps and no tools.
or
EQB
Mattress only
a mattress
Step 3
Hook your wooden side
rails (EPR, EPS) onto
the bottom
pins in the vertical slot
on the headboard and
footboard legs.
1168348 C
two metal
Hook your wooden
side rails (EPR, EPS)
onto the top
pins in the vertical slot
on the headboard and
footboard legs.
two metal
Page 2
 Loading...