

Light Emotion thunderboltg2, MOONSTAR4 User Instruction Manual
User’s instruction manual
This manual contains important information about the safe installation and use of this product
Please read this instruction manual carefully before installing or operating
Please keep these instructions in a safe place for future reference
Introduction
Thanks for choosing our laser device, believing this brand new product will bring you unlimited marvel and
happiness. Before operating this device, please read this manual thoroughly, and retain it for future reference.
CAUTION
Please read this manual fully before installing or operating this product as it contains important
safety information relating to its installation and operation.
This Class 3B laser product emits hazardous levels of optical radiation and will cause injury to
the eyes if viewed directly.
This product is not suitable for projection directly at audiences or other personnel.
This product must not be used for any form of audience scanning application and is for
professional use only.
Important information
This product is a Class 3B laser and should only be installed and used by personal who are trained in the
management of laser radiation and are able to operate in accordance within the guidance given by the Health
and Safety Executive (HSE) in HS(G)95: “The Radiation Safety of Lasers used for Display purposes”.
This product contains no user-serviceable parts. Under no circumstances should any attempt be made by the
user to dismantle or modify it in any way.
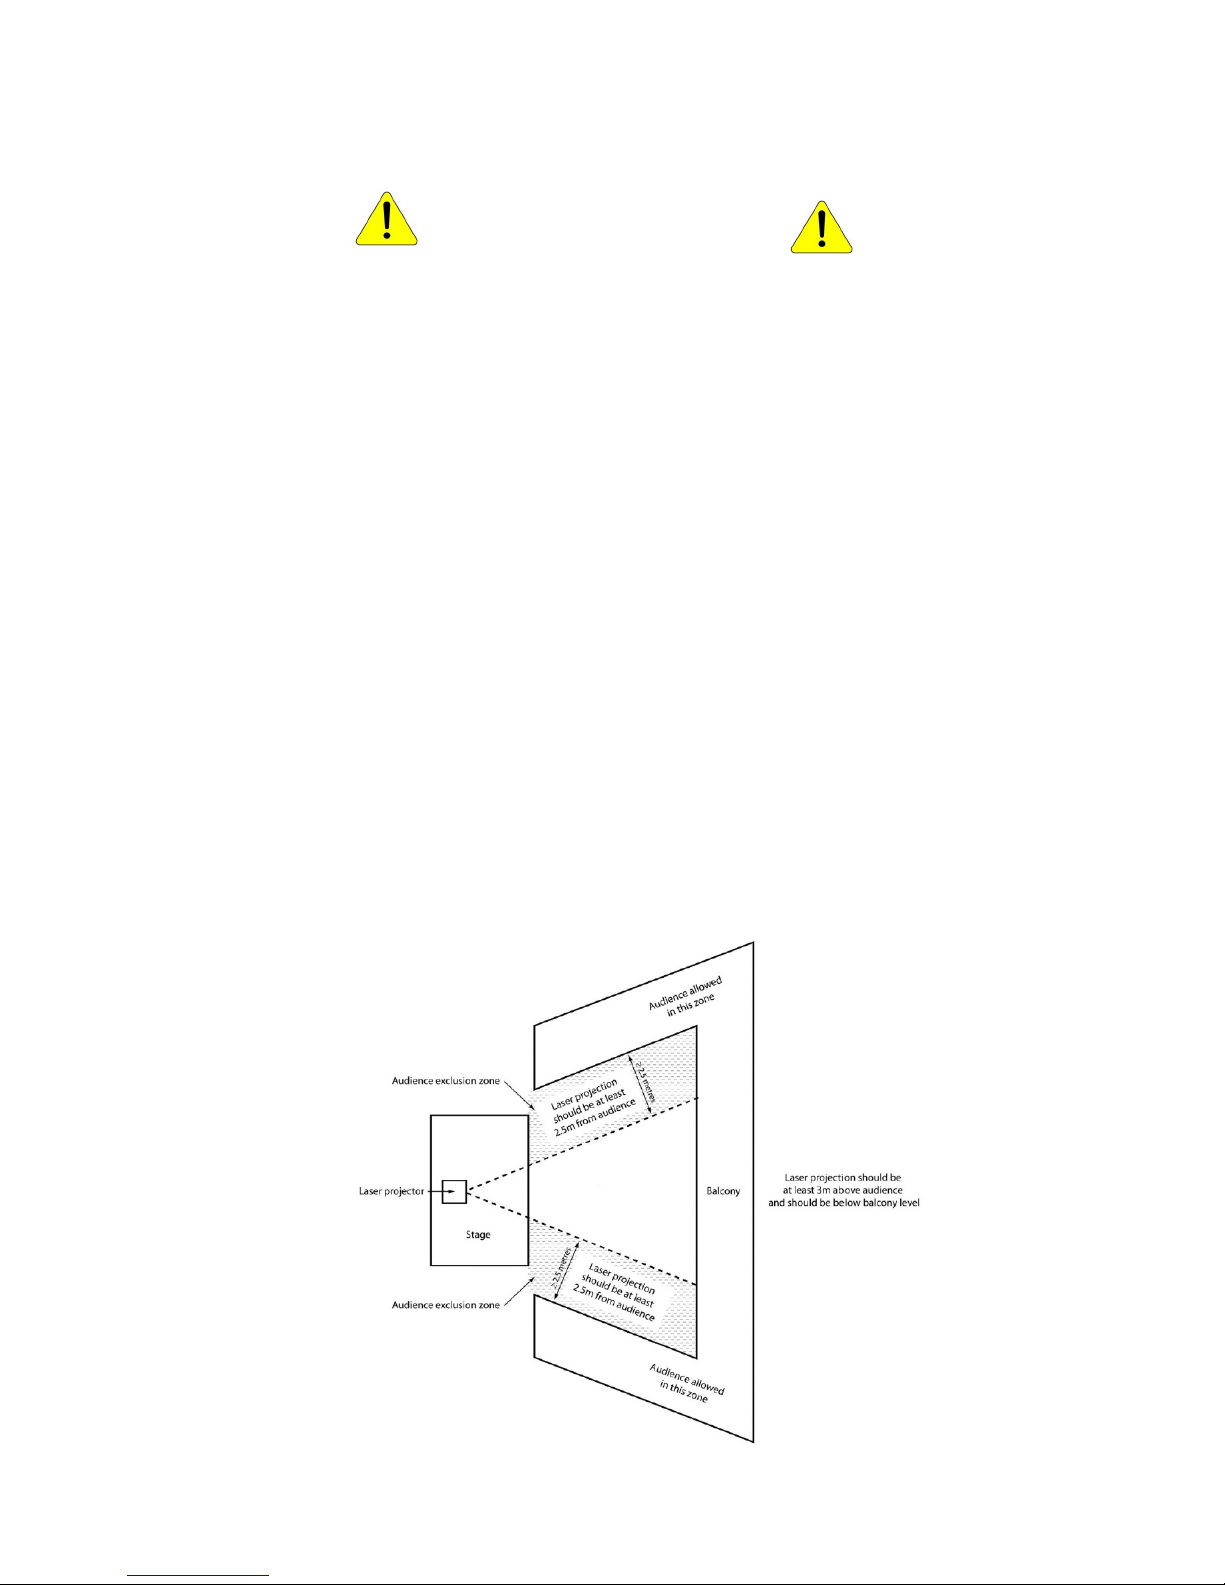
Installation instructions
This product must be securely mounted with adequate fixings to hold the weight. If mounted at height, use a
safety wire attached to the eyebolt and a secondary fixing point. Position the aperture so that its emission is
always directed away from people and objects that are able to reflect the emission towards people. In this
regard the separation distances of 3 metres vertically and 2.5 metres horizontally, cited in HS(G)95 and shown
below must be observed.
Vertical bird’s eye view
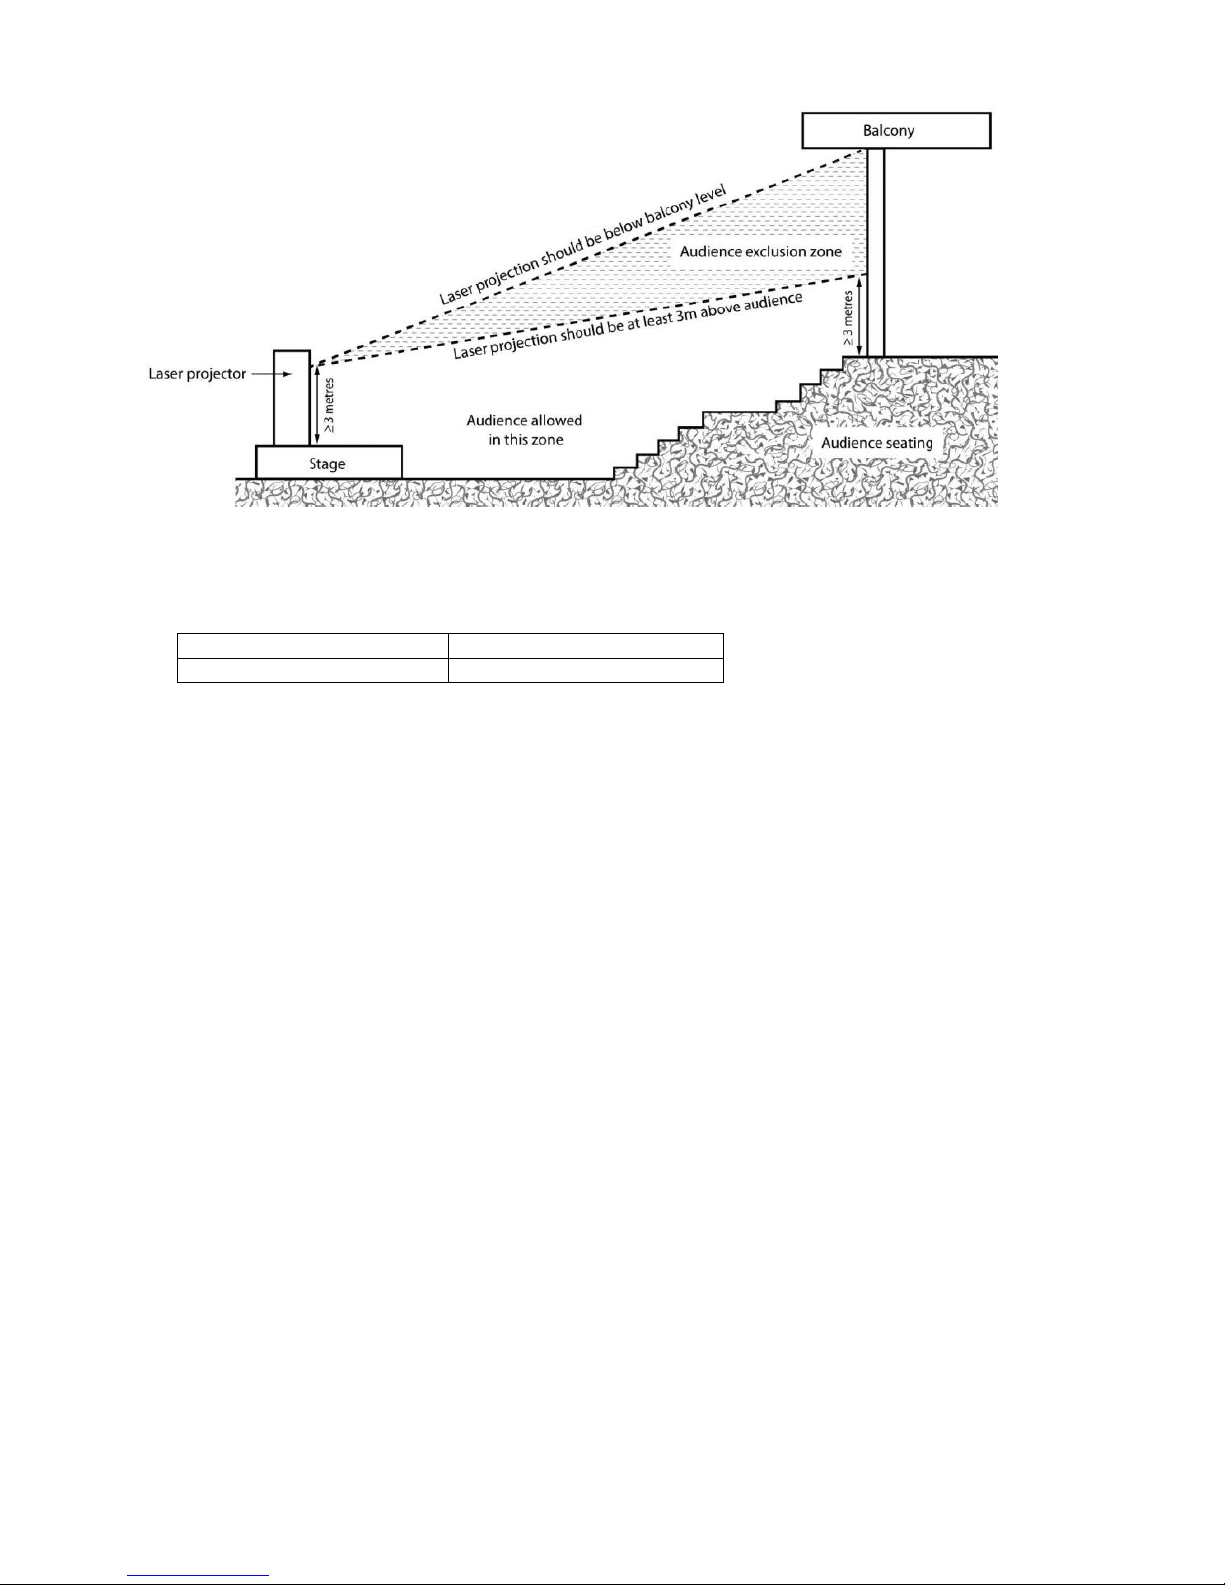
Vertical cross sectional view
Unpacking
Please check the contents to ensure that the product has been received in good condition.
Laser x 1 unit
I.R. remote control x1 pc
IEC Power Lead x 1pc
Safety Keys x2pcs
If you find any accessory is missing or the product has arrived with any problems, please contact your retailer
at once.
This product contains no user-serviceable parts so make no attempt to try to fix or modify this item yourself as
this will invalidate the warranty. We recommend you keep the original package and proof of purchase for any
possible replacement or returned demand.
Setting up
1. Unpack the laser ensuring all packaging and tape is removed.
2. Always test the laser before fixing in a permanent location.
3. Connect the IEC mains plug and switch the rear power switch on.
4. Insert the safety key and turn to a quarter turn clockwise. At this point ensure that no one is exposed to
laser radiation.
5. Select which mode you want to operate the laser in.
6. Leave the laser to run for 10 minutes before installing in its location.
Installation
When mounting at height, attach a safety wire to the eyebolt with an independent fixing.
Use the integral mounting bracket with a suitable clamp for stand or truss being fixed to. When mounting
directly to ceiling surfaces, be sure to use adequate fixings for the supporting material.
 Loading...