

Lifestyle bbq ABM-TROLINTL-0808 Assembly Instructions Manual

ASSEMBLY
INSTRUCTIONS
The Australian Barbeque
International Trolley
Tools required: 1 adjustable spanner
1 phillips head screwdriver
www.lifestylebbqs.com
See www.lifestylebbqs.com 'My New Lifestyle Barbeque' for
updates, other instructions, recipes and other information to
get the greatest enjoyment from your Lifestyle Barbeque.
2
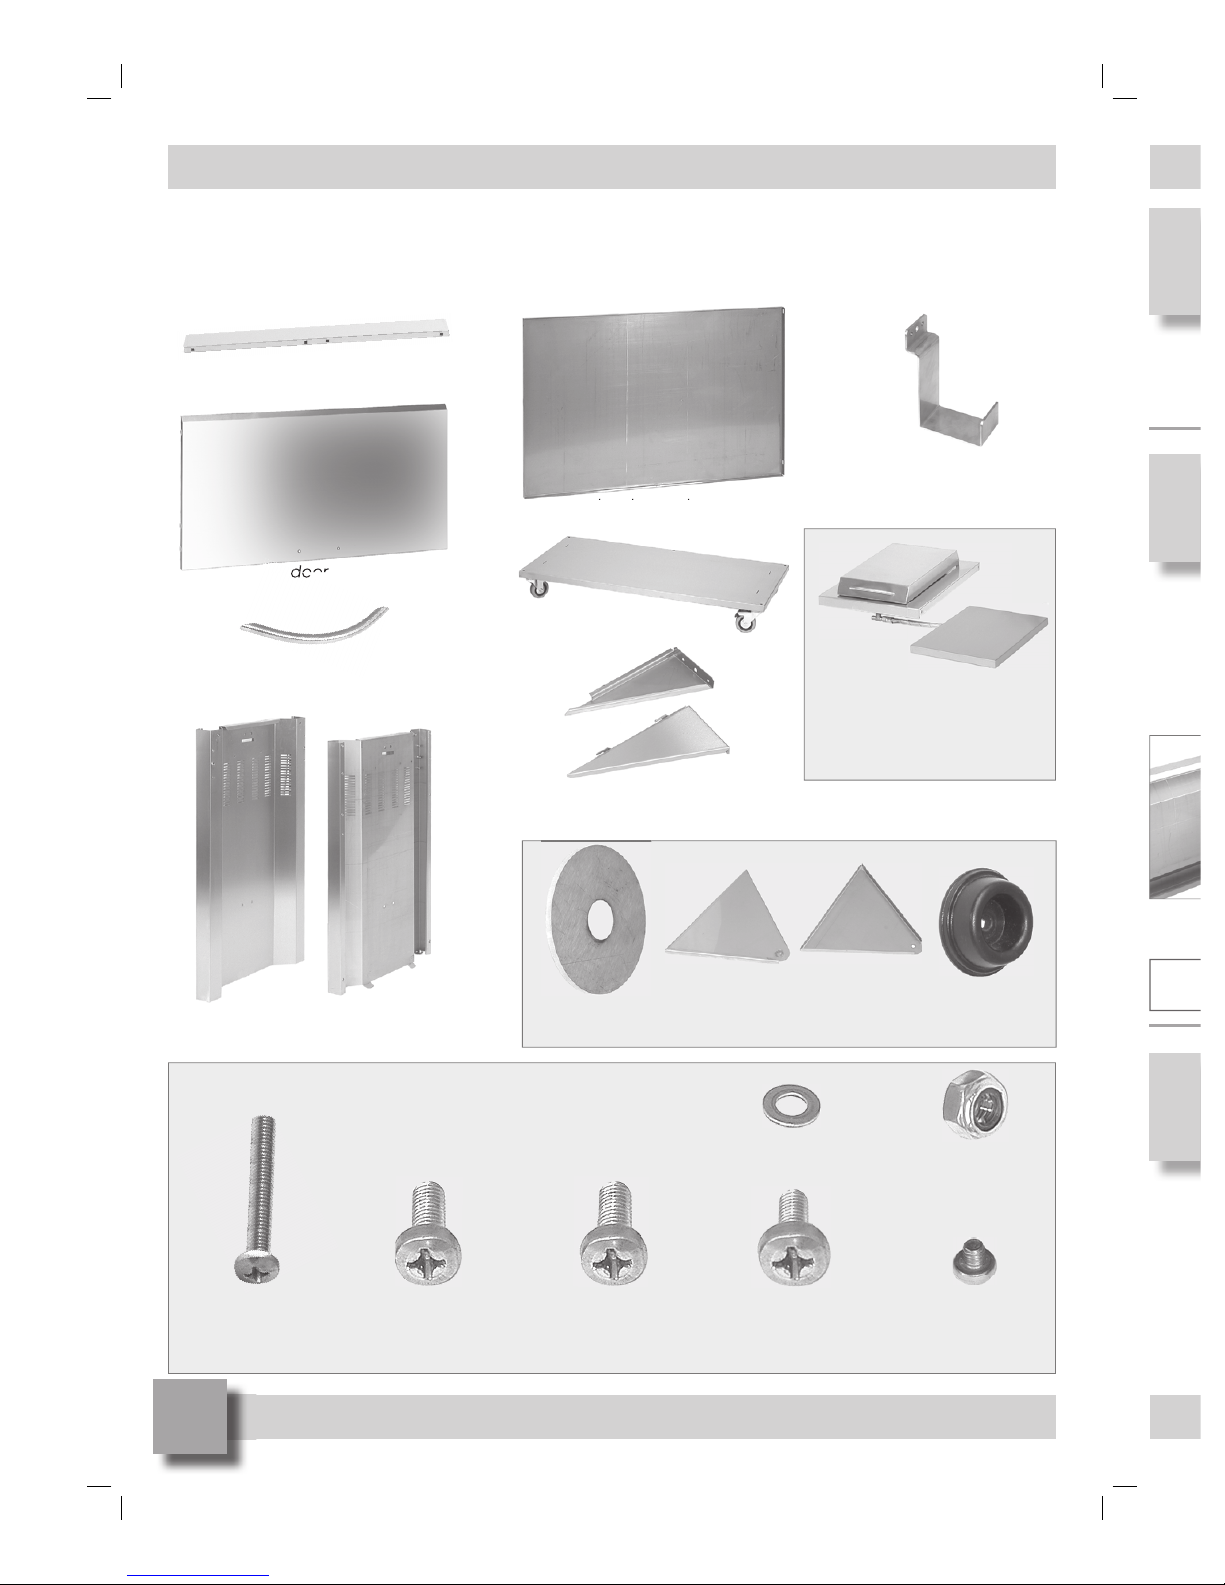
Trolley parts
base panel
front infi ll panel
back panel
2 x side panels
cylinder bracket
door
door
door handle
2 x large nylon
washers
2 x rotating door
supports
2 x rubber
door stops
1
3
Remove protective plastic fi lm from all components. It is often
easiest to remove the plastic from the mating surfaces only,
then remove the remaining plastic when the barbeque and
trolley are fullly assembled.
2
2 pairs side shelf
brackets
4 x long bolts
17 x 15mm
screws
4 x 30mm
screws
4 x locking nuts
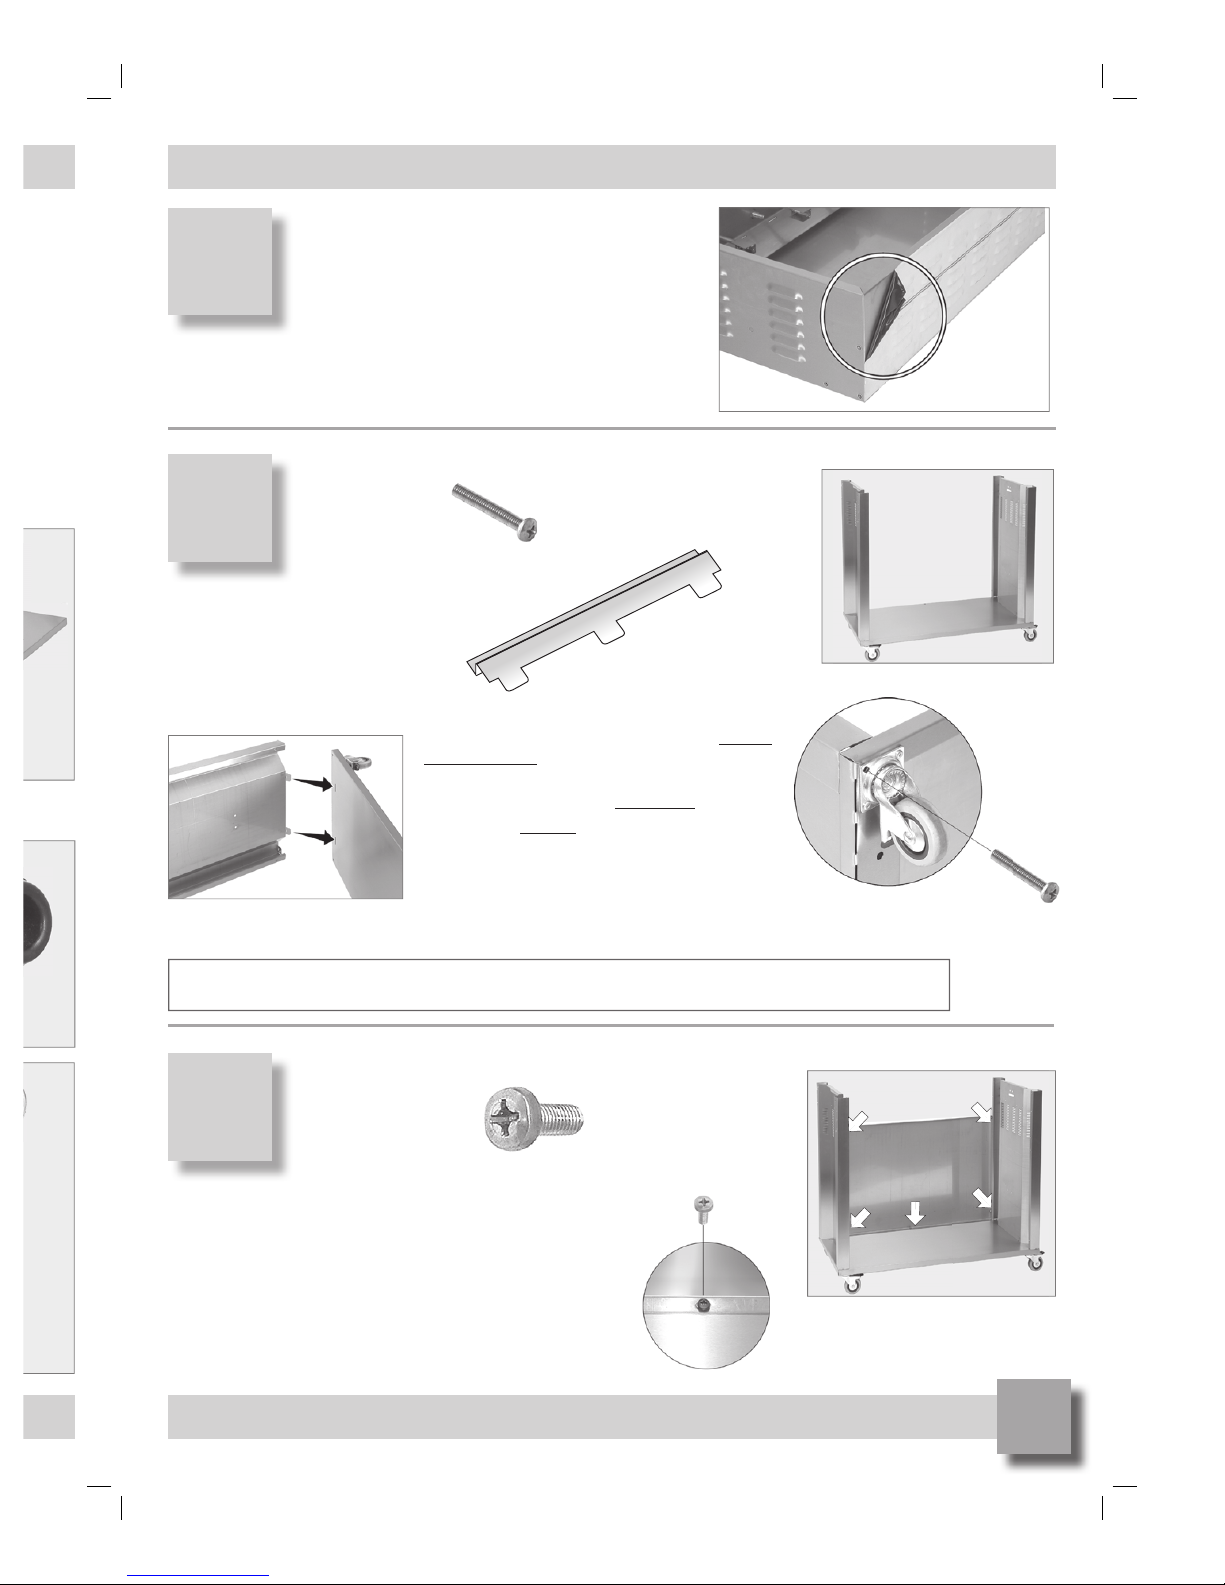
Slot the side panel tangs into
the base panel. Secure using
a long screw at each corner
via castor
12 x 10mm
screws
2 x 4mm 10mm
small screws
Hint: It may be easier if most of your trolley assembly is done with the trolley on its back.
Hint: Lubricate the screws to avoid them jamming in the nut sert
Screw the rear panel into place.
4 x small washers
found in separate carton:
2 side shelves (if S/S KIT is
ordered) or
1 side shelf and 1 side
burner (if S/B KIT is ordered.)
3
1
3
Remove protective plastic fi lm from all components. It is often
easiest to remove the plastic from the mating surfaces only,
then remove the remaining plastic when the barbeque and
trolley are fullly assembled.
2
4 x long screws
YOU WILL NEED
5 x 15mm screws
YOU WILL NEED
Slot the side panel tangs into
the base panel. Secure using
a long screw at each corner
via castor
Base shelf is pictured with castors fi tted.
To assemble the base shelf fi rst fi t the castor
adaptor plate.
Insert the tangs into the corresponding slots
on the underside of the base shelf.
Then fi t four castors via 3x15mm screws and
1xlong bolt for each castor.
Be sure to carefully align the long screw
and start the fi rst few turns by hand before
using a cordless drill. Lubricate the bolt and
restart the thread if resistance is felt.
Hint: It may be easier if most of your trolley assembly is done with the trolley on its back.
Hint: Lubricate the screws to avoid them jamming in the nut sert
Screw the rear panel into place.
 Loading...