

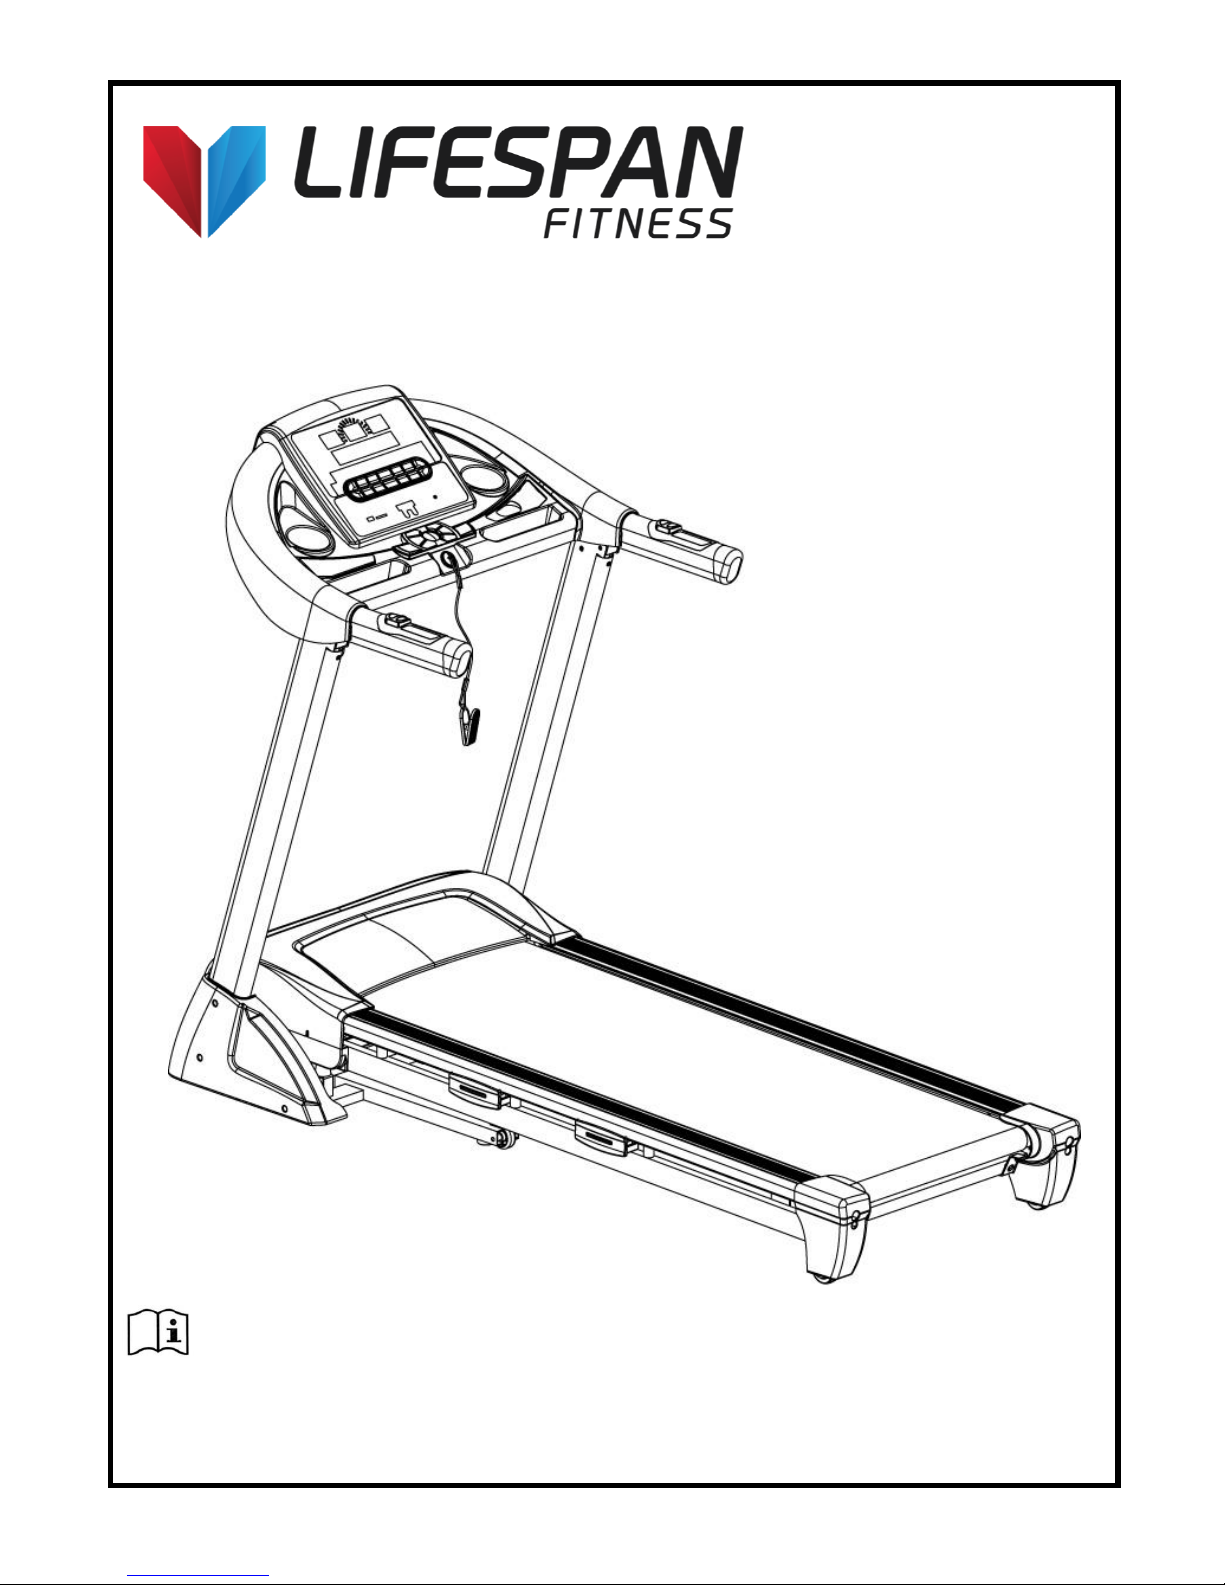
Lifespan Fitnes Rise, PACER Owner's Manual
NOTE: This manual may be subject to updates or changes. Up to date manuals are available through our website at www.lifespanfitness.com.au
Product may vary slightly from the item pictured due to model upgrades
Read all instructions carefully before using this product. Retain this owner’s manual for
future reference.
RISE OWNER’S MANUAL

2
TABLE OF CONTENTS
1. IMPORTANT SAFETY INSTRUCTIONS 3
2. IMPORTANT ELECTRICAL INFORMATION 4
3. IMPORTANT OPERATING INSTRUCTIONS 5
4. ASSEMBLY INSTRUCTIONS 6
5. FOLDING INSTRUCTIONS 10
6. OPERATION GUIDE 11
7. EXERCISE GUIDE 23
8. MAINTENANCE INSTRUCTIONS 25
9. EXPLODED DIAGRAM 33
10. PARTS LIST 35
11. TROUBLE SHOOTING GUIDE 36
12. WARRANTY 38

3
1. IMPORTANT SAFETY INSTRUCTIONS
WARNING - Read all instructions before using this treadmill.
It is important your treadmill receives regular maintenance to prolong its useful life. Failing to
regularly maintain your treadmill may void your warranty.
Danger – To reduce the risk of electric shock disconnect your treadmill from the electrical outlet prior to
cleaning and/or service work.
DO NOT USE AN EXTENSION CORD: DO NOT ATTEMPT TO DISABLE THE GROUNDED PLUG BY
USING IMPROPER ADAPTERS OR IN ANY WAY MODIFY THE CORD SET.
Install the treadmill on a flat level surface with access to a 220-240 volt (50/60Hz), grounded outlet.
Do not operate treadmill on deeply padded, plush or shag carpet. Damage to both carpet and
treadmill may result.
Do not block the rear of the treadmill. Provide a minimum of 1 metre clearance between the rear of
the treadmill and any fixed object.
Place your unit on a solid, level surface when in use
Never allow children on or near the treadmill.
When running, make sure the plastic clip is fastened on your clothing. It is for your safety, should
you fall or move too far back on the treadmill.
Keep hands away from all moving parts.
Never operate the treadmill if it has a damaged cord or plug.
Keep the cord away from heated surfaces.
Do not operate where aerosol spray products are being used or where oxygen is being administered.
Sparks from the motor may ignite a highly gaseous environment.
Never drop or insert any object into any openings.
The treadmill is intended for in-home use only and not suitable for long time running.

4
To disconnect, turn all controls to the off position, remove the safety key, and then remove the plug
from the outlet.
The pulse sensors are not medical devices. Various factors, including the user’s movement, may
affect the accuracy of heart rate readings. The pulse sensors are intended only as exercise aids in
determining heart rate trends in general.
Use the handrails provided; they are for your safety.
Wear proper shoes. High heels, dress shoes, sandals or bare feet are not suitable for use on your
treadmill. Quality athletic shoes are recommended to avoid leg fatigue.
Allowed temperature: 5 to 40 degrees.
Remove the safety key after use to prevent unauthorized treadmill operation.
2. IMPORTANT ELECTRICAL INFORMATION
WARNING!
NEVER use a ground fault circuit interrupt (GFCI) wall outlet with this treadmill. Route the power
cord away from any moving part of the treadmill including the elevation mechanism and transport
wheels.
NEVER remove any cover without first disconnecting AC power.
NEVER expose this treadmill to rain or moisture. This treadmill is not designed for use outdoors,
near a pool, or in any other high humidity environment.
This is high-power item; please do not share the same outlet with other high power machines such
as, fridges, air conditioning etc. Please choose an outlet exclusively for the machine and make sure
the fuse is 10A.

5
3. IMPORTANT OPERATING INSTRUCTIONS
Be sure to read the entire manual before operating your machine.
Understand that changes in speed and incline do not occur immediately. Set your desired speed on
the computer console and release the adjustment key. The computer will obey the command
gradually.
Use caution while participating in other activities while walking on your treadmill, such as watching
television, reading, etc. These distractions may cause you to lose balance or stray from walking in
the centre of the belt; which may result in serious injury.
In order to prevent losing balance and suffering unexpected injury, NEVER mount or dismount the
treadmill while the belt is moving. This unit starts with at a very low speed. Simply standing on the
belt during slow acceleration is proper after you have learned to operate this machine.
Always hold on to handrail while making control changes.
A safety key is provided with this machine. Remove the safety key will stop the walking belt
immediately; the treadmill will shut off automatically. Inserting the safety key will reset the display.
Do not use excessive pressure on console control keys. They are precision set to function properly
with little finger pressure.
6
4. ASSEMBLY INSTRUCTIONS
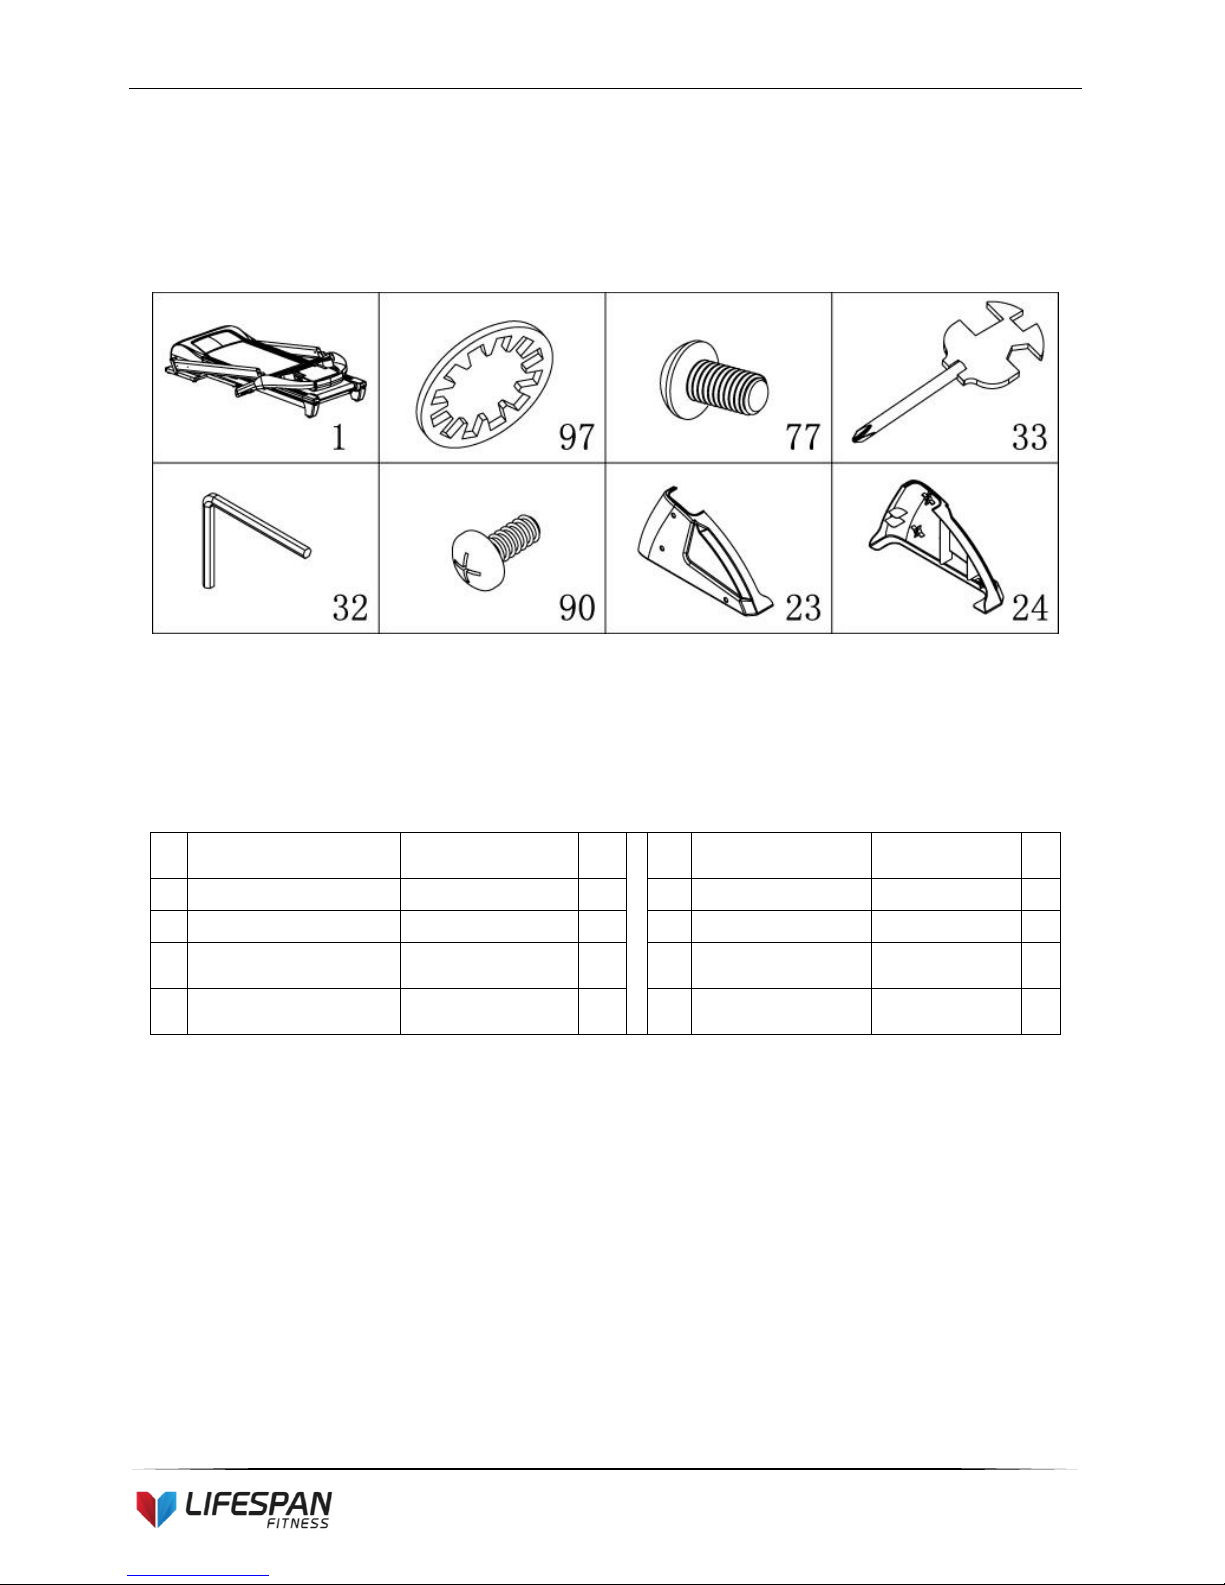
PARTS LIST
NO.
Description
Specification
Nos.
NO.
Description
Specification
Nos
.
1
MIAN FRAME
1
32
5#ALLEN WRENCH
5mm
1
97
LOCK WASHER
8
10
90
BOLT
M5*12
6
77
BOLT
M8*15
10
23
LEFT UPRIGHT
TUBE COVER
1
33
WRENCH W/SCREW
DRIVER
S=13、14、15
1
24
RIGHT UPRIGHT
TUBE COVER
1
ASSEMBLY TOOLS:
5#ALLEN WRENCH 5mm x 1pc
Wrench with screw driver S=13, 14, 15 x 1pc
Note: Do not connect power before completing assembly
7
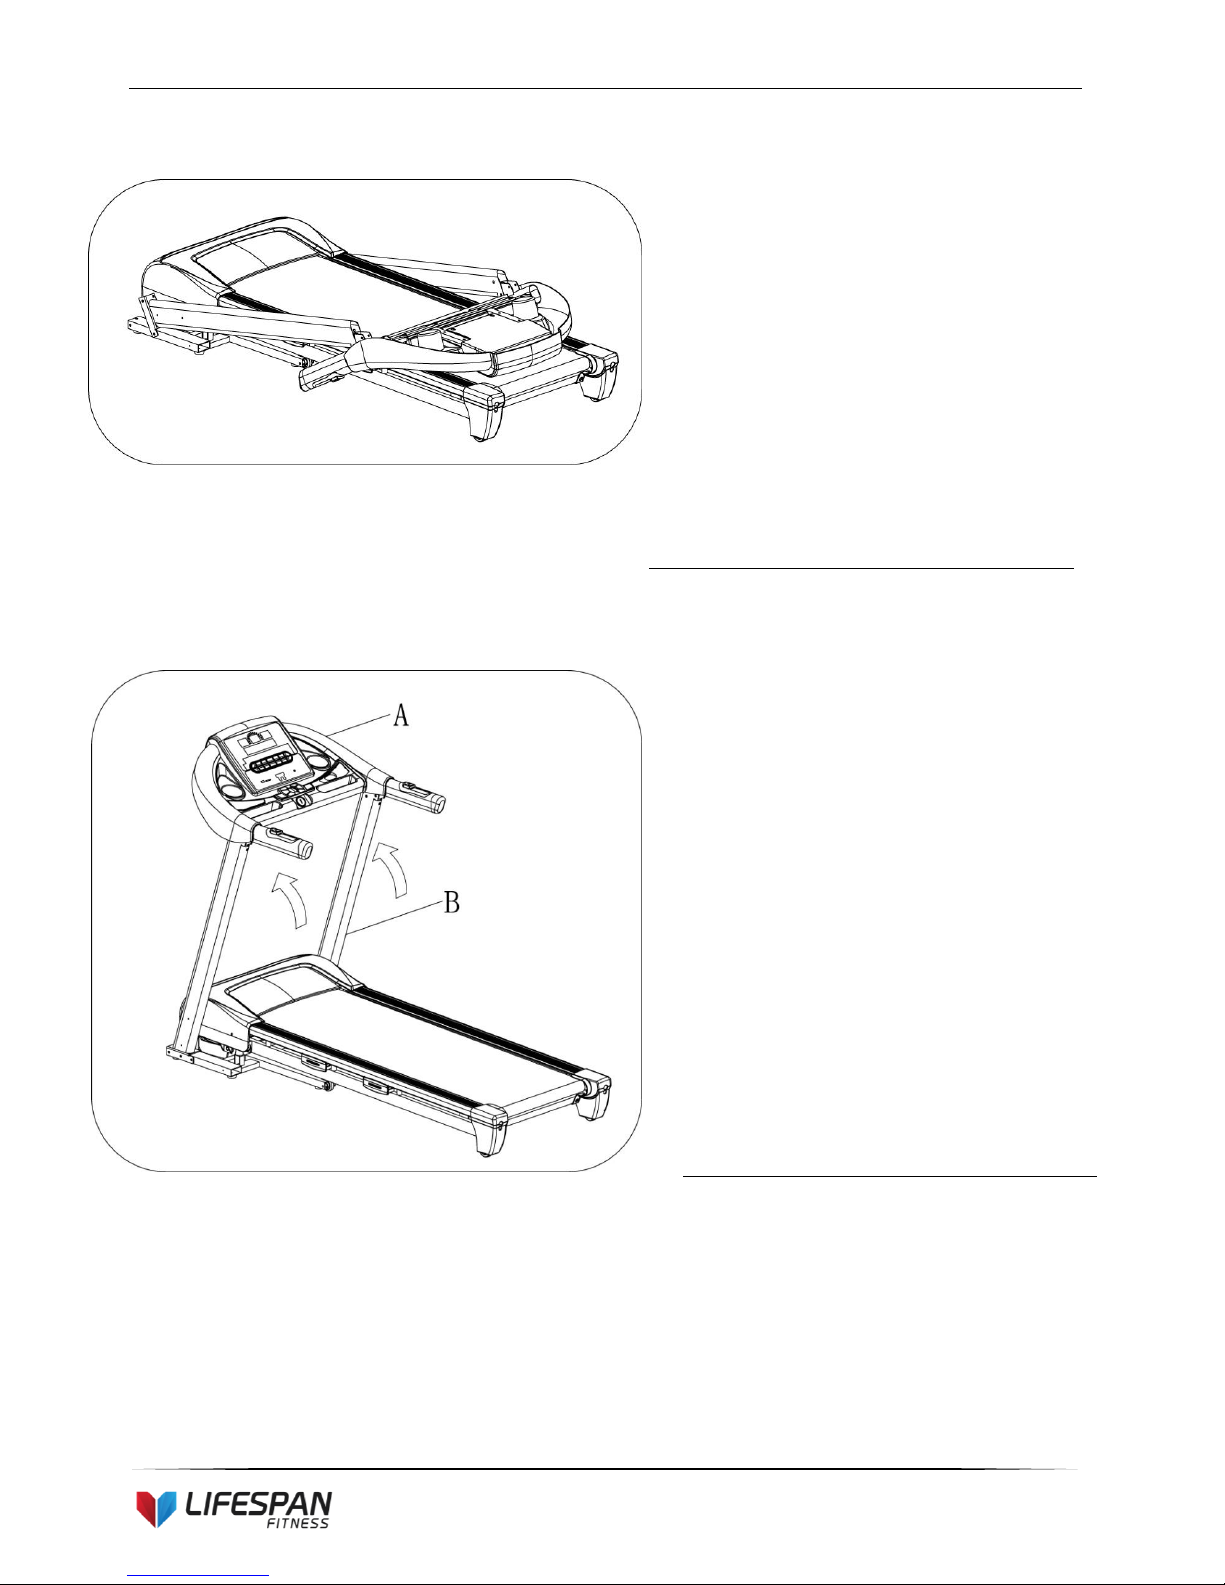
STEP 1:
STEP 2:
1. Open the carton
2. Extract the parts listed above
3. Place the Main Frame flat onto level
ground
1. Lift up the console (A) and Upright tube
(B) towards the arrow direction.
Note: Take care not to sever to wires inside
the frame during this step.
8
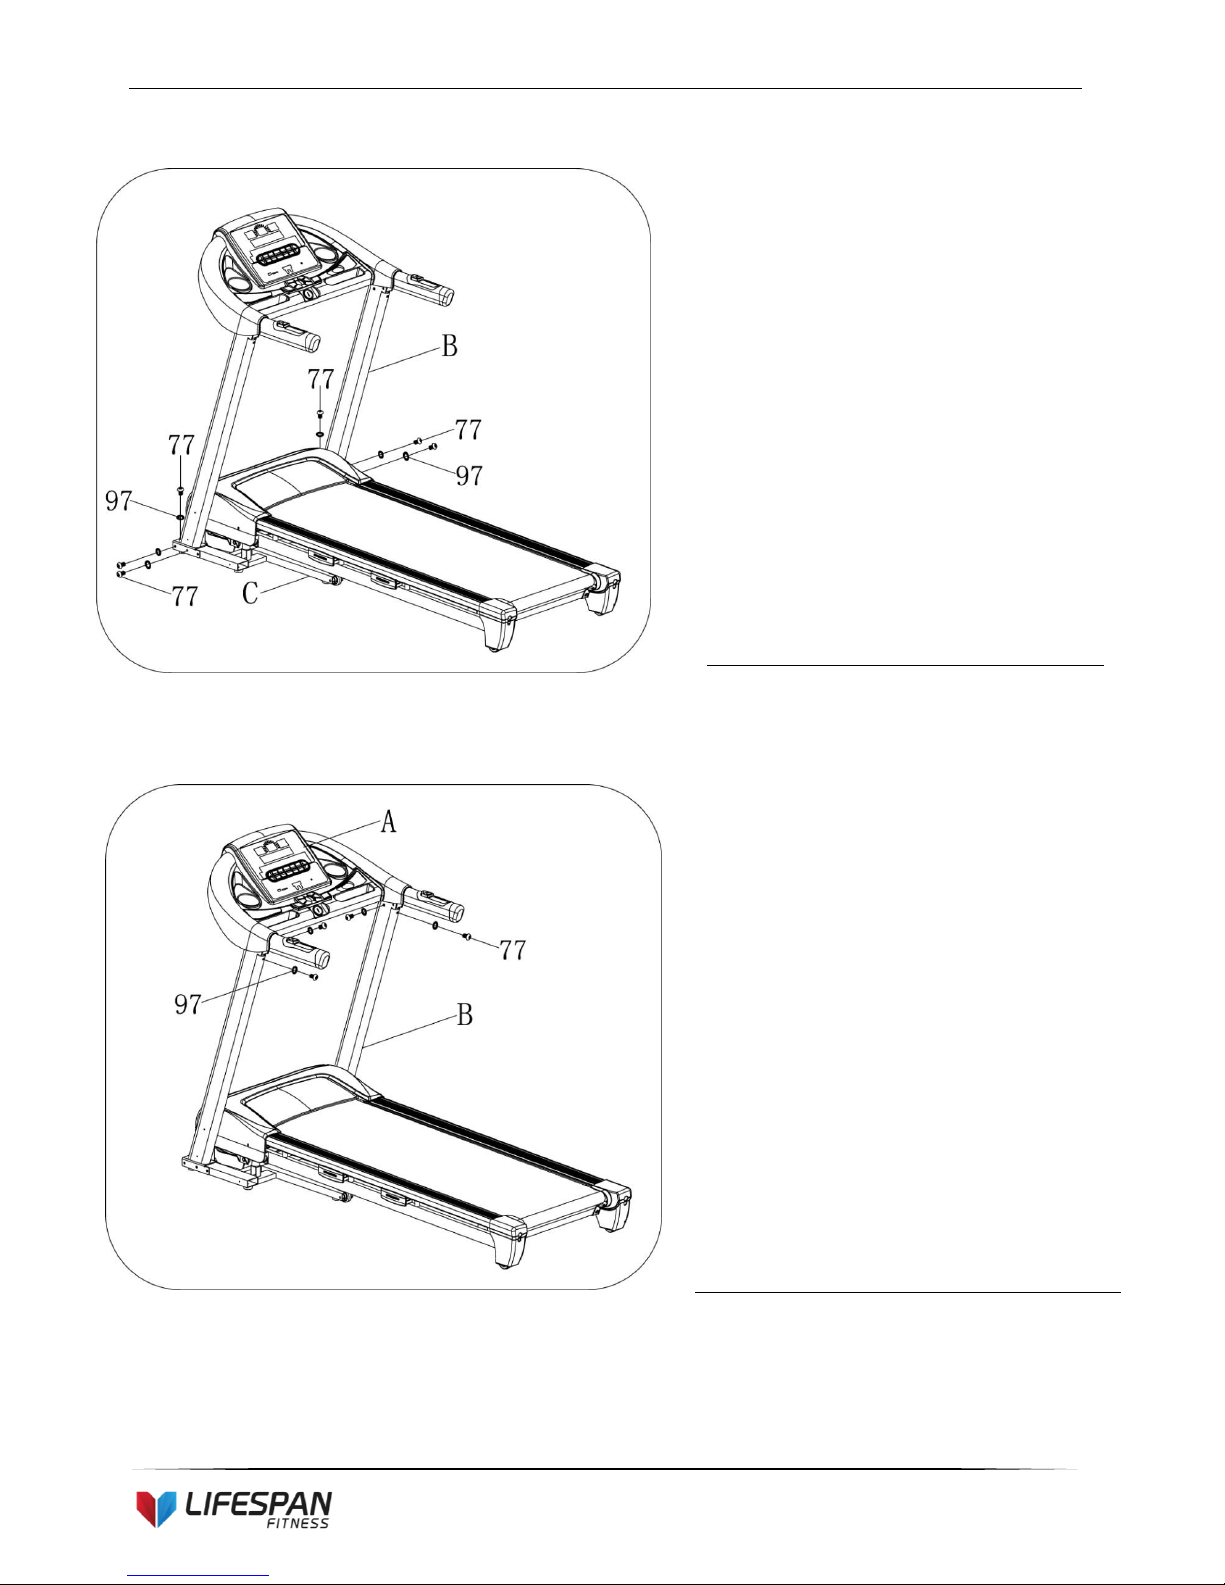
STEP 3:
STEP 4:
1. Use the 5# Allen wrench (32), M8*15
bolt (77) and lock washer (97) to
secure the upright tube (B) onto MAIN
FRAME
1. Use the 5# Allen wrench (32), M8*15
bolt(77) and lock washer (97) to secure
the computer(A) onto the left and right
upright tube(B).
9
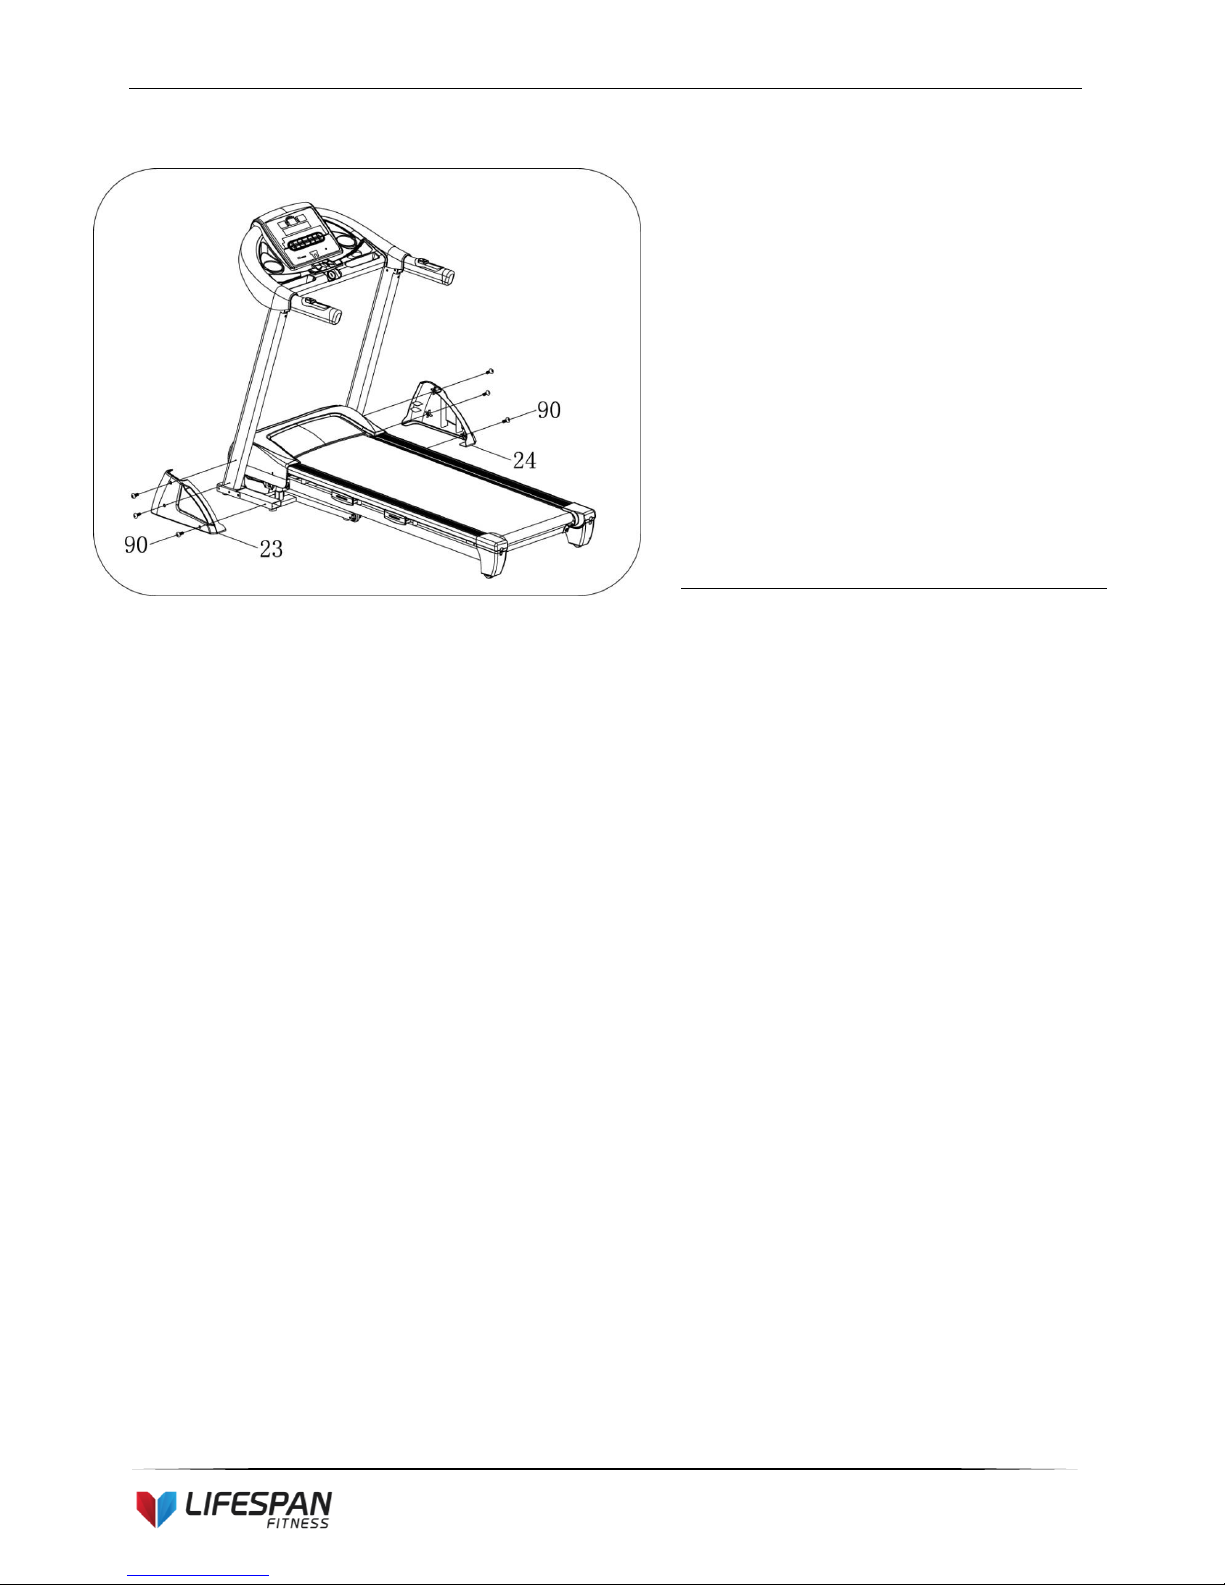
STEP 5:
1. Attach the Left & Right upright tube
covers(23,24) to the base frame using
wrench w/screw driver (33) and M5*12
bolt(90).
10
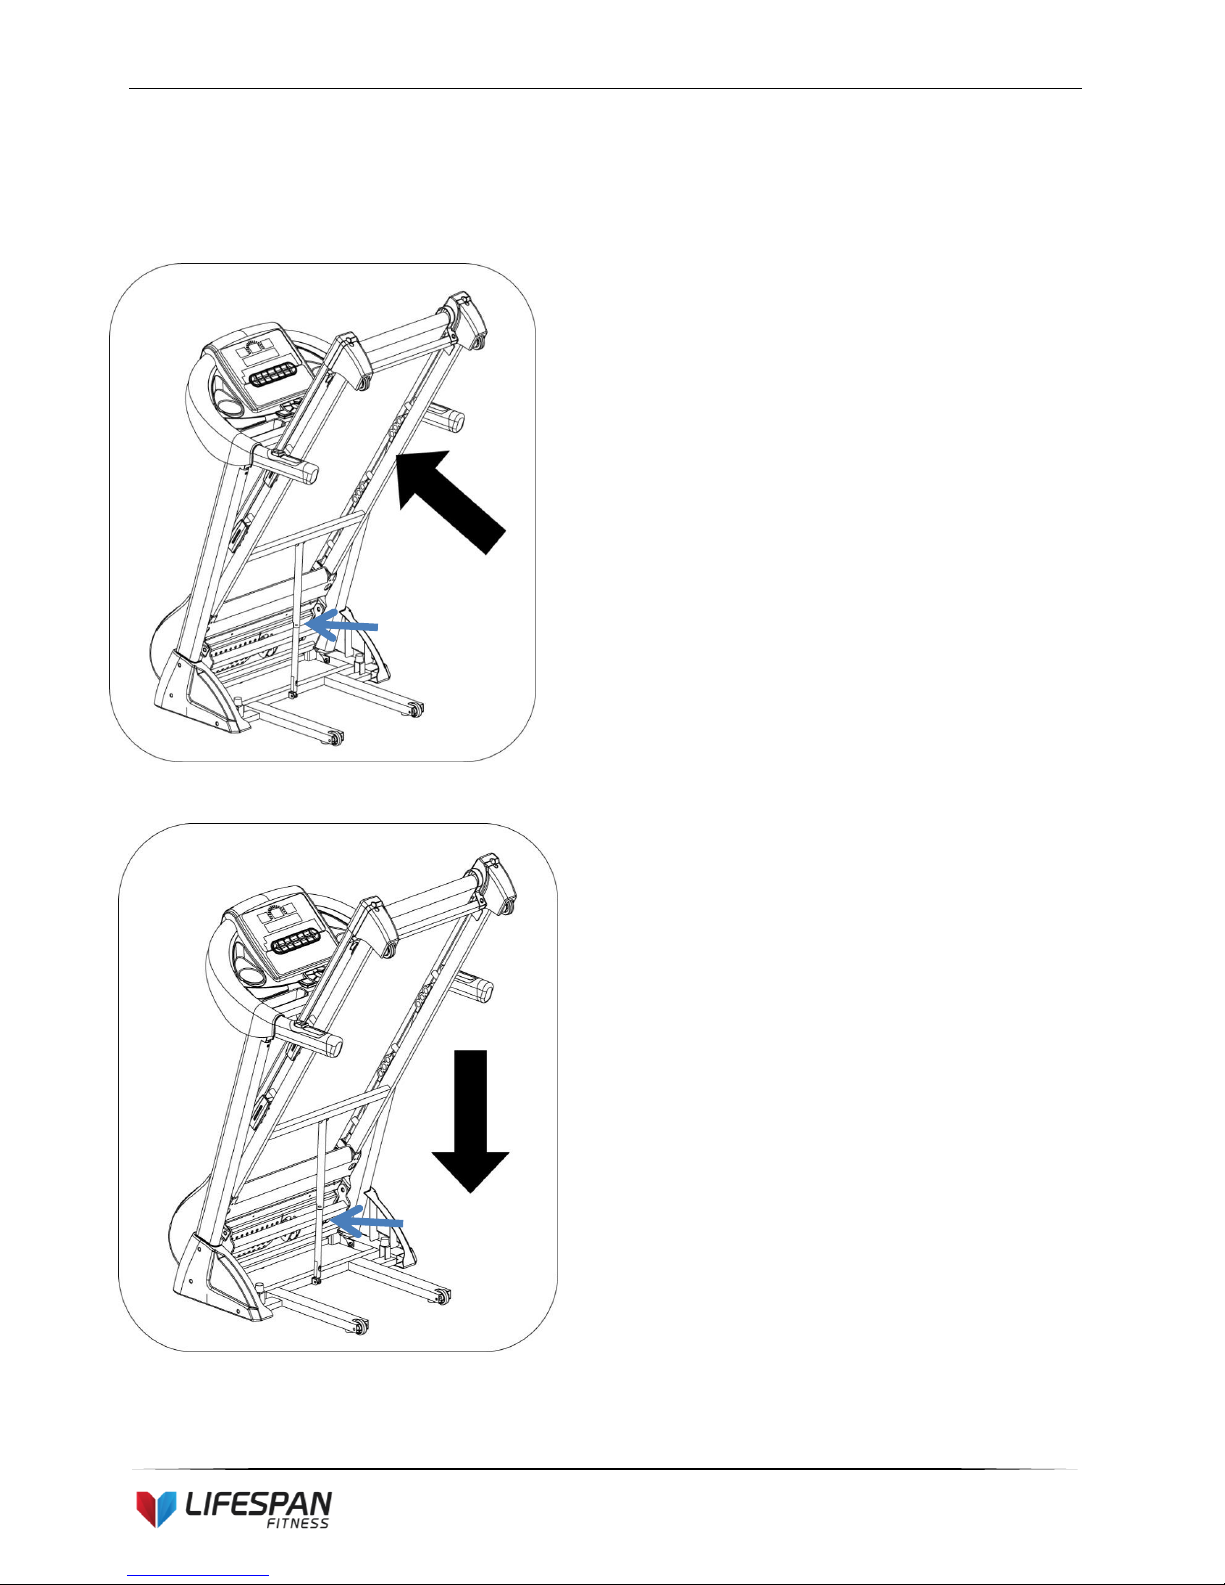
5. FOLDING INSTRUCTIONS
Folding:
Unfolding:
Place your hand on position (A), then pull
up the base frame until you hear the click
sound emitted when the air pressure bar
(B) is locked into the round tube.
Whilst supporting position A with our
hand, gently push the marked area on the
air pressure bar with your foot.
The base frame will descend gradually.
(Please keep people and any pets away
the machine during descent)
A
B
A
B
Video Tutorial Available at:
http://youtu.be/TcuPbJ7KuxQ
Lifespan Fitness YouTube Channel:
http://www.youtube.com/user/treadmillsvideos
11
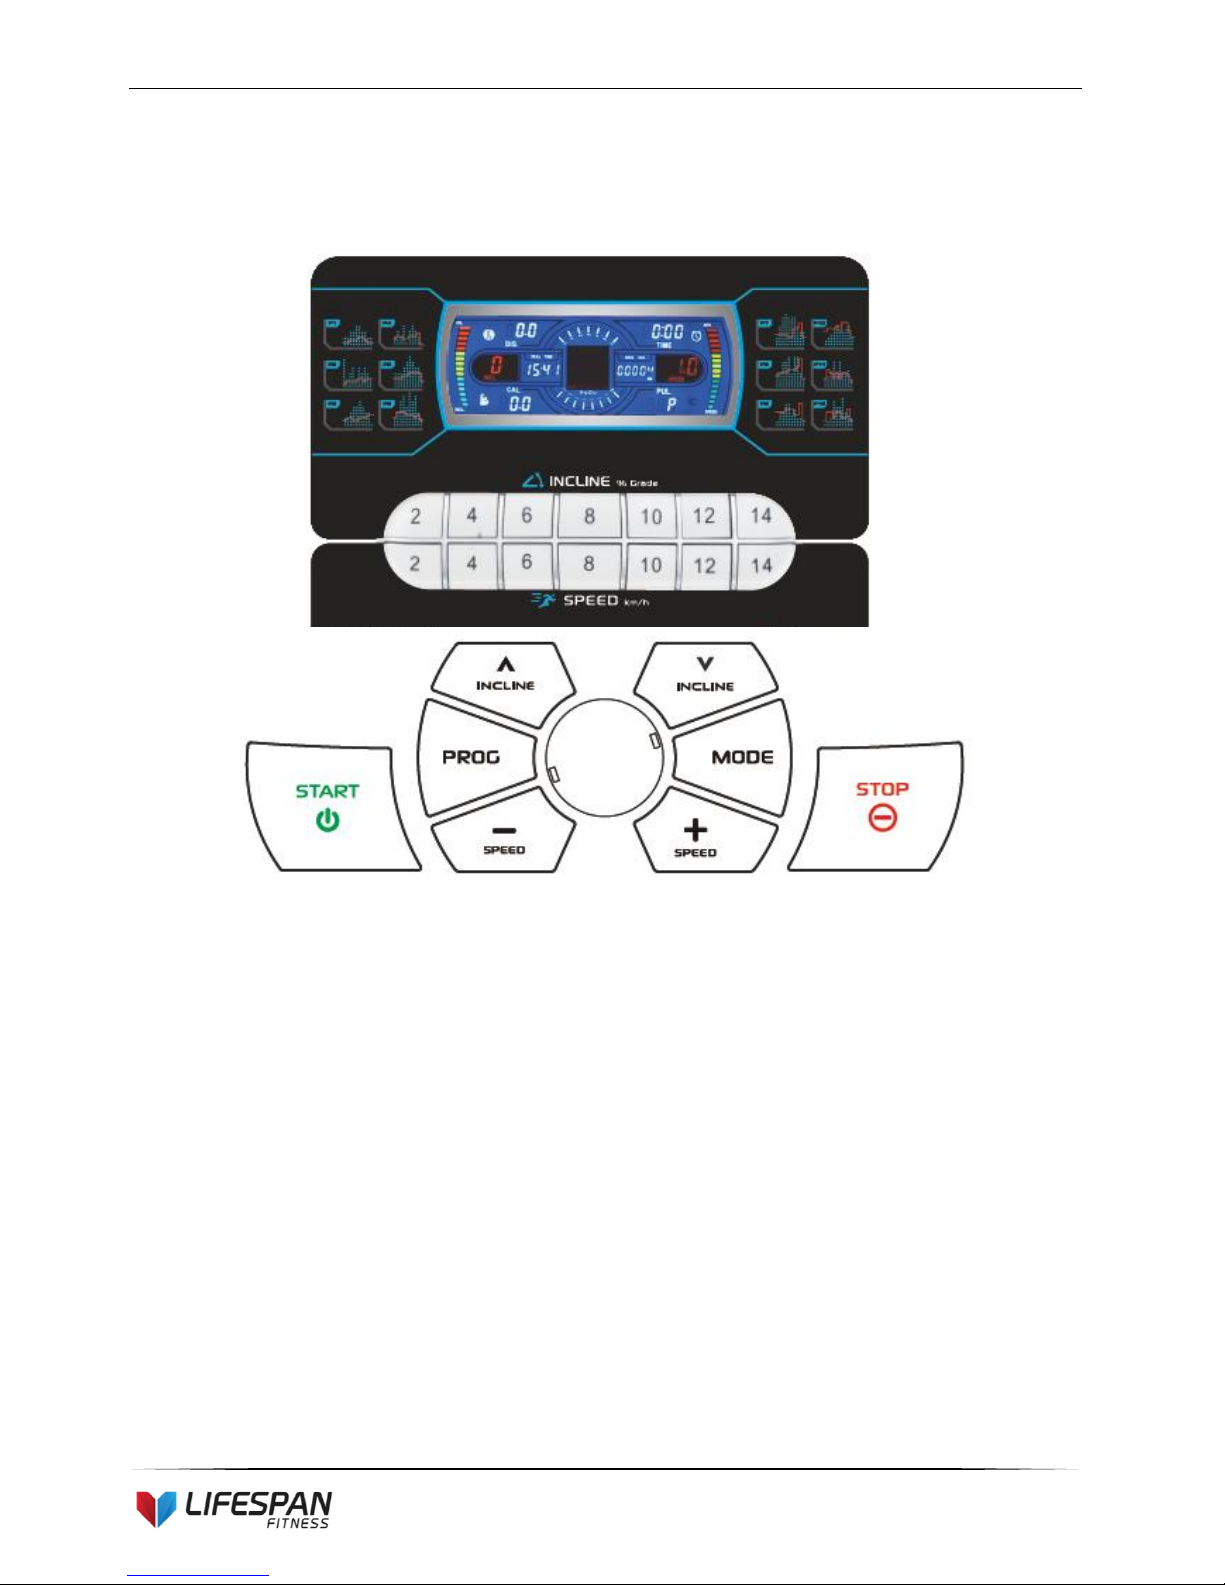
6. OPERATION GUIDE
1. OVERVIEW
2. LCD WINDOW DISPLAY
1. Speed window: displays “U1-U3-FAT-P1-P99-” when setting mode. The speed range is 1 - 18km/h
during workout.
2. INCL window: displays incline gradient, the range is 0-18.
3. Time window: displays workout time, the range is 0:00-99:59. When time reaches 99:59, the treadmill
will slow down until stop and show “End”. 0.5 seconds after “End” the treadmill will enter standby. The
Countdown setting is from the setting time until the timer reaches zero. Upon reaching “0”, the
computer will display “End” and will slow down to a stop. Then it will enter standby in 5 seconds
4. DIS window: shows the running distance. The range is from 0.00-99.9km. When distance reaches
99.9, the treadmill will slow down until stop and show “End”. Upon reaching “0”, the computer will

12
display “End” and will slow down to a stop. Then it will enter standby in 5 seconds
5. CAL window: shows calories burnt. When displaying calorie value the range is from 0-999. When it
reaches 999 the treadmill will slow down until a stop and show “End”. Countdown is from the setting
value to zero. Upon reaching “0”, the computer will display “End” and will slow down to a stop. Then it
will enter standby in 5 seconds.
6. PUL window: shows the heart rate. When you hold the hand pulse sensor the window will show your
heart rate. The range is from 50-200 beats per minute (Heart rate data is an estimate intended for
reference ONLY 7、”CLOCK” window: Display clock.
7. ODO DIS window: Odometer. Displays total running mileage.
8. MATRIX window: This matrix window will show a 400m running track. Every time a lap is completed,
the machine will “beep” and display the number of laps you have completed.
3. BUTTON FUNCTIONS
1. “PROG”: when the treadmill is in standby mode, this button cycles through: “
a. “0:00” is the manual mode and default running mode.
b. “P1-P99” - built in programs
c. “U1-U3” - user defined programs
d. “FAT” - body fat testing mode
2. “MODE”: mode selection button. Press this button to cycle through “0:00”, “15:00”, “1.0”, “50”
a. (“0:00” = manual mode, “15:00” = timer countdown mode, “1.0” = distance countdown mode,
“50” = calorie countdown mode)
b. You can adjust the value with the Speed+ & Speed- or INCL+ & INCL- buttons. Press
“START” to start your exercise after finishing setting the values.
3. “START”: begins workout. When the power is on and safety key correctly placed on the computer,
press this button to start the treadmill.
 Loading...