

Page 1

S1/S2 Sport Series
Indoor Bike
Owner’s Manual
For safe use and product knowledge, please
completely read this Product OWNERS MANUAL.
v. 1.2
Page 2

Page 3

Welcome to LifeSpan
1/
S1/S2
ext. 4
Web site: www.LifeSpanFitness.com
r
3
Page 4

Table of Contents
Welcome to Lifespan
Limited Home Use Warranty
Important Safety Precautions
S1 Contents
S1 Assembly Instructions
S1 Assembly Instructions Continued
S2 Contents
S2 Assembly Instructions
S2 Assembly Instructions Continued
3
5
6
7
8
9
10
11
12
13
S1/S2 Adjustments
S1 Exploded View
S2 Exploded View
Extended Warranty
Serial Number Information
4
14
15
16
19
20
Page 5
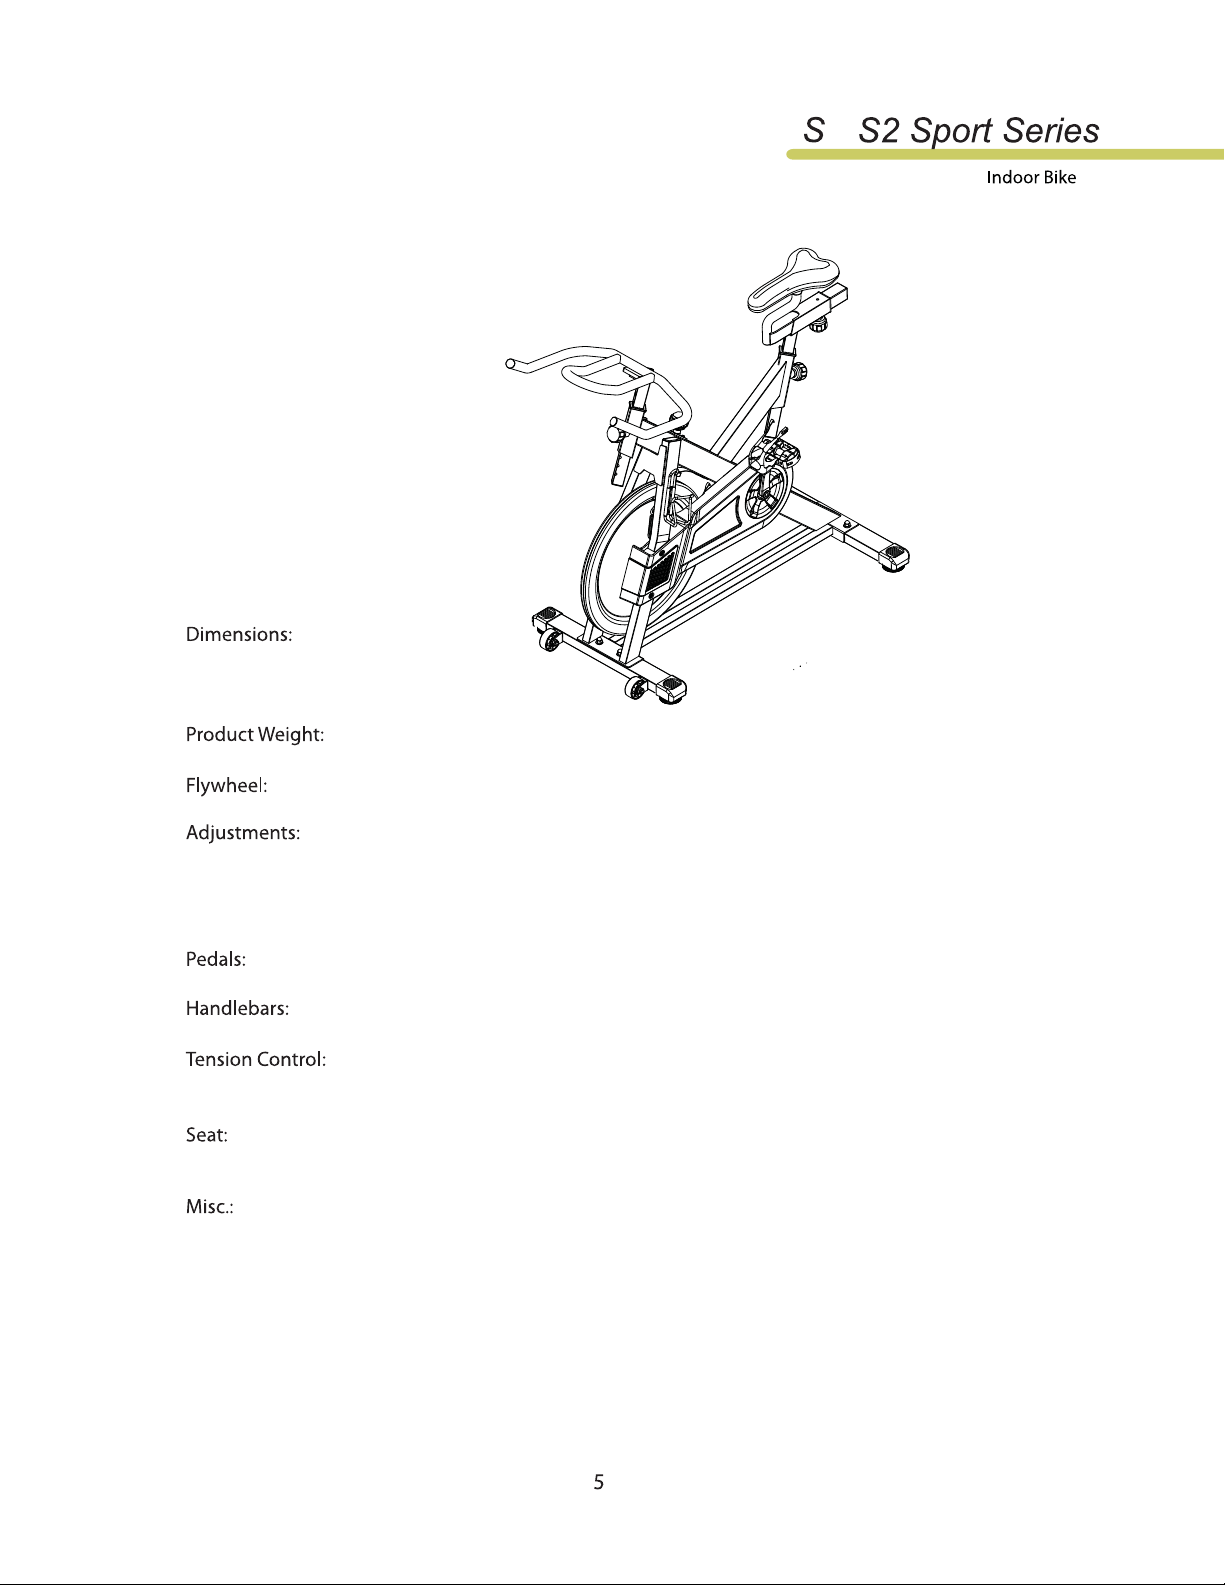
Specications
1/
S1
48” Max. Length
47” Max. Height
18” Wide
84 lbs.
31 lbs.
Seat Height
Handlebar Height
Seat Fore/Aft
Alloy with sealed bearings
PVC Dipped
Micro Adjustment knob with felt pad
friction control
Standard Mount Seat
S2
48” Max. Length
45” Max. Height
21.5” Wide
97 lbs.
40 lbs.
Seat Height
Handlebar Height
Seat Fore/Aft
Alloy with sealed bearings
PVC Dipped
Micro Adjustment knob with felt pad
friction control
Standard Mount Two Tone Bike Seat
Max. User Weight:
Water Bottle Holder
Front Mounted Transport Wheels
4 Adjustable Foot Pads for Leveling
300 lbs
Water Bottle Holder
Front Mounted Transport Wheels
4 Adjustable Foot Pads for Leveling
300 lbs.
Page 6

Limited Home Use Warranty
The LifeSpan Sport S1/S2 Indoor Bike(s) come with the following limited warranty, which applies only to
the use of the Indoor Bike in the home, for residential, non-commercial purposes:
Frame:
Parts:
Labor:
Wear Items:
(see details above)
S1
5 years
90 days
90 days
90 days
S2
5 years
1 year
1 year
90 days (friction pad, seat and pedals)
S1/S2
Labor warranty does not cover replacement of customer assembled parts.
bike
6
the registration is
Page 7

Important Safety Precautions
Keep children o your indoor bike at all times.
1/
.
7
Page 8

S1 Contents
#19
#18 Screw x 4
#20
#21
#16
Plastic
#9
#6
#8
#2 Seat Bracket
#10
#12
2
3
4
6
2
10
5
15
16
11
18
19
18
19
9
12
13
18
1
19
14
14
7
18
19
14
8
Page 9

S1 Assembly Instructions
1/
a) Remove plastic block attached to frame for
protection during shipping.
b) Remove bolts (18) and washers (19) from the rear base.
c) Stand the main frame assembly upright with the rear
base (9) positioned underneath the frame.
d) Insert two bolts (18) with washers (19) down through
the holes in the frame and into the rear base.
e) Once both bolts are started, securely tighten rear
base (9) to frame.
a) Remove plastic block attached to frame for protection
during shipping.
b) Remove bolts (18) and washers (19) from the front base.
c) Position the front base underneath the frame.
d) Insert the two bolts (18) with washers (19) down
through the holes in the frame and into the front base (8).
9
19
18
18
18
19
18
19
d) Once both bolts are started, securely tighten the front
base (8) to the frame.
on the bolt of
the
Tighten both pedals with the multifuntion wrench (20).
12
10
10
8
Front
of Bike
12
Page 10

S1 Assembly Instructions Contiuned
Round Adjustment Knob Instructions
Turn knob clockwise
to tighten
6
7
Insert handlebar post (6) into the frame, with holes
facing out toward knob. Adjust height and tighten knob (7).
(follow round adjustment knob instructions above)
3
4
2
5
a) Loosen the knob (5) on the front of the frame and slide the
seat bracket (2) into the frame. (follow the round adjustment
knob instructions above)
b) Loosen the knob (4) on the botton of the seat bracket (2) and
slide the seat post (3) into the seat bracket. (follow the
round adjustment knob instructions above)
7
10
Page 11

S2 Contents
1/
15
15
Page 12

S2 Assembly Instructions
Place a washer (55) and cap nut (56) over each bolt
and with the multifunction wrench secure the rear base
in place.
U
Place a washer (55) and cap nut (56) over each bolt and
with the multifuntion wrench secure the front base
in place.
52
55
56
57
56
55
57
Identify which pedal goes on the right side and which pedal
goes on the left side by locating the “R” on the bolt of the right
pedal (62R) and the “L” on the bolt of the left pedal (62L).
Tighten both pedals with the multifuntion wrench.
12
Front
of Bike
Page 13

S2 Assembly Instructions Contiuned
Round Adjustment Knob Instructions
1/
Turn knob clockwise
to tighten
Insert handlebar post (16) into the frame with holes
facing out toward knob. Adjust height and tighten knob
(15). (follow round adjustment knob instuctions above)
63
a) Loosen the knob (15) on the botton of the seat bracket (17).
(follow round adjustment knob instructions above)
b) Slide seat post (63) into the seat bracket (17) from the front of
the bracket as illustrated. (follow round adjustment knob
instructions above)
13
Page 14

Where to Place your Indoor Bike
Place
Adjust the foot down until it touches the oor. Repeat if necessary until the
bike is completely stable.
S1/S2 Adjustments
The straps should be tight enough to keep the ball of your foot on the pedals throughout the complete
pedal rotation. Before your workout, test each strap and adjust if required. To tighten the strap simply
pull down on the loose end of the strap until the strap is properly tensioned. To loosen the strap, press
down on the top of the clip and pull the strap up.
14
Page 15

S1 Exploded View
15
02
01
18
17
09
16
11
19
08
05
07
04
02
13
10
12
16
03
14
06
07
14
01
02
04
07
09
13
03
04
01
02
15
01
08
02
06
05
04
07
07
01
07
06
05
04
03
03
04
05
02
01
05
06
07
04
01
06
12
09
07
11
08
02
11
03
02
06
07
06 03
06
07
05
03
06
14
04
04
02
03
01
02
12
05
02
09
08
01
03
05
13
01
04
05
14
06
09
03
01
04
08
02
04
06
05
10
15
02
07
09
01
15
Page 16

S2 Exploded View
50
49
33
35
47
62
36
70
68
43
32
35
39
40
41
54
58
57
54
58
31
63
61
60
58
53
57
59
31
60
61
60
59
52
58
55
54
46
48
45
52
42
44
41
40
39
62
54
14
56
55
56
64
65
05
03
06
12
15
07
04
08
34
15
20
10
11
02
13
01
38
69
16
03
28
37
36
19
15
18
17
22
29
30
27
31
26
63
21
16
08
09
04
07
03
05
06
25
23
24
Page 17

1/
Page 18

Page 19

Page 20

TREADMILL MODEL NUMBER
SERIAL NUMBER :
MADE IN TAIWAN
- S1/S2
 Loading...