

Lifemax 1225 User Manual
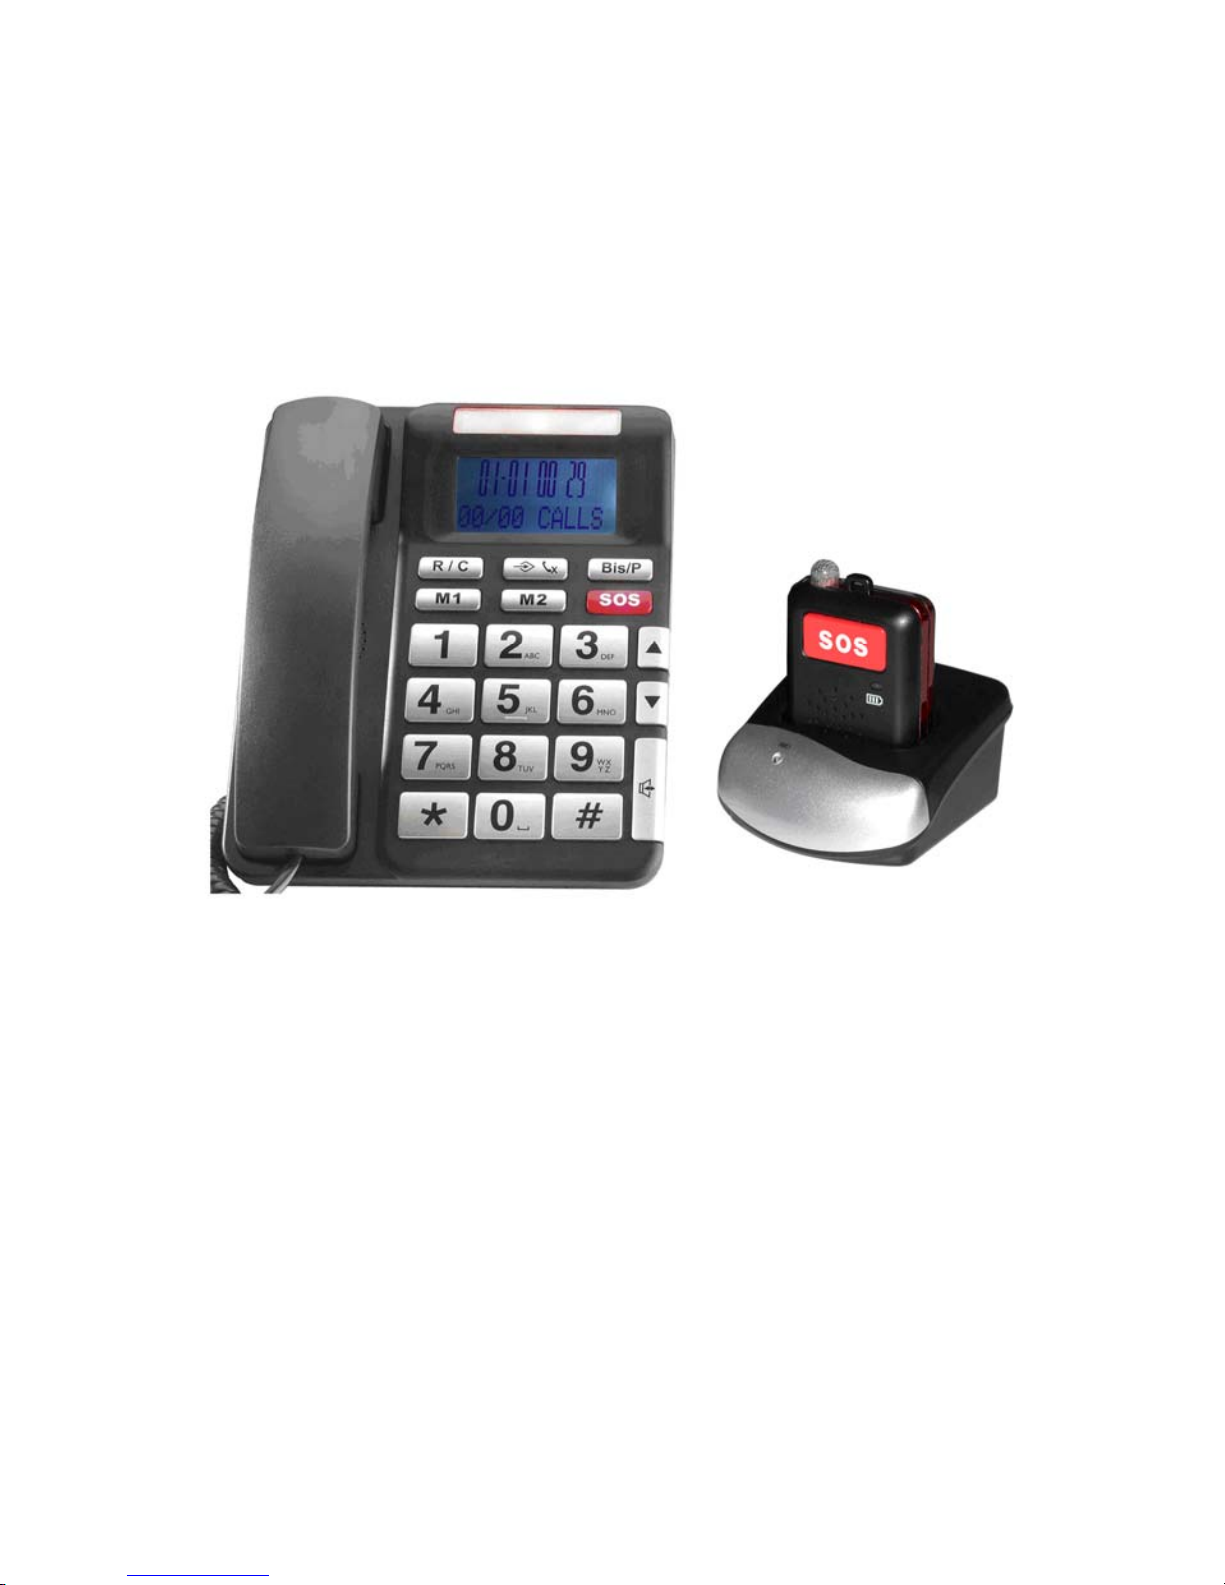
Emergency Phone with 2-Way Speech SOS
Pendant
Model: 1225

2
CONTENTS
Product Features…………… ……… ……… ……… ……… ……… ………….
Instructions for use……………………………………………………….……
Menu Settings…………… … … …… … … … …… … … … …… … … …… … ..….
CALL LOG…………………………………………..……………………...…
PHONE BOOK…………….…………………………………………………..
Base (BS) Settings……… ….………… …… … … … …..…………………… .…
Pendant(PENDT) Set-up…………………………………………………….…
SOS SETTINGS ……………… … …..…………………… … … …… … .....…
R OOM MONITOR-ECI special fu nction………. ……………....................
REGISTRATION…….……………………………………..……………...…
Operat ions .……… …… ……… ……………… .……… …… …........... .......…
Hand s fr e e operat ion & volume co ntrol………… …….………...................
Mute th e mou thpiece…….… …… …… …… …… …… …… .…… …… …...…
C all er ID-typ e I & II …… …… ……… …… ………….....…… .... ........ .........
Edit and copy i ncoming cal ls to phonebook…… .....……… …....................
Aut o timer...…………… ……………………… ……………......................…
Flash(R) …………………………………………………………..…..........…
On-scr ee n di ali n g……………............ ..... ........ ..... ........ ..... ....... ...... ....... …
Namematching…............... ........ ..... ....... ..... ........ ..... ........ ..... ..... ..........…
View and dial phone numbers from phonebook........… ……… ……… ……...
Review last 20 numbers, redial and dial out…………………………………..
Memory programming,dial out and delete ……………………………….......
Memory full ……………………………………………..………………..…..
Intercom………………………………………………………………….…...
Call transfer…………………………………………………………...……....
3 Party conference call …………………………………………………….....
SOS(Emergency calls)operation:SOS ……………………………………......
Room Monitor Operation: …………………………………..…………..…....
Pendant power on/off operation………………………………...………….....
Pen d a n t ba tte ry alert …… ……… ……………… …… ……...........…… .…....
…………………………………….......
Handset on base unit works on an analogue line duri ng power failure……...
How to recal l pin cod e………………… …… ………………… ……….….....
MMI/Menu Tree……………………………………………….......................
Battery Repl acemen t……… …… …… …… …… …… …… …… …… …… .....
END button function on pendant
4
5
6
6
7
9
13
15
15
16
16
16
16
17
18
18
18
18
18
19
19
19
21
21
21
22
22
23
24
24
25
25
25
26
27
3
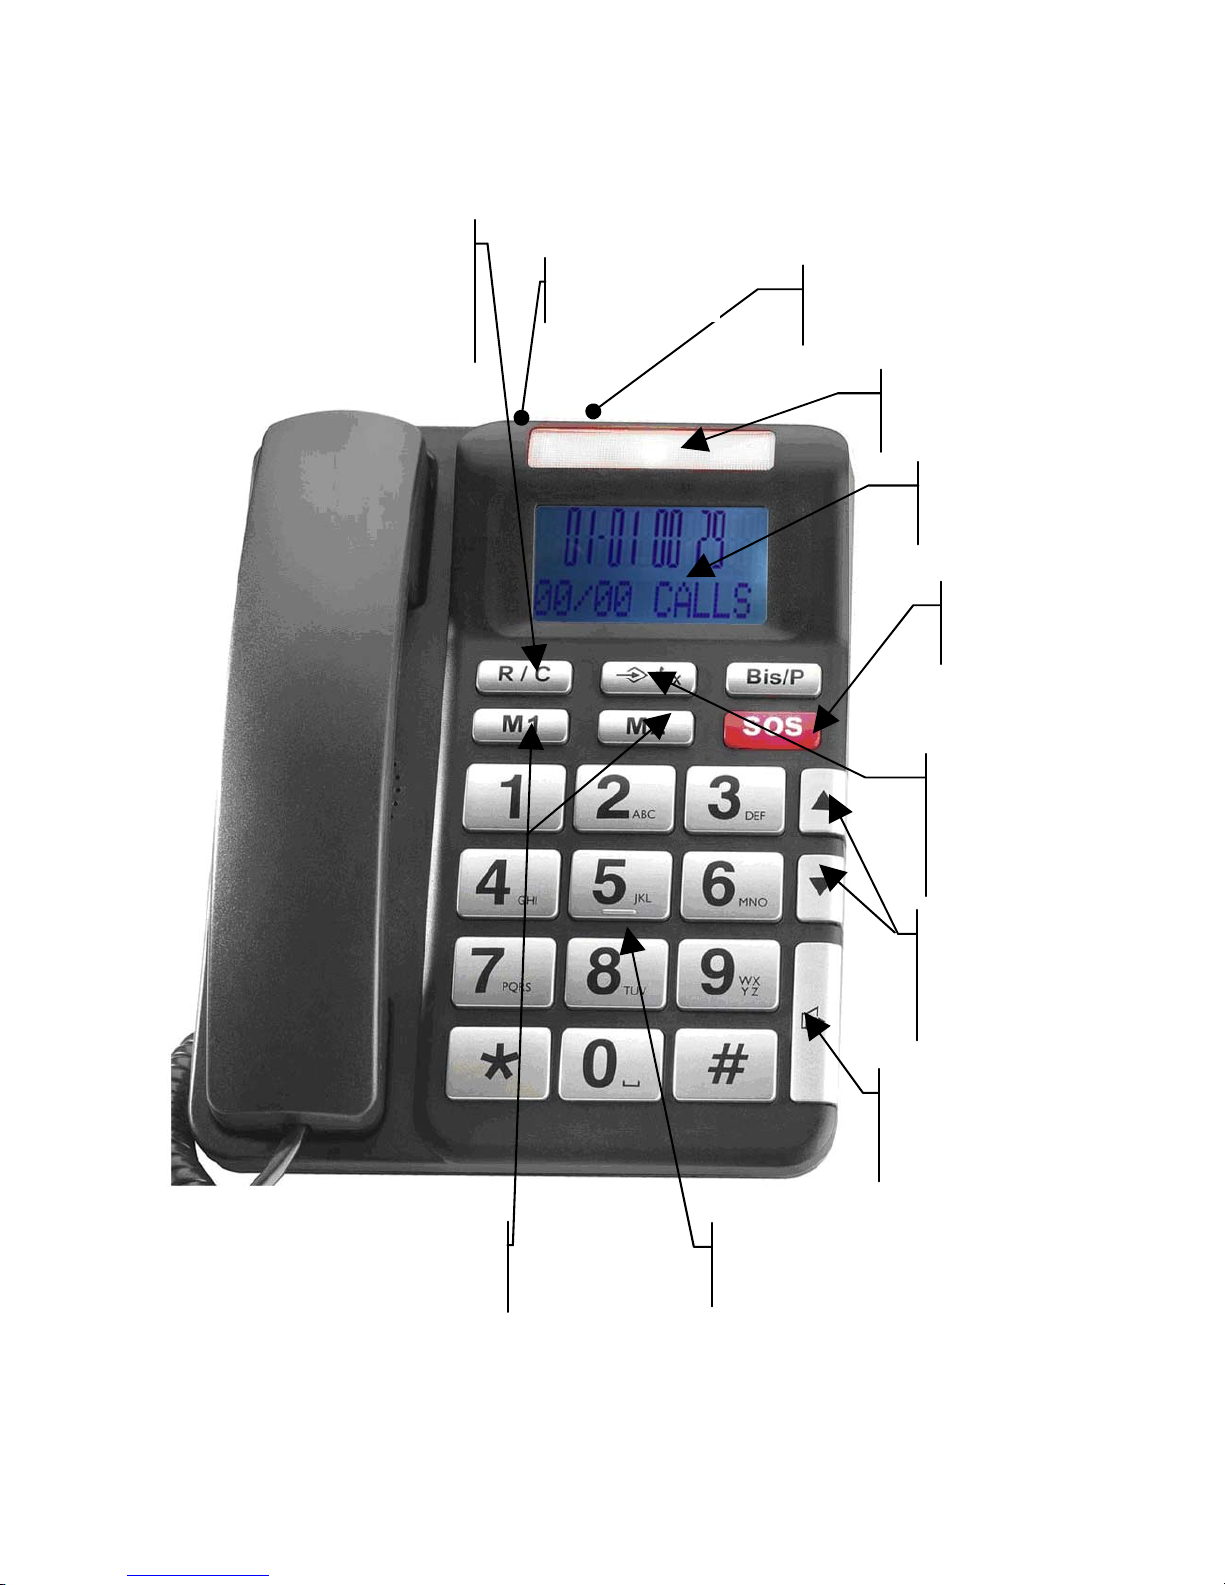
SOS key
LCD display
Lighted LED
MENU/SELECT
key and MUTE
ke
y
UP / DOWN keys
Speakerphone
mode
Direct memories
Keyboard
Flash / Delete /
Intercom
Power su
pply
7.5V DC
Line entry
4
Product Features
1.8GHz DECT technology
Pendant range up to 50m indoor and up to 300m outdoor
Pendant Talk time: 4 hours and Standby time: 80 hours
The base unit works on analog line in case of power failure
Phonebook: 80 names
2 One touch Memories
10 Two touch Memories
Type I & II caller ID
Caller ID number voice announcement
Talking keypad
Outgoing Call / LNR: 20
Missed Call log: 29
Multi-language
Ring Tone: 12 melodies
Ring Tone Volume: Off + 5 levels
Speakerphone with 6 levels volume
Receiver Volume: 5 levels
Mute Function
Flashing: 100, 300, 600, 1000 ms
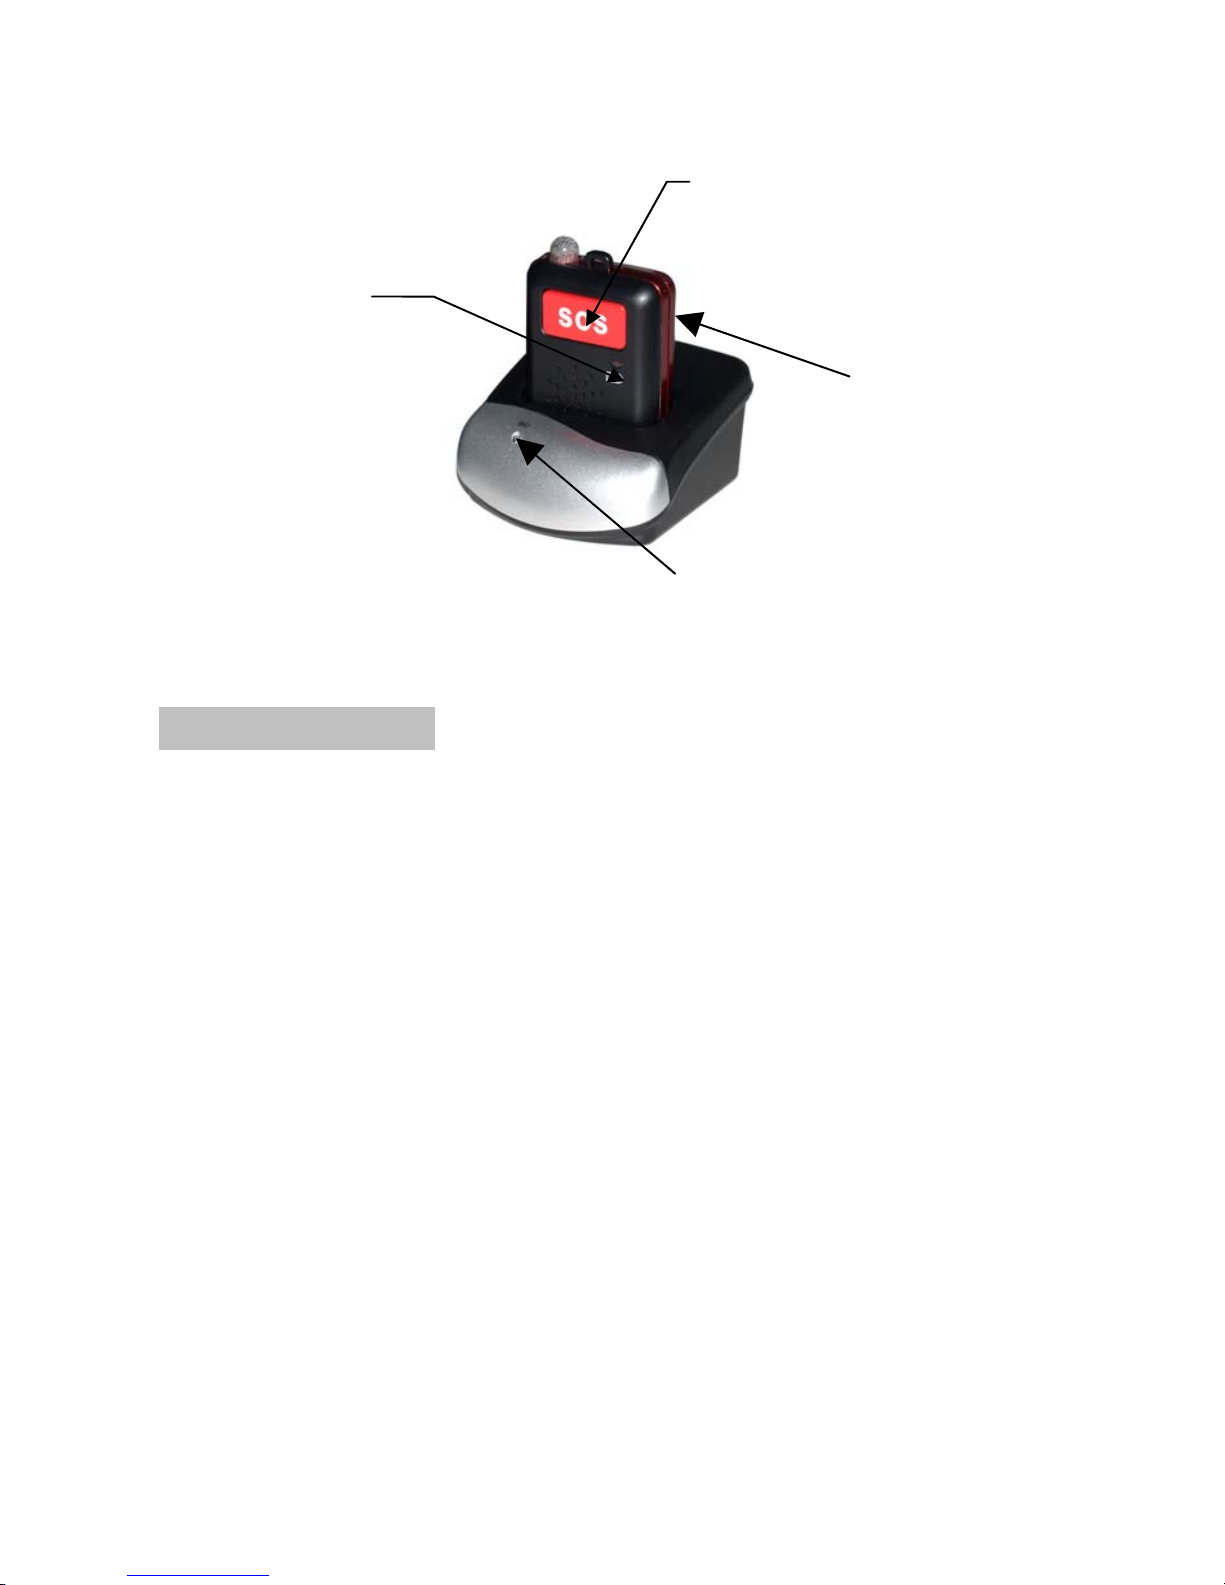
SOS key
Press to make SOS
call
LED Battery
Power
Indicator
Battery charge LED
END button
In idle mode, press it to
check battery
In talking mode, press it to
end the call

5
Can page up to 4 pendants
Internal Call
3 way Conference
Call-transfer
Emergency Numbers (SOS): 5 groups
Room Monitor
Hearing Aid Compatible Function : Handset of the base unit
Pendant and Base Low battery alarm
ON/OFF key tone selection
Out of range tone
ON/OFF pendant power selection
Instructions for use
Plan your product location
It is important that you consider carefully in advance where your product
will be situated and make sure that it is:
- On a flat and stable surface
- Within 2 metres of an adapter line and telephone socket
- At least 1 metre away from other electrical appliances to avoid any
interference
- Not in a humid or very damp place such as a bathroom.
Setting up
1. Connect curly cord to phone base on the side of the unit near the handset
cradle and the other end to the handset.
2. Connect the adapter lead and telephone cable to the back of the base unit.
Plug the power adapter into the mains power wall socket and switch on.
3. On the charger, connect the charger power adapter to the mains power
socket and switch on.
4. Place the pendant handset in the charger and charge for a minimum of 12
hours before first use.
5. Plug the telephone line cord into the telephone wall socket.

6
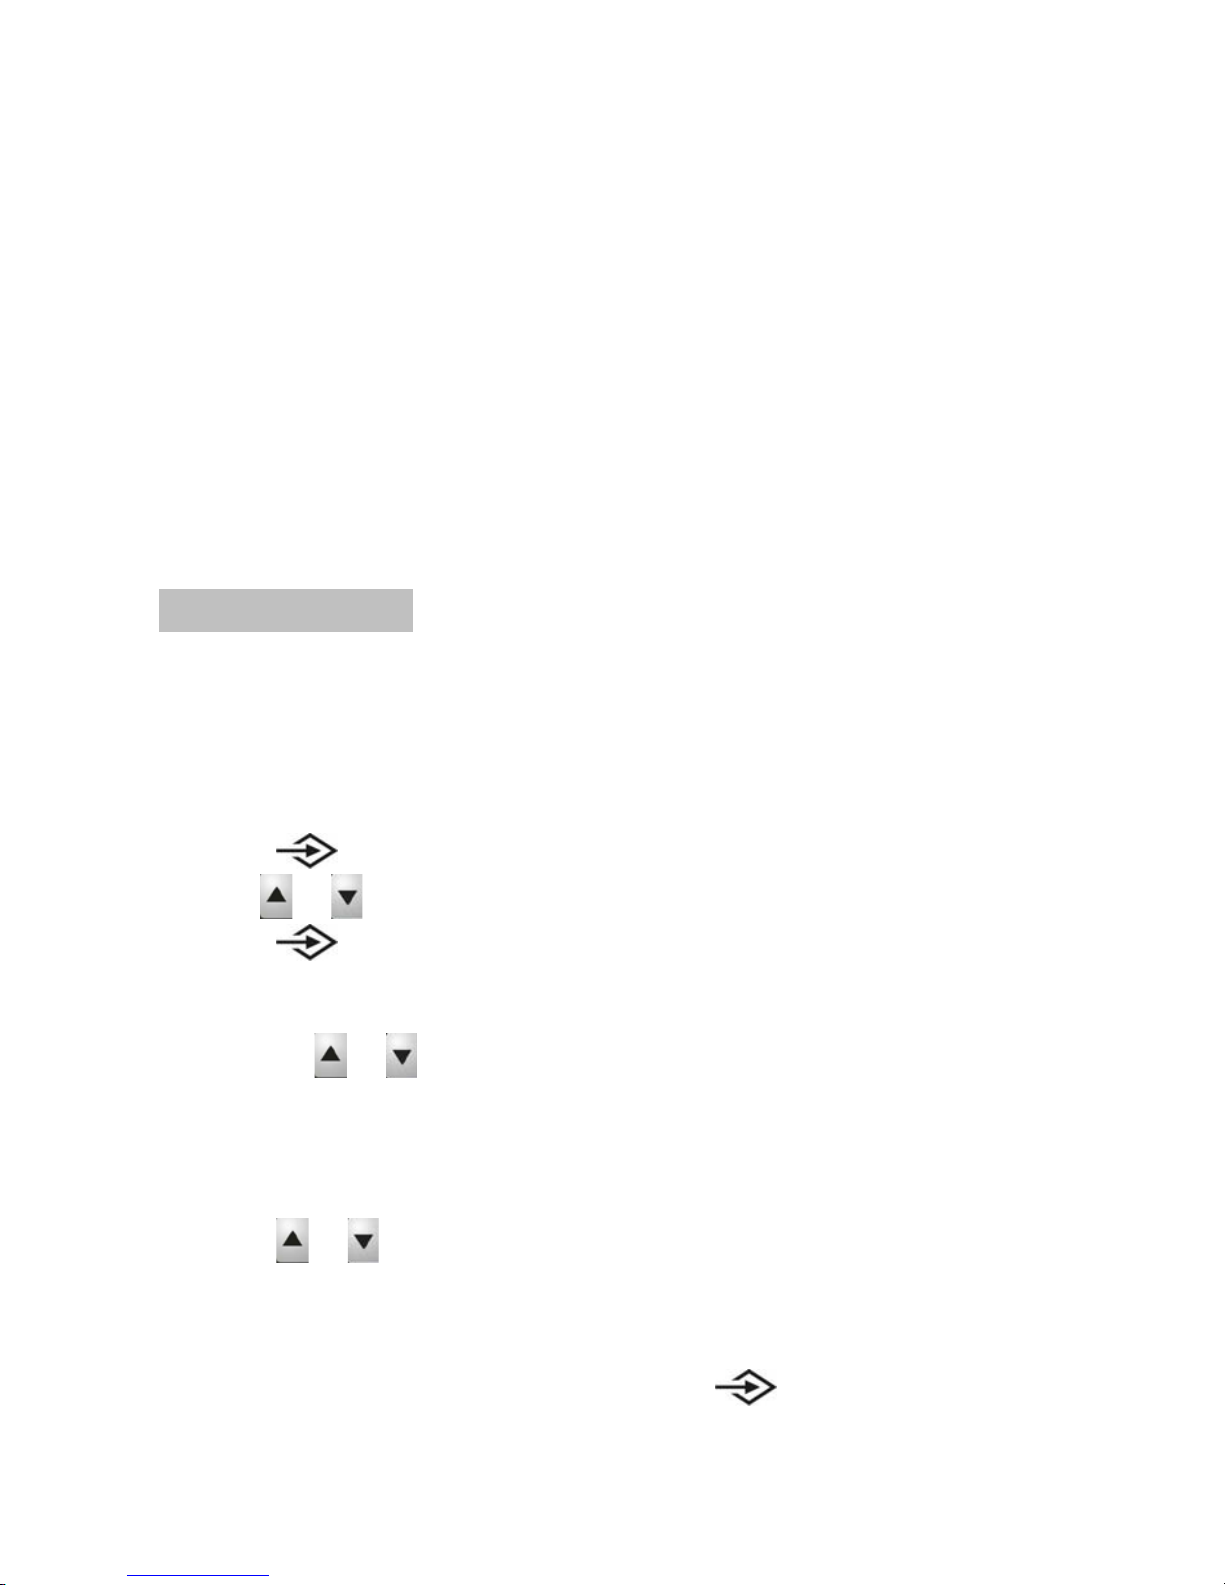
Menu Settings
A. In the standby mode, press key. Under call log or when reviewing
the phonebook, you can enter the menu setting without entering a pin code.
B. Base setting/pendant setting/SOS setting/room monitor/registration,
require entering “0000” code and then press
key to enter the menu
settings.
There are seven (7) sub-menus as below:
1) CALL LOG
2) PHONE BOOK
3) BS SETTINGS
4) PENDT SETUP
5) SOS SETTINGS
6) ROOM MONITOR
7) REGISTRATION
Press
or key to navigate up and down through the menu’s and sub-
menu’s. Press
key to enter menu and also then to select sections and
to confirm changes. Details of each section are shown in next part of the
user manual. Use the R/C key to delete characters, for example when
entering names or numbers in the phonebook.
CALL LOG
The first menu is CALL LOG.
There are two sections in this menu, RECEIVED calls and DIALED calls
Use
or key to select.
Press
key to enter received call list or dialed call list.
The LCD will show the last record. If no entries are available in the list
the LCD will be shown empty.
Press
or key once to view other records.
When the record is shown Press
key to access and or to scroll
through options below:
** ADD TO PB: This allows the user to add an entry from the caller list to
the phonebook
7
** DELETE: This allows the user to delete the current selected entry from
caller list
** DELETE ALL: This allows the user to delete all entries in the caller
list
During standby state, the LCD will show 01/02 call, 01 indicates missed
calls, 02 indicates no. of calls.
**In the on-hook state, review the most recent 29 incoming calls. In the
case of missed calls, LCD will display records eg.02/04, 02 indicates
amount of missed calls and 04 indicates the total amount.
**If you have missed calls, press UP key and the LCD displays the missed
calls, it will return to standby mode. Then press UP key again to review all
missed calls.
PHONE BOOK
The phonebook allows 80 entries with name and number. Each name has
maximum 12 characters and each number has maximum 20 digits.
LIST:
This function allows the user to review the phonebook list and make a call
directly from the phonebook list.
Press
key.
Use
or key to find PHONE BOOK.
Press
key to enter.
Then LCD first will show: LIST
** The function allows the user to review the phone book record lists
by using
or key. If no entries are available in the list the LCD
will be shown empty.
NEW ENTRY:
To add a new entry to the phonebook:
Press
or key to find “NEW ENTRY” item.
** The display shows “NAME?”, enter the name by using the
alphanumeric keys on the phone base unit.
** If you make a mistake, quickly press “R/C” key to correct.
** Once your have completed your entry Press
key to confirm.

8
Now enter the telephone number and select the melody to be stored &
press
key to confirm, a sound will be heard to confirm the entry
has been saved.
Note: If the phonebook memory is full and you wish to add one more
record, an appropriate message will be presented to the user : “MEM IS
FULL”.
EDIT RECORD:
To modify a stored phonebook record:
Press
or key to select “EDIT RECORD” item.
** Press
key to enter and the first record in the phone book will be
displayed.
** Press
or to find the stored record which you want to change.
** Press
key to select the record you want to change.
** Press
or to move from letter to letter, R/C to delete and to
confirm once amendments are complete.
** Once a stored record has been selected, the user will have the option to
edit each of the names/number and or change the melody as well.
A sound will be heard to confirm the changes are saved.
DEL RECORD:
To delete a stored phonebook entry:
Press
or key to find “DEL RECORD” item.
Press
key to select, and use or to find the stored record
which you want to delete.
Press
key to delete.
Press
key to confirm, a sound will be heard to confirm.
DELETE ALL:
To delete all stored phonebook entries:
Press
or key to find “DELETE ALL” item.
Press
key to delete all entries.
Press
key to confirm, a sound will be heard to confirm
9
MEM STATUS:
To view how many records are stored in the phonebook and the total
records available:
Press
or key to find “MEM Status” item.
** If showing 10/80, that means there are 10 records stored from a total of
80 records available.
BASE (BS) SETTINGS
To change the base settings:
Press
key and use or key to find “BS SETTINGS” menu.
Enter default PIN “0000” then
key to enter.
Then you can proceed as below:
RING SET UP:
To change the base ring melody on Internal and External calls.
There are 12 melodies and 6 different volume levels (for Volume 1, 2, 3, 4,
5, off).
Press
key, then use or key to find “RING SETUP” item.
Press
key to enter.
Press
or key to find the INT RING or EXT RING setup.
Press
key to confirm.
Press
or key to select the MELODY and VOLUME setup.
After selection, press
key to confirm.
Press
or key to select the desired melody, the corresponding
melody can be heard during selection.
If selecting VOLUME, press
key to confirm.
Press
or key to select desired ringer volume 1-5 or OFF, if you
want to switch the volume OFF, the corresponding volume sound can
be heard during selection.
Press
key to confirm your selection before exit, a sound will be
heard to confirm.
 Loading...