

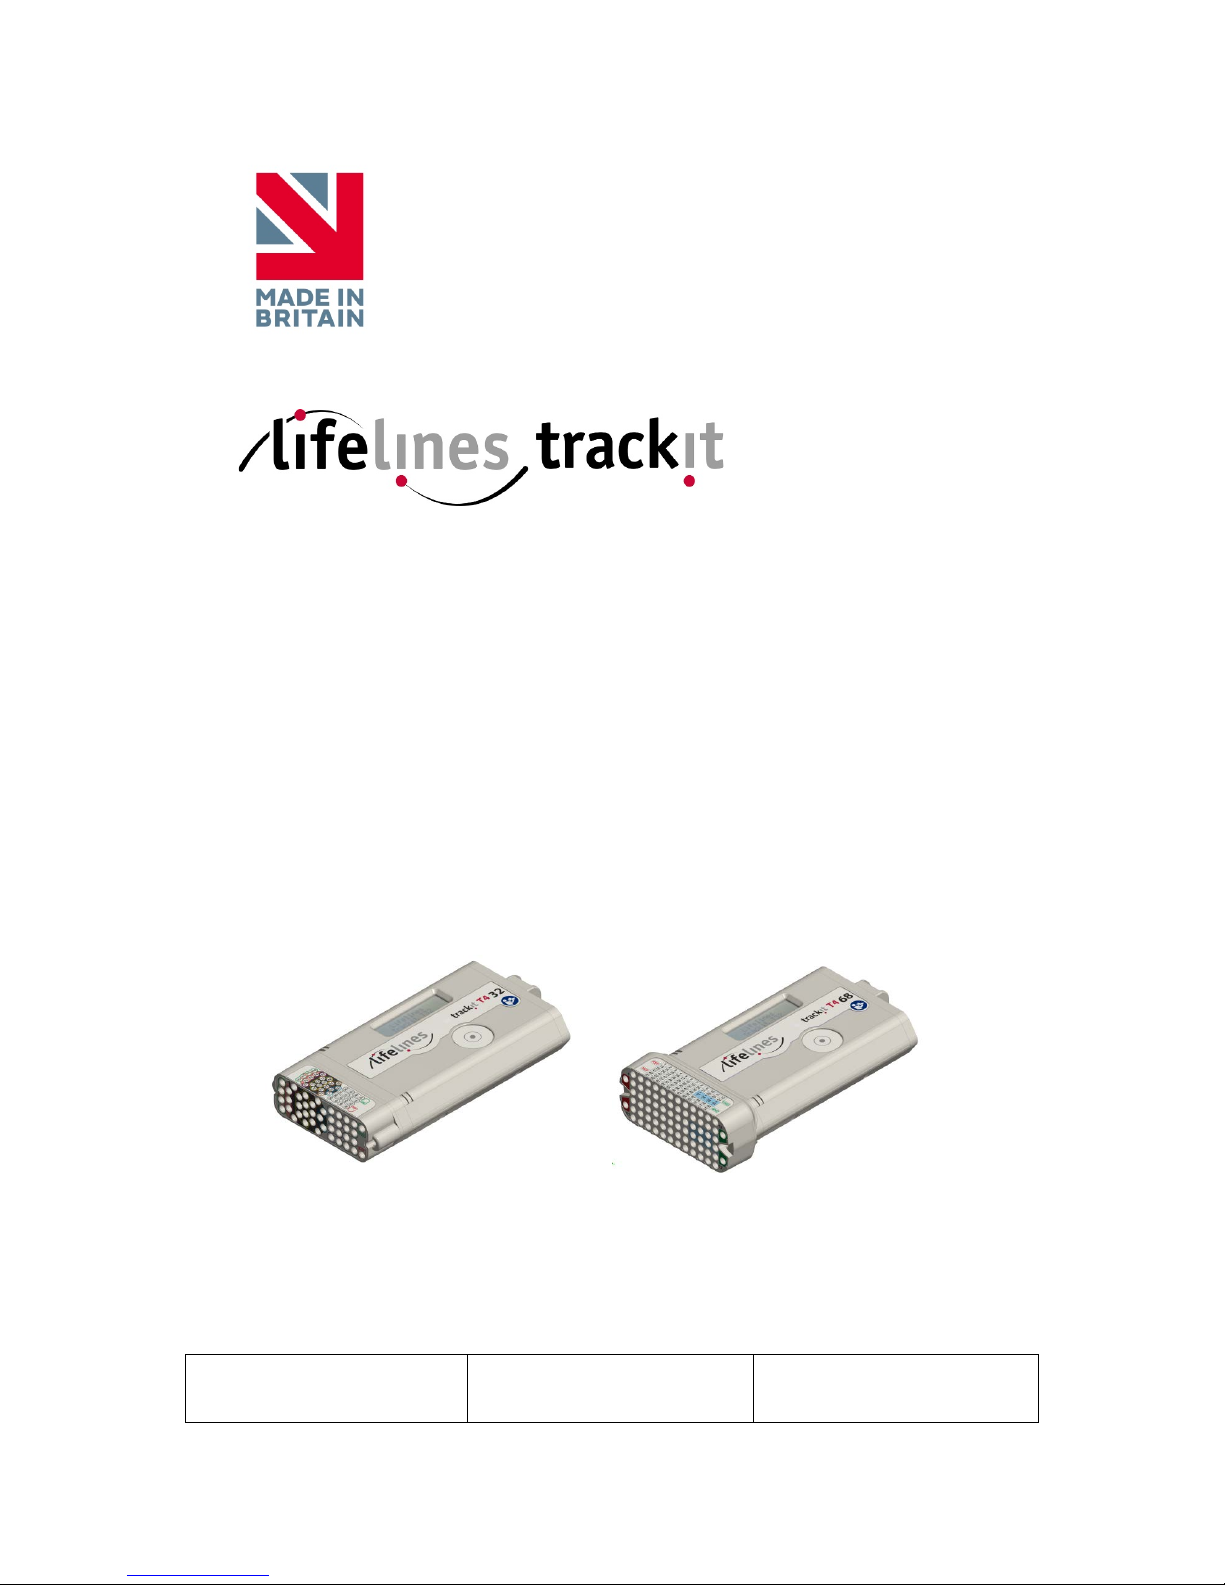
Lifelines trackit T4 32, trackit T4 68 User Manual
T4
EEG Amplifier
User Manual
32 channel version: T4
32
68 channel version: T4
68
Part no. 51285-006
Issue 1.9
Created Checked Approved

T4 EEG Amplifier User Manual
2
Version History
V 1 (23 June 2016)
• Initial release
V 1.1 (09 Aug 2016)
• Amended part numbers in secti on 1.4.
V 1.2 (28 Sep 2016)
• Various amendments for IE C 60601-1.
V 1.3 (13 Dec 2016)
• Amendments to Nonin and Aux Input specifications in section 1.6.
• Changed ‘Con tr a indication’ to ‘Warning’ in section 1.2. There are no con traindications for this
device.
V 1.4 (08 February 2017)
• Added to section 1.2 “CONTRAINDICATIONS: There are no known contraindications to the
use of this equipment”.
• Added to section 1.2 and 2.3 “W ARNING: To avoid the risk of electric shock, this equipment
must only be connected to a supply m a ins with protective ea r th”.
• Removed drawing numbers in section 1.4.
• Amended section 2.4: Internal Li-Ion backup battery operation.
• Added to Section 4.1: “Note: If a Setup that uses greater than 32 channels plus the Nonin is
attempted...”.
• Added to section 3.3 details of ba ttery replacement frequen c y.
V 1.5 (10 March 2017)
• Amended instructions concerning oximeter and Aux. input sensors.
V 1.6 (13 March 2017)
• Further amendm e nts to instructions concerning oximete r a nd Aux. input se nsors.
V 1.7 (22 March 2017)
• Added to Aux DC Inpu t instructions – “for hospital and clinic use. Not for home use ” in
section 1.6 and 3.3.
V1.8 (18 August 2017)
• Photic operation added in Appendix 2.
• Wireless operation added in Appendix 5.
V1.9 (08 November 2017)
• Added disinfection infor m a tion in section 2.8 .
• Change of N.B. to 0086 (BSI) .
T4 EEG Amplifier User Manual
3
Lifelines Ltd, 7 C la r e ndon Court,
Over Wallop, near Stockbridge,
Hampshire SO20 8HU, UK
Telephone +44 (0)1264 78222 6
www.LLines.com
sales@LLines.com
0086

T4 EEG Amplifier User Manual
4
Disclaimers & Warranties
The information in this section is subject to change without notice.
Except as stated below, Lifelines Ltd m a kes no warranty of any kind with rega rd to th is material,
including, but not limited to, the implied warranties o f merchantability and fitness for a particular
purpose. Lifelines shall not be liabl e for errors contai ned herein or for incidental or consequential
damages in conne c tion with the furnishing, performa nce or use of this m a te r ia l.
Lifelines shall warrant its products against all defects in material and workmanship for one year
from the date of delivery.
Misuse, accident, modification, unsuitable phys ic a l or operating environment, improper m aintenance or damage c a used by a product for which Lifelines is n ot r e s p onsible will void the warranty.
Lifelines do not wa rrant uninterru pted or error-free o pe r a tion of its products.
Lifelines or its au thorised agents w ill repair or replace any products that pr ove to be defective d ur-
ing the warranty period, prov ided th a t th ese products are used a s pr es c r ibed in th e oper a ting instructions in the user’s and service manuals.
No other party is au thorised to make any warranty to assume liability for Life lines products. L ifelines will not recognise any other warranty, either implied or in writing. In addition, services per formed by someone o ther than Lifelin es or its authorised a ge nts or any technical modification or
changes of products without Lifelin e s p r ior, written cons e nt may be cause for voiding this warra nty.
Defective products or parts m ust be returned to Lifelines or its authorised agents, along with an
explanation of the failure. Shippin g c osts must be prepaid.
Lifelines Ltd. manufa c tures hardware and software to be us ed on or with standard PC-compatible
computers and operating software. Lifelines, however, assumes no responsibility for the use or reliability of its softw a re or hardware with equipment that is not furnished by third-party manufacturers accepted by Lifelines at the da te of purchase.
All warranties f or third-party products used within the T4 system a r e the responsibility of the relevant manufac turer. Please refer to the relevant documentation on each product for further details.
This document contains proprietar y information tha t is protected by copyright. All righ ts are reserved. No part of this document may be photocopied, reprod uced in any other form or translated
into another language without the prior written consen t of Lifelines.
Trademarks
Microsoft, Windows and Windows N T are registered trad em arks of the Micros oft Corporation. All
other trademarks and product names are the property of their relevant owners.
Responsibility of manufacturer
The manufacturer and distributor con sider themselves responsible for th e eq uipment’s safety, reliability and perform ance only if:
any peripheral equipment to be used with th e T4 system is supplied by third-party providers
recommended by the manuf a c turer;
assembly operations, extension s, readjustments , modifications, or repairs are carrie d out by
persons authorised by the manufacturer;
the electrical installation of the r e levant room complie s with the appropriate requirements ;
the equipment is used by a health-care professional and in accor dance with the instructions for
use.
Note: the manufacturer has a policy of continual product improvement; hence the equipment
specifications a re subject to cha nge without notice.
Check with Lifelin e s or your distributor if a software update is a vailable.
Note: Medical electrical equipment needs s pec ia l precautions regarding EMC and needs to be installed and put in to s e r vice according to the EMC information provided in the Appendix.

T4 EEG Amplifier User Manual
5
Software and Virus Protection
Lifelines takes all reasonable steps to ensure that its s oftware is virus -free. In line with modern
computing practice, it is advisable that continual protection against viruse s , trojans, malware, adware etc. is provided on the PC used for installation and the surrounding systems. Please note the
following recommendations which should be supported by your internal IT/Computing depar tment
procedures and practices:
1. Virus protection software should be installed on ev ery computer at risk of infection. This
software should have a residen t ( online) shield and provide email scanning if appropriate.
2. Virus scanning should be set to manual mode or automatic if desired but at a ti m e when
the system is not being used.
3. All programs offering auto-update fea tures, including Windows , should be set to man ual or
automatic if desir ed but at a time when the system is not being u sed.
4. Adopt formal departmental or organisational proc edures to ensur e the integrity and s afe
operation of the med ic al equipment and supportin g systems.

T4 EEG Amplifier User Manual
6
Contents
Version History 2
Disclaimers & Warranties 4
Trademarks 4
Responsibility of manufacture r 4
Software and V ir us Protection 5
Contents 6
Illustrations 7
1 Overview and Technical Des c r ipti on 8
1.1 General description 8
1.2 Cautions and Warnings 8
1.3 Explanation of s ymbols 10
1.4 The Amplifier and its parts 11
1.5 Specifications and safety 11
1.6 Description of the c om p onents 12
1.7 Replaceable parts 13
2 Installation and Maintenance 13
2.1 Checks for completeness and integrity 14
2.2 Environmental parameters for oper ation 14
2.3 Power supply con nections 14
2.4 Battery Operation Time 14
2.5 Use in the home environment 15
2.6 Use with other equipment 15
2.7 Interference 15
2.8 Maintenance and cleaning 16
2.9 Disposal of equipment 16
3 Connections and usage 16
3.1 Overview 16
3.2 Laptop installation and operation 17
3.3 Connecting the T4 System 17
3.4 Starting the syste m 19
3.5 Shutdown of the system 20
3.6 Battery replacement and ch a r gin g 20
4 The setup and recording software 21
4.1 Setting up a recording protocol 21
4.2 Configuring th e a m p lifier 25
4.3 Montage Editor 29
4.4 Reading an EEG recording 30
Appendix 1: Specifications 31
Appendix 2: Photic Stimulation 34
Appendix 3: Additi onal Events Inf or m ation 36
Appendix 4: PC Setup 39
Appendix 5: Wireless 41
Introduction 41
System overview 41
Connection and use 41
Appendix 6: Troubleshooti ng Guide 46
Appendix 7: Manufacturer’s Declaration 47
EMC Compatibility 47

T4 EEG Amplifier User Manual
7
Illustrations
Figure 1 Connecting the T4 Amplifier – Clinical Use 16
Figure 2 Connecting the T4 Amplifier - Home Use 17
Figure 3 Connecting the T4 Amplifier (front face) 18
Figure 4 Connecting the T4 Amplifier ( ba c k face) 18
Figure 5 New Patient dialog 21
Figure 6 New Patient databas e 22
Figure 7 Signal List 22
Figure 8 Signal Editing Tool 23
Figure 9 EEG setup 23
Figure 10 Setup Recording dialog 24
Figure 11 Channel setup 24
Figure 12 Recording Channel editing 25
Figure 13 Trackit s oftware toolbar 25
Figure 14 Trackit Control Panel 26
Figure 15 Ongoing trace display 27
Figure 16 Adjust display parameters 27
Figure 17 Impedance check 28
Figure 18 Online Event View er 28
Figure 19 Montage Editor 29
Figure 20 Photic Stimulation 34
Figure 21 Photic Stimulation contr ol window 34
Figure 22 Photic tri g ge r s ignal definition 35
Figure 23 User Events 37
Figure 24 Events Template s etu p 37
Figure 25 Free-text Event 37
Figure 26 Event List 38
Figure 27 Options Tab 1 39
Figure 28 Options Tab 2 39
Figure 29 Options Tab 3 40

T4 EEG Amplifier User Manual
8
1 Overview and Technical Description
1.1 General description
Indications for u se
The T4 EEG Amplifier is intended to be used as a fron t-end amplifier to acq uire, store and tr ansmit
electrophysiological signals ( wireless or cabled).
CAUTION: Federal (USA) law restricts this device to sale by or on the order of a physician.
General description
The Trackit T4 EE G A m p lifier is a multi-chan nel electroencephalograph des ign ed for use in routine
EEG and lab monitoring applications and due to its small siz e, can be used in ambulatory
applications. In this situation, the EEG electrodes are fitted to th e patient by a traine d clinician
prior to the patient being sen t home. No subsequent intervention is required by the patient. Upon
completion of th e r e c or d ing, the data which is stored on a me m or y card is reviewed by a clinician
using review and analysis software on a PC.
It is a compact USB amplifier which provides 32 channels (or 68 channels with internal expansion
option) with built-in calibration and electrode impedance measuremen t. Also provided is a Nonin
pulse oximeter interface , a Patient Even t input and an Aux DC input. Optional wireless
communication is a vailable (Bluetooth and WLAN WiFi).
There are two var iants of the Trackit T4 EEG Amplifier:
• Trackit T4-32 providing 24 referential + 8 poly channels.
• Trackit T4-68 providing 64 referential + 4 poly channels ( using internal expansion board).
Plug-on Patient Connection U nits (PCUs) prov ide 32 channel touch p r oof inputs (model T4-PCU
24+8) or 68 channels (model T4-PCU 64+4).
The Amplifier is intended to be connected to a USB port on a PC which is powered from a m ed ic a lly
approved power supply. In additi on it ca n be battery powered in ambulatory applications.
This equipment is intended on ly as an adjunct device in patient asses s m ent; it must be used in
conjunction with other methods of pa tient diagnosis. T he equipment does not sustain or supp or t
life.
Intended User
The intended user of the equipment is a healthcare professional who has the training and
knowledge to undertake EEG examinations and is familiar w ith EEG equipmen t a nd practice.
1.2 Cautions and Warnings
WARNING: Do not us e the T4 EEG Amplifier in an MRI environment, in an oxygen rich
environment or during defibrillation.
WARNING: This equipment is in ten ded to be u s ed by a healthcare professiona l and in accordance
with these instructions for use w hich must be read in their entirety before th e device is used.
WARNING: This equipment in intended only as an adjunct device in patient assessment; it must
be used in conjunction with other methods of patient diag nosis. This equipmen t is not be used for
the determination of brain death.
WARNING: Only use the PC and the medical-grade power supply as supplied or authorised by
Lifelines.
WARNING: To avoid the risk of electric shock, this equipm ent must only be con nected to a supply
mains with protective earth.
WARNING: Lifelines does not supply EEG electrodes. T he unit accepts standard 1.5 mm
touchproof electrodes us in g D IN 42802-style connectors. To ensur e p a tie nt safety, the elec tr odes
used must be approved to the Medica l Device Directive 93/42/EE C in Europe or FDA cleared for use
in USA.
CAUTION: The conductive part of electrodes and their connec tor s , including the Ne utral electrode,
should not contac t other conductiv e p a r ts including ear th.
WARNING: Do not plug the USB connec tor into any device other than th e P C supplied or
authorised by Life lines. Do not con nect any other equipme nt to the PC.

T4 EEG Amplifier User Manual
9
CAUTION: Do not touch simu ltaneously any a ccessible USB or other c ontacts on the PC an d the
patient.
WARNING: Stran gulation haza r d due to long cables. As with all medical equipme nt, carefully
route patient cabling to reduce th e p os s ib ility of patien t entanglement or stra ngulation.
CAUTION: Ensure that carr ying bag and straps are worn over clothing to prevent an y possibility of
skin irritation.
CAUTION: When in close proximi ty to the Amplifier, do n ot use mobile phones, transmitters,
power transforme r s , motors, or other e quipment that gen er ates magnetic field s. Refer to the
Appendix for more information. Medica l electrical equipment needs s pecial precautions regardin g
EMC and needs to be in s talled and put into service according to the EMC informa tion provided in
the Appendix.
WARNING: The func tion or s a fety of the equipment could be impaired if it has been subjected to
unfavourable conditions in storage or in transit. If a t any time function or safety is thought to be
impaired, the instrument s hould be taken out of operation and s ec ured against unintended us e.
WARNING: Do not ope n or modify the equipm e nt without the authorization of the manufactur er .
CAUTION: Federal (USA) la w restricts this dev ic e to sale by or on the order of a physic ian.
CONTRAINDICATIONS: There are no known contraindic a tions to the use of this equipment.
T4 EEG Amplifier User Manual
10
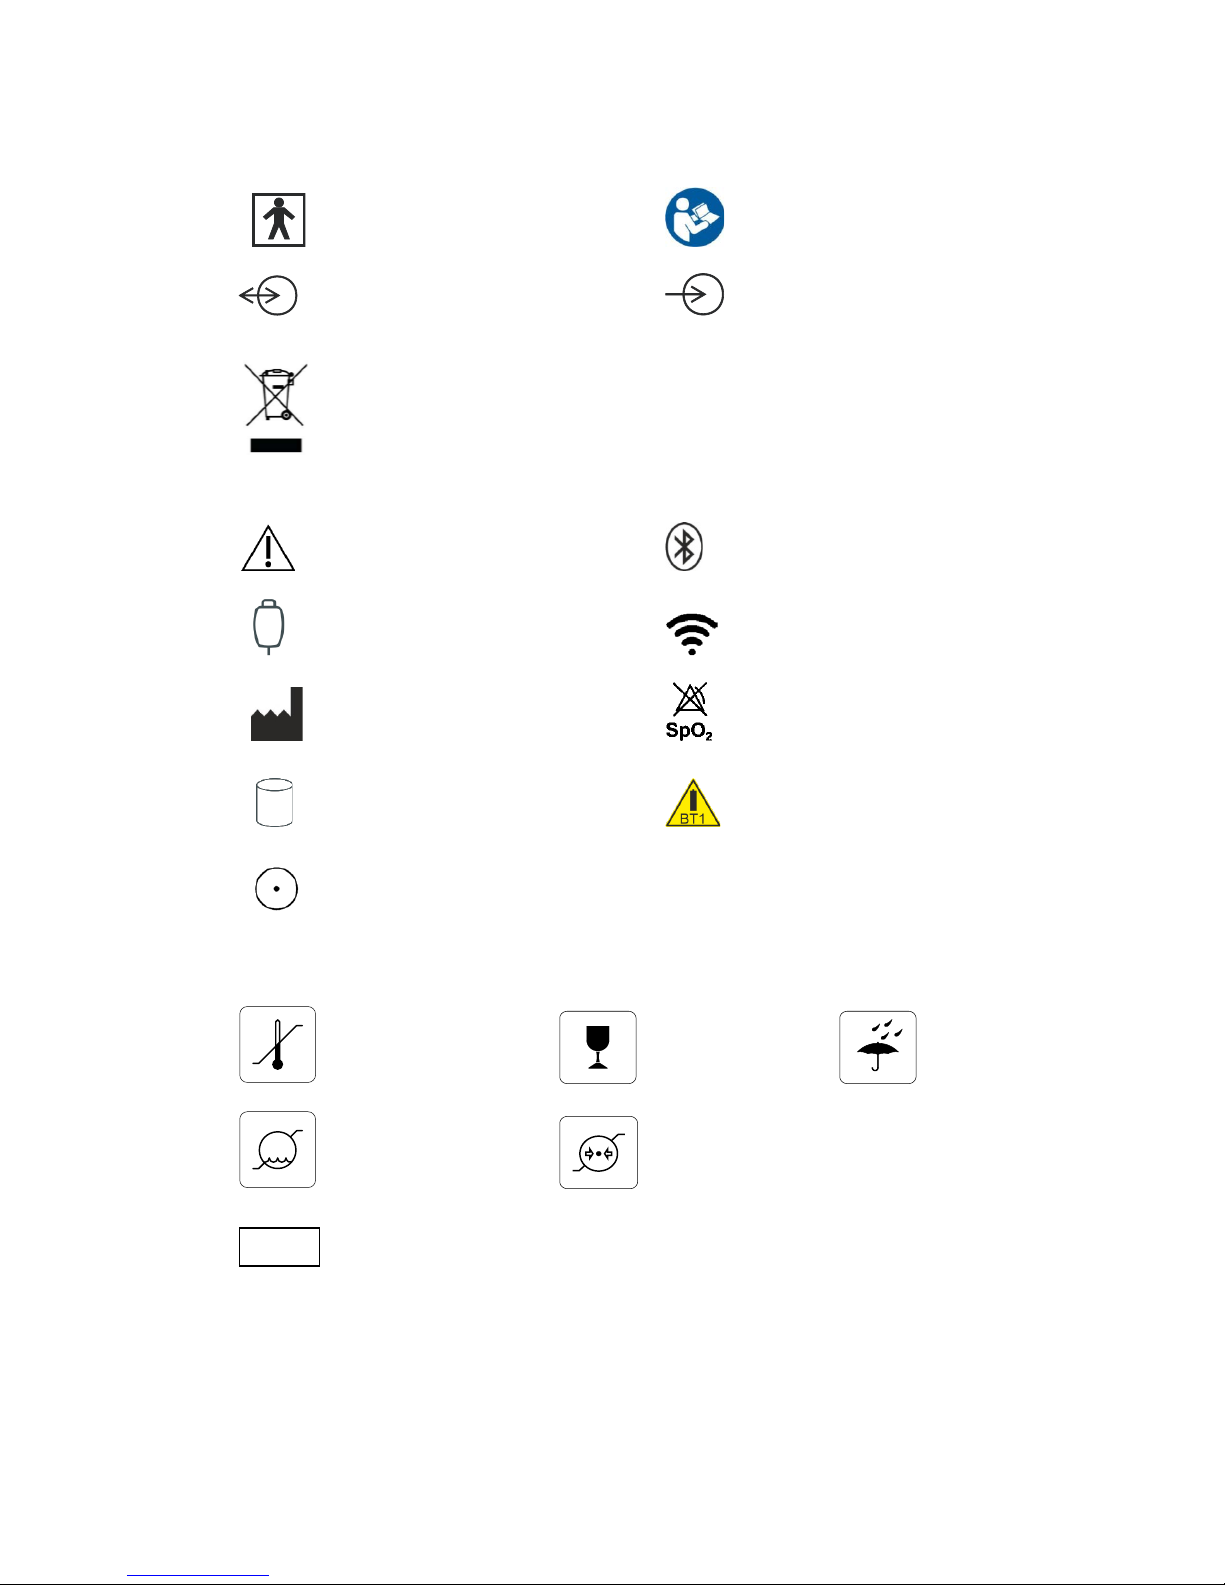
1.3 Explanation of symbols
Type BF applied part Follow operating instructions
Input/output connection Input connection
Special recycling required, do not dispose of in landfill. When this equipment has
reached the end of its useful life, it must be disposed of in an environmentallyfriendly way. Waste electrical and electronic equipment (WEEE) requires special
procedures for recycling or disposal. This includes batteries, printed circuit boards,
electronic components, wiring and other elements of electronic devices. Follow all
of your respective local laws and regulations for the proper disposal of such
equipment. Contact y our local distributor for information concerning th is .
Consult warnings in User Manual Bluetooth
Pushbutton WLAN WiFi
Manufacturer Nonin Xpod Pulse Oximeter
Memory card read/write Internal battery hazard
- refer to section 1.7
On/Off and patient event switch
Storage and transport symbols
Temperature limits Fragile Keep dry
Relative humidity limits Atmospheric pressure limits
International protection code
Protected against ingress of solid object 12.5 mm diameter.
Protected against access to hazardous parts with finger.
Protected against ingress of water dripping (15° tilted).
-25
+70
°C
0
93
%RH
500
1060
hPa
IP22

T4 EEG Amplifier User Manual
11
1.4 The Amplifier and its parts
The T4 EEG Amplifier is a multi-channel electroencephalograph des igned for use in routine EEG and
lab monitoring applications.
It is a compact USB amplifier which provides 32 ch a nn els ( or 68 c hannels with internal expansion
option) with built-in calibration and electrode impedance measuremen t. A Nonin XPOD interface is
provided, a Patien t Event input an d an Aux DC input. Optional wireless communication is available
(Bluetooth and WLAN WiFi).
The Amplifier is intended to be connected to a specific PC and a medical grade power supply. R efer
section 3.1 for details.
Caution:
Only use the PC supplied or author ised by Lifelines
Only use the medical-grade mains power supply with it as supplied or authorised by Lifelin es
The T4 EEG Amplifier comprises the following components :
T4-32 Amplifier part number 1505
T4-68 Amplifier part number 1501
T4-PCU 24+8 part number 1552
T4-PCU 64+4 part number 1553
USB Power Bank battery part number 1560
Battery cable part number 1561
T4 bag and straps part number 1562
Patient event switc h part number 1353
Xpod Pulse Oximeter Nonin part number 1327
Trackit tool part number 1115
Amplifier USB cab le part number 1277
Lenovo ThinkP ad laptop computer part number 1389
Medical grade power supply part number 1390
Mains cable, UK part number 1066
Trackit software CD, standard part number 1009
Part numbers may be preceded by ‘L14’ on labelling or packaging.
1.5 Specifications and safety
Refer to Appendix 1 for specifications.
The Amplifier has been c e rtifie d and complies with the following standards:
IEC 60601-1 and
IEC 60601-2-26
European standard for medical electrical equipment, general re-
quirements and particu la r requirements for E E G sy stems.
ANSI/AAMI ES 60601-1
AAMI Deviations f rom IEC 60601-1 (USA).
CAN/CSA 22.2 No 601.1 M90 Canadian standard for medical electrical equipment, general re-
quirements.
IEC 60601-1-2 European standard for m edical elec tr ic al equipment, EMC r equire-
ments, calling:
*CISPR11
Conducted Emissions, Group 1, Class B
CISPR11
Radiated Emissions, Group 1, Class B
IEC61000-4-2
Electrostatic Discharges
IEC61000-4-3
Immunity - Radiated RF Field
*
IEC61000-4-4
Immunity - Transients Bursts
*
IEC61000-4-5
Immunity – Surges
IEC61000-4-6
Immunity – Conducted
IEC61000-4-8
Immunity – Power frequency fields
*
IEC61000-4-11
Immunity – Voltage dips, interruption s
*
IEC61000-3-2
Harmonic Emissions
*
IEC61000-3-3
Voltage Fluctua tions/flicker
*
Note: Compliance is provided by the PC.

T4 EEG Amplifier User Manual
12
Classification of system
Classification Clinical use Home use
Degree of protection again s t
electrical shock
Internally powered; or it can
be connected to a PC which is
powered by a medical grade
Class I power supply.
Type BF applied parts.
Internally powered.
Type BF applied parts.
If a PC is supplied, it h as no
electrical connection to the
Amplifier & has no a p plied parts.
Degree of protection again s t
harmful ingress of water
Ordinary (no pr otec tion) or
IP22 (Amplifier in bag)
IP22 (Amplifier in bag)
Mode of operation Continuous operation Continuous operation
Suitability for use in an
oxygen rich environment
Not suitable Not suitable
1.6 Description of the components
The T4 Amplifier
The T4 USB amplifier provides 3 2 c hannels (or 68 cha nnels with internal expansion option ) with
built-in calibration and electrode impedance measurement. A Nonin XPOD interfac e is pr ovided, a
Patient Event in put, an Aux DC input and an Electrocap connector . The Amplifier h a s bu ilt in typeBF patient isolation and has a USB in te r face to the PC. O p tional wireless comm unication is available
(Bluetooth and W L AN WiFi).
The Patient Connection Unit (PCU) connects the sta ndard 1.5mm touchproof EEG recording electrodes attached to the patient to the T4 unit. It is available either as a T4-PC U 24+8 (32 ch a nnel)
unit or a T4 PCU 64+4 ( 6 8 channel). The PC U is plugged into the front of the unit and retained with
two screws operated by the su pplied s pecial tool.
Applied parts, type BF
EEG Electrodes
The amplifier connects to standard 1.5m m tou c hproof EEG recording electrodes arranged in a
standard 10-20 pattern (T4 PCU 24+8) or the grid lay out (T4 PCU 64+4), attached to the patient’s head.
WARNING: Lifelin es does not supply EEG electrodes. T he Amplifier accepts standard 1.5 mm
touchproof electrodes us in g D IN 42802-style connectors. To ensur e p a tie nt safety, the elec trodes used must be approved to the Medic a l Device Directive 93/42/EEC in Europe or to the
relevant local stan dards outside Eu r op e.
CAUTION: The conductive part of electrodes and their connectors , including the Neutral electrode, should not contact other conductive parts including earth.
Oximeter Sensor
The amplifier is approved for use with a Nonin 8000AA sensor which attaches to the patient’s
finger.
Patient Event pushbutton
The Patient Event Pushbutton is used by the pa tie nt to record the instance of a significant
event.
Aux DC Input
The amplifier is approved for use with a SleepSen s e body position sensor, ty pe 1575, for
hospital and clinic use. Not for home use.
CAUTION: Only use approved sensors as specified by Lifelines.
USB Cable
The Amplifier plugs directly into a USB port on the PC.
WARNING: The Amplifier must only be us ed with the USB cable provided with the unit.
USB Power Bank battery pack for ambulatory applications
The Amplifier plugs directly into the USB port on the Power Bank.
WARNING: The Am plif ier must only be used with the USB Power Bank supplied or authorised by
Lifelines.

T4 EEG Amplifier User Manual
13
Micro-SD Memory Card
The micro-SD card is used to store the EEG data recorded by T4. Storage cards of varying capacity
are available in the micro-SD format.
Bags and Straps for ambulatory applications
The Bag houses the Amplifier and ba ttery.
Medical grade AC/DC mains power supply module for Laptop PC
Where EEG studies are condu c ted w ithin the patient environment the leakage current must be con trolled. The laptop PC mains power supply must be a special medical-grade type with appropriate
safety standards, supplied or authorised by Lifelines.
WARNING: The laptop must only be connected to the medical-grade laptop power suppl y
supplied or authori sed by Lifeline s. D o not use a standard laptop power supply.
Only use the laptop s upplied or authorised by Lifeline s.
The Setup and Recording Software
The T4/Trackit setup software runs under Microsoft Windows 2000 (with SP2), Windows XP, Windows Vista, Windows 7, 8 or 10 on the host PC and is used to setup and review the T4 Amplifier
and to record on to the P C.
Functions of the software:
Download the recording template. This includes which electrodes are used and the recording
montage. See section 4. 2, step 2.
Perform a calibration check of the Amplifier. See section 4.2, step 8.
Perform an EEG recording. See section 4.2, step 8.
View on-going EEG traces. See section 4.2, s tep 9.
1.7 Replaceable parts
Lifelines Ltd. w ill m ake available on r e quest circuit diagr ams, component part lists, descript ions,
calibration instr uctions, or other information tha t will assist service personnel to repair those parts
that are designated by Lifelines Ltd. as repairable by service personnel.
Internal battery re placement – service personnel only
The T4 amplifier contains a replaceable lithium ion rechargeable coin c ell, ty pe LIR2450.
WARNING: Battery replacement by inadequately trained personnel could result in a hazard. It must be rep la c e d only with the corre c t type and it must be ins talled correctly with
+ve uppermost.
1. Remove PCU and the four screws from underside of instru m ent, two from the fron t a nd two
from the rear mould ings. Remove bottom of case.
2. Un-clip the wrap-around screen to expose the battery beneath.
3. Grasp battery between thumb and forefinger and pull it from the soc ket.
4. Push replacement battery in to the socket ensuring +ve is uppermost.
5. Re-clip the wrap-around screen and reassemble the case.
Battery safety instructions
Do not attempt to open, puncture, disassemble or modify the battery in any way.
Do not subject the battery to sudden shock or heat.
Do not dispose of battery in fire.
2 Installation and Maintenance
WARNING: The f ollowin g s ec tion must be read and understood before the equipment is switched ON.
Note: Medical electrical equipment needs s pec ia l precautions regarding EMC and needs to be in-
stalled and put in to s e r vice according to the E M C information provided in the Appen dix.
The function or safety of the equ ipm ent could be impaired if it has been subjected to unfavourable
conditions in stor a g e or in transit. If at any time function or safety is thought to b e im p a ir ed, the
instrument should be taken out of operation and secured again s t u nintended use.
The manufacturer shou ld be contacted (details on page 3) for a s s ista nce, if needed, in setting up,
using or maintaining the equipment; or to r eport unexpec te d operation or events.

T4 EEG Amplifier User Manual
14
The assembly of the system and any modifications during its service life require evaluation to the
requirements of IEC 60601-1.
2.1 Checks for completeness and integrity
1 Remove the equipment from the packaging case(s).
2 Use the parts list to check that all ordered i tems have been received.
3 Check for signs of damage that may have occurred during transit or storage. If any damage is
found, do not us e the instrument; con ta c t your distributor.
2.2 Environmental parameters for oper ation
The operational a nd storage/transportation environmental cond itions are as foll ows:
Operational:
Temperature +5°C to +40°C
Relative humidity 15% to 93% non-condensing
Atmospheric pressure 700 hPa to 1060 hPa
WARNING: Do not obstruct any cooling slots. Positi on the equipment so that a ir flows freely.
Storage and transport:
Temperature -25°C to +70°C
Relative humidity Up to 9 3% non-condensing at +70°C
Atmospheric pressure 500 hPa to 1060 hPa
2.3 Power supply connections
Power require me nts
Standard USB port.
Power consumption
Maximum power from USB port: 2.5W.
Medical grade AC mains power supply module for Laptop PC
Where EEG studies are condu c ted w ithin the patient environment the leakage current must be con trolled. The mains power su pply must be a special medical-grade ty pe with appropriate safety
standards, as supplied or authorised by Lifelines.
Mains power input: 100–240 Vac, 47–63 Hz, 1.4 A @ 115 Vac, 0.7 A @ 230 Vac.
Output: 20 Vdc, 5. 25 A .
WARNING: The laptop must only be connected to the medical-grade laptop power suppl y
supplied or authorised by Lifeli nes. Do not use a standard l a ptop power supply .
Only use the laptop s upplied or authorised by Lifeline s.
WARNING: To avoi d t he risk of electric shoc k , this equipment must only be connecte d to
a supply mains with protective ea rt h.
WARNING: The Amplifier must only be used with the USB cable prov ided with the unit.
2.4 Battery Operation Time
USB Powerbank Li-Polymer battery pack
When fully cha rged the battery pack will typically power the unit for 36 hou r s depending on the
number of channels, sample rate and wireless usage.
The typical service life is 2 years.
Internal Li-Ion backup battery
The internal bac kup battery will ena ble the unit to contin ue operating for a short period of time (15
mins approx.) to allow the main battery pa c k to be replaced. It is recharged au tom atically, whenever the main battery pack is c onnected, with acquire off. The s ta te of c harge is displayed, as described in section 3.4, wh enever the unit is internally powered from the backup battery. To ch a r ge
manually, opera te the pushbutton se veral times to activa te the backlight and if the reading drop s
below approximately 70%, c harge the battery for about 10 minu tes by connecting the main battery
pack or connecting to a USB port.
The typical service life is 500 charge-discharge cycles.

T4 EEG Amplifier User Manual
15
2.5 Use in the home environment
Where the equipment is intended t o be u s ed in the home, the unit and its batter y should be operated in its bag where it is protected against ingress of solid objects and water to a degree of IP22.
The laptop PC is option a l in the home environmen t and m a y be us ed for video recordings. There is
no connection betw ee n the PC and the T4 Amplifier unit, as a ll communication is a c complished
wirelessly.
Keep the equipment away from s ou r c es of heat.
Do not use mobile phones.
Do not allow pets or children to interfer e with the sensor ca b les.
When the equipment is operated with or without its B luetooth or WiFi on, oth er dev ic es in the vicinity should be moved away or turned off to reduce the likeliho od of interference to the equipment or
by the equipment.
The T4 may have internal radios f itted. These are approved indu s try-standard Blu etooth and Wi-Fi
types which pres e nt minimal risk of r eciprocal interfer ence with other equ ipm e nt.
2.6 Use with other equipment
Defibrillators and HF surgical equipment
The equipment is n ot de fibrillator proof and should not be u s e d in situations whe r e a defibrillator is
likely to be used.
The equipment should not be us ed w ith, or in the presence of, h igh fr equency surgical equipment.
Other patient-connected equipment
When used simultaneously with othe r patient-connected equip m ent, for example a cardiac pa c emaker or other electrical stimulat or, it is unlikely th at a safety hazar d will arise. However always
consult the docum entation supplied w ith the other patient-connected equipment to ens ure that all
hazards, warnings and c autions a r e c on s ider ed before the equipment is us ed to gether.
Leakage curren t
This system is designed to comply w ith IEC 60601-1, the international standard f or m e dical electronic equipment, w hich specifies the permissible lev els of leakage current. A potential hazard exists in the summation of leakage cur r ents caused by connec ting several pieces of equipment together. Because this system can be used in conjunction with standard electronic devices, the total
leakage current should be tested whenever the system is modified.
There should be no electrical c on nections between the sys tem equipment, which is powered v ia a
medical grade power supply , and any other equipment powered f r om another mains supply.
2.7 Interference
The T4 will continue to operate in the presence of r a d io frequency magnetic fields (RF) an d the effects of electrostatic discharges (ESD) and other interference, in accordance with the requirements
of EN60601-1-2. However, the T4 amplifier records signals of very low amplitude, and these s ignals themselves a re not immune to the effects of RF, ESD and low-frequency magnetic fiel d interference. Such interference may cause signal artefacts.
The T4 may have internal radios fitted. These are approv ed industry-standard Bluetooth and Wi-Fi
types which pres e nt minimal risk of r eciprocal interfer ence with other equipment.
However, when the equipmen t is opera ted with or without its Bluetooth or WiFi on, other device s in
the vicinity should be moved away or turned off to reduce the likelihood of interference to the
equipment or by the equipment
Caution: When in close proximity to the amplifier, do n ot use mobile phones , transmitters, pow er
transformers, m otor s, or other equipm ent that generates ma gnetic fields. Refer to the Appen dix for
more information .
Note: Medical electrical equipment needs s pec ia l precautions regarding EMC and needs to be installed and put in to s e r vice according to the EMC information provided in the Appendix.
 Loading...