

Life form LF03611U Instruction Manual
Child Defibrillation Chest Skin
LF03611U
Instruction Manual
Products by Nasco
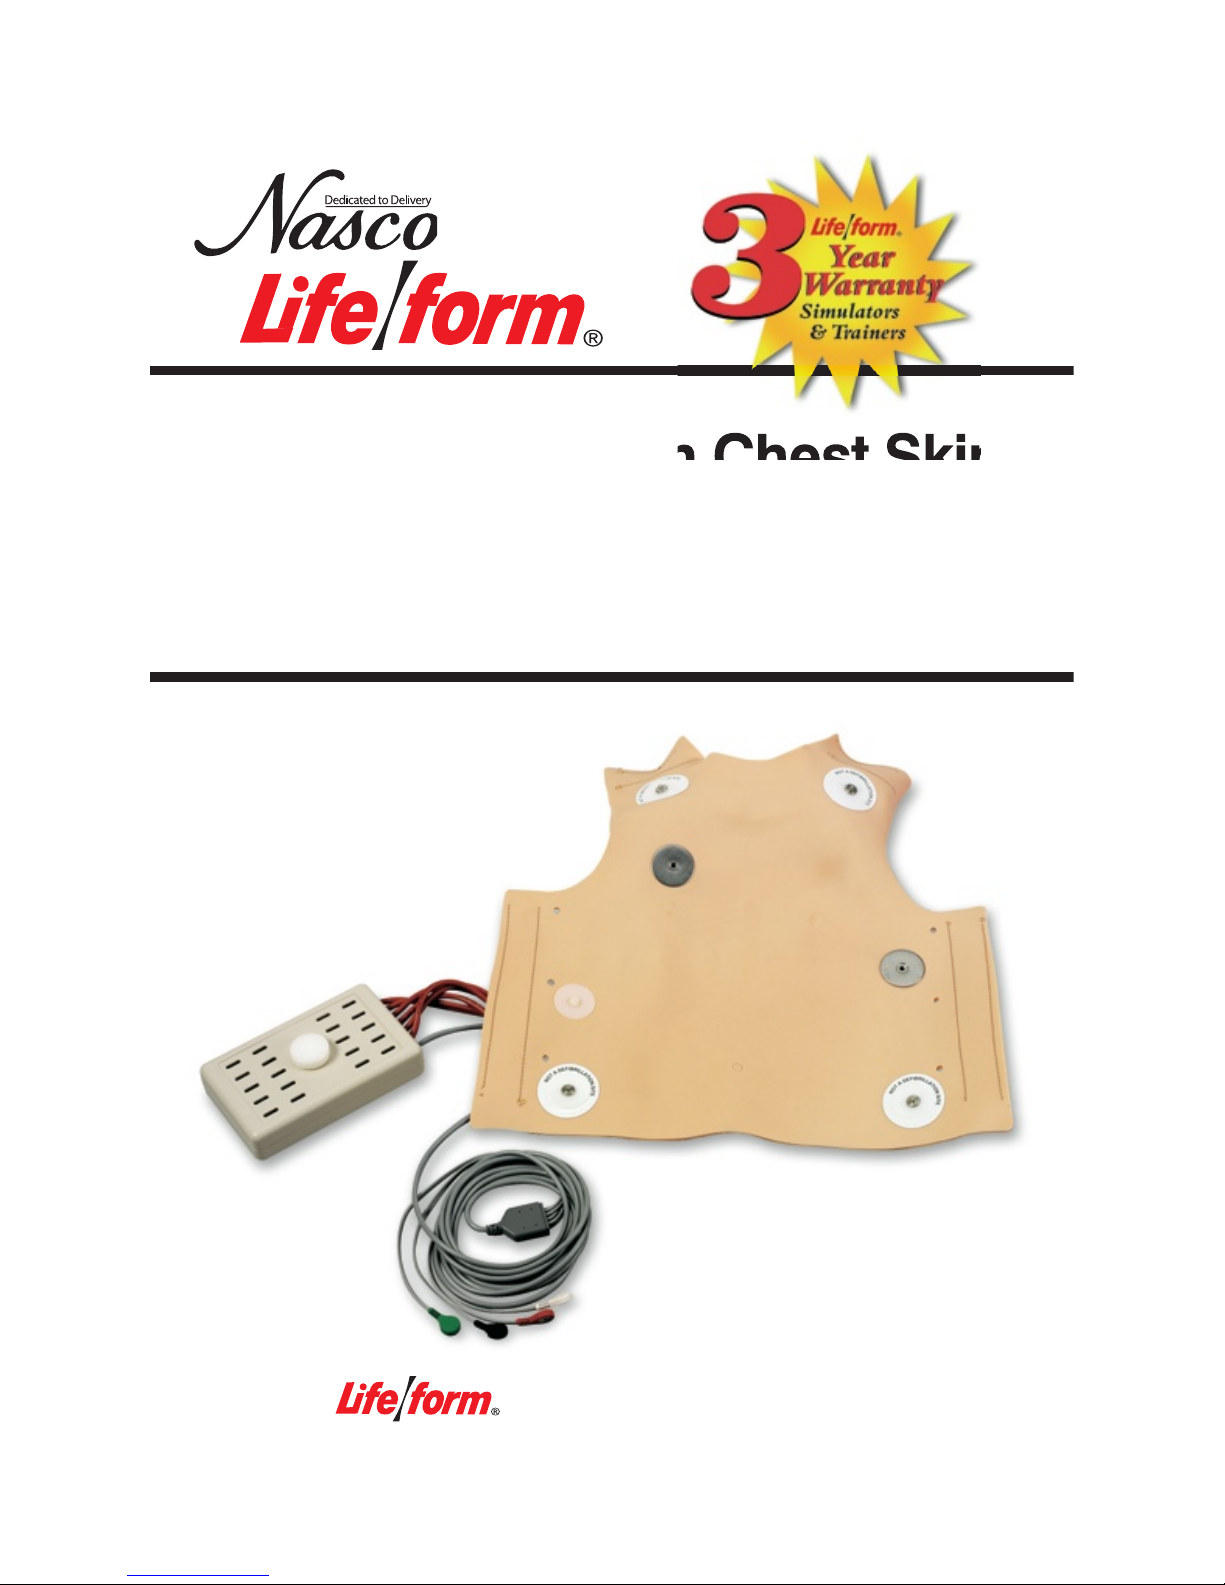
About the Simulator
The
Life/form
®
Child Defibrillation
Chest Skin has been designed to be
placed on the Resusci® Junior* brand
of CPR manikin to enable you, the
customer, to safely practice defibrillation. (See figure 1.)
Figure 1
The Child Defibrillation Chest Skin has
been designed to absorb
a maximum
of 360 joules of energy**.
Although
capable of absorbing 360 joules,
we do recommend that the smallest
energy level possible be used while
training with the skin.
The Child Defibrillation Chest Skin
will enable you to practice defibrillation using manual, semiautomatic,
and automatic external defibrillators
(AEDs). When using
any one of these
types of defibrillators
in training, always
follow the recommended operating
procedures for that particular defibrillator. Our chest skin has been specially designed to accommodate the
Resusci® Junior* CPR manikin.
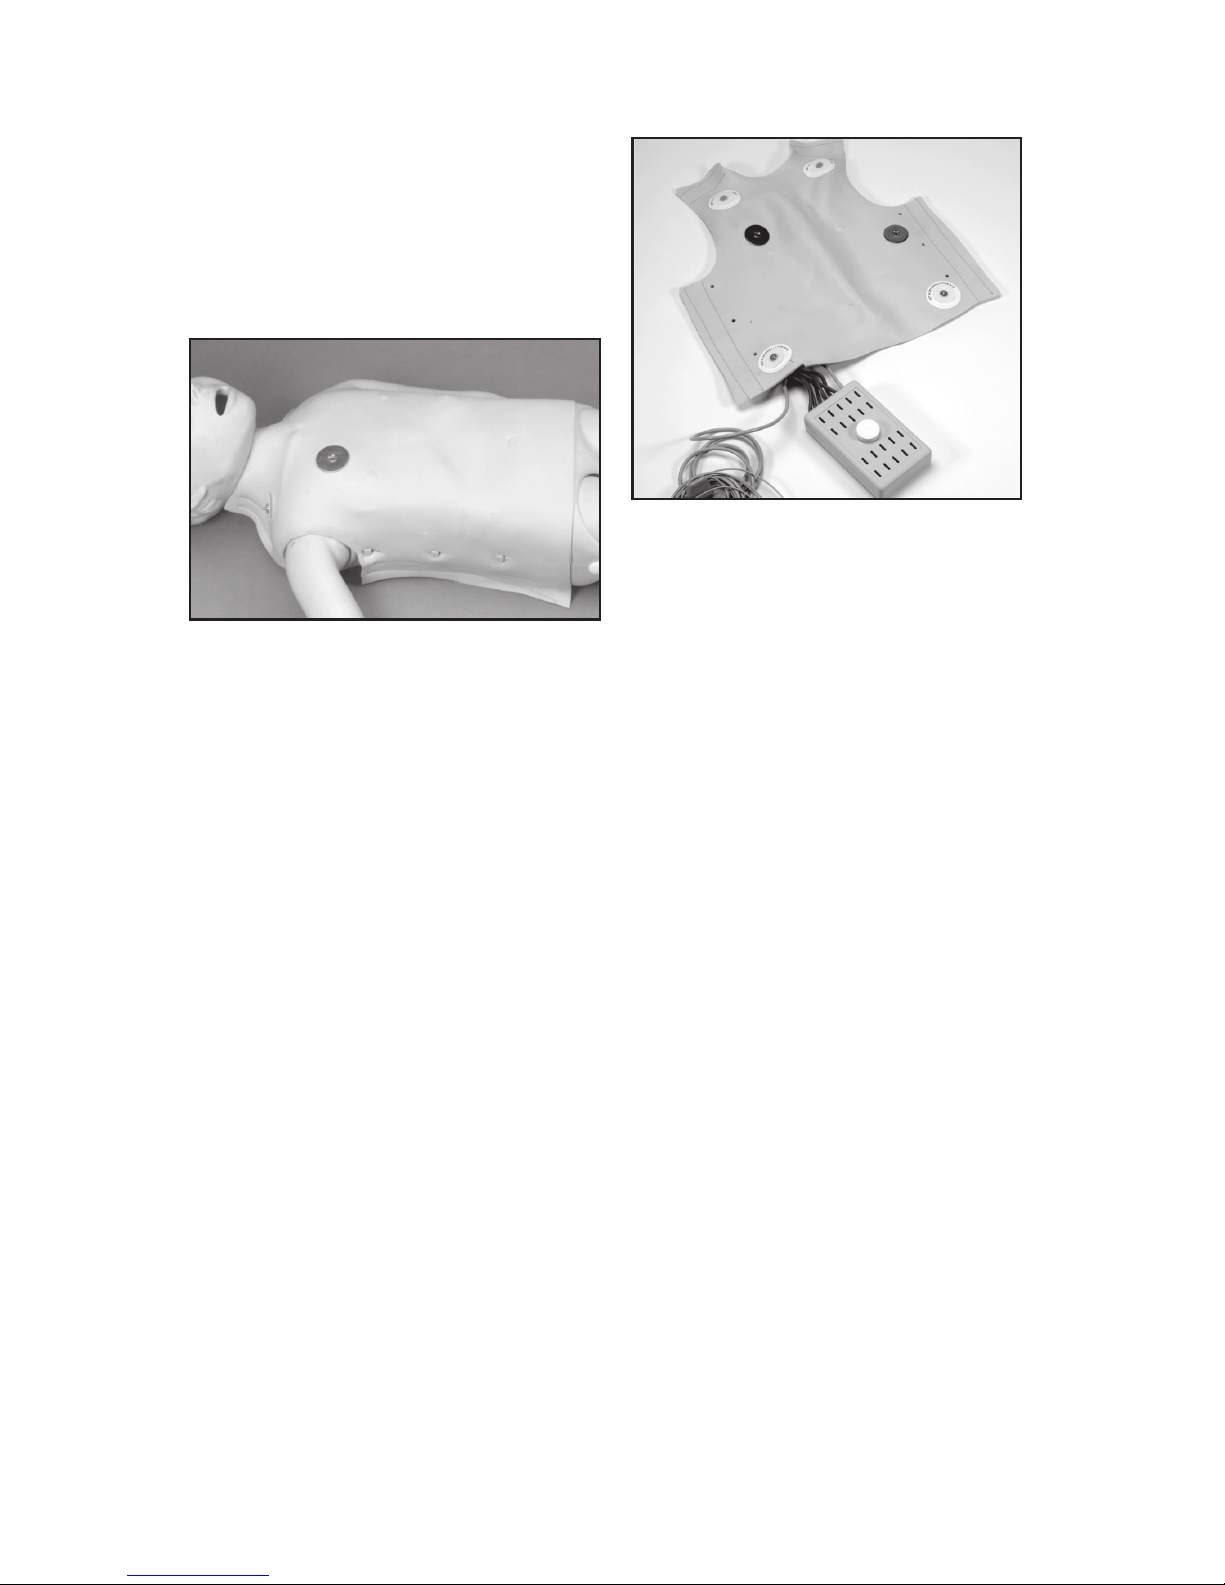
List of Components
(See figure 2.)
•
Defibrillation Chest Skin with
Load Box and Four Lead Snap
Cable Connector
• Bottle of Nasco Cleaner
• Load Box Mounting Plate
• 2 Machine Screws
Figure 2
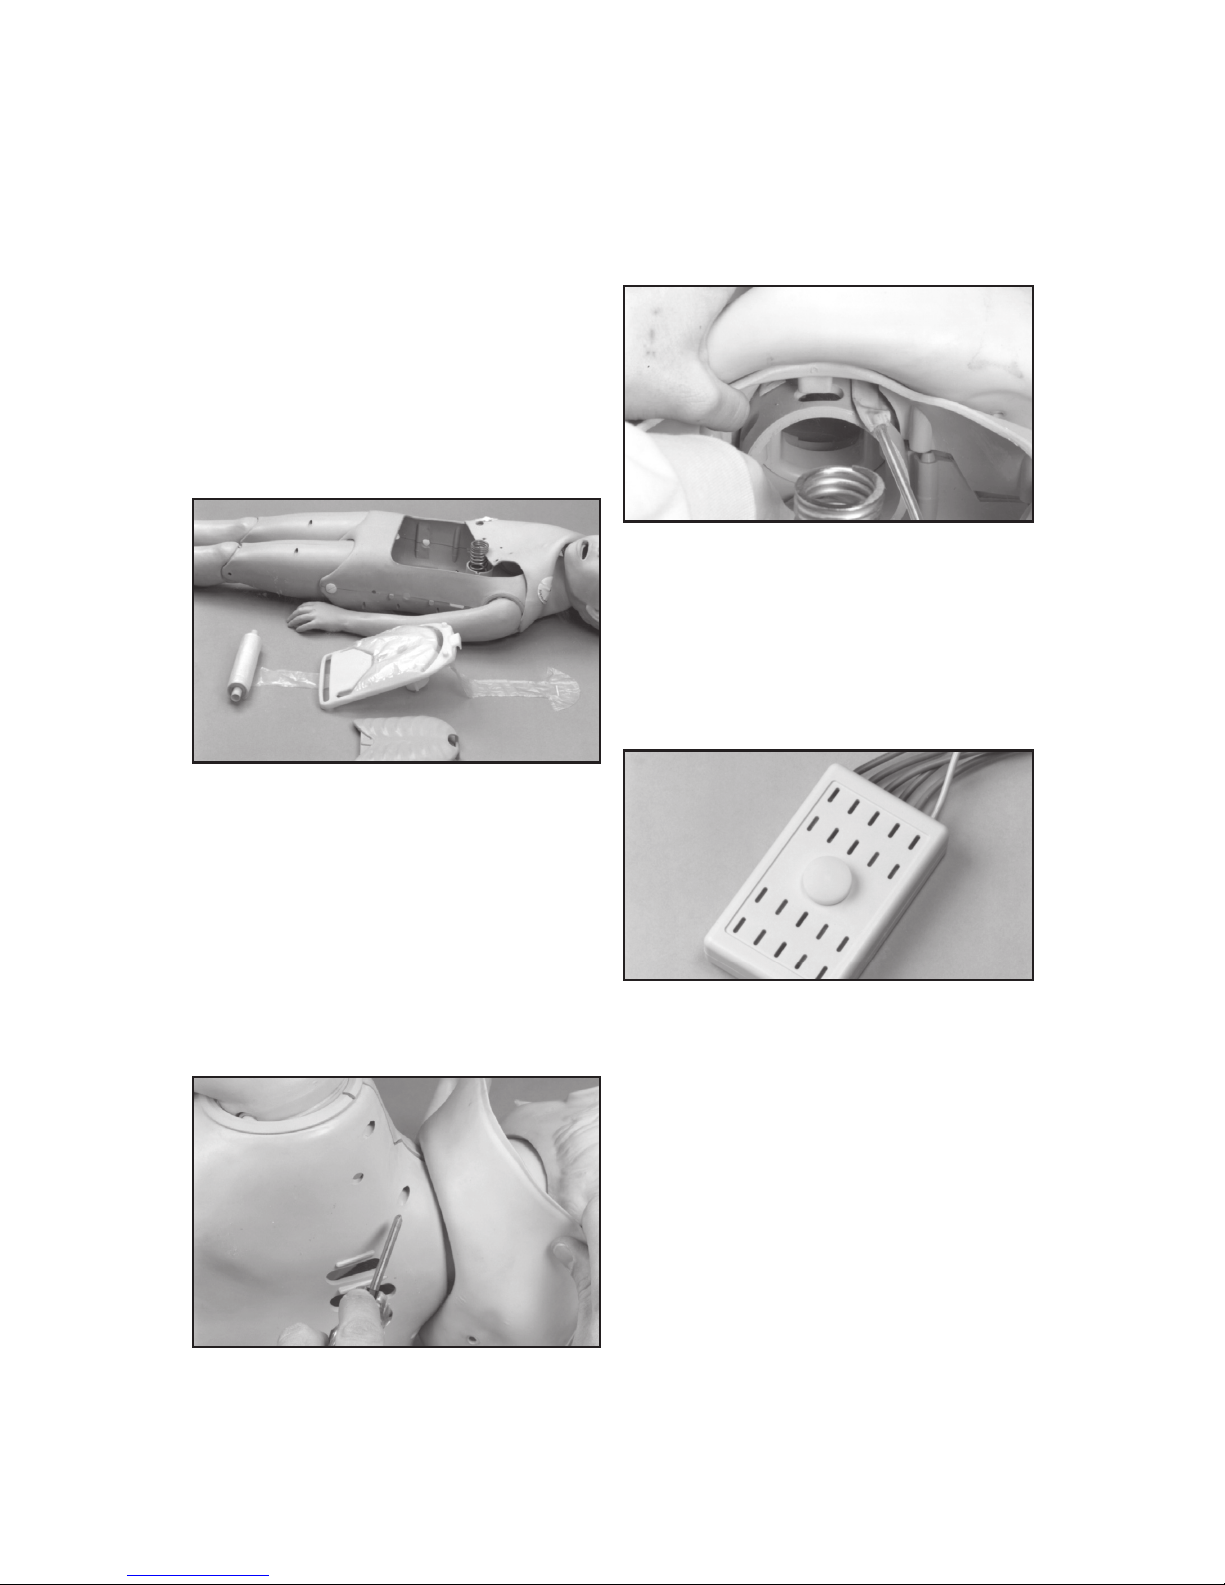
Things You Will Need
Phillips Screwdriver
**Note: 360 joules is the maximum
energy level that Nasco recommends
administering to the defibrillation
chest skin. Energy levels in excess
of 360 joules may cause irreparable
damage to the chest skin, circuitry,
and patient simulator being used –
thus voiding
Nasco’s warranty and
endangering
your equipment. Nasco
assumes no liability for damage or
injury that may be caused by the use
and/or misuse of this equipment. All
normal safety precautions for defibrillation training should be followed and
energy levels should be minimized.
Nasco did not design nor intend this
defibrillation chest skin to be used as
anything other than a training apparatus for defibrillation.
Set Up
The Child Defibrillation Chest Skin
has
been designed to replace the standard outer chest skin on the Resusci®
Junior* CPR manikin,
thus
enabling
you to safely defibrillate.
Please follow the set-up proce
dures
for placing the Child Defibrillation
Chest
Skin on the manikin.
*RESUSCI® JUNIOR IS A TRADEMARK OF LAERDAL MEDICAL CORPORATION.
1
Removing the Regular
Resusci®
Junior* Chest Skin
In order to install our Child Defibrillation
Chest Skin, you must first remove the
outer skin that is currently in place on
your CPR manikin.
1. Unhook the chest skin from the
sides and fold it up over the head.
2. Lift out the lung plate.
3. Remove the lung bag system from
the Resusci® Junior* body.
Figure 3
4. Lift out the chest plate and
remove
the roll of bags. (See figure 3.)
Note: The lung bag roll cannot be
reinstalled when the load box is in
place. The lung bags will have to be
set up one at a time.
5. Detach the rubber tether strap from
the pin at the base of the neck.
Figure 4
6. Turn the body over and remove
the four screws that hold the two
halves of the upper body together.
These are located across the back
of the shoulders. (See figure 4.)
Figure 5
7. Lift the top half of the body slightly
away from the bottom, releasing
the tab that holds the neck in place.
(See figure 5.)
8. Remove the head and neck from
the body and remove the chest skin.
Figure 6
Installing the Load Box
(See figure 6.)
The next step is to install the load box
for the defibrillation chest skin. The
load box is the box attached to the
skin via one large cable and a smaller
cable with four lead snaps attached.
This is the device that will absorb
the
energy being administered to the
chest skin during defibrillation.
Note: It is very important that this
load box is installed properly!
*RESUSCI® JUNIOR IS A TRADEMARK OF LAERDAL MEDICAL CORPORATION.
2
 Loading...