

Life form LF01095U Instruction Manual
BLOOD PRESSURE
SIMULATOR
LF01095U
INSTRUCTION MANUAL
Products by NASCO
901 Janesville Avenue, P.O. Box 901
Fort Atkinson, Wisconsin 53538-0901
1-800-558-9595
www.eNASCO.com • E-mail: lifeform@eNASCO.com
Fort Atkinson
COPYRIGHT © NASCO 2003 PRINTED IN U.S.A. NP 34-91/RV 06-04
Other Available Simulators
LF00698U Adult Injectable Arm (White)
LF00856U Female Catheterization
LF00901U Prostate Examination
LF00906U Ostomy Care
LF00929U Surgical Bandaging
LF00957U Enema Administration
LF00958U Pediatric Injectable Arm
LF00961U Intramuscular Injection
LF00984U Breast Examination
LF00995U Arterial Puncture Arm
LF00997U Adult Injectable Arm (Black)
LF00999U Pediatric Injectable Head
LF01008U Intradermal Injection Arm
LF01012U Heart Catheterization (TPN)
LF01019U Ear Examination
LF01020U Supplementary Ear Set
LF01025U Male Cath-Ed I
LF01026U Female Cath-Ed II
LF01027U Peritoneal Dialysis
LF01028U Suture Practice Arm
LF01036U Spinal Injection
LF01053U Cross-Sectional Anatomy,
Torso, Head
LF01054U Cross-Sectional Anatomy,
Head
LF01062U Pelvic, Normal & Abnormal
LF01063U Stump Bandaging, Upper
LF01064U Stump Bandaging, Lower
LF01069U Cervical Effacement
LF01070U Birthing Station
LF01082U Cricothyrotomy
LF01083U Tracheostomy Care
LF01084U Sigmoidoscopic
Examination
LF01087U
Central Venous Cannulation
LF01095U Blood Pressure Arm
LF01108U Intraosseous Infusion
Simulator
LF01142U Auscultation Trainer
LF01162U Venatech IV Trainer
LF03000U
CPARLENE® Series
LF03601U Adult Airway Management
Trainer
LF03602U Adult Airway Management
on Manikin
LF03603U Adult Airway Management
Head Only
LF03609U Child Airway Management
Trainer
LF03610U Child Airway Management
Trainer Head Only
LF03611U Child Defibrillation Chest
Skin
LF03612U Child IV Arm
LF03613U Child Blood Pressure Arm
LF03614U Child Intraosseous Infusion/
Femoral Access Leg Only
LF03615U Complete Child
CRiSis™
Update Kit
LF03616U Child
CRiSis™ Manikin
LF03617U Deluxe Child
CRiSis™
Manikin with Arrhythmia Tutor
LF03620U PALS Update Kit
LF03621U Infant Airway Management
Trainer Head Only
LF03622U Intraosseous Infusion Right
Leg
LF03623U Infant Airway Management
Trainer
LF03626U Child Femoral Access
Injection Pad Replacement
LF03632U Child Intraosseous Infusion/
Femoral Access Leg on a
Stand
LF03633U Child Airway Management
Trainer with Torso
LF03693U
Basic Buddy CPR Manikin
LF03699U “Airway Larry” Airway
Management Trainer
LF03720U
Baby Buddy Infant CPR Manikin
LF03953U
CRiSis™ Manikin
LF03955U Deluxe CRiSis™ Manikin
LF04001U
GERi™ Nursing Manikin
LF04020U
KERi™ Nursing Manikin
LF04021U
KERi™ Basic Manikin
LF04022U
KERi™ Advanced Manikin
LF04030U
GERi™ Advanced Manikin
LF04040U
GERi™ Basic Manikin
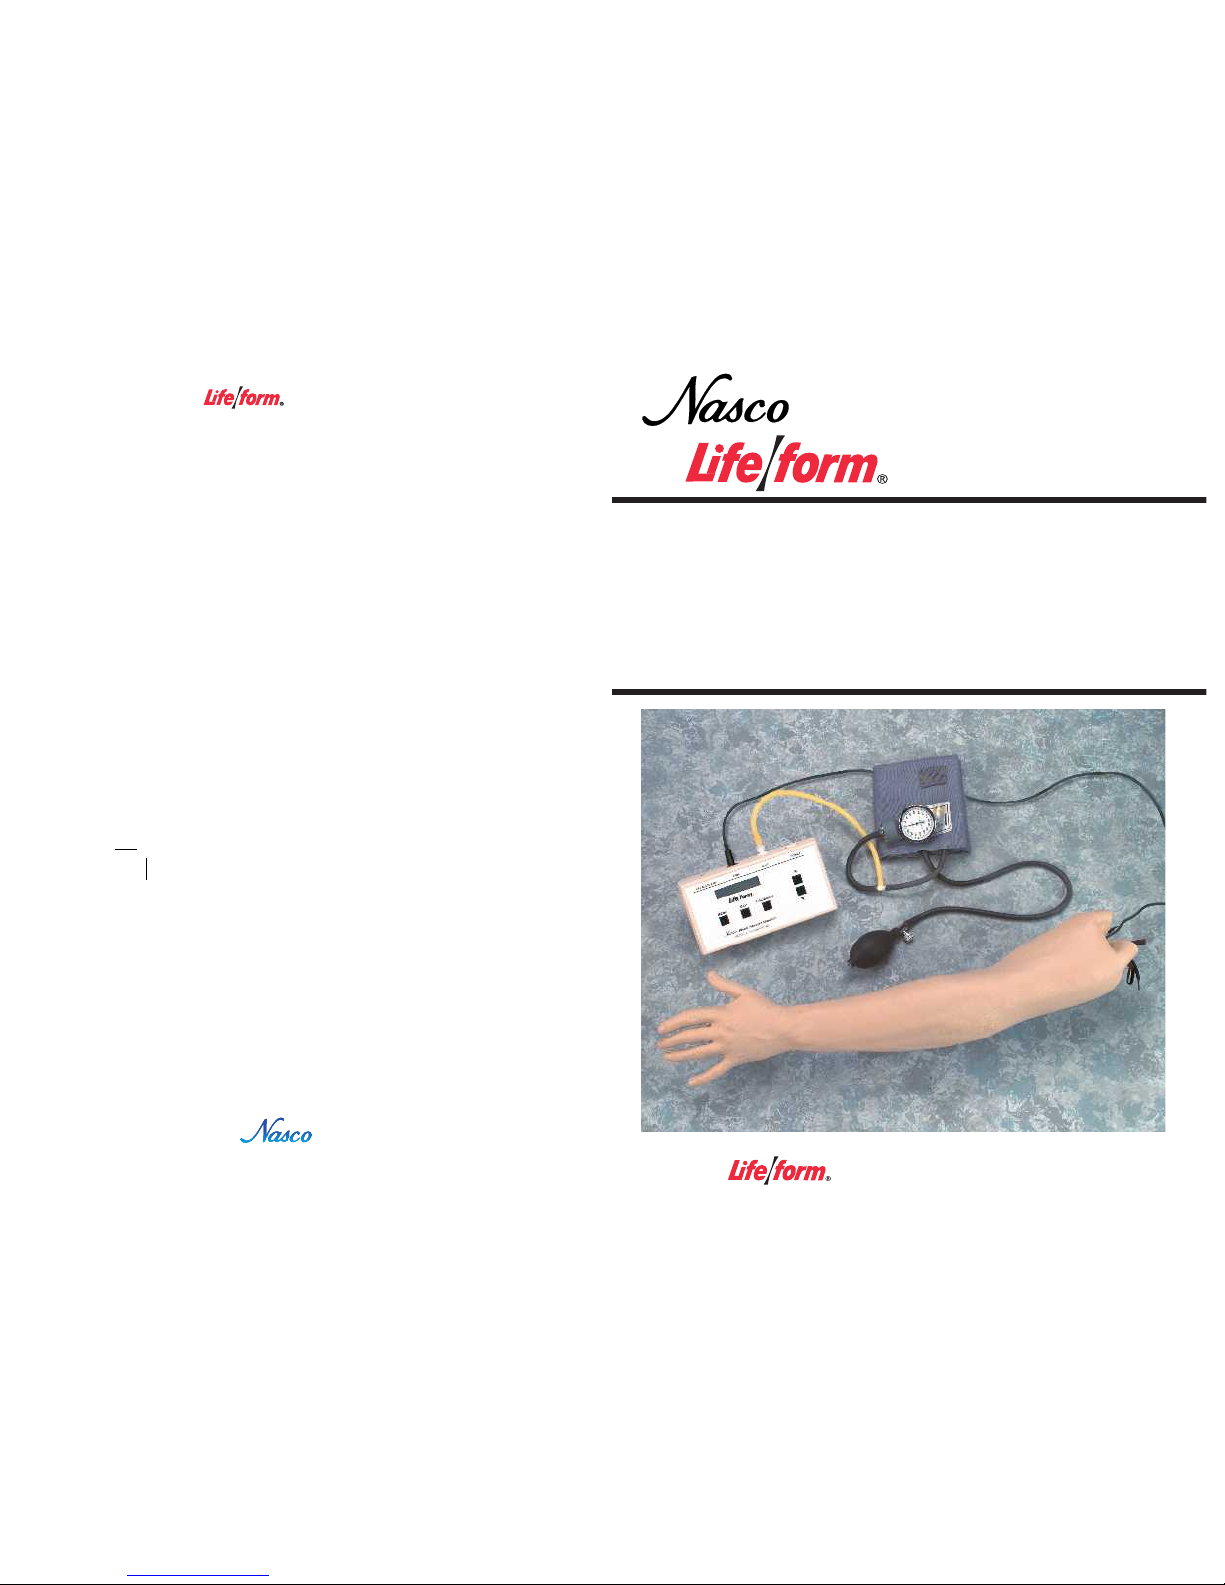
About the Simulator…
The NASCO
Life/form
®
Blood Pressure
Simulator is designed for years of main
tenance free operation as a training tool
for not only the nurse, doctor, or pre hospital healthcare provider, but also for
anyone involved
in the training of health
care professionals.
The NASCO
Life/form
®
Blood Pressure
Simulator has digitally recorded blood
pressure sounds that can be varied by pulse
rate and volume. The different Korotkoff
phases can be identified and an optional
auscultatory gap can be selected. A pal
pable radial pulse is present in the wrist.
For additional uses, purchase the Blood
Pressure Speaker System (SB20146U) for
group demonstrations or review.
List of Components
1. Case
2. Arm with speaker wire
3. Electronic control unit
4. 6 “AA” batteries
5. Sphygmomanometer
General Instructions for Use:
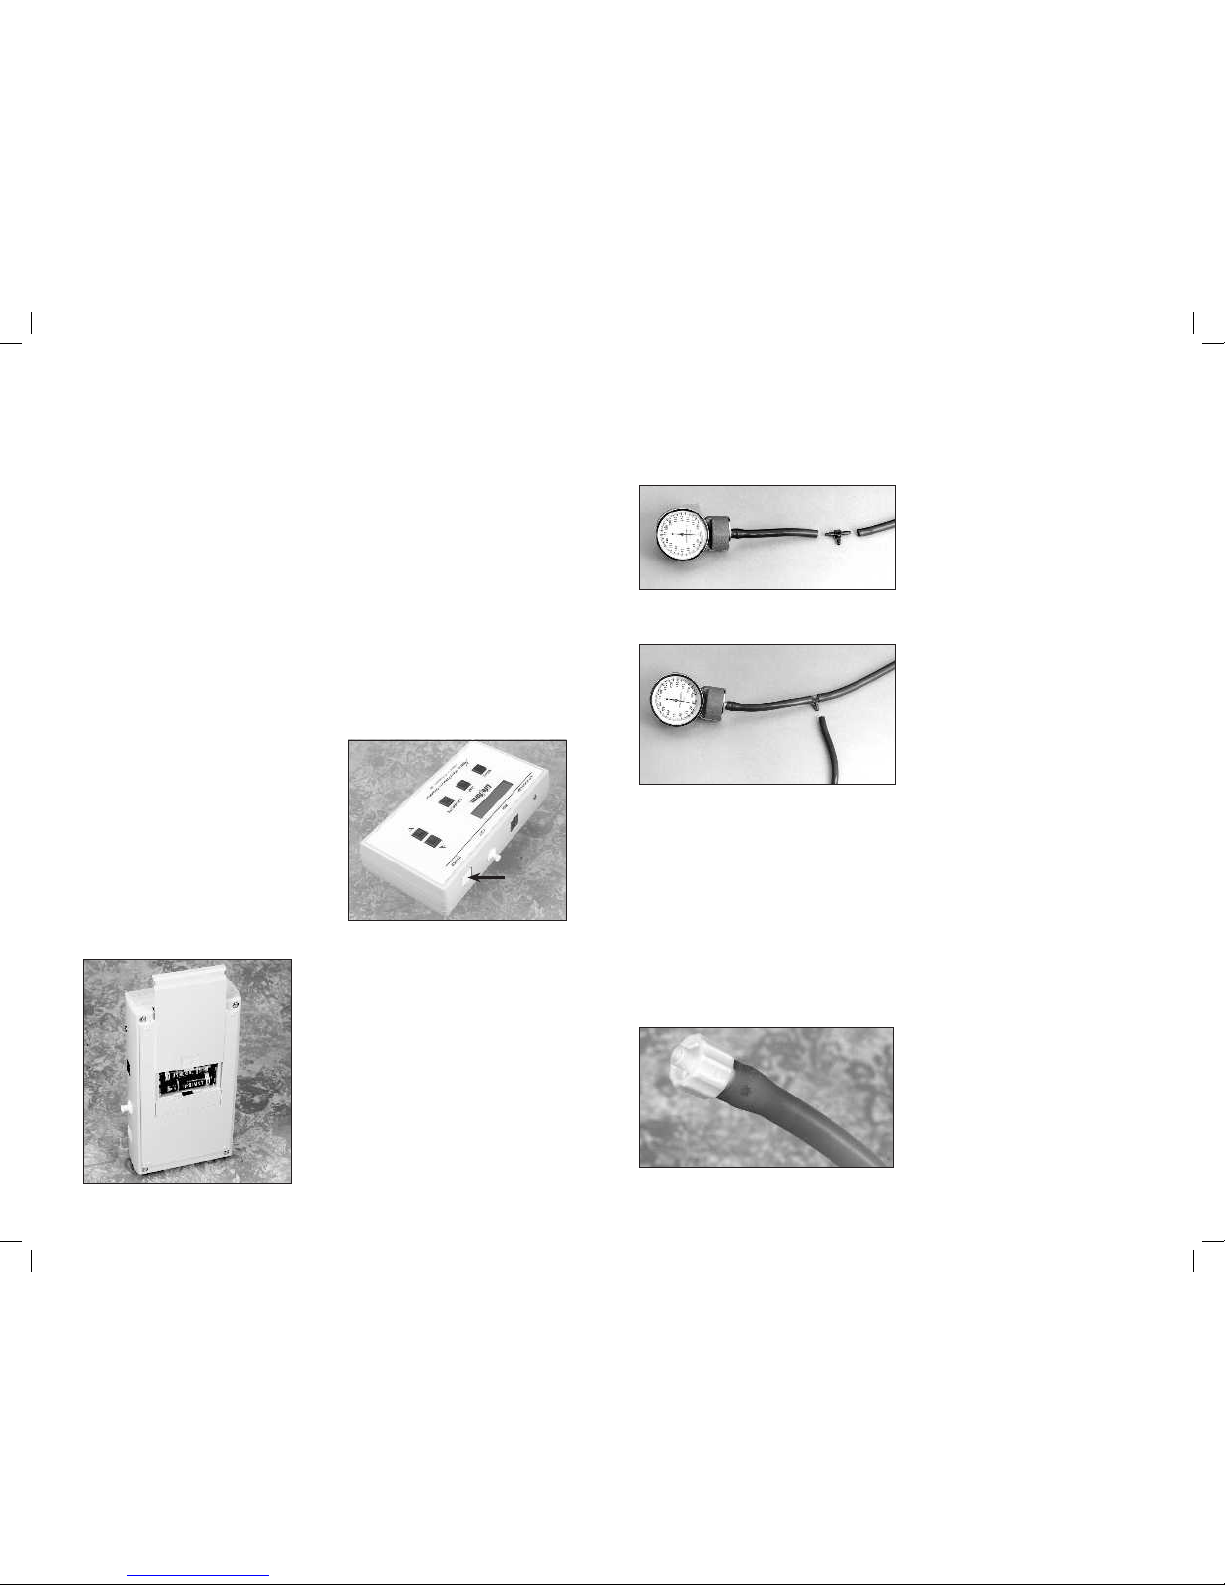
Installing the Batteries
Take the Blood Pressure Electron ic
Control Unit from the box and turn it over,
placing it face down onto a padded work
surface. Locate the “Open” compartment
on the back of the panel where the bat
teries are to be installed. (See figure
1.) Place your thumb or index finger on
the “Open” compartment and push up.
This will open the battery compart
ment. The compartment is marked as to
the “+” and “–” positions of the batteries.
The battery bracket is now accessible to
the user.
Install 6 “AA” batteries as indicated by
the orientation diagram embossed in the
bottom of the bracket. It is recommend
ed that alkaline b atteries be used for
increased battery life. After the batteries
have been properly installed, reassemble
the Blood Pressure Simulator by simply
reversing the disass embly procedures.
Place the unit face up on the work surface and turn it on by pressing the on/off
switch on the top right of the
unit. (See
figure 2.) Observe the display and verify
that a readable display is pre
sent, indicat-
ing proper battery installation.
Note: The control box has a ba ttery
saving feature which will turn the unit off
after about 8-10 minutes if no keys are
used within that period of time.
Take the T-fitting and insert it between
the two ends of tubing that were
previ-
ously cut. (See figure 15.) Assemble
the
portion of pressure line tubing over the
remaining barbed end on the T-fitting.
(See figure 16.)
Lastly, take the loose end of the tub
-
ing and push the female luer fitting into
it. (See figure 17.) Attach the female
luer fitting to the fitting marked CUFF at
the top of the unit. Once all of the nec
essary connections have been properly
made, go to the section titled “Calibration
Procedures” and calibrate the unit. When
the calibration procedures have been
completed, the simulator is ready for use.
Figure 2
Figure 1
1
6
Supplies/Replacement Parts for
Blood Pressure Simulator
LF01096U Electronic Control Unit
with Sphygmomanometer
SB20146U Blood Pressure Speaker
System
Figure 15
Figure 16
Figure 17
The next step is to connect the simulated arm and speaker assembly along
with the sphygmomanometer cuff and
gauge assembly included with the unit.
First, locate the end of the pressure line
attached to the sphygmomanometer that
has the female luer fitting attached to
it. Attach this to the male luer fitting at
the top of the unit marked CUFF. (See
figure 3.) After the pressure line fitting
has been properly installed, locate the
plug that is at the end of the wire which
extends from the simulated arm assembly.
Insert the plug from the arm into the
jack at the top of the unit marked ARM.
(See figure 4.) At this point the Blood
ON/OFF
SWITCH
 Loading...