

Page 1
SM22 ASSEMBLY INSTRUCTIONS
M051-K50-A163
Page 2
SM22 Assembly Instructions
The SM22 comes partially assembled. Follow the steps below to complete the assembly.
WARNING: THE SM22 IS LARGE AND HEAVY. USE CAUTION WHEN ASSEMBLING
THIS MACHINE. IT IS RECOMMENDED THAT THIS MACHINE BE BOLTED TO THE
FLOOR.
MATERIALS AND TOOLS REQUIRED FOR ASSEMBLY
1. Socket wrench with 9/16” socket
2. 9/16” open end wrench
ASSEMBLY TIME
Two people can accomplish this assembly in approximately 1 hour.
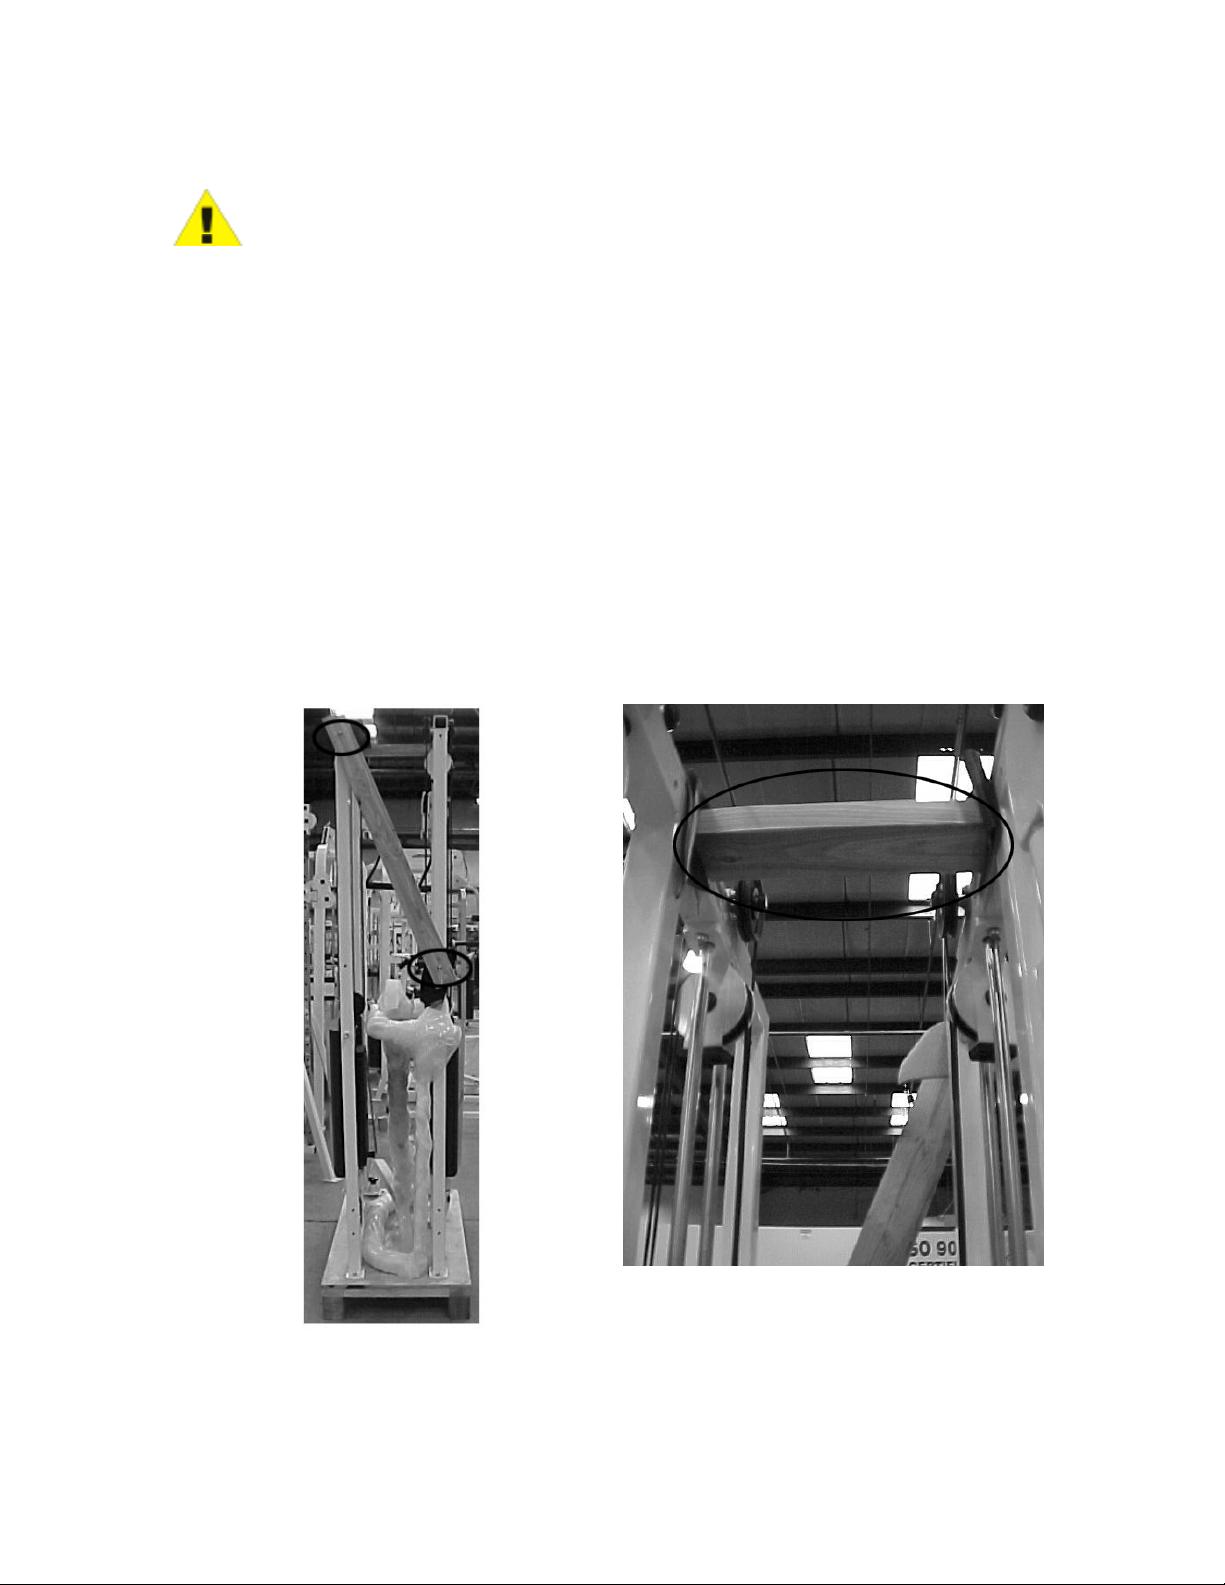
UNPACKING
Figure 1. SM22 on pallet (cross bracing circled).
2
Page 3

SM22 Assembly Instructions
Follow the steps below when unpacking the SM22.
1. Remove the cross brace and top brace 2 x 4’s (circled in Figure 1).
2. Remove the bolt bag.
3. Unbolt the Bottom Brace and lift it off of the pallet.
4. Unbolt the Top and lift it off of the pallet.
5. Slide the Back Brace off of the pallet.
WARNING: THE SIDES OF THE SM22 ARE VERY UNSTABLE UNTIL THE MACHINE
HAS BEEN COMPLETELY ASSEMBLED. SOMEONE SHOULD BE HOLDING THE
SIDES UNTIL THEY HAVE BEEN ASSEMBLED.
Figure 2. Sides lagged down.
6. WITH SOMEONE HOLDING UP THE LEFT SIDE, unbolt the left side from the pallet.
Carefully remove the side from the pallet and make sure it is placed in a stable position.
7. Repeat Step 6 for the Right Side.
8. Remove the packaging materials from the machine and discard it along with the lag bolts
and the pallet.
3
Page 4

SM22 Assembly Instructions
ASSEMBLY
3
1
2
3/8” x 2-3/4” bolt (12)
Caplug washer
Nyloc nut
Caplug Caplug
Figure 3. SM22 assembly.
4
Page 5

SM22 Assembly Instructions
You will be using 3/8” x 2-3/4” bolts in the configuration shown in Figure 1 to assemble this
machine. Using a 9/16” socket and open end wrench:
1. Connect the Back Brace (#1) to the sides. Leave the bolts loose until all parts have been
assembled.
2. Connect the Bottom Brace (#2) to the sides. Leave the bolts loose until all parts have
been assembled.
3. Connect the Top (#3) to the sides. Leave the bolts loose until all parts have been
assembled.
4. Go back and tighten all bolts. Overtightening the bolts will make it difficult to put the
Caplug on the nut.
5. Place the Caplugs on all the Caplug washers.
6. Check to see that the weight stack pins slide easily into all weight plates.
7. Check to see that the pulley adjustment mechanism works correctly by lifting the handle
(see Figure 2) and placing it into each of the two holes. Then attach a handle to the cable
and lift the weight stack in each of the variable resistance positions.
Figure 4. Adjusting the pulleys.
5
Page 6

SM22 Assembly Instructions
WEIGHT STACK STICKER PLACEMENT
The figure below shows where to place the weight stack stickers. The row of lower weight plate
numbers needs to go above the “Lighter” sticker and the row of higher weight plate numbers need
to go above the “Heavier” sticker. The sticker edge should be placed 1-1/4” from the center of the
pin holes.
1.25”
1.25”
2.5
5.0
7.5
10.0
12.5
15.0
17.5
20.0
22.5
25.0
27.5
30.0
32.5
35.0
37.5
40.0
42.5
45.0
47.5
LIGHTER
5
10
15
20
25
30
35
40
45
50
55
60
65
70
75
80
85
90
95
HEAVIER
Figure 5. Weight plate stickers.
To apply the weight plate stickers:
1. Peel off the backing.
2. Line up sticker backing edge with holes as shown in the figure. Make sure the sheet of
labels is straight.
3. Press down each sticker.
4. Slowly and carefully remove the top strip. Make sure each plate number is left behind.
PARTS LIST
Caplug washer 0017-00104-0368 24
3/8” x 2-3/4” hex bolts 0017-00101-1408 12
3/8” Nyloc nut 0017-00103-0217 12
Caplug cap 0017-00042-0969 24
6
Description Part Number Quantity
 Loading...