

Page 1

Übersetzung
Installation instructions Page 10
Multi-temperature wine cabinet
EN
7080 198-00
UWT 1682
Page 2
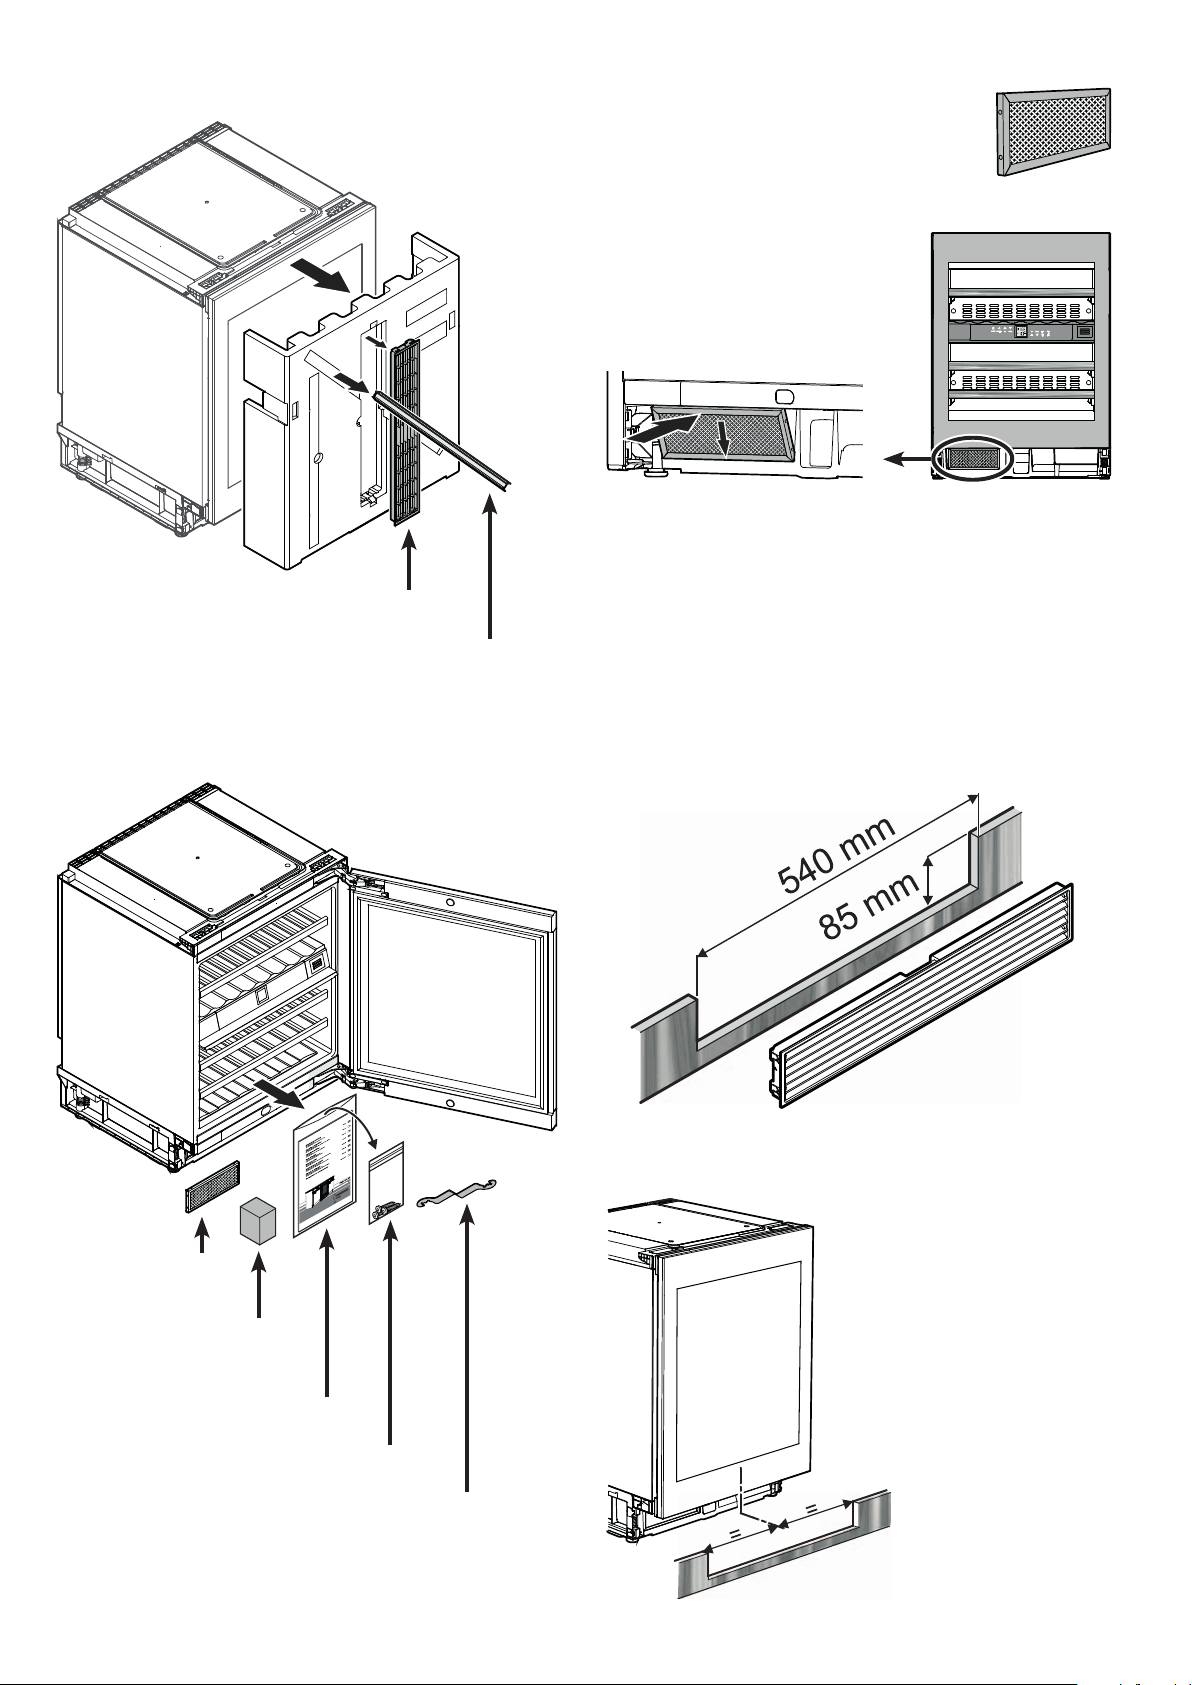
Supplied accessories
Mounting the dust lter
The supplied dust filter prevents that dirt enters
the motor compartment, reducing the refrigeration
performance. Therefore always install the dust filter.
Remove the protective lm from the
dust lter.
Insert the lter at the bottom and click
into place at the top.
Ventilation grille
Cover strips
Appliance venting
The required air ow is directed through the plinth.
It is important to use the provided ventilation grille for the ventilation opening.
Cut-out section in the plinth panel
Dust lter
Foam moulding for ventila-
tion duct in appliance plinth
Accompanying documents
Retaining screws for installation
Spanner to adjust the height of the appliance
10
Important
The cut-out section in the
plinth panel must be centred
in relation to the appliance.
Page 3
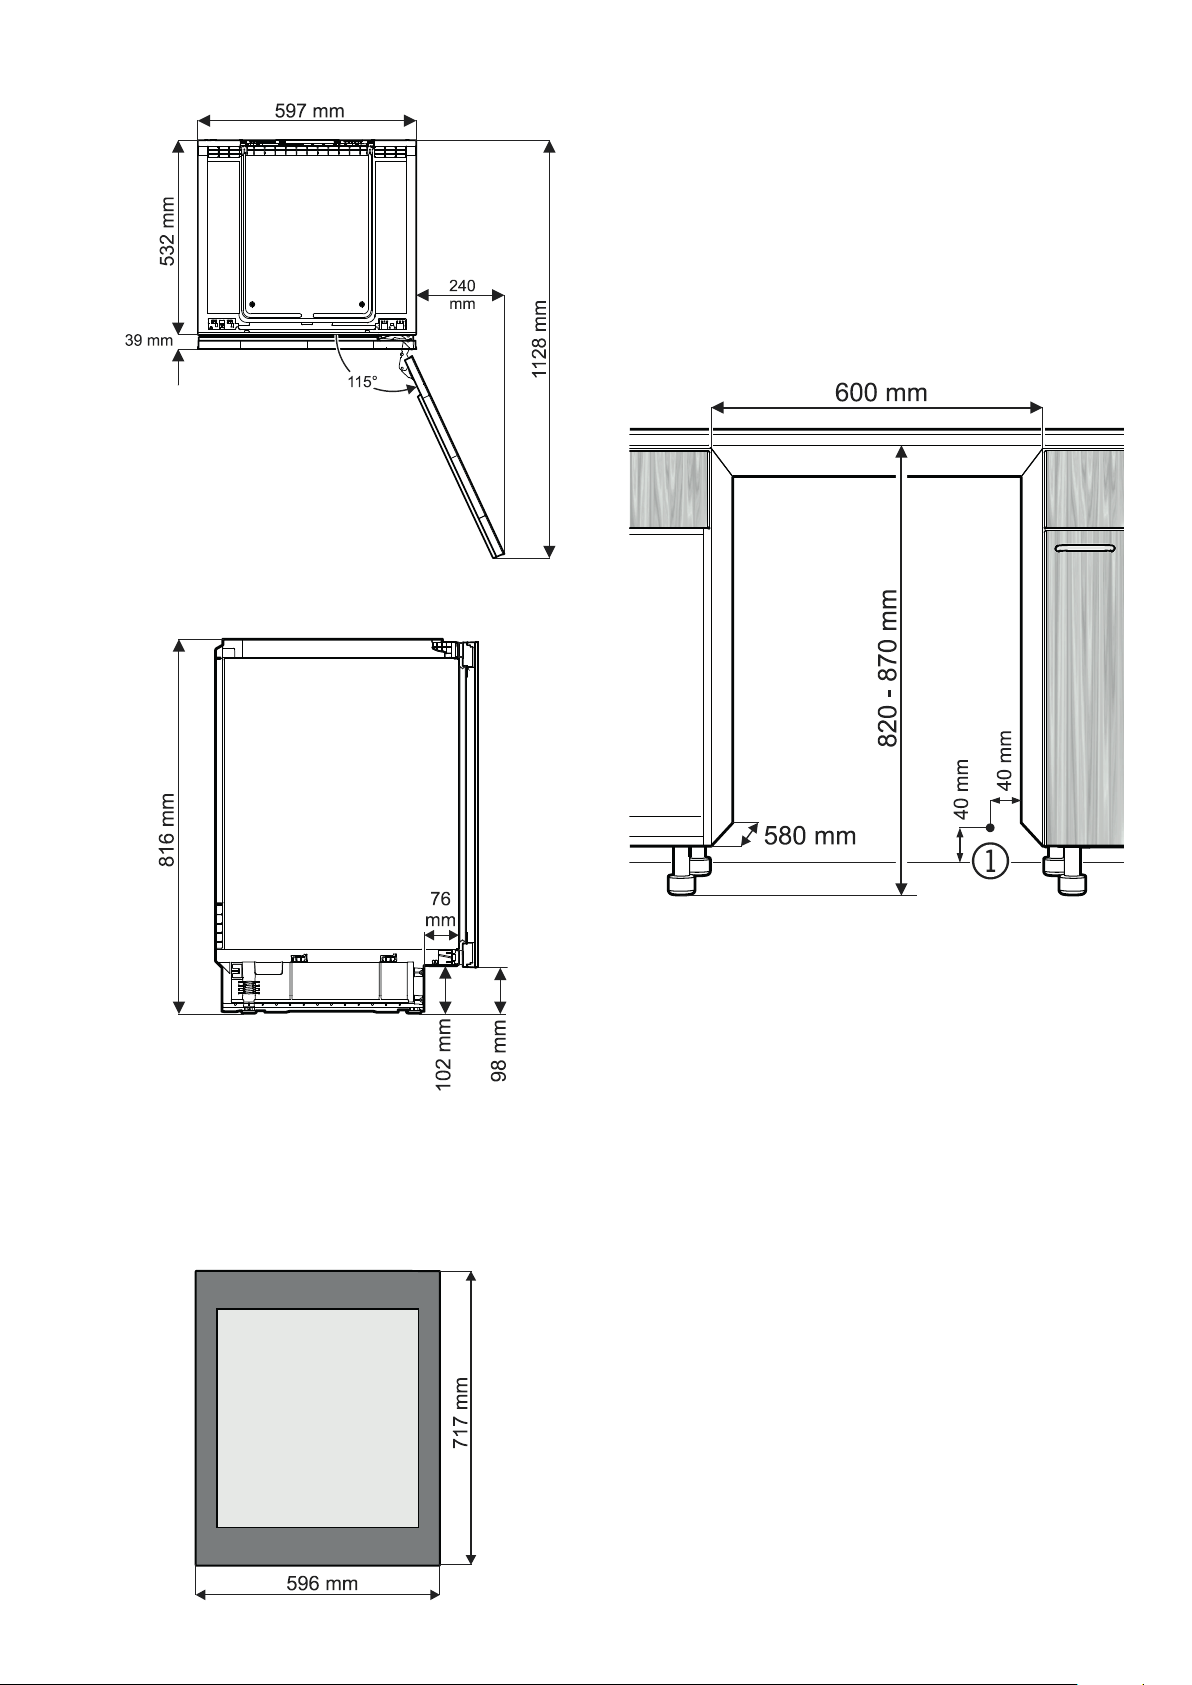
Appliance dimensions
View from
above
Maximum door
opening angle
Side view
EN
Installation dimensions
Important
In order to avoid any problems when installing the appliance and
to avoid damage to the appliance, the following conditions must
be complied with.
The oor on which the appliance stands must be
horizontal and level.
The kitchen unit must be aligned horizontally and
vertically.
Height when adjustable feet have been
screwed in as far as they will go.
Maximum height adjustment = 50 mm
Dimensions of appliance door
1 In this area, the power cord comes out of the appliance rear.
Free length of the power cord = 2000 mm
Choose the position of the socket considering these specications.
The socket must not be situated behind the appliance and must be easily accessible.
11
Page 4

Installing the appliance
1.
Remove cover
Apply the cover strips to the leading edge of
the appliance housing on the left and right.
1
.
1.
3.
3.
Slide in the appliance until the front surface of the appliance door
is ush with the unit fronts.
When sliding in the appliance, make sure that the mains
cable is not damaged!
2.
2.
Adjust the height of the appliance to 4 mm less than the recess
height by turning the adjustable feet clockwise.
4.
4.
• Screw the appliance to the
body of the unit at the top lefthand side.
• Click cover into place again.
Turn the spanner anticlockwise to raise the appliance front and
clockwise to lower it.
Position the spanner accordingly
Important
The appliance must be aligned horizontally and vertically. If the appliance is not level, the main body of the
appliance can be deformed and the door will not close
properly.
12
Page 5

5.
5.
Screw the appliance to the body
of the unit at the bottom on the
left and right.
EN
7.
Insert the ventilation grille in the plinth panel.
7.
6.
Insert the foam moulding approx. 10 mm into the opening
in the appliance plinth as indicated.
6.
Important
If the foam moulding is not installed, the appliance will not
achieve its full refrigeration performance during operation.
8.
8.
Fit the plinth panel. In doing so, the foam moulding is pushed
backwards into its nal position.
Important
The foam moulding mu st be touching the ventilation grille.
13
Page 6

Changing over door hinges
Door hinges should only be changed by a trained expert.
Changing the door hinges must be done by two people.
1.
3. Remove screws from upper hinge.
3.
4.
1. Remove covers.
4. Remove door.
5.
Important
The door must now be held secure by somebody.
2. Remove screws from lower
hinge.
14
2.
5. Compress the covers in the places shown,
release and remove.
Page 7

6.
EN
9.
6. Unscrew hinges and re-fit on the opposite side
at diagonals to the original position.
7.
9. Remove the upper retaining bracket
and transfer to the opposite side.
10. Remove the lower retaining
bracket and transfer to the op-
10.
posite side.
7. Fit covers and click into place.
8. Remove the covers.
11.
8.
11. Fit the door on the appliance.
Important
The door must now be held secure by
somebody.
15
Page 8

12.
12. Screw on the hinge at the top left.
15.
Tighten screws.
15. Close door and check that it
is aligned with the side walls
of the appliance.
Adjusting the lateral tilt of the door
If the door is at an angle, adjust the angle.
13.
13. Screw on the hinge at the
bottom left.
Tighten screws.
16.
16. Undo the screws.
Align the door at the side.
Tighten screws.
14.
14. Remove spacer.
Turn spacer through 180° and
re-t on the opposite side.
16
Page 9

17.
17. Fit covers.
EN
17
Page 10

Liebherr Hausgeräte Lienz GmbH
Dr.-Hans-Liebherr-Strasse 1
A-9900 Lienz
Österreich
www.liebherr.com
*708019800*
 Loading...