


SFPW 360 B1
Contents
Introduction ........................ 3
About these operating instructions .............3
Intended use ..............................3
Used Warning types .......................4
Safety ............................ 5
Important safety instructions .................. 5
Safety instructions for batteries ................ 6
Package contents ................... 8
Description of components ........... 9
Use .............................. 10
Requirements for the set-up location ...........10
Connecting to a power supply ...............10
Displays in basic mode .............. 13
Handling and operation ............. 14
Setting the date and time manually ...........14
Setting 12/24-hour mode ..................16
Changing the temperature unit ...............16
Changing the language of the weekday display . 16
Show the calendar week ...................17
Setting a second clock time .................17
Setting the alarm time ......................18
Activating/deactivating the alarm ............19
Switching off the alarm signal ...............19
Snooze function ..........................19
Battery change display ....................20
Switch on/dim the display lighting ............20
Projection function ........................20
Charging USB devices .....................22
US - EN │ 1 ■

SFPW 360 B1
Troubleshooting ................... 22
Cleaning. . . . . . . . . . . . . . . . . . . . . . . . . . 23
Storage .......................... 23
Disposal .......................... 24
Disposal of device ........................24
Disposal of batteries .......................24
Disposal of the packaging ..................24
Appendix ......................... 25
Technical specifications ....................25
FCC Compliance Statement .................26
3 year limited warranty ....................27
Distributor ...............................29
■ 2 │ US - EN

SFPW 360 B1
Introduction
About these operating instructions
Congratulations on purchasing your new device.
You have selected a high-quality product. The
operating instructions are part of this product. They
contain important information about the safety, usage
and disposal of the product. Before using the product,
please familiarize yourself with all operating and safety information. Use the product only as described and
for the specified range of applications. Keep these
operating instructions in a safe location. In addition,
please pass these documents on, together with the
product, to any future owner.
Intended use
The projection alarm clock:
– shows the time, date and room temperature,
– projects the time or the temperature onto the wall
or ceiling and
– functions as an alarm clock.
In addition, the device has a USB port that can be
used to charge smartphones or other mobile devices.
The device is intended solely for private households
and not for the commercial sector.
US - EN │ 3 ■

SFPW 360 B1
Used Warning types
The following types of warning are used in these
operating instructions:
► WARNING indicates a hazardous situation that, if
not avoided, could result in death or serious injury.
► NOTICE indicates information that is considered
important, but not hazardous (e. g. messages
related to property damage).
A tip provides additional information that will
assist you in using the device.
■ 4 │ US - EN
SFPW 360 B1
Safety
This section contains important safety instructions
for handling the device. Improper use may result in
personal injury and/or property damage.
IMPORTANT SAFETY INSTRUCTIONS
READ ALL INSTRUCTIONS BEFORE USE!
FOR HOUSEHOLD USE ONLY!
SAVE THESE INSTRUCTIONS
■ This product is not intended for use by persons
(including children) with reduced physical, sensory
or mental capabilities or lacking experience and
knowledge unless supervised or instructed in safe
product use by a person responsible for their
safety. Children should be supervised to ensure
they do not play with the product.
■ Before operating the device, ensure that the prod-
uct and the power adapter and cable connections
are undamaged! Never operate a device that is
damaged.
■ Use only power
the user manual
■ Do not attempt to repair the mains adapter or
the welded power cable. In the event of a defect,
the entire mains adapter must be replaced.
Contact the
■
■ Before operating the device, ensure that the
supplied power voltage matches that required by
the power adapter.
service hotline.
Use the device and the power adapter
only in dry interior rooms.
adapter
.
listed in
US - EN │ 5 ■

SFPW 360 B1
■ The mains power socket that is used must be easily
accessible at all times so that the power adapter
can be quickly removed from the mains power
socket in the event of an emergency.
■ Do not expose the device to moisture or direct
sunlight.
■ Do not look directly into the light from the projec-
tion
lens, as this can cause permanent damage to
your eyes. Never aim the light directly at people
or animals
.
Safety instructions for batteries
Mishandling the batteries can cause fires, explosions, leakages, or other hazards! In order
to handle batteries safely, please observe the
following safety instructions:
► Do not throw the batteries into a fire and do not
subject them to high temperatures.
► Do not open, deform, or short-circuit batteries,
since this can lead to chemical leakage.
► Do not attempt to recharge the batteries. Do
not charge batteries unless they are explicitly
labeled as "rechargeable". There is a risk of
explosion!
► Never heat batteries in order to revive them.
► Check the condition of the batteries at regular
intervals. Leaking chemicals can cause perma-
nent damage to the device. Take particular care
when handling damaged or leaking batteries.
Risk of acid burns! Wear protective gloves.
■ 6 │ US - EN

SFPW 360 B1
► Chemicals that leak from a battery can cause
skin irritation. In the event of contact with the
skin, rinse with plenty of water. If the chemicals
come into contact with your eyes, rinse them thor-
oughly with water, and do not rub them. Consult a
physician immediately.
► Keep batteries out of the reach of children.
Children might put batteries into their mouth and
swallow them. If a battery has been swallowed,
seek medical assistance immediately. Also,
contact your local poison control center.
► Do not mix alkaline, carbon-zinc (standard),
Ni-Cd (rechargeable) or other types of batteries.
► Use only the correct type and size of battery
indicated.
► Always insert the batteries the right way (ob-
serve correct polarity); otherwise there is a risk
that they could explode.
► Clean the battery contacts and also those of the
device prior to battery installation.
► If you do not intend to use the device for a long
time, remove the batteries.
► Remove discharged batteries from equipment
promptly to avoid possible damage from
leakage.
► Always replace the whole set of batteries at one
time, taking care not to mix old and new ones.
► If the battery compartment does not close se-
curely, stop using the product and keep it away
from children.
US - EN │ 7 ■

SFPW 360 B1
Package contents
The following components are included in delivery:
Projection alarm clock
Power adapter
3 type AAA batteries
These operating instructions
Check the package for completeness and signs
of visible damage. If the delivery is incomplete
or damage has occurred as a result of defective
packaging or during transport, contact the
service hotline.
♦ Unpack all parts of the device from the packaging
and remove all packaging materials.
Risk of suffocation!
► Do not allow children to play with the packaging
materials! Keep all packaging materials away
from children.
■ 8 │ US - EN

SFPW 360 B1
Description of components
For illustrations see fold-out pages
Figure A
1 button
2 Projection lens
3 Swivelling projection arm
4 ROTATION TIME/TEMP button
5 – /WEEK LANG button
6
+/12/24
7 °C /°F
8 SET button
9 On/Off switch (Alarm 1)
0 On/Off switch for permanent projection
q On/Off switch
w USB port
e Connection socket for the power adapter
r Battery compartment
t Battery compartment cover
z FOCUS dial
u Power adapter
Figure B
i Month display
o Day display
p Weekday/calendar week display
a Battery change display
s Time zone symbol
d Summer time symbol
f WWVB signal reception icon
g Activated alarm 1/2 display
h Temperature display/second clock time display
j Activated snooze function display
k Local time/time zone display
button
button
(Alarm 2)
US - EN │ 9 ■

SFPW 360 B1
Use
Requirements for the set-up location
► When choosing a location for the device, ensure
that the device is not subjected to direct sunlight,
vibration, dust, heat, cold and moisture.
► Do not set up the device in the vicinity of heat
sources, such as radiators.
► Protect sensitive surfaces before setting up the
product.
♦ Place the device on a flat and level surface.
Connecting to a power supply
This device can be operated with batteries or the
power adapter. For a permanent projection, permanent
display illumination and to use the USB port w,
the power adapterumust be connected.
Mains power operation:
♦ Ensure that the On/Off switch for permanent projec-
tion0 is in the "OFF" position.
♦ Plug the low voltage plug on the power adapter u
into the connector socket e on the device and connect the power adapter u to an easily accessible
power plug.
Battery operation:
♦ Open the battery compartmentr on the rear of
the device by removing the battery compartment
covert.
♦ Insert three AAA batteries into the battery compart-
mentr as indicated.
♦ Close the battery compartmentr again.
■ 10 │ US - EN
SFPW 360 B1
Once the power supply has been established, there
will be a beep, the display will light up and go
through a brief check of the display elements. Afterwards, the device will automatically attempt to receive
the WWVB signal. The reception icon flashes on
the display. If the reception icon is not flashing completely ( ) on the display, it means that the reception
of the WWVB signal is too weak and the time cannot
be synchronized. Try to find a set-up location where
the reception icon flashes completely ( ) on the
display.
If the WWVB signal is being received correctly, the
current Eastern standard time (EST) is shown on the
display. In addition, the reception icon is permanently shown on the display.
The default time zone of the device is Eastern
Standard Time (EST). To change the time zone
please refer to Setting the date and time
manually section.
If the device is unable to synchronize with the
WWVB signal, you can also set the time manually (see Setting the date and time manually
section) or you can attempt automatic reception
again.
♦ Press and hold the °C /°F
3 seconds until the reception icon
button7 for about
flashes on
the display. The device makes another reception
attempt.
US - EN │ 11 ■

SFPW 360 B1
The WWVB signal
WWVB is a National Institute of Standards and
Technology (NIST) time signal radio station near Fort
Collins, Colorado. The 70 kW ERP signal transmitted
from WWVB is a continuous 60 kHz carrier wave,
the frequency of which is derived from a set of atomic
clocks located at the transmitter site, yielding a frequency uncertainty of less than 1 part in one trillion.
Under ideal conditions, the device can receive the
signal up to a distance of approximately 2000 miles
from the transmitter. Reception of the WWVB signal
normally takes between 3 and 5 minutes. If reception
of the WWVB signal fails, the device will stop trying
to establish reception after approximately 7 minutes.
Reception can be considerably restricted by obstacles
(e.g. concrete walls) or interference sources (e.g. other electronic devices). If reception problems persist,
you should change the location of the device (e.g. put
it by a window).
■ 12 │ US - EN
SFPW 360 B1
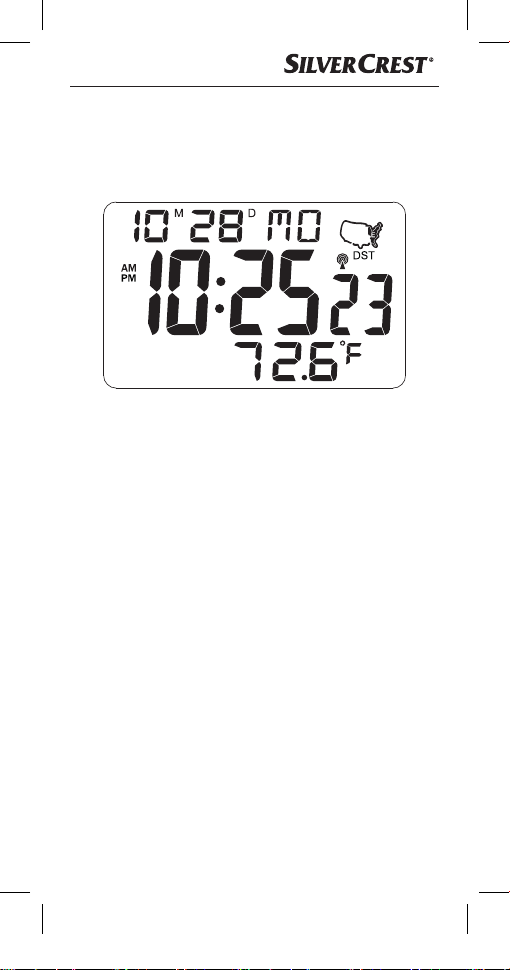
Displays in basic mode
Once the projection alarm clock has received the
WWVB signal, it is in basic mode. In basic mode, the
following information is shown on the display:
The current month appears next to the abbreviation
M and the date of the current day is displayed next
to the abbreviation D. The abbreviation for the current
weekday is shown on the right.
The language for this abbreviation is preset to English
but can be changed if required. The weekday display
can also be changed to display the calendar week
(see section Display calendar week). The time is
shown in 12-hour format by default. The abbreviation
PM (Latin: "post meridiem" = afternoon) is shown
in front of the time between 12 noon and 11.59 at
night. The abbreviation AM (Latin: "ante meridiem"
= morning) is shown in front of the time between 12
midnight and 11.59 in the morning. During the summer period, DST
This display is only shown if the WWVB signal is
being received.
recognize daylight saving time (i.e. parts of Arizona
and Indiana), you must turn off this function (see
Setting the date and time manually section).
(daylight saving time) is displayed.
If you live in an area that does not
US - EN │ 13 ■

SFPW 360 B1
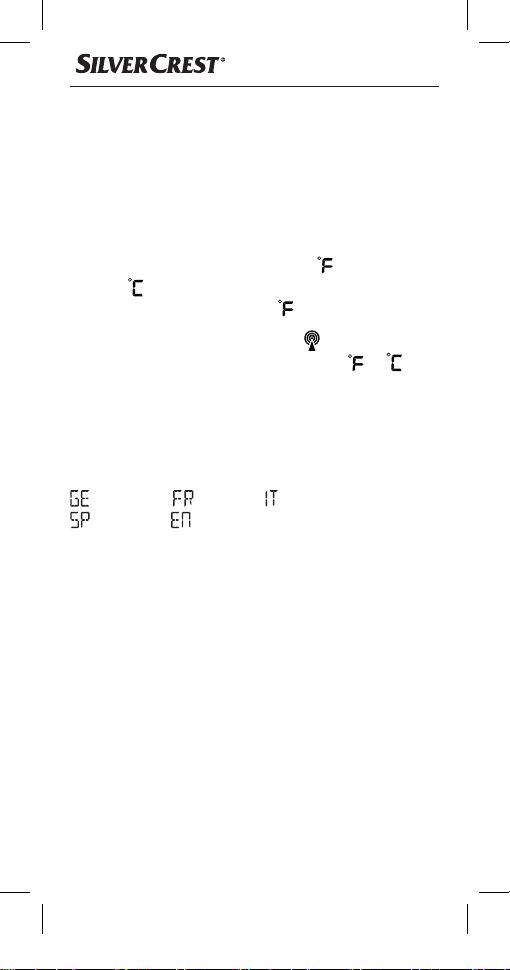
The room temperature is displayed to one decimal
place under the time. The preset temperature unit
is degrees Fahrenheit ( ) and can be changed to
degrees Celsius (
).
Handling and operation
Setting the date and time manually
If no button is pressed for around 20 seconds
during manual setting of the time, the device
exits setting mode. Any settings already made
will be saved.
♦ In basic mode, press the SET button 8 for about
3seconds. The year flashes on the display.
♦ Press the – /WEEK LANG button5 or the
+ /12/24
♦ Press the SET button8 to confirm your entry.
The month display flashes on the display.
♦ Press the – /WEEK LANG button5 or the
+ /12/24
♦ Press the SET button8 to confirm your entry.
The day display flashes on the display.
♦ Press the – /WEEK LANG button5 or the
+ /12/24
button6 to set the desired value.
button6
button6
to set the desired value.
to set the desired value.
■ 14 │ US - EN
SFPW 360 B1
♦ Press the SET button8 to confirm your entry.
The hours flash on the display.
♦ Press the – /WEEK LANG button5 or the
+ /12/24
button6 to set the desired value.
♦ Press the SET button8 to confirm your entry.
The minutes flash on the display.
♦ Press the – /WEEK LANG button5 or the
+ /12/24
button6
to set the desired value.
♦ Press the SET button8 to confirm your entry. The
current DST setting flashes on the display.
♦ If desired, press the – /WEEK LANG button5 or
+ / 12/24 button6
the
to
select the setting to
deactivate the DST function.
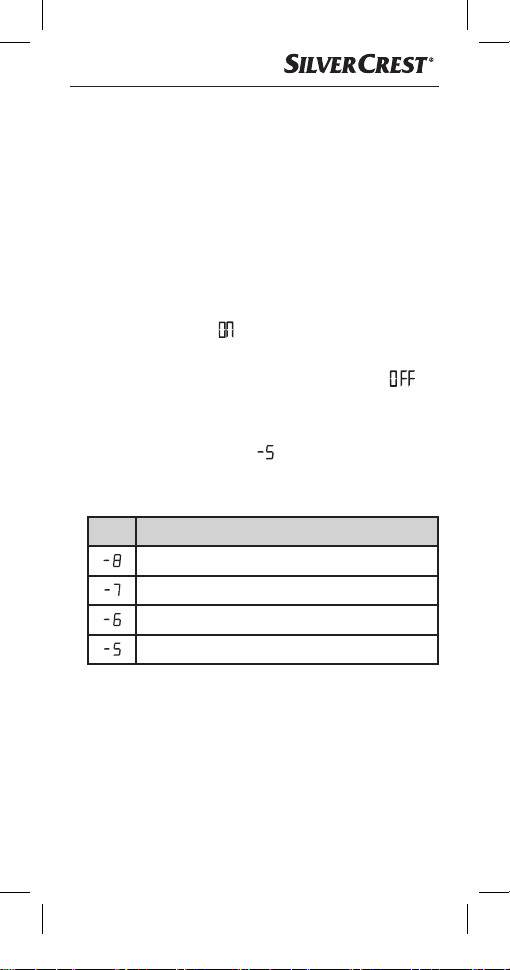
♦ Press the SET button8 to confirm your entry. The
current time zone setting
flashes on the display.
♦ Press the – /WEEK LANG button5 or the
+ /12/24
button6
to set
desired time zone:
# Time zone
Pacific Standard Time (PST)
Mountain Standard Time (MST)
Central Standard Time (CST)
Eastern Standard Time (EST)
♦ Press the SET button8 to confirm your entry and
exit setting mode.
US - EN │ 15 ■
SFPW 360 B1
Setting 12/24-hour mode
♦ In basic mode, briefly press the
+ /12/24
24-hour mode.
button6
to switch between 12- and
Changing the temperature unit
Your device offers you the option to display the room
temperature in degrees Fahrenheit ( ) or degrees
Celsius ( ). On delivery, the temperature unit is
preset to degrees Fahrenheit ( ).
♦ In basic mode, use the °C /°F
switch between the temperature units (
button7 to
or ).
Changing the language of the weekday display
Your device offers you the option to display the weekday in 5 different languages:
= German, = French, = Italian,
= Spanish, = English.
♦ In basic mode, press and hold the
– /WEEK LANG button5 until the desired
language is shown on the display.
♦ Release the – /WEEK LANG button 5. The de-
vice saves the language settings and the weekday
is shown in the desired language.
■ 16 │ US - EN

SFPW 360 B1
Show the calendar week
Your device offers you the option to display the weekday or the calendar week.
♦ In basic mode, briefly press the – /WEEK LANG
button5 to switch between the weekday display
and calendar week display (WEEK).
Setting a second clock time
You can use this function to set a second clock running parallel to the time on the display.
♦ Press the SET button8 until SECOND TIME
appears on the display.
♦ Press the SET button8 for about 3 seconds.
The hour of the second clock time flashes on the
display.
♦ Press the – /WEEK LANG button5 or the
+ /12/24
♦ Press the SET button8 to confirm your entry.
The minutes of the second clock time flash in the
display.
♦ Press the – /WEEK LANG button5 or the
+ /12/24
♦ Press the SET button8 to confirm your entry. The
second clock time is shown on the display.
button6 to set the desired value.
button6 to set the desired value.
US - EN │ 17 ■

SFPW 360 B1
Setting the alarm time
The device allows you to set two different alarms. The
set alarm times always relate to the time shown on the
display (local time or time zone).
♦ In basic mode, press the SET button8 once to
access alarm mode. The current alarm time is
shown on the display and the symbol for the first
alarm (AL1).
♦ Press the SET button8 for about 3 seconds. The
hours flash on the alarm time display.
♦ Press the – /WEEK LANG button5 or the
+ /12/24
♦ Press the SET button8 to confirm your entry.
The minutes flash on the alarm time display.
♦ Press the – /WEEK LANG button5 or the
+ /12/24
♦ Press the SET button8 to confirm your entry. The
alarm time 1 is set now.
The process for setting the second alarm time is
similar to that of setting the first.
♦ In basic mode, press the SET button8 twice to ac-
cess alarm mode. The current alarm time is shown
on the display and the symbol for the second alarm
(AL2).
♦ Now, follow the steps described above to set the
second alarm time.
button6
button6 to set the desired value.
to set the desired value.
■ 18 │ US - EN
SFPW 360 B1
Activating/deactivating the alarm
After setting the respective alarm times, these must still
be activated.
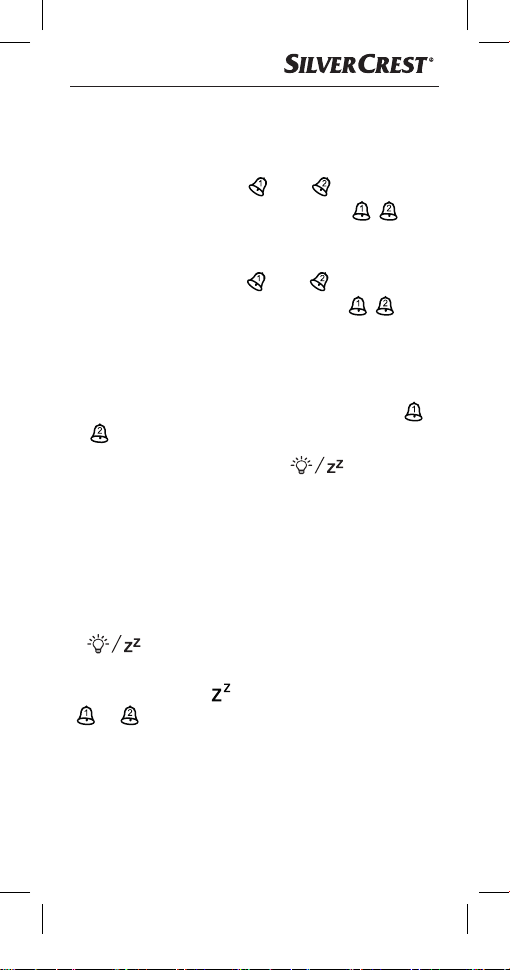
♦ Push the On/Off switch
position. The respective alarm symbol (
appears on the display and indicates that alarm
1 or 2 is activated.
♦ Push the On/Off switch 9 or q to the "OFF"
position. The respective alarm symbol ( ) goes
out on the display and alarm1 or2 is deactivated.
9 or q to the "ON"
)
Switching off the alarm signal
The alarm signal will sound at the set time for around
4minutes and the corresponding alarm symbol (
) flashes on the display.
or
Press any button other than the button1 to
♦
turn off the alarm signal.
You do not have to reactivate the alarm function. The
alarm signal will automatically sound again at the set
time on the next day.
Snooze function
♦ While the alarm is going off, press the
button1 to activate the snooze function.
The alarm signal is interrupted for around 5minutes.
The snooze symbol (
( or ) flash on the display.
) and respective alarm symbol
US - EN │ 19 ■

SFPW 360 B1
Battery change display
If the battery symbol a appears on the display,
the batteries should be changed as soon as possible
(see section Connecting to a power supply).
Switch on/dim the display lighting
To turn on the display illumination permanently, the
power adapter u
Battery operation:
must be connected.
Touch the button1 to turn on the illumination and projection for about 5seconds.
Mains power operation:
Touch the button1 to select high, low, or no
display illumination.
Projection function
This device offers you the option to project the time or
the temperature onto a level surface, such as a wall
in a (preferably dark) room. The projection area can
be swivelled 180° from the front to the back. The
maximum projection distance is 4m.
Single projection
♦ Press the button 1 to switch on the
projection
5seconds.
and the display illumination for about
■ 20 │ US - EN

SFPW 360 B1
Permanent projection
For permanent projection, the power adapter must be
connected to a power supply (see section Connect-
ing to a power supply).
♦ Set the On/Off switch for permanent projection 0
to the position ON to switch on the projection.
♦ Set the On/Off switch for permanent projection 0
to the position OFF to switch off the projection.
Rotating the projection
♦ Press repeatedly the ROTATION TIME/TEMP
button4 to rotate the time/temperature projection
by 90°-steps.
Focussing the projection
♦ Turn the FOCUS dialz on the rear of the projec-
tion arm3 to focus the projection.
Switching the projection between time and
temperature
♦ Touch the
button1 to switch on the
projection.
♦ While the projection is on, press
the ROTATION TIME/TEMP button4 for
around 3seconds. The projection switches
between time and temperature.
US - EN │ 21 ■

SFPW 360 B1
Charging USB devices
Use of the USB port w is only possible during
power adapter u is connected.
► Ensure that the power consumption of the USB
device is not higher than 800 mA. For more
information, refer to the instruction manual of
your USB device.
♦ Connect your USB device to the USB port
to charge it.
♦ Disconnect your USB device from the USB port
w once it has completely charged.
w
Troubleshooting
Synchronisation with WWVB signal not
possible
■ Disruptive obstacles or other interference sources
such as concrete walls or other radio transmission
devices are interfering with WWVB signal reception.
Change the installation location (e.g. near a
window) and try again.
Connected USB device is not charging
■ The projection alarm clock is not connected to the
power.
Connect the power adapter u to the projec-
tion alarm clock.
■ No plug connection to USB device.
Check the plug connection.
■ The charging current of the connected USB device
is too high (> 800 mA).
T
he USB device cannot be charged by the
projection alarm clock.
■ 22 │ US - EN

SFPW 360 B1
Cleaning
Risk of electrocution!
► Remove the power adapter from the power
socket before starting to clean the device.
► To avoid irreparable damage to the device, en-
sure that no moisture gets into it during cleaning.
► Do not use caustic, abrasive or solvent-based
cleaning materials. These can damage the
surfaces of the device.
♦ Clean the surfaces of the device with a soft, dry
cloth. For stubborn dirt, use a slightly damp cloth
with a mild detergent.
Storage
♦ If you do not intend to use the device for an ex-
tended period of time, disconnect it from the power
supply, remove the batteries and store it in a clean,
dry place without exposure to direct sunlight.
US - EN │ 23 ■

SFPW 360 B1
Disposal
Disposal of device
Electrical devices may not be thrown away as part of
normal household trash. If you can no longer use your
electrical device, dispose of it in accordance with
the legal provisions applicable in your state. This will
ensure that old electrical devices are re cycled and
environmental pollution is kept to a minimum.
Further information about disposal is available on the
Internet at www.epa.gov.
Disposal of batteries
Some batteries contain heavy metals such as
mercury, lead, cadmium, and nickel; therefore, many
communities do not allow them to be thrown away
with your regular trash. Recycling is always the best
option for disposing of used batteries.
Dry-Cell Batteries are used in a variety of electronics
and include alkaline and carbon zinc (9-volt, D, C,
AA, AAA), mercuric-oxide (button, some cylindrical
and rectangular), silver-oxide and zinc-air (button),
and lithium (9-volt, C, AA, coin, button, rechargeable) batteries. Look for in-store recycling bins or
community collection events to dispose of these
batteries.
Disposal of the packaging
The packaging materials have been
selected for their environmental
friendliness and ease of disposal, and
are therefore recyclable.
Dispose of packaging materials that are no longer
needed in accordance with applicable local
regulations.
■ 24 │ US - EN

SFPW 360 B1
Note the marking on the different
VI
packaging materials and separate them
as necessary. The packaging materials
are marked with abbreviations (a) and
numbers (b) with the following meanings:
1–7: Plastics, 20–22: Paper and cardboard,
80–98: Composites.
Appendix
Technical specifications
Projection alarm clock
Mains power operation
Battery operation
Max. Operating
temperature
Temperature
measuring range/
measuring accuracy
Temperature resolution 0.1°F (0.1°C)
Radio clock signal WWVB
Projection distance max. 13 ft (4 m)
USB port
(type A)
Power adapter
Model HX075-0501000-AU
Input
Output 5.0 V
Polarity
Protection class
Efficiency class 6
5 V
(DC), 1A
3 × 1.5 V (DC)
(type AAA/LR03)
+104°F (+40°C)
+32 to +122°F
(0 to +50°C)/
±2.7 °F (±1.5 °C)
(DC), 800mA
5 V
100–240V ∼(AC),
50/60 Hz, max. 0.3 A
(DC)/1.0 A
(positive inside,
negative outside)
(double insulation)
II /
US - EN │ 25 ■

SFPW 360 B1
FCC Compliance Statement
This device complies with Part 15 of the FCC Rules.
Operation is subject to the following two conditions:
(1) This device may not cause harmful interference,
and (2) this device must accept any interference
received, including interference that may cause undesired operation.
CAUTION: Changes or modifications not expressly
approved by the party responsible for compliance
could void the user’s authority to operate the equipment.
NOTE: This equipment has been tested and found
to comply with the limits for Class B digital devices,
pursuant to part 15 of the FCC rules. These limits are
designed to provide reasonable protection against
harmful interference in a residential installation. This
equipment generates, uses and can radiate radio
frequency energy and, if not installed and used in
accordance with the instructions, may cause harmful
interference to radio communications. However, there
is no guarantee that interference will not occur in a
particular installation. If this equipment does cause
harmful interference to radio or television reception,
which can be determined by turning the equipment
off and on, the user is encouraged to try to correct
the interference by one or more of the following
measures:
- Reorient or relocate the receiving antenna.
- Increase the separation between the equipment and
the receiver.
- Connect the equipment into an outlet on a circuit
different from that to which the receiver is connected.
- Consult the dealer or an experienced radio/TV
technician for help.
■ 26 │ US - EN

SFPW 360 B1
3 year limited warranty
What does this warranty cover?
The warranty covers:
▯ Damage, breakage or inoperability due to
defect.
▯ Damage not caused by normal wear and tear
or failure to follow the safety and maintenance
instructions provided in the user manual.
What is not covered by the warranty?
The warranty does not cover damage caused by:
▯ Normal wear and tear of the product, includ-
ing fragile parts (such as switches, glass, etc.);
▯ Improper use or transport;
▯ Disregarding safety and maintenance instruc-
tions;
▯ Accidents or acts of nature (e.g. lightning, fire,
water, etc.);
▯ Tampering with the product (such as removing
cover, unscrewing screws, etc.)
Consequential and incidental damages are also not
covered under this warranty. However, some states
do not allow the exclusion or limitation of incidental or
consequential damages, so this limitation or exclusion
may not apply to you.
US - EN │ 27 ■

SFPW 360 B1
What is the coverage period and warranty
resolution?
The warranty is for 3 years from the date of purchase.
At our discretion, the product will either be refunded
or replaced.
What will we not do?
We will not:
▯ Start a new warranty period upon product
exchange;
▯ Repair the product.
How to process the warranty?
To initiate, please:
▯ Call customer service at 1 (844) 543-5872
▯ Visit the customer service website at
www.lidl.com/contact-us
or
▯ Visit a LIDL store for further assistance
To ensure the quickest warranty return process, please
have the following available:
▯ The original sales receipt that includes the
purchase date;
▯ The product and manual in the original package;
▯ A statement of the problem.
■ 28 │ US - EN

SFPW 360 B1
What must you do to keep the warranty in
effect?
▯ Retain the original receipt;
▯ Follow all product instructions;
▯ Do not repair or modify the product.
How does state law relate to this
warranty?
This warranty gives you specific legal rights, and you
may also have other rights which vary from state
to state. All implied warranties are limited by the
duration and terms of this warranty. Some states do
not allow limitations on how long an implied warranty
lasts, so the above limitation may not apply to you.
Distributor
LIDL US LLC.
ARLINGTON
VA 22202
US - EN │ 29 ■

SFPW 360 B1
■ 30 │ US - EN

SFPW 360 B1
Contenido
Introducción ...................... 33
Acerca de este instructivo de operación .......33
Uso previsto .............................33
Tipos de advertencias .....................34
Seguridad ........................ 35
Instrucciones importantes de seguridad ........35
Instrucciones de seguridad para baterías ......36
Contenido del paquete .............. 39
Descripción de los componentes ...... 40
Uso .............................. 41
Requisitos para el lugar de instalación .........41
Conexión a una fuente de alimentación .......41
Pantallas en modo básico ........... 45
Manejo y operación ................ 46
Ajuste manual de la fecha y la hora ..........46
Ajuste del modo de 12/24 horas ............48
Cambio de la unidad de temperatura .........48
Cambio del idioma en la pantalla de días de la
semana .................................48
Mostrar la semana calendario ...............49
Ajuste de una segunda hora del reloj .........49
Ajuste de la alarma .......................50
Activación y desactivación de la alarma .......51
Apagado de la señal de la alarma ...........51
Función de dormitar .......................51
Pantalla de cambio de baterías ..............52
Encendido y atenuación de la luz de la pantalla 52
Función de proyección .....................52
Carga de dispositivos USB ..................54
US - ES │ 31 ■

SFPW 360 B1
Solución de problemas .............. 54
Limpieza .........................55
Almacenamiento ................... 55
Eliminación ....................... 56
Eliminación del dispositivo ..................56
Eliminación de baterías ....................56
Eliminación del empaque ...................56
Apéndice ......................... 57
Especificaciones técnicas ...................57
Declaración de conformidad de la FCC .......58
Garantía limitada de 3 años ................59
Importador ..............................61
■ 32 │ US - ES

SFPW 360 B1
Introducción
Acerca de este instructivo de operación
Felicidades por comprar su nuevo dispositivo.
Ha seleccionado un producto de alta calidad.
El instructivo de uso es parte de este producto.
Contiene información importante sobre seguridad,
uso y eliminación del producto. Antes de usar el
producto, familiarícese con toda la información de
operación y seguridad. Use el producto solamente
como se describe y para la variedad de aplicaciones
especificada.
Mantenga este instructivo de operación en un lugar
seguro. Asimismo, entregue estos documentos, junto
con el producto, a todo futuro propietario.
Uso previsto
El reloj despertador de proyección:
– muestra la hora, la fecha, la temperatura
ambiente,
– proyecta la hora o la temperatura sobre la
pared o techo, y
– funciona como reloj despertador.
Además, el dispositivo tiene un puerto USB que
puede usarse para cargar teléfonos celulares u otros
dispositivos móviles.
El dispositivo está diseñado exclusivamente para uso
privado en el hogar y no para uso comercial.
US - ES │ 33 ■
SFPW 360 B1
Tipos de advertencias
Los siguientes tipos de advertencias se usan en
este instructivo de operación:
► ADVERTENCIA indica una situación peligrosa
que, si no se evita, podría provocar la muerte
o lesiones graves.
► AVISO indica información que se considera im-
portante, pero no está relacionada con peligro
(por ejemplo, mensajes relacionados con daños
materiales).
Una sugerencia contiene información adicional
que le ayudará a usar el dispositivo.
■ 34 │ US - ES

SFPW 360 B1
Seguridad
Esta sección contiene instrucciones de seguridad
importantes para el manejo del dispositivo. El uso
inadecuado puede provocar lesiones personales y
daños materiales.
INSTRUCCIONES IMPORTANTES DE
SEGURIDAD
¡LEA TODAS LAS INSTRUCCIONES ANTES DEL USO!
¡SÓLO PARA USO DOMÉSTICO!
CONSERVE ESTE INSTRUCTIVO
■ Este dispositivo no ha sido fabricado para uso por
parte de personas (incluyendo niños) con capacidades físicas, sensoriales o mentales limitadas, o
falta de experiencia y conocimiento, a menos que
sean supervisadas e instruidas en el uso del dispositivo de parte de una persona responsable de su
seguridad. Los niños deben ser supervisados para
asegurar que no jueguen con el dispositivo.
■ ¡Antes de operar el dispositivo, asegúrese de
que el producto, el adaptador de corriente y las
conexiones del cable no estén dañadas! Nunca
opere un dispositivo que esté dañado.
■ Utilice el aparato exclusivamente con
el adaptador de red suministrado.
■ El adaptador de red y el cable de conexión fijo
no pueden repararse. Si se detecta algún defecto,
debe sustituirse el adaptador de red completo.
Póngase en contacto con la
servicio de asistencia técnica
línea telefónica del
.
US - ES │ 35 ■

SFPW 360 B1
■ Use el dispositivo y el adaptador de
corriente solamente en habitaciones secas.
■ Antes de operar el dispositivo, asegúrese de que
el voltaje eléctrico corresponda al que requiere
el adaptador de corriente.
■ La toma de corriente que se utiliza debe ser fácil-
mente accesible en todo momento de manera que
el adaptador de corriente puede desconectarse
rápidamente de la toma en caso de emergencia.
■ No exponga el dispositivo a la humedad o a la
luz solar directa.
■ No observe directamente la luz de las lentes de
proyección, ya que puede sufrir daño permanente
en los ojos. Nunca dirija la luz directamente a
personas o animales.
Instrucciones de seguridad para
baterías
¡El manejo inadecuado de las baterías puede
provocar incendios, explosiones, derrames
u otros riesgos!
Para manejar en forma segura las baterías,
siga las siguientes instrucciones:
► No arroje las baterías al fuego ni las someta a
altas temperaturas.
► No abra, deforme ni cortocircuite las baterías;
esto puede ocasionar derrames químicos.
► No intente recargar las baterías. No recargue
las baterías a menos que estén etiquetadas
explícitamente como "recargables". ¡Existe el
riesgo de explosión!
■ 36 │ US - ES

SFPW 360 B1
► Nunca caliente las baterías para reactivarlas.
► Revise regularmente la condición de las baterías.
La fuga de químicos puede causar daño permanente al dispositivo. Tenga especial cuidado
cuando maneje baterías dañadas o con fugas.
¡Existe el riesgo de quemaduras por ácido! Use
guantes de protección.
► La fuga del químicos de la batería puede causar
irritación en la piel. En caso de contacto con la
piel, enjuague con abundante agua. Si los químicos entran en contacto con los ojos, enjuáguelos con agua abundante y no se frote los ojos.
Consulte a un médico de inmediato.
► Mantenga las baterías fuera del alcance de los
niños. Los niños podrían llevarse las baterías a la
boca e ingerirlas. Si se ha ingerido una batería,
solicite asistencia médica inmediatamente. También póngase en contacto con su centro local de
control de envenenamiento.
► No combine baterías alcalinas, de carbono-zinc
(estándar), Ni-Cd (recargables) o de otros tipos.
► Use solamente el tipo y tamaño de batería
indicados.
► Inserte siempre las baterías correctamente (ob-
serve la polaridad correcta); de no ser así, existe
el riesgo de que exploten.
► Limpie los contactos de las baterías y los del
dispositivo antes de instalar las baterías.
► Si no va a usar el dispositivo durante un periodo
largo, retire las baterías.
US - ES │ 37 ■

SFPW 360 B1
► Retire las baterías descargadas del equipo de
inmediato para evitar posible daño por fugas
de líquidos.
► Reemplace siempre todas las baterías al mismo
tiempo. Nunca mezcle baterías usadas con
nuevas.
► Si el compartimiento de la batería no se cierra
en forma segura, deje de usar el producto y
manténgalo alejado de los niños.
■ 38 │ US - ES

SFPW 360 B1
Contenido del paquete
Los siguientes artículos se incluyen en la entrega:
Reloj despertador de proyección
Adaptador de corriente
Tres baterías AAA
Este instructivo de uso
Verifique que el paquete esté completo y no
muestre signos visibles de daño. Si la entrega
está incompleta o si ha ocurrido daño debido
al empaque defectuoso o durante el transporte,
póngase en contacto con la línea directa de
servicio al cliente.
♦ Desempaque todas las partes del dispositivo
del empaque y saque todos los materiales de
empaque.
► ¡No permita que los niños jueguen con el material
de empaque! Mantenga todos los materiales de
empaque lejos de los niños.
¡Riesgo de asfixia!
US - ES │ 39 ■

SFPW 360 B1
Descripción de los componentes
Vea las imágenes en las páginas desplegables
Figura A
1 Botón
2 Lentes de proyección
3 Brazo de proyección giratorio
4 Botón ROTATION TIME/TEMP
5 Botón – /WEEK LANG
6 Botón +/ZONE 12/24
7 Botón °C /°F
8 Botón de configuración SET
9 Interruptor de encendido/apagado
(Alarma 1)
0 Interruptor de encendido/apagado para
proyección permanente
q Interruptor de encendido/apagado
(Alarma 2)
w Puerto USB
e Conector para el adaptador de corriente
r Compartimiento de baterías
t Tapa del compartimiento de baterías
z CuadranteFOCUS
u Adaptador de corriente
Figura B
i Pantalla del mes
o Pantalla del día
p Pantalla del día de la semana/semana
calendario
a Pantalla de cambio de baterías
s Símbolo de huso horario
d Símbolo de horario de verano
■ 40 │ US - ES

SFPW 360 B1
f Icono de recepción de señal de la WWVB
g Pantalla de alarma activada 1/2
h Pantalla de temperatura/segunda hora de reloj
j Pantalla de función de dormitar activada
k Pantalla de hora local/huso horario
Uso
Requisitos para el lugar de instalación
► Cuando elija un lugar para el dispositivo,
asegúrese de que el dispositivo no esté sujeto
a la luz solar directa, vibración, polvo, calor,
frío o humedad.
► No coloque el dispositivo cerca de fuentes de
calor como radiadores.
► Proteja las superficies sensibles antes de colocar
el producto.
♦ Coloque el dispositivo sobre una superficie plana
y nivelada.
Conexión a una fuente de alimentación
Este dispositivo puede operarse con baterías o con un
adaptador de corriente. Para proyección permanente,
iluminación permanente de la pantalla y para usar el
puerto USB w, el adaptador de corrienteu
debe estar conectado.
Operación con la alimentación de corriente:
♦ Asegúrese de que el interruptor de encendido/
apagado para la proyección permanente0 esté
en la posición apagada "OFF".
US - ES │ 41 ■

SFPW 360 B1
♦ Conecte la clavija de bajo voltaje en el adaptador
de corriente uen el conector e del dispositivo y
conecte el adaptador de corriente u en una toma
de corriente fácilmente accesible.
Operación con baterías:
♦ Abra el compartimiento de bateríasr en la parte
posterior del dispositivo al retirar la tapa del compartimiento de bateríast.
♦ Inserte tres baterías AAA en el compartimiento de
bateríasr como se indica.
♦ Cierre nuevamente el compartimiento de bate-
ríasr.
Una vez que se haya establecido la corriente eléctrica,
se escuchará un pitido, la pantalla se iluminará y hará
una revisión breve de los elementos de la pantalla.
Posteriormente, el dispositivo intentará automáticamente recibir la señal de la WWVB. El icono de
recepción
parpadea en la pantalla. Si el icono de
recepción no parpadea completamente ( ) en la
pantalla, significa que la recepción de la señal de la
WWVB es muy débil y la hora no puede sincronizarse.
Trate de encontrar un lugar de configuración donde
el icono de recepción parpadee completamente ( )
en la pantalla.
Si la señal de la WWVB se recibe correctamente,
la hora estándar del este (EST) se muestra en la
pantalla. Además, se muestra el icono de recepción
permanentemente en la pantalla.
■ 42 │ US - ES

SFPW 360 B1
El huso horario predeterminado es Hora estándar
del este (EST). Para cambiar el huso horario,
consulte la sección Ajuste manual de la fecha
y la hora.
Si el dispositivo no puede sincronizarse con la
señal de la WWVB, también puede ajustar la
hora manualmente (consulte la sección Ajuste
manual de la fecha y la hora) o puede intentar
nuevamente la recepción automática.
♦ Presione y mantenga así el botón °C /°F
7
durante aproximadamente 3 segundos hasta que
el icono de recepción parpadee en la pantalla.
El dispositivo hace otro intento de recepción.
US - ES │ 43 ■

SFPW 360 B1
La señal de la WWVB
La WWVB es una estación de radio de señal de la
hora del National Institute of Standards and Technology (NIST) (Instituto Nacional de Estándares y
Tecnología) que se encuentra cerca de Fort Collins,
Colorado. La señal ERP (potencia radiada efectiva)
de 70 kW transmitida desde la WWVB es una onda
portadora continua de 60 kHz, cuya frecuencia se
deriva de un grupo de relojes atómicos ubicados en
el lugar donde se encuentra el transmisor, y produce
una incertidumbre de frecuencia de menos de 1 parte
en un trillón.
En condiciones ideales, el dispositivo puede recibir
la señal hasta una distancia de aproximadamente
2000 millas de donde se encuentra el transmisor.
La recepción de la señal de la WWVB normalmente
tarda de 3 a 5 minutos. Si la recepción de la señal
de la WWVB falla, el dispositivo dejará de intentar
establecer la recepción después de aproximadamente
7 minutos. La recepción puede estar considerablemente restringida por obstáculos (como los muros de
concreto) o por fuentes de interferencia (como es el
caso de otros dispositivos electrónicos). Si persisten
problemas de recepción, el dispositivo deberá cambiarse de ubicación, tal como colocarse cerca de una
ventana.
■ 44 │ US - ES

SFPW 360 B1
Pantallas en modo básico
Una vez que el reloj despertador de proyección haya
recibido la señal de la WWVB, ingresa en el modo
básico. En el modo básico, la siguiente información
se muestra en la pantalla:
El mes actual aparece junto a la abreviatura M y la
fecha del día actual se muestra junto a la abreviatura
D. La abreviatura para el día de la semana actual se
muestra a la derecha.
El idioma de esta abreviatura se presenta en inglés,
pero puede cambiarse si se prefiere. La pantalla del
día de la semana también puede cambiarse para
mostrar la semana calendario (consulte la sección
Mostrar la semana calendario). De forma predeterminada, la hora se muestra en formato de 12 horas.
La abreviatura PM (del latín "post meridiem" = tarde)
se muestra frente a la hora entre las 12 mediodía y
las 11.59 de la noche. La abreviatura AM (del latín
"ante meridiem" = mañana) se muestra frente a la
hora entre las 12 de la medianoche y las 11.59 de
la mañana. Durante el verano, aparecerá DST (significa "horario de verano"). Esta pantalla se muestra
solamente si se recibe la señal de la WWVB.
US - ES │ 45 ■

SFPW 360 B1
Si usted vive en una zona donde no se aplica el horario de verano (como en algunas partes de Arizona
e Indiana), debe apagar esta función (consulte la
sección Ajuste manual de la fecha y la hora).
La temperatura ambiente se muestra hasta en una
posición decimal debajo de la hora. La unidad de
temperatura predeterminada es en grados Fahrenheit
( ) y puede cambiarse a grados Celsius ( ).
Manejo y operación
Ajuste manual de la fecha y la hora
Si no se presiona ningún botón durante aproximadamente 20 segundos durante el ajuste manual
de la hora, el dispositivo sale del modo de ajuste.
Todos los ajustes hasta ese punto se guardarán.
♦ En modo básico, presione el botón SET 8 durante
unos 3 segundos. El año parpadea en la pantalla.
♦ Presione el botón – /WEEK LANG 5 o el botón
+ /12/24 6 para establecer el valor deseado.
♦ Presione el botón SET8 para confirmar su entrada.
El mes parpadea en la pantalla.
♦ Presione el botón – /WEEK LANG 5 o el botón
+ /12/246 para establecer el valor deseado.
■ 46 │ US - ES

SFPW 360 B1
♦ Presione el botón SET 8 para confirmar su entrada.
El día parpadea en la pantalla.
♦ Presione el botón – /WEEK LANG5 o el botón
+ /12/24 6 para establecer el valor deseado.
♦ Presione el botón SET 8 para confirmar su entrada.
Las horas parpadean en la pantalla.
♦ Presione el botón – /WEEK LANG 5 o el botón
+ /12/24 6 para establecer el valor deseado.
♦ Presione el botón SET 8 para confirmar su entrada.
Los minutos parpadean en la pantalla.
♦ Presione el botón – /WEEK LANG 5 o el botón
+ /12/24 6 para establecer el valor deseado.
♦ Presione el botón SET 8 para confirmar su entrada.
El ajuste de DST actual
parpadea en la pantalla.
♦ Si lo desea, presione el botón – /WEEK LANG5
o el botón + / 12/24 6 para seleccionar el ajuste
que desactiva la función DST.
♦ Presione el botón SET 8 para confirmar su entrada.
El ajuste del huso horario actual
parpadea en
la pantalla.
♦ Presione el botón – /WEEK LANG5 o el botón
+ /12/246 para establecer el huso horario
deseado:
# Huso horario
Hora estándar del Pacífico (PST)
Hora estándar de la montaña (MST)
Hora estándar del centro (CST)
Hora estándar del este (EST)
US - ES │ 47 ■

SFPW 360 B1
♦ Presione el botón SET 8 para confirmar su entra-
da y salir del modo de ajuste.
Ajuste del modo de 12/24 horas
♦ En el modo básico, presione brevemente el botón
+ /12/24 6 para cambiar entre el modo de
12 y 24 horas.
Cambio de la unidad de temperatura
Su dispositivo le ofrece la opción de mostrar la
temperatura ambiente en grados Fahrenheit (
grados Celsius (
de la unidad de temperatura es en grados Fahrenheit
(
).
♦ En modo básico, utilice el botón °C /°F
para cambiar entre las unidades de temperatura
( o ).
). La configuración predeterminada
) o
7
Cambio del idioma en la pantalla de
días de la semana
Su dispositivo le ofrece la opción de mostrar el día
de la semana en 5 idiomas diferentes:
= Alemán, = Francés, = Italiano,
= Español, = Inglés.
♦ En el modo básico, presione y mantenga así el
botón – /WEEK LANG5 hasta que se muestre
el idioma deseado en la pantalla.
♦ Suelte el botón – /WEEK LANG 5.
El dispositivo guarda los ajustes de idioma y el día
de la semana se muestra en el idioma deseado.
■ 48 │ US - ES

SFPW 360 B1
Mostrar la semana calendario
Su dispositivo le ofrece la opción de mostrar el día de
la semana o la semana calendario.
♦ En el modo básico, presione brevemente el botón
– /WEEK LANG 5 para cambiar entre la
pantalla del día de la semana y la pantalla de la
semana calendario (WEEK).
Ajuste de una segunda hora del reloj
Puede usar esta función para ajustar un segundo reloj
que funciona paralelo a la hora en la pantalla.
♦ Presione el botón SET 8 hasta que aparezca
SECOND TIME en la pantalla.
♦ Presione el botón SET8 durante unos 3 segundos.
La hora del segundo reloj parpadea en la pantalla.
♦ Presione el botón – /WEEK LANG 5 o el botón
+ /12/24 6 para establecer el valor deseado.
♦ Presione el botón SET 8 para confirmar su entrada.
Los minutos de la hora del segundo reloj parpadean
en la pantalla.
♦ Presione el botón – /WEEK LANG5 o el botón
+ /12/24 6 para establecer el valor deseado.
♦ Presione el botón SET8 para confirmar su entrada.
La hora del segundo reloj se muestra en la pantalla.
US - ES │ 49 ■

SFPW 360 B1
Ajuste de la alarma
El dispositivo le permite establecer dos alarmas diferentes. Para ajustar las horas de la alarma, siempre
refiérase a la hora que se muestra en la pantalla
(hora local o huso horario).
♦ En el modo básico, presione el botón SET 8 una
vez para entrar en el modo de alarma. La hora
de la alarma actual y el símbolo para la primera
alarma (AL1) se muestran en la pantalla.
♦ Presione el botón SET 8 durante unos 3 segundos.
Las horas parpadean en la pantalla de la hora de
la alarma.
♦ Presione el botón – /WEEK LANG 5 o el botón
+ /12/24 6 para establecer el valor deseado.
♦ Presione el botón SET 8 para confirmar su entrada.
Los minutos parpadean en la pantalla de la hora
de la alarma.
♦ Presione el botón – /WEEK LANG 5 o el botón
+ /12/24 6 para establecer el valor deseado.
♦ Presione el botón SET 8 para confirmar su entrada.
La hora de la alarma 1 está ahora establecida.
El proceso para establecer la hora de la segunda
alarma es similar al de la primera alarma.
♦ En el modo básico, presione el botón SET 8 dos
veces para tener acceso al modo de alarma. La
hora de la alarma actual y el símbolo para la
segunda alarma (AL2) se muestran en la pantalla.
♦ A continuación, siga los pasos descritos ante-
riormente para establecer la hora de la segunda
alarma.
■ 50 │ US - ES

SFPW 360 B1
Activación y desactivación de la alarma
Después de establecer las horas de las alarmas
respectivas, aún deben activarse.
♦ Presione el interruptor de encendido/apagado
9 o
q a la posición de encendido "ON".
El símbolo de alarma respectivo (
en la pantalla e indica que la alarma
1 o 2 está activada.
♦ Presione el interruptor de encendido/apagado
9 o q a la posición de apagado "OFF". El
símbolo de alarma respectivo ( ) se apaga
en la pantalla y la alarma 1 o2 se desactiva.
) aparece
Apagado de la señal de la alarma
La señal de la alarma sonará a la hora establecida
durante aproximadamente 4minutos y el símbolo de
alarma correspondiente (
pantalla.
Presione un botón que no sea al botón 1
♦
para apagar la señal de la alarma.
No es necesario que reactive la función de la alarma.
La señal de la alarma sonará automáticamente otra
vez a la hora establecida el día siguiente.
o ) parpadeará en la
Función de dormitar
♦ Mientras la alarma se activa, presione el botón
1 para activar la función de dormitar.
La señal de la alarma se interrumpe durante
aproximadamente 5 minutos.
El símbolo de dormitar (
correspondiente ( o ) parpadean en la
pantalla.
) y el símbolo de la alarma
US - ES │ 51 ■

SFPW 360 B1
Pantalla de cambio de baterías
Si el símbolo de batería a aparece en la
pantalla, las baterías deberán cambiarse lo más
pronto posible (consulte la sección Conexión a una
fuente de alimentación).
Encendido y atenuación de la luz de la
pantalla
Para encender la iluminación de la pantalla permanentemente, debe conectarse el adaptador de corriente u.
Operación con baterías:
Toque el botón 1 durante unos 5segundos
para encender la iluminación y la proyección.
Operación con la alimentación de corriente:
Toque el botón 1 para seleccionar iluminación alta, baja o no mostrarla.
Función de proyección
Este dispositivo le ofrece la opción de proyectar la
hora o la temperatura sobre una superficie nivelada,
tal como una pared en una habitación (de preferencia oscura). El área de proyección puede girarse
180° desde el frente hacia atrás.
La distancia máxima de proyección es de 4m (13 pies).
Proyección simple
♦ Presione el botón
5segundos para encender la proyección y la
iluminación de la pantalla.
1 durante unos
■ 52 │ US - ES

SFPW 360 B1
Proyección permanente
Para proyección permanente, el adaptador de
corriente debe estar conectado a una fuente a
alimentación (consulte la sección Conexión a una
fuente de alimentación).
♦ Coloque el interruptor de encendido/apagado
para proyección permanente 0 en la posición de
encendido ON para encender la proyección.
♦ Coloque el interruptor de encendido/apagado
para proyección permanente 0 en la posición de
apagado OFF para apagar la proyección.
Rotación de la proyección
♦ Presione el botón ROTATION TIME/TEMP 4
varias veces para rotar la proyección de la hora/
temperatura en pasos de 90°.
Enfoque de la proyección
♦ Gire el cuadrante FOCUS z en la parte posterior
del brazo de proyección giratorio3 para enfocar
la proyección.
Cambio de la proyección entre hora y
temperatura
♦ Toque el botón
1 para encender la
proyección.
♦ Mientras la proyección está encendida, presione el
botón ROTATION TIME/TEMP 4 durante unos
3 segundos. La proyección alterna entre hora y
temperatura.
US - ES │ 53 ■

SFPW 360 B1
Carga de dispositivos USB
El uso del puerto USB w solamente es posible
mientras el adaptador de corriente u está conectado.
► Asegúrese de que el consumo de energía del
dispositivo USB no sea mayor de 800 mA. Para
obtener más información, consulte el manual de
instrucciones de su dispositivo USB.
♦ Conecte su dispositivo USB en el puerto USB
w para cargarlo.
♦ Desconecte su dispositivo USB del puerto USB
w cuando esté completamente cargado.
Solución de problemas
No es posible la sincronización con la señal
de la WWVB
■ Hay obstáculos perjudiciales u otras fuentes de
interferencia, tales como muros de concreto o
dispositivos de transmisión de radio, interfiriendo
con la recepción de la señal de la WWVB.
Cambie la ubicación de la instalación, tal como
cerca de una ventana, y vuelva a intentar.
El dispositivo USB conectado no está
cargando
■ El reloj despertador de proyección no está
conectado a la fuente de alimentación.
Conecte el adaptador de corriente u al
reloj despertador de proyección.
■ 54 │ US - ES

SFPW 360 B1
■ No hay conexión de enchufe con el dispositivo
USB.
Revise la conexión de enchufe.
■ La corriente de carga del dispositivo USB conecta-
do es demasiado alta (> 800 mA).
El dispositivo USB no puede cargarse median-
te el reloj despertador de proyección.
Limpieza
¡Riesgo de electrocución!
► Desconecte el adaptador de corriente de la
toma de corriente antes de comenzar a limpiar
el dispositivo.
► Para evitar daño irreparable al dispositivo,
asegúrese de que no penetre humedad en este
durante la limpieza.
► No use materiales de limpieza cáusticos, abrasi-
vos ni a base de solventes. Estos pueden dañar
las superficies del dispositivo.
♦ Limpie las superficies del dispositivo con una tela
suave y seca. Para manchas difíciles, use una tela
ligeramente humedecida con detergente suave.
Almacenamiento
♦ Si no va a usar el dispositivo durante un periodo
prolongado, desconéctelo de la fuente de alimentación, retire las baterías y guárdelo en un lugar
limpio y seco, protegido de la luz solar directa.
US - ES │ 55 ■

SFPW 360 B1
Eliminación
Eliminación del dispositivo
Los dispositivos eléctricos no deben ser desechados
como parte de la basura doméstica normal. Si ya no
puede usar su dispositivo eléctrico, elimínelo de conformidad con las disposiciones legales aplicables en
su estado. Esto asegura que los dispositivos eléctricos
usados sean reciclados y la contaminación ambiental
se mantenga a un nivel mínimo.
Puede encontrar más información sobre la eliminación de desechos en Internet en www.epa.gov.
Eliminación de baterías
Algunas baterías contienen metales pesados como
mercurio, plomo, cadmio y níquel; por ello, muchas
comunidades no permiten que se desechen con
la basura normal. El reciclaje es siempre la mejor
opción para eliminar las baterías usadas.
Las baterías de celda seca se usan en una gran
variedad de aparatos electrónicos, e incluyen baterías
alcalinas y de carbono-zinc (de 9 voltios, D, C, AA,
AAA), de óxido de mercurio (de botón, algunas cilíndricas y rectangulares), de óxido de plata y de zinc
aire (de botón) y de litio (de 9 voltios, C, AA, de tipo
moneda, de botón, recargables). Busque los depósitos
de reciclaje en las tiendas, o los eventos de recopilación de la comunidad para desechar estas baterías.
Eliminación del empaque
Los materiales de empaque han sido
seleccionados por su compatibilidad
ambiental y facilidad de eliminación y,
por lo tanto, son reciclables.
Elimine los materiales de empaque que ya no se necesitan de conformidad con las normas locales aplicables.
■ 56 │ US - ES

SFPW 360 B1
Observe las marcas en los diferentes
VI
materiales de empaque y sepárelos
según sea conveniente. Los materiales
abreviaturas (a) y números (b) con los siguientes
significados: 1–7: Plásticos: 20–22: Papel y cartón,
80–98: Materiales compuestos.
de empaquetado están marcados con
Apéndice
Especificaciones técnicas
Reloj despertador de proyección
Operación con
alimentación eléctrica
Operación con
baterías
Máx. Temperatura de
funcionamiento
Rango de medición
de temperatura y
precisión de la medición
Resolución de la
tempera tura
Señal de reloj de radio WWVB
Distancia de la proyección
Puerto USB
(tipo A)
Adaptador de corriente
Modelo HX075-0501000-AU
Entrada
Salida 5.0 V
Polaridad
Clase de protección
Eficiencia clase 6
5 V (CD) / 1 A
3 × 1.5 V (CD)
(tipo AAA/LR03)
+104 °F (+40 °C)
+32 a +122 °F
(0 a +50 °C)/
±2.7 °F (±1.5 °C)
0.1 °F (0.1 °C)
máx. 4 m (13 pies)
(CD) / 800 mA
5 V
100–240 V ∼(CA,
50/60 Hz, máx. 0.3 A
(CD)/1.0 A
(positivo adentro,
negativo afuera)
(doble aislamiento)
II /
US - ES │ 57 ■

SFPW 360 B1
Declaración de conformidad de la FCC
Este dispositivo cumple con la Parte 15 del Reglamento de la FCC. La operación está sujeta a las dos
siguientes condiciones:
(1) Este dispositivo no puede causar interferencia
dañina, y (2) este dispositivo debe aceptar cualquier
interferencia recibida, incluyendo interferencia que
pueda causar operación no deseable.
PRECAUCIÓN: Los cambios o modificaciones no
aprobados expresamente por la parte responsable
del cumplimiento normativo podrían invalidar la
autoridad del usuario de operar este equipo.
NOTA: Este equipo se ha probado y se ha determinado
que cumple con los límites de los dispositivos digitales
Clase B, de conformidad con la parte 15 del reglamen
to de la FCC. Estos límites están diseñados para proporcionar protección razonable contra interferencia dañina
en una instalación residencial. Este equipo genera, usa
y puede emitir energía de radiofrecuencia y, si no se
instala y usa de acuerdo con las instrucciones, puede
causar interferencia dañina a las comunicaciones de
radio. Sin embargo, no hay garantía de que no ocurrirá
interferencia en una instalación en particular.
Si este equipo causa interferencia dañina a la recepción de radio o televisión, lo cual puede determinarse
al apagar y encender el equipo, se aconseja al
usuario intentar corregir la interferencia mediante
una o más de las siguientes medidas:
- Reoriente o reubique la antena receptora.
- Incremente la distancia entre el equipo y el receptor.
- Conecte el equipo en una toma de un circuito eléctri-
co diferente a la que está conectado el receptor.
- Consulte al distribuidor o a un técnico experimenta-
do en radio o televisión para solicitar ayuda.
■ 58 │ US - ES
-

SFPW 360 B1
Garantía limitada de 3 años
¿Lo que cubre la presente garantía?
La garantía incluye:
▯ Daños, quebraduras o incapacidad para
funcionar debido a defectos.
▯ Daños que no hayan sido causados por el
desgaste propio del uso o por no seguir las
instrucciones de seguridad y mantención incluidas en el manual para el usuario.
¿Lo que no cubre esta garantía?
La garantía no cubre daños causados por:
▯ El desgaste propio del uso del producto, in-
cluidas las partes frágiles (como interruptores,
piezas de vidrio, etc.).
▯ Uso o transporte no indicado del producto.
▯ Desatención a las instrucciones de seguridad y
mantención.
▯ Accidentes o causas de fuerza mayor (e.g.
relámpagos, incendio, inundación, etc.).
▯ Manipulación mal intencionada del producto
(retirar la cubierta, tornillos, etc.).
La presente garantía tampoco cubre daños indirectos o emergentes. Sin embargo algunos estados no
permiten la exclusión o limitación de daños indirectos
o emergentes, por lo que dicha exclusión o limitación
pudiera no aplicarse en su caso.
¿Período de cobertura y resolución de la
garantía?
La garantía es válida por 3 años a partir de la fecha
de compra. La empresa, según lo estime conveniente,
devolverá el dinero o repondrá el producto.
US - ES │ 59 ■

SFPW 360 B1
¿La empresa no?
▯ Dará inicio a un nuevo período de garantía al
hacerse el cambio del producto.
▯ Reparará el producto.
¿Cómo se tramita la garantía?
Recomendamos que primero usted:
▯ Llame al Servicio de atención al cliente al
1 (844) 543-5872.
▯ Visite el Portal de atención al cliente en
www.lidl.com/contact-us
▯ Visite una de nuestras tiendas LIDL en caso de
cualquier inquietud.
A fin de acelerar el trámite de la garantía, tenga a
bien contar con lo siguiente:
▯ Recibo de venta original que incluya la fecha
de compra.
▯ Producto y manual en su empaque original.
▯ Descripción del problema.
¿Qué debe hacer usted para mantener la
garantía vigente?
▯ Guardar el recibo original.
▯ Seguir todas las instrucciones para el uso del
producto.
▯ No realizar ninguna reparación ni alteración
al producto.
■ 60 │ US - ES

SFPW 360 B1
¿De qué manera influyen las leyes estatales con esta garantía?
La presente garantía le otorga derechos legales específicos, y pudiera usted contar con otros derechos los
cuales varían de un estado a otro. Todas las garantías implícitas se encuentran limitadas a la duración y
términos de la presente garantía. Algunos estados no
permiten limitaciones al período de tiempo y términos
de la garantía implícita, por lo que dichas limitaciones pudieran no aplicarse en su caso.
Importador
LIDL US LLC.
ARLINGTON
VA 22202
US - ES │ 61 ■

SFPW 360 B1
■ 62 │ US - ES
 Loading...