

AFT 77 A1
Table of Contents
Introduction ................... 3
About these operating instructions ........3
Intended use .........................3
Warning types .......................4
Safety ....................... 5
Important safety instructions .............5
Safety instructions for batteries ...........6
Package contents .............. 8
Description of parts ............ 9
First use ..................... 10
Requirements at the setup location ...... 10
Operating the outdoor sensor ......... 11
Operating the temperature station ......11
Displays in basic mode ......... 15
Operation and use ............ 18
Basic settings ...................... 18
Setting the alarm ...................20
Activating/deactivating the alarm ...... 21
Turning off the alarm ................ 22
Snooze function .................... 22
Displaying the maximum/
minimum temperature ................ 23
Changing the temperature unit ......... 23
Battery display ..................... 24
Changing the radio channel ........... 24
US - EN │ 1 ■

AFT 77 A1
Troubleshooting .............. 26
Cleaning. . . . . . . . . . . . . . . . . . . . . 27
Storage ..................... 27
Disposal ..................... 27
Disposal of the device ............... 27
Disposal of batteries ................. 28
Disposal of the packaging ............28
Appendix .................... 29
Technical specifications .............. 29
FCC Compliance Statement ........... 30
3 year limited warranty .............. 32
Distributor ......................... 34
■ 2 │US - EN

AFT 77 A1
Introduction
About these operating instructions
Congratulations on purchasing your new device.
You have selected a high-quality product. The
operating instructions are part of this product.
They contain important information about the
safety, usage and disposal of the product.
Before using the product, please familiarize
yourself with all operating and safety information. Use the product only as described and
for the specified range of applications. Keep
these operating instructions in a safe location.
In addition, please pass these documents on,
together with the product, to any future owner.
Intended use
The radio temperature station shows you the
indoor and outdoor temperatures in degrees
Fahrenheit (°F) or degrees Celsius (°C) as well
as the minimum and maximum temperatures.
The display also include the time in 12/24hour format and the date. In addition, the radio
temperature station has two alarms.
The product is intended exclusively for private
households and is not recommended for
commercial use.
US - EN │ 3 ■
AFT 77 A1
Warning types
The following warning types are used in these
operating instructions:
► WARNING indicates a hazardous situation
that, if not avoided, could result in death or
serious injury.
► NOTICE indicates information that is
considered important, but not hazardous
(e.g. messages related to property
damage).
A tip provides additional information that
will assist you in using the device.
■ 4 │US - EN

AFT 77 A1
Safety
This section contains important safety instructions for handling the device. Improper use
may result in personal injury and/or property
damage.
IMPORTANT SAFETY INSTRUCTIONS
READ ALL INSTRUCTIONS BEFORE USE!
SAVE THESE INSTRUCTIONS
■ This device may only be used by children
aged 8 years and above and by persons
with limited physical, sensory or mental
capabilities or lack of experience and
knowledge, if it is provided that they are
being supervised or have been instructed
on how to use the device safely and are
aware of the potential risks. Children must
not play with the device. Cleaning and user
maintenance tasks may not be carried out
by children unless they are supervised.
■ Before using the product for the first time,
make sure it is not damaged! Do not
operate devices that are damaged.
■ Only use the temperature station in dry
indoor areas.
■ Make sure the temperature station is not ex-
posed to humidity or direct sunlight.
US - EN │ 5 ■

AFT 77 A1
Safety instructions for batteries
Mishandling the batteries can cause
fires, explosions, leakages, or other
hazards! In order to handle batteries
safely, please observe the following
safety instructions:
► Do not throw the batteries into a fire and
do not subject them to high temperatures.
► Do not open, deform, or short-circuit batteries,
since this can lead to chemical leakage.
► Do not attempt to recharge the batteries.
Do not recharge batteries unless they are
explicitly labeled as "rechargeable". There
is a risk of explosion!
► Never heat batteries in order to revive them.
► Check the condition of the batteries at regu-
lar intervals. Leaking chemicals can cause
permanent damage to the device. Take
particular care when handling damaged or
leaking batteries. Risk of acid burns! Wear
protective gloves.
► Chemicals that leak from a battery can
cause skin irritation. In the event of contact
with the skin, rinse with plenty of water.
If the chemicals come into contact with
your eyes, rinse them thoroughly with water
and do not rub them. Consult a physician
immediately.
■ 6 │US - EN

AFT 77 A1
► Keep batteries out of the reach of children.
Children might put batteries into their mouth
and swallow them. If a battery has been
swallowed, seek medical assistance immediately. Also, contact your local poison
control center.
► Do not mix alkaline, carbon-zinc (standard),
Ni-Cd (rechargeable) or other types of
batteries.
► Use only the correct type and size of bat-
tery indicated.
► Always insert the batteries the right way
(observe correct polarity); otherwise there
is a risk that they could explode.
► Clean the battery contacts and also those
of the device prior to battery installation.
► If you do not intend to use the device for
a long time, remove the batteries.
► Remove discharged batteries from equip-
ment promptly to avoid possible damage
from leakage.
► Always replace the whole set of batteries
at the same time. Never mix old and new
ones.
► If the battery compartment does not close
securely, stop using the product and keep it
away from children.
US - EN │ 7 ■

AFT 77 A1
Package contents
The scope of delivery consists of the following
components:
1 temperature station
1 outdoor sensor
4 batteries type AA
2 wall plugs
2 screws
Operating instructions
Check the package for completeness and
signs of visible damage. If the delivery is
incomplete or damage has occurred as
a result of defective packaging or during
transport, contact the service hotline.
♦ Remove all parts from the packaging and
remove all packaging material.
► Do not allow children to play with the
packaging materials! Keep all packaging
materials away from children. Risk of
suffocation!
■ 8 │US - EN
AFT 77 A1
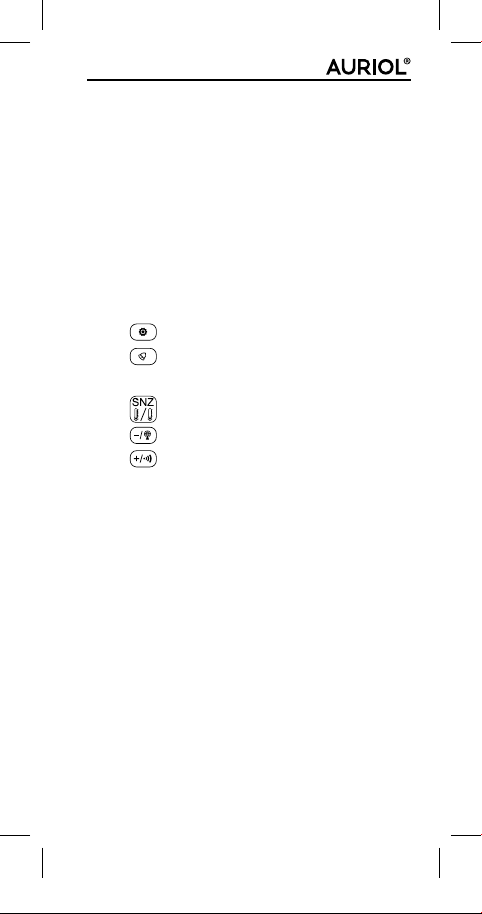
Description of parts
See foldout page for illustrations
Figure A
Display
1 Time panel
2 Internal temperature panel
3 Date panel
4 Outdoor temperature panel
Temperature station
5
6
7 Hook
8
9
0
q Battery compartment
w Stand
e Battery compartment cover
Figure B
Outdoor sensor
r Control LED
t Hook
z TX button
u Channel selector
i Battery compartment
o Battery compartment cover
p Stand
button
button
button
button
button
US - EN │ 9 ■

AFT 77 A1
First use
Before use, insert the battery first into the
outdoor sensor and then into the temperature station.
Requirements at the setup location
► When selecting the setup location, make
sure the devices are not exposed to direct
sunlight, vibration, dust, heat, cold or
humidity.
► Do not set up the device near sources of
heat, e.g. heaters.
► Mount the outdoor sensor within a max-
imum radius of 98 ft to the temperature
station. Make sure there are no interfering
obstacles between the outdoor sensor and
the temperature station. Otherwise, there
could be transmission interference.
♦ Both the temperature station and the
outdoor sensor can be suspended from a
screw using the hooks 7 and t.
♦ Alternatively, you can fold out the
standsw/p of the temperature station
and the outdoor sensor to set them up on
an even, horizontal surface.
■ 10 │US - EN

AFT 77 A1
Operating the outdoor sensor
♦ Open the battery compartmention the
back of the device by sliding the battery
compartment coveroin the direction of
the arrow.
♦ Insert two type AA batteries as indicated
in the battery compartmenti.
♦ Close the battery compartmenti again.
The control LEDron the front of the outdoor sensor lights up briefly.
Afterwards, the control LEDr lights up
once per minute to indicate that transmission is in progress.
Operating the temperature
station
♦ Open the battery compartmentqon the
back of the device by removing the battery
compartment covere.
♦ Insert two type AA batteries as indicated in
the battery compartmentq.
♦ Close the battery compartmentq again.
Once the power supply has been established,
the display will light up and go through a brief
check of the display elements.
The temperature station will now attempt to
connect to the outdoor sensor. The reception
icon
flashes on the outdoor temperature
panel 4.
US - EN │ 11 ■

AFT 77 A1
If no outdoor temperature is displayed within
approx. 3minutes, the temperature station
will stop the reception search. The reception
icon
turns off and is displayed on the
outdoor temperature panel4. The system likely
cannot detect a signal due to structural conditions or because the sensor is too far away.
If the device is unable to connect to the outdoor sensor automatically, you can establish
a connection manually:
♦ Press and hold the
button0 until the
reception icon flashes on the outdoor
temperature panel4.
♦ Press the TX buttonz to manually start the
wireless signal for the outdoor sensor.
The temperature station automatically starts
to receive the WWVB signal after 3minutes,
regardless of whether the outdoor sensor
reception search has been successful or not.
The reception icon
flashes on the time
panel1. If the reception icon is not flashing
completely ( ) on the display, it means that
the reception of the WWVB signal is too weak
and the time cannot be synchronized. Try to
find a set-up location where the reception icon
flashes completely ( ) on the display.
■ 12 │US - EN

AFT 77 A1
If the WWVB signal is being received correctly,
the current Eastern standard time (EST) is displayed on the time panel1 and the date and
weekday are displayed on the date panel3.
In addition, the reception symbol is permanently displayed on the time panel1.
The default time zone of the temperature
station is Eastern Standard Time (EST). To
change the time zone please refer to Basic
settings section.
If the device is unable to synchronize with
the WWVB signal, you can also set the time
manually (see Basic settings section), or you
can attempt automatic reception again.
♦ Press and hold the
button9 for about
3 seconds to attempt the reception search
again. The reception icon flashes on the
time panel1.
US - EN │ 13 ■

AFT 77 A1
The WWVB signal
WWVB is a National Institute of Standards and
Technology (NIST) time signal radio station near
Fort Collins, Colorado. The 70 kW ERP signal
transmitted from WWVB is a continuous 60 kHz
carrier wave, the frequency of which is derived
from a set of atomic clocks located at the transmitter site, yielding a frequency uncertainty of
less than 1 part in one trillion.
Under ideal conditions, the temperature station
can receive the signal up to a distance of approximately 2000 miles from the transmitter.
Reception of the WWVB signal normally takes
between 3 and 5 minutes. If reception of the
WWVB signal fails, the temperature station will
stop trying to establish reception after approximately 7 minutes.
Reception can be considerably restricted by
obstacles (e.g. concrete walls) or interference
sources (e.g. other electronic devices).
If reception problems persist, you should
change the location of the temperature station
(e.g. put it by a window).
■ 14 │US - EN

AFT 77 A1
Displays in basic mode
After the temperature station has received the
signal from the outdoor sensor and the WWVB
signal, the device enters basic mode.
In basic mode, the temperature station displays
the following information:
The time panel1
The time is shown
in 12-hour format
by default. In the
12-hour format,
the abbreviation
(Latin for "post meridiem" = afternoon) is
shown in front of the time between 12 noon
and 11.59 at night. The abbreviation
(Latin for "ante meridiem" = morning) is shown
in front of the time between 12 midnight and
11.59 in the morning. During summer,
(daylight saving time) is displayed. This display
is only shown if the WWVB signal is being
received.
If you live in an area that does not recognize
daylight saving time (i.e. parts of Arizona and
Indiana), you must turn off this function (see
Basic settings section).
US - EN │ 15 ■

AFT 77 A1
The date panel3
The current day appears under
the icon and the current
month under the icon .
The abbreviation for the current
weekday is shown to the right
of the icon . The language for this abbreviation is preset to English but can be changed, if
preferred. Please refer to the Basic settings
section for details.
The indoor temperature panel2
The indoor temperature measured by the temperature
station is displayed to one
decimal place. The tempera-
ture unit (degrees Fahrenheit) is shown top right. The temperature unit
can also be changed to (degrees Celsius).
If the temperature drops below the measuring
range of 32 °F to 122 °F (or 0 °C to 50 °C)
is shown; is shown if the temperature
rises above this range.
The temperature trend is shown to the left of
the temperature display. The following displays
are possible:
= the temperature is rising.
= the temperature is constant.
= the temperature is dropping.
■ 16 │US - EN

AFT 77 A1
If the battery symbol
appears to the left of
the temperature display, you should replace
the batteries of the temperature station as
soon as possible (see section Operating the
temperature station).
The outdoor temperature panel4
The outdoor temperature is
displayed to one decimal
place. The temperature unit
(degrees Fahrenheit) is
shown top right. The temperature unit can also be changed to (degrees
Celsius). If the temperature drops below the
measuring range of -4 °F to 140 °F (or -20 °C
to 60 °C) is shown; is shown if the
temperature rises above this range.
In addition, the channel used by the connected
outdoor sensor is displayed (e.g. CH1).
The temperature trend is shown to the left of
the temperature display. The following displays
are possible:
= the temperature is rising.
= the temperature is constant.
= the temperature is dropping.
If the battery symbol
appears to the left of
the temperature display, you should replace
the batteries of the outdoor sensor as soon as
possible (see section Operating the outdoor
sensor).
US - EN │ 17 ■

AFT 77 A1
Operation and use
Basic settings
♦ If the device is unable to synchronize with
the WWVB signal, you can also set the time
manually.
♦ To make the basic settings, press and hold
the
button5 for approximately
3 seconds.
the time panel1.
♦ Press the
to set the desired time zone:
# Time zone
0 Pacific Standard Time (PST)
1 Mountain Standard Time (MST)
2 Central Standard Time (CST)
3 Eastern Standard Time (EST)
♦ Press the
entry. (year display) flashes on the
time panel1.
♦ Press the
to set the desired value.
♦ Press the
try. The (day) and (month) icons flash
on the date panel3.
♦ Press the button9 or the button 0
to set the desired date format (M - D or
D-M).
(time zone setting) flashes on
button9 or the button0
button5 to confirm your
button9 or the button 0
button5 to confirm your en-
■ 18 │US - EN

AFT 77 A1
♦ Press the button5 to confirm your
entry. The month display flashes on the date
panel3.
♦ Press the
to set the desired value.
♦ Press the
entry. The day display flashes on the date
panel3.
♦ Press the
to set the desired value.
♦ Press the
entry. The language selection option
flashes on the date panel3.
♦ Press the button9 or the button0
to select the desired language.
You can choose between German
Italian
French
default language.
♦ Press the
entry. flashes on the time panel1.
♦ Press the
to select the required hour format (12- or 24hour format).
♦ Press the
entry. The hour display flashes on the time
panel1.
♦ Press the
to set the desired value.
button9 or the button 0
button5 to confirm your
button9 or the button 0
button5 to confirm your
( ),
( ), Spanish ( ), English ( ) and
( ). English ( ) is preset as the
button5 to confirm your
button9 or the button 0
button5 to confirm your
button9 or the
button0
US - EN │ 19 ■

AFT 77 A1
♦ Press the button5 to confirm your
entry. The minute display flashes on the time
panel1.
♦ Press the button9 or the
to set the desired value.
♦ Press the
entry.
time panel1.
♦ Press the
to deactivate ( ) or activate ( ) the DST
function.
♦ Press the
entry. The display will now change back
to basic mode.
button5 to confirm your
(current DST setting) flashes on the
button9 or the button0
button5 to confirm your
button0
Setting the alarm
You can set two different alarms on the temperature station.
♦ In basic mode, press the
access alarm mode. The currently set alarm
time and the icon for the first alarm
displayed on the time panel1.
♦ Press and hold the
proximately 3 seconds. The hour display
flashes.
♦ Press the
to set the desired value. The symbol
appears on the time panel1 to indicate
that Alarm 1 is active.
button9 or the button0
button6 to
( ) are
button6 for ap-
■ 20 │US - EN

AFT 77 A1
♦ Press the
entry. The minute display flashes.
♦ Press the
to set the desired value.
♦ Press the
entry. The display will change back to basic
mode.
The process for setting the second alarm time
is similar to that of setting the first.
♦ In basic mode, press the
twice to access alarm mode. The currently
set alarm time and the icon for the second
alarm
panel1.
♦ Now, follow the steps described above to
set the second alarm time.
button6 to confirm your
button9 or the
button 6 to confirm your
button0
button6
( ) are displayed on the time
Activating/deactivating the alarm
♦ In basic mode, press the button6 to
access alarm mode. The currently set alarm
time and the icon for the first alarm
displayed on the time panel1.
♦ Press the
The
♦ Press the
vate Alarm 1. The symbol on the time
panel1 turns off.
button0 to activate Alarm 1.
symbol appears on the time panel1.
button0 again to deacti-
( ) are
US - EN │ 21 ■

AFT 77 A1
♦ In basic mode, press the button6
twice to access alarm mode. The currently
set alarm time and the icon for the second
alarm
( ) are displayed on the time
panel1.
♦ Press the
The symbol appears on the time
panel1.
♦ Press the
vate Alarm 2. The
panel1 turns off.
button0 to activate Alarm2.
button0 again to deacti-
symbol on the time
Turning off the alarm
The alarm signal will sound at the set time for
approximately 2 minutes.
♦ Press any button with the exception of the
button8 to turn the alarm signal off.
You do not have to reactivate the alarm function. The alarm signal will automatically sound
again at the set time on the next day.
Snooze function
♦ While the alarm signal sounds, press
the
button8 to activate the snooze
function. The alarm signal is interrupted
for approximately 5 minutes. The display
for the snooze function ( ) and the alarm
symbol(s) and flash on the display.
■ 22 │US - EN

AFT 77 A1
Displaying the maximum/
minimum temperature
Once the power supply and the connection
to the outdoor sensor have been established,
the maximum and minimum temperatures are
automatically recorded and saved by the temperature station.
♦ In basic mode, press the
once. The symbol is shown on both
temperature panels, and the highest measured temperature for indoors and outdoors
is displayed.
♦ Press the
symbol is shown and the lowest measured
temperature for indoors and outdoors is
displayed.
♦ Press the
current indoor and outdoor temperatures.
♦ Press and hold the
proximately 3 seconds while the maximum
or minimum value is being displayed to
delete the saved values.
button8 twice: the
button8 again to show the
button8
button8 for ap-
Changing the temperature unit
On delivery, the temperature unit is preset to
degrees Fahrenheit ( ).
♦ In basic mode, press the
to switch between the temperature units
or ).
(
button9
US - EN │ 23 ■

AFT 77 A1
Battery display
If the battery symbol is shown on the indoor
temperature panel2, the batteries in the temperature station should be replaced as soon as
possible (see also the section Operating the
temperature station).
If the battery symbol
temperature panel4, the batteries in the
outdoor sensor should be replaced as soon
as possible (see also section Operating the
outdoor sensor).
is shown on the outdoor
Changing the radio channel
Changing the radio channel on the
outdoor sensor
You can select between 3 radio channels.
Channel 1 is preset.
♦ Open the battery compartmention the
rear of the device by removing the battery
compartment covero.
♦ Select a radio channel by pushing the chan-
nel selectoru to CH1, CH2 or CH3.
♦ Press and hold the
reception signal flashes on the outdoor
temperature panel4.
♦ Press the TX buttonz to manually initiate
the outdoor sensor radio signal. If reception is successful, the temperature on the
outdoor temperature panel 4 will now be
displayed on the new radio channel.
♦ Close the battery compartmenti again.
button0 until the
■ 24 │US - EN

AFT 77 A1
Changing the radio channel display
on the temperature station
If the temperature station is receiving the outdoor sensor radio signal, it will automatically
display the corresponding channel.
However, you can also manually set the display
of various radio channels.
♦ Press the
button0 repeatedly to
switch between the displays CH1 (display
channel 1), CH2 (display channel 2), CH3
(display channel 3) and (display all
channels alternately in a loop).
Only the values from outdoor sensors that
are connected to the temperature station are
shown.
If you use multiple outdoor sensors, choose
a different channel for each outdoor sensor
US - EN │ 25 ■

AFT 77 A1
Troubleshooting
Connection to the outdoor sensor
cannot be established.
■ Disruptive obstacles or other interference
sources such as concrete walls or other
radio transmission devices are located
between the temperature station and the
outdoor sensor.
Change the installation location and
try again.
■ Distance between temperature station and
outdoor sensor is too great.
Decrease the distance. "Visual contact"
between the outdoor sensor and the
temperature station often improves the
transmission.
■ The batteries in the temperature station or
the outdoor sensor are dead.
Replace the batteries.
Synchronization with WWVB signal
not possible
■ Disruptive obstacles or other interference
sources, such as concrete walls or other
radio transmission devices, are interfering
with WWVB signal reception.
Change the installation location (e.g.
near a window) and try again.
■ The batteries of the temperature station are
dead.
Replace the batteries.
■ 26 │US - EN

AFT 77 A1
Cleaning
► To avoid irreparable damage to the device,
ensure that no moisture can penetrate inside
the device during cleaning.
► Do not use caustic, abrasive or solvent-
based cleaning materials. They can
damage the surfaces of the device.
♦ Clean the surfaces of the device with a soft,
dry cloth. For stubborn dirt, use a slightly
damp cloth with a mild detergent.
Storage
♦ If you decide not to use the product for a
long period, remove the batteries and store
it in a clean, dry place away from direct
sunlight.
Disposal
Disposal of the device
Electric devices may not be thrown away as
part of normal household trash. If you can no
longer use your electric device, dispose of it in
accordance with the legal provisions applicable
in your state. This will ensure that old electric
devices are recycled and environmental pollution is kept to a minimum.
Further information about disposal is available
on the internet at www.epa.gov.
US - EN │ 27 ■

AFT 77 A1
Disposal of batteries
Some batteries contain heavy metals such as
mercury, lead, cadmium, and nickel; therefore,
many communities do not allow them to be
thrown away with your regular trash. Recycling
is always the best option for disposing of
used batteries. Dry-cell batteries are used in a
variety of electronics and include alkaline and
carbon zinc (9-volt, D, C, AA, AAA), mercuricoxide (button, some cylindrical and rectangular),
silver-oxide and zinc-air (button), and lithium
(9-volt, C, AA, coin, button, rechargeable)
batteries. Look for in-store recycling bins or
community collection events to dispose of these
batteries.
Disposal of the packaging
The packaging materials have
been selected for their environmental friendliness and ease of
recyclable. Dispose of packaging materials
that are no longer needed in accordance with
applicable local regulations.
numbers(b) with the following meanings:
1–7: Plastics, 20–22: Paper and cardboard,
80–98: Composites.
disposal, and are therefore
Note the marking on the different
packaging materials and
separate them as necessary. The
packaging materials are marked
with abbreviations (a) and
■ 28 │US - EN

AFT 77 A1
Appendix
Technical specifications
Temperature station
Batteries 2 x 1.5 V
(type AA/LR06)
Temperature
measuring range/
measuring accuracy
Temperature
resolution
Radio clock signal WWVB
Outdoor sensor
Batteries 2 x 1.5 V
Temperature
measuring range/
measuring accuracy
Transmission
frequency
Transmission output < 10 dBm
Range in open
terrain
Protection type IPX4 (splash-proof)
+32 °F to +122 °F
(0 °C to +50 °C )/
±2.7 °F (±1.5 °C)
0.1 °F (0.1 °C)
(DC)
(type AA/LR06)
-4 °F to +140 °F
(-20 °C to +60 °C)/
±2.7 °F (±1.5 °C)
433 MHz
max. 98 ft (30 m)
(DC)
US - EN │ 29 ■

AFT 77 A1
FCC Compliance Statement
This device complies with Part 15 of the FCC
Rules. Operation is subject to the following two
conditions:
(1) This device may not cause harmful interference, and (2) this device must accept any
interference received, including interference
that may cause undesired operation.
CAUTION: Changes or modifications not
expressly approved by the party responsible
for compliance could void the user’s authority
to operate the equipment.
NOTE: This equipment has been tested and
found to comply with the limits for Class B
digital devices, pursuant to part 15 of the FCC
rules. These limits are designed to provide
reasonable protection against harmful interference in a residential installation. This equipment generates, uses and can radiate radio
frequency energy and, if not installed and used
in accordance with the instructions, may cause
harmful interference to radio communications.
■ 30 │US - EN

AFT 77 A1
However, there is no guarantee that interference will not occur in a particular installation. If
this equipment does cause harmful interference
to radio or television reception, which can be
determined by turning the equipment off and
on, the user is encouraged to try to correct the
interference by one or more of the following
measures:
- Reorient or relocate the receiving antenna.
- Increase the separation between the equipment and the receiver.
- Connect the equipment to an outlet on a
circuit different from that to which the receiver
is connected.
- Consult the dealer or an experienced radio/
TV technician for help.
US - EN │ 31 ■

AFT 77 A1
3 year limited warranty
What does this warranty cover?
The warranty covers:
▯ Damage, breakage or inoperability due
to defect.
▯ Damage not caused by normal wear and
tear or failure to follow the safety and
maintenance instructions provided in the
user manual.
What is not covered by the warranty?
The warranty does not cover damage caused
by:
▯ Normal wear and tear of the product,
including fragile parts (such as switches,
glass, etc.);
▯ Improper use or transport;
▯ Disregarding safety and maintenance
instructions;
▯ Accidents or acts of nature (e.g. light-
ning, fire, water, etc.);
▯ Tampering with the product (such as
removing cover, unscrewing screws etc.)
Consequential and incidental damages are
also not covered under this warranty. However,
some states do not allow the exclusion or limitation of incidental or consequential damages,
so this limitation or exclusion may not apply to
you.
■ 32 │US - EN

AFT 77 A1
What is the period of coverage and
warranty resolution?
The warranty is for 3 years from the date of
purchase.
At our discretion, product will either be refunded or replaced.
What will we not do?
We will not:
▯ Start a new warranty period upon
product exchange;
▯ Repair product.
How to process the warranty?
To initiate, please:
▯ Call customer service at
1 (844) 543-5872
▯ Visit the Website Customer Service
Platform at
www.lidl.com/contact-us
or
▯ Visit a LIDL store for further assistance
To ensure the quickest warranty return process,
please have the following available:
▯ The original sales receipt that includes
the date purchased;
▯ The product and manual in the original
package;
▯ A statement of the problem.
US - EN │ 33 ■

AFT 77 A1
What must you do to keep the
warranty in effect?
▯ Retain the original receipt;
▯ Follow all product instructions;
▯ Do not repair or modify the product.
How does state law relate to this
warranty?
This warranty gives you specific legal rights, and
you may also have other rights which vary from
state to state. All implied warranties are limited
by the duration and terms of this warranty.
Some states do not allow limitations on how
long an implied warranty lasts, so the above
limitation may not apply to you.
Distributor
LIDL US LLC.
ARLINGTON
VA 22202
■ 34 │US - EN

AFT 77 A1
FCC Supplier’s Declaration of Conformity
Weather station LCD-USA Version/ AFT 77 A1,
MBö-320042
This device complies with part 15 of the FCC
Rules. Operation is subject to the following two
conditions: (1) This device may not cause harmful
interference, and (2) this device must accept any
interference received, including interference that
may cause undesired operation.
Suppliers Name: Lidl US, LLC
Suppliers Address: 3500 S. Clark Street Arlington
Virginia United States
Internet contact information: www.lidl.com
US - EN │ 33 ■
 Loading...