

Page 1
K6-8KPS Shielded RJ45 Category 6 Keystone Insert
Product Installation Instructions
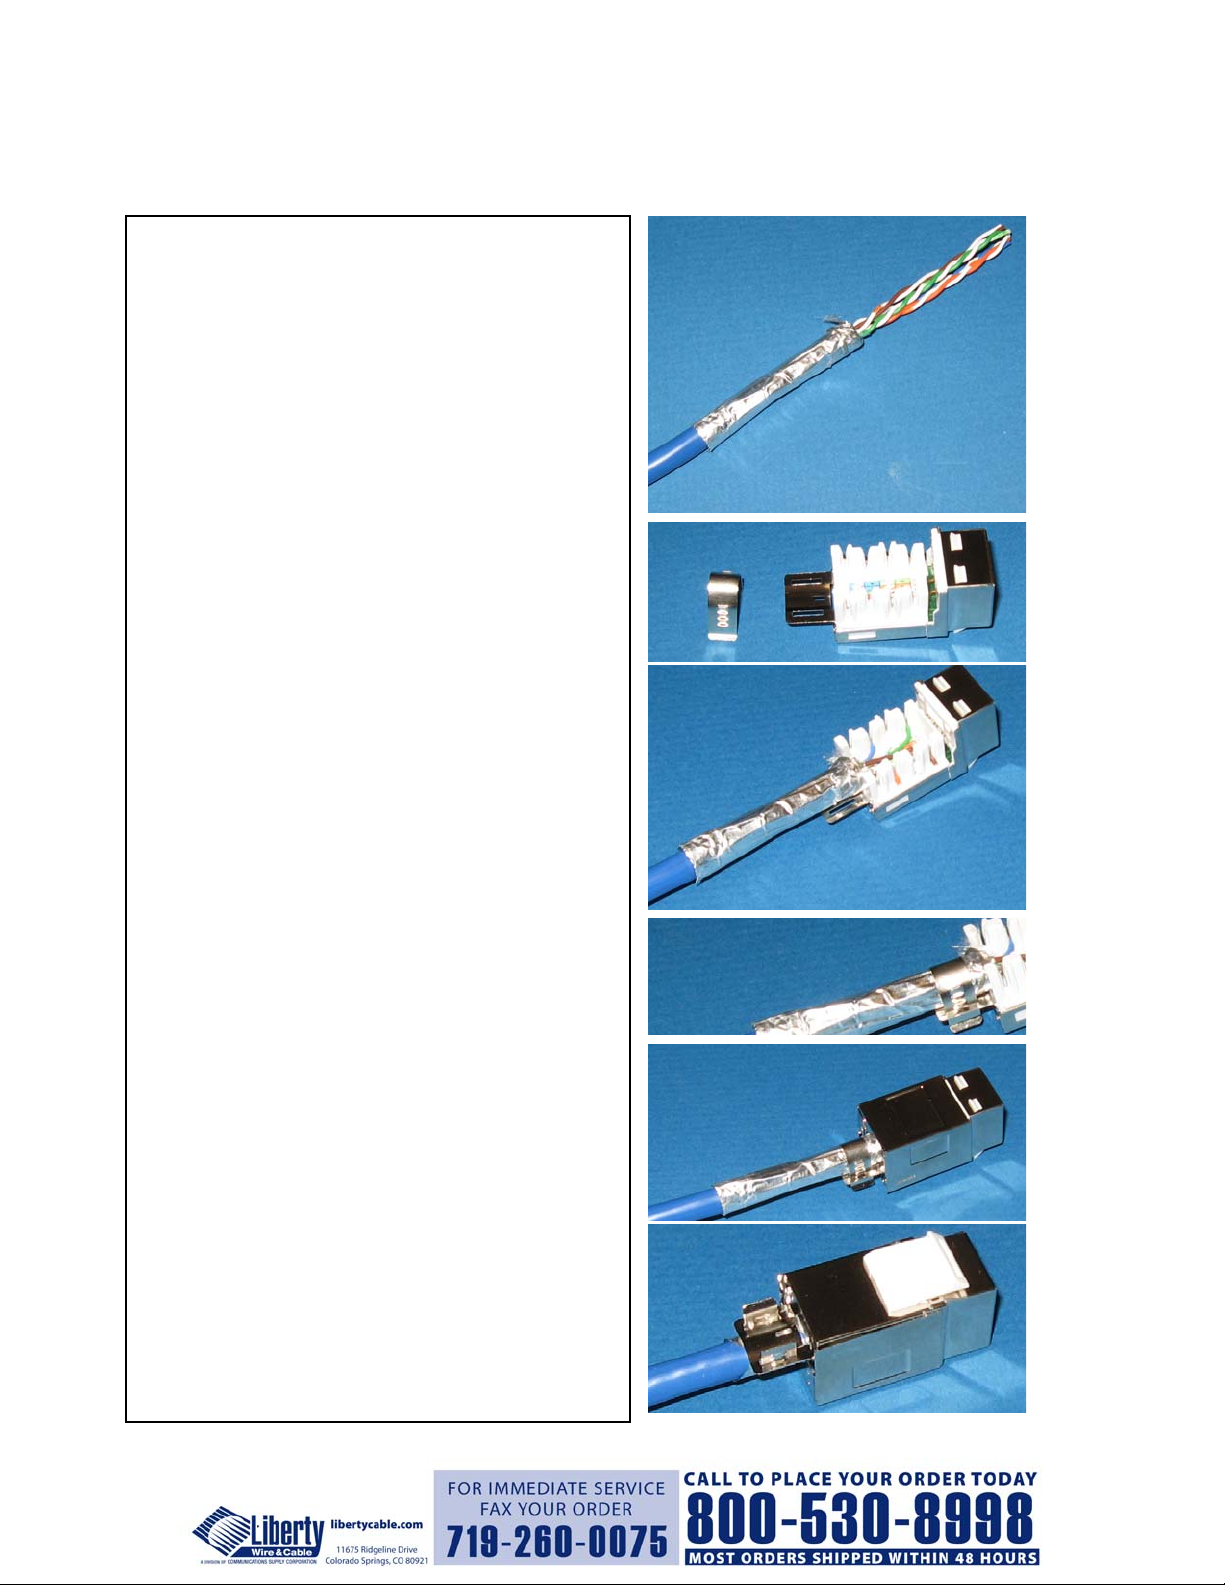
Prepare the Cable:
Steps 1-3
Step 1:
Measure and strip off at least 2-inches of the outer jacket of
the Category Cable. The shield must remain intact and
use of the ripcord instead of a bladed tool will assist this
action
Step 2:
Fold the foil shield back over the jacket. The inner silver
surface of the shield is the conductive portion and must be
facing out after folding over the jacket.
Step 3.
Wrap the drain wire around the edge of the folded shield.
Use a half hitch knot to secure the drain in place.
Prepare the Connector:
Step 4
Step 4.
Remove the cable clamp and the shielded cap from the
connector and set aside for later use. DO NOT flex the flat
tabular cable support as it will break.
Terminate the wire:
Step 5-6
Step 5.
Untwist the pairs and lay into the 110 block according to
the style needed (568A or 568B). Ensure t he cable end is
flush to the center channel entrance. Inserted too far will
interfere with the outer pair punch down. If the cable is too
far out the 0.5-inch requirement for untwisted distance to
termination will be compromised.
Step 6.
Punch down the conductors using a 110-style termination
tool. Trim off the wires if the tool does not have an
automatic trimming feature. Ensure the white/color striped
Step 7
wires are trimmed far enough away from walls to prevent
shorting to the shield cap at final assembly.
Final Assembly of the Connector:
Step 7.
Step 8
Replace the Wire Clamp in the bracket at the rear of th e
insert and tighten on the wire by ratcheting down the
Clamp over the folded shield and drain wire. Support the
tabular cable support when ratcheting down or the t ab can
flex and break off.
Step 8.
Replace the Shielded Cap over the termination zone of the
insert.
Step 9:
Step 9
Insert completed assembly into any Keystone Faceplate.
Ensure the bend radius of the Category Cable is not
compromised. The suggested minimum bend radius is 10
times the outside diameter of the cable. A tighter bend
radius then this will compromise cable performance and
also place excessive strain on the cable clamp assembly at
the rear of the insert.
Revision Date: 10/22/2008
 Loading...