

Page 1
ConnecTec™ Audio
Connector Instructions
Step 1.
Ensure you have the correct Connector Body for the AWG (Gage)
of the wire. The Blue Ring is for 16-AWG, the Red Ring is for
14 AWG and the Black Ring is for 10-12 AWG wire.
Step 2.
Strip the wire outer jacket to desired length. (Optional – slide
shrink tubing up cable at this point for later use)
Step 3.
Trim wire ends square for best results.
Step 4.
push the wire up into the connector. The operator will feel the
pin bite into the wire end.
Step 5.
Continue pushing the wire into the connector and turn the
connector clockwise (Right) to thread the wire over the
threaded pin.
Step 6.
completely when fully seated.
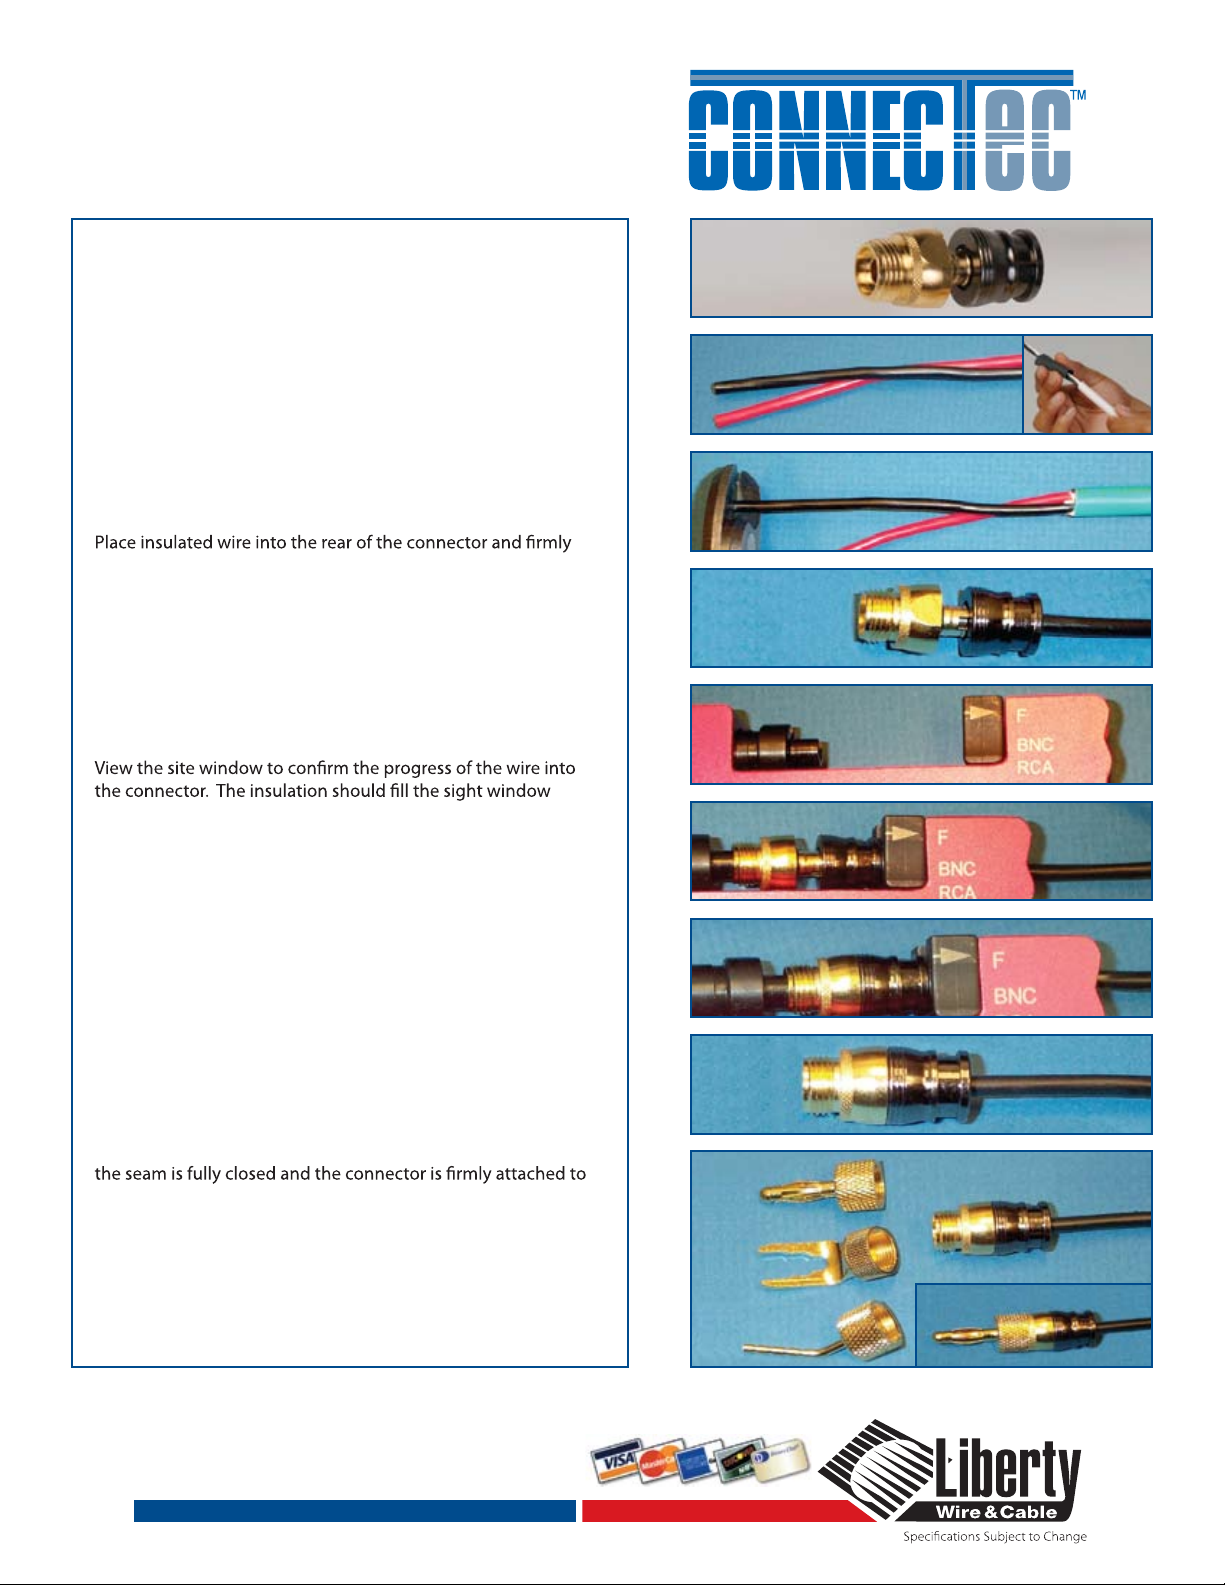
STEP 1
STEP 2A STEP 2B
STEP 3
STEP 4,5,6
STEP 7
STEP 8
Step 7.
Ensure the CM-TOOL is set up correctly with the die arrow
positioned for “F” Connectors.
Step 8.
Place the Connector into the tool and line the plunger nose into
the face of the connector.
Step 9.
Firmly compress the connector until the seam is closed between
the rear die and gold connector body
Step 10.
Remove the connector from the tool and inspect to ensure
the cable. Repeat 3-9 for other connectors. (Optional – Shrink
tubing can be positioned and shrunk at this juncture.)
Step 11.
Thread the adapter of choice onto the threaded front portion
of the connector. This can be unthreaded and another adapter
substituted when required.
STEP 9
STEP 10
STEP 11A
STEP 11B
800-530-8998
THE AV PROFESSIONAL’S FIRST CHOICE.
LIBERT YCABLE. COM
 Loading...