

Liberty Grandview Skyshow D Series User Manual

Integr ate d Motorized Screen
User Manual for SkyShow
Series Model D
Sui table for Mo del Nam ed SK-M I(F)
Protecting your Screen:
To ens ure long la sting vie wing enjoyment keep
the screen roll ed up w hen n ot in u se. Check both
the front and bac k s ur fac es before retract ing i nto
the case t o ma ke sure it is free of dust, dirt, insects
or other foreign matter. Use a s oft brush or clo th to
lig htly remove any foreign particles.
Cleaning your Screen:
Use warm water with a mild d etergent to remove
any marks on the surface or screen casing (only
dab, do n ot rub). Immediately dry the screen with
a sof t cloth or towel. Do no t leave it to air dry.
Never us e any s olv ent s, chem icals or abrasive
cle aners o n the scr een sur face as t hey can
per manently damage the sc reen su rface.
Scr een: Voltag e AC220 -230V /50-6 0HZ, 0.8A mp, power 1 90watt s.
RF re mote( F): Volt age 3V, use CR 2450* 1 batter y.
Rad io Frequ ency : 433 Hz. maxim um cont rol dist ance 15 m.
Setti ng for Up and Down Li mited Positioning for Mo tor:
The l imite d posit ionin g of motor h as been d efaul ted whe n
EX- facto ry, it is not a llowed t o reset .
Note:
Whe n setti ng RS23 2 or RS48 5, if th e scree n is not ab le to
ope rate as i t is, pleas e switch p ositi on of No. 1 and N o. 2.
The e lectr ic resi stanc e of retu rn circ uit is le ss than 2 0Ω.
Do no t do wiri ng near by inte rfere nce sou rces.
RS4 85/RS 232 con trol pro tocal :
Bau d Rate: 2 400
Dat a Bits: 8
Sto p Bits: 1
Pari ty: No ne
Hex c omman d:
Scr een UP: f f ee ee ee dd
Sto p: ff ee ee e e cc
Dow n: ff ee ee e e ee
In so me case s you may n eed to
ena ble the R S-232 c ontro l by
sen ding he x comma nd:
ff ee e e ee aa
P1
DB9
1
6
2
7
3
5
TXD
GND
6
5
4
3
2
1
6P6C
8
4
9
D. RS4 85 or RS2 32 :
From l eft to ri ght, 1 & 2 ca ble for c ontrol .
For RS 485, ca ble 1 is D -, cabl e 2 is D+. The
con necti ng of RS2 32 as fig ure sho ws.
USB Serial Port (CO M3) Property
Detail Event
Drive Program
General
Port
Confirm
Advanced Restore
Baud Rate:
2400
Data Bits:
8
Parity:
None
Stop Bits:
1
Flow Control:
None
Cancel
RJ12
6P6C
6
5
4
3
2
1
UP
S1
S2
S3
DOWN
STOP
COM
RJ12
6P6C
6
5
4
3
2
1
UP
S1
DOWN
STOP
COM
S2
S3
123 45 6
EXT ERNAL
CTR L
C. LVC:
Simp ly contac t
RJ12 6P 6C connec tor.
From lef t to right, 3- 6
is cont rol signal c able,
3 is comm on cable,
4 is stop, 5 is l ower,
6 is lift .
Tri gger co ntrol
Use a s mall pi n fit to si ze to inse rt int o posit ionin g setti ng
key hole at r ear sid e of remo te and pre ss it to ma ke the li ght on.
The n press “down” key o n remote t o opera te scre en to go
dow n. When s creen m oves to th e requi red pos ition , then p ress
“sto p” butto n. And ple ase pres s posit ionin g setti ng key hole
wit h pin aga in. Thi s is the dow n posi tioni ng set as re quire d.
Ple ase fol low the sa me to set u p limit , Plea se chec k below :
Not e: Maxim um trav el dist ance of s teel wi re is 5met ers.
Stop
Stop
Up Down
Cycle c ontro l
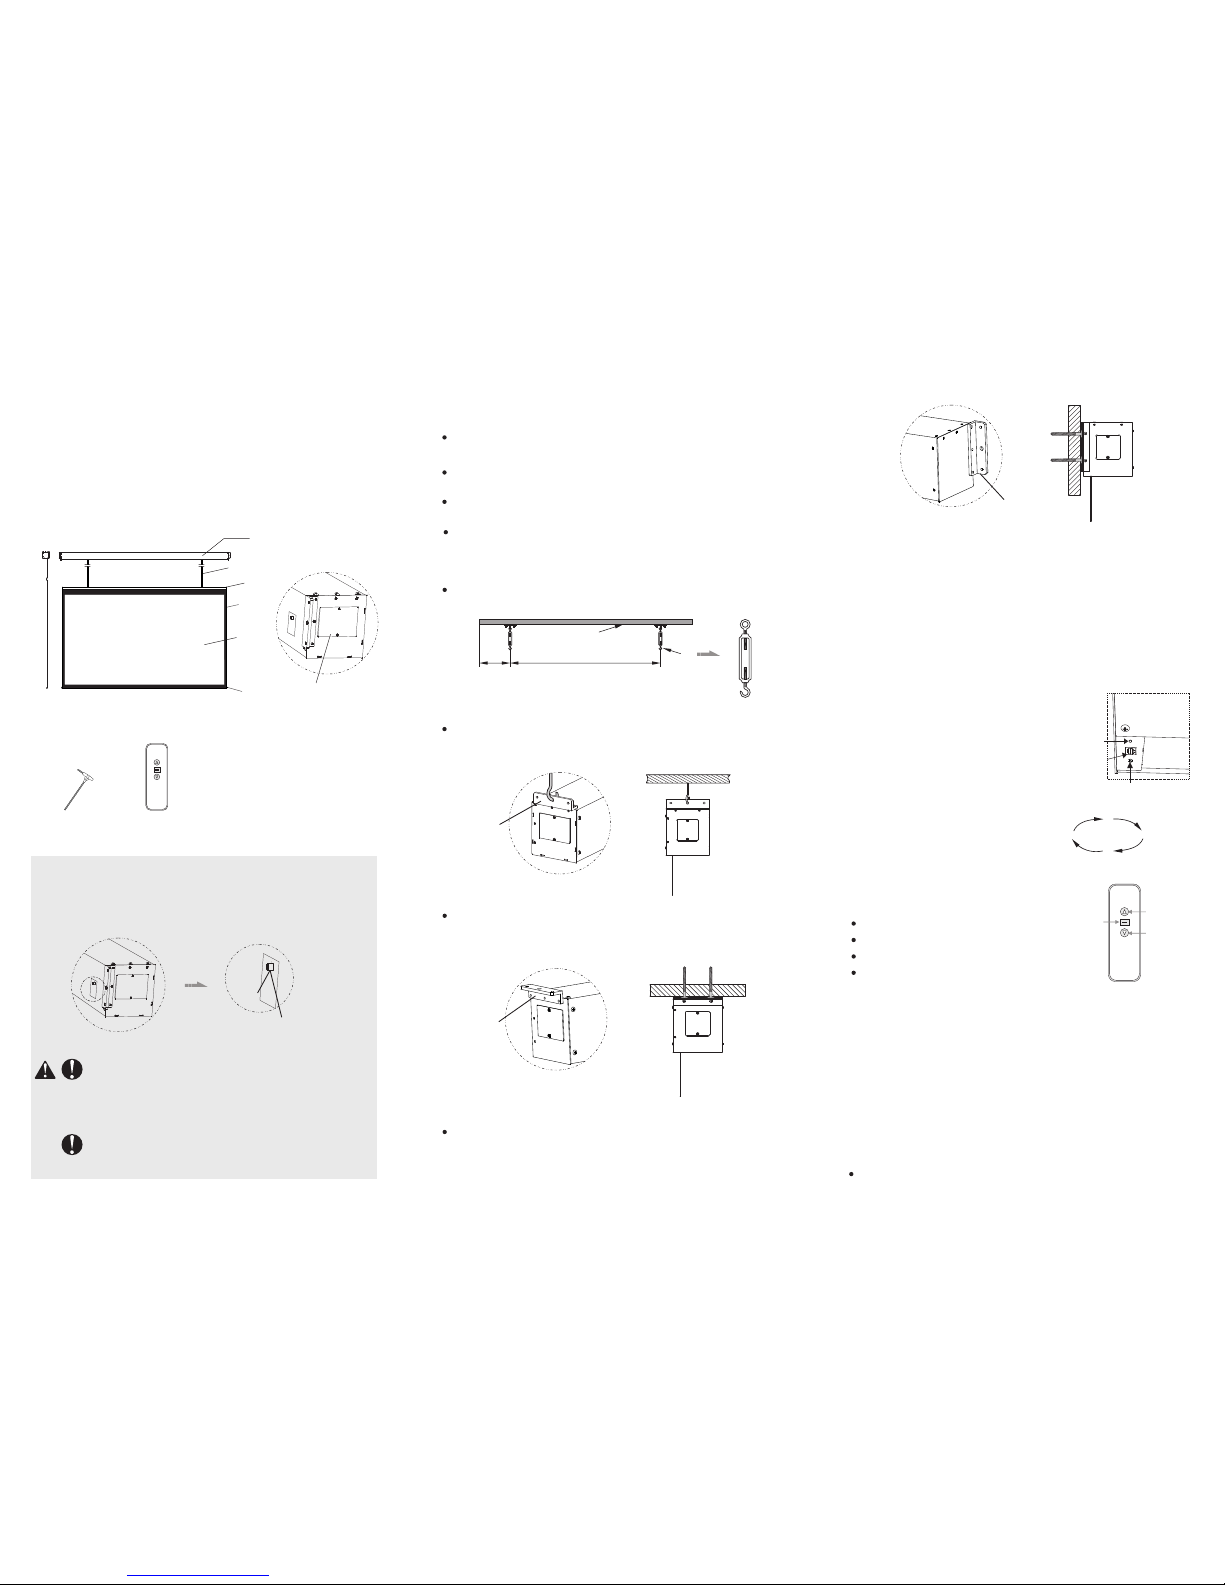
In or der to en sure pro duct s afety d uring t ransp ortat ion, we
ins tall fi xing sc rews at t he two end s of prod uct. Fixi ng
scr ews mus t be take n out bef ore scre en inst allat ion,
CAUTION
Mak e sure th e hook is w ell fixe d onto th e ceili ng, hang t he
scr een on an d lock th e buckl e. Ensu re the ho ok and bu ckle is
wel l insta lled in c ase of dro pping a ccide ntall y, figur e below :
Reco mmend l eavin g
Min. 1 000mm d istan ce
from e dge in ca se of
futu re repa iring.
Requ ired In stall ation
dist ance
Hook
Conc rete cei ling
It is r ecomm ended t o use hoo k availa ble wit h adjus table
len gth, pl ease ch eck bel ow:
Powe r conne ction :
Gra ndvie w scree n is pre- insta ll with y our loc al plug, you ca n
Ple ase pre pare bel ow nece ssar y Insta llati on tool s: Screw s
dri ver, leve ling I nstru ment, ta pe meas ure and m arker.
Bef ore inst allat ion, pl ease me asure t he inst allat ion scr ews
It mu st be ass ured th e scree n is fixed f irml y onto the w all
whi ch is str ong eno ugh acco rding t o the siz e and sel f weigh t.
Aft er inst allat ion, ke ep the ca sing bo th edge l evel.
Dear Customers:
Tha nk you for t he purc hasin g of Gran dview S kysho w serie s Dtyp e proje ction s creen . Befor e your nor mal usi ng of pro duct,
ple ase rea d the spe cific ation f irst, an d keep it w ell for f uture
Scre en
Blac k
Scre en
Moto r/Cir cuit Bo ard
Insp ecti on Hole
Acce ssaries:
M5 Adj ustme nt
Span ner(1 pcs)
Remo te
cont rolle r(1pc )
WARNI NG: Ple ase gua rante e ceili ng or wal l or
sus pensi on devi ce can be aring 4 t imes of p roduc t
net w eight b efore in stall ation,o ther wise pe ople
hur t and pro pert y losse s possi ble to ha ppen by t he
rea son of sc reen fa lling.
WARNI NG: In stall ation po sitio n must st rict ly fit fo r
the d imens ion of pr oduct , to avoi d probl ems lik e
pro duct ca nnot be i nstal led or in stall l eanin g.
fixi ng
scre w
take o ut befo re insta llati on
(Rec ommen d to take o ut
afte r unpac king t he cart on)
Moun ting
brac ket
Moun ting
brac ket
Leav e at leas t 1000m m spare d istan ce on the l eft edg e
refe rrin g to ceili ng hang ing ins talla tion. Fi x the lef t and ri ght
mou nting b racke ts with s crews on to wall a nd make i t firm.
Leav e at leas t 1000m m spare d istan ce on the l eft edg e
refe rrin g to ceili ng hang ing/ ce iling m ounte d insta llati on. Fix
the l eft and r ight mo untin g brack ets wit h screw s onto wal l
Moun ting
brac ket
Cau tion:
Ple ase rem ove all th e stick ers bef ore ope rate the s creen .
Imp orta nt note:
Thi s produ ct is usi ng Sing le-ph ase AC po wer sup ply, mus t well
B. RF remot e with mo del nam e :
Pres s Up butt on, scr een ret ract
Pres s Stop bu tton, s creen s top
Pres s Down bu tton, s creen e xpand
RF re mote is p re-se tting i n facto ry wit h
the s creen , also ca n reset if n ecess ary.
Ele ctron ic posi tioni ng by Rem ote:
User c ould se t the dow n limit w ith rem ote acco rding t o requi rement .
Rem ote pai ring:
It' s the rem ote par ing sta tus once m otor co nnect t o the pow er with in
10 se conds. P ress UP & S TOP butt on toge ther for r emote p airin g with
Rem ote un- pairi ng:
It' s the rem ote par ing sta tus once m otor co nnect t o the pow er with in
10 se conds. P ress UP & S TOP butt on toge ther for c lear th e memor y,
Down
butt on
Stop
butt on
Fabric control instruction
4 Con trol way s are avai lable f or inte grated
A. Ma nual co ntrol ( cycli c key)
B. Wire less re mote
C. LVC
RF emi tter fo r
mode l named
6P out put
por t for
RS48 5 and
A. Ma nual co ntrol :
Man ual con trol bu tton is on t he lef t
sid e of the ca sing (c lose to R S485 an d
dry c ontac t inter face ), this i s a cycle
con trol but ton.
 Loading...