

LG Motorsports C5Pro User Manual
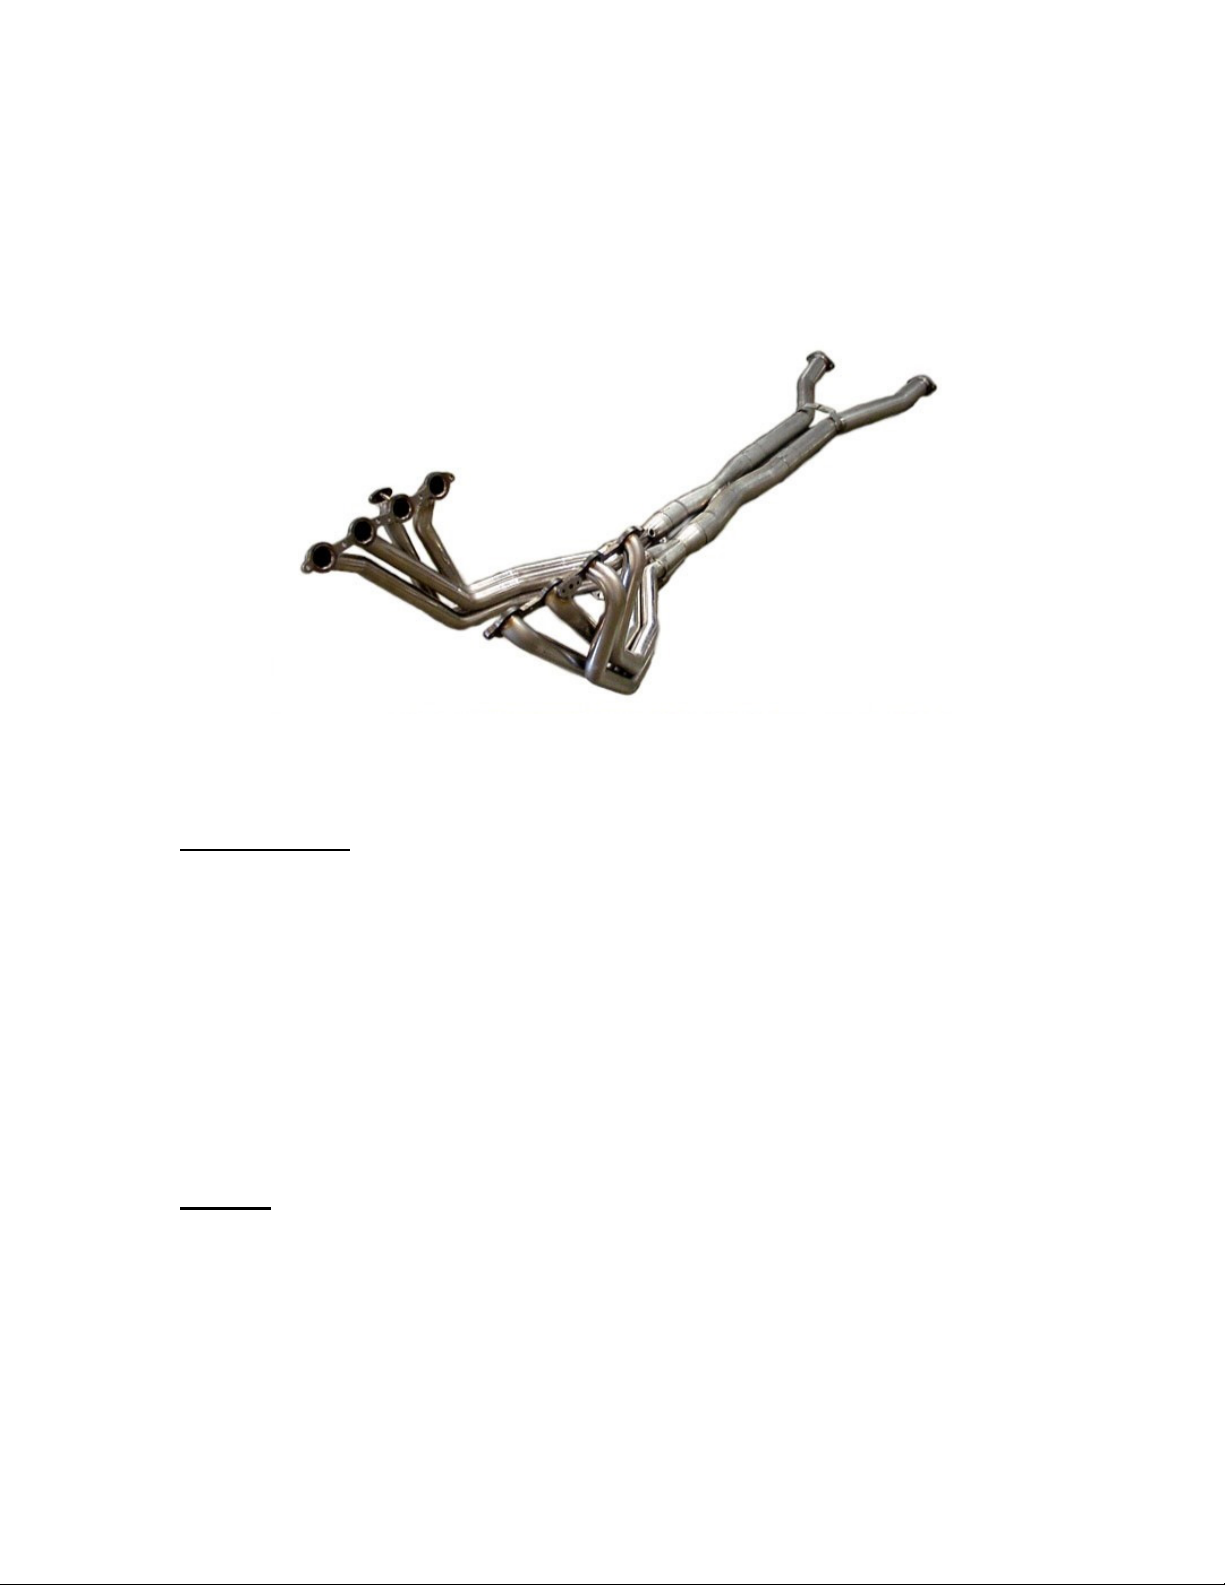
LG Pro Long Tube Headers
C5 Corvette
“THE MOST POWERFUL HEADERS ON THE PLANET”
Brought to you by LG Motorsports
972-429-1963
Thank you for purchasing LG headers for your C5 Corvette.
Parts Inventory:
1. Driver side header
2. Passenger side header
3. X- pipe with 02 sensor bungs
4. 2 high flow cats OR 2 cat delete pipes
5. Driver side rear flow tube
6. Passenger side rear flow tube
7. 6 3” stainless steel band clamps
8. 1 pair of flat to square 02 adapters (’97 to ’03 cars)
9. 2 pairs of square to square 02 extensions (’04 only)
10. AIR injection pipe (’97 thru ’00 cars only)
Optional
1. Pair LS1 style exhaust gaskets
2. Stainless Stage 8 Locking header bolts

Instructions:
Removal:
Start by supporting the car on a lift, or 4 jack stands on a level surface about two
or more feet off of the ground. Disconnect negative battery cable before any work
begins.
Once noting the placement of the stock exhaust parts you will need to start by
removing the old exhaust components. Start by removing the fuel rail covers on top of
the engine. These simply unclip and pull off. The driver side is a little trickier as you
need to route the fuel line through the cut out in the cover. Once that is done then set
them aside. You will also have to unbolt and remove the oil dipstick from the passenger
side of the engine.
Move on to removing the spark plug wires and spark plugs from the engine. Be
careful not to drop any of the spark plugs as this will damage the plug and cause a misfire
condition. Also make sure to pull by the boot on the wires or they will separate. If your
car has over 30,000 miles now is a good time to think about new wires. Once this is
done, the next electrical part that needs to be completed is removal of the factory 02
sensors. There are 4 sensors in the stock exhaust. Unclip the sensors from their wires
and make note which sensors are used in the front and which are used in the rear.
At this point it is time to start removing the factory exhaust system. Start by unbolting all of the clamps on the under side of the car and all of the factory hanger bolts.
There is a 2 bolt flange at the mufflers at the rear that will need to be un-bolted first.
Remove the exhaust manifold to H pipe bolts and remove the factory H pipe to the
mufflers. At this point you can move back up top and remove the bolts that hold the
manifolds onto the engine. Before removing all bolts please remove the AIR injection
fittings from the top of the manifolds. Removing the coil brackets to the valve cove rs
will make this job much easier. The manifolds should drop out from the top down. Now
you have removed all components of the factory exhaust system and are ready to start the
install of the header system.
Install:
Start by installing the driver side header from the bottom side of the car. The
headers should slide into the engine compartment by pointing the collector towards the
inside of the car and down, and rotate into place. You can ‘hang’ them from the head
bolts until you can go back on the top side. I suggest installing only a front and rear bolt
with the gasket first then only starting the rest of the bolts before installing the rest of the
system.
Now install the header on the passenger side to start the rest of the install. The
header should install from the bottom up. We also only recommend using GM header
gaskets for the 2000 LS1 Camaro/Corvette as these use the same port design as the
headers and have proven the best seal.
 Loading...