

Page 1
Multimedia [Menu 4]
You can enjoy your multimedia function such as camera,
voice recorder, MP3 for your fun and convinience.
Take photo [Menu 4-1]
• To take a picture with Folder opened
1. Select Take photo, and then press . If you want
to reach this menu directly, press for a long time.
2. Focus on the subject to capture the image, and
then press the key.
3. If you want to save it, press the left soft key or
the key.
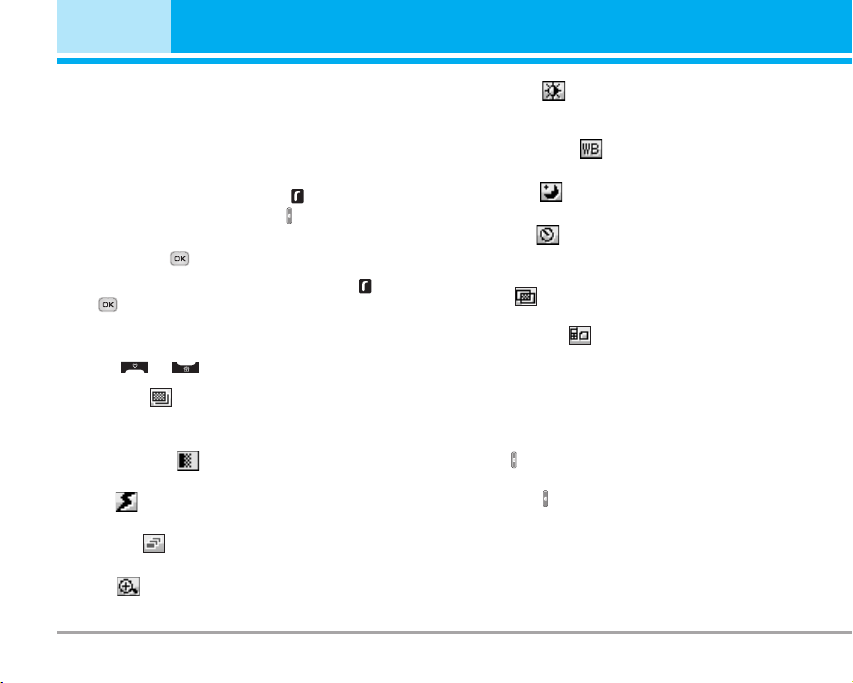
n Note You can control the image size, brightness, colour
and zooming by pressing the navigation key.
( or ).
] Resolution [ ]: Allows you to set the image size
to one of Hi (1280X960), Med (640x480), Low
(320x240) main screen, contact, and front screen.
] Picture quality [ ]: Allows you to set the image
quality from Standard, Fine and Superfine.
] Flash [ ]: Allow you to set the flash when you
take a photo in dark place.
] Multishot [ ]: Allows to take a multishot photos
successively.
] Zoom [ ]: Allows you to set the zooming value
from x1 to x2 depends on resolution.
36 P7200
] Brightness [ ]: Use the right/left navigation keys
to adjust lighting. 9 lighting levels are available:
-2.0, -1.5, -1.0, -0.5, 0.0, +0.5, +1.0, +1.5, +2.0.
] Lighting settings [ ]: Allows you to change the
settins according to the enviroment.
] Night time [ ]: Allows you to take a picture by
using this menu at night.
] Autoshoot [ ]: Allows you to select the delay time
(None, 3 Seconds , 5 Seconds, 10 seconds). Then
the phone takes a photo after the specified time.
] Colour [ ]: 3 settings are available: Color, Sepia,
Black/White.
] Memory status [ ]: Check the available memory
to take new pictures.
• To take a picture with Folder closed
You can see yourself by sub LCD, when you take your
self-portrait.
1. Press [ ] for a long time.
2. Focus on the subject to capture the image, and
then press [ ]. This time, the picture is saved
automatically.
• Take photo: Activate the Take photo mode.
• Slide show: View the pictures in Album as slide show.
• Torch: Activate the flash light.
• Back: Go back to the previous menu.
Page 2
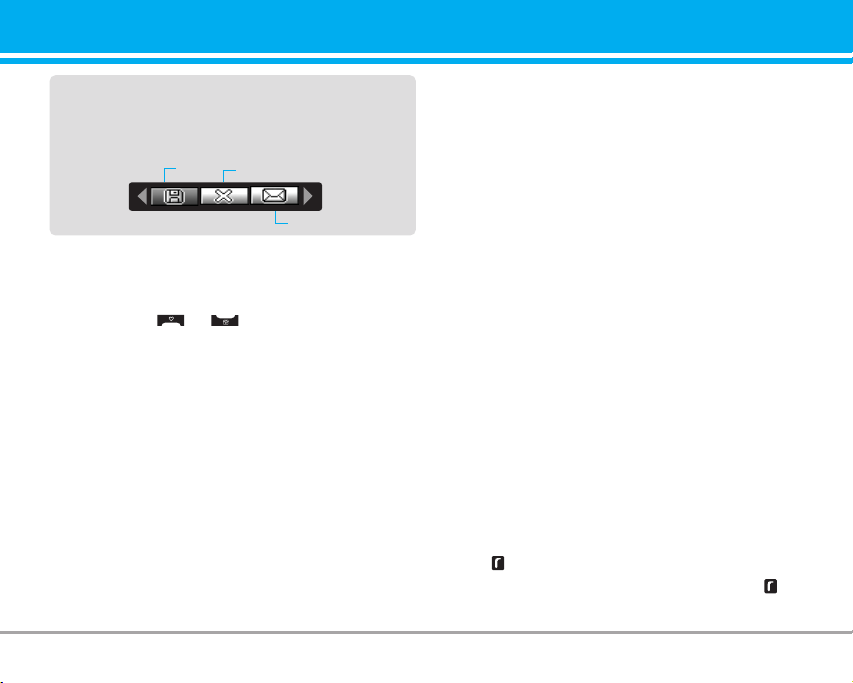
After finishing all the setting, focus on the subject to
capture and press the Camera key or OK key. With a
click, the image is captured and the following menu
bar appears.
Save
Delete
MMS message
Fun frames [Menu 4-2]
You can take a picture on the various of backgrounds.
Furthermore, you can select a frame by pressing the
navigation key or .
n Note
In this mode, you can’t change the settings of resolution.
• Options
] Full view: You can view full photo.
] Multi view: You can view the maximum of 9
thumbnails in a screen.
] Set as wallpaper: You can set a picture as a wallpaper.
] Send via multimedia message: You can send a
picture thru MMS.
] Send via bluetooth: You can send the photo by
bluetooth.
] Copy/Move to external memory: You can copy or
move between phone and the SD memory.
] Rename: You can edit the title of picture.
] Delete: You can delete a photo.
] Information: You can view the information about
Title, Size, Date and Time you’ve taken.
Take silent movie [Menu 4-3]
You can record video streaming for 20 seconds.
1. Select Take silent movie menu.
2. If you want to record the data, press the left soft
key [Record].
3. You can check the remained time by time bar.
Voice recorder [Menu 4-4]
The voice memo feature you to record up to 10 voice
messages and each memo is up to 60 Seconds.
n Note The default setting for recording time is 30 seconds,
but you can select 30 secs or 1 min in settings
menu.
Record [Menu 4-4-1]
You can record voice memo in Voice recorder menu.
1. Once recording is started, the message Recording
and the remaining time is displayed.
2. If you want to finish recording, press the left soft
key [Save].
3. Key in Voice memo title, press the left soft key
[OK].
P7200 37
Page 3
Multimedia [Menu 4]
View list [Menu 4-4-2]
The phone shows voice memo list. You can playback
and delete the recorded voice memo.
] Play: Allows to listen to the recorded voice memo.
] Record new: Allows to record new voice memo.
] Send via message: Allows to send the multimedia
message or bluetooth with voice memo.
] Delete: Allows to delete voice memo.
] Delete all: Allows to delete all voice memos.
Karaoke [Menu 4-5]
Karaoke is the sing-a-long functionality.
You can download the song to the phone by using the
WAP. These function come with synchronised lyrics
to prompt you singing along.
Start to Karaoke menu
1. Select Karaoke, press by the left soft key .
The following menus are available.
My song
1. Select the My song menu by pressing the OK key.
The song list, all of the downloaded and default
songs, are displayed.
2. To scroll highlight the song you want, and then the
OK key.
The following options are available.
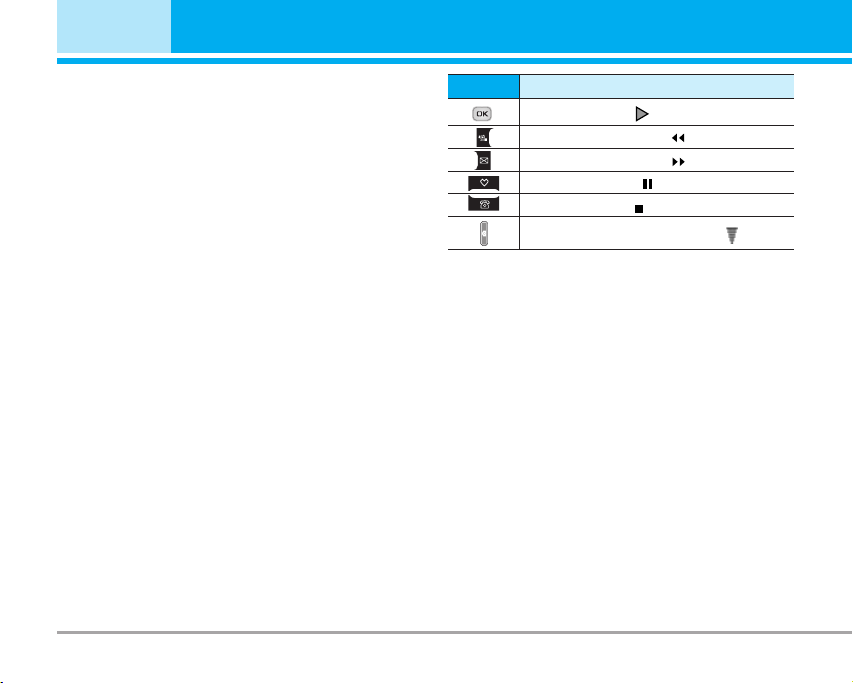
] Start song: You can play the current track to sing-a-long.
38 P7200
key
To play the track ( )
To skip to the next track ( )
To skip to the next track ( )
To pause the track ( )
To stop playback ( )
To adjust the volume of the song. ( )
Description
] Whole text: You can see the whole lyrics of the
selected song.
] Delete: You can delete the selected song form the list.
] Back to list: Go back to the list.
New song
Select the New song by pressing the OK key. A new
song can be downloaded using the network connection.
n Note In order to use New song function You need to
setup internet connection. Go to Downloads, and
then select Games & more. In this menu, you can
go to Profiles and select one of them. In Settings
menu, you should connect Internet according to
your network settings (For more information to
connect internet, contact Your service provider).
After finishing setup, don’t forget to activate this
profile by pressing Activate in menu.
Help
n Note To use Karaoke menu, please refer to Wow LG site
http://www.wowlg.com.
Page 4
MP3 [Menu 4-6]
The P7200 has an integrated MP3 player built-in. You
can enjoy listening to MP3 music files on a memory in
your phone using a compatible headset or via the
internal loudspeaker.
n Note Because of the small dimension of the speaker, in some
cases the audio could be distorted, especially at maximum
volume and when there are lots of bass sounds.
Therefore, we recommend you to use the stereo headset
in order to appreciate the high quality of your music.
The music player supports:
• MPEG-1 Layer III: Sampling frequency up to 48KHz,
Bit rate up to 192Kbps, stereo
• MPEG-2 Layer III: Sampling frequency up to 24KHz,
Bit rate up to 160Kbps, stereo
• AAC: ADIF, ADTS formats
n Note P7200 doesn't support the variable rate of AAC file.
Therefore, you can't change the file from MP3
format to AAC.
You can transfer MP3 files from a compatible PC to the
memory in your phone using the LG Contents Bank on
the CD-ROM in the sales package.
When you connect the phone to a PC using the USB
cable(supplied in the same package), you need to install
a driver. For further details, refer to the CD-ROM manual.
(Sampling frequency up to 48KHz)
n Note • The PC should run Windows 98 SE, Windows ME,
Windows 2000, Windows XP operating system.
• Besides downloading the MP3 files to the phone, you
can upload the pictures taken on the phone to the PC
using the USB cable. And you can also manage the
phonebook, scheduler, and Memo on the PC. Consult
with the authorised dealer for availability of accessories.
• To download MP3 file in Windows 2000, you should set
folder option in PC as follow: View WEB ->Use Windows
default folder (I).
MP3 player [Menu 4-6-1]
1. Press MP3 menu, and then select MP3 player.
2. Press the left soft key [Options] to access the
following menus.
] Main LCD skin: This menu allows to change the
backgroud of main LCD on playing MP3 file.
] Front LCD skin: This menu allows to change the
backgroud of front LCD on playing MP3 file with
closing a folder.
] Equalizer
This menu helps you to adjust various of
environment on listening to the music. This phone
supports four preset menus. When you enter this
menu, you can view current value of equalizer.
P7200 39
Page 5

Multimedia [Menu 4]
] Flip setting:
• Continue playing
Although you close the flip on playing, the play
mode is continued without a pause.
• Stop playing
When you close the flip, you can stop the play mode.
] View play list
You can view the play list on listening to the music.
] Playmode
This menu allows to set the play mode: Play all,
Repeat all, Random all, Play one and Repeat one.
] Set as ring tone
This menu allows to set the MP3 file as a ring tone.
You can also set it as a ring tone in Profile.
Play list [Menu 4-6-2]
This menu allows to view the whole play list. You can
move the track by pressing the navigation key.
In addition, if you select option menu, you can delete
the file or view its information .
40 P7200
My photos [Menu 4-7]
You can view and send a picture. In addition, you can
set the window as a background.
All photos [Menu 4-7-1]
You can view all pictures in order.
General photos [Menu 4-7-2]
You can view all pictures except of frame and phone
book ones.
Mode photos [Menu 4-7-3]
You can view all frame pictures.
Contacts photos [Menu 4-7-4]
You can view all contacts photos.
] Full view: You can view full photo.
] Multi view: You can view the maximum of 9
thumbnails in a screen.
] Set as wallpaper: You can set a picture as a
wallpaper.
] Send via multimedia message: You can send a
picture thru MMS.
] Send via bluetooth: You can send the photo by
bluetooth.
Page 6

] Copy/ Move to external memory: You can copy or
move between phone and the SD memory.
] Rename: You can edit the title of picture.
] Delete: You can delete the photo.
] Information: You can view the information about
Title, Size, Date and Time you’ve taken.
Silent movie [Menu 4-8]
This menu allows to play or delete the video file. You
can change the name of file, and check information
related to size and time.
Settings [Menu 4-9]
Camera [Menu 4-9-1]
] Auto save: If you set On, the images will be saved
automatically without displaying menu bar to save.
] Shutter tone: You can change the shutter tone to
take a picture.
] Delete all photos: This menu allows to delete all
photos after asking your confirmation.
Voice recorder [Menu 4-9-2]
] Duration: You can set the duration to record for 30
seconds or 1 minute.
Memory in use [Menu 4-9-3]
You can check the capacity of memory in use.
P7200 41
Page 7
Messages [Menu 5]
New message [Menu 5-1]
This menu includes functions related to SMS (Short
Message Service), MMS (Multimedia Message
Service), voice mail, as well as the network’s service
messages.
Text message [Menu 5-1-1]
You can write and edit text message, checking the
number of message pages.
1. Enter the Messages menu by pressing the left soft
key [Select].
2. If you want to write a new message, select Text
message.
3. To make text input easier, use T9.
4. Press [Insert] to attach the followings.
Insert
] Picture: You can insert the Default graphics or
graphics in My pictures that are available for short
messages.
] Sound: You can insert sounds that are available for
short messages.
] Text templates: You can use Text templates already
set in the phone.
] Contacts: You can add phone numbers or e-mail
addresses in address book.
] Symbol: You can add special characters.
42 P7200
] Business card: You can add your signature to the
message.
] Schedule: You can insert your own schedule on
writing the message.
5. If you want to set option for your text, or to finish
your writing, press the left soft key [Options].
Options
] Send: Sends text messages.
1. Enter numbers of recipient.
2. Press key to add more recipients.
3. You can add phone numbers in the address book.
4. Press the left soft key after entering numbers.
All messages will be automatically saved in the
outbox folder, even after a sending failure.
] Save to drafts: Stores messages in Drafts.
] Font & Alignment: You can select Size and Style of
fonts, and the alignment of text.
] Colour: You can select Colour of foreground and
background.
] T9 dictionary: You can add your own word. This
menu can be shown only when edit mode is
Predictive (T9Abc/T9abc/T9ABC).
] Exit: If you press Exit while writing a message, you
can end the writing message and back to the Message
menu. The message you have written is not saved.
Page 8

n Note The phone which supports EMS release 5 is
available to send colour pictures, sounds, text
styles, etc.. The other party may not receive
pictures, sounds or text styles you sent properly if
the phone does not support such options.
Multimedia message [Menu 5-1-2]
You can write and edit multimedia messages,
checking message size.
1. Enter the Message menu by pressing the left soft
key [Select].
2. If you want to write a new message, select
Multimedia message.
3. You can create a new message or choose one of
the multimedia message templates already made.
4. Press Insert to add photos, pictures, sounds,
record voice, text templates, contacts, symbol,
business card, and schedule.
Options
] Send: You can send multimedia messages to
multiple recipients, priorities your message, and
make it sent later as well.
Note
n
All messages will be automatically saved in the
outbox folder, even after a sending failure.
] Preview: You can preview multimedia messages
you wrote.
] Save: You can save multimedia messages To drafts
or As template.
] Edit subject: You can edit the subject of each
message.
] Add slide: You can add a slide before or after current slide.
] Move to slide: You can move to previous or next slide.
] Delete slide: You can delete current slides.
] Set slide format
- Set timer: You can set timer for slide, text, picture
and sound.
- Set color: You can set the color of foreground or
background.
] T9 dictionary: You can add your own word. This
menu can be shown only when edit mode is
Predictive (T9Abc/T9abc/T9ABC).
] Exit: You can get back to the Message menu.
n Note If you select the picture (15K) on writing multimedia
message, loading duration will take around 15
seconds at least. Furthermore, you can’t activate
any key during loading time. After 15 seconds, it is
available to write multimedia message.
P7200 43
Page 9
Messages [Menu 5]
Inbox [Menu 5-2]
You will be alerted when you have received messages.
They will be stored in Inbox.
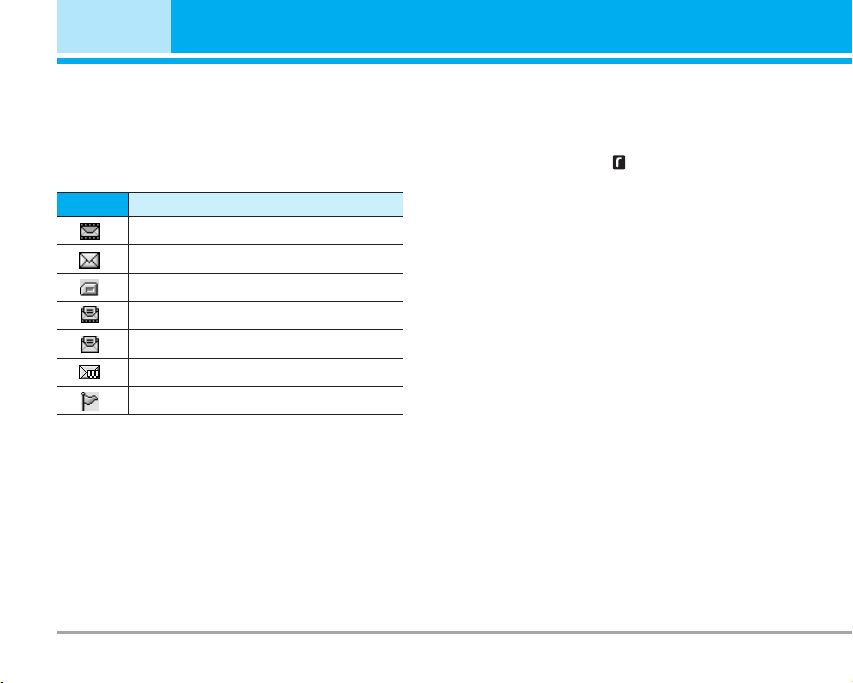
In Inbox, you can identify each message by icons. For
detail, see the icon directive.
Icon
Multimedia message
Short message
SIM message
Read multimedia message
Read text message
Push message
Notified multimedia message
If the phone shows ‘No space for SIM message’, you
have to delete only SIM messages from Inbox. If the
phone displays ‘No space for message’, you can
make space of each repository as deleting messages,
media and applications.
* SIM message
SIM message means the message exceptionally stored in
SIM card. You can move this message to the phone.
44 P7200
Icon directive
For notified multimedia message, you have to wait for
downloading and processing of the message.
To read a message, select one of the messages by
pressing the left soft key .
] View: You can view the received messages.
] Reply: You can reply to the sender.
] Forward: You can forward the selected message to
another party.
] Return call: You can call back to the sender.
] Delete: You can delete the current message.
] Information: You can view information about
received messages; Sender’s address, Subject
(only for Multimedia message), Message date &
time, Message type, Message size.
] Delete all: You can delete all messages.
Page 10
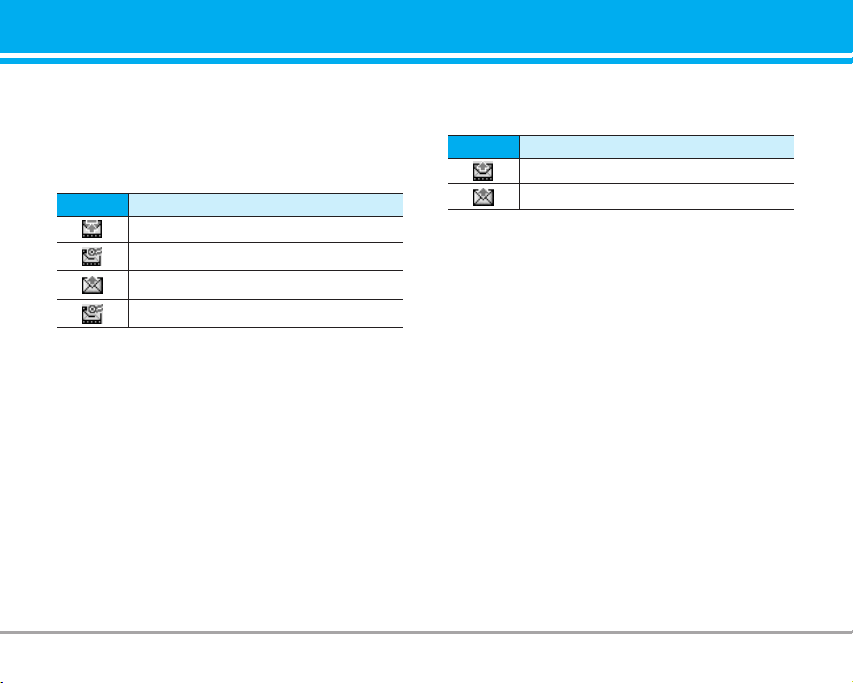
Outbox [Menu 5-3]
This menu allows to view the message which is
about to send or is failed sending. After sending the
message successfully, the message will be moved to
sent menu.
Icon
MMS Unsent
MMS delivery confirmed
SMS unsent
SMS delivery confirmed
] View: You can view the message.
] Edit: You can edit the message.
] Send: You can send the message. After sending the
message, this will be moved to sent menu.
] Delete: You can delete the message.
] Information: You can check information of each
message.
] Send all: You can send all messages in outbox.
] Delete all: You can delete all messages in outbox.
Icon directive
Sent [Menu 5-4]
You can view the message which is already sent.
Icon
MMS Sent
SMS sent
] View: You can view the sent messages.
] Forward: You can forward the current message to
other recipients.
] Delete: You can delete the current message.
] Information: You can view information about outbox
messages; Recipient’s address, Subject (only for
Multimedia message), Message date & time,
Message type, Message size.
] Delete all: You can delete all messages didn’t send.
Icon directive
Drafts [Menu 5-5]
Using this menu, you can preset up to five multimedia
messages that you use most frequently. This menu
shows the preset multimedia message list.
The following options are available.
] View: You can see the multimedia messages.
] Edit: Modifies the massage you choose.
P7200 45
Page 11
Messages [Menu 5]
] Delete: Deletes the message you choose.
] Information: To view the information of the message.
] Delete all: Deletes all of the messages in the folder.
Listen to voice mail [Menu 5-6]
Once this menu has been selected, simply press the
left soft key [OK] to listen to voice mail. You can
also hold down the key in standby mode to listen
to voice mail.
n Note When you receive a voice mail, your phone displays
the icon and you hear an alert. Please check with
your network provider for details of their service in
order to configure th
e handset correctly.
Info message [Menu 5-7]
(Dependent to network and subscription)
Info service messages are text messages delivered by
the network to GSM. They provide general information
such as weather reports, traffic news, taxis, pharmacies,
and stock prices. Each type of has the number;
therefore, you can contact service provider as long as
you have input the certain number for the information.
When you have received an info service message, you
can see the popup message to show you that you have
received a message or the info service message is
directly displayed. To view the message again or not in
standby mode, follow the sequence shown below;
46 P7200
Read [Menu 5-7-1]
1. When you have received an info service message
and select Read to view the message, it will be
displayed on the screen. You can read another
message by scrolling , or [Next].
2. The message will be shown until another message
is reached.
Topics [Menu 5-7-2]
(Dependent to network and subscription)
] Add new: You can add Info service message
numbers in the Phone memory with its nickname.
] View list: You can see Info service message
numbers which you added. If you press
[Options], you can edit and delete info message
category which you added.
] Active list: You can select info service message
numbers in the active list. if you activate an info
service number, you can receive messages sent
from the number.
Page 12

Templates [Menu 5-8]
Text template [Menu 5-8-1]
You have 6 text templates as below;
• Please call me back
• I'm late. I will be there at
• Where are you now?
• I am on the way.
• Top urgent. Please contact.
• I love you.
Multimedia template [Menu 5-8-2]
After saving new template, you can use the following
options.
] View: You can see multimedia templates.
] Delete: You can delete multimedia templates.
] Add new: Allows you to add new multimedia templates.
] Send via multimedia message: You can write and
send multimedia messages.
] Edit: You can edit multimedia templates.
] Delete all: Allows you to delete all multimedia messages.
Settings [Menu 5-9]
Text message [Menu 5-9-1]
] Message types:
Text, Voice, Fax, Natl. paging, X.400, E-mail, ERMES
Usually, the type of message is set to Text. You can
convert your text into alternative formats. Contact your
service provider for the availability of this function.
] Validity period: This network service allows you to
set how long your text messages will be stored at
the message centre.
] Delivery report: If you set to Ye s, you can check
whether your message is sent successfully.
] Reply charging: When a message is sent, it allows
the recipients to reply and charge the cost of the
reply to your telephone bill.
] SMS centre: If you want to send the text message,
you can receive the address of SMS centre
through this menu.
Multimedia message [Menu 5-9-2]
] Priority: You can set the priority of the message
you choose.
] Validity period: This network service allows you to
set how long your text messages will be stored at
the message centre.
P7200 47
Page 13

Messages [Menu 5]
] Subject: You can insert the subject of each template.
] Delivery report: If it is set to Ye s in this menu, you can
check whether your message is sent successfully.
] Read reply: You can send the reply for the
confirmation whether you read the message or not.
] Auto download: If you select On, you receive
multimedia messages automatically. If you select
Off, you receive only notification message in the
inbox and then you can check this notification. If
you select Home network only, you receive
multimedia messages depends on Homenetwork.
] Network settings: If you select multimedia message
server, you can set URL for multimedia message server.
] Permitted types
Personal: Personal message.
Advertisements: Commercial message.
Information: Necessary information.
Voice mail centre [Menu 5-9-3]
You can receive the voicemail if your network service
provider supports this feature. When a new voicemail is
arrived, the symbol will be displayed on the screen.
Please check with your network service provider for
details of their service in order to configure the phone
accordingly.
48 P7200
] Home: You can listen to voice mails by selecting Home.
] Roaming: Even when you are in abroad, you can listen
to voice mails if roaming service is supported.
Info message [Menu 5-9-4]
] Receive
Yes: If you select this menu, your phone will receive
Info service messages.
No: If you select this menu, your phone will not
receive Info service messages any more.
] Alert
Yes: Your phone will beep when you have received
Info service message numbers.
No: Your phone will not beep even though you have
received info service messages.
] Languages
You can select the language you want by pressing
[On/Off]. Then, the info service message will be shown
in the language that you selected.
Push message [Menu 5-9-5]
You can set the option whether you will receive the
message or not.
Page 14

My stuff [Menu 6]
Photos [Menu 6-1]
After taking a picture, you can view or send it by
MMS and bluetooth. Press the left key [Options] to
enter the options.
] Full view: You can view full photo.
] Multi view: You can view the maximum of 9
thumbnails in a screen.
Set as wallpaper: You can set a picture as a wallpaper.
]
] Send via multimedia message: You can send a
picture thru MMS.
] Send via bluetooth: You can send the photo by
bluetooth.
] Copy/ Move to external memory: You can copy or
move between phone and the SD memory.
] Rename: You can edit the title of picture.
] Delete: You can delete the photo.
] Information: You can view the information about
Title, Size, Date and Time you’ve taken.
Pictures [Menu 6-2]
After selecting a picture, press the left key [View].
You can check the options as follow:
] Set as wallpaper: Currently selected picture can
be set as a wallpaper.
] Send via multimedia message: The picture
downloaded from network can be sent by MMS
service.
] Send via bluetooth: The picture downloaded from
network can be sent by Bluetooth.
] Copy to external memory: The picture can be
moved to SD memory card.
Silent movie [Menu 6-3]
This menu allows to play or delete the video file. You
can change the name of file, and check information
related to size and time.
Sounds [Menu 6-4]
After selecting a sound, press the left key [Options].
You can check the options as follow:
] Set as ringtone: Currently selected sound can be
set as a ringtone.
] Send via text/ multimedia message: The sound
downloaded from network can be sent by SMS or
MMS service.
] Send via bluetooth: The sound downloaded from
network can be sent by Bluetooth.
Music [Menu 6-5]
You can download MP3 file from networ, and then
you can enjoy the music. In addition, you can set this
music as a ringtone.
Others [Menu 6-6]
This menu provides a space to store the external files
which are not opened on this phone.
External Memory [Menu 6-7]
This menu allows you to view Photos, Pictures, Sounds
and Music in the SD card. If the external memory is not
a pop up message “Please insert external
available,
memory” is displayed.
P7200 49
Page 15

Display [Menu 7]
You can set functions relating to the phone.
Wallpaper [Menu 7-1]
You can select the background pictures in standby mode.
Main LCD [Menu 7-1-1]
Front LCD [Menu 7-1-2]
Preinstalled
You can select a picture or an animation of wallpaper
by pressing or .
My pictures
You can select a picture or an animation as wallpaper.
Menu colour [Menu 7-2]
Your phone provides you with 4 menu colour themes.
Set the menu colour by scrolling and pressing the left
soft key [Select].
Greeting note [Menu 7-3]
If you select On, you can edit the text which is
displayed in standby mode.
Backlight [Menu 7-4]
You can set the light-up duration of the display.
50 P7200
Information window [Menu 7-5]
You can preview the current state of the selected
menu before open the menu. The state is shown at
bottom of the display.
Page 16

Profiles [Menu 8]
In Profiles, you can adjust and customise the phone
tones for different events, environments, or caller groups.
There are six preset profiles: General, Silent, Vibrate only,
Loud, Headset and Car. Each profile can be personalised.
Press the left soft key [Menu] and select Profiles using
up/down navigation keys.
Activate [Menu 8-X-1]
1. A list of profiles is displayed.
2. In the Profiles list, scroll to the profile you want to
activate and press the left soft key [Select] or OK key.
3. Then, select Activate.
Personalise [Menu 8-X-2]
Scroll to the desired profile in the Profile list. After
pressing the left soft key or the OK key, select
Personalise. The profile setting option opens. Set the
option as required.
] Call alert type: Set the alert type for incoming calls.
] Ring tone: Select the desired ring tone from the list.
] Ring volume: Set the volume of the ringing tone.
] Message alert type: Set the alert type for messages.
] Message tone: Select the alert tone for messages.
] Keypad tone: Select the desired keypad tone.
] Flip tone: Allows to set the flip tone for adjusting
environment.
] Keypad volume: Set the volume of keypad tone.
] Sound effects volume: Set the volume of effect
sound.
] Power on/off volume: Set the volume of the ringing
tone when switching the phone on/off.
] Auto answer: This function will be activated only
when your phone is connected to the handsfree kit.
• Off: The phone will not answer automatically.
• After 5 secs: After 5 seconds, the phone will
answer automatically.
• After 10 secs: After 10 seconds, the phone will
answer automatically.
Rename [Menu 8-X-3]
You can rename a profile and give it any name you want.
n Note Vibrate only, Silent and Headset profiles cannot be
renamed.
1. To change the name of a profile, scroll to the
profile in the profile list and after pressing the left
soft key or the OK key, select Rename.
2. Key in the desired name and press the OK key or
the left soft key [OK].
P7200 51
Page 17

Tools [Menu 9]
Favourites [Menu 9-1]
This option allows you to add your own favourites to the list
already provided. Once you create your own menu, you can
access the desired function quickly in the idle screen by
pressing the up navigation key.
Alarm clock [Menu 9-2]
You can set up to 5 alarm clocks to go off at a specified time.
1. Select On and enter the alarm time you want.
2. Select the repeat period: Once, Mon~Fri, Mon~Sat,
Everyday.
3. Select the alarm tone you want and press [OK].
4. Edit the alarm name and press [OK].
Bluetooth [Menu 9-3]
Bluetooth enables compatible mobile devices,
peripherals and computers that are in close proximity
to communicate directly with each other without wires.
This handset supports built-in Bluetooth connectivity,
which makes it possible to connect them with
compatible Bluetooth headsets, computer applications
and so on.
n Note You can exchange the data within only phonebook
via bluetooth.
52 P7200
My devices [Menu 9-3-1]
You can view all devices which are compatible with
bluetooth phone.
Handsfree devices [Menu 9-3-2]
You can view the list of handsfree devices which is
compatible with bluetooth phone.
If you enter My devices or Handsfree devices menu,
you access the options as follow.
] Connect/Disconnect: Allows to connect the other
bluetooth devices.
] Add new: Allows to search new bluetooth device.
] Assign name: Allows to change the name of bluetooth.
] Set as authorised/Set as unauthorised: Allows to
set the authorised connection between each
bluetooth devices.
] All service: Allows to view all services which are
supported by bluetooth device.
] Delete : Allows to delete the bluetooth device.
] Delete all: Allows to delete all bluetooth devices.
Settings [Menu 9-3-3]
You can register new device which is compatible
with bluetooth. If you already have added the device,
you can search it after entering a password.
Page 18

] Set bluetooth
You can activate or cancel bluetooth function.
] Handset's visibility
You can set the function that your phone is shown
on the other bluetooth devices.
] Handset's name
You can set the name of bluetooth device. The
default name is P7200.
SyncML [Menu 9-4]
The SyncML function synchronises the data in a
phone and the data on a server such as contact
address information, schedule items, etc. via a
wireless network.
• Connect
Select SyncML from the Connectivity menu and then
press the key.
Select the Connect item and then press the key.
Connect to the server with the selected server profile
and the synchronization animation is displayed while
the synchronization is performed.
• Server settings
This menu allows you to configure the profile for a
SyncML.
] Adding a new profile
- Input and choose the Profile name, Host address,
Username, Password, Contacts, Contact name,
Calendar, Calendar name, To do, To do name and
Access point.
- Press the key to save the new profile.
- In the Settings screen, press the left soft key
[Options] key and select Add new to add a new
profile.
] Editing a profile
- Select a profile to edit.
- Press the left soft key [Options], select Edit, and
edit the selected profile.
] Deleting profiles
- Press the left soft key [Options] and select Delete.
- Select Yes to delete the selected profile.
] Selecting a server
- Select a desired server profile to synchronise in
the Settings screen and then press the key.
• Logs
Select a SyncML item in the Connectivity menu and
then press the key.
Select Logs item and then press the key to view
the log for the last synchronisation operation performed.
P7200 53
Page 19

Tools [Menu 9]
Calculator [Menu 9-5]
This contains the standard functions such as +, –, x, ÷
: Addition, Subtraction, Multiplication, and Division.
Furthermore, you can use the various function of
calculator such as sin, cos, log.
1. Input the numbers by pressing numeric keys.
2. Use a navigation key to select a sign for calculation.
3. Then input the numbers.
4. Press key to view the result.
5. If you press the left soft key [Function], you can
use the virious of calculation.
6. To input the decimal numver, press key. If you
press key, you can enter ( ).
7. To end Calculator, press the right soft key [Back].
Unit converter [Menu 9-6]
This converts any measurement into a unit you want.
There are 7 types that can be converted into units:
Currency, Surface, Length, Weight, Temperature,
Volume and Velocity.
1. You can select one of four unit types by pressing
[Unit] key.
2. Select the unit you want to convert by pressing
and .
3. Select the standard value by using , .
54 P7200
World time [Menu 9-7]
You can view clocks of the world’s major cities.
1. Select the city belonged to the time zone by
pressing , key.
2. You can set the current time to the city time you
select by pressing the left soft key [Set].
SIM-Menu [Menu 9-8]
This menu depends on SIM and the network services.
Page 20

Browser [Men u *]
You can access various WAP (Wireless Application
Protocol) services such as banking, news, weather
reports and flight information. These services are
specially designed for mobile phones and they are
maintained by WAP service providers.
Check the availability of WAP services, pricing and
tariffs with your network operator and/or the service
provider whose service you wish to use. Service
providers will also give you instructions on how to
use their services.
Once connected, the homepage is displayed. The
content depends on the service provider. To exit the
browser at any time, press the ( ) key. The phone
will return to the previous menu.
Navigating with the WAP browser
You can surf the Internet using either the phone keys
or the WAP browser menu.
Using the phone keys
When surfing the Internet, the phone keys function
differently to phone mode.
Key
Scrolls each line of the content area
Returns to the previous page
Selects options and confirms actions
Description
Using the WAP browser menu
There are various menu options available when surfing the Mobile Web.
n Note The WAP browser menus may vary, depending on
your browser version.
Home [Menu
Connects to a homepage. The homepage will be the
site which is defined in the activated profile. It will be
defined by the service provider if you have not
defined it in the activated profile.
Bookmarks [Menu
This menu allows you to store the URL of favourite
web pages for easy access at a later time. Your
phone has several pre-installed bookmarks.
These pre-installed bookmarks cannot be deleted.
To create a bookmark
1. Press the left soft key [Options].
2. Select Add new and press the OK key.
3. After entering the desired URL and title, press the
OK key.
-1]
*
-2]
*
P7200 55
Page 21

Browser [Menu *]
After selecting a desired bookmark, the following
options are available.
] Connect: Connects to the selected bookmark.
] Add new: Select this to create a new bookmark.
] Edit: You can edit the URL and/or the title of the
selected bookmark.
] Delete: Deletes the selected bookmark.
] Delete all: Deletes all the bookmarks.
Go to URL [Menu *-3]
You can connect directly to the site you want. After
entering a specific URL, press the OK key.
Settings [Menu *-4]
You can set the profile, cache, cookie and security
related to internet service.
Profiles [Menu
A profile is the network information used to connect
to the Internet.
Each profile has submenus as follows:
] Activate: Activates the selected profile.
] Settings: Use this to edit and change WAP settings
for the selected profile.
*
-4-1]
- Homepage: This setting allows you to enter the
address (URL) of a site you want to use as homepage.
You do not need to type http:// at the front of each URL
as the WAP Browser will automatically add it.
- Bearer: You can set the bearer data service.
1 Data/2 GPRS
- Data settings: Appears only if you select Data
Settings as a Bearer/service.
Dial number: Enter the telephone number to dial to
access your WAP gateway.
User ID: The users identity for your dial-up server
(and NOT the WAP gateway).
Password: The password required by your dial-up
server (and NOT the WAP gateway) to identify you.
Call type: Select the type of data call : Analogue of
Digital (ISDN).
Linger time: You need to enter timeout period. After
entering that, the WAP navigation service will be
unavailable if any data is not input or transferred.
- GPRS settings: The service settings are only
available when GPRS is chosen as a bearer service.
APN: Input the APN of the GPRS.
User ID: The users identify for your APN server.
Password: The password required by your APN server.
56 P7200
Page 22

- Proxy settings
Proxy: Activates or cancels proxy.
IP address: Input the IP address of the Proxy server
you access.
Port number: Input the Proxy Port.
- DNS settings
Primary server: Input the IP address of the primary
DNS server you access.
Secondary server: Input the IP address of the
secondary DNS server you access.
] Rename: You can change the profile name.
] Add new: You can add a new profile.
] Delete: Deletes the selected profile from the list.
Clear cookie [Menu *-4-5]
Removes all context saved in cookie.
Security [Menu *-4-6]
A list of the available certification is shown.
] Authority: You can see the list of authority
certificates that have been stored in your phone.
] Personal: You can see the list of personal
certificates that have been stored in your phone.
Browser version [Menu *-5]
The WAP browser version is displayed.
Cache [Menu
The information or services you have accessed are
saved in the cache memory of the phone.
*
-4-2]
Cookie [Menu *-4-3]
The information or services you have accessed are
saved in the cache memory of the phone.
Clear cache [Menu *-4-4]
Removes all context saved in cache.
n Note A cache is a buffer memory, which is used to save
data temporarily.
P7200 57
Page 23

Call register [Menu 0]
You can check the record of missed, received, and
dialled calls only if the network supports the Calling
Line Identification (CLI) within the service area.
The number and name (if available) are displayed
together with the date and time at which the call was
made. You can also view call times.
Missed calls [Menu 0-1]
This option lets you view the last 10 unanswered
calls. You can also:
• View the number if available and call it, or save it in
the Address Book
• Enter a new name for the number and save both in
the Address Book
• Send a message by this number
• Delete the call from the list
Received calls [Menu 0-2]
This option lets you view the last 10 incoming calls.
You can also:
• View the number if available and call it or save it in
the Address Book
• Enter new name for the number and save both in
the Address Book
• Send a message by this number
• Delete the call from the list
58 P7200
Dialled calls [Menu 0-3]
This option lets you view the last 20 outgoing calls
(called or attempted).
You can also:
• View the number if available and call it or save it in
the Address Book
• Enter new name for the number and save both in
the Address Book
• Send a message by this number
• Delete the call from the list
All calls [Menu 0-4]
This option allows you to view all records of call.
You can also:
• View the number if available and call it, or save it in
the Address Book
• Enter a new name for the number and save both in
the Address Book
• Send a message by this number
• Delete the call from the list.
Delete recent calls [Menu 0-5]
Allows you to delete Missed calls and Received calls
lists. You can delete Dialled calls and All calls lists at
one time.
Page 24

Call charges [Menu 0-6]
Call duration [Menu 0-6-1]
Allows you to view the duration of your incoming and
outgoing calls. You can also reset the call times.
The following timers are available:
] Last call: Length of the last call.
] All calls: Total length of all calls made and
incoming calls since the timer was last reset.
] Received calls: Length of the incoming calls.
] Dialled calls: Length of the outgoing calls.
] Reset all: Allows you to clear the length of all calls
by pressing the left soft key [Yes].
Call costs [Menu 0-6-2]
Allows you to check the cost of your last call, all
calls, remaining and reset the cost. To reset the cost,
you need to PIN2 code.
Settings [Menu 0-6-3]
(SIM Dependent)
] Set tariff: You can set the currency type and the
unit price. Contact your service providers to obtain
charging unit prices. To select the currency or unit
in this menu, you need the PIN2 code.
] Set credit: This network allows you to limit the cost
of your calls by selected charging units.If you
select Read, the number of remaining unit is
shown. If you select Change, you can change your
change limit.
] Auto display: This network service allows you to
see automatically the cost of your last calls. If set
to On, you can see the last cost when the call is
released.
GPRS information [Menu 0-7]
You can check the amount of data transferred over
the network through the GPRS information option.
In addition, you can also view how much time you are
online.
Call duration [Menu 0-7-1]
You can check the duration of Last call and All calls.
You can also reset the call timers.
Data volume [Menu 0-7-2]
You can check The Sent, Received or All data
volumes and Reset all.
P7200 59
Page 25

Settings [Menu #]
Date & Time [Menu #-1]
You can set functions relating to the date and time.
Set date [Menu #-1-1]
] Set date
You can enter the current date.
] Date format
You can set the Date format such as DD/MM/YYYY,
MM/DD/YYYY, YYYY/MM/DD.
(D: Day / M: Month / Y: Year)
Set time [Menu #-1-2]
] Set time
You can enter the current time.
] Time format
Your can set the time format between 24-hour and
12-hour.
Languages [Menu #-2]
You can change the language for the display texts in
your phone. This change will also affect the Language
Input mode.
60 P7200
Call settings [Menu #-3]
You can set the menu relevant to a call by pressing
[Select] in the Setting menu.
Call divert [Menu #-3-1]
The Call divert service allows you to divert incoming
voice calls, fax calls, and data calls to another
number. For details, contact your service provider.
] All voice calls
Diverts voice calls unconditionally.
] If busy
Diverts voice calls when the phone is in use.
] If no reply
Diverts voice calls which you do not answer.
] If out of reach
Diverts voice calls when the phone is switched off
or out of coverage.
] All data calls
Diverts to a number with a PC connection unconditionally.
] All fax calls
Diverts to a number with a fax connection unconditionally.
] Cancel all
Cancels all call divert service.
Page 26

The submenus
Call divert menus have the submenus shown below.
• Activate
Activate the corresponding service.
To voice mail centre
Forwards to message centre. This function is not
shown at All data calls and All fax calls menus.
To other number
Inputs the number for diverting.
To favourite number
You can check recent 5 diverted numbers.
• Cancel
Deactivate the corresponding service.
• View status
View the status of the corresponding service.
Answer mode [Menu #-3-2]
] Flip open
If you select this menu, you can receive an incoming
call when only opening flip.
] Any key
If you select this menu, you can receive a call by
pressing any key except [End] key.
] SEND key only
If you select this menu, you can receive a call by
only pressing [Send] key.
Send my number [Menu #-3-3]
(network and subscription dependent)
] On
You can send your phone number to another party.
Your phone number will be shown on the receiver’s
phone.
] Off
Your phone number will not be shown.
] Set by network
If you select this, you can send your phone number
depending on two line service such as line 1 or line 2.
Call waiting [Menu #-3-4]
(network dependent)
] Activate
If you select Activate, you can accept a waiting
(receiving) call.
] Cancel
If you select Cancel, you cannot recognize the
waiting (receiving) call.
P7200 61
Page 27

Settings [Menu #]
] View status
Shows the status of Call waiting.
Minute minder [Menu #-3-5]
If you select On, you can check the call duration by
deep sound every minute during a call.
Auto redial [Menu #-3-6]
] On
When this function is activated, the phone will automatically try to redial in the case of failure to connect a call.
] Off
Your phone will not make any attempts to redial
when the original call has not connected.
Closed user group [Menu #-3-7]
(network dependent)
Restricts usage of the phone with numbers that belong to
certain user groups. When this function is used, every
outgoing call is associated with a group index. If a group
index is specified, it is used for all outgoing calls. If no
group index is specified, the network will use the
preferential index (a specific index that is stored in the
network).
62 P7200
] Default: Activates the default group agreed on with the
network operator.
] Set: Select this to activate the selected CUG Index.
] Edit: You can edit the CUG name and CUG Index.
] Delete: Delets the selected CUG.
] Delete all: Delets all CUG.
Security settings [Menu #-4]
PIN code request [Menu #-4-1]
In this menu, you can set the phone to ask for the PIN
code of your SIM card when the phone is switched on.
If this function is activated, you’ll be requested to enter the
PIN code.
1. Select PIN code request in the security settings menu,
and then press [Select].
2. Set On/Off.
3. If you want to change the setting, you need to enter PIN
code when you switch on the phone.
4. If you enter wrong PIN code more than 3 times, the
phone will lock out. If the PIN is blocked, you will need
to key in PUK code.
5. You can enter your PUK code up to 10 times. If you put
wrong PUK code more than 10 times, you can not unlock
your phone. You will need to contact your service provider.
Page 28

Handset lock [Menu #-4-2]
You can use security code to avoid unauthorized use of
the phone. Whenever you switch on the phone, the phone
will request security code if you set phone lock to On.
If you set phone lock to Automatic, your phone will
request security code only when you change your SIM
card.
Call barring [Menu #-4-3]
The Call barring service prevents your phone from
making or receiving certain category of calls. This
function requires the call barring password. You can
view the following submenus.
] All outgoing calls
The barring service for all outgoing calls.
] Outgoing international
The barring service for all outgoing international calls.
] Outgoing international except home country
The barring service for all international outgoing calls
except home network.
] All incoming
The barring service for all incoming calls.
] Incoming when abroad
The barring service for all incoming calls when roaming.
] Cancel all barrings
You can cancel all barring services.
] Change password
You can change the password for Call Barring Service.
The submenus:
• Activate
Allows to request the network to set call restriction on.
• Cancel
Set the selected call restriction off.
• View status
View the status whether the calls are barred or not.
Fixed dial number [Menu #-4-4]
(SIM dependent)
You can restrict your outgoing calls to selected phone
numbers. The numbers are protected by your PIN2 code.
] Enable
You can restrict your outgoing calls to selected
phone numbers.
] Disable
You can cancel fixed dialling function.
] Number list
You can view the number list saved as Fixed dial number.
P7200 63
Page 29

Settings [Menu #]
Change codes [Menu #-4-5]
PIN is an abbreviation of Personal Identification
Number to prevent use by unauthorized person.
You can change the access codes: PIN1 code, PIN2
code, Security code.
1. If you want to change the Security code/PIN1/PIN2
code input your original code, and then press [OK].
2. Input new Security code/PIN1/PIN2 code and verify them.
Network settings [Menu #-5]
You can select a network which will be registered either
automatically or manually. Usually, the network
selection is set to Automatic.
Automatic [Menu #-5-1]
If you select Automatic mode, the phone will
automatically search for and select a network for you.
Once you have selected “Automatic”, the phone will
be set to “Automatic” even though the power is off
and on.
Manual [Menu #-5-2]
The phone will find the list of available networks and
show you them. Then you can select the network
which you want to use if this network has a roaming
64 P7200
agreement with your home network operator. The
phone let you select another network if the phone fails
to access the selected network.
Preferred [Menu #-5-3]
You can set a list of preferred networks and the phone
attempts to register with first, before attempting to register
to any other networks. This list is set from the phone’s
predefined list of known networks.
GPRS settings [Menu #-6]
You can set GPRS service depending on various situations.
Switch on [Menu #-6-1]
If you select this menu, the phone is automatically
registered to a GPRS network when you switch the
phone on. Starting a WAP or PC dial-up application
created the connection between phone and network
and data transfer is possible. When you end the
application, GPRS connection is ended but the
registration to the GPRS network remains.
When needed [Menu #-6-2]
If you select this menu, the GPRS connection is established
when you connect a WAP service and closed when you
end the WAP connection.
Page 30

Memory status [Menu #-7]
You can check free space and memory usage of each
repository, SIM memory. You can go to each repository
menu.
Reset settings [Menu #-8]
You can initialize all factory defaults. You need Security
code to activate this function.
P7200 65
Page 31

Accessories
There are various accessories for your mobile phone.
You can select these options according to your
personal communication requirements.
66 P7200
Travel Adapter
This charger allows you to
charge the battery while away
from home or your office.
Standard Battery
Stereo headset
Allows hands-free operation.
Includes earpiece and
microphone.
Data cable/CD
You can connect your phone to
PC to exchange the data
between them.
Memory card adapter/
Memory card
n Note
• Always use genuine LG accessories.
• Failure to do this may invalidate your warranty.
• Accessories may be different in different regions; please
check with our regional service company or agent for
further enquires.
Page 32

General
Product name : P7200
System : GSM 900 / DCS 1800 / PCS 1900
Ambient Temperatures
Маx. : +55°C
Мin : -10°C
Technical Data
P7200 67
Page 33

Appendix. RF Exposure Statement
WARNING! Read this information before operating the phone.
In August 1996, the Federal Communications (FCC) of the United States, with its action in Report
and Order FCC 96-326, adopted an updated safety standard for human exposure to radio
frequency(RF) electromagnetic energy emitted by FCC regulated transmitters. Those guidelines
are consistent with the safety standard previously set by both U.S. and international standards
bodies.
The design of this phone complies with the FCC guidelines and these international standards.
CAUTION
Use only the supplied and approved antenna. Use of unauthorized antennas or modifications could
impair call quality, damage the phone, void your warranty and/or result in violation of FCC
regulations.
Do not use the phone with a damaged antenna. If a damaged antenna comes into contact with skin,
a minor burn may result. Contact your local dealer for a replacement of antenna.
Body Worn Operation
This device was tested for typical body-worn operations with the back of the phone kept 1.5
cm from the body. To comply with FCC RF exposure requirements, a minimum separation
distance of 1.5 cm must be maintained between the user’s body and the back of the phone,
including the antenna, whether extended or retracted. The use of belt-clips, holsters, and
similar accessories should not containing metallic components in its assembly. The use of
accessories that do not satisfy these requirements may not comply with FCC RF exposure
requirements, and should be avoided.
For Your Safety FCC Part 15 Class B Compliance
This device and its accessories comply with part 15 of FCC rules. Operation is subject to the
following two conditions: (1) This device and its accessories may not cause harmful
interference, and (2) this device and its accessories must accept any interference received,
including interference that may cause undesired operation.
Page 34

Appendix 2. Consumer Information on SAR
(Specific Absorption Rate)
This Model Phone Meets the Government’s Requirements for Exposure to Radio Waves. Your
wireless phone is a radio transmitter and receiver. It is designed and manufactured not to exceed
the emission limits for exposure to radio frequency (RF) energy set by the Federal
Communications Commission of the U.S. Government. These limits are part of comprehensive
guidelines and establish permitted levels of RF energy for the general population. The guidelines
are based on standards that were developed by independent scientific organizations through
periodic and thorough evaluation of scientific studies. The standards include a substantial safety
margin designed to assure the safety of all persons, regardless of age and health.
The exposure standard for wireless mobile phones employs a unit of measurement known as the
Specific Absorption Rate, or SAR. The SAR limit set by the FCC is 1.6 W/kg. Tests for SAR are
conducted using standard operating positions specified by the FCC with the phone transmitting at
its highest certified power level in all tested frequency bands. Although SAR is determined at the
highest certified power level, the actual SAR level of the phone while operating can be well below
the maximum value. Because the phone is designed to operate at multiple power levels to use only
the power required to reach the network, in general, the closer you are to a wireless base station
antenna, the lower the power output.
Before a phone model is available for sale to the public, it must be tested and certified to the FCC
that it does not exceed the limit established by the government-adopted requirement for safe
exposure. The tests are performed in positions and locations (e.g., at the ear and worn on the
body) as required by the FCC for each model.
The highest SAR value for this model phone when tested for use at the ear is 1.35 W/kg and
when worn on the body, as described in this user guide, is 0.165 W/kg (body-worn measurements
differ among phone models, depending upon available accessories and FCC requirements). While
there may be differences between SAR levels of various phones and at various positions, they all
meet the government requirement for safe exposure.
The FCC has granted an Equipment Authorization for this model phone with all reported SAR
levels evaluated as in compliance with the FCC RF emission guidelines. SAR information on this
model phone is on file with the FCC and can be found under the Display Grant section of
http://www.fcc.gov/oet/fccid after searching on FCC ID BEJP7200.
 Loading...