


Using the PC
101
Using a Wired/Wireless Router
A wireless / regular router connects several PCs and mobile devices to one internet line and
enables the use of internet and the network.
A wireless / regular router has to be bought separately. Refer to the manual provided
by the manufacturer for instructions.
Connecting a Wireless or Regular Router
If one internet line is used with a wireless / regular router and several devices are
connected, this may result in a slower connection.
In case of a wireless LAN, it is recommended to change the network name and security
settings for a more secure connection.
Network speed can differ according to operation environment and specifications.
1 Connect the internet cable of the modem that was provided by your internet provider to
the router's WAN port.
2 Connect all devices (PC, IPTV, internet phone, etc.) with a LAN cable to LAN ports 1 to
4 of the router.
The number of LAN ports can vary for each router model.
3 Please refer to the manual provided by the router manufacturer for setup of the network
and Internet.
ENGLISH
Using the PC
Mounting and Using Memory Card
This product supports one Micro SD slot.
Insert the card into the multi-card slot to the fullest in the right direction as shown in the
following figure.
ENGLISH
102
Micro SD Slot
Checking Available Memory Card
This model supports Micro SD memory cards.
Directly applicable
memory cards

Using the PC
TIP
• When the memory card is formatted, the data stored in the memory card will be
deleted. Check whether there are important data before formatting the memory stick.
• To format a memory card, right-click the memory card drive and select Format.
When Format window appears, press Start to continue.
• Windows The format feature may not be available on versions of Windows that are
earlier than Vista
®
. Format the card on other digital devices or format it after
installing Memory Stick Formatter.
• If the write protection tab of memory card is locked, the user cannot format the
memory stick nor write or delete the data.
• SD™, MMC™ memory cards can be used only as storage devices and do not
support the copyright protection feature.
Removing Memory Card
Push the card with your finger to make the card spring out of the slot. Remove the memory
card.
ENGLISH
103
104
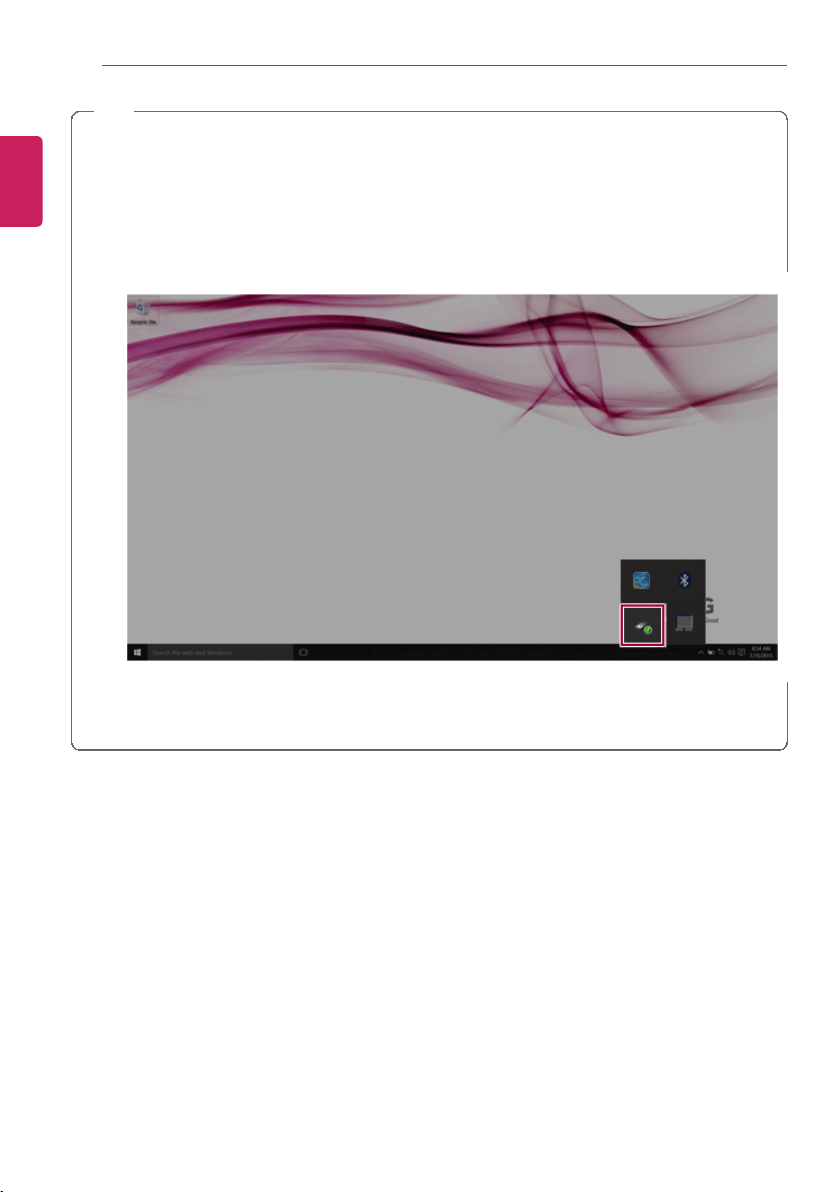
2 Select Remove Multi-Card USB Device to safely remove hardware.
ENGLISH
Using the PC
TIP
To safely remove a memory card:
The figures herein may differ by language selection and is subject to change for
performance improvements without prior notice.
1 Click Safely Remove Hardware and other Media icon on the right side of the
taskbar.
Using Software
] icon on the desktop to run [LG Control Center].
TIP
Select the [
] button > [All Apps] > [LG Software] and run [LG Control Center].
ENGLISH
Using Software
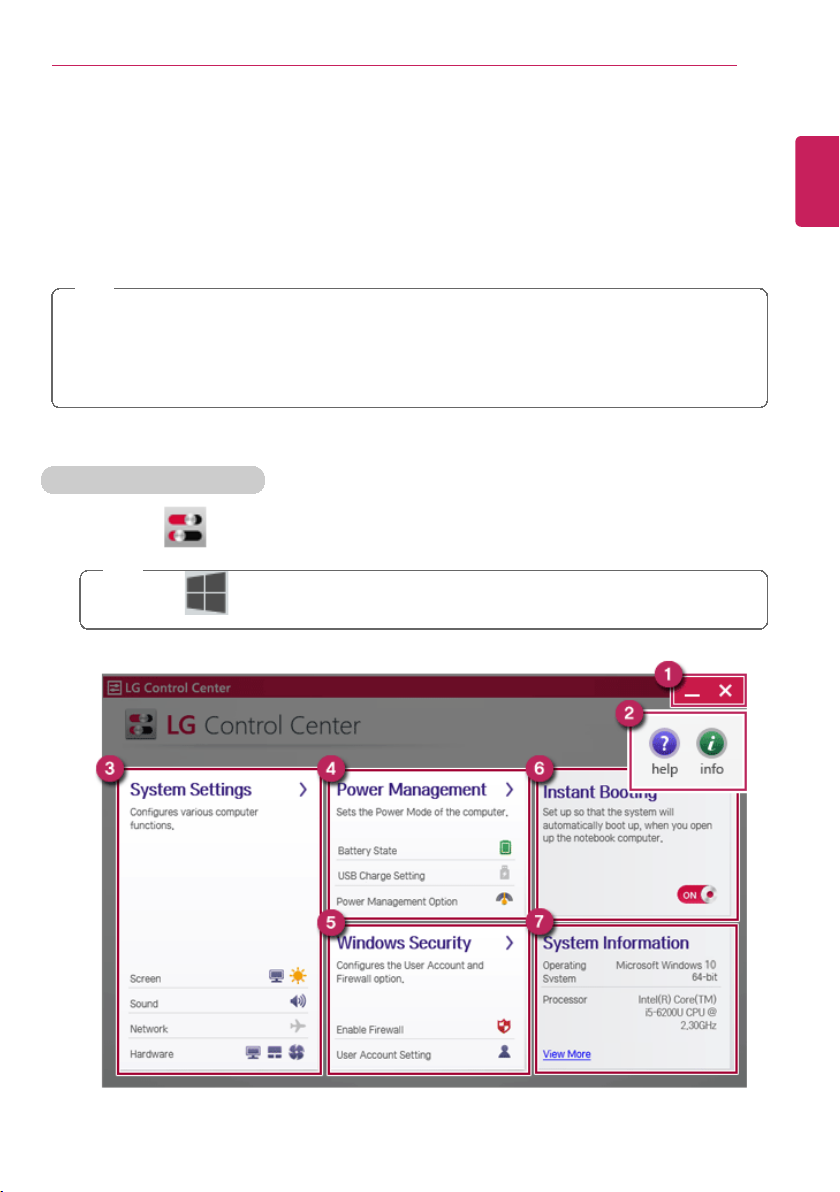
LG Control Center
LG Control Center is a software that helps you to change PC Settings, Power Settings,
Windows Security Settings, etc. as well as viewing system information.
TIP
LG Control Center For more details about how to use , refer to the corresponding
help.
The figures herein is subject to change for performance improvements without prior
notice and the functions supported by LG Control Center may vary from models.
Using LG Control Center
105
1 Press the [

106
ENGLISH
Using Software
a Minimize/Exit Button: Minimizes the size of the window, or exits the software.
b help/info Button: Runs Help or displays information about the software.
c System Settings : Sets up the screen brightness / resolution, external display, sound
and other various devices.
d Power Management : Sets up power management option, USB charging, battery
status and battery life extension.
e Windows Security : Sets User Account Control settings and Firewall settings.
f Instant Booting: You can set the system to automatically boot whenever you open
the notebook PC.
g System Information : Displays the PC OS in use, processor information and other
system information.
Using Software
] icon on the desktop to run LG Update Center.
TIP
Select the [
] button > [All Apps] > [LG Software] and run [LG Update Center].
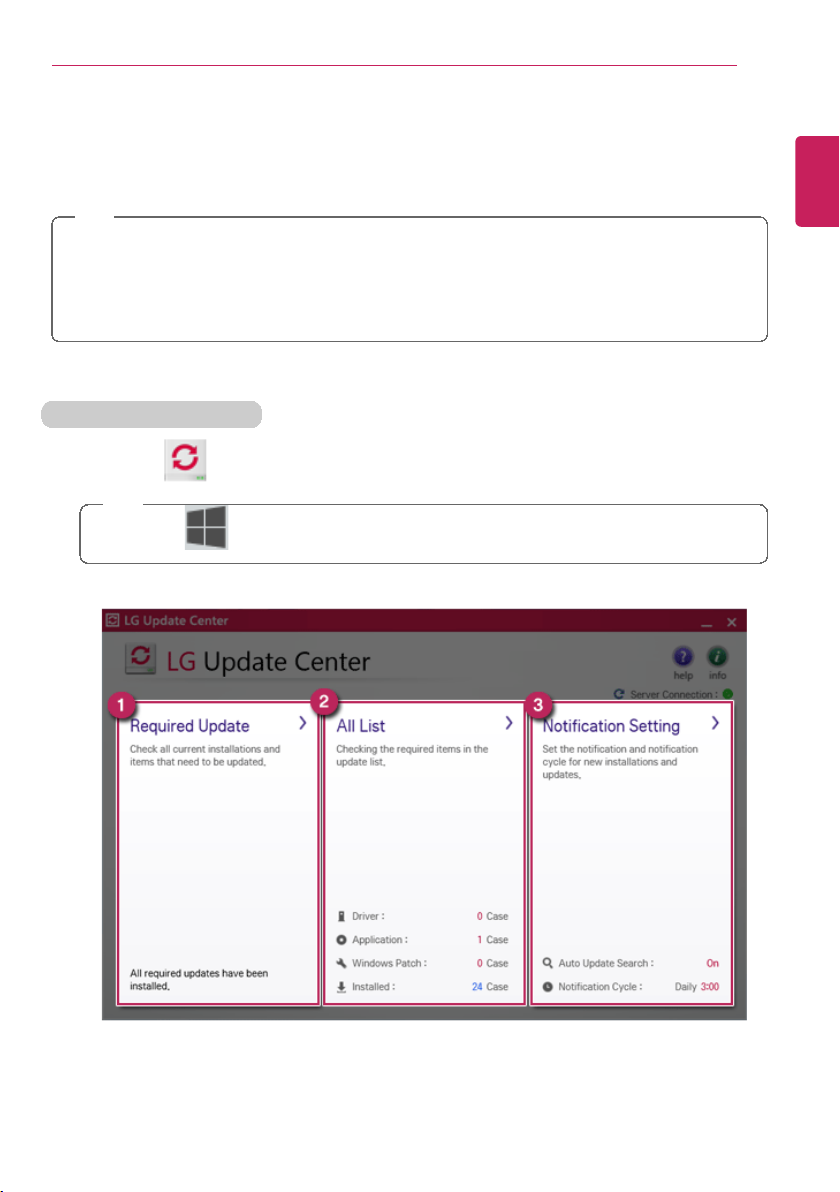
a Required Update: Installs critical items that must be applied to the system.
b All List : Displays and installs all required items for the system.
ENGLISH
LG Update Center
LG Update Center allows you to install various PC drivers, applications and Windows
patches easily.
TIP
The illustrated images are subject to change without prior notice.
It may not work properly depending on user preferences (security tools, etc.) and the
network status.
For more information on LG Update Center, refer to [Help].
Using LG Update Center
107
1 Press the [

108
ENGLISH
Using Software
c Notification Setting: Sets up notifications for online updates for installed items.
TIP
You can use the LG Update Center to quickly install the latest drivers, or reinstall any
deleted drivers.
Use LG Update Center to keep your system current and optimized.
Using Software
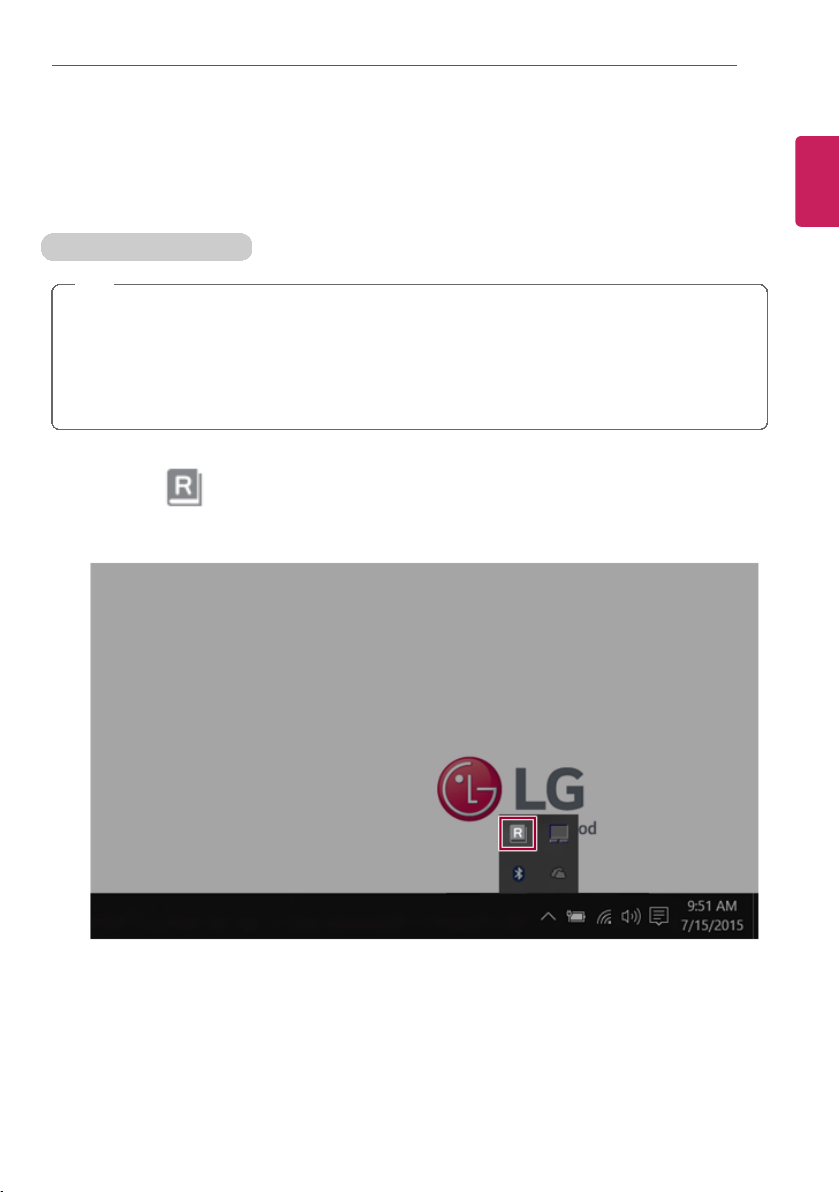
] icon on the taskbar.
ENGLISH
109
LG Reader Mode
LG Reader Mode prevents the users from eyestrain and helps them to read the PC screen
comfortably by displaying the screen just like a printed paper.
Using LG Reader Mode
TIP
You cannot adjust the screen brightness in reader mode. Deactivate reader mode to
adjust screen brightness.
If you want to use the hot keys you can use reader mode more conveniently.
• Press the [Fn] + [F9] keys to switch the PC screen to reader mode. Press them
again to turn off reader mode.
1 Press the [
Using Software
ENGLISH
110
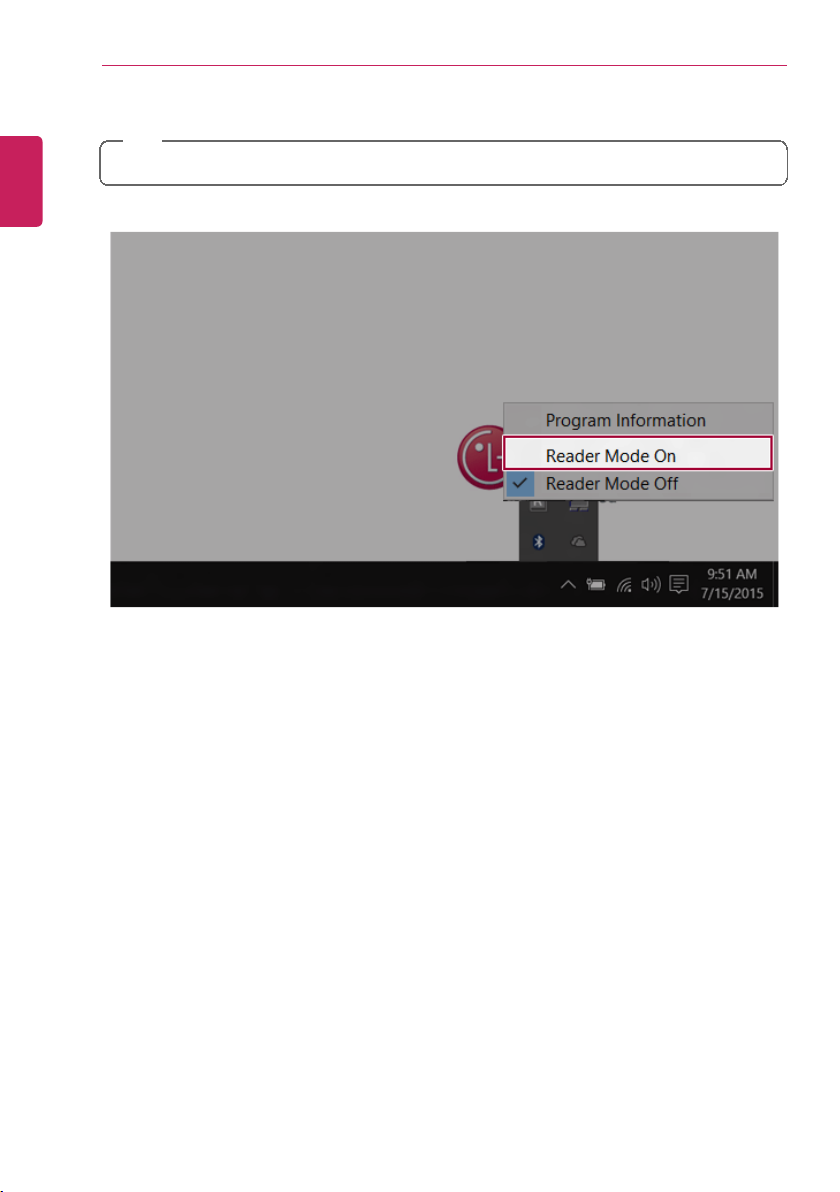
2 Select the [Reader Mode On] menu to switch to reader mode as shown in the figure.
TIP
Select [Reader Mode Off] to turn off the mode.

Restoring the System
] button and select the [Settings] menu.
ENGLISH
111
Restoring the System
Restoring the System
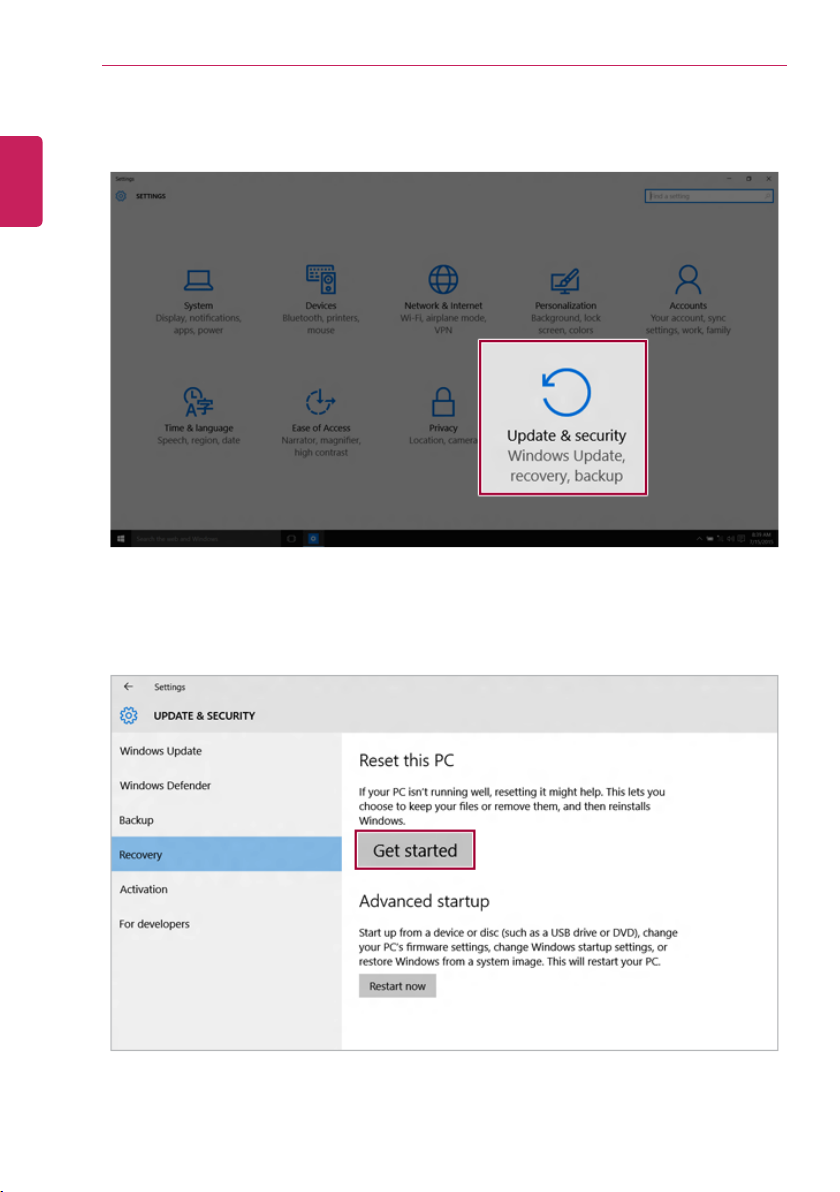
If the system has an error, you can use Windows 10's recovery feature to recover or restore
the system to its initial pre-purchase state.
CAUTION
If you have deleted the restoration data in the protected area of the disk, or have
arbitrarily installed another operating system, the restore function may not work.
To recover the system, the AC adapter must be connected.
1 Press the [
Restoring the System
3 Select the [Recovery] menu and press [Get started] to reset the PC.
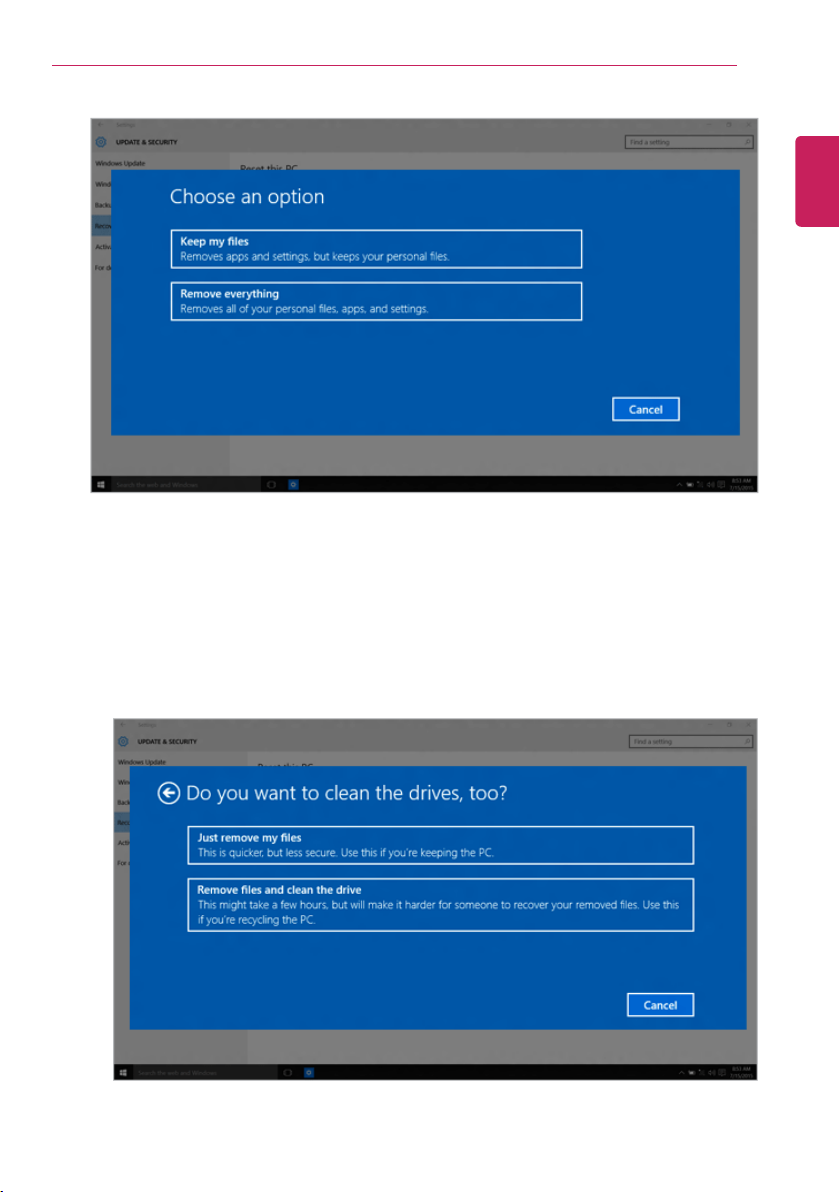
4 If the following screen appears, select a desired option to proceed with recovery.
ENGLISH
112
2 When the [Settings] screen appears, select [Update & security].
Restoring the System
a Keep my files: Recovers the PC without losing any personal files.
PC settings are reset to the default and any user-installed Desktop app will be
deleted.
b Remove everything: Removes all items from the system and restores the system to
its initial pre-purchase state.
ENGLISH
113

114
ENGLISH
Restoring the System
• Just Remove My Files: Factory-resets the drive where Windows is installed (for
example: Drive C).
• Remove files and clean the drive: Resets all partitions and drives in the system.
CAUTION
All data is lost during the initialization, so you must backup all critical data in advance.
It may take about 5 hours or longer depending on the system conditions.
Restoring the System
ENGLISH
115
LG Recovery Center RE
If booting is impossible due to an error with the system, you can recover the system using
LG Recovery Center RE.
TIP
It is recommended that you create a recovery drive in case a serious error occurs in the
system.
CAUTION
If you have deleted the restoration data in the protected area of the hard disk, the restore
function may not work.
All data is lost during the initialization, so you must backup all critical data in advance.
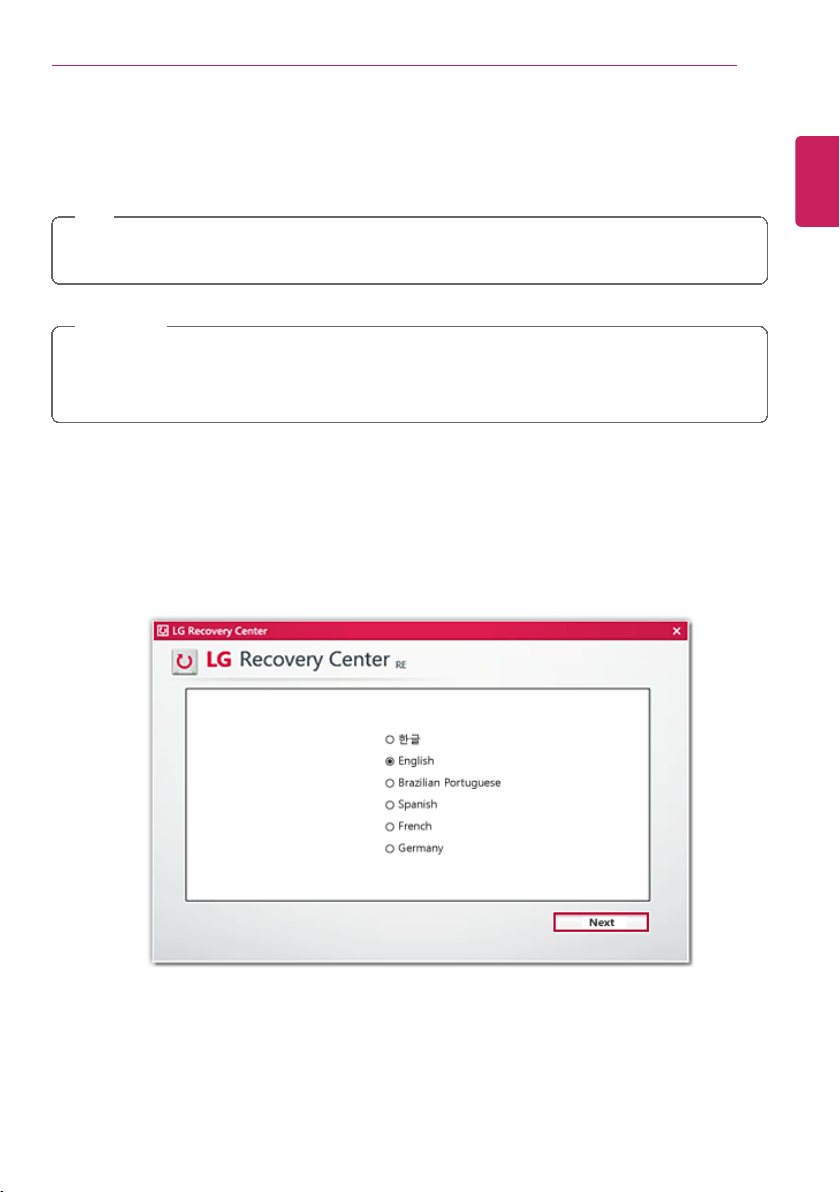
1 Turn on the notebook PC and press [F11].
2 When the following screen appears, select the language you want to use and then click
[Next].

Restoring the System
ENGLISH
116
3 When the following screen appears, select the [Agree] button and then click [Next].
For recovery, the power adapter must be connected. Connect the system power
and then recover the system.
Restoring the System
ENGLISH
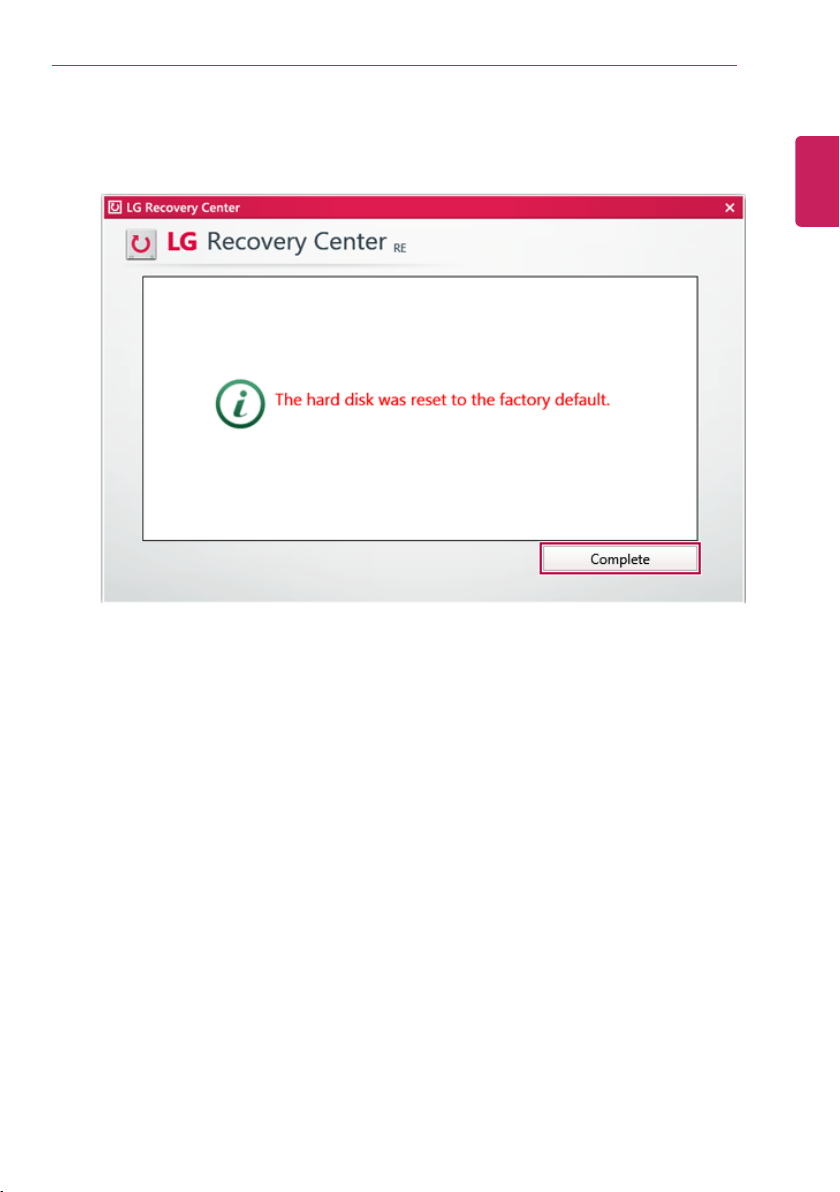
4 When the factory reset is completed as shown in the following figure, click [Complete]
and then restart the system.
117
Restoring the System
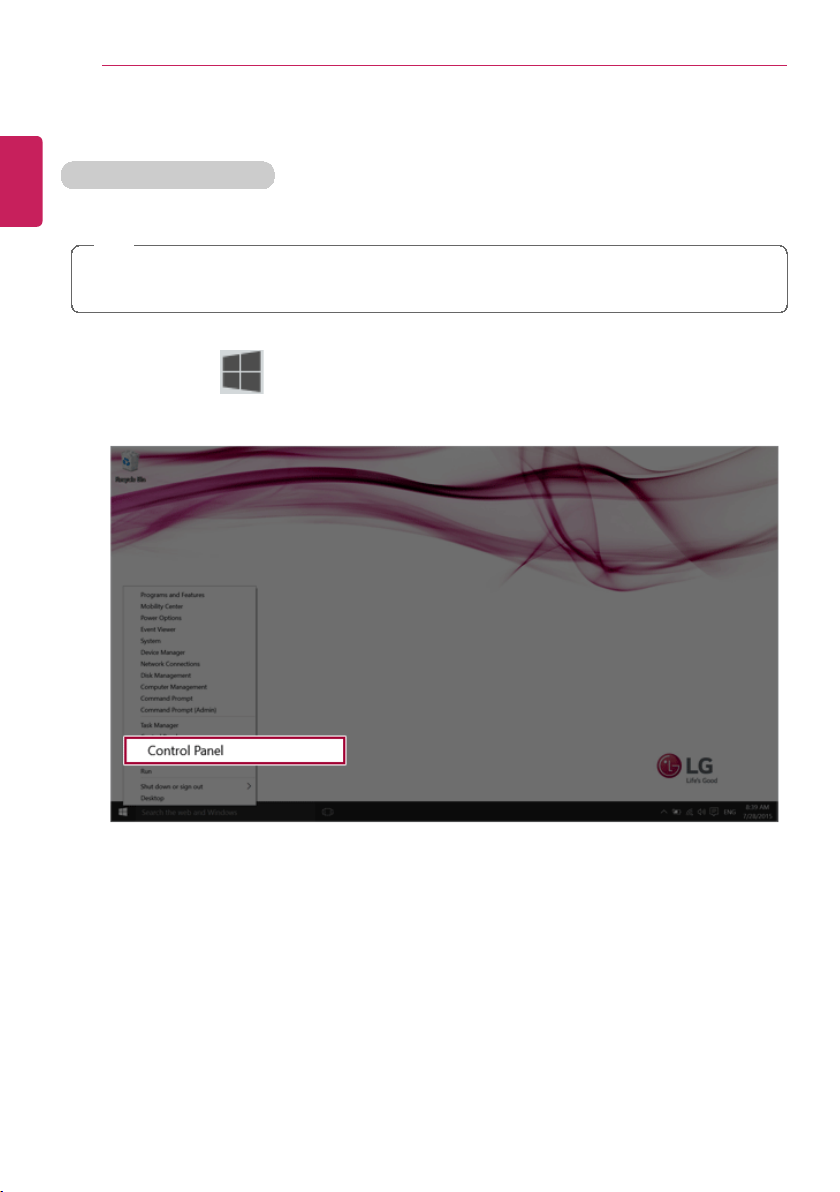
] button and select the [Control Panel] menu.
ENGLISH
118
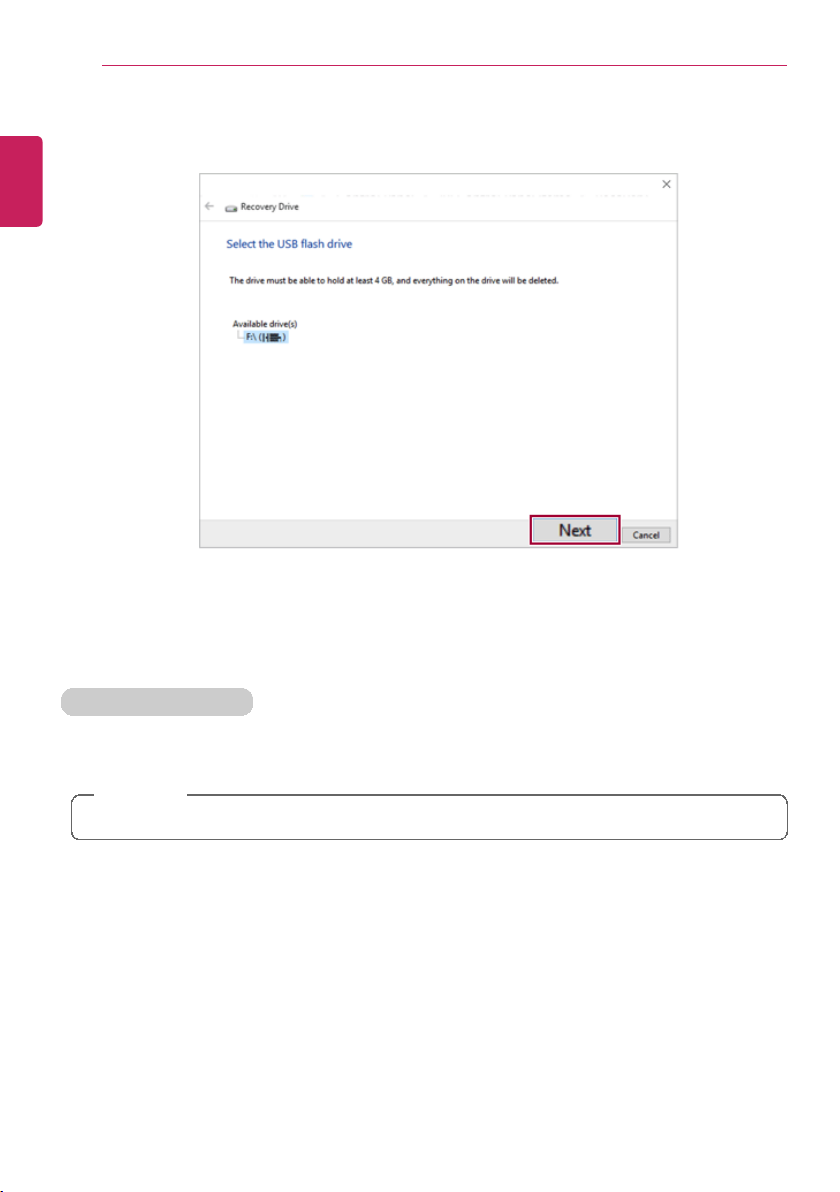
Recovery Drive
Creating Recovery Drive
Create a recovery drive in case LG Recovery Center RE is unable to recover the system.
TIP
This process may delete all data on the storage device designated as the recovery drive.
Make sure to back up all important data in advance.
1 Right-click the [
Restoring the System
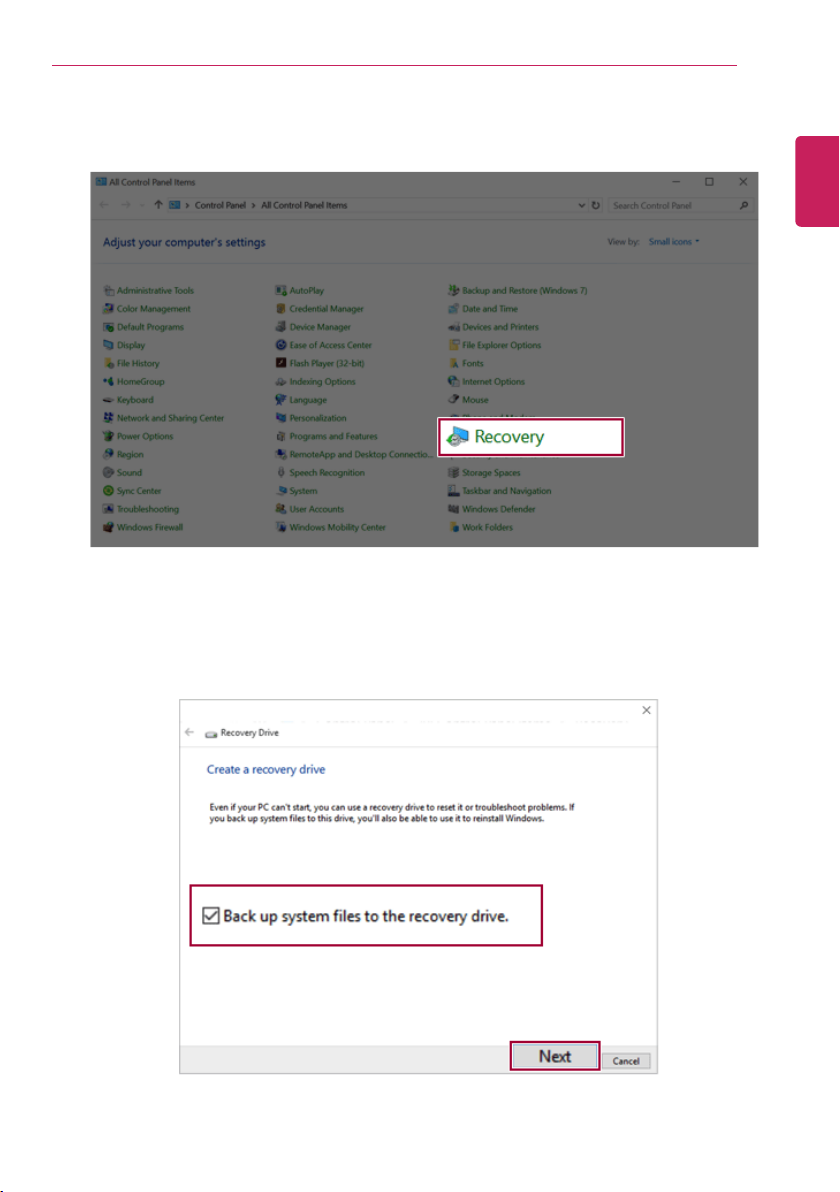
3 When the following screen appears, select [Back up the system files to the recovery
drive.] and click [Next].
ENGLISH
2 Click [Recovery] in the control panel and select [Create Recovery Drive].
119
Restoring the System
5 Once the storage device is ready, click [Finish] to complete the creation of the recovery
drive.
Using Recovery Drive
In case LG Recovery Center RE is unable to recover the system, you can use the recovery
drive to recover the system.
CAUTION
All data may be lost depending on the user settings during the system recovery.
1 Connect the recovery drive to the USB port of the PC.
2 Turn on the PC and press [F10] several times.
3 When the screen for selecting the booting device appears, select the connected
recovery drive and click [Enter].
4 Set the language and select the [Troubleshooting] menu.
5 Select the item you want to recover the system by following the instructions.
ENGLISH
120
4 Select the USB flash drive to use and click [Next] to create a recovery drive.

Setup and Upgrade
] icon on the desktop to run [LG Update Center].
TIP
Select the [
] button > [All Apps] > [LG Software] and run [LG Update Center].
2 Select [Required Updates] or [All List] to install the driver.
For more information on LG Update Center, refer to [Help].
ENGLISH
Setup and Upgrade
Installing the Driver
The figures herein may differ by language selection and is subject to change for
performance improvements without prior notice.
Using LG Update Center to install the Driver
121
1 Press the [

Setup and Upgrade
122
TIP
ENGLISH
You can use the LG Update Center to quickly install the latest drivers, or reinstall any
deleted drivers.
Use LG Update Center to keep your system current and optimized.
How to Download LG Update Center
You can install LG Update Center by downloading it from the LG Electronics Service
Center (www.lg.com).

Setup and Upgrade
123
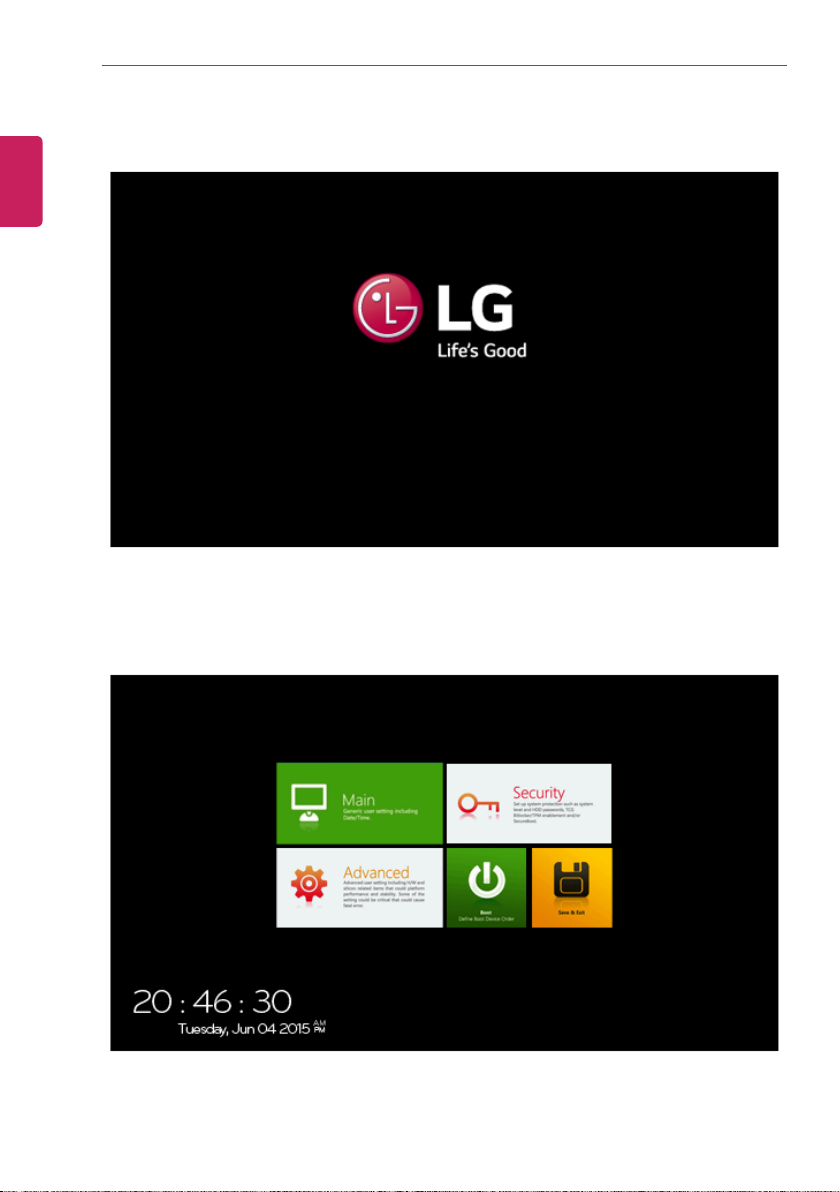
Starting System Setup
System setup means storing the hardware configuration information of the PC in the flash
memory. Through system setup, the PC retrieves various information including current date
and time, memory capacity, and storage device (HDD, SSD, eMMC) capacity and type.
You setup the system when you set passwords, change the boot order, and add new
peripheral devices to the machine.
Items displayed on the Setup screen may differ by model type and specification.
•
•
•
TIP
To use the system setup (F2), booting device selection (F10), or recovery (F11), you need
to restart the system (click [Restart] in the system power menu) and then immediately
press the corresponding function key due to the fast booting speed.
CAUTION
• Do not change the system setup unless necessary. Incorrect system setup may
cause errors during system operation. Use caution when changing the system
setup.
• For performance improvement, the system setup menu configuration and the initial
setup status may be changed and may become different from images included in the
user manual.
ENGLISH
Setup and Upgrade
2 In a few moments, the system setup screen appears.
ENGLISH
124
1 Reboot the system and press [F2].

Keys Used in System Setup
Setup and Upgrade
125
Keys Function
Enter Selects the current item.
Esc To deselect the current item or to move to the previous screen.
▲, ▼, ◄, ► (Arrow
Moves the cursor up, down, left, and right.
keys)
F10 Saves the new settings or exits the system setup.
ENGLISH

Setup and Upgrade
ENGLISH
126
Setting the Password
This process is to set a password so that other people cannot use the PC or change the
settings.
The user can set a password while booting the system or setting up the system.
CAUTION
• Without the registered password, access to the system will be denied. Write down
and keep the password in a safe place.
Set Supervisor Password
The password prevents unauthorized people from accessing the PC. By default, no
password is set for the machine. If an unauthorized person changes the password in the
System Setup, you will be unable to access the system.
1 After opening the system setup screen, click the [Security] button.

Setup and Upgrade
ENGLISH
2 When the following screen appears, click [Enter] in the [Set Supervisor Password]
menu.
127

Setup and Upgrade
ENGLISH
128
3 When the following message appears, enter the password and click [OK]. The
password must not exceed 8 characters consisting of letters (A - Z), numbers (0 - 9), or
a combination of both.

4 When the following message appears, click [OK].
5 To save the changes in the system setup, press [F10].
ENGLISH
Setup and Upgrade
129

Setup and Upgrade
TIP
• With Supervisor Password, you are authorized to set all items in the System Setup
and to set Password on boot. In case other people also use the PC, it is
recommended to set the Set User Password.
Set User Password
The password set by the [Set User Password] process is lower in level than that set by the
[Set Supervisor Password] process, and so the user can use the[Set User Password]
only after setting a password in the [Set Supervisor Password] menu.
ENGLISH
130
6 When the following message appears, click [YES]. The PC will restart.

Setup and Upgrade
2 When the following screen appears, click [Enter] in the [Set User Password] menu.
ENGLISH
1 After opening the system setup screen, click the [Security] button.
131

Setup and Upgrade
ENGLISH
132
3 When the following message appears, enter the password and click [OK]. The
password must not exceed 8 characters consisting of letters (A - Z), numbers (0 - 9), or
a combination of both.

4 When the following message appears, click [OK].
5 To save the changes in the system setup, press [F10].
ENGLISH
Setup and Upgrade
133

Setup and Upgrade
TIP
• [User Password] allows limited access to the items in the System Setup compared
to the [Supervisor Password] item.
Password on boot
[Password on boot] menu protects the system by requesting [Set Supervisor Password]
or [Set User Password] during boot up.
ENGLISH
134
6 When the following message appears, click [YES]. The PC will restart.

Setup and Upgrade
2 When the following screen appears, set [Set Supervisor Password] only or both [Set
Supervisor Password] and [Set User Password].
ENGLISH
1 After opening the system setup screen, click the [Security] button.
135

Setup and Upgrade
Set HDD Password / Set SSD Password
HDD / SSD Password is to set a password in the HDD and SSD separately from the
Supervisor Password.
If you set both HDD password and SSD password, the password input window
appears twice during booting.
If you set both the HDD password and SSD password, the password input window
appears in order of [Boot Priority Order] at the top of the [Boot] menu.
ENGLISH
136
3 Click [Off] in the [Password on boot] menu as shown in the following figure. The button
changes to [On] and the [Password on boot] setting is completed.

Setup and Upgrade
2 When the [Security] menu appears, click the [HDD Security Status] button.
ENGLISH
1 After opening the system setup screen, click the [Security] button.
137

Setup and Upgrade
ENGLISH
138
3 When the following screen appears, click [Enter] in the [Set HDD Password] or [Set
SSD Password] menu.

Setup and Upgrade
ENGLISH
4 When the following message appears, enter the password and click [OK]. The
password must not exceed 8 characters consisting of letters (A - Z), numbers (0 - 9), or
a combination of both.
139

Setup and Upgrade
6 To save the changes in the system setup, press [F10].
ENGLISH
140
5 When the following message appears, click [OK].

7 When the following message appears, click [YES]. The PC will restart.
CAUTION
HDD PasswordWithout the password, it is impossible to recover the HDD.
• The replacement of HDD due to a forgotten HDD Password is not covered by
warranty.
ENGLISH
Setup and Upgrade
141

Setup and Upgrade
2 Change the password in the same way as setting one.
ENGLISH
142
Changing or Deleting the Password
You can delete or change the password only after entering the current password.
Changing the Password
1 Execute System Setup, enter the password, and click [Enter].

Deleting the Password
ENGLISH
Setup and Upgrade
143
1 Execute System Setup, enter the password, and click the [Security] button.

Setup and Upgrade
ENGLISH
144
2 When the following screen appears, click [Enter] in the [Set Supervisor Password]
menu.

Setup and Upgrade
ENGLISH
145
3 When the following message appears, enter the current password in the [Enter Current
Password] field.

Setup and Upgrade
ENGLISH
146
4 Click [Enter] in [Enter New Password] and [Confirm New Password].

5 When the following message appears, click [OK].
6 To save the changes in the system setup, press [F10].
ENGLISH
Setup and Upgrade
147

Setup and Upgrade
ENGLISH
148
7 When the following message appears, click [YES]. The PC will restart.

Deleting the Password (Set HDD Password / Set SSD Password)
2 When the [Security] menu appears, click the [HDD Security Status] button.
ENGLISH
Setup and Upgrade
149
1 Execute System Setup, enter the password, and click the [Security] button.

Setup and Upgrade
ENGLISH
150
3 When the following screen appears, click [Enter] in the [Set HDD Password] or [Set
SSD Password] menu.

Setup and Upgrade
ENGLISH
151
4 When the following message appears, enter the current password in the [Enter Current
Password] field.

Setup and Upgrade
ENGLISH
152
5 Click [Enter] in [Enter New Password] and [Confirm New Password].

6 When the following message appears, click [OK].
7 To save the changes in the system setup, press [F10].
ENGLISH
Setup and Upgrade
153

Setup and Upgrade
ENGLISH
154
8 When the following message appears, click [YES]. The PC will restart.

Setup and Upgrade
ENGLISH
Restoring the Factory Default Settings
If you have changed the system setup by mistake, you can restore the default settings.
1 After opening the system setup screen, click the [Save & Exit] button.
155

Setup and Upgrade
ENGLISH
156
2 When the [Exit] menu appears, select [Load Setup defaults].

Setup and Upgrade
4 To save the changes in the system setup, press [F10].
ENGLISH
3 When the following message appears, click [Yes]. The settings will be reset to the
factory default.
157

Setup and Upgrade
TIP
• You may press [F9] to use the [Load Setup defaults] menu.
ENGLISH
158
5 When the following message appears, click [YES]. The PC will restart.

Setup and Upgrade
ENGLISH
Changing the Booting Order
The user can change the booting order according to his or her needs, or select a boot
device
The model in the example can differ from actual models and is subject to change for
performance improvements, without prior notice.
TIP
To use the system setup (F2), booting device selection (F10), or recovery (F11), you need
to restart the system (click [Restart] in the system power menu) and then immediately
press the corresponding function key due to the fast booting speed.
Changing the Booting Order
1 Reboot the system and press [F2].
159

Setup and Upgrade
3 Drag the icon of the device to change the booting order in the [Edit Boot Order] menu
to change the boot order.
ENGLISH
160
2 When the system setup screen appears, click the [Boot] button.

4 To save the changes in the system setup, press [F10].
6 The changes are saved and the system reboots.
ENGLISH
5 When the following message appears, click [YES].
Setup and Upgrade
161

Setup and Upgrade
ENGLISH
162
Selecting a Booting Device to Use
1 Reboot the system and press [F10].

2 When the Select Booting Device screen appears, select the device.
3 Boots using the selected device.
ENGLISH
Setup and Upgrade
163

Setup and Upgrade
] button and select the [Settings] menu.
TIP
Press the [
] key or [Ctrl] + [Esc] to display the Start menu.
ENGLISH
164
Windows 10 Auto Scaling
The Windows 10 Auto Scaling feature for user's convenience may partially blur the screen
or display some icons and texts larger.
Refer to the following information to change the DPI scaling to suit your needs.
1 Click the [

Setup and Upgrade
3 [Change the size of text, apps and other items.] Adjust the value to change the size.
ENGLISH
2 Select [System] > [Display].
165

Setup and Upgrade
ENGLISH
166
4 Click [Apply] to apply the changes.

Setup and Upgrade
] icon to run LG Control Center.
TIP
Select the [
] button > [All Apps] > [LG Software] and run [LG Control Center].
2 On LG Control Center screen, set the [Instant Booting] to [ON].
3 Shutdown the system and close the notebook PC cover.
4 When the cover is opened, the notebook PC turns on and the system starts to boot
automatically.
ENGLISH
Using Instant Booting
Instant Booting allows the system to boot automatically when the notebook PC cover is
opened, so that you can use the system without pressing the power button.
167
1 On the desktop, press the [

FAQ
168
FAQ
ENGLISH
FAQ Content
LG Recovery Center RE
If booting is impossible due to an error with the system, you can recover the system using
LG Recovery Center RE.
TIP
It is recommended that you create a recovery drive in case a serious error occurs in the
system.
CAUTION
If you have deleted the restoration data in the protected area of the hard disk, the restore
function may not work.
All data is lost during the initialization, so you must backup all critical data in advance.
1 Turn on the notebook PC and press [F11].

FAQ
ENGLISH
169
2 When the following screen appears, select the language you want to use and then click
[Next].

FAQ
ENGLISH
170
3 When the following screen appears, select the [Agree] button and then click [Next].
For recovery, the power adapter must be connected. Connect the system power
and then recover the system.

FAQ
ENGLISH
4 When the factory reset is completed as shown in the following figure, click [Complete]
and then restart the system.
171

FAQ
] icon to run LG Control Center.
TIP
Select the [
] button > [All Apps] > [LG Software] and run [LG Control Center].
2 On LG Control Center screen, set the [Instant Booting] to [ON].
3 Shutdown the system and close the notebook PC cover.
4 When the cover is opened, the notebook PC turns on and the system starts to boot
automatically.
ENGLISH
172
Using Instant Booting
Instant Booting allows the system to boot automatically when the notebook PC cover is
opened, so that you can use the system without pressing the power button.
1 On the desktop, press the [

FAQ
] button and select the [Settings] menu.
TIP
Press the [
] key or [Ctrl] + [Esc] to display the Start menu.
ENGLISH
173
Windows 10 Auto Scaling
The Windows 10 Auto Scaling feature for user's convenience may partially blur the screen
or display some icons and texts larger.
Refer to the following information to change the DPI scaling to suit your needs.
1 Click the [

FAQ
3 [Change the size of text, apps and other items.] Adjust the value to change the size.
ENGLISH
174
2 Select [System] > [Display].

4 Click [Apply] to apply the changes.
ENGLISH
FAQ
175

FAQ
] button and select the [Settings] menu.
ENGLISH
176
Restoring the System
If the system has an error, you can use Windows 10's recovery feature to recover or restore
the system to its initial pre-purchase state.
CAUTION
If you have deleted the restoration data in the protected area of the disk, or have
arbitrarily installed another operating system, the restore function may not work.
To recover the system, the AC adapter must be connected.
1 Press the [

2 When the [Settings] screen appears, select [Update & security].
3 Select the [Recovery] menu and press [Get started] to reset the PC.
4 If the following screen appears, select a desired option to proceed with recovery.
ENGLISH
FAQ
177

178
a Keep my files: Recovers the PC without losing any personal files.
PC settings are reset to the default and any user-installed Desktop app will be
deleted.
b Remove everything: Removes all items from the system and restores the system to
its initial pre-purchase state.
ENGLISH
FAQ

FAQ
179
• Just Remove My Files: Factory-resets the drive where Windows is installed (for
example: Drive C).
• Remove files and clean the drive: Resets all partitions and drives in the system.
CAUTION
All data is lost during the initialization, so you must backup all critical data in advance.
It may take about 5 hours or longer depending on the system conditions.
ENGLISH

FAQ
ENGLISH
180
Connecting to External Display
TIP
• Ensure the monitor power is off before connecting the external monitor to the PC.
Connecting to the HDMI Port
HDMI is a high-speed multimedia interface that can transfer uncompressed full digital audio
and video signals.
When LG Notebook PC supports SPDIF, HDMI is not supported.
TIP
Use ‘HDMI to VGA Gender' to connect to VGA port.
HDMI to VGA Gender is available at LG Service Center.
1 Connect the HDMI cable to the PC and the external device (TV, monitor) that supports
HDMI.
2 HDMI port transfers both video and audio simultaneously. Hence, there is no need for a
separate audio connection.

FAQ
] + [P] keys are pressed, the screen output option changes.
Release the keys to display the selected screen output.
CAUTION
• If you do not set Speaker as the default value after disconnecting the HDMI cable,
the system may not produce any sound.
• If a program was running already, you need to exit and restart the program for it to
produce sound.
ENGLISH
3 On the PC, press [Fn] + [F7] to display monitor (projector) toggling screen. Select the
desired screen output.
TIP
181
• Every time [

FAQ
182
Using a Wired/Wireless Router
ENGLISH
A wireless / regular router connects several PCs and mobile devices to one internet line and
enables the use of internet and the network.
A wireless / regular router has to be bought separately. Refer to the manual provided
by the manufacturer for instructions.
Connecting a Wireless or Regular Router
If one internet line is used with a wireless / regular router and several devices are
connected, this may result in a slower connection.
In case of a wireless LAN, it is recommended to change the network name and security
settings for a more secure connection.
Network speed can differ according to operation environment and specifications.
1 Connect the internet cable of the modem that was provided by your internet provider to
the router's WAN port.
2 Connect all devices (PC, IPTV, internet phone, etc.) with a LAN cable to LAN ports 1 to
4 of the router.
The number of LAN ports can vary for each router model.
3 Please refer to the manual provided by the router manufacturer for setup of the network
and Internet.

FAQ
183
Wireless LAN
The wireless network (Wireless LAN) is the network environment that connects a PC with
the internet provider or company network through an Access Point (wireless or regular
router).
Wireless LAN is optional. Hence, it may not be installed in some models.
Turning On/Off Airplane Mode
Prior to using the wireless LAN, press [Fn] + [F6] to turn off Airplane Mode.
Pressing [Fn] + [F6] will turn the Airplane Mode on or off. It is recommended that you keep
the mode turned on when the machine is not used to reduce the battery power
consumption.
Using the Wireless LAN
If an Access Point (wired or wireless router) is in the vicinity of the PC, the wireless LAN can
easily be accessed.
During the search for a wireless network (Wireless LAN), various Access Point may
be found according to the location where the PC is used.
In case no accessible wireless network (Wireless LAN) is near the PC, no Access
Point might be found.
A password protected Access Point cannot be accessed without the correct
password.
ENGLISH

184
] button and select the [Settings] menu.
TIP
Press the [
] key or [Ctrl] + [Esc] to display the Start menu.
ENGLISH
FAQ
1 Press the [

FAQ
3 Select an access point to connect to and click the [Connect] button.
ENGLISH
2 Select [Network and Internet] > [Wi-Fi] to search for near access points automatically.
185

FAQ
5 Click Internet Browser to check if the internet is working properly.
ENGLISH
186
4 If a connection is established, [Connected] is displayed below the access point name.

FAQ
ENGLISH
187
Wired LAN
Wired LAN is the network environment that users can connect to by using a cable to
connect to their internet providers or the company's network.
Using Wired LAN
Wired LAN is installed with an automatic IP (DHCP) as default value.
Please refer to the following instructions for details on setting up an automatic IP (DHCP) or
manual IP.
1 Connect the LAN adapter to the micro USB port on the PC.
TIP
The recommended network cable for the optimal network environment is CAT5 or
higher.
The network (LAN) cable may be connected when the LAN adapter is used.
The LAN adapter may be separately purchased at LG Service Center.

FAQ
ENGLISH
188
2 Connect the wired LAN cable to the LAN port.

FAQ
] button and select the [Settings] menu.
TIP
Press the [
] key or [Ctrl] + [Esc] to display the Start menu.
ENGLISH
189
3 Press the [

FAQ
ENGLISH
190
4 Select [Network and Internet] > [Ethernet] > [Change Adapter Options].

5 Right-click [Ethernet] and select the [Properties] menu.
ENGLISH
FAQ
191

FAQ
ENGLISH
192
6 Select [Internet Protocol Version 4 (TCP/IPv4)] and click the [Properties] button.

FAQ
8 Click [OK] to complete the network setup.
9 Click Internet Browser to check if the internet is working properly.
ENGLISH
7 To use an automatic IP(DHCP), select [Obtain an IP Address Automatically]. If you
wish to use a manual IP, select [Use Following IP Address] to enter the address.
Contact the network service provider or administrator to use a static IP.
193

FCC Warning
This equipment has been tested and found to comply with the limits for a digital device, pursuant to part 15 of the FCC Rules. These
limits are designed to provide reasonable protection against harmful interference in a residential installation.
This equipment generates, uses and can radiate radio frequency energy and, if not installed and used in accordance with the
instructions, may cause harmful interference to radio communications. However, there is no guarantee that interference will not occur
in a particular installation. If this equipment does cause harmful interference to radio or television reception, which can be determined
by turning the equipment off and on, the user is encouraged to try to correct the interference by one or more of the following measures:
• Reorient or relocate the receiving antenna.
• IIncrease the separation between the equipment and receiver.
• Connect the equipment into an outlet on a circuit different from that to which the receiver is connected.
• Consult the dealer or an experienced radio/TV technician for help
Caution: Any changes or modifications to this device not explicitly approved by manufacturer could void your authority to operate this
equipment.
This device complies with part 15 of the FCC Rules. Operation is subject to the following two conditions:
(1) This device may not cause harmful interference, and (2) this device must accept any interference received, including interference that
may cause undesired operation.
This equipment complies with FCC radiation exposure limits set forth for an uncontrolled environment.
This transmitter must not be collocated or operating in conjunction with any other antenna or transmitter unless authorized to do so by the
FCC.
09

IC Warning
“This device complies with Industry Canada licence-exempt RSS standard(s).”
Operation is subject to the following conditions: (1) this device may not cause interference, and (2) this device must accept any
interfer-ence, including interference that may cause undesired operation of the device.
Le présent appareil est conforme aux CNR d’Industrie Canada applicables aux appareils radio exempts de licence. L’exploitation est
autorisée aux deux conditions suivantes : (1) l’appareil ne doit pas provoquer de brouillage, et (2) l’appareil doit accepter tout brouillage
radioélectrique subi, même si le brouillage est susceptible d’en compromettre le fonctionnement.
• This device is restricted to indoor use only within the 5.15 ~ 5.25 GHz Band.
 Loading...