

Page 1

Using the PC
1 Touchpad
• Moves the cursor.
2 Scrolling area
3 Left button
• Use to select or execute programs.
4 Right button
• Functions as the right button of a mouse in most cases. However, the usage may differ
depending on programs.
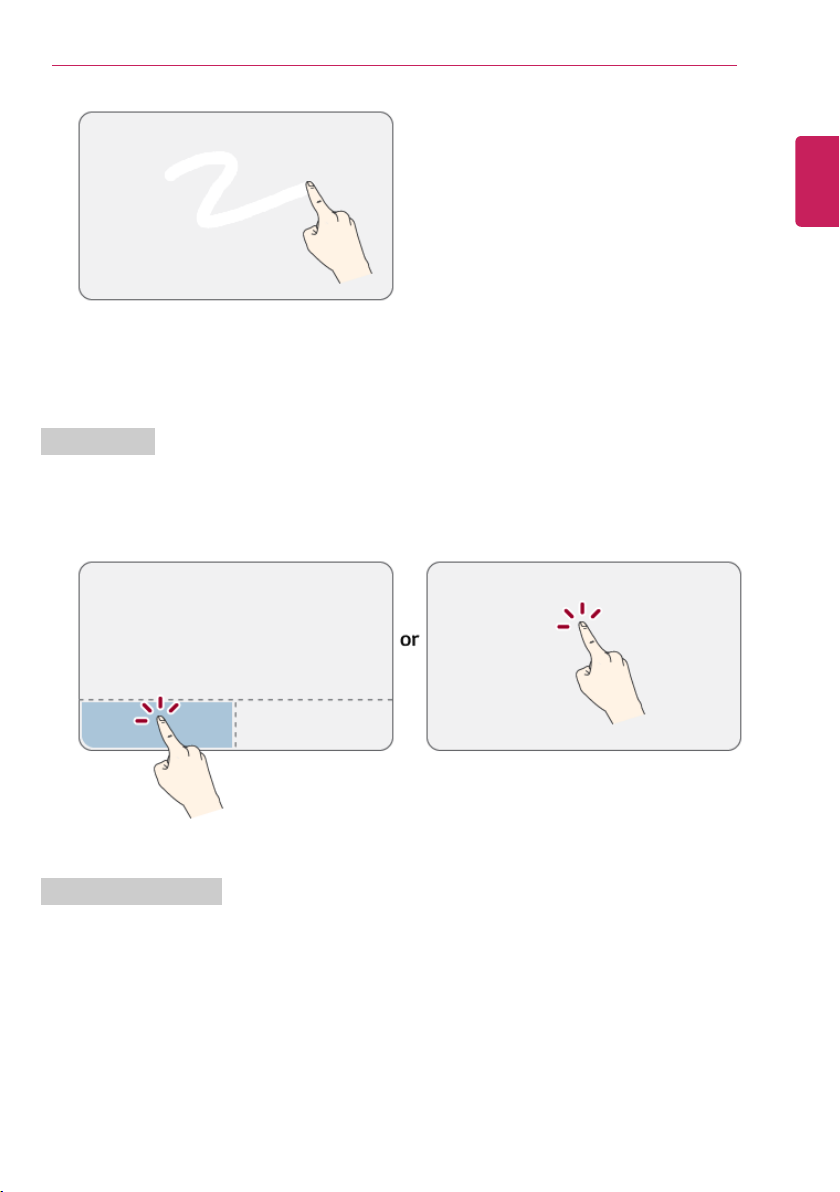
Moving the Cursor (Pointer) on the Screen
Place a finger on the touchpad and glide the finger.
ENGLISH
100
Using the Touchpad
The built-in touchpad provides the same functionality as an external mouse. You can use the touchpad
and USB mouse simultaneously.
The touchpad scroll feature is not supported in the model that supports the gesture feature.
Page 2
Using the PC
Click (Select)
Press and release the left button swiftly with a finger. (Or tap the touchpad once.)
Do this, for example, to select a menu or icon and to place the cursor to type on a word processor file.
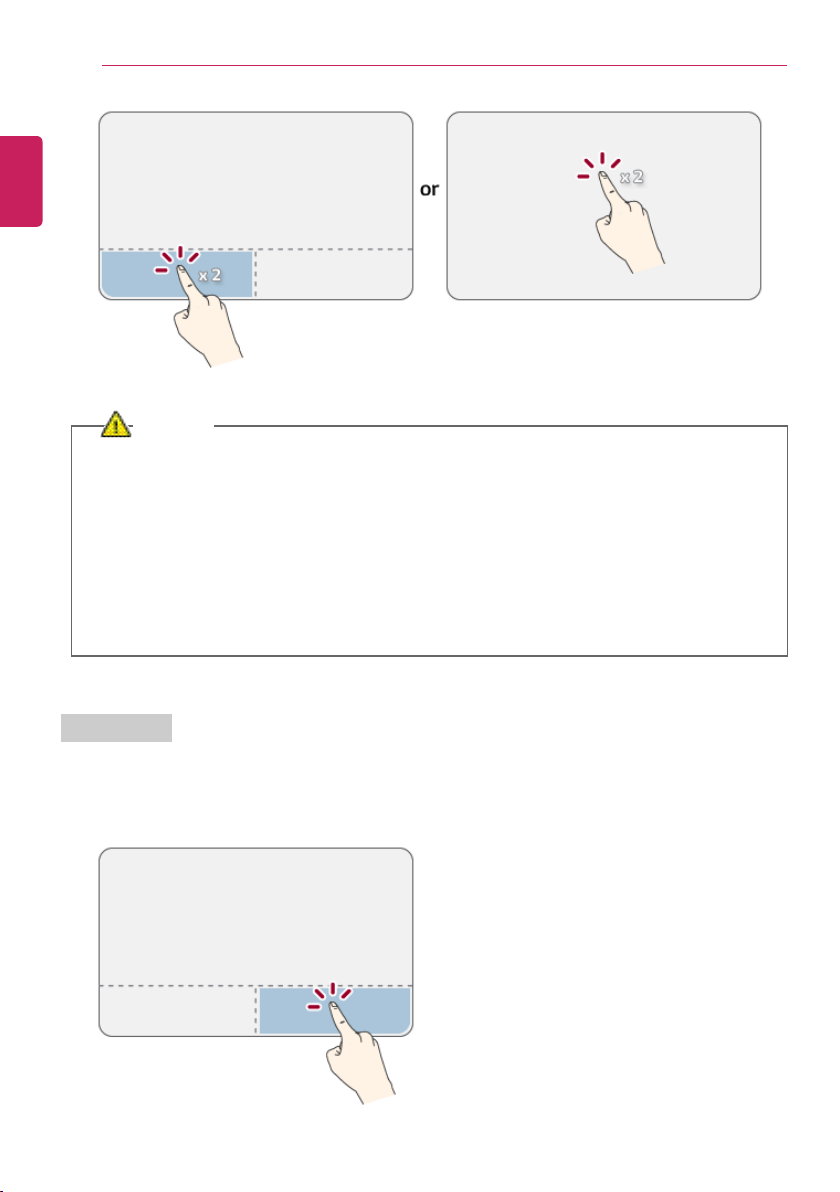
Double-click (Execute)
Press the left button twice consecutively and release the button. (Or tap the touchpad twice.)
Do this, for example, to run a program after selecting its execution file (or icon).
ENGLISH
101
Page 3
102
CAUTION
Notes on Using the Touchpad
• Do not use a sharp object such as a pen on the pad nor peel the cover. It may cause an
impairment.
• Do not place more than one finger, and do not use while wearing a glove or when the
hand is wet. The Touchpad will not work properly. Oil or dirt at the fingertip can also cause
an impairment.
• The touchpad is sensitive. Do not impose excessive force or maintain an uncomfortable
position. Otherwise, it may result in a finger or wrist injury.
Right button
Press and release the right button swiftly.
Functions as the right button of a mouse, but the usage may differ depending on programs.
ENGLISH
Using the PC
Page 4
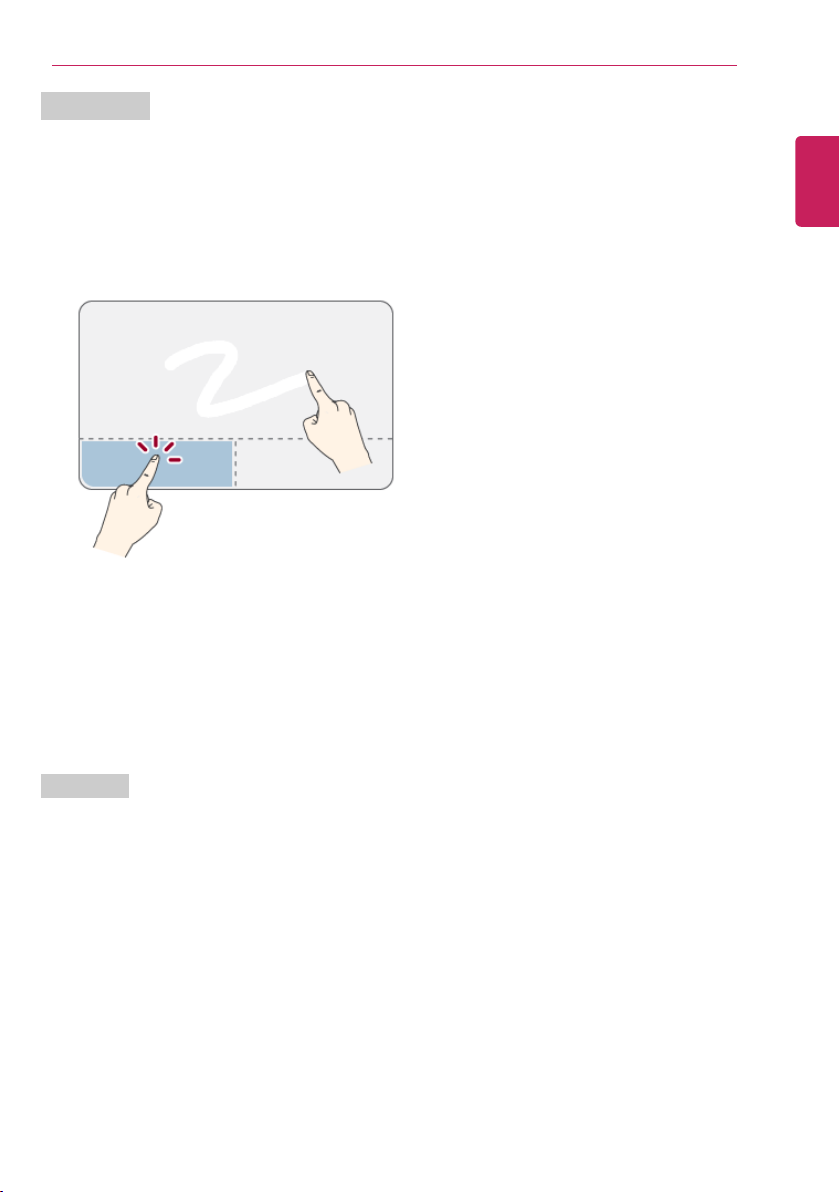
Drag & Drop
1 Drag
• Glide one finger on the pad with another finger pressing and holding the left button.
2 Drop
• Release the left button to drop it into the Recycle Bin. (By using this, you can drop a file into the
Recycle Bin at will.)
ClickLock
When activated, this feature allows you to drag/scroll without pressing and holding the left button.
ENGLISH
Using the PC
103
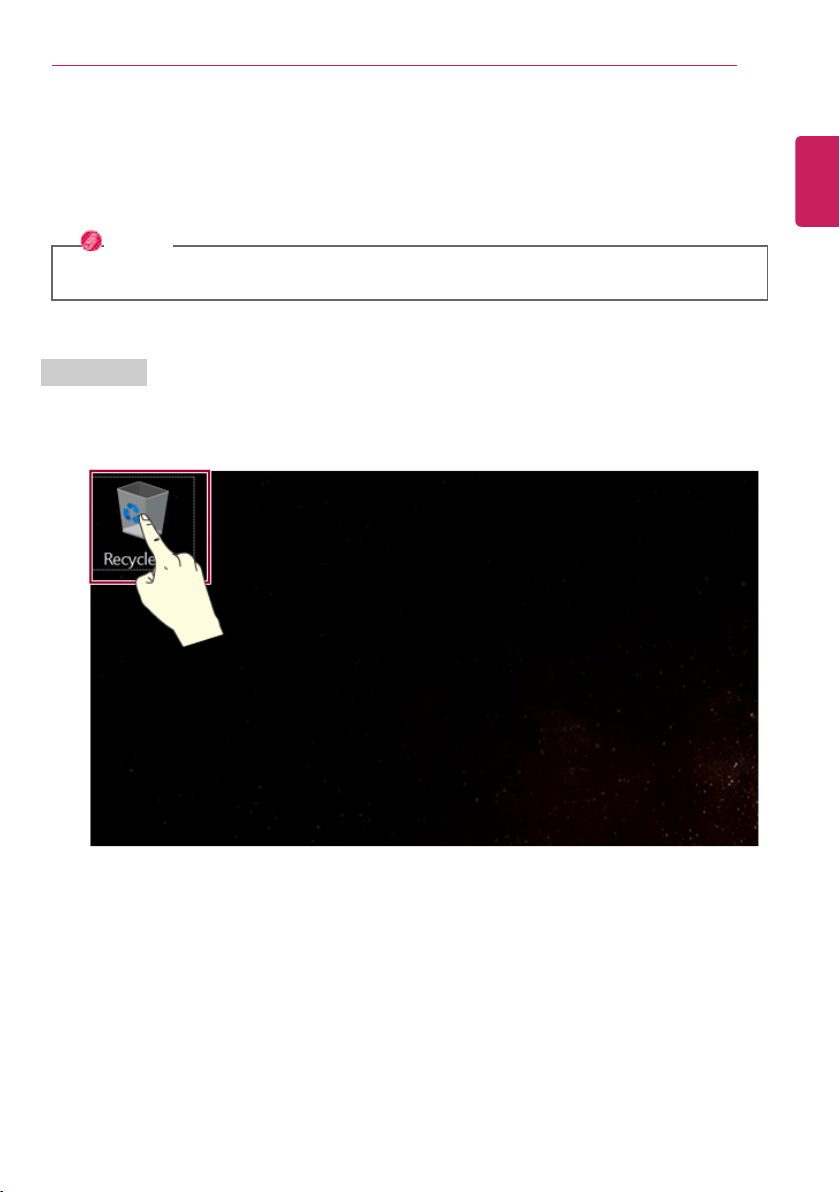
To drag, click and hold an icon, and move it to another location.
To drop, release the dragged icon in the location you want.
To move a file icon to another folder or to Recycle Bin, place the cursor (or the pointer) on the icon,
press and hold the left button, and glide another finger on the touchpad until the icon reaches the
aimed location. After reaching the destination, release the left button.
Page 5
104
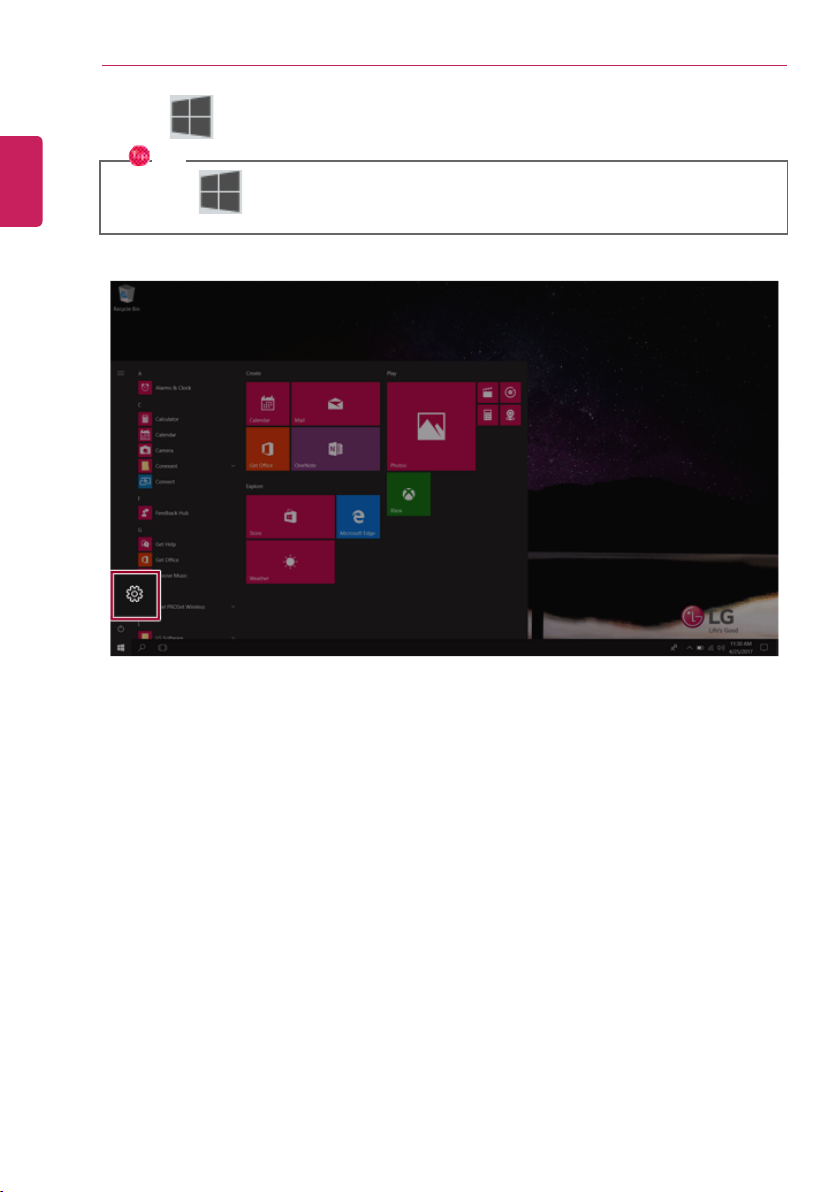
] button and select the Settings menu.
TIP
Press the [
] key or [Ctrl] + [Esc] to display the Start menu.
ENGLISH
Using the PC
1 Click the [
Page 6
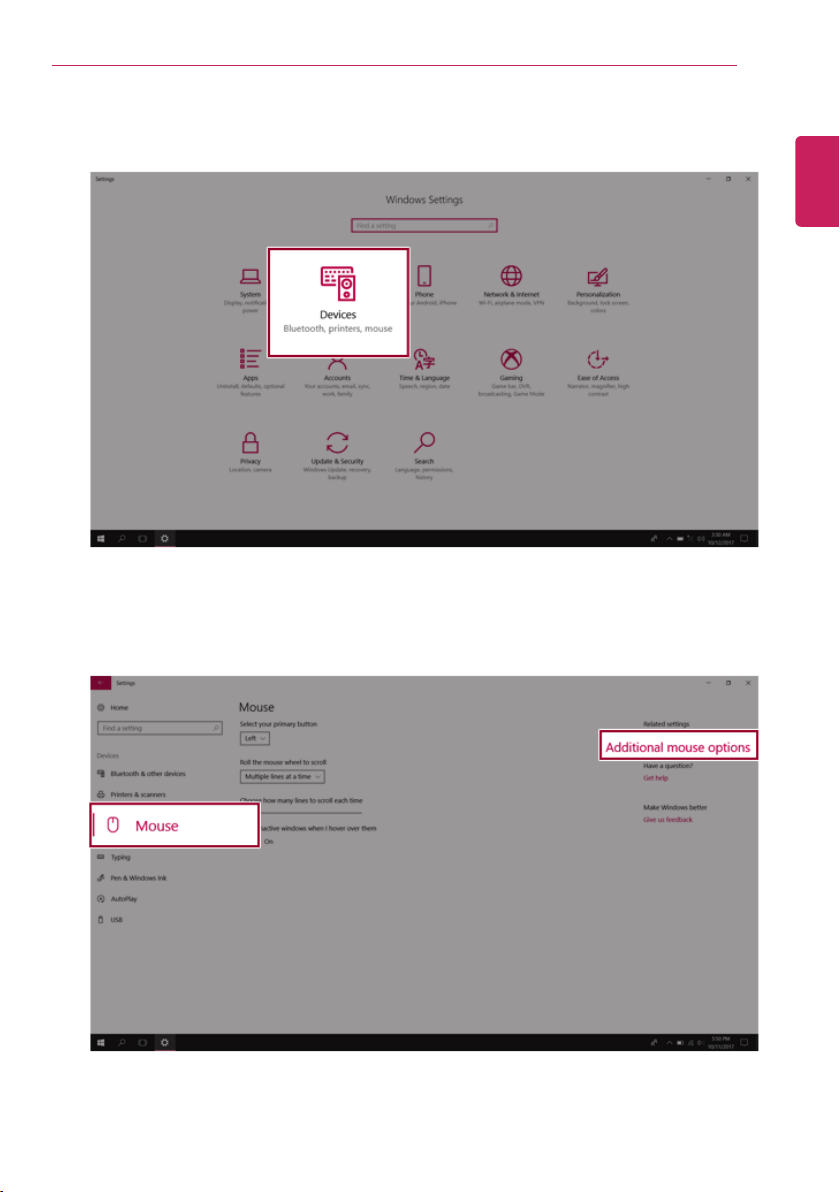
2 When the [Settings] screen appears, select [Devices].
3 Select [Mouse] > [Additional Mouse Options].
ENGLISH
Using the PC
105
Page 7

Using the PC
5 Press [Settings] to set the time for the ClickLock.
ENGLISH
106
4 When [Mouse Properties] screen appears, select [Turn on ClickLock].
Page 8

Using the PC
7 Move on the touchpad to use the drag/scroll feature.
8 Press the left mouse button to turn off the ClickLock.
Touchpad Gesture
The touchpad gesture feature allows you to use Windows programs more easily by utilizing multitouch functions.
Windows 10 Touchpad Gestures allow you to use the PC more easily.
The touchpad gesture feature may not be supported in some models.
ENGLISH
6 Press the left button of the touchpad and release it to change the button into the pressed state.
107
Page 9
Using the PC
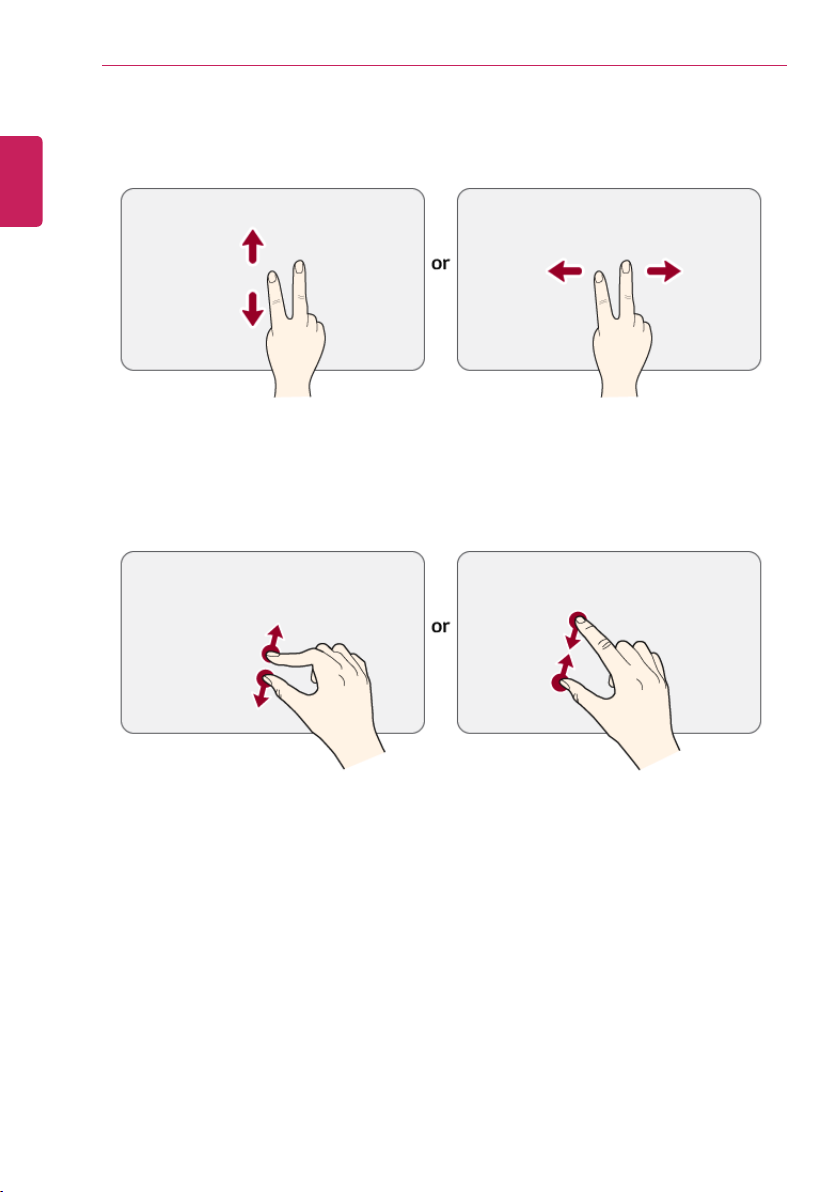
• Place two fingers on the touchpad and widen or narrow them to zoom out or in.
ENGLISH
108
• Place two fingers on the touchpad and move up/down/left/right to scroll the screen.
(It operates only on an app or screen which scrolling is available.)
Page 10
Using the PC
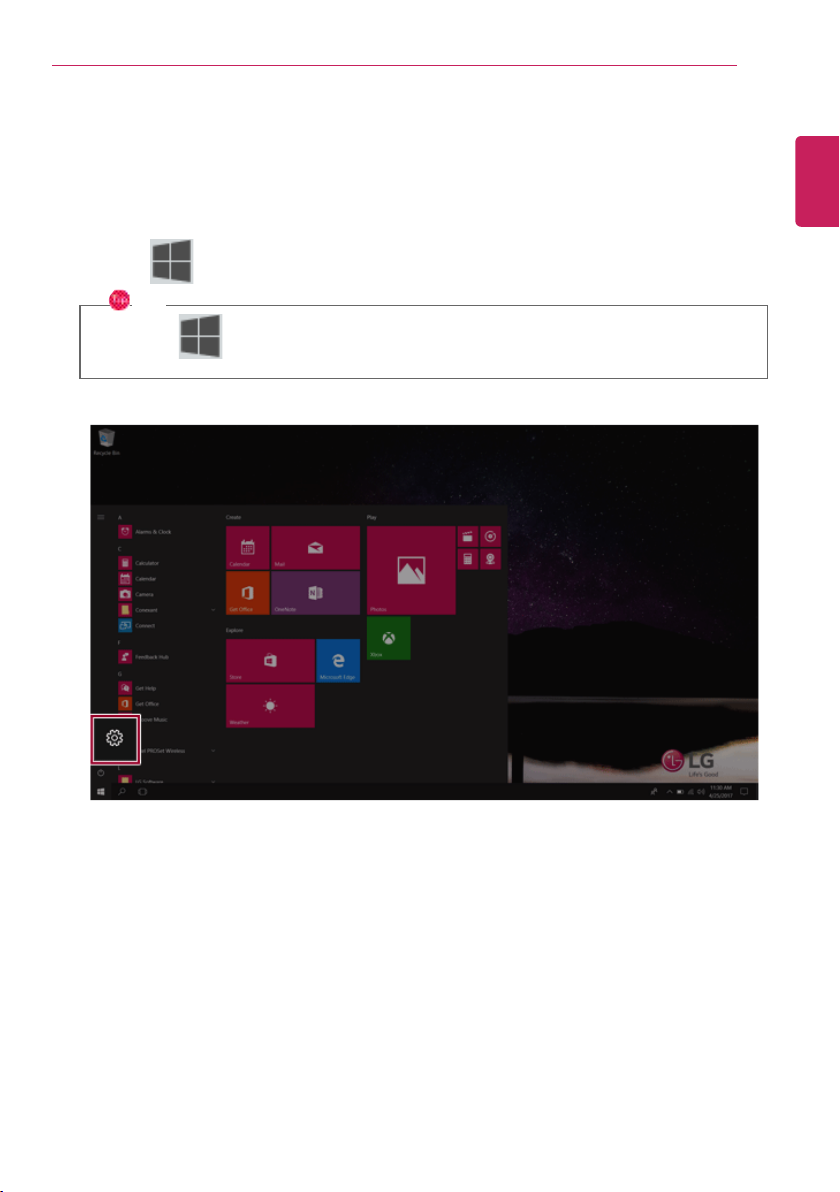
] button and select the Settings menu.
TIP
Press the [
] key or [Ctrl] + [Esc] to display the Start menu.
ENGLISH
Setting Touchpad
You can change the touchpad features or enable/disable the gesture feature.
The figures herein may differ by language selection and are subject to change without prior
notice.
109
1 Click the [
Page 11
Using the PC
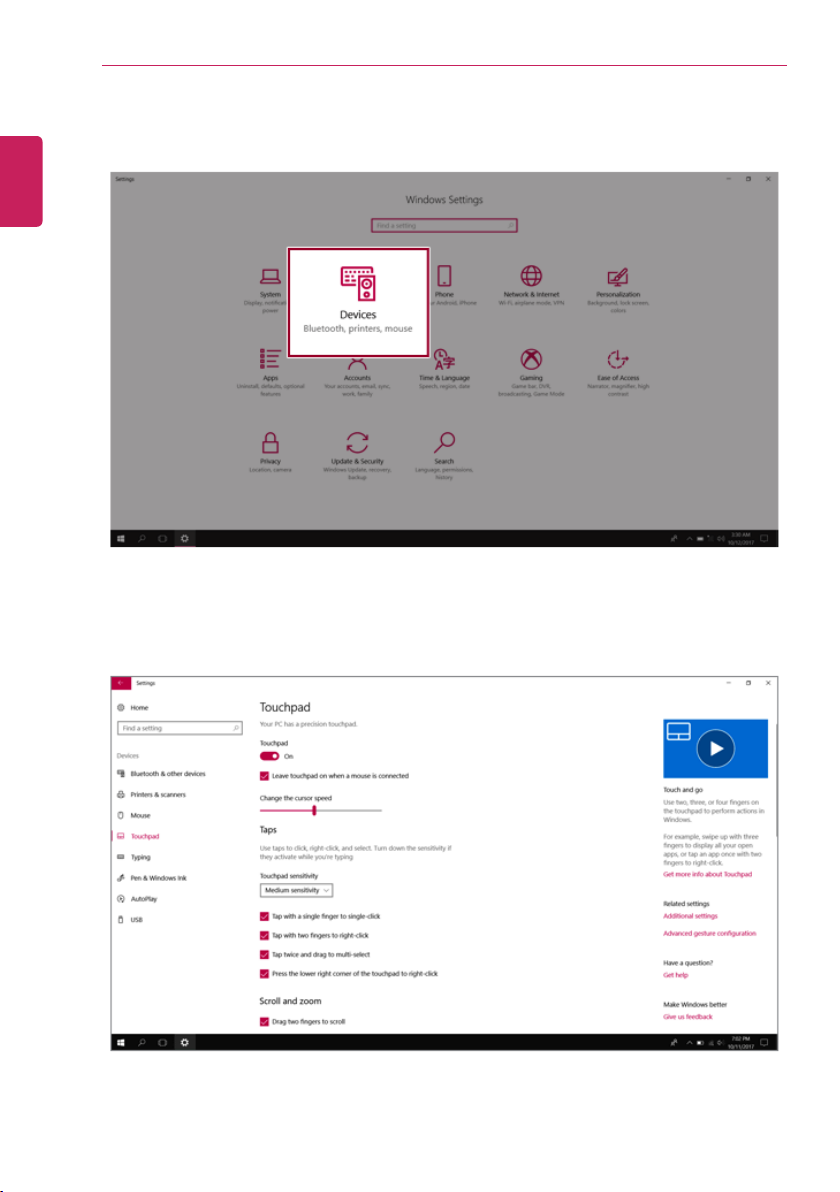
3 Change the settings as needed on the [Touchpad] menu.
ENGLISH
110
2 When the [Settings] screen appears, select [Devices].
Page 12
Using the PC
OPTION
This applies only to models equipped with a touch panel.
Basic Usage
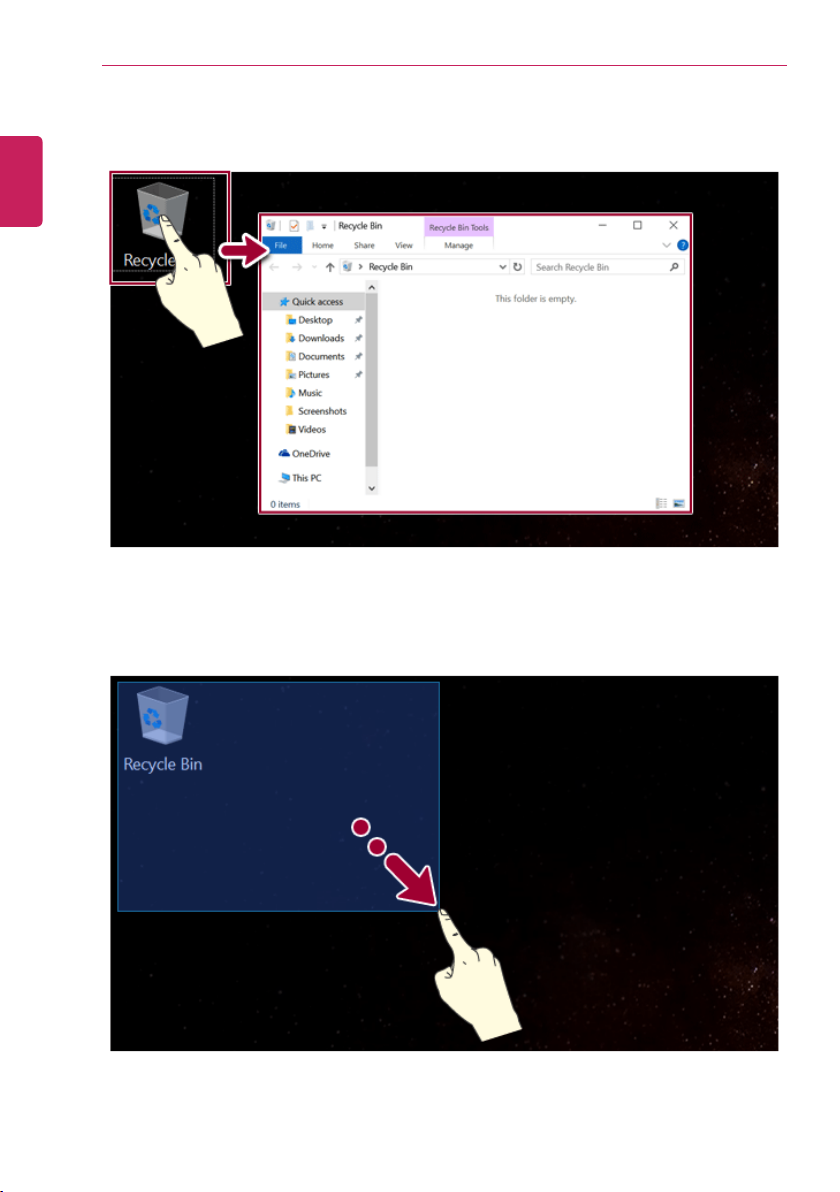
1 Touching Once: Touch the panel once to use as left mouse button.
ENGLISH
111
Using Touch Panel
Use the touch panel for a faster and more convenient use of the PC. All gestures provided by Windows
10 can be used.
For more details about the Windows 10 gestures, refer to Windows help.
Page 13
Using the PC
3 Drag: After touching the start point, finger movement can be used instead of the mouse.
ENGLISH
112
2 Touching Twice: Touch the panel twice to use as double-click.
Page 14
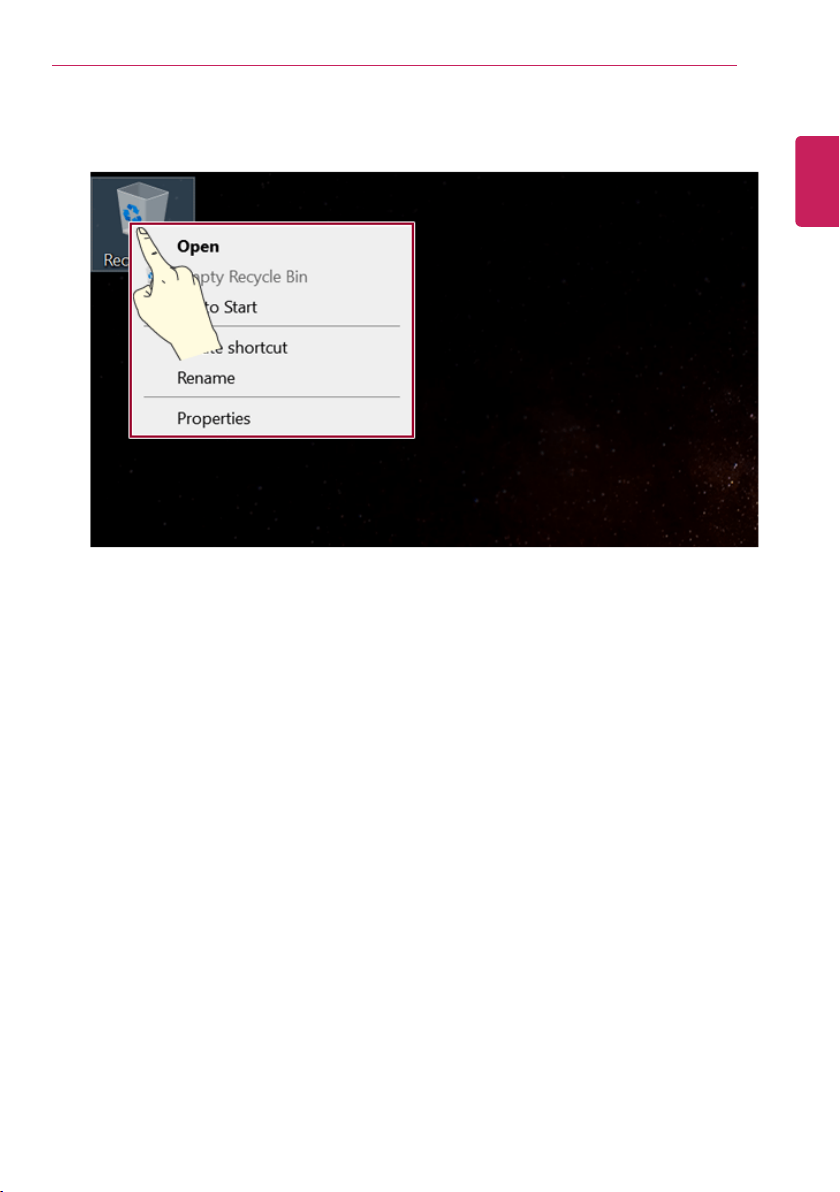
4 Touching Longer: Touch the panel for a longer time to use as right mouse button.
ENGLISH
Using the PC
113
Page 15
Using the PC
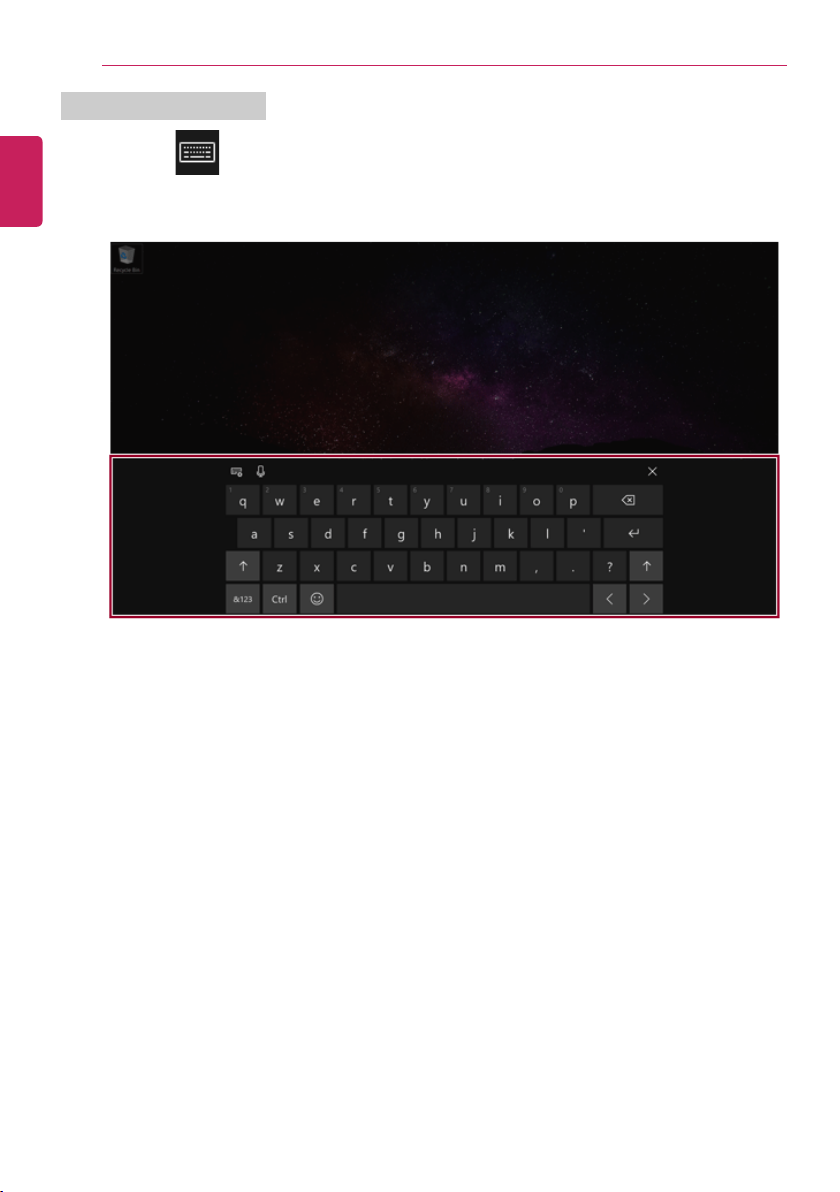
] icon on the right side of taskbar to display the [Keyboard] screen as shown
below.
ENGLISH
114
Using the Touch Keyboard
1 Press the [
Page 16
Using the PC
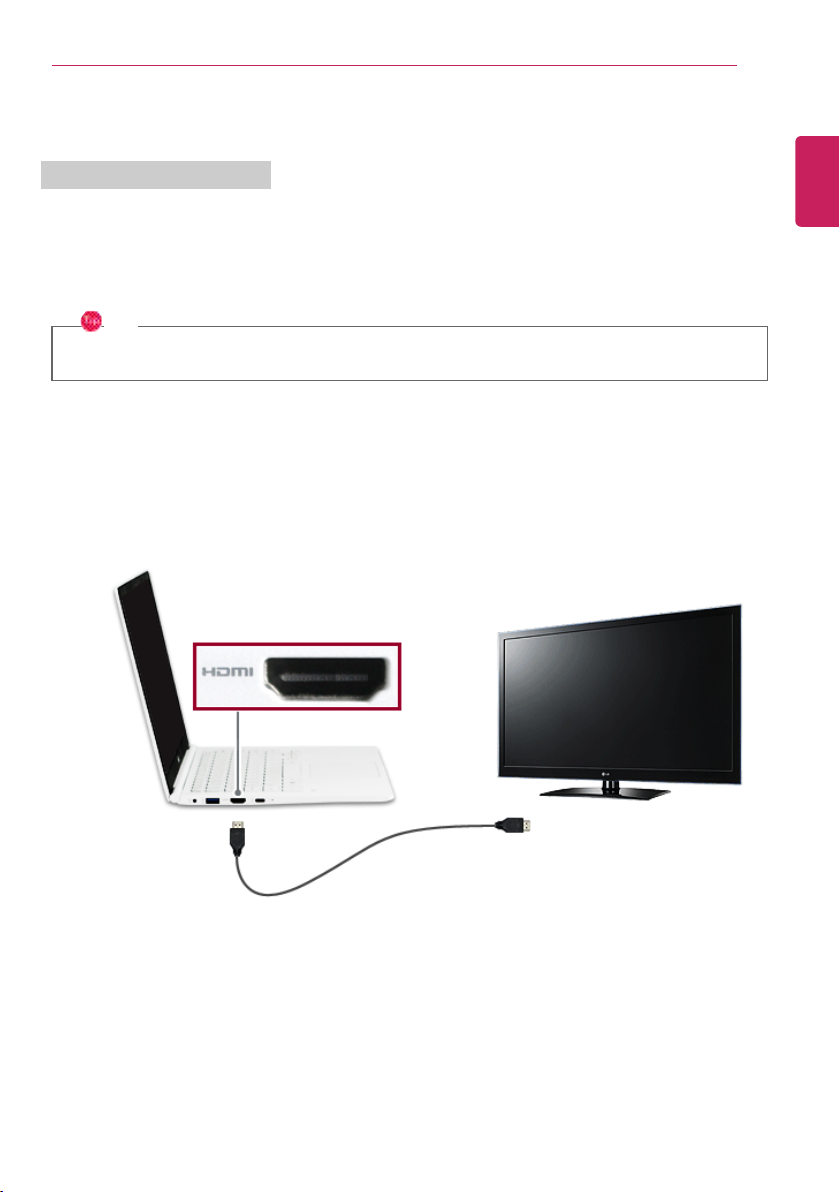
TIP
Ensure the monitor power is off before connecting the external monitor to the PC.
1 Connect the HDMI cable to the PC and the external device (TV, monitor) that supports HDMI.
2 HDMI port transfers both video and audio simultaneously. Hence, there is no need for a separate
audio connection.
3 On the PC, press [Fn] + [F7] to display monitor (projector) toggling screen. Select the desired
screen output.
ENGLISH
Connecting to External Display
Connecting to the HDMI Port
HDMI is a high-speed multimedia interface that can transfer uncompressed full digital audio and video
signals.
When LG Notebook PC supports SPDIF, HDMI is not supported.
In some models, DTS Audio may not work when you use HDMI.
115
Page 17

116
TIP
• Every time [ ] + [P] keys are pressed, the screen output option changes. Release the
keys to display the selected screen output.
CAUTION
• If you do not set Speaker as the default value af ter disconnecting the HDMI cable, the
system may not produce any sound.
• If a program was running already, you must exit and restart the program to produce sound.
ENGLISH
Using the PC
Page 18
Using the PC
OPTION
• To use the wireless display feature, the display device must support this feature.
• To connect to the display device that does not support wireless display,you must
separately purchase a wireless display connection device.
• Once the wireless display connection is established, no additional procedures and searching
are necessary the next time you try to connect.
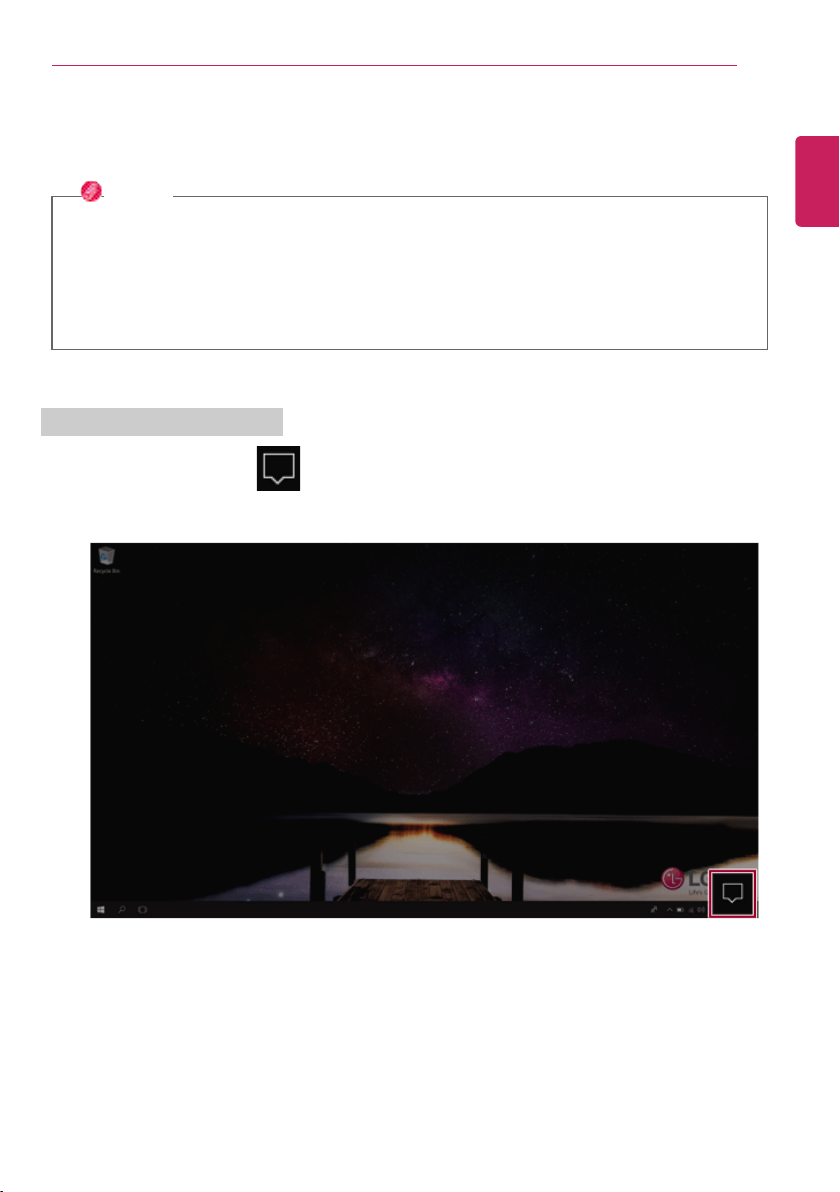
Connecting to Wireless Display
1 Press the Action Center [ ] icon on the right side of the taskbar.
ENGLISH
Connecting to Wireless Display
The wireless display feature connects the PC screen and sound to a display (TV, projector, etc.).
117
Page 19
Using the PC
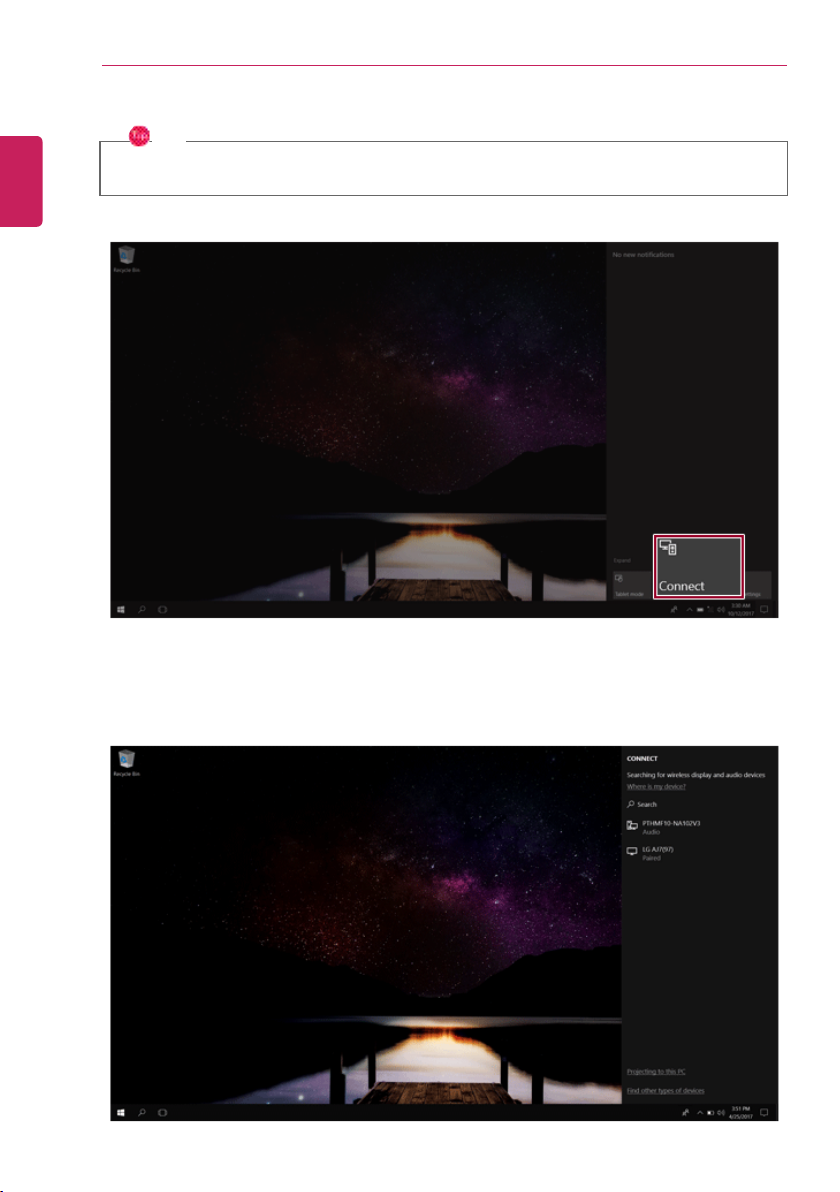
TIP
If the tile does not appear, press the [Expand] menu.
3 Search for wireless display devices in the proximity.
ENGLISH
118
2 When the Action Center screen appears, press the Connect tile.
Page 20
Using the PC
ENGLISH
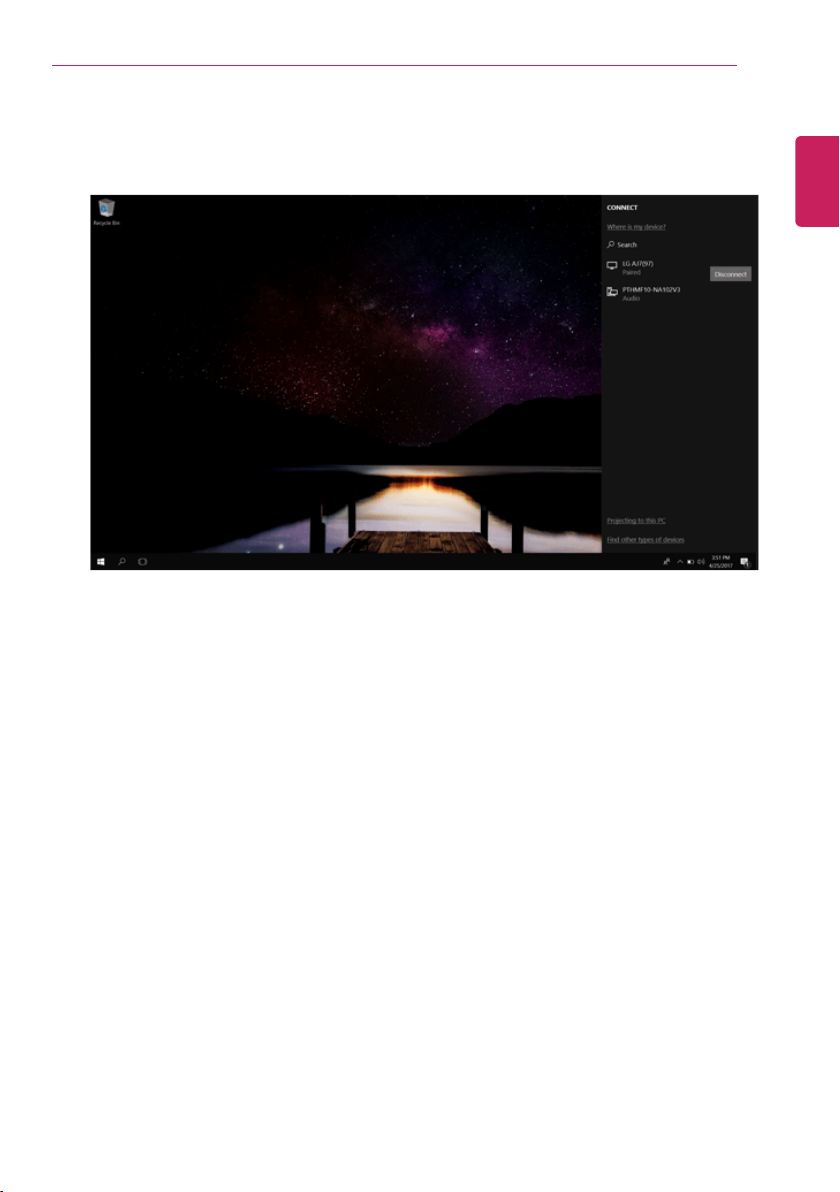
4 If the device is connected as shown below, the PC screen and sound are produced on the wireless
display device.
119
Page 21
Using the PC
OPTION
Thunderbolt™ connection may not be supported in some models.
Connecting a USB Device
If a USB device is connected to a USB-C™ port, the port works as an ordinary USB port.
TIP
To use a conventional USB device, a separate conversion adapter should be used.
(Conversion adapters may be purchased separately.)
Outputting to an External Display
By connecting a display that supports USB-C™ Alternate Mode, you can use the USB-C™ port to
output a screen to an external display.
TIP
We support DisplayPort (DP) interface standards.
CAUTION
You must use a cable that supports Alternate Mode to output a screen to another display.
If you use USB-C™ accessories (cables, interface adapters, etc.) that are used for other products,
you may have compatibility problems (no screen output or a malfunction).
Connecting a Thunderbolt™ Device
You can connect to the USB-C™ port an external display or a high-performance data device that
support the Thunderbolt™specifications.
Depending on the specifications of the device connected to the USB-C™ port, it acts as a USB 3.0 or
Thunderbolt™ device.
ENGLISH
120
Connecting an External USB-C™ (Thunderbolt™) Device
The USB-C™ port mounted on this product supports USB 3.1 Gen 1(USB 3.0) standards.
Use the USB-C™ port to connect USB devices or to output a screen to an external display.
Page 22
Using the PC
TIP
The Thunderbolt™ cable is not provided with the product. Make sure that you use a certified
cable.
Some functions may not be available depending on the product. For more information, refer to
the user manual provided with the device to be connected.
Connecting two notebook PCs that support Thunderbolt™
Use Thunderbolt™ to connect two PCs easily and quickly and send and receive data between them.
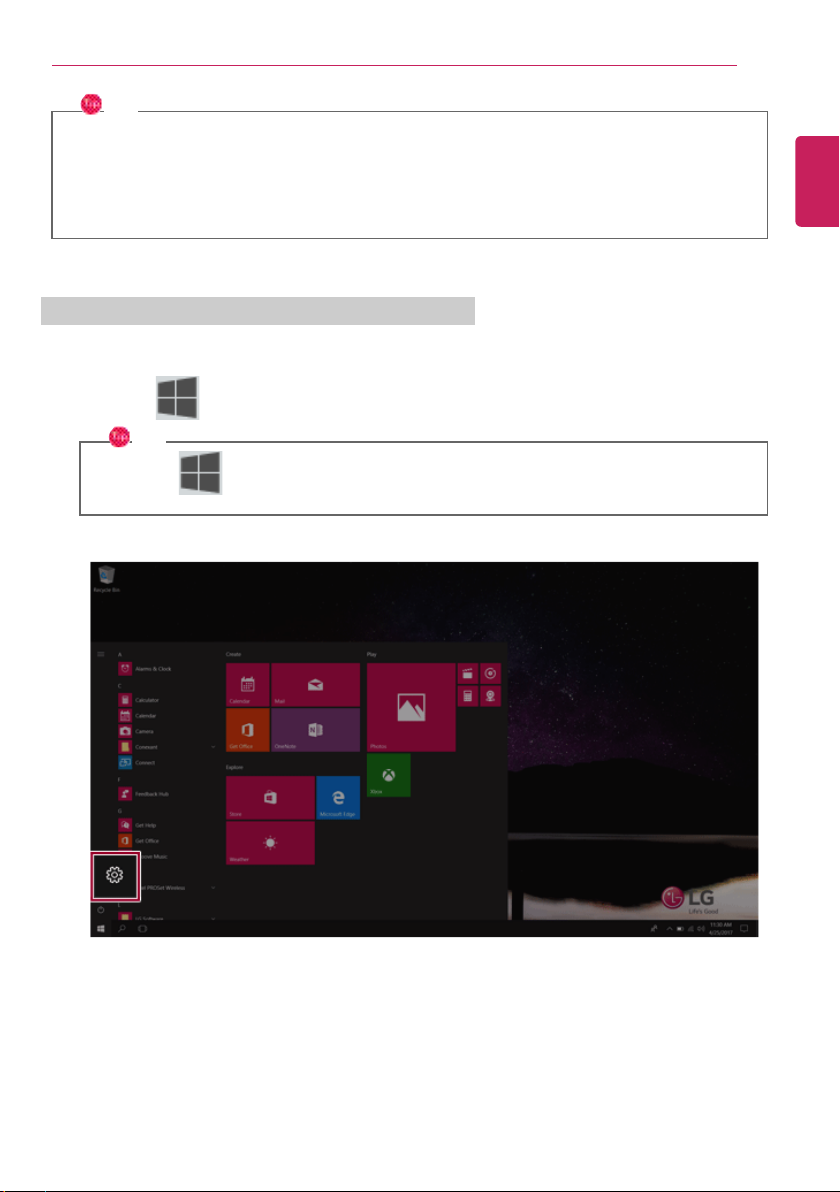
1 Press the [ ] button and select the Settings menu.
TIP
Press the [
] key or [Ctrl] + [Esc] to display the Start menu.
2 Select [Network & Internet] > [Status] > [Network and Sharing Center] > [Change advanced
sharing settings].
ENGLISH
121
Page 23
Using the PC
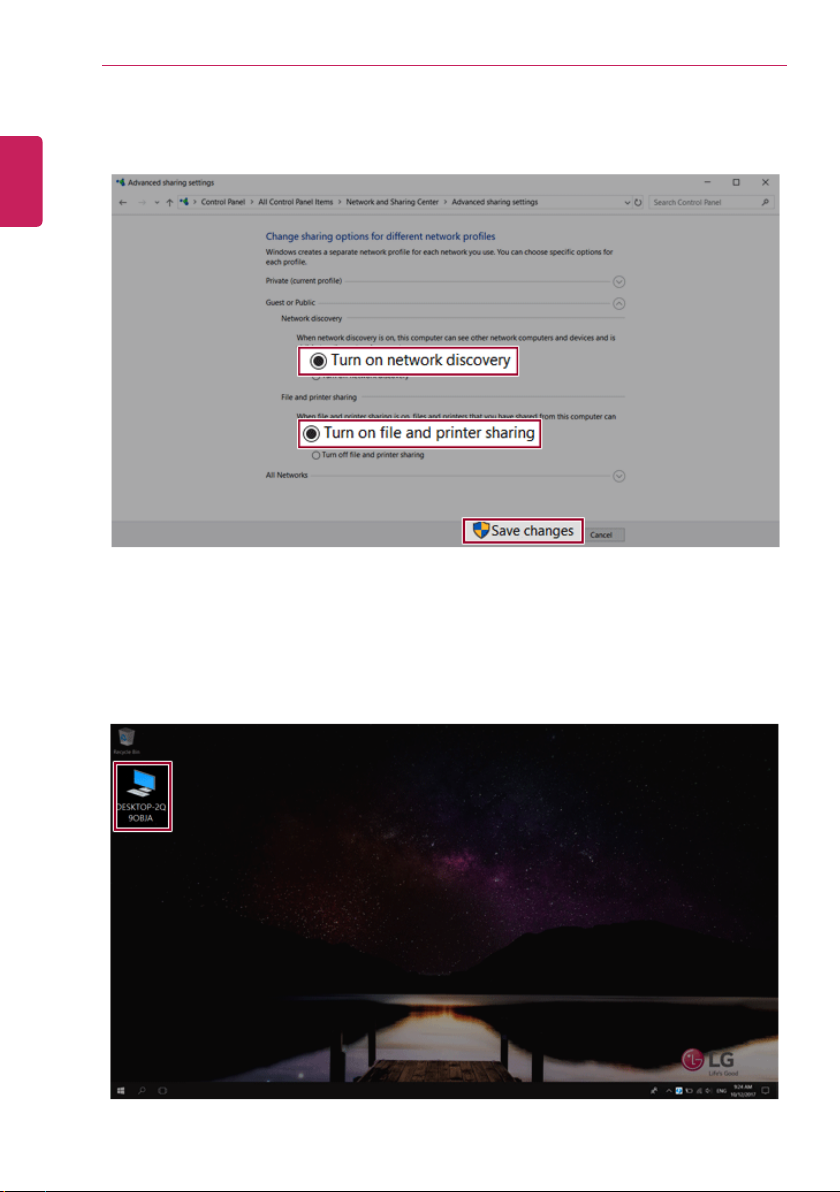
4 Use the Thunderbolt™ cable to connect two notebook PCs.
5 A while later, an icon of the connected computer appears on the desktops of the two notebook
PCs.
ENGLISH
122
3 Set [Change sharing options for different network profiles] as follows, and save the changes.
Page 24

6 Double-click the connected computer icon to open the authentication screen.
TIP
If there is no shared folder in the connected PC, nothing may appear on the screen.
ENGLISH
7 Input the user name and password to connect to the other PC.
Using the PC
123
Page 25

Using the PC
OPTION
Thunderbolt™ connection may not be supported in some models.
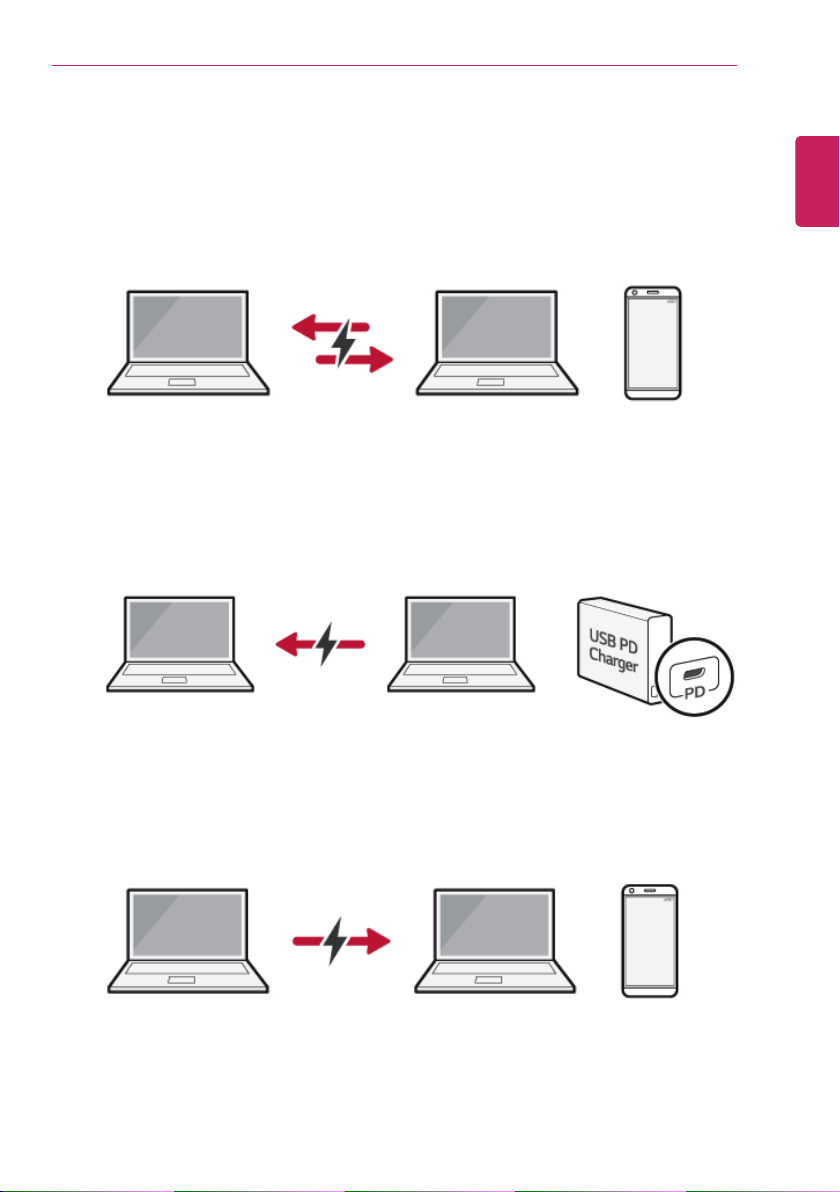
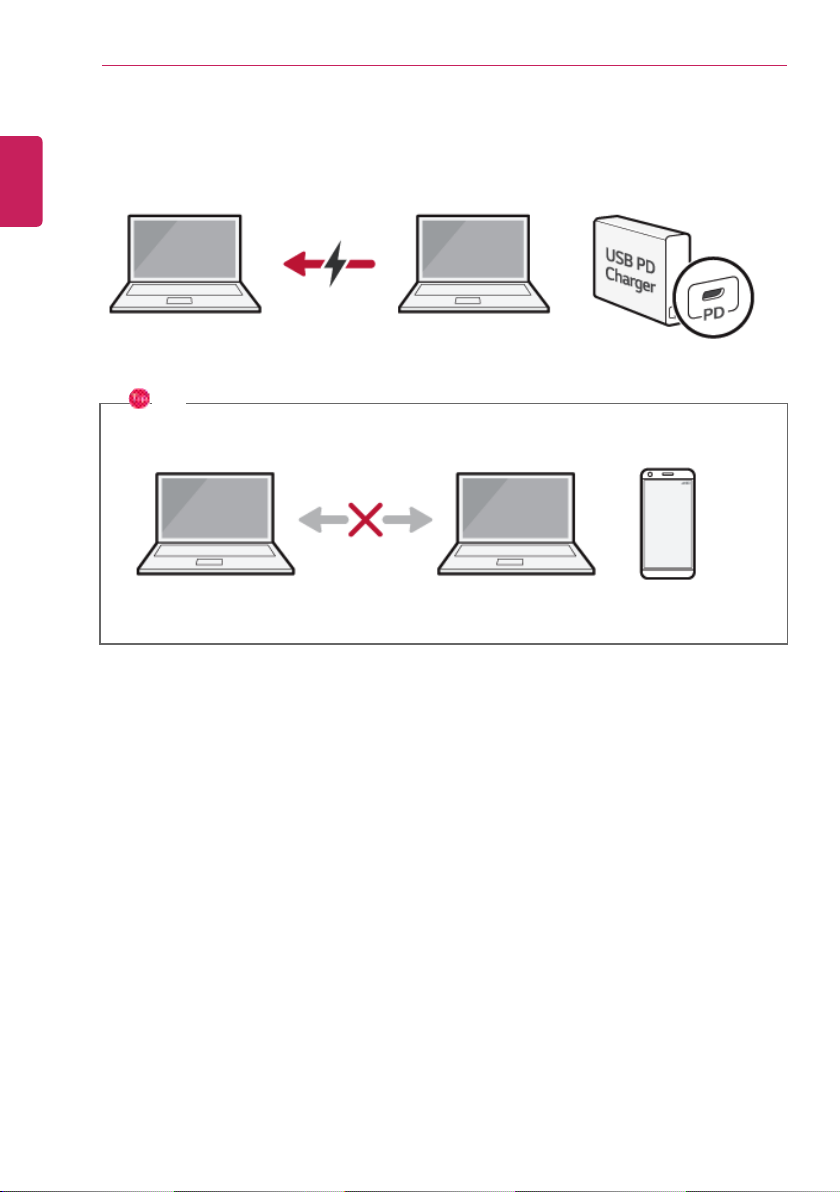
• To charge a notebook PC battery, the external device (USB PD Charger, notebook PC, etc.) should
support USB Power Delivery 10 W (5 V / 2 A) or higher profile.
• The external devices that use the USB-C™ port can be charged at 10 W (5 V / 2 A), 15 W (5 V / 3
A), and 18 W (9 V / 2 A).
• USB PD (Power Delivery) supports charging at 15 W (5 V / 3 A) or 18 W (9 V / 2 A) when
connected, whereas a regular USB device supports general charging at 10 W (5 V / 2 A).
• When the remaining battery capacity of the notebook PC falls below 10 %, both USB PD and
regular USB device support charging at 10 W (5 V / 2 A) only.
• Always-On Charging is supported only with USB-C™ ports, but not with the regular USB ports.
• If you connect an AC adapter while the notebook PC is being used to charge an external device, it
may take more time to charge the notebook PC.
Using the Charging Function
LG Control Center can be used to set one of the three charging functions: Automatic, Sink and
Source.
TIP
For information on how to use LG Control Center, refer to [Using Sof tware] > [LG Control
Center].
ENGLISH
124
Using USB-C™ (Thunderbolt™) Charging Function
You can connect a USB-C™ device to charge a notebook PC battery or other external devices.
Page 26
Using the PC
• When the connected device is set to Source (the notebook PC is charged.)
• When the connected device is set to Sink (the connected device is charged.)
ENGLISH
1 Automatic
The operation mode is automatically selected depending on the charge settings of the connected
device.
• When the connected device is set to Automatic (charging the notebook PC or a connected
device. Charging the notebook PC by using the mobile phone is not supported.)
125
Page 27
126
TIP
If the connected device is set to Sink, the charging function does not work.
ENGLISH
2 Sink
Using the PC
The connected device is used to charge the notebook PC.
Page 28
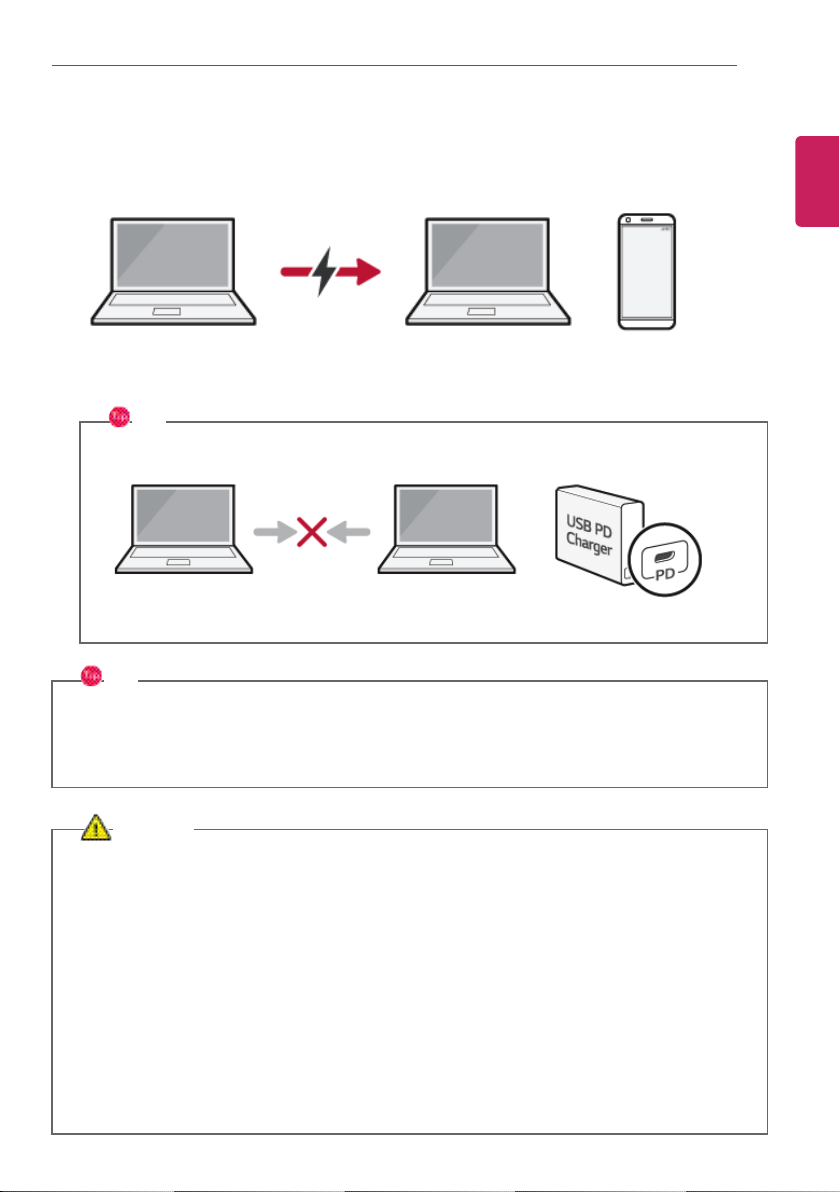
3 Source
TIP
If the connected device is set to Source, the charging function does not work.
TIP
The charging status of the external device being charged is not displayed on the notebook PC.
If you connected a smartphone, you should select "Charge mobile phone" on the smartphone
screen to charge the phone battery.
CAUTION
When you set the charging function for a USB-C™ port in LG Control Center, beware of the
following:
• If you changed the charge setting, it is recommended that you remove the USB-C™ cable
and re-connect it.
• If you restart the system or turn off the power, the charge setting is changed to
[Automatic].
• If the charge setting is set to [Sink], some of the devices connected to the USB-C™ port
may not work properly.
• Always-On Charging only supports the ON (automatic) and OFF options.
• If the power consumption of the notebook PC is larger than the power supply from the
external device, the battery may be consumed gradually.
ENGLISH
The notebook PC is used to charge the connected device.
Using the PC
127
Page 29

Using the PC
. It can also establish a network and exchange data
with other Bluetooth
-enabled PC or smartphone.
OPTION
The Bluetooth device is optional, and it may not be available in some models.
The figures herein may differ by language selection and are subject to change without prior
notice.
For details on connecting a Bluetooth device, refer to the user manual that came with the
Bluetooth device.
1 Click the [ ] button and select the [Settings] menu.
TIP
Press the [
] key or [Ctrl] + [Esc] to display the Start menu.
ENGLISH
128
Bluetooth
Bluetooth allows the user to access wirelessly various devices such as camera, cell phone, headset,
printer, and GPS receiver that support Bluetooth
Page 30
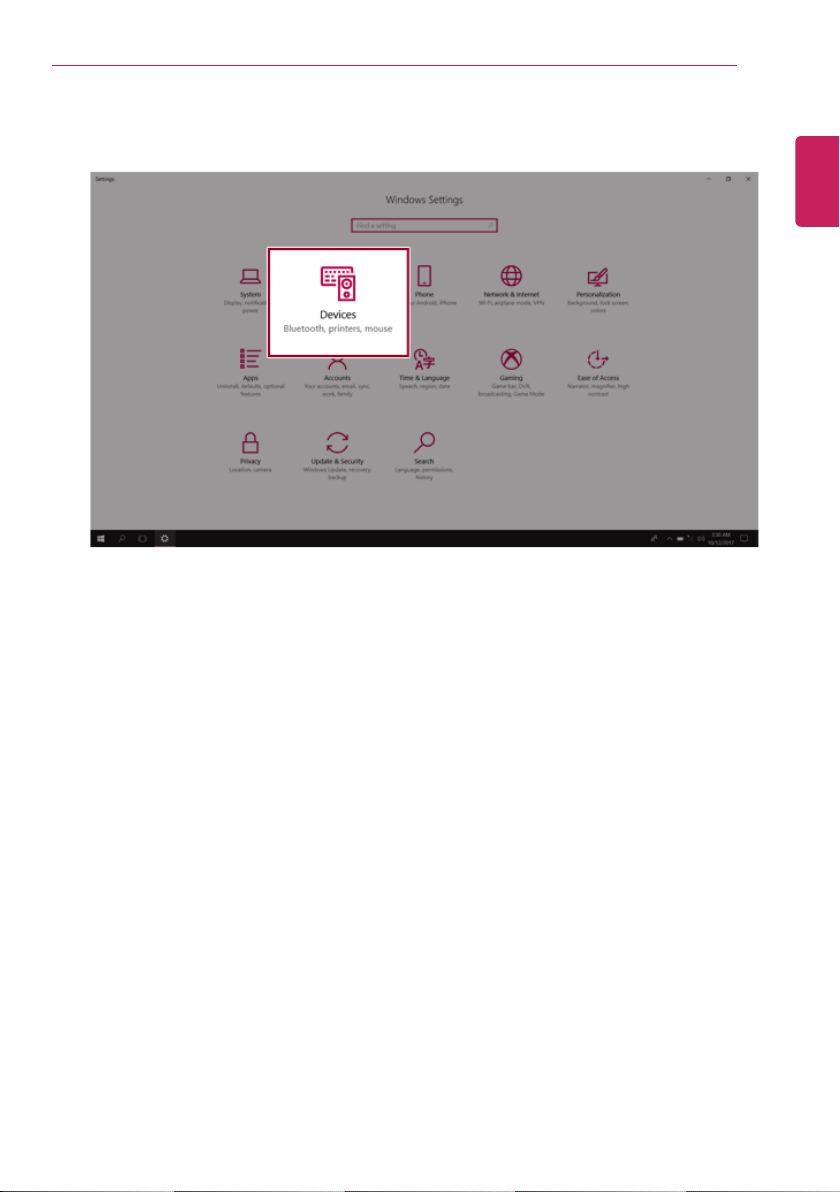
2 When the [Settings] screen appears, select [Devices].
ENGLISH
Using the PC
129
Page 31

Using the PC
ENGLISH
130
3 Select [Bluetooth & other devices] > [Add Bluetooth or other device] > [Bluetooth] to search
for Bluetooth devices.
Page 32

4 Select a device to connect to.
5 Complete the Bluetooth connection as directed.
ENGLISH
Using the PC
131
Page 33

Using the PC
TIP
The recommended network cable for the optimal network environment is CAT5 or higher.
The network (LAN) cable may be connected when the LAN adapter is used.
ENGLISH
132
Wired LAN
LAN is the network environment that users can connect to by using a cable to connect to their
internet providers or the company's network.
Using Wired LAN
LAN is installed with an automatic IP (DHCP) as default value.
Please refer to the following instructions for details on setting up an automatic IP (DHCP) or manual
IP.
1 Connect the LAN adapter to the USB-C™ port on the PC.
Page 34

2 Connect the wired LAN cable to the LAN port.
ENGLISH
Using the PC
133
Page 35

134
] button and select the [Settings] menu.
TIP
Press the [
] key or [Ctrl] + [Esc] to display the Start menu.
ENGLISH
Using the PC
3 Press the [
Page 36

4 Select [Network & Internet] > [Status] > [Change adapter options].
ENGLISH
Using the PC
135
Page 37

Using the PC
ENGLISH
136
5 Right-click [Ethernet] and select the [Properties] menu.
Page 38

6 Select [Internet Protocol Version 4 (TCP/IPv4)] and then click [Properties].
ENGLISH
Using the PC
137
Page 39

Using the PC
8 Press [OK] to complete the network setup.
9 Click the Internet Browser icon to check whether the internet is operating normally.
ENGLISH
138
7 To use an automatic IP(DHCP), select [Obtain an IP address automatically]. If you wish to use a
static IP, select [Use the following IP Address] to enter the address.
Contact the network service provider or administrator to use a static IP.
Page 40

Using the PC
] icon on the right side of the taskbar.
ENGLISH
139
Wireless LAN
The wireless network (Wireless LAN) is the network environment that connects a PC with the internet
provider or company network through an Access Point (wireless or regular router).
Turning On/Off Airplane Mode
Prior to using the wireless LAN, press [Fn] + [F6] to turn off Airplane Mode.
Pressing [Fn] + [F6] keys will turn on or off the Airplane Mode. If you are not going to use the
product for a while, keep the Airplane Mode turned on to reduce the battery power consumption.
Using the Wireless LAN
If an Access Point (wired or wireless router) is in the vicinity of the PC, the wireless LAN can easily be
accessed.
During the search for a wireless network (Wireless LAN), various Access Points may be found
according to the location where the PC is used.
In case there are no accessible wireless networks (Wireless LAN) near the PC, no Access Points
may be found.
A password protected Access Point cannot be accessed without the correct password.
1 Press the Action Center [
Page 41

Using the PC
TIP
If Wi-Fi is turned off, press the [Wi-Fi] tile.
ENGLISH
140
2 Press the [Network] tile to search for a nearby Access Point.
Page 42

3 Select the Access Point you want to connect to and press [Connect].
ENGLISH
Using the PC
141
Page 43

Using the PC
5 Click the Internet Browser icon to check whether the internet is operating normally.
ENGLISH
142
4 If a connection is established, [Connected] appears below the Access Point name.
Page 44

Using the PC
Using a Wired/Wireless Router
A wireless / regular router connects several PCs and mobile devices to one internet line and enables
the use of internet and the network.
A wireless / regular router has to be bought separately. Refer to the manual provided by the
manufacturer for instructions.
Connecting a Wireless or Regular Router
If one internet line is used with a wired / wireless router and several devices are connected, this may
result in a slower connection.
In case of a wireless LAN, it is recommended to change the network name and security settings for a
more secure connection.
Network speed can differ according to operation environment and specifications.
1 Connect the internet cable of the modem that was provided by your internet provider to the
router's WAN port.
2 Connect all devices (PC, IPTV, internet phone, etc.) with a LAN cable to LAN ports 1 to 4 of the
router.
The number of LAN ports can vary for each router model.
3 Please refer to the manual provided by the router manufacturer for setup of the network and
internet.
143
ENGLISH
Page 45

Using the PC
Mounting and Using Memory Card
This product supports one Micro SD slot.
Check the direction and insert the Micro SD into the multi-card slot until it is locked in place as shown
in the following figure.
ENGLISH
144
Micro SD Slot
Checking Available Memory Card
This model supports Micro SD memory cards.
• Directly applicable memory cards
Page 46

Using the PC
TIP
• When the memory card is formatted, the data stored in the memory card will be deleted.
Check whether there are important data before formatting the memory stick.
• To format a memory card, right-click the memory card drive and select Format. When the
Format window appears, press Start to continue.
• If the write protection tab of memory card is locked, the user cannot format the memory
stick nor write or delete the data.
• SD™ memory cards can be used only as storage devices and do not support the copyright
protection feature.
Removing Memory Card
Push the card with your finger to make the card spring out of the slot. Remove the memory card.
ENGLISH
145
Page 47

146
TIP
To safely remove a memory card:
The figures herein may differ by language selection and are subject to change without prior
notice.
1 Click Safely Remove Hardware and other Media icon on the right side of the taskbar.
2 Select Remove Multi-Card USB Device to safely remove hardware.
ENGLISH
Using the PC
Page 48

Using Software
TIP
The menus displayed in LG Control Center and its supported functions may differ depending on
the model.
The figures herein are subject to change without prior notice.
Running LG Control Center
Select the [
] button > [LG Software] to run [LG Control Center].
1 Minimize/Exit Button: Minimizes the size of the window, or exits the software.
2 help/info Button: Runs Help or displays information about the software.
ENGLISH
147
Using Software
LG Control Center
LG Control Center is a software that helps you change PC Settings, Power Settings, Windows Security
Settings, etc. as well as check current system information.
Page 49

Using Software
ENGLISH
148
3 System Settings: Sets the screen brightness / resolution, external display, sound and other
devices.
4 Power Management: Sets the USB-C™ charging function, battery status and battery life
extension function.
5 Windows Security: Sets User Account Control settings and Firewall settings.
6 Instant Booting: You can set the system to automatically boot whenever you open the notebook
PC.
7 System Information: Displays the PC OS in use, processor information and other system
information.
System Settings Screen
You can use this screen to configure various devices in your PC.
Page 50

Using Software
1 Set USB-C™ Charging
ENGLISH
149
1 Screen: Allows you to set the brightness and resolution of the screen. (This function is not
supported in a model that does not provide the brightness settings in Windows.)
2 External Display: Allows you to configure the connection mode of an external display connected
to the PC.
3 Color Temperature: The screen color can be set to cold(with a bluish tint) or warm(with a reddish
tint).
4 Keyboard Backlight: Allows you to configure the Keyboard Lighting.
5 Hotkey mode setting: Allows you to set the hot keys so that you can use them without pressing
the Fn key.
6 Sound: Allows you to adjust the volume of the sound or use the mute function.
7 Airplane Mode: Allows you to set the Airplane Mode. (It turns off the wireless LAN).
8 Silent Mode: Allows you to set the fan to the low-speed mode.
9 Touchpad: Allows you to set whether to use the touchpad.
10 Touch Screen: Allows you to set whether to use the touch screen.
Power Management Screen
You can check or change the settings related to PC USB-C™ port or battery.
Page 51

Using Software
1 User Account Control Settings: Allows you to change the User Account Control settings in
Windows.
2 Firewall: Turns on/off the Windows firewall. (It may not work if other vaccine software is installed
in the PC.)
Instant Booting
You can set the system to automatically boot whenever you open the notebook PC.
ENGLISH
150
a Set Always-On: Allows you to set the USB port so that you can perform charging using the
USB-C™ port even when the PC is turned off.
b Set Charging: Sets the charging function for a USB-C™ port (Automatic, Sink, or Source).
2 Battery State: Allows you to measure the battery lifespan so that you can replace it timely.
3 Extend Battery Life: Allows you to increase the battery lifespan by lowering the battery charging
level to 80% of the battery capacity.
Windows Security Screen
You can change the User Account Control and firewall settings in Windows.
Page 52

FAQ
Q: Battery status displays “Warning”.
• The battery is a consumable item and its lifespan may decrease depending on the usage frequency
and environment. It is recommended that you visit the LG Electronics service center to have the
battery replaced.
ENGLISH
Using Software
151
Page 53

Using Software
TIP
It may not work properly depending on user preferences (security tools, etc.) and the network
status.
You can use the LG Update Center to quickly install the latest drivers, or reinstall any deleted
drivers.
Use LG Update Center to keep your system current and optimized.
The figures herein are subject to change without prior notice.
Running LG Update Center
Select the [
] button > [LG Software] to run [LG Update Center].
1 Minimize/Exit Button: Minimizes the size of the window, or exits the software.
2 help/info Button: Runs Help or displays information about the software.
3 Required Update: Installs critical items that must be applied to the system.
ENGLISH
152
LG Update Center
LG Update Center allows you to install various PC drivers, applications easily.
Page 54

4 All List: Displays and installs all required items for the system.
ENGLISH
5 Notification Setting: Sets up notifications for online updates for installed items.
Required Update
You can install essential updates and drivers that are necessary for the system.
1 Select the [Required Update] menu.
Using Software
153
Page 55

Using Software
TIP
All items are selected by default.
All List
You can install all updates and drivers that can be installed in the system.
ENGLISH
154
2 When the Required Update list appears, select the updates to install and press the [Installation]
button.
Page 56

1 Select the [All List] menu.
ENGLISH
Using Software
155
Page 57

Using Software
TIP
All items are selected by default.
Notification Setting
You can check the critical updates to set whether to display the notifications for update installation.
TIP
The Auto Update Search function is set to [ON] by default. If you set it to [OFF], the
notifications are not displayed.
ENGLISH
156
2 When the list appears, select the updates to install and press the [Installation] button.
Page 58

1 Select the [Notification Setting] menu.
2 Set [Auto Update Search] to [ON] or [OFF].
ENGLISH
Using Software
157
Page 59

158
4 Select [Notification List Setup] menu to turn on/of f the notification for each item.
FAQ
Q: Is there a way that I can install the drivers and applications easily?
• You can select [Required Update] or [All List] menu in LG Update Center to automatically install
the drivers and applications that you want.
Q: The server connection status is not displayed in the program.
• Check if your PC is properly connected to the wired or wireless LAN.
• Check if Internet connection works properly.
Q: I want to hide the update notifications.
• Select the [Notification Setting] menu and set the [Auto Update Search] to [OFF].
• Select [Notification List Setup] menu to turn on/off the notification for each item.
Q: How can I update the items that are excluded from the notification list?
• You can also install the items that are excluded from the notification list by using the [Required
Update] or [All List] menu.
ENGLISH
3 Set the [Cycle].
Using Software
Page 60

Using Software
CAUTION
Using the Reader Mode and the Night light at the same time can cause color distortion. When
you use the Reader Mode, turn off the Night light.
• Press the [ ] icon to the right of the taskbar to run the Action Center and press the
[Night light] tile to turn on/off the Night light.
TIP
You can use hot keys to use the Reader Mode function more conveniently.
• Press the [Fn] + [F9] keys to switch the PC screen to reader mode. Press them again to
turn off reader mode.
ENGLISH
159
LG Reader Mode
LG Reader Mode prevents the users from eyestrain and helps them to read the PC screen comfortably
by displaying the screen just like a printed paper.
Using LG Reader Mode
Page 61

160
] icon on the taskbar.
ENGLISH
Using Software
1 Press the [
Page 62

2 Select the [Reader Mode On] menu to switch to reader mode as shown in the figure.
TIP
Select [Reader Mode Off] to turn off the reader mode.
ENGLISH
Using Software
161
Page 63

Using Software
TIP
The [Advanced Settings] menu is activated when Reader Mode is on.
2 The [Advanced Settings] window appears as shown below.
ENGLISH
162
Using Advanced Settings
1 Select the [Advanced Settings] menu as shown in the figure.
Page 64

Using Software
a System Brightness: System brightness can be adjusted.
b Color Adjustment: Color and its brightness, contrast and gamma can be adjusted.
c Reset: Settings are reset to the default settings.
ENGLISH
163
Page 65

Using Software
CAUTION
As 3D Fx is a sound effect optimized for watching movies, it may cause sound distortion when
you listen to music in this mode.
Please disable this mode when you use music content.
Running DTS Headphone: X/DTS Studio Sound Program
1 Press [ ] icon on the right side of the task bar to run [DTS Audio].
2 Default is DTS Studio Sound and DTS Headphone: X operates when the earphone is connected.
ENGLISH
164
DTS Headphone: X/DTS Studio Sound
DTS Headphone: X/DTS Studio Sound provides rich, sonorous sound when you listen to music, watch
videos or play games in the PC.
DTS Headphone: X/DTS Studio Sound may not be applied depending on the model.
The figures herein are subject to change without prior notice.
Page 66

DTS Headphone: X Tour
1 Power: DTS Headphone: X Turns the power on/off.
2 Earbuds: Allows you to select the connected earphone.
3 Content Mode: Allows you to select entertainment/game/sport and provides optimum setting for
each content.
4 Stereo Default Settings: Provides settings for stereo including wide/front/traditional.
ENGLISH
Using Software
165
Page 67

Using Software
1 Power: DTS Studio Sound Turns the power on/of f.
2 Bass Boost: Boosts the lowest frequencies for enhanced bass sound.
3 Volume Leveling: Increases audio level without distortion of sound.
4 Surround Sound: Sets up surround sound effects through the PC's embedded speakers.
5 3D: Sets up 3D sound effects through the PC's embedded speakers.
6 Equalizer: Sets the equalizer.
7 Advanced Level: DTS Studio Sound Provides advanced options menu.
TIP
If you want to remove Audio Driver or DTS Headphone: X/DTS Studio Sound, remove [DTS
Audio] and [Conexant High Definition Audio Driver] in the order specified and restart the
system.
If you want to reinstall Audio Driver or DTS Headphone: X/DTS Studio Sound, remove [DTS
Audio] and [Conexant High Definition Audio Driver] in the order specified and install
[Conexant High Definition Audio Driver]. Then restart and install [DTS Audio].
• If you do not remove or install them in the order specified, an error may occur.
ENGLISH
166
DTS Studio Sound Tour
Page 68

Restoring the System
CAUTION
If you have deleted the restoration data in the protected area of the disk, or have arbitrarily
installed another operating system, the restore function may not work.
To recover the system, the AC adapter must be connected.
1 Click the [ ] button and select the Settings menu.
ENGLISH
Restoring the System
Restoring the System
If the system has an error, you can use Windows 10's recovery function to recover or restore the
system to its initial pre-purchase state.
167
Page 69

Restoring the System
3 Select the [Recovery] menu and press [Get started] in the Reset this PC menu.
ENGLISH
168
2 When the [Settings] screen appears, select [Update & Security].
Page 70

Restoring the System
• Keep my files: Recovers the PC without losing any personal files.
PC settings are reset to default and any user-installed Desktop app will be deleted.
• Remove everything: Removes all items from the system and restores the system to its initial
pre-purchase state.
When the following screen appears, select [Yes].
ENGLISH
4 If the following screen appears, select a desired option to proceed with recovery.
169
Page 71

170
Select the options you want to proceed with the recovery.
- Just remove my files: Factory-resets the drive where Windows is installed (for example: Drive
C).
- Remove files and clean the drive: Resets all partitions and drives in the system.
ENGLISH
Restoring the System
Page 72

Restoring the System
CAUTION
All data is lost during the initialization, so you must backup all critical data in advance.
It may take about 5 hours or longer depending on the system conditions.
ENGLISH
171
Page 73

Setup and Upgrade
] button > [LG Software] to run [LG Update Center].
2 Select [Required Update] or [All List] to install the driver.
TIP
You can use the LG Update Center to quickly install the latest drivers, or reinstall any deleted
drivers.
Use LG Update Center to keep your system current and optimized.
ENGLISH
172
Setup and Upgrade
Installing the Driver
The figures herein may differ by language selection and are subject to change without prior
notice.
Using LG Update Center to install the Driver
1 Select the [
Page 74

How to Download LG Update Center
Setup and Upgrade
173
You can install LG Update Center by downloading it from the LG Electronics Website (www.lg.com).
ENGLISH
Page 75

Setup and Upgrade
TIP
To use the system setup (F2), booting device selection (F10), you need to restart the system
(click [Restart] in the system power menu) and then immediately press the corresponding
function key due to the fast booting speed.
CAUTION
• Do not change the system setup unless necessary. Incorrect system setup may cause
errors during system operation. Use caution when changing the system setup.
• For performance improvement, the system setup menu configuration and the initial setup
status may be changed and may become different from images included in the user
manual.
ENGLISH
174
Starting System Setup
System setup means storing the hardware configuration information of the PC in the flash memory.
Through system setup, the PC retrieves various information including current date and time, memory
capacity, and hard disk capacity and type.
You setup the system when you set passwords, change the boot order, and add new peripheral devices
to the machine.
Items displayed on the Setup screen may differ by model type and specification. Refer to
• Refer to .
• Refer to .
• Refer to .
Page 76

1 Reboot the system and press [F2].
2 In a few moments, the system setup screen appears.
ENGLISH
Setup and Upgrade
175
Page 77

Setup and Upgrade
176
Keys Used in System Setup
ENGLISH
Keys Function
Enter
Esc
▲, ▼, ◄, ► (Arrow keys)
+, —
F10
Selects the current item.
To deselect the current item or to move to the previous screen.
Moves the cursor up, down, left, and right.
Increases or decreases the item value.
Saves the new settings or exits the system setup.
Page 78

Setup and Upgrade
CAUTION
• Without the registered password, access to the system will be denied. Write down and
keep the password in a safe place.
Set Supervisor Password
The password prevents unauthorized people from accessing the PC. By default, no password is set for
the machine. If an unauthorized person changes the password in the System Setup, you will be unable
to access the system.
1 After opening the system setup screen, use the arrow keys to move to [Security].
2 When the following screen shows up, click [Set Supervisor Password] by using the arrow keys
and press [Enter].
ENGLISH
177
Setting the Password
This process is to set a password so that other people cannot use the PC or change the settings.
The user can set a password while booting the system or setting up the system.
The model in the example can differ from actual models and is subject to change for performance
improvements, without prior notice.
Page 79

Setup and Upgrade
4 When the following message appears, select and press [Enter].
5 To save the changes in the system setup, press [F10].
6 When the following message appears, select [Yes] and press [Enter]. The PC will restart.
ENGLISH
178
3 When the following message shows up on the screen, enter the password and press [Enter]. The
password must not exceed 8 characters in total and must consist of letters (A - Z), numbers (0 -
9), special characters or their combination.
Page 80

Setup and Upgrade
TIP
• With Supervisor Password, you are authorized to set all items in the System Setup and
to set Password on boot. In case other people also use the PC, it is recommended to set
the Set User Password.
Set User Password
The password set by the Set User Password process is lower in level than that set by the [Set
Supervisor Password] process, and so the user can use the [Set User Password] only after setting a
password in the [Set Supervisor Password] menu.
1 After opening the system setup screen, use the arrow keys to move to [Security].
2 When the following screen appears, press [Enter] in the [Set User Password] menu.
ENGLISH
179
Page 81

Setup and Upgrade
4 When the following message appears, select and press [Enter].
5 To save the changes in the system setup, press [F10].
6 When the following message appears, select [Yes] and press [Enter]. The PC will restart.
TIP
• [User Password] allows limited access to the items in the System Setup compared to the
[Supervisor Password] item.
ENGLISH
180
3 When the following message shows up on the screen, enter the password and press [Enter]. The
password must not exceed 8 characters in total and must consist of letters (A - Z), numbers (0 -
9), special characters or their combination.
Page 82

Password on boot
ENGLISH
Setup and Upgrade
181
Password on boot protects the system by requesting [Set Supervisor Password] or [Set User
Password] during boot up.
1 After opening the system setup screen, use the arrow keys to move to [Security].
2 When the following screen appears, set [Set Supervisor Password] only or both [Set Supervisor
Password] and [Set User Password].
Page 83

Setup and Upgrade
Set SSD Password / NVMe Password
TIP
Some models installed with NVMe may not support the password settings.
Depending on the model, the menu name may be displayed as SSD Password, NVMe
Password, etc.
For a model equipped with two SSD or NVMe devices, the menu name may be displayed as
SSD01, SSD02, NVMe0, NVMe1, etc.
SSD Or, for a model equipped with two NVMe devices, you can set a password for each device. If
both passwords are set, the password input window appears twice during the booting process.
The password input windows appear according to the [Boot Priority order] in the [Boot] menu.
1 After opening the system setup screen, use the arrow keys to move to [Security].
ENGLISH
182
3 The popup screen will show up, after selecting [Password on boot] and press [Enter]. Af ter
selecting [Enable] and press [Enter], [Password on boot] will be complete.
Page 84

Setup and Upgrade
3 When the following message appears on the screen, enter the password and press [Enter]. The
password must not exceed 8 characters in total and must consist of letters (A - Z), numbers (0 -
9), special characters or their combination.
ENGLISH
2 When the following screen shows up, click [Set SSD02 Password] by using the arrow keys and
press [Enter].
183
Page 85

Setup and Upgrade
5 To save the changes in the system setup, press [F10].
6 When the following message appears, select [Yes] and press [Enter]. The PC will restart.
CAUTION
If you forgot SSD Password / NVMe Password, you cannot restore the SSD/NVMe.
• The replacement of SSD/NVMe due to a forgotten SSD Password / NVMe Password is
not covered by warranty.
ENGLISH
184
4 When the following message appears, select and press [Enter].
Page 86

Setup and Upgrade
2 Change the password in the same way as setting one.
Deleting the Password
1 Execute System Setup, enter the password, and press [Enter].
ENGLISH
185
Changing or Deleting the Password
You can delete or change the password only after entering the current password.
The model in the example can differ from actual models and is subject to change for performance
improvements, without prior notice.
Changing the Password
1 Execute System Setup, enter the password, and click [Enter].
Page 87

Setup and Upgrade
3 When the following message appears, enter the current password in the [Enter Current
Password] field.
ENGLISH
186
2 After moving [Security] by using the arrow keys from the setup start screen, click [Set Supervisor
Password] and press [Enter].
Page 88

4 Press [Enter] in [Enter New Password] and [Confirm New Password].
5 When the following message appears, select and press [Enter].
6 To save the changes in the system setup, press [F10].
7 When the following message appears, select [Yes] and press [Enter]. The PC will restart.
ENGLISH
Setup and Upgrade
187
Page 89

Setup and Upgrade
2 After moving [Security] by using the arrow keys from the setup start screen, click [Set SSD02
Password] and press [Enter].
TIP
Depending on the model, the menu name may be displayed as SSD Password, NVMe
Password, etc.
For a model equipped with two SSD, NVMe devices, the menu name may be displayed as
SSD01, SSD02, NVMe0, NVMe1, etc.
ENGLISH
188
Deleting the Password (Set SSD Password / Set NVMe Password)
1 Execute System Setup, enter the password, and press [Enter].
Page 90

Setup and Upgrade
4 Press [Enter] in [Enter New Password] and [Confirm New Password].
5 When the following message appears, select and press [Enter].
6 To save the changes in the system setup, press [F10].
ENGLISH
3 When the following message appears, enter the current password in the [Enter Current
Password] field.
189
Page 91

Setup and Upgrade
ENGLISH
190
7 When the following message appears, select [Yes] and press [Enter]. The PC will restart.
Page 92

Setup and Upgrade
3 When the following message appears, select [Yes] and press [Enter]. The settings will be reset to
the factory default.
4 To save the changes in system setup, press [F10].
ENGLISH
191
Restoring the Factory Default Settings
If you have changed the system setup by mistake, you can restore the default settings.
The model in the example can differ from actual models and is subject to change for performance
improvements, without prior notice.
1 After opening the system setup screen, use the arrow keys to move to [Exit].
2 Click [Load Setup Defaults] by using the arrow keys and pressing [Enter].
Page 93

Setup and Upgrade
TIP
• When you press[F9], you can use [Load Setup Defaults].
ENGLISH
192
5 When the following message appears, select [Yes] and press [Enter]. The PC will restart.
Page 94

Setup and Upgrade
TIP
To use the system setup (F2), booting device selection (F10), you need to restart the system
(click [Restart] in the system power menu) and then immediately press the corresponding
function key due to the fast booting speed.
Changing the Boot Order
1 Reboot the system and press [F2].
2 Move to the [Boot] menu when the system setup screen appears.
ENGLISH
193
Changing the Boot Order
The user can change the boot order according to his or her needs, or select a boot device
The model in the example can differ from actual models and is subject to change for performance
improvements, without prior notice.
Page 95

Setup and Upgrade
4 When you press [F10] and the following screen appears, select [Yes] and press [Enter].
5 The changes are saved and the system reboots.
ENGLISH
194
3 Go to [Boot Priority Order] and press [F5] or [F6] to change the booting order.
Page 96

Selecting a Booting Device to Use
2 When the Select Booting Device screen appears, select the device.
ENGLISH
Setup and Upgrade
195
1 Reboot the system and press [F10].
Page 97

Setup and Upgrade
196
3 Boots using the selected device.
ENGLISH
Page 98

Setup and Upgrade
] button and select the [Settings] menu.
TIP
Press the [
] key or [Ctrl] + [Esc] to display the Start menu.
ENGLISH
Windows 10 Auto Scaling
The Windows 10 Auto Scaling feature for user's convenience may partially blur the screen or display
some icons and texts larger.
Refer to the following information to change the DPI scaling to suit your needs.
197
1 Press the [
Page 99

Setup and Upgrade
ENGLISH
198
2 Select [System] > [Display].
Page 100

Setup and Upgrade
TIP
After changing the auto scaling settings, it is recommended that you click [Sign out now]
and log on to Windows again.
ENGLISH
3 Modify the [Change the size of text, apps, and other items] value to change the Auto Scaling
settings.
199
 Loading...