

Page 1
Calls
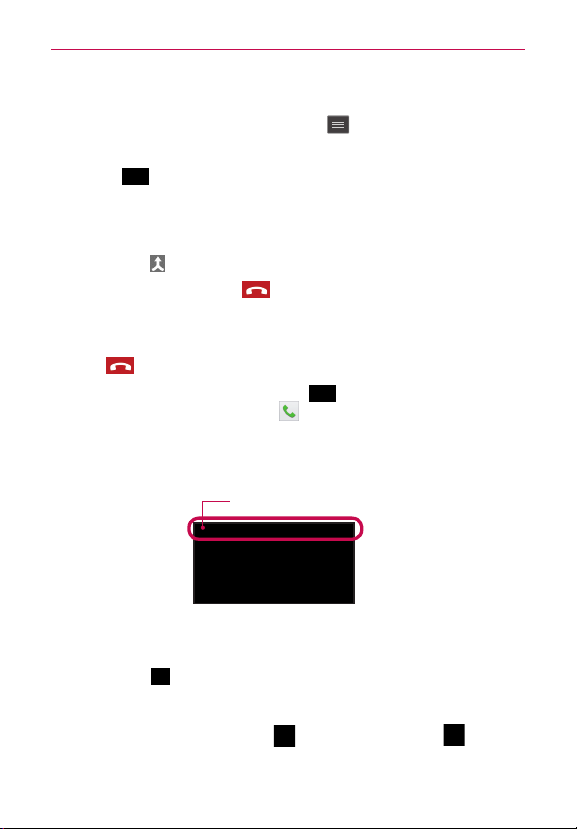
Making a second call
1. During your initial call, tap the Menu Key and select Add call.
2. Dial the number or search your contacts.
3. Tap Call to connect the call.
4. Both calls will be displayed on the call screen. Your initial call will be put
on hold.
5. Tap the call entry on the screen to toggle between active calls or tap
Merge calls to merge the calls.
6. To end active calls, tap End . If there is no active call, it will end the
call on Hold.
Ending a Call
Tap End to end a call.
NOTE
If you exit the current call screen and return to the Home screen, you will
be notified that you are still on an active call by the green phone icon within
the Status Bar.
To redial recent numbers, touch Redial at the end of the call or find the number
within the Call logs and tap Call to the right of the entry.
Active Call Notification
31
Ending a Call from the Status Bar
1. Touch and drag the Status Bar down to open the Notifications Panel.
2. Tap End call to end the currently active call.
Viewing your call logs
From the Home screen, tap Phone , then tap the Call logs tab.
View a complete list of all dialed, received, and missed voice calls.
Page 2

Calls
32
TIP!
Tap any single call log entry to view the date, time, and duration of the call.
Tap the Menu Key
delete all.
, then tap Clear to delete entries individually or Clear all to
Call settings
You can configure phone call settings, such as call forwarding, and other
special features offered by MetroPCS.
1. From the Home screen, tap the Menu Key and tap System settings.
2. Tap Call and set any desired options.
Page 3

Contacts
You can add contacts on your phone and synchronize them with the
contacts in your Google Account or other accounts that support syncing
contacts.
Searching for a contact
1. From the Home screen, tap Apps and then tap Contacts to open
your contacts.
2. Tap the Search contacts box and enter the contact name using the
keypad. You can also tap a letter along the right side of the screen to
access names starting with the chosen letter.
Adding a new contact
1. From the Home screen, tap Phone and enter the new contact’s
number.
2. Tap Add to Contacts > Create new contact. Select the desired account (if
applicable).
3. If you want to add a picture to the new contact, tap . Choose from
Take photo to take a picture using the camera or Select from Gallery.
Then browse for an image and select it.
4. Tap to enter more specific name information.
5. Enter the details about your contact.
6. Tap Save to save the contact entry.
Favorite Contacts
You can classify frequently called contacts as favorites.
33
To add a contact to your favorites
1. From the Home screen, tap Apps and then tap Contacts to open
your contacts.
2. Tap a contact to view its details.
3. Tap the star to the right of the contact’s name. The star turns gold and
the contact is added to your favorites.
Page 4

Contacts
34
To remove a contact from your favorites list
1. From the Home screen, tap Apps and then tap Contacts to open
your contacts.
2. Tap the Favorites tab to view your favorite contacts.
3. Tap a contact to view its details.
4. Tap the gold star to the right of the contact’s name. The star turns grey
and the contact is removed from your favorites.
Creating a group
1. From the Home screen, touch Apps and then touch Contacts to
open your contacts.
2. Touch the Groups tab, then touch the Menu Key and select New
group.
3. Enter a name for the new group. You can also set a ringtone for the
group.
4. Touch Save to save the group.
NOTE
If you delete a group, the contacts assigned to that group will not be lost. They will
remain in your contacts.
Page 5

Messaging
Your phone combines text and multimedia messages into one intuitive,
easy-to-use menu.
Conversation view
Messages exchanged with another party are displayed in chronological
order so that you can conveniently see an overview of your conversations.
Sending a message
1. From the Home screen, tap Messaging , then tap Compose to
create a new message.
2. Enter a contact name or phone number in the To field. As you enter
the contact name, matching message appear. You can tap a suggested
recipient. You can also add multiple message
3. Tap the text field to start entering your message.
4. Tap the Menu Key to open the options menu. Choose from any of
the available options.
5. Tap Send(or Send MMS) to send your message.
WARNING!
If an image, video, or audio file is added to a text message, it will be automatically
NOTE
The 160-character limit may vary from country to country depending on how the text
message is coded and the language used in the message.
converted into a multimedia message and your service plan will be decremented
accordingly.
When you get a text message during a call, there will be an audible notification.
Using smilies
Liven up your messages using smilies.
When writing a new message, tap the Menu Key
smiley.
, then tap Insert
35
Changing your message settings
Your phone’s message settings are predefined, so you can send messages
immediately. You can change the settings based on your preferences.
From the Home screen, tap Messaging > Menu Key > Settings.
•
Page 6

36
You can use the Email application to read emails from services like Gmail.
The Email application supports the following account types: POP3, IMAP
and Exchange.
Your service provider or system administrator can provide you with the
account settings you need.
Managing an email account
The first time you open the Email application, a set-up wizard opens to help
you to set up an email account.
After the initial setup, Email displays the contents of your inbox. If you have
added more than one account, you can switch among accounts.
To add another email account:
• Open the Email application and tap the Menu Key > Accounts >
Menu Key
> Add account.
To change an email account’s settings:
• Open the Email application and tap the Menu Key > Account
settings.
To delete an email account:
• Open the Email application and tap the Menu Key > Accounts >
Menu Key
> Remove > Yes.
> Remove account > tap an account you want to delete
Working with account folders
Open the Email application and tap the Menu Key and select Folders.
Each account has an Inbox, Outbox, Sent and Drafts folder. Depending on
the features supported by your account’s service provider, you may have
additional folders.
Page 7

Email
Composing and sending email
To compose and send a message
1. While in the Email application, tap Compose .
2. Enter an address for the message’s intended recipient. As you enter
text, matching addresses will be proposed from your Contacts. Separate
multiple addresses using semicolons.
3. Tap the Cc and Bcc fields to copy contacts and tap Attach to attach
files, if required.
4. Enter the subject and your message.
5. Tap Send to send the message.
If you aren’t connected to a network, for example, if you’re working in
airplane mode, the messages that you send will be stored in your Outbox
folder until you connect to a network again. If it contains any pending
messages, the Outbox will be displayed on the Accounts screen.
TIP!
When a new email arrives in your Inbox, you will be notified by a sound or vibration.
Tap the email notification to stop receiving notifications.
37
Page 8
Camera
38
To open the Camera application, tap Camera on the Home screen.
Getting to know the viewfinder
Swap camera – Switch between the rear–facing camera lens and the
front–facing camera lens.
Voice shutter – To take a photo, say one of the following words: Cheese,
Smile, Whisky, Kimchi or LG.
Shot mode – Choose from Normal, Panorama or Continuous shot.
Flash – Allows you to turn on the flash when taking a photo in dark
conditions.
Settings – Touch this icon to open the settings menu. See Using the
advanced settings on the following page.
Mode switch – Touch this icon and drag it downwards to switch to video
mode.
Capture – Touch to capture a picture.
Gallery – Touch to view the last photo you captured. This enables you to
access your Gallery and view saved photos while in camera mode.
NOTE
Please ensure the camera lens is clean before taking pictures.
Page 9
Camera
Using the advanced settings
In the viewfinder, tap to open the advanced options. You can change the
camera settings by scrolling through the list. After selecting the option, tap
the Back Key
NOTE
.
Touch if you want to change the viewfinder menu.
Zoom in or out.
Defines and controls the amount of sunlight entering the photo.
Focuses on a specific spot.
Selects photo resolution. If you choose high resolution, file size will
increase, which means you will be able to store fewer photos in the
memory.
Finds the appropriate color and light settings for the current
environment.
The ISO rating determines the sensitivity of the camera’s light
sensor. The higher the ISO, the more sensitive the camera. This is
useful in darker conditions when you cannot use the flash.
Improves color quality in various lighting conditions.
Applies artistic effects to your pictures.
Sets a delay after the capture button is pressed. This is ideal if you
want to be in the photo.
Activate this to use your phone’s location-based services. Take
pictures wherever you are and tag them with the location. If you
upload tagged pictures to a blog that supports geo tagging, you can
see the pictures displayed on a map.
This function is only available when the GPS function is active.
Selects a shutter sound.
Automatically shows you the picture you just took.
39
Page 10
Camera
40
Set the storage location for your pictures. Choose from Internal
memory and SD card.
Restore all camera default settings.
Touch this whenever you want to know how a function works. This
icon will provide you with a quick guide.
●
TIP!
When you exit the camera, some settings return to their defaults, such as white
balance, color effect, timer and scene mode. Check these before you take your next
photo.
●
The setting menu is superimposed over the viewfinder, so when you change photo
color or quality elements, you will see a preview of the changed image behind the
Settings menu.
Taking a quick photo
1. Open the Camera application.
2. Holding the phone horizontally, point the lens towards the subject you
want to photograph.
3. A focus box will appear in the center of the viewfinder screen. You can
also tap anywhere on the screen to focus on that spot.
4. When the focus box turns green, the camera has focused on your
subject.
5. Touch to capture the photo.
Once you’ve taken a photo
Your captured photo will appear on the screen if Auto review is set to On
(refer to Using the advanced settings). Touch image preview in the bottom
right corner of the screen to view the last photo you took. The following
options are available:
Touch to share your photo using the SmartShare function.
Touch to take another photo immediately.
Page 11

Camera
Touch to send your photo to others or share it via social network
services.
Touch to delete the photo.
41
TIP!
If you have a social networking account and set it up on your phone, you can share
your photo with your social networking community.
Touch the Menu Key to open all advanced options.
Set image as – Touch to use the photo as a Contact photo, Home screen
wallpaper or Lock screen wallpaper.
Move – Touch to move the photo to another place.
Copy – Touch to copy the selected photo and save it to another album.
Rename – Touch to edit the name of the selected photo.
Rotate left/right – To rotate left or right.
Crop – Crop your photo. Move your finger across the screen to select the
area to be cropped.
– View and edit the photo.
Edit
Applies a brightness effect to your photo.
Applies artistic effects to your photos.
Applies color effects to your photos.
Applies additional options to your photos.
Slideshow – Automatically shows you the images in the current folder one
after the other.
Details – Find out more information about the contents.
Viewing your saved photos
You can access your saved photos when in camera mode. Just tap the
image preview in the bottom right corner of the screen and your Gallery will
be displayed.
Page 12

Camera
42
•To view more photos, scroll left or right.
To zoom in or out, double-tap the screen or place two fingers and spread
•
them apart (move your fingers closer together to zoom out).
Getting to know the viewfinder
Swap camera – Switch between the rear–facing camera lens and the
front-facing camera lens.
Video size – Touch to set the size (in pixels) of the video you are
recording.
Live effect – Live effect provides various visual effects when taking a
video.
Flash – Allows you to turn on the flash when taking a video in dark
conditions.
Settings – Touch this icon to open the settings menu. See Using the
advanced settings on the following page.
Mode switch – Touch this icon and drag it upwards to switch to camera
mode.
Record – Starts recording video.
Gallery – Touch to view the last video you recorded. This enables you to
access your Gallery and view your saved videos while in video mode.
Page 13

Camera
43
TIP!
When recording a video, place two fingers on the screen and pinch to use the Zoom
function.
Using the advanced settings
Using the viewfinder, touch to open all the advanced options.
Touch if you want to change the viewfinder menu.
Zoom in or out.
Defines and controls the amount of sunlight entering the video.
Improves color quality in various lighting conditions.
Choose a color tone to use for your new view.
Activate this to use your phone’s location-based services.
Allows you to record with or without sound.
Auto review automatically shows you the video you just recorded.
Set the storage location for your pictures. Choose from Internal
memory and SD card.
Restore all video camera default settings.
Touch this if you want to know how a function works. This icon will
provide you with a quick guide.
Recording a quick video
1. Open the Camera application and touch the Mode switch button.
2. The video camera viewfinder appears on the screen.
3. Holding the phone, point the lens towards the subject you wish to
capture in your video.
4. Touch once to start recording.
5. A timer showing the length of the video will appear.
6. Touch on the screen to stop recording.
Page 14

44
Camera
NOTE
Touch on the screen to take a picture while you're recording.
After recording a video
A still image representing your video will appear on the screen if Auto
review is set to On. Touch the image preview in the bottom right corner of
the screen to view the video. The following options are available:
Touch to share your video using the SmartShare function.
Touch to record another video immediately.
Touch to send your video to others or share it via social network
services.
Touch to delete the video.
Watching your saved videos
1. In the viewfinder, touch the image preview in the bottom right corner of
the screen.
2. Your Gallery will appear on the screen.
3. Tap a video to play it automatically.
Adjusting the volume when viewing a video
To adjust the volume of a video while it is playing, use the Volume Keys on
the left side of the phone.
Page 15

LG Unique Functions
QuickMemo
The QuickMemo feature allows you to create memos and capture screen
shots.
Capture screens, draw on them, and share them with family and friends
with QuickMemo.
1. Enter the QuickMemo
screen by pressing both the
Volume Keys for one second
on the screen you want to
capture.
OR
Open the Notifications Panel
and tap .
OR
2. Select the desired menu option
from Pen type, Color, and
Eraser. Then create a memo.
45
3. Tap in the Edit menu and
select to save the memo. To
exit QuickMemo at any time,
tap the Back Key .
Page 16

LG Unique Functions
46
NOTE
Please use a fingertip while using the QuickMemo. Do not use your fingernail.
Using the QuickMemo options
You can easily use the QuickMenu options when using the QuickMemo.
Touch to keep the current memo on the screen and use other
phone features simultaneously.
Selects whether to use the current image or a note image as
your background.
Allows you to undo and redo previous actions.
Selects the pen type and the color.
Erases the memo that you created.
Touch to send your memo to others or share it via social
network services.
Saves the memo in the Gallery.
Viewing the saved QuickMemo
From the Home screen, tap Apps > Gallery and select the
QuickMemo album.
Live Zooming
Live Zooming allows you to zoom in or zoom out on a portion of a video
that is being played to make the desired scan appear larger or smaller.
When viewing the video, use your index finger and thumb in a pinching or
spreading motion to zoom in or out.
Page 17

LG Unique Functions
●
NOTE
When playing a video, slide the screen up or down to adjust the screen brightness.
●
When playing a video, slide the screen left or right to rewind or fast-forward.
●
Do not to press too hard; the touch screen is sensitive enough to pick up a light, but
firm touch.
QSlide
The QSlide function enables an overlay on your phone’s display for easy
multi-tasking.
Tap to exit the QSlide function
and return to full window.
OR
Slide to adjust transparency.
Tap to exit the QSlide function.
47
NOTE
The QSlide function can support up to two windows at the same time.
1. Open the Notifications Panel and tap the desired app from the QSlide
apps section.
OR
While using an application that supports QSlide, tap . The function will
be displayed continuously as a small window on your screen.
2. Slide to adjust the transparency level.
Page 18

Multimedia
48
Gallery
You can store multimedia files in internal or external memory for easy
access to all your multimedia files. Use this application to view multimedia
files like pictures and videos.
From the Home screen, tap Apps
> Apps tab > Gallery .
You can manage and share all your image and video files with Gallery.
●
NOTE
● Some files may not play properly, depending on how they are encoded.
Some file formats are not supported, depending on the software installed on the
device.
Viewing pictures
Launching Gallery displays your available folders. When another application,
such as Email, saves a picture, the download folder is automatically created
to contain the picture. Likewise, capturing a screenshot automatically
creates the Screenshots folder. Tap a folder to open it.
Pictures are displayed by creation date in a folder. Select a picture to view it
full screen. Scroll left or right to view the next or previous image.
Zooming in and out
Use one of the following methods to zoom in on an image:
Double-tap anywhere to zoom in. Double-tap again to return to fullscreen
•
view.
•Spread two fingers apart on any place to zoom in. Pinch in to zoom out.
Playing videos
Video files display the icon in the preview. Select a video and tap to
play it.
Viewing photo and video options
When viewing a photo or video, tap the Menu Key and use the
advanced editing options.
Deleting images and videos
Use one of the following methods:
Page 19

Multimedia
• In a folder, tap and select the photos and videos you want to delete,
then tap Delete.
When viewing a photo or video, tap .
•
Setting as wallpaper
When viewing a photo, touch the Menu Key > Set image as and select
Home screen wallpaper or Lock screen wallpaper.
●
NOTE
Some file formats are not supported, depending on the device software.
●
If the file size exceeds the available memory, an error can occur when you open
files.
Videos
Your phone has a video player that lets you play all of your favorite videos.
Playing a video
1. From the Home screen, tap Apps > Apps tab > Videos .
2. Select the video you want to play.
Touch to pause video playback.
Touch to resume video playback.
Touch to go 10 seconds for ward.
Touch to go 10 seconds backward.
Touch to manage the video volume.
Touch to change the ratio of the video screen.
Touch access QSlide and display the video in small window.
Touch to share your video via the SmartShare function.
Touch to lock the window.
49
To change the volume while watching a video, press the Volume Keys on
the left side of the phone.
Page 20

Multimedia
50
Touch and hold a video in the list to access the following options: Share,
Delete and Details.
Music
Your phone has a music player that lets you play all your favorite tracks. To
access the music player, from the Home screen, tap Apps
> Music
.
> Apps tab
Add music files to your phone
Start by transferring music files to your phone:
•Transfer music using Media sync (MTP).
•Download from the wireless Web.
•Synchronize your phone to a computer.
•Receive files via Bluetooth.
Transfer music using Media sync (MTP)
1. Connect the phone to your PC using the USB cable.
2. Select the Media sync (MTP) option. Your phone will appear as another
hard drive on your computer. Click on the drive to view it. Copy the files
from your PC to the drive folder.
3. When you’re finished transferring files, swipe the Status Bar down and
touch USB connected > Charge only. You may now safely unplug your
device.
Playing a song
1. From the Home screen, tap Apps > Apps tab > Music .
2. Touch the Songs tab.
3. Select the song you want to play.
Touch to find the files with YouTube
Touch to share your music via SmartShare function.
Page 21

Multimedia
Touch to set shuffle mode
Touch to set repeat mode
Touch to manage the music volume
Touch to pause playback
Touch to resume playback
Touch to skip to the next track on the album or in the playlist.
Touch and hold to fast-forward.
Touch to go back to the beginning of the song. Touch twice to
return to the previous song. Touch and hold to rewind.
Touch to set the current song as a favorite
Touch to see the current playlist
Touch to return to the music library.
To change the volume while listening to music, press the Volume Keys on
the left side of the phone.
Touch and hold any song in the list to access the following options: Play,
Add to playlist, Share, Set as ringtone, Delete, Details and Search.
NOTE
Music file copyrights may be protected by international treaties and national copyright
laws. Therefore, it may be necessary to obtain permission or a licence to reproduce or
copy music. In some countries, national laws prohibit private copying of copyrighted
material. Before downloading or copying the file, check the national laws of the
relevant country concerning the use of such material.
51
Page 22

Utilities
52
Setting your alarm
1. From the Home screen, tap Apps > Apps tab > Alarm/Clock >
.
2. Set the desired alarm time.
3. Set Repeat, Snooze duration, Vibration, Alarm sound, Alarm volume,
Auto app starter, Puzzle lock and Memo.
4. Touch Save.
NOTE
To change alarm settings in the alarm list screen, touch the Menu Key and
select Settings.
Using your calculator
1. From the Home screen, tap Apps > Apps tab > Calculator .
2. Touch the number keys to enter numbers.
3. For simple calculations, touch the function you want to perform ( , ,
or ) followed by .
4. For more complex calculations, touch the Menu Key , select the
Advanced panel, then choose the desired function.
NOTE
To view the calculation history, tap .
Adding an event to your calendar
1. From the Home screen, tap Apps > Apps tab > Calendar .
2. Tap to change the calendar view (Day, Week, Month, Agenda).
3. Tap on the date for which you wish to add an event and touch . Then
select the calendar you wish to add the event to (if necessary).
4. Touch the Event name field and enter the event name.
5. Touch the Location field and enter the location. Check the date and enter
the time you wish your event to start and finish.
6. If you wish to add a note to your event, touch the Description field and
enter the details.
7. If you wish to repeat the alarm, set REPEAT and set REMINDERS, if
necessary.
Page 23

Utilities
8. Touch Save to save the event in the calendar.
File manager
The File Manager application allows you to manage files in your internal/
external storage.
To open the File Manager application
From the Home screen, tap Apps > Files Manager .
File Manager Options
: Allows you to create a new folder.
: Allows you to move files and folders to another folder.
: Allows you to delete files and folders.
: Allows you to search for files.
Tap the Menu Key to access the following options.
Sort by: Allows you to sort files and folders by Name, Size, Date, and Type.
View by: Allows you to change the view mode to List or Grid.
Copy: Allows you to copy files and folders and paste them in another
location.
Share: Allows you to share files and folders with others.
Upload: Allows you to upload files and folders to online storge
Zip: Allows you to compress files and folders into a .zip file.
Exit: Allows you to exit the application.
53
Application Manager
You can manage your programs with Application Manager.
1. From the Home screen, tap Apps > Application Manager .
2. The Application Manager lists your installed apps along with their size
and version.
Page 24

Utilities
54
3. Tap Uninstall to uninstall the app, then tap OK to confirm.
Application Manager Settings
To adjust the Application Manager settings, tap the Menu Key and
select Settings. The following settings are available.
Update notification cycle: Allows you to set the notification cycle for app
•
updates.
•Auto app update: Automatically updates apps if available.
•Update over Wi-Fi only: Updates apps only via Wi-Fi.
Visual Voicemail
The Visual Voicemail application allows users to view a list of people who
left voicemail messages on your phone. You can listen to your message
without being limited by the date.
1. From the Home screen, tap Apps > Visual Voicemail .
2. A list of the voicemail messages will be displayed.
Important!
NOTE
If this is the first time accessing Visual Voicemail, you may be prompted to enter a
new PIN code and touch Next to activate Visual Voicemail.
To use your phone’s Visual Voicemail capability, you must have the Visual Voicemail
service added to your rate plan.
3. Tap an on-screen voicemail message to play it back.
Voice Recorder
Use the voice recorder to record voice memos or other audio files.
Recording a sound or voice
1. From the Home screen, tap Apps > Apps tab > Voice Recorder .
2. Touch to begin recording.
3. Touch to end the recording.
4. Touch to listen to the recording.
NOTE
Touch to access your list of recordings. You can listen to the saved recordings.
The available recording time may differ from actual recording time.
Page 25

Utilities
Sending the voice recording
1. Once you have finished recording, you can send the audio clip by
touching .
2. Choose from any of the available methods for sharing.
Task Manager
You can manage your applications using Task Manager. You can easily check
the number of applications that are currently running and shut down certain
applications.
Task Manager Options
•Touch Stop to stop individual apps.
•Tap Stop all to stop all currently running apps.
•Tap the Menu Key
to access Help, Sort by, Settings
Polaris Office 4
Polaris Office 4 is a professional mobile office solution that lets users
conveniently view various types of office documents, including Word, Excel
and PowerPoint files, anywhere or anytime, using their mobile devices.
From the Home screen, tap Apps
> Apps tab > Polaris Office 4 .
Viewing files
Mobile users can now easily view a wide variety of file types, including
Microsoft Office documents and Adobe PDF, right on their mobile devices.
When viewing documents using Polaris Office 4, the objects and layout
remain the same as in the original documents.
55
FileShare
This feature allows you to share files from your phone.
1. From the Home screen, tap Apps > Apps tab > FileShare .
2. Choose the types of content you would like to share. Choose from
Images, Videos, Music and Documents.
Page 26

Utilities
56
3. Tap Send file in the upper right corner of the screen, then checkmark
the file(s) you want to share.
4. Tap Send at the bottom of the screen to begin scanning for available
devices, then select the device you want from the list.
5. Tap Send at the bottom of the screen to use the selected device to send
your file(s).
Backup
About backing up and restoring smartphone data
It is recommended that you regularly create and save a backup file on the
internal storage, especially before updating any software. Maintaining a
current backup file in storage memor y may allow you to recover smartphone
data if your smartphone is lost, stolen, or corrupted by an unforeseen issue.
This Backup application is supported between LG smartphones, other S/W
or OS versions. As a result, when you buy the new LG smartphone, you can
backup the current phone data to your new phone.
If you have the Backup application preloaded on your smartphone, you can
backup and restore most of your smart phone data, including downloaded
and pre-installed applications, bookmarks, calendar entries, call logs,
contacts, home screen settings, messages, and system settings. You may
also:
•Perform a manual backup of your smartphone data.
•Schedule automatic backups of your smartphone data.
•Restore your smartphone data.
NOTE
WARNING!
Please note that the Backup function does not support the backup of User data &
Media data (Picture/Video/Music). Please backup those files using the Media sync
(MTP). Connect your phone to your computer using a USB cable and touch Media
sync (MTP).
To protect against unexpected shutoff during backup or restore operations, due to
insufficient battery power, you should always keep your battery fully charged.
Backup your smart phone data
1. From the Home screen, tap Apps > Apps tab > Backup >
Page 27

Utilities
Manual backup > Internal Storage or SD Card > Next.
2. Touch New backup to enter a name for your backup file and select Next.
3. Select the check box next to the item you want to backup and select
Backup to backup.
Restoring smartphone data
To restore data that is in your internal memory, Media sync mode must be
turned off.
NOTE
All files that are stored on your smart phone are deleted before the backup file is
restored.
1. From the Home screen, tap Apps > Apps tab > Backup >
Restore
2. On the Restore screen, select a backup file that contains the data you
wish to restore.
3. Select the item you wish to restore and tap Restore to restore it to your
phone.
NOTE
Please note that your phone data will be overwritten with the content of your backup.
4. If the backup file is encrypted, type the password that you created to
encrypt it.
5. When all selected files have been restored, your phone will reboot.
Enable encryption
You can set Enable encryption to encrypt your backup files for extra
protection.
1. Open the Backup application and tap at the upper right corner of the
screen.
2. Enter and confirm your password and tap Done.
57
Google+
Use this application to stay connected with people via Google’s social
network service.
From the Home screen, tap Apps
NOTE
This application may not be available depending on the region or service provider.
> Apps tab > Google+ .
Page 28

Utilities
58
Voice Search
Use this application to search webpages using voice.
1. From the Home screen, tap Apps > Apps tab > Voice Search .
2. Tap the mic icon and say a keyword or phrase when Speak now appears
on the screen.
3. Select one of the suggested keywords that appear.
NOTE
This application may not be available depending on the region or service provider.
Downloads
Use this application to see what files have been downloaded.
From the Home screen, tap Apps
> Apps tab > Downloads .
Page 29

The Web
MetroWEB
Use this application to browse the Internet. The MetroWEB application gives
you a fast, full-color world of games, music, news, sports, entertainment
and much more, right on your mobile phone wherever you are and whatever
you enjoy.
NOTE
Additional charges apply when connecting to these services and downloading
content. Check data charges with your network provider.
From the Home screen, tap MetroWEB .
Using the Web toolbar
Touch and hold the Web toolbar and slide it upwards with your finger to
open.
Touch to go back one page.
Touch to go forward one page, to the page you connected to after
the current one. This is the opposite of what happens when you
touch the Back Key , which takes you to the previous page.
Touch to go to the Home page.
Touch to add a new window.
Touch to access your bookmarks.
Viewing webpages
Tap the web address field, enter the web address and tap on the
keyboard.
59
Opening a page
To open a new page, tap on the Browser toolbar.
To go to another webpage, tap , scroll up or down, and tap the page to
view it.
Searching the web by voice
Tap the web address field, tap , speak a keyword, and then select one of
Page 30

The Web
60
the suggested keywords that appear.
NOTE
This feature may not be available depending on the region or service provider.
Bookmarks
To bookmark the current webpage, tap the Menu Key > Save to
bookmarks. Enter the desired information and tap OK.
To open a bookmarked webpage, tap
on the Browser toolbar and select
one.
History
Tap on the Browser toolbar and select the History tab to open a
webpage from the list of recently-visited webpages. To clear the history, tap
the Menu Key
> Clear all history.
Using QSlide
Use this feature to access the Internet without closing the current
application.
While viewing content on the Browser, tap
. You can then browse other
information on your phone. To view the browser in full screen, tap
close the browser, tap
.
Chrome
Use Chrome to search for information and browse webpages.
From the Home screen, tap Apps
NOTE
This application may not be available, depending on your region and service provider.
> Apps tab > Chrome .
Viewing webpages
Tap the web address field, and then enter a web address or search criteria.
. To
Opening a page
To go to a new page, tap > New tab.
To go to another webpage, tap
select it.
, scroll up or down and tap the page to
Page 31

The Web
Searching the web by voice
Tap the address field, tap , speak a keyword and select one of the
suggested keywords that appear.
Syncing with other devices
Sync open tabs and bookmarks to use with Chrome on another device
when you are logged in with the same Google account.
To view open tabs on other devices, tap the Menu Key
devices. You must be signed in to the same Google account on all devices.
Select a webpage to open.
Viewing bookmarks
To view bookmarks, tap .
> Other
61
 Loading...