

Page 1

Function
Screen Capture Function
1. Press the MENU button. Then, move to OPTION with
the ġ, Ģ, ˘, ˚ buttons and press the OK button.
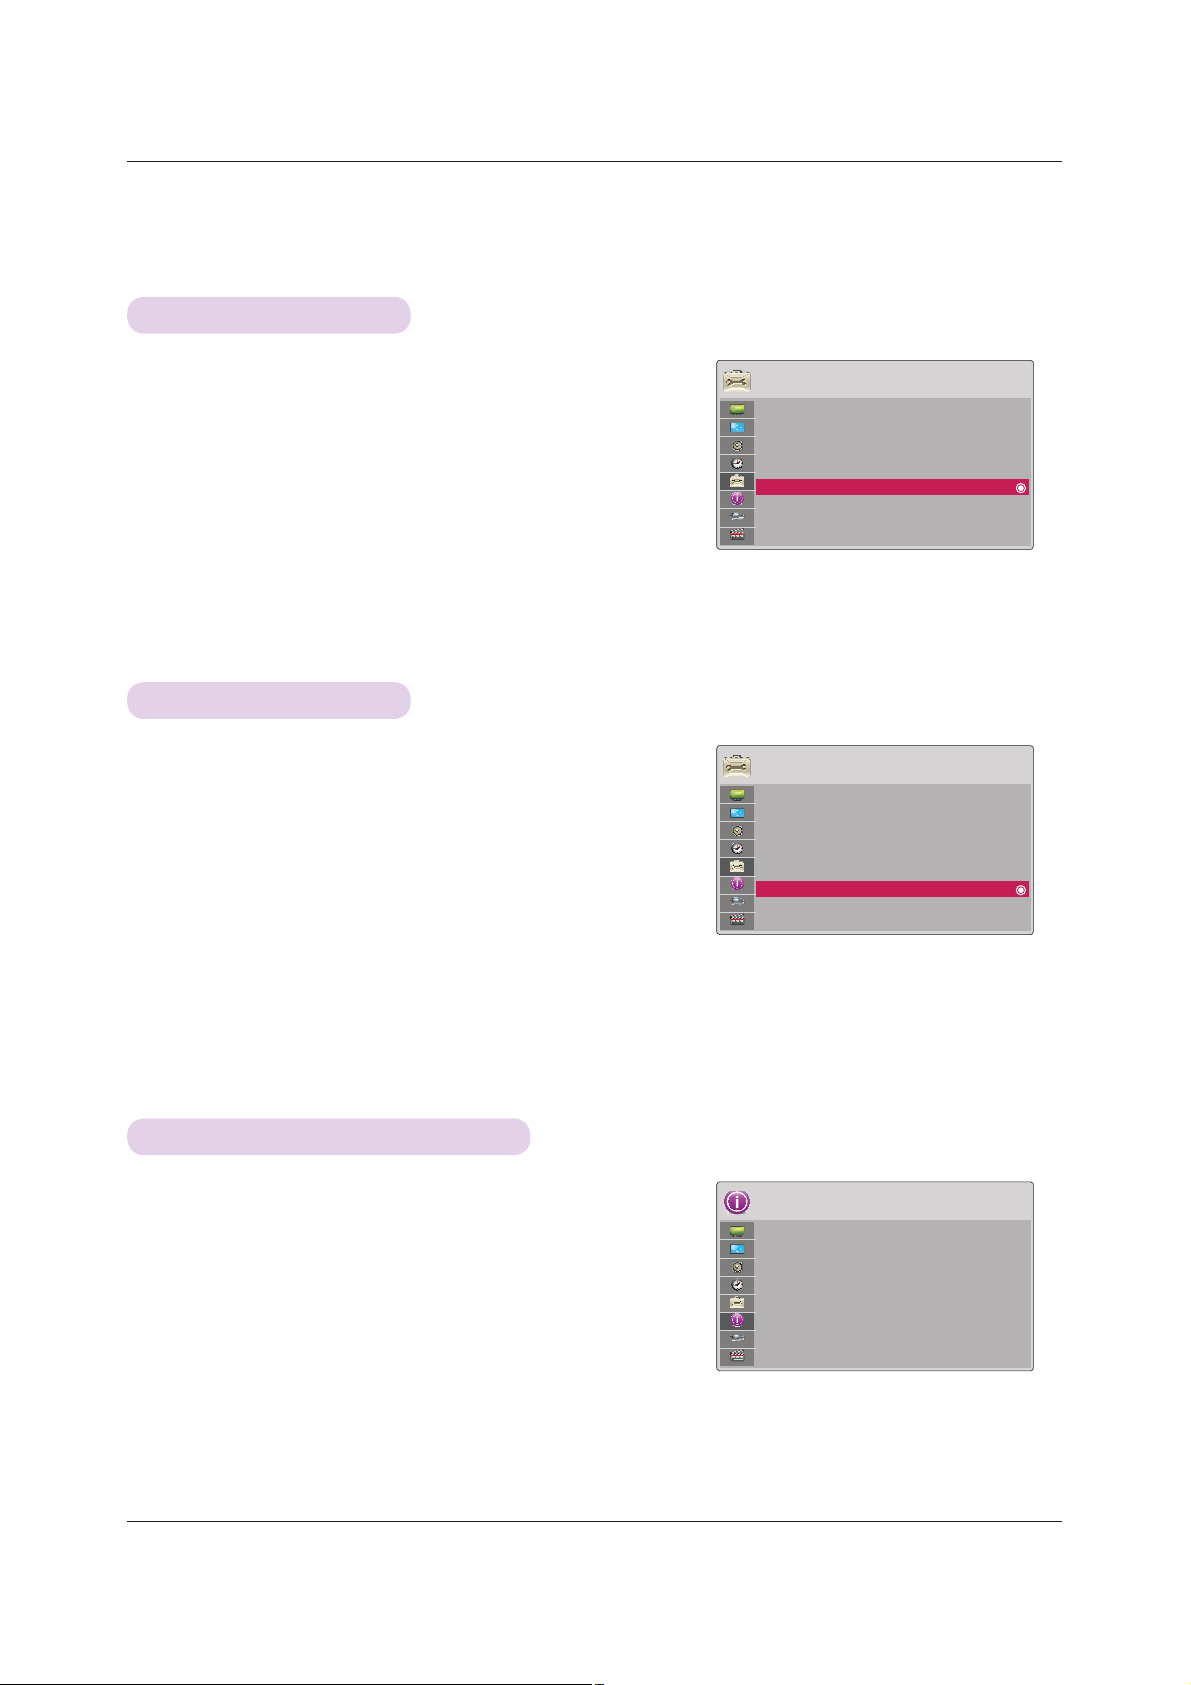
2. Press the ġ, Ģ buttons to move to Screen Capture
and press the OK button.
• It can only be elected when there is an input signal.
OPTION
Menu Language : English
Blank Image : Black
Screen Capture
LED Mode : Normal
Auto Power : Off
Demo Mode : Off
Initial Setting : Home Use
• It takes up to 2 minutes when capturing screen.
• Press the BACK button to exit the menu screen.
To adjust the brightness of the screen
1. Press the Q.MENU button on the remote control.
2. Press the ˘, ˚buttons to move to LED Mode.
3. Move to a desired item with the ˘, ˚ buttons.
• LED Mode changes into Dimming mode automatically at specific temperatures (35°C or
higher). Dimming mode gets about 90% brightness of original led mode.
• LED Mode changes into Dimming mode automatically if use a optical battery.
• You can use this function through the MENU button.
• Press the BACK button to exit the menu screen.
ᰰMove ᰷OK
LED Mode
Normal
To make the power of the projector turn on automatically when power is in
1. Press the MENU button. Then, move to OPTION with the
ġ, Ģ, ˘, ˚ buttons and press the OK button.
2. Press the ġ, Ģ buttons to move to Auto Power and
press the OK button.
3. Press the ġ, Ģ buttons to move to On and press the
OK button.
• On: Connecting DC cable to the projector turns on the projector.
• Off: Connecting DC cable to the projector makes the projector in standby state.
• Press the BACK button to exit the menu screen.
28
OPTION
Menu Language : English
Blank Image : Black
Screen Capture
LED Mode : Normal
Auto Power : Off
Demo Mode : Off
Initial Setting : Home Use
ᰰMove ᰷OK
Page 2
Demo Mode Function
Function
1. Press the MENU button. Then, move to OPTION with the
ġ, Ģ, ˘, ˚ buttons and press the OK button.
2. Press the ġ, Ģ buttons to move to Demo Mode and press
the OK button.
3. Press the ġ, Ģ buttons to move to On and press the
OK button.
• It can be selected when Initial Setting is set as Store Demo.
• Press the BACK button to exit the menu screen.
Initial Setting Function
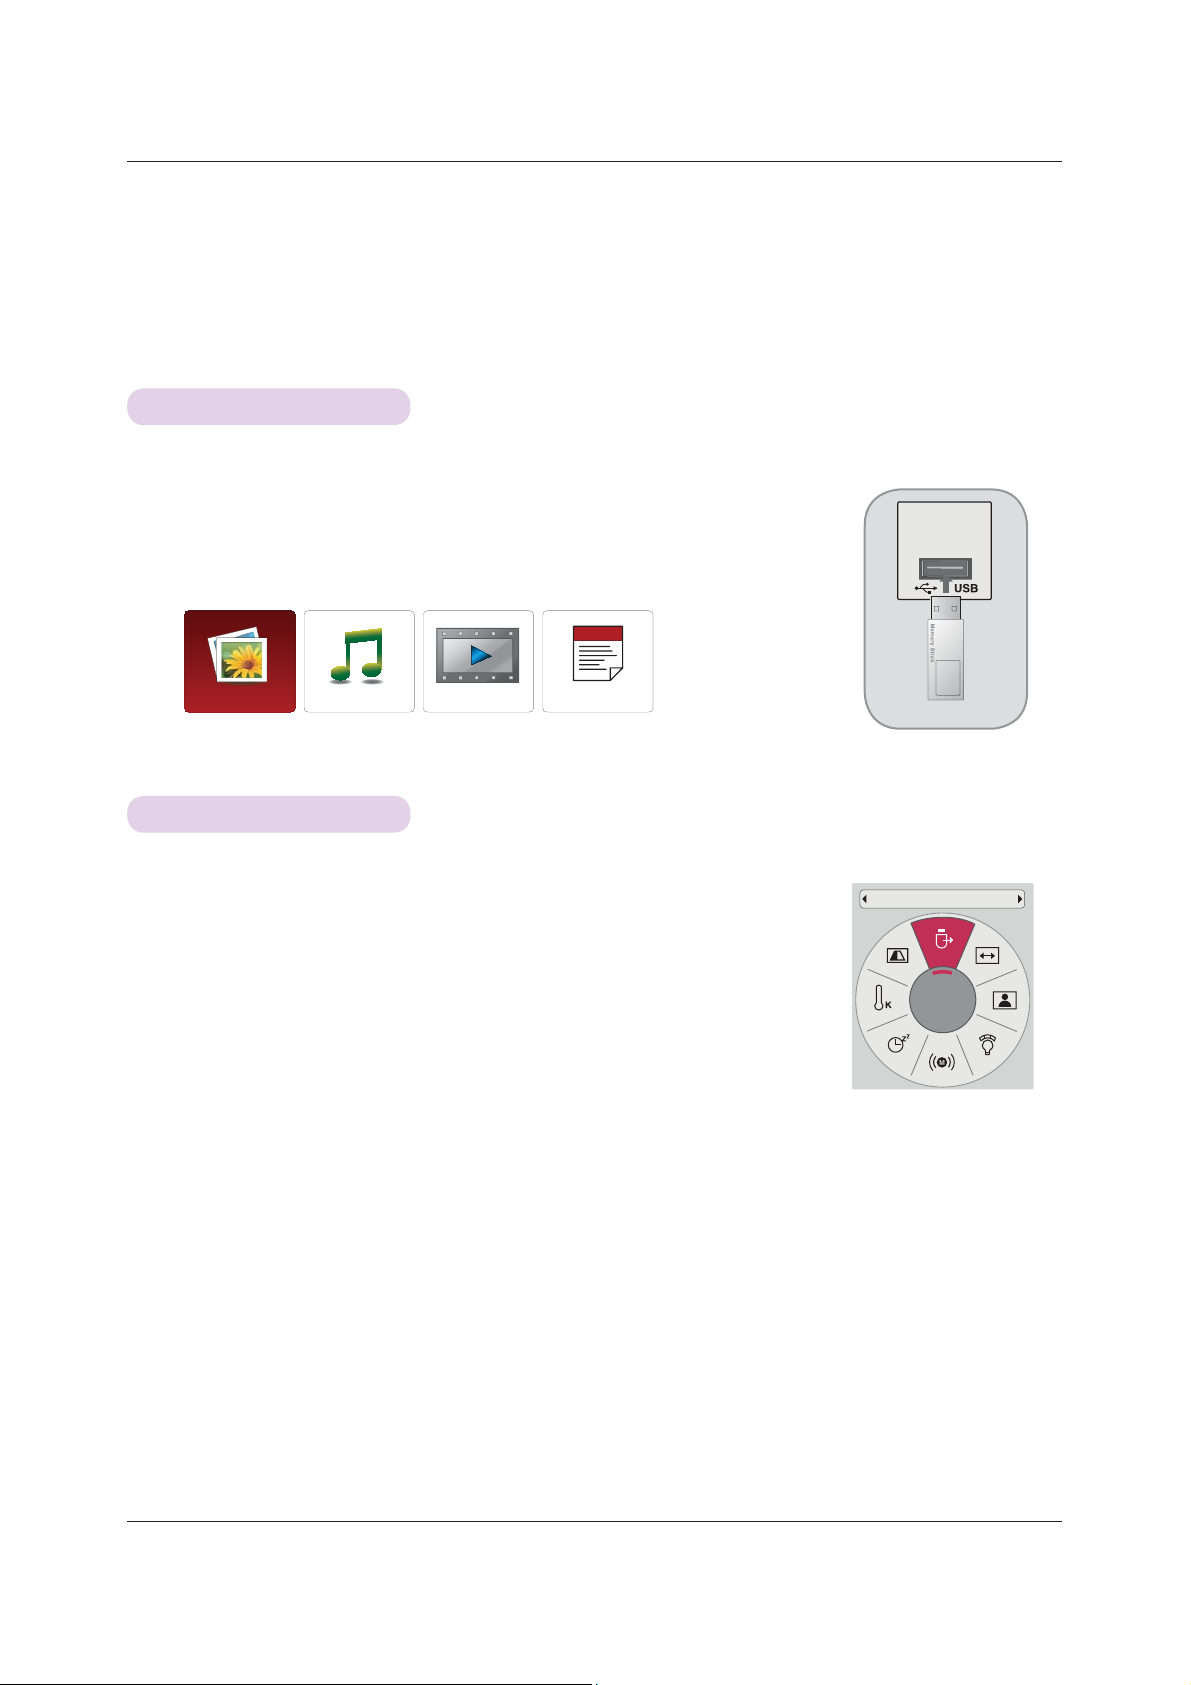
1. Press the MENU button. Then, move to OPTION with the
ġ, Ģ, ˘, ˚ buttons and press the OK button.
2. Press the ġ, Ģ buttons to move to Initial Setting and
press the OK button.
3. Move to a desired item with the ġ, Ģbuttons and then
press the OK button.
OPTION
Menu Language : English
Blank Image : Black
Screen Capture
LED Mode : Normal
Auto Power : Off
Demo Mode : Off
Initial Setting : Store Demo
OPTION
Menu Language : English
Blank Image : Black
Screen Capture
LED Mode : Normal
Auto Power : Off
Demo Mode : Off
Initial Setting : Home Use
ᰰMove ᰷OK
ᰰMove ᰷OK
• Set as Home Use when used in homes.
• Press the BACK button to exit the menu screen.
INFORMATION Menu Options
To See The Projector Information
1. Press the MENU button. Then, move to INFORMATION with
the ġ, Ģ, ˘, ˚ buttons and press the OK button.
2. You can see the current information of the projector.
• Press the BACK button to exit the menu screen.
INFORMATION
Model Name : HX300G-JE
Input : RGB
Resolution : 1024 x 768
Fh/Fv : 48.36 Hhz/60 Hz
29
Page 3
USB
USB
* Image shown may differ from your projector.
To use the USB device
Connecting the USB device
* When you connect a USB device, this screen is displayed, automatically.
In USB device, you can not add a new folder or delete the existing folder.
1. Connect the USB device to the USB jack on the back of the set.
2. It turns automatically to DivX Home Menu.
PHOTO LIST
MUSIC LIST
MOVIE LIST FILE VIEWER
Eject USB
* Select “Eject” in order to eject a USB device.
1. Press the Q.MENU button on the remote control.
2. Press the ˘, ˚ buttons to move to USB Device.
3. Press the OK button on the remote control.
• After Eject USB, USB memory cannot be read. Remove USB memory, and connect
again.
• Press the BACK button to exit the menu screen.
USB memory stick
USB Device
Eject ᯙ
30
Page 4

USB
Precautions when using the USB device
Ź Only a USB storage device is recognizable.
Ź If the USB storage device is connected through a USB hub, the device is not recognizable.
Ź A USB storage device using an automatic recognition programmed may not be recognized.
Ź A USB storage device which uses its own driver may not be recognized.
Ź The recognition speed of a USB storage device may depend on each device.
Ź Please do not turn off the projector or unplug the USB device when the connected USB storage device is working. When
such device is suddenly separated or unplugged, the stored files or the USB storage device may be damaged.
Ź Please do not connect the USB storage device which was artificially maneuvered on the PC. The device may cause the
product to malfunction or fail to be played. Never forget to use only a USB storage device which has normal music files,
image files, movie files or text files.
Ź Please use only a USB storage device which was formatted as a FAT16, FAT32 and NTFS file system provided with the
Windows operating system. In case of a storage device formatted as a different utility programmed which is not supported by Windows, it may not be recognized.
Ź Please connect power to a USB storage device which requires an external power supply. If not, the device may not be rec-
ognized.
Ź Please connect a USB storage device with cable is offered by USB maker. If connected with cable is not offered by USB
maker or an excessively long cable, the device may not be recognized.
Ź Some USB storage devices may not be supported or operated smoothly.
Ź If the name of a folder or file is too long, it will not be displayed or recognized.
Ź File alignment method of USB storage device is similar to Window XP and filename can recognize up to 100 English
characters.
Ź Please backup the important file because a data of USB device may be damaged. Data management is consumer's
responsibility and in consequence the manufactures does not cover the product bearing data damage.
Ź The recommended capacity is 1TB or less for a USB external hard disk and 32GB or less for USB memory. Any device
with more than the recommended capacity may not work properly.
Ź Only the FAT32 file system supports the delete function.
Ź If the USB memory device does not work properly, disconnect and reconnect it.
Ź If a USB external hard disk with a “Energy Saving”function does not work, turn the hard disk off and on again to make it
work properly.
Ź USB storage devices below USB 2.0 are supported as well.But they may not work properly in the movie list.
Ź If your USB memory device has multiple partitions, or if you use a USB multi-card reader, you can use up to 4 partitions
or USB memory devices.
Ź If a USB memory device is connected to a USB multi-card reader, its volume data may not be detected.
Ź How fast a USB memory device is detected differs from device to device.
Ź If the USB is connected in Standby Mode, specific hard disk will automatically be loaded when the projector is turned on.
Ź Some USB storage devices may not be supported or operated smoothly.
Ź If the USB HDD does not have an external power source, the USB device may not be detected. So be sure to connect the
external power source.
- Please use a power adaptor for an external power source. We do not guarantee an USB cable for an external power
source.
31
Page 5
USB
PHOTO List
* It is available to playback the photo file(*.jpg) in the USB device.
The On Screen Display may be different from your set. Images are an example to assist with the projector operation.
PHOTO(*.JPEG) supporting file
Baseline : 64 x 64 ~ 15360 x 8640
Progressive : 64 x 64 ~ 1920 x 1440
• You can play JPEG files only.
• Non-supported files are displayed in the form of predefined icon.
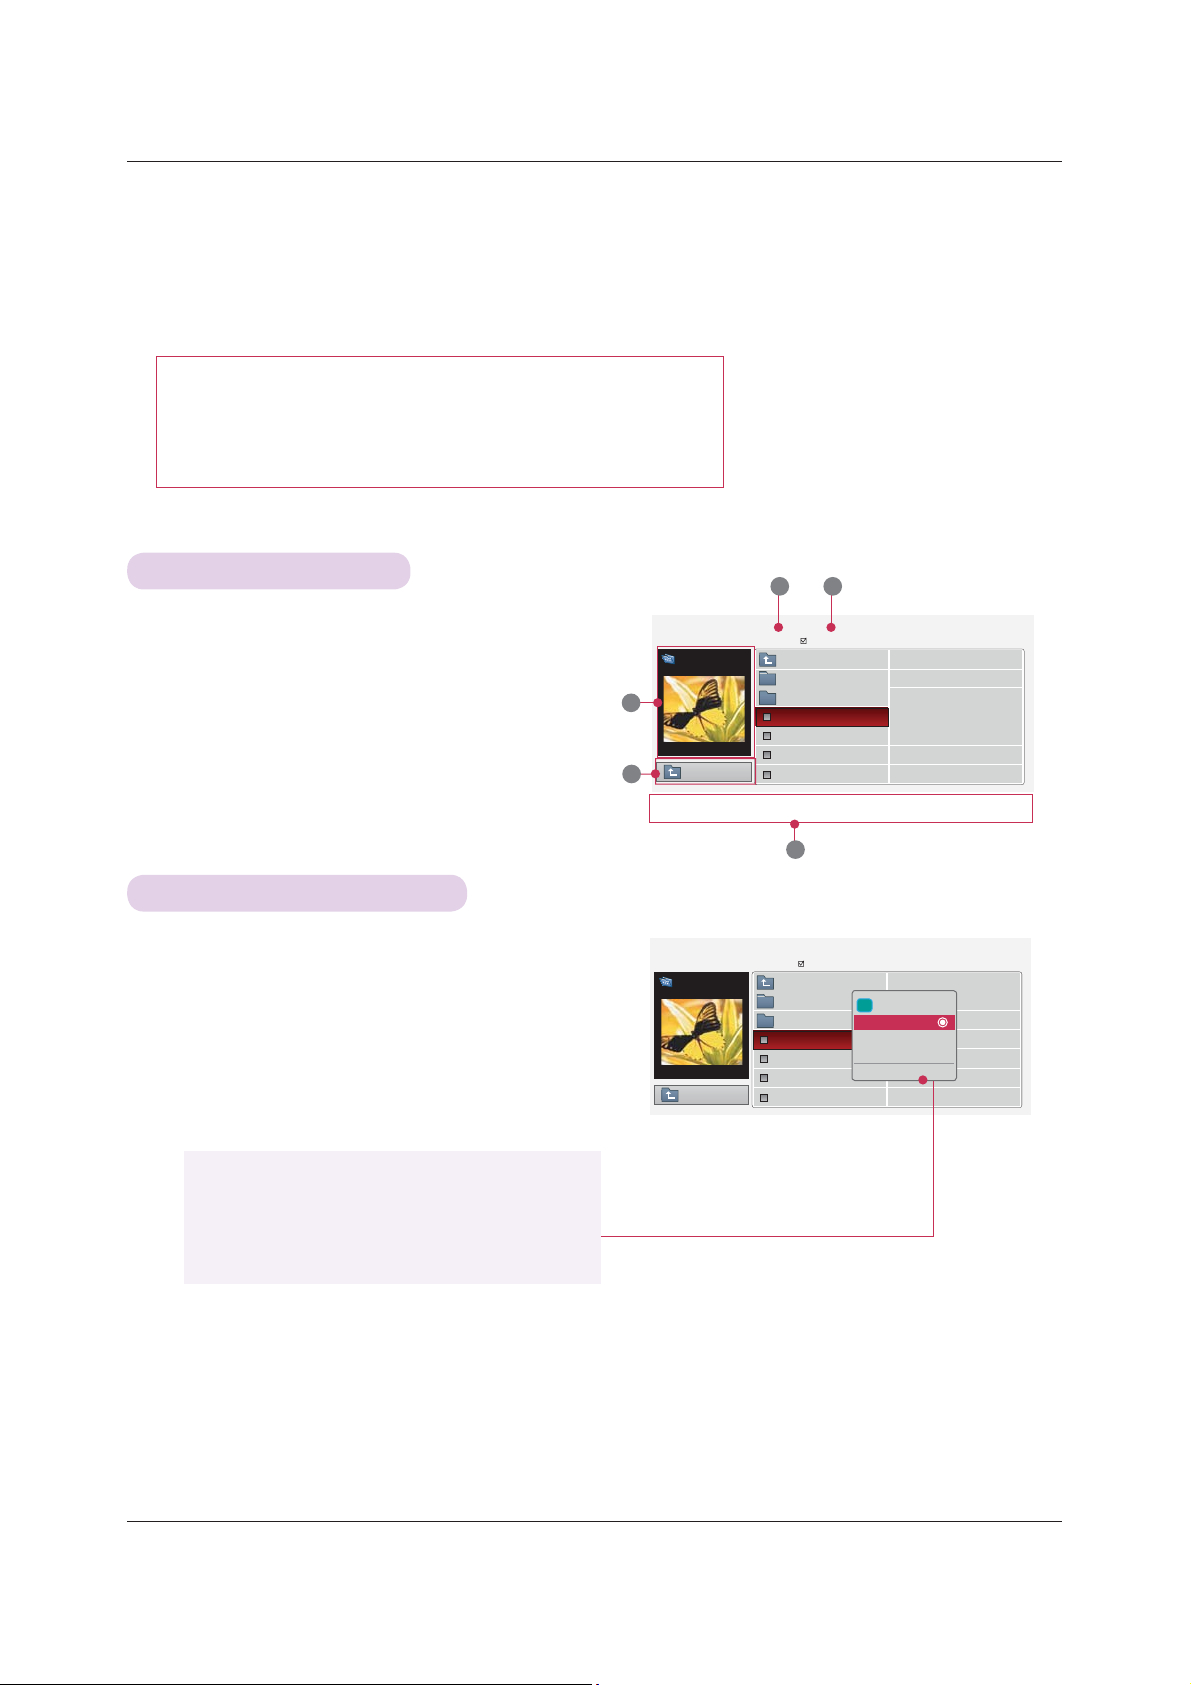
Screen Components
1. Moves to upper level file
2. Preview: Display the thumbnail/folder name of the photo
in the selected folder
3. Current page/Total pages
4. Total number of marked photos
5. Corresponding buttons on the remote control
Photo Selection and Popup Menu
1. Press the USB button. Then, move to PHOTO LIST with
the ˘, ˚ buttons and press the OK button.
2. Press the ġ, Ģ, ˘, ˚ buttons to move to a desired
photo file and press the OK button.
3. Move to a desired item with the ġ, Ģbuttons and then
press the OK button.
3 4
Photo List
[090704]
Butterfly
2
1366x768 125KB
1
Up Folder
ᰰ
Navigation ᰷PopUp Menu Page Change ᲣMark
Page 1/1
No Marked
Up Folder
Photo
X.Box
DSC0001
DSC0002
DSC0003
DSC0004
5
Photo List
[090704]
Butterfly
x
768 125KB
1366
Up Folder
ᰰ
Navigation ᰷PopUp Menu Page Change ᲣMark
Page 1/1
Up Folder
Photo
X.Box
DSC0001
DSC0002
DSC0003
DSC0004
No Marked
i 1366x768, 125KB
View
Mark All
Delete
Close
ᱷ
ᱷ
Exit
Exit
• View: Display the selected item.
• Mark All: Mark all photos on the screen.
• Delete: Delete the selected photo item.
• Close: Close the pop-up menu.
• If the picture file is damaged, it may not be displayed properly.
• High resolution pictures may take longer time to display on the entire screen.
32
Page 6
Full Screen Menu
1. Press the USB button. Then, move to PHOTO LIST with the
˘, ˚ buttons and press the OK button.
2. Press the ġ, Ģ, ˘, ˚ buttons to move to desired photo and
press the OK button.
3. Press the ġ, Ģ buttons to move to View and press the OK
button.
USB
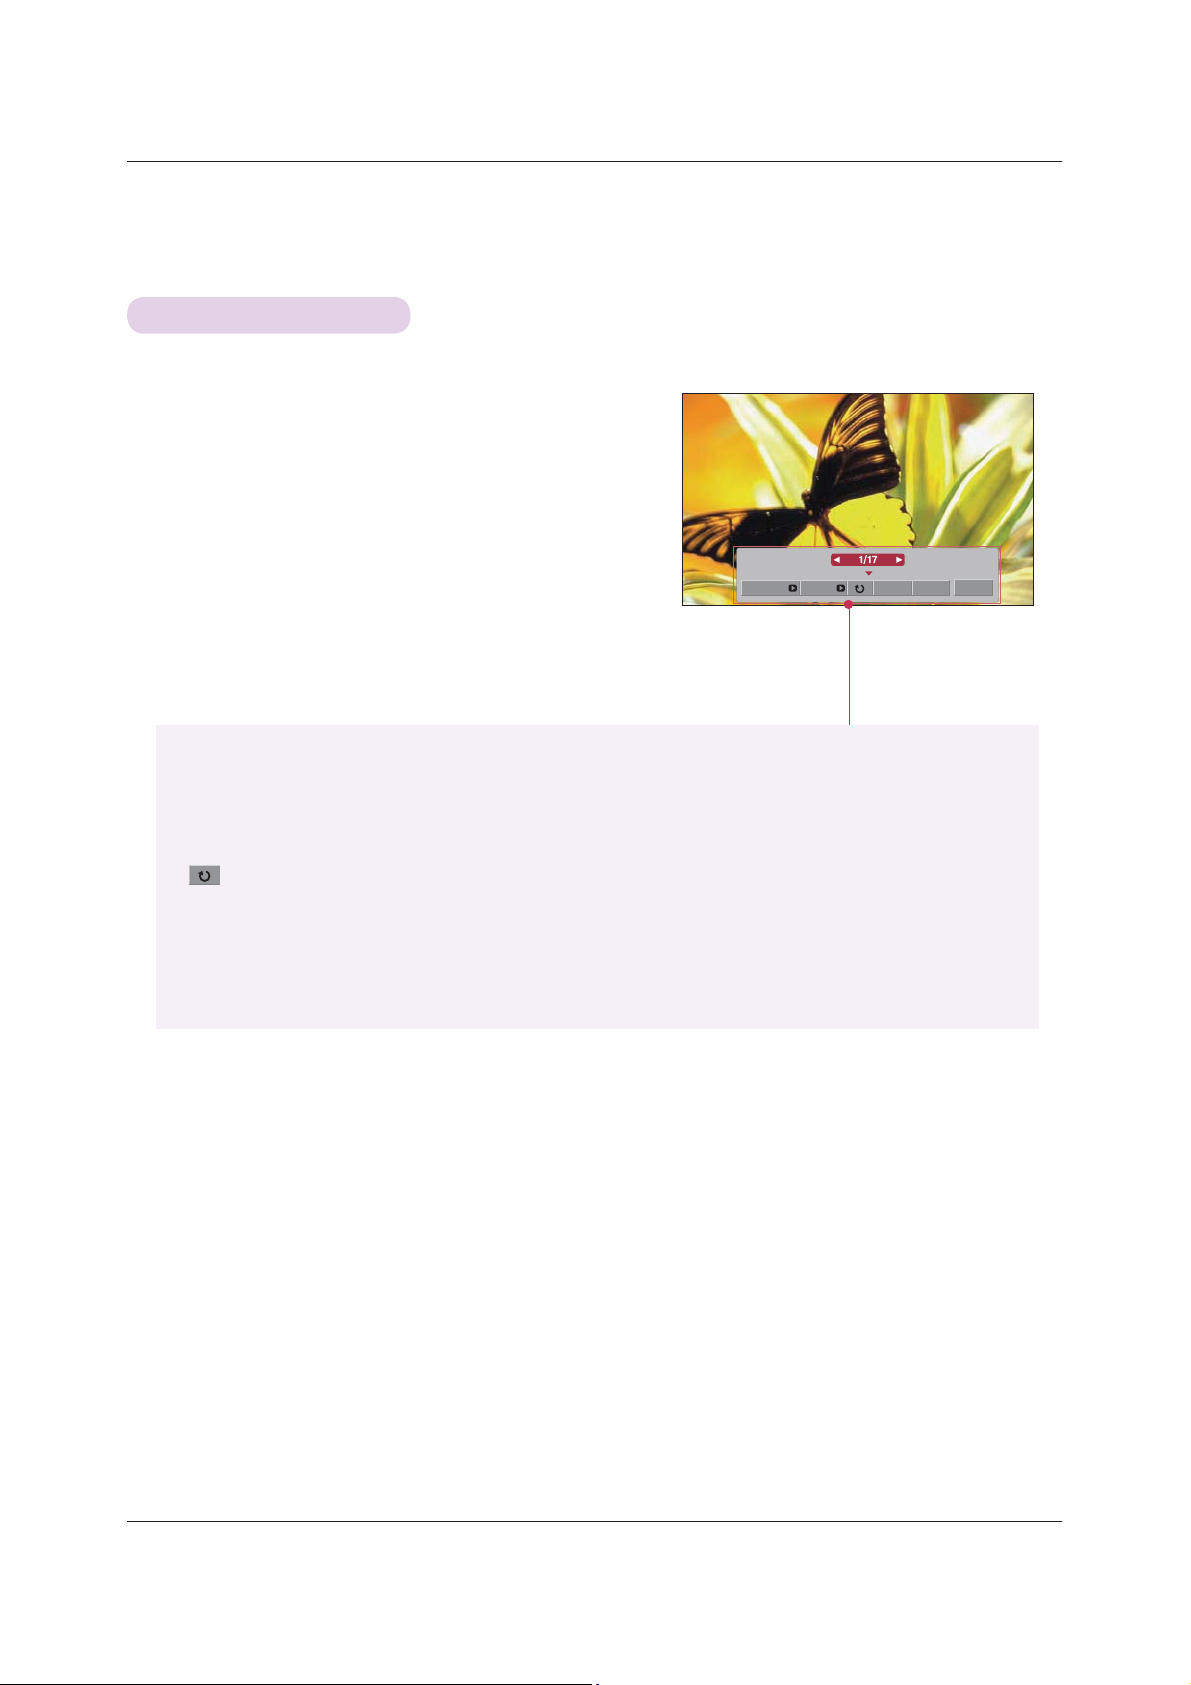
4. The selected photo is displayed in full size and show up the
menu.
Slideshow BGM Delete Option Hide
5. Use ġ, Ģ, ˘, ˚ button to select and control the menu on
the full-sized screen.
• Use ˘, ˚ button to select the previous or next photo.
• Slideshow: Selected photos are displayed during the slide show. If no photo is selected, all photos in the
current folder are displayed during slide show.
- Set the time interval of the slide show in Option.
• BGM: Listen to music while viewing photos in full size.
- Set the BGM device and album in Option.
•
(Rotate): Rotate photos.
• Delete: Delete photos.
• Option: Set values for Slide Speed and Music Folder.
You cannot change Music Folder while BGM is playing.
• Hide: Hide the menu on the full-sized screen.
-
To see the menu again on the full-sized screen, press OK button to display.
33
Page 7

USB
MUSIC List
* You can use the Music List menu to play MP3 files form a USB storage device.
The On Screen Display on your model may be slightly different.
MUSIC (*.MP3) supporting file
Bit rate range 32 Kbps ~ 320 Kbps
• Sampling rate MPEG1 Layer3 : 32kHz, 44.1kHz, 48kHz
• Sampling rate MPEG2 Layer3 : 16kHz, 22.05kHz, 24kHz
• Sampling rate MPEG2.5 Layer3 : 8kHz, 11.025kHz, 12kHz
Screen Components
1. Moves to upper level file
2. Preview: Display the title/folder name of the music in
the selected folder
3. Current page/Total pages
4. Total number of marked music
5. Corresponding buttons on the remote control
Music Selection and Popup Menu
1. Press the USB button. Then, move to MUSIC LIST with
the ˘, ˚ buttons and press the OK button.
2. Press the ġ, Ģ, ˘, ˚ buttons to move to a desired
music file and press the OK button.
3. Move to a desired item with the ġ, Ģ buttons and then
press the OK button.
3 4
Music List
Drive 1
Flower
2
ᯫ 00:00 / 05:42
1
Up Folder
ᰰ
Navigation ᰷PopUp Menu Page Change ᲣMark
Page 1/1
No Marked
Title Duration
Up Folder
Flower
Oblivious
5
Music List
Drive 1
Arirang
ᯫ 00:00 / 05:42
Up Folder
ᰰ
Navigation ᰷PopUp Menu Page Change ᲣMark
Page 1/1
No Marked
Title Duration
Up Folder
Arirang
Good Bye
i
3945 KB,128 Kbps
Play
Play with Photo
Mark All
Delete
Close
05:42
05:24
04:12
05:30
ᱷ
ᱷ
Exit
Exit
• Play: Once a song finishes playing, the next selected one will be played. When there are no selected
music to play, the next one in the current folder will be played. If you go to a different folder and
press the OK button, the current music in playback will stop.
When music is playing,
is displayed in front of the music play time.
After certain time elapsed,the full music list screen disappears and the playback information
screen which is on the top of the music list runs as a screen saver. Press OK, ▇ , or BACK
button to stop the screen saver.
A damaged or corrupted music file that does not play displays 00:00 as the play time.
Music files with copy-protection will not play.
• Play with Photo: Start playing the selected music and then move to the Photo List.
• Mark All: Mark all music in the folder.
• Delete: Delete the selected music.
• Close: Close the pop-up menu.
34
Page 8

MOVIE List
* The movie list is activated once USB is detected. It is used when playing movie files on projector.
Supported Movie File
USB
Extension name Video Codec Audio Codec
mpg, mpeg, vob MPEG1, MPEG2 Dolby Digital,MPEG,MP3,LPCM
dat MPEG1 Dolby Digital,MPEG,MP3,LPCM
ts,trp,tp MPEG2, H.264/AVC Dolby Digital,AAC,MPEG
mp4
avi
mkv H.264/AVC, MPEG 1, MPEG 2, MPEG 4 SP, MPEG4 ASP Dolby Digital,HEAAC,AAC,MPEG,MP3,LPCM
divx
MPEG4 SP, MPEG4 ASP, Divx 3.11, Dvix 4.12, Dvix 5.x
Dvix 6, Xvid 1.00, Xvid 1.01, Xvid 1.02, Xvid 1.03
Xvid 1.10–beta 1, Xvid 1.10-beta 2, H.264/AVC
MPEG 2, MPEG 4 SP, MPEG4 ASP, Divx 3.11, Divx 4
Divx 5, Divx 6, Xvid 1.00, Xvid 1.01, Xvid 1.02, Xvid 1.03
Xvid 1.10–beta 1, Xvid 1.10–beta 2, H.264/AVC
MPEG 2, MPEG 4 SP, MPEG4 ASP, Divx 3.11, Divx 4
Divx 5, Divx 6, Xvid 1.00, Xvid 1.01, Xvid 1.02, Xvid 1.03
Xvid 1.10–beta 1, Xvid 1.10–beta 2, H.264/AVC
Dolby Digital,HEAAC,
AAC,MPEG,MP3,LPCM
Dolby Digital,HEAAC,AAC,MPEG,
MP3,LPCM
Dolby Digital,HEAAC,AAC,MPEG,
MP3,LPCM
Bit rate range : within 32 kbps ~ 320 kbps (MP3)
Subtitle format :
*.smi/*.srt/*.sub(MicroDVD, SubViewer1.0/2.0)/*.ass/*.ssa/*.txt(TMPlayer)/*.psb(PowerDivx)
Max Resolution
1920x1080
@30p
35
Page 9

USB
Precautions when playing the DivX
Ź A DivX movie file and its subtitle file must be located in the same folder.
Ź At this time, a movie file name and its subtitle file name must be identical for it to be displayed.
Ź Specific subtitles created by the user may not be operated normally.
Ź Some special characters are not supported in subtitles.
Ź HTML tags are not supported in subtitles.
Ź Subtitles in languages other than the supported languages are not available.
Ź Time information in an external subtitle file should be arranged in ascending order to be played.
Ź Damaged movie files may not be played, and certain functions could be limited during the playback.
Ź Certain video files created with an encoder may not be played.
Ź If the video and audio structure of recorded file is not interleaved, either video or audio is outputted.
Ź Video with resolution higher than maximum resolution supported for each frame, cannot be guaranteed for smooth
playback.
Ź DTS Audio codec is not supported.
Ź Playback for movie file exceeding 30 GB (Giga Byte) is not supported.
Ź Playing a video through a USB connection that doesn’t support high speed may not work properly.
Ź When watching a video using MOVIE LIST, the function to ajdust screen deos not work.
Ź The screen may suffer temporary interruptions (image stoppage, faster playback, etc.) when the audio language is
changed.
Ź Movie files other than the specified types and formats may not work properly.
Ź Max bitrate of playable movie file is 20Mbps.
Ź Files encoded with GMC(Global Motion Compensation) may not be played.
Ź When you are watching the movie by Movie List function, user setup for each image mode does not operate.
Ź Only the files saved in ASCII CODE is supported for the external subtitles of the movie.
Ź Only 500 alphabets and 500 numbers are supported for each line of the subtitle.
Ź Only 10000 of sync blocks can be supported within the subtitle file.
36
ᰶ ABOUT DIVX VIDEO: DivX® is a digital video format created by DivX,Inc. This is an official DivX Certified device that
plays DivX video. Visit www.divx.com for more information and software tools to convert your files into DivX video.
ᰶ ABOUT DIVX VIDEO-ON-DEMAND: This DivX Certified® device must be registered in order to play DivX Video-on-
Demand (VOD) content. To generate the registration code, locate the DivX VOD section in the device setup menu. Go
to vod.divx.com with this code to complete the registration process and learn more about DivX VOD.
ᰶ "DivX Certified to play DivX video up to HD 1080p, including premium content"
ᰶ "Pat. 7,295,673; 7,460,688; 7,519,274
Manufactured under license from Dolby Laboratories. “'ROE\ “and the double-D symbol are trademarks of
Dolby Laboratories.
Page 10

USB
Screen Components
1. Moves to upper level folder
2. Preview: Display the title/folder name of the movie in the
selected folder
3. Current page/Total pages
4. Total number of marked movies
5. Corresponding buttons on the remote control
Movie Selection and Popup Menu
1. Press the USB button. Then, move to MOVIE LIST with
the ˘, ˚ buttons and press the OK button.
2. Press the ġ, Ģ, ˘, ˚ move to a desired movie file and
press the OK button.
3. Move to a desired item with the ġ, Ģbuttons and then
press the OK button.
3 4
Movie List
Movie
Page 1/1
No Marked
Title Duration
Up Folder
2
704 x 396 668 MB
1
Up Folder
ᰰ
Navigation ᰷PopUp Menu Page Change ᲣMark
5
Movie List
Movie
704 x 396 668 MB
Up Folder
ᰰ
Navigation ᰷PopUp Menu Page Change ᲣMark
Page 1/1
No Marked
Title Duration
Up Folder
i
704 x 396 668 MB
Play
Mark All
Delete
Close
ᱷ
ᱷ
Exit
Exit
• Play: Play the selected movie titles.
- In the case of files not supported, a message regarding non-supported file is displayed.
- The screen is played, but when the audio file is not supported, the following message shows.
• Mark All: Mark all movies in the folder.
• Delete: Delete the selected movie.
• Close: Close the pop-up menu.
i
This file is invalid.
i
Unsupported Audio.
37
Page 11

USB
Playing the Movie
* You can adjust various method during the movie play.
1. Press the USB button. Then, move to MOVIE LIST with
the ˘, ˚ buttons and press the OK button.
2. Press the ġ, Ģ, ˘, ˚ move to a desired movie file and
press the OK button.
3. Press the ġ, Ģbuttons to move to Play and press the
OK button.
◆ Use of remote control
ᰶ
Press the ▶II (Play/Pause) button to play/pause the screen.
ᰶ Press the ▇ (Stop) button to stop.
ᰶ Press the I◀◀ (Skip -) button to play the previous movie.
ᰶ Press the ▶▶I (Skip +) button to play the next movie.
Option
Option Menu Selection
On MOVIE LIST play mode.
Press the (RED) button on the remote control.
ᰶPicture Size: Select the Full or Original screen size.
ᰶPicture Mode: Select the Vivid, Standard, Cinema, Sport or Game.
ᰶ Audio Language:
ᰶ Subtitle Language: Select Language Group of the subtitle during movie play.
- Sync: When the video is not synchronized with the caption, it can be adjusted by the unit
of 0.5 second.
- Position: Move the location of the subtitle.
Subtitle Language Group Supported Language
Select Language Group of the audio during movie play.
Latin1
Latin2
Latin4
Latin5
Cyrillic
Greek
Hebrew
Chinese
Korean
Arabic
French, Spanish, Catalan Basque, Portuguese, Italian, Albanian, Rhaeto-Romanic, Dutch, German,
Danish, Swedish, Norwegian, Finnish, Faeroese, Icelandic, Irish, Scottish, English
Czech, Hungarian, Polish, Romanian, Croatian, Slovak, Slovenian, Servian
Estonian, the Baltic languages Latvian(Lettish)and Lithuanian, Greenlandic and Lappish
English, Turkish
Bulgarian, Byelorussian, Macedonian, Russian, Serbian and pre-1990 (no ghe with upturn)Ukrainian
English, modern Greek
English, modern Hebrew
Chinese
English, Korean
English, Arabic
Picture Size
Picture Mode
Audio Language
Subtitle Language
Sync
Position
Close
ᯧ
Full
Standard
Full
Latin1
ᯓ
0
0
38
Page 12

To See The DivX Registration Code
* Confirm the DivX registration code number of the projector.
Using the registration number, movies can be rented or purchased at www.divx.com/vod.
USB
1. Press the MENU button. Then, move to USB with the ġ, Ģ, ˘, ˚
buttons and press the OK button.
2. Press the ġ, Ģ buttons to move to DivX Reg. Code and press the
OK button.
USB
Photo List
Music List
Movie List
File Viewer
DivX Reg. Code
Deactivation
ᰰMove ᰷OK
3. You can see the DivX registration code of the projector.
• With a DivX registration code from other projector, playback of rented
or purchased DivX file is not allowed. (Only DivX files matched with the
registration code of the purchased projector are playable.)
• The video or audio of a file converted based on a standard other than
the DivX codec standard may be corrupted or unable to be played.
• Press the BACK button to exit the menu screen.
Deactivation Function
* Delete the existing authentication information to receive a new DivX user authentication for projector. Once this function is
executed, a DivX user authentication is required again to see DivX DRM files.
1. Press the MENU button. Then, move to USB with the ġ, Ģ, ˘, ˚
buttons and press the OK button.
2. Press the ġ, Ģbuttons to move to Deactivation and press the
OK button.
3. Move to a desired item with the ˘, ˚buttons and then press the
OK button.
• DRM (Digital Rights Management) function:
These are the technology and the service that prevents the illegal use of
digital contents to protect the copyrights owners’ benefits and rights. File
can be played after the license is cleared through the methods of online,
etc.
• Press the BACK button to exit the menu screen.
USB
Photo List
Music List
Movie List
File Viewer
DivX Reg. Code
Deactivation
ᰰMove ᰷OK
39
Page 13

USB
FILE Viewer
Supported File : XLS, DOC, PPT, TXT, XLSX, PPTX, DOCX, PDF
• Microsoft Office Version 97 / 2000 / 2002 / 2003 / 2007
• Adobe PDF Version 1.0 / 1.1 / 1.2 / 1.3 / 1.4
- File Viewer realigns the document, so it may look different from the PC.
- For the documents that include images, the resolution may look lower during the realigning process.
- If the document volume is big or it has many pages, the loading may take long time.
- For some fonts that are not supported, they may be replaced with other fonts.
Screen Components
1. Moves to upper level file
2. Preview: Display the title/folder name of the file in
the selected folder
3. Current page/Total pages
4. Corresponding buttons on the remote control
View File
1. Press the USB button. Then, move to FILE Viewer with
the ˘, ˚ buttons and press the OK button.
2. Press the ġ, Ģ, ˘, ˚move to a desired file and press
the OK button.
3
File Viewer
Drive 1
Requiem 2 story.txt
2
1
Up Folder
ᰰ
Navigation ᰷PopUp Menu Page Change
Page 1/1
Title Date
Up Folder
Requiem 2 story.txt
information.ppt
4
ᱷ
Exit
• Use Page
button to move the previous or next page.
ġ, Ģ
• Go Page: Move to a desired page.
0 3 /14 page
1. Move to Go Page with ˘, ˚buttons and press ġbutton.
2. Press the ġ, Ģ, ˘, ˚buttons select a desired page and press the OK button.
• Zoom: Zoom in or zoom out.
100 % - + horizontal array vertical array
1. Move to Zoom with ˘, ˚buttons and press ġbutton.
2. Press the ˘, ˚buttons select a desired page and press the OK button.
• Hide: Close the menu.
- To see the menu again on the full-sized screen, press MENU button to display.
40
Go Page Zoom Hide
OK
Page 14

Information
Supported Monitor Display
* The following table lists the display formats supported by the projector.
Format Vertical Freq.(Hz) Horizontal Freq.(kHz)
< DVD/DTV Input >
Signal Component-*1 HDMI-*2
480i O X
480p O O
NTSC (60 Hz)
PAL (50 Hz)
24 / 30 Hz 1080p
720p O O
1080i O O
1080p O O
576i O X
576p O O
720p O O
1080i O O
1080p O O
OO
Information
* If the projector does not support the input signal,
“Invalid Format” message appears on the screen.
* The projector supports DDC1/2B type as Plug &
Play function. (Auto recognition of PC monitor)
* PC synchronization signal types supported
:Separate type synchronization.
* To get the the best picture quality, adjust the PC
graphics card to 1024x768.
* Cable type
1- RGB to Component Cable
2- HDMI Cable
Maintenance
*The projector needs little maintenance. You should keep the lens clean because any dirt or stains may appear on the
screen. If any parts need to be replaced, contact your dealer. When cleaning any part of the projector, always turn the
power off and unplug the projector first.
Cleaning the lens
If there is any dust or stain on the surface of the lens, you must always clean the lens. Use an air spray or cleaning cloth
for product exterior, provided with the product, to lightly clean the product. Please use a recommended air spray or lens
cleaning product.To clean lens, small amount of cleaning agent on a swab or a soft cloth and rub on the lens. Please be
aware that liquid may flow pass through the lens if the product is sprayed on lens directly.
Cleaning the Projector Case
To clean the projector case, first unplug the power cable. To remove dirt or dust, wipe the casing with polish cloth provided. When you want to remove the dust or stain on the lens, use the cloth for product exterior, provided with the product.
Do not use alcohol, benzene, thinners or other chemical detergents as these can cause the casing to be warped or discolored.
41
Page 15

Information
Specifications
MODEL
HX300G (HX300G-JE) / HX301G (HX301G-JE)
Resolution 1024 (Horizontal) x 768 (Vertical) pixel
Horizontal / Vertical Ratio 4:3 (horizontal:vertical)
Panel size (mm) 13.97
Screen size
(Projection distance)
0.55 m ~ 2.75 m
Projection Offset 110 %
Remote control distance 6 m
Video compatibility NTSC/PAL/SECAM/NTSC4.43/PAL-M/PAL-N/PAL-60
AC-DC Adapter LG, PA-1121-04, 19.5 V
, 6.15 A
Audio Output 1W + 1W
Height (mm) 57.5
(without foot), 61.0 (with foot)
Width (mm) 160
Length (mm) 135.5
Weight (g) 786
USB Device 5 V, 0.5 A (max)
Operating Condition
Temperature
In operation : 0°C ~ 40°C
In storage and transit : -20°C ~ 60°C
Humidity
In operation : 0 % ~ 80% relative humidity
Not in operation : 0 % ~ 85% relative humidity
FM Transmitter Spec
(HX300G only)
Frequency Band : 88.5 MHz ~ 95.5 MHz
Channel Spacing : 200 KHz
Transmition Power : Under 250 uV
42
Page 16

Information
Open Source Software Notice
The following GPL executables and LGPL, MPL libraries used in this product are subject to the
GPL2.0/LGPL2.1/MPL1.1 License Agreements:
GPL EXECUTABLES:
Linux kernel 2.6, busybox, lzo, u-boot
LGPL LIBRARIES:
uClibc
MPL LIBRARIES:
nanox
LG Electronics offers to provide source code to you on CD-ROM for a charge covering the cost of
performing such distribution, such as the cost of media, shipping and handling upon e-mail request
to LG Electronics at:
opensource@lge.com
This offer is valid for a period of three (3) years from the date of the distribution of this product by
LG Electronics.
You can obtain a copy of the GPL, LGPL and MPL licenses on the CD-ROM provided with this
product.
Also you can obtain the translation of GPL, LGPL licenses from
http://www.gnu.org/licenses/old-licenses/gpl-2.0-translations.html,
http://www.gnu.org/licenses/old-licenses/lgpl-2.1-translations.html.
This product includes
cmap: copyright © 1990-1998 Adobe Systems Incorporated.
Ź
ŹGIF LZW Decoder: copyright © 1987, by Steven A. Bennett
Ź md5: copyright © 1991-2, RSA Data Security, Inc
Ź jpeg: Independent JPEG Group, copyright © 1991 – 1998, Thomas G. Lane.
Ź libpng: copyright © 2004 Glenn Randers-Pehrson
Ź OSSP str - String Handling:
- copyright © 1999-2005 Ralf S. Engelschall <rse@engelschall.com>
- copyright © 1999-2005 The OSSP Project http://www.ossp.org/
Ź random number generator : copyright © 1990, 1993 The Regents of the University of California.
Ź Standard C functions
- copyright © 1998 Softweyr LLC.
- copyright © 1988, 1993 The Regents of the University of California.
Ź tinyxml: copyright © 2000-2006 Lee Thomason
Ź zlib: copyright © 1995-2002 Jean-loup Gailly and Mark Adler.
All rights reserved.
Permission is hereby granted, free of charge, to any person obtaining a copy of this software and
associated documentation files (the "Software"), to deal in the Software without restriction, including
without limitation the rights to use, copy, modify, merge, publish, distribute, sublicense, and/or sell
copies of the Software, and to permit persons to whom the Software is furnished to do so, subject
to the following conditions:
THE SOFTWARE IS PROVIDED "AS IS", WITHOUT WARRANTY OF ANY KIND, EXPRESS OR
IMPLIED, INCLUDING BUT NOT LIMITED TO THE WARRANTIES OF MERCHANTABILITY, FITNESS
FOR A PARTICULAR PURPOSE AND NONINFRINGEMENT. IN NO EVENT SHALL THE AUTHORS
OR COPYRIGHT HOLDERS BE LIABLE FOR ANY CLAIM, DAMAGES OR OTHER LIABILITY,
WHETHER IN AN ACTION OF CONTRACT, TORT OR OTHERWISE, ARISING FROM, OUT OF OR
IN CONNECTION WITH THE SOFTWARE OR THE USE OR OTHER DEALINGS IN THE SOFTWARE.
43
Page 17

Information
WARNING: This equipment may generate or use radio frequency energy. Changes or modifications to this equipment may
c
a
N
th
on.
T
in
o
e
d
e
fo
-
-
-
Hereby, LG. declares that this HX300G-JE is in compliance with the essential requirements and other relevant provision of directive
1999/5/EC.
ause harmful interference unless the modification are expressly approved in the instruction manual. The user could lose the
uthority to operate this equipment if an unauthorized change or modification is made.
This device complies with Part 15 or the FCC's Rules. Operation is subject to the following two Conditions:
1. This device may not cause harmful interference, and
2. This device must accept ant interference received, including interference that may cause undesirable operation.
Open Source Software Notice
OTE: This equipment has been tested and found to comply with the limits for a Class B digital device, pursuant to part 15 of
e FCC Rules. These limits are designed to provide reasonable protection against harmful interference in a residential installati
The following GPL executables and LGPL, MPL libraries used in this product are subject to the
GPL2.0/LGPL2.1/MPL1.1 License Agreements:
his equipment generates, uses and can radiate radio frequency energy and, if not installed and used in accordance with the
struction, may cause harmful interference to radio communications. However, there is no guarantee that interference will not
GPL EXECUTABLES:
ccur in a particular installation. If this equipment does cause harmful interference to radio or television reception, which can b
Linux kernel 2.6, busybox, lzo, u-boot
etermined by turning the equipment off and on, the user is encouraged to try to correct the interference by on or more of th
llowing measures:
LGPL LIBRARIES:
Reorient or relocate the receiving antenna.
uClibc
Increase the separation between the equipment and receiver.
Connect the equipment into an outlet on a circuit different from that to which the receiver is connected.
MPL LIBRARIES:
Consult the dealer or an experienced radio/TV technician for help.
nanox
LG Electronics offers to provide source code to you on CD-ROM for a charge covering the cost of
performing such distribution, such as the cost of media, shipping and handling upon e-mail request
to LG Electronics at:
opensource@lge.com
This offer is valid for a period of three (3) years from the date of the distribution of this product by
LG Electronics.
You can obtain a copy of the GPL, LGPL and MPL licenses on the CD-ROM provided with this
product.
Also you can obtain the translation of GPL, LGPL licenses from
http://www.gnu.org/licenses/old-licenses/gpl-2.0-translations.html,
http://www.gnu.org/licenses/old-licenses/lgpl-2.1-translations.html.
This product includes
cmap: copyright © 1990-1998 Adobe Systems Incorporated.
Ź
ŹGIF LZW Decoder: copyright © 1987, by Steven A. Bennett
Ź md5: copyright © 1991-2, RSA Data Security, Inc
Ź jpeg: Independent JPEG Group, copyright © 1991 – 1998, Thomas G. Lane.
Ź libpng: copyright © 2004 Glenn Randers-Pehrson
Ź OSSP str - String Handling:
- copyright © 1999-2005 Ralf S. Engelschall <rse@engelschall.com>
- copyright © 1999-2005 The OSSP Project http://www.ossp.org/
Ź random number generator : copyright © 1990, 1993 The Regents of the University of California.
Ź Standard C functions
- copyright © 1998 Softweyr LLC.
- copyright © 1988, 1993 The Regents of the University of California.
Ź tinyxml: copyright © 2000-2006 Lee Thomason
Ź zlib: copyright © 1995-2002 Jean-loup Gailly and Mark Adler.
All rights reserved.
Permission is hereby granted, free of charge, to any person obtaining a copy of this software and
associated documentation files (the "Software"), to deal in the Software without restriction, including
without limitation the rights to use, copy, modify, merge, publish, distribute, sublicense, and/or sell
copies of the Software, and to permit persons to whom the Software is furnished to do so, subject
to the following conditions:
THE SOFTWARE IS PROVIDED "AS IS", WITHOUT WARRANTY OF ANY KIND, EXPRESS OR
IMPLIED, INCLUDING BUT NOT LIMITED TO THE WARRANTIES OF MERCHANTABILITY, FITNESS
FOR A PARTICULAR PURPOSE AND NONINFRINGEMENT. IN NO EVENT SHALL THE AUTHORS
OR COPYRIGHT HOLDERS BE LIABLE FOR ANY CLAIM, DAMAGES OR OTHER LIABILITY,
WHETHER IN AN ACTION OF CONTRACT, TORT OR OTHERWISE, ARISING FROM, OUT OF OR
IN CONNECTION WITH THE SOFTWARE OR THE USE OR OTHER DEALINGS IN THE SOFTWARE.
43
Page 18

The model and serial number of the projector is
located on the back and one side of the projector.
Record it below should you ever need service.
MODEL
SERIAL
 Loading...