

LG Electronics USA 9QK-LN790 User Manual
45
Finding a location with navigation
What is the Traffic Message Channel
The Traffic Message Channel (TMC) is a specific
application of the FM Radio Data System (RDS)
used for broadcasting real-time traffic and weather
information. Data messages are received silently,
decoded, and delivered to a TMC enabled navigation
system that can offer dynamic route guidance
alerting the driver of a problem on the planned route
and calculating an alternative route to avoid the
incident.
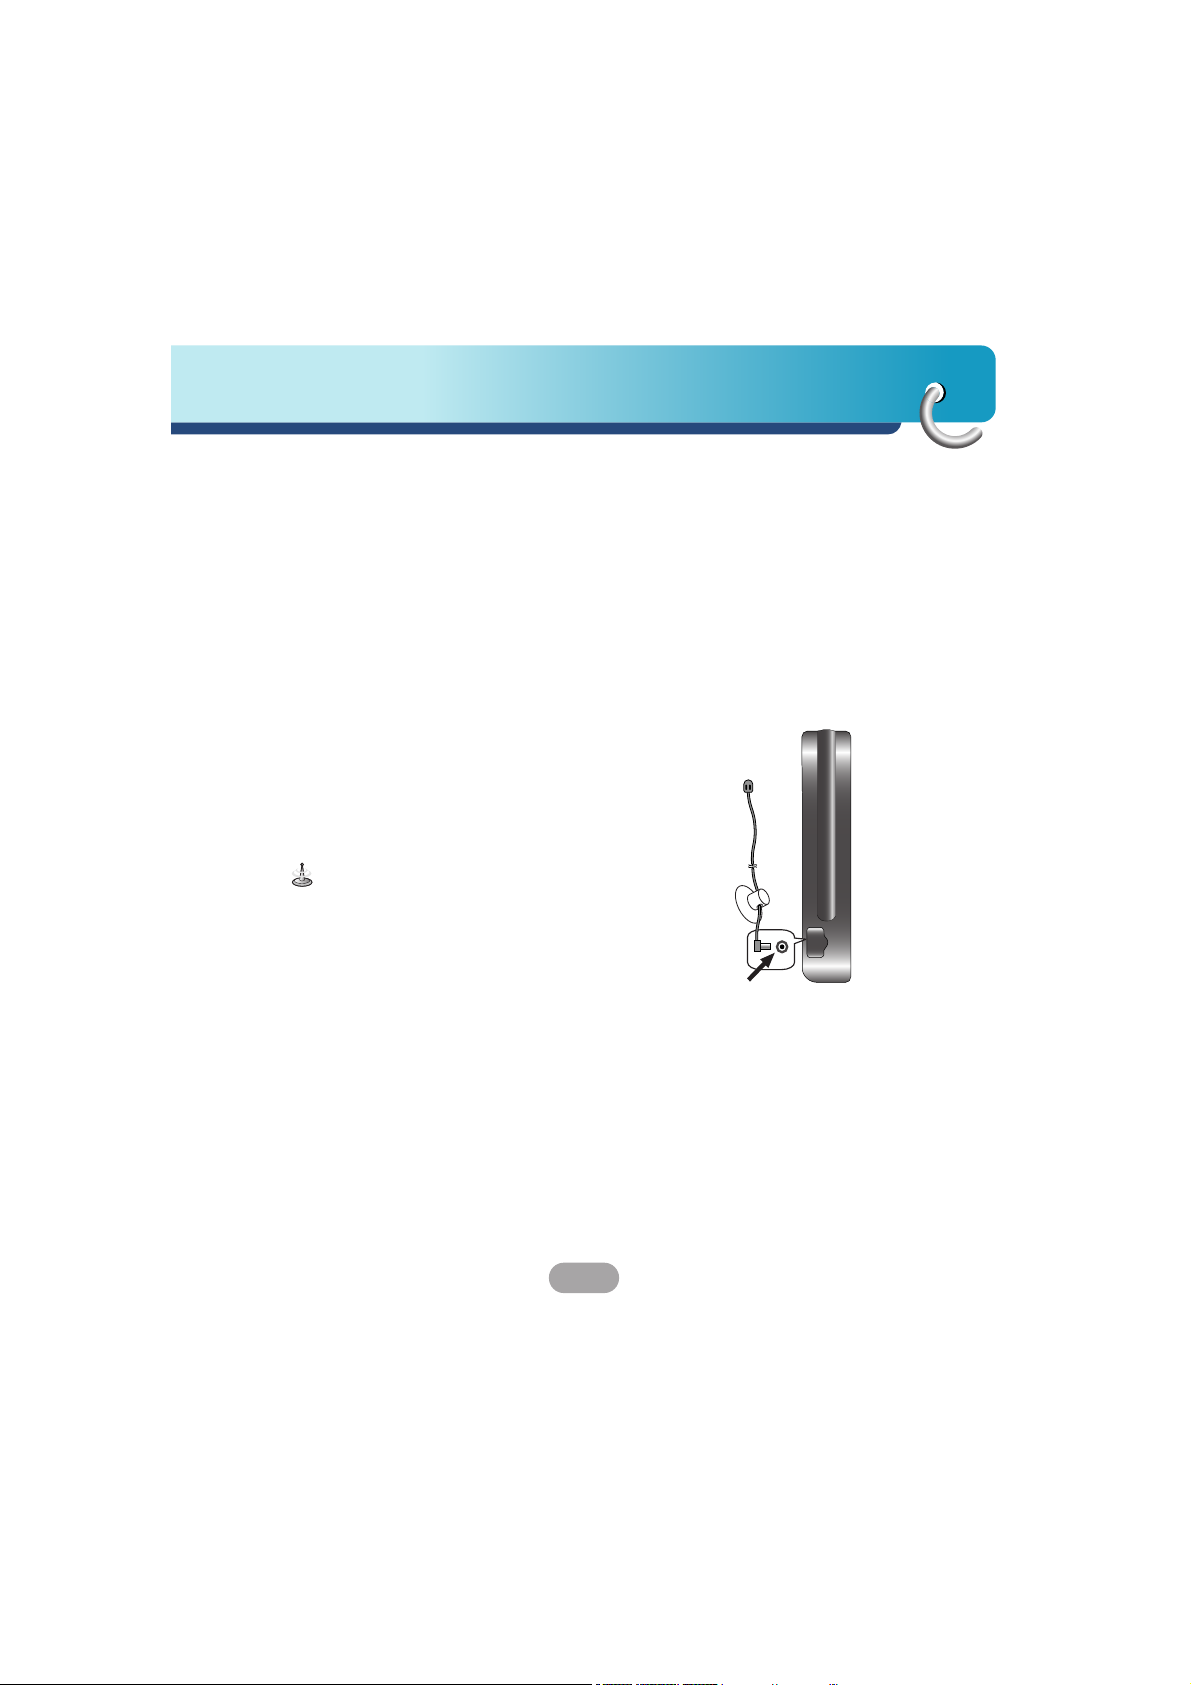
Connect your TMC antenna (Optional)
1. Open the cover from your Navigator.
2. Connect the antenna cable on the Navigator.
3. Use the suction cups to route the antenna
horizontally or vertically on the windscreen.
For best signal reception, route it vertically.
Drivers in California and Minnesota prohibit from
placing anything on the windshield of a vehicle.
Disclaimer
Developer is not responsible for any damage caused
by an accident due to unreliable TMC radio
transmissions by national, regional, or local
broadcasters caused by TMC service restrictions, or
by natural and man-made conditions that prevent
real-time traffic and weather information from being
delivered to the TMC-enabled navigation system.
Developer is not responsible for the quality or
accuracy of the events broadcasted and the method
they are displayed.
Finding a location with navigation
46
Service Information
When you are in an FM TMC service area, your
Navigator receives traffic signals as soon as you
connect TMC module to your Navigator. You need to
be in range of an FM station transmitting TMC
(Traffic Message Channel) data to receive traffic
information.
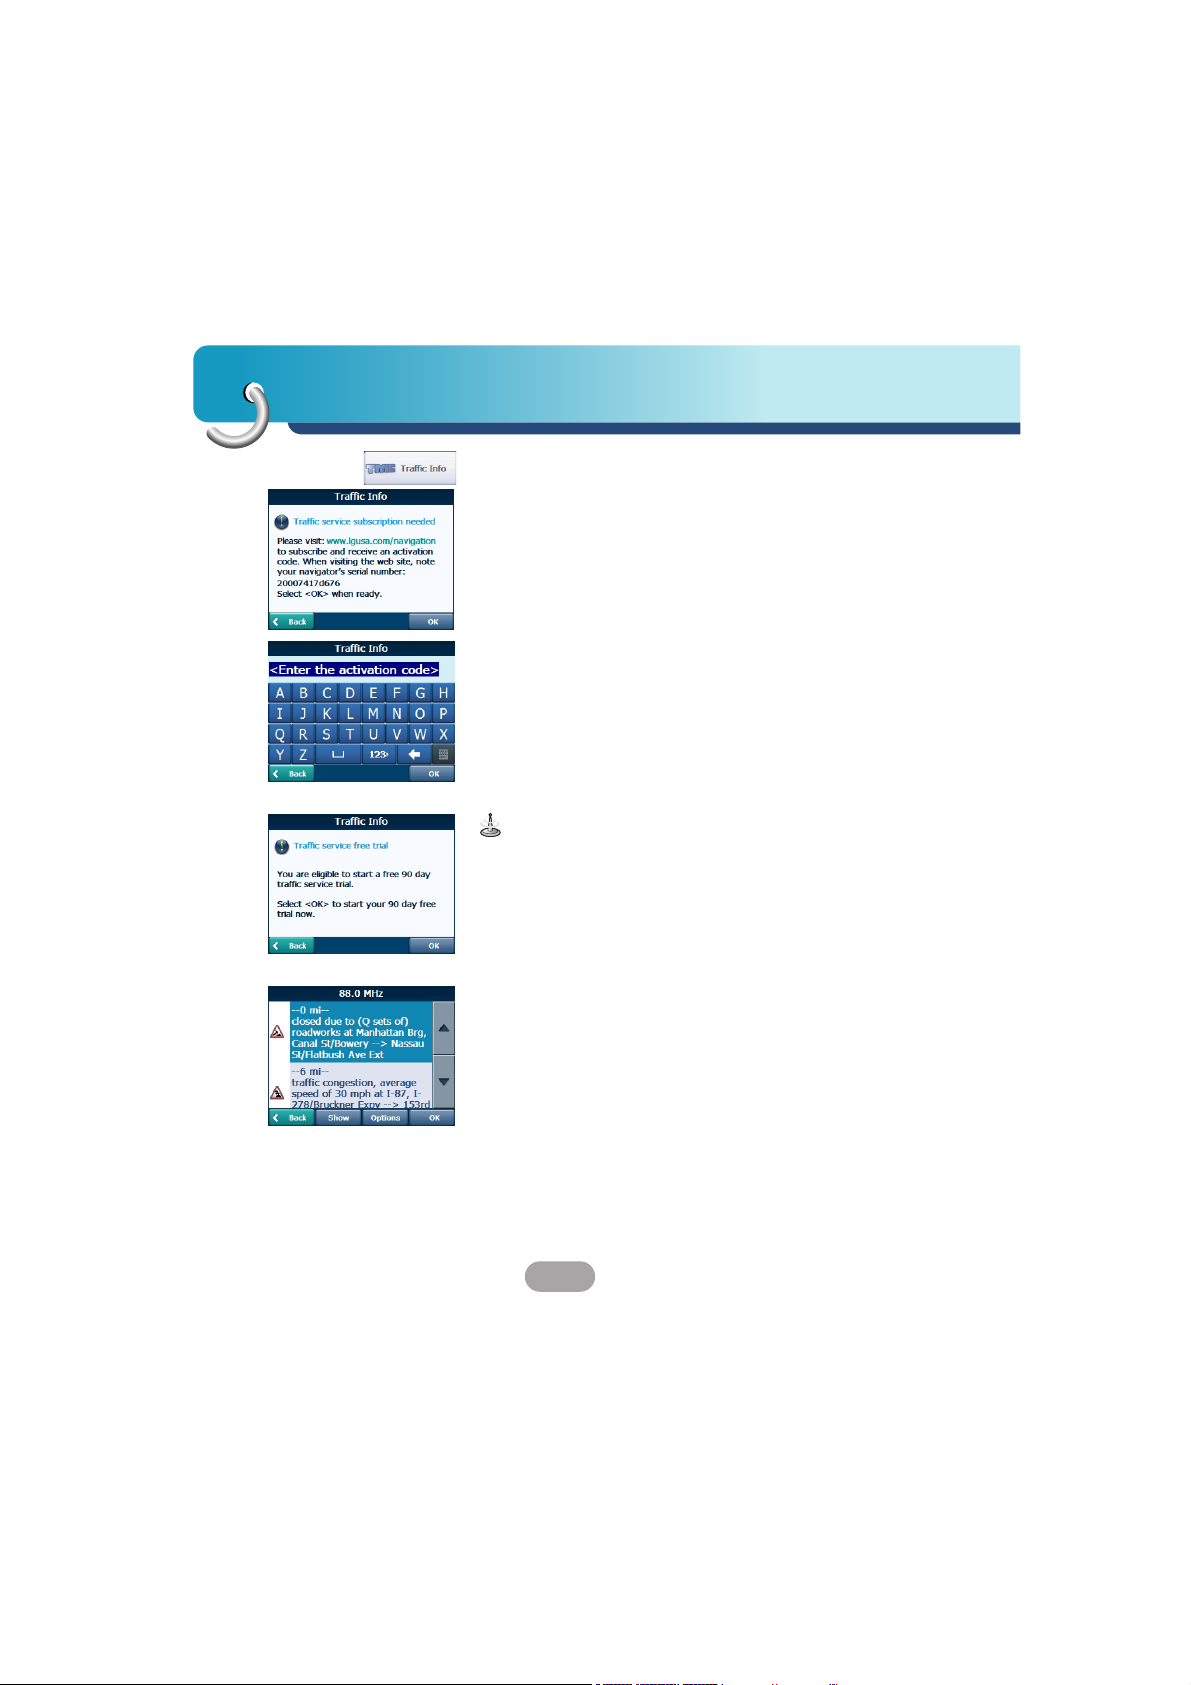
You do need to subscribe to traffic service.
1. Visit www.lgusa.com/navigation to subscribe and
receive an activation code.
2. When visiting the website, note your navigator’s
serial number.
3. Touch “OK” button when ready.
You can use a free 90 days traffic trial service. Select
“OK” to start your 90 days free trial now
Traffic Message Alerts
Traffic (TMC) messages are national and regional
public radio FM transmissions that are used to inform
drivers of traffic, weather, and other driving
conditions, as shown below.
The traffic messages are displayed in the TMC Inbox
screen, which can be opened by tapping on the TMC
icon.
47
Finding a location with navigation
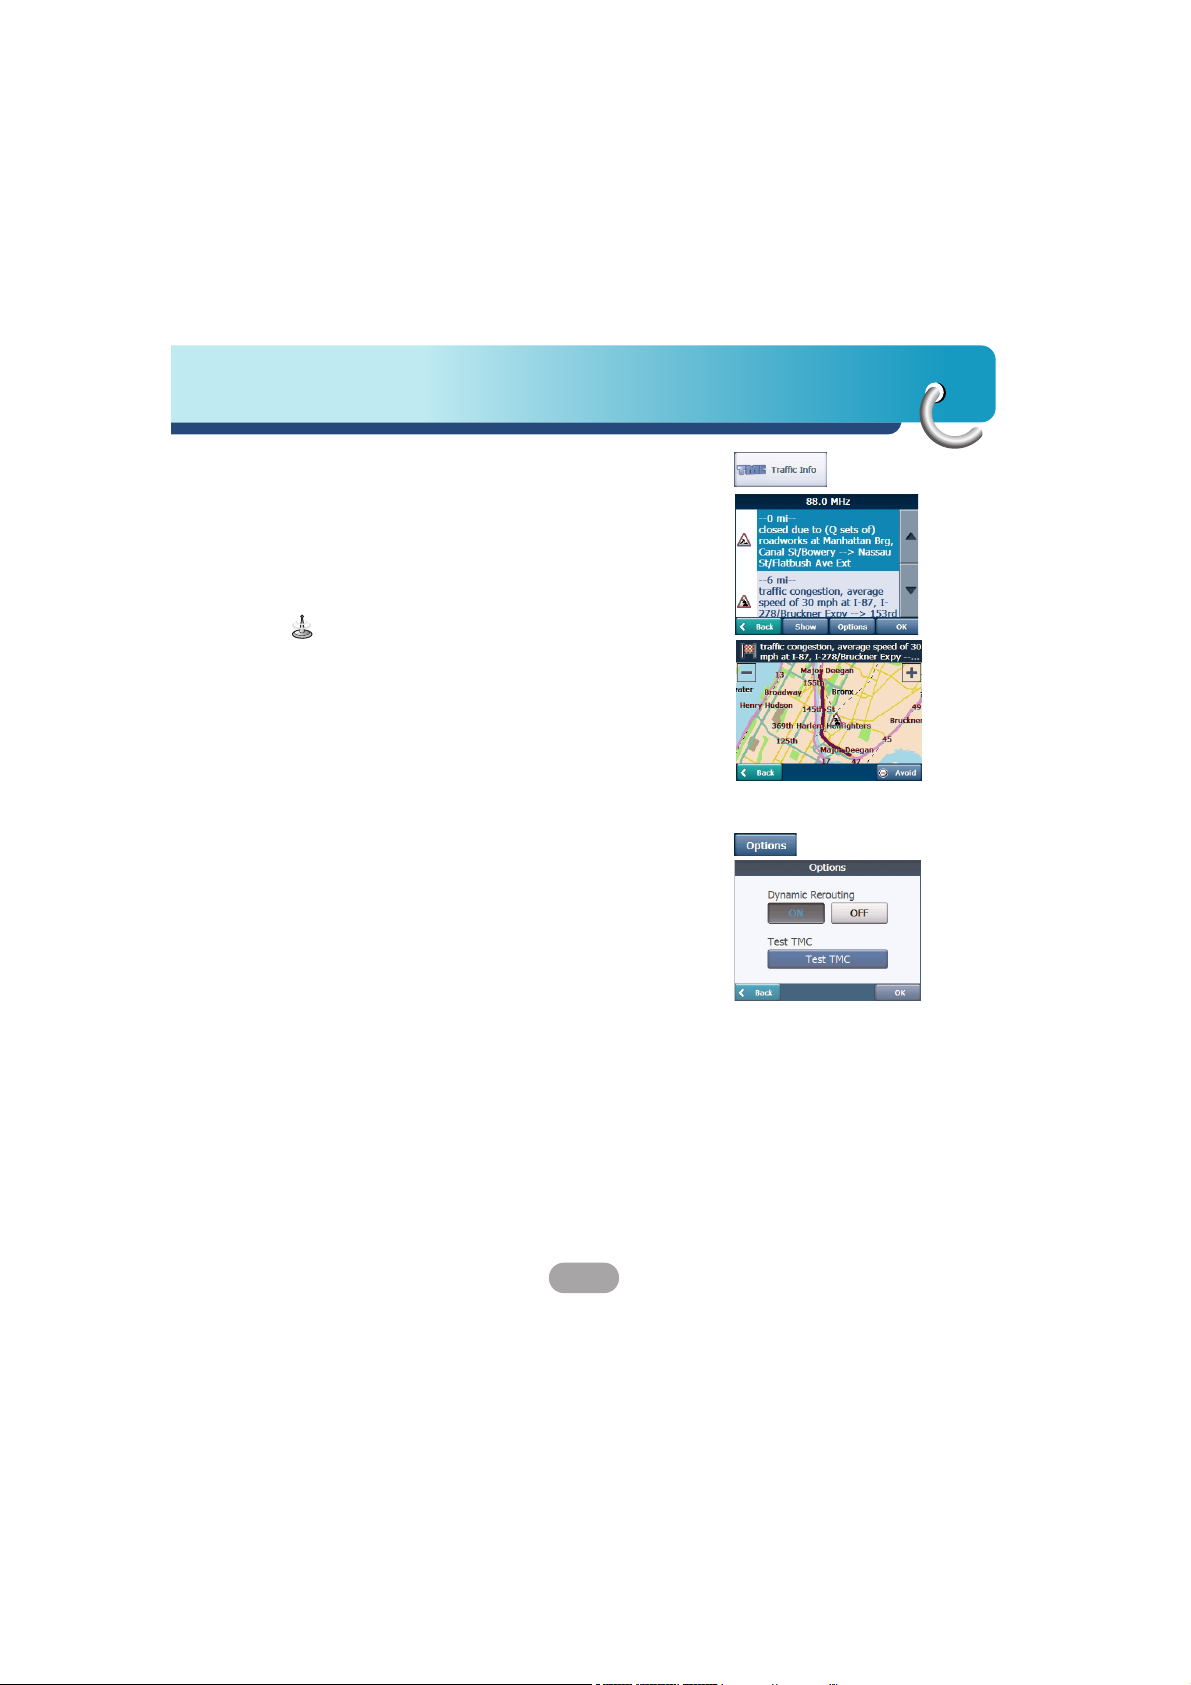
1. From the Navigation menu, select the “Traffic Info”
button, which opens the TMC inbox, and
displays traffic reports.
2. You can select a traffic report and tap “OK” to
show a map of the affected road.
If you click the “Avoid” button, the Navigation
recalculates your route.
• If the event was avoided, the Show Map screen
displays the “Allow” button to recalculate to that
previously avoided route section.
• All TMC messages are delivered to the TMC Inbox,
but only messages relating the direct route and 200
meter radius are displayed. The radius is set to 160
kilometers when no route has been selected.
Traffic Info Options
You can tap the “Options” button, the “Traffic Info
options” dialog box is displayed, as shown below.
These options have already been preconfigured for
the best performance. It’s not advisable to change
them. However, you can change the Traffic Info.
Option configurations by selecting the following
settings:
Dynamic Rerouting :
ON - The Navigation automatically
recalculates the route to avoid a road with adverse
traffic conditions – traffic jam or accident only.
OFF - You can manually select the TMC event from
the inbox and tap the “Avoid” button from the Show
Map screen.

Finding a location with navigation
48
Test TMC :
When you tap this button, The Navigation expands
the search radius for to the "Whole Map" for one
minute and switches automatically to the TMC Inbox
screen and Displays one test message called
"Testing TMC Service". After one minute, Navigator
reverts to the route and the 200 meter radius.”
If you do not receive any message after tapping this
button, please check in the following order:
1. If you see the turner scanning but not locking on a
TMC station, try to change your position and
check that you have put your antenna vertically
upright.
2. Depending on your location, you may not have
TMC coverage.
3. Check that you are using the map of the country
that you are currently traveling in.
Please make sure your navigation unit acquires the
GPS signal before starting Traffic service free trial or
subscription.
(Current position icon will turn green when GPS
signal is acquired)
If you complete traffic service free trial without
acquiring GPS signal, the unit may not display the
accurate expiration date.
However, if the unit acquires GPS signal after
completing traffic service free trial or subscription, the
expiration date will be automatically
adjusted and displayed correctly on the screen.

49
Finding a location with navigation
Route Manager
From the Navigation menu, tap the “Route Manager”
button to display Navigator’s route
navigation features, as described in the sections
below.
Turn-by-Turn List
After you have entered a destination and calculated a
route, the Directions bar appears at the top of the
Map screen, displaying the following information:
•
The next turn direction
•
The distance to the next turn
•
The street name of the next turn
Tap the “Turn-by-Turn” button on the Route Manager
menu. The Navigator displays a complete set of
turn-by-turn directions from your current point to your
selected destination. Use the Scroll buttons to move
up or down the directions list.
The following options are available:
The “Route” button displays your entire route on the
Map screen, plus the travel distance and the
Estimated Travel Time Remaining (ETR).
The “Turn” button displays the next turn on the Map
screen, including the street name, the distance to it,
and the direction of the turn.
The “Avoid” button lets you avoid the selected turn in
the directions list. The Navigator recalculates the
route automatically.
Note that when you exclude a turn, the recalculated
route may take longer.
Finding a location with navigation
50
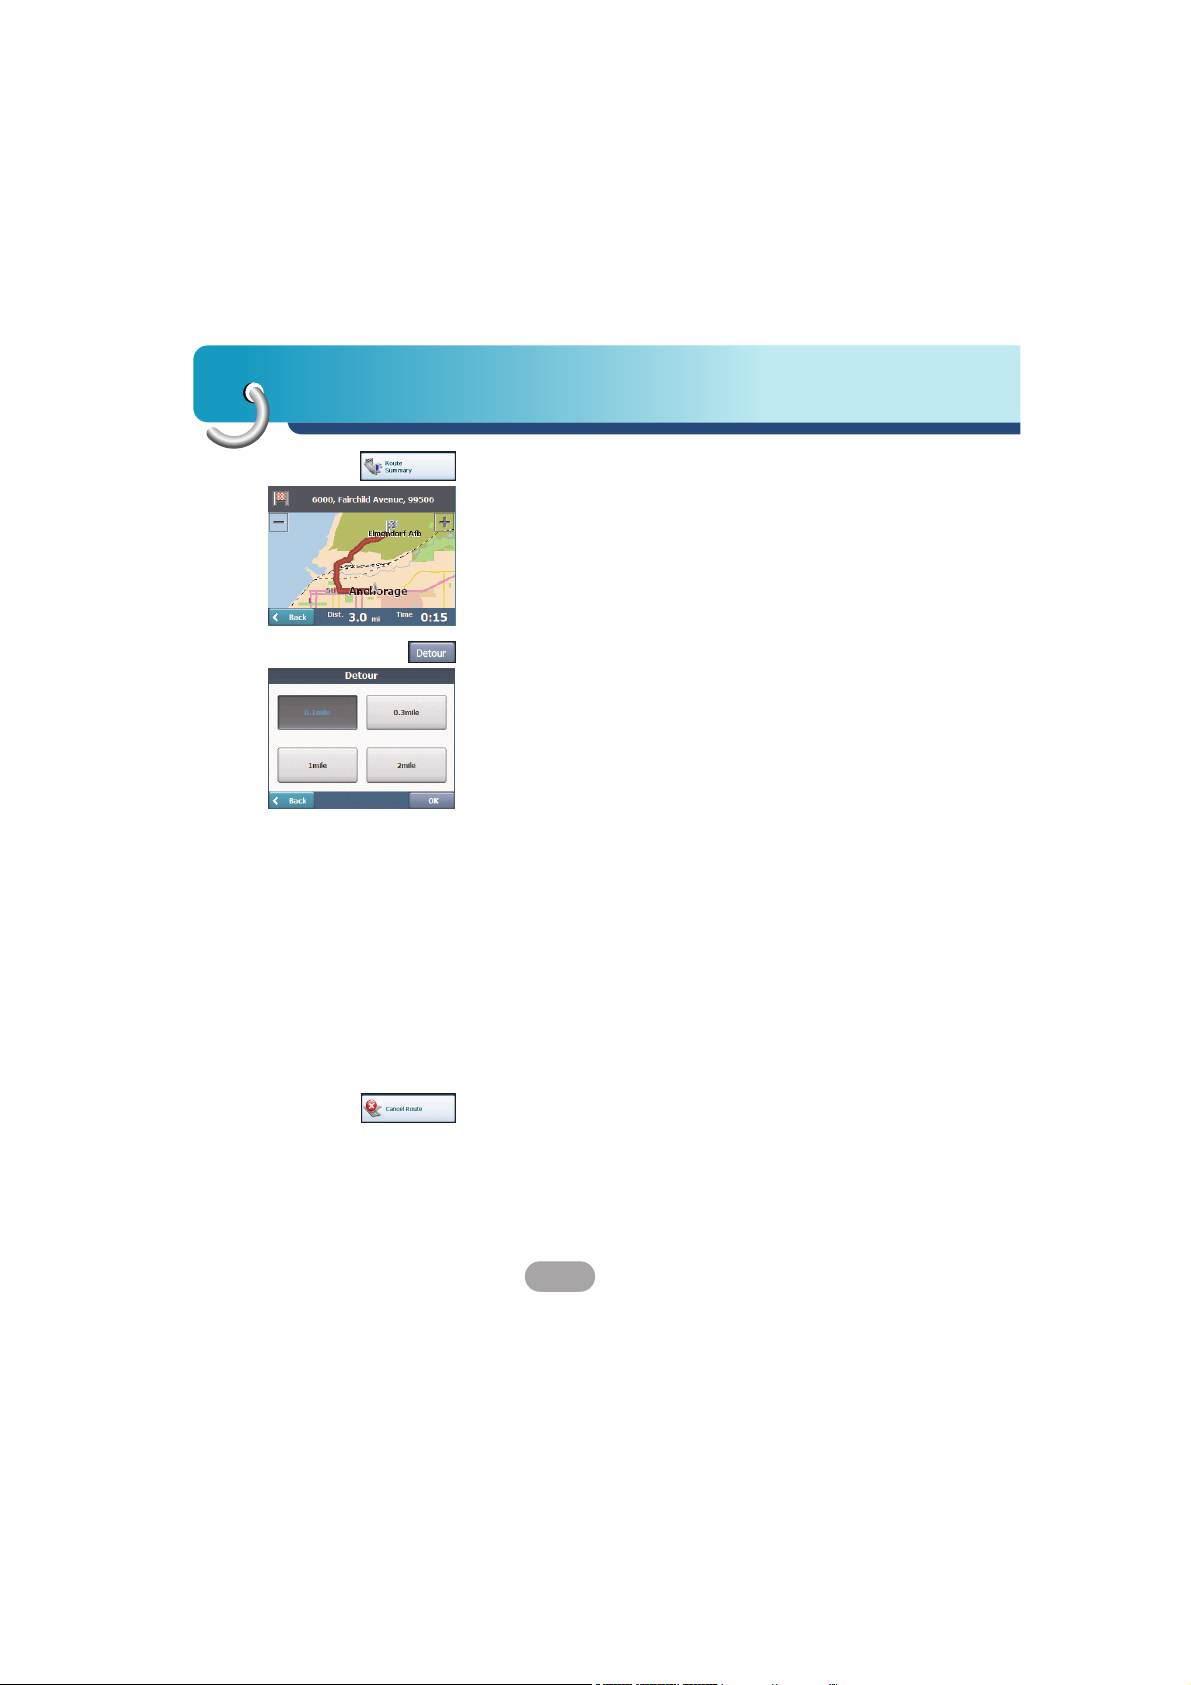
Route Summary
The “Route Summary” button lets you display an
overview of your complete route on the Map screen,
the total driving distance to your destination, the
estimated travel time, and the complete destination
address.
Detour
You can specify that certain roads be permanently
excluded from your route calculations. Use this
feature when you want to avoid congested roads, toll
roads, or unsafe streets.
1. From the “Route Manager” menu, tap the
“Detour” button.
2. The Detour screen appears, displaying the detour
distance options to avoid a road event, such as an
accident.
3. Select the Detour option that you want and tap the
“OK” button to generate a detour for the distance
specified.
For example, if you are traveling on Highway A4
and you are alerted by the news that there is a
terrible traffic for the next 2 Km, you can have
calculate a detour that takes you off the highway
and then returns you back to the highway after a
distance of 2 Km.
Cancel Route
If you no longer need to travel to your destination or
if you want to change your destination.
51
Finding a location with navigation
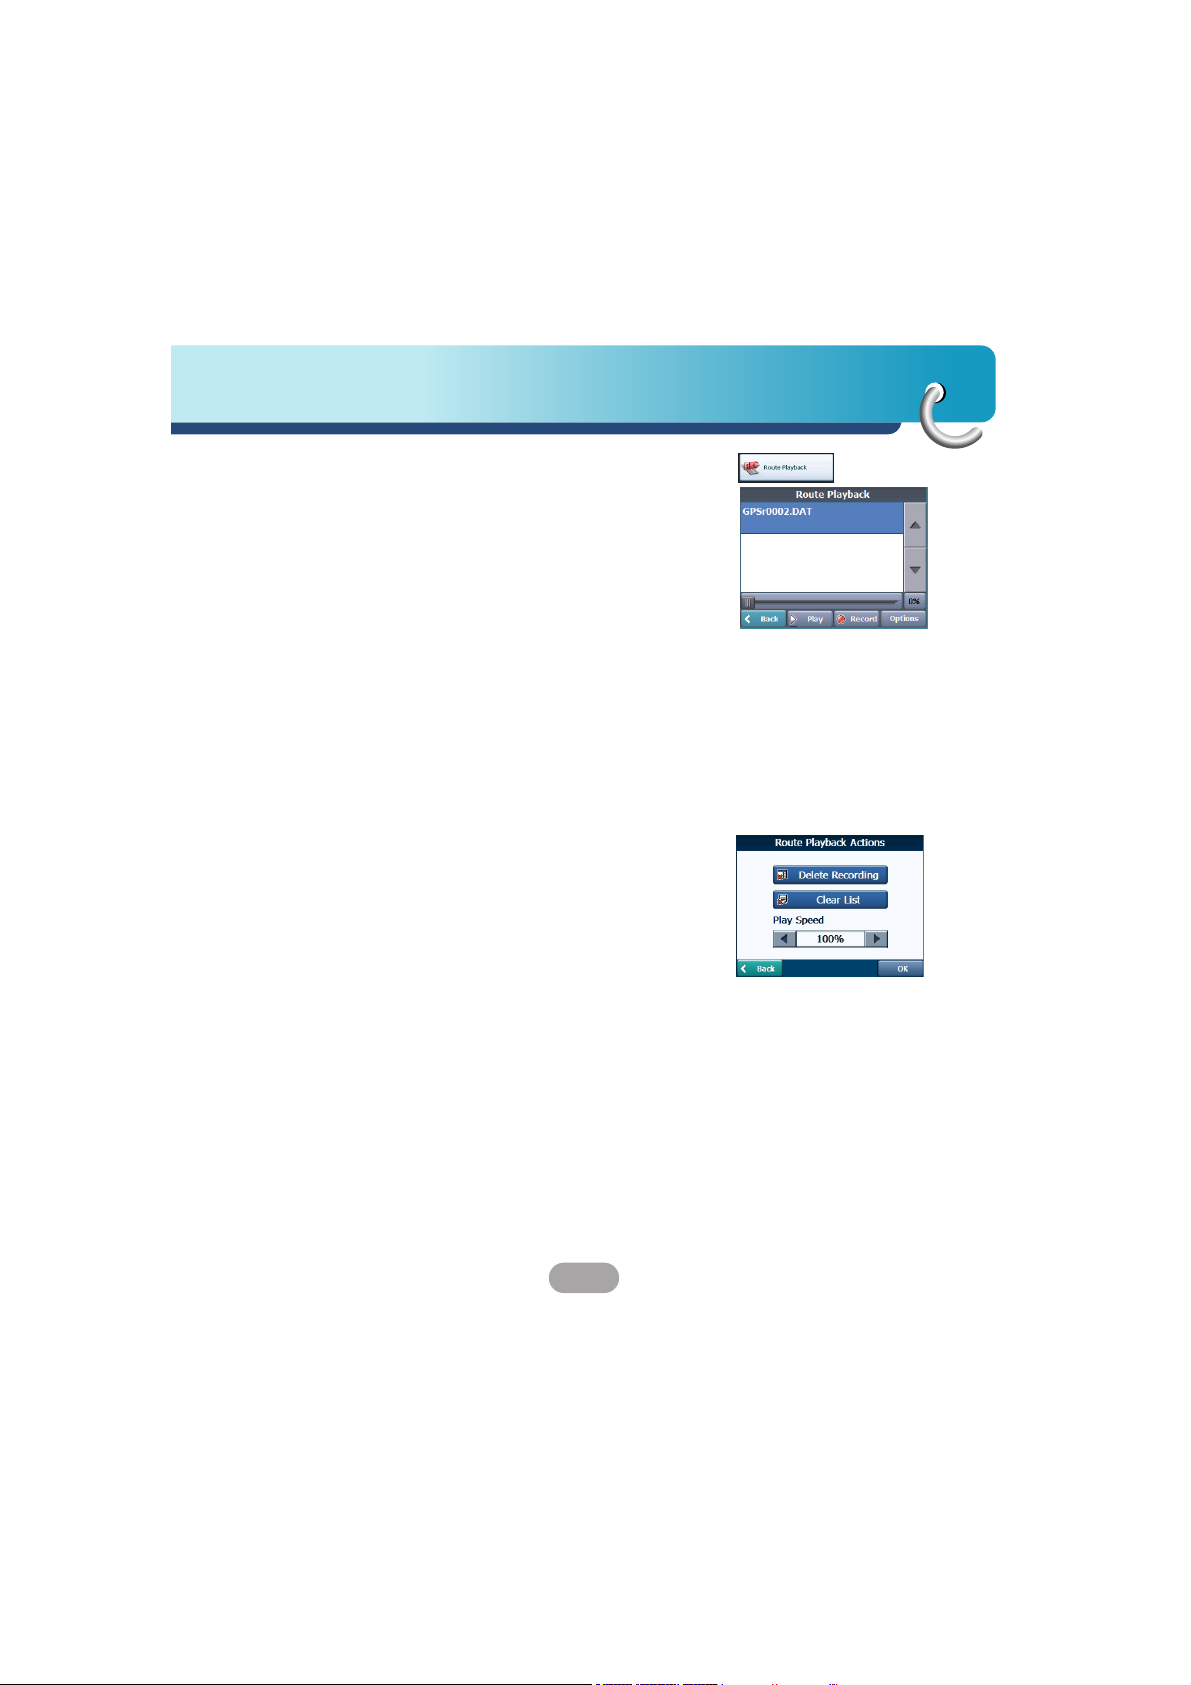
Route Playback
This feature lets you record your route as you’re
driving and then to play it back on the Main Map
screen.
1. To record a route, tap the “Record” button in the
Route Playback screen. The navigator shows the
Main Map screen and navigates you to the
selected destination.
2. To stop recording, return to the Route Playback
screen and tap the “Stop” button.
3. To playback your recording, select the data file,
and tap the “Play” button.
The navigator plays the recorded route on the
Main Map screen.
4. To stop the playback, return to the Route Playback
screen and tap the “Stop” button.
Route Playback Options
You can tap the “Options” button to display the
following commands:
•
Delete Recording
This button lets you remove a selected recording.
•
Clear List
This button removes all recordings.
•
Playback Speed
Use the arrow keys to adjust the playback speed.
The range is from 100% to 300%.
Finding a location with navigation
52
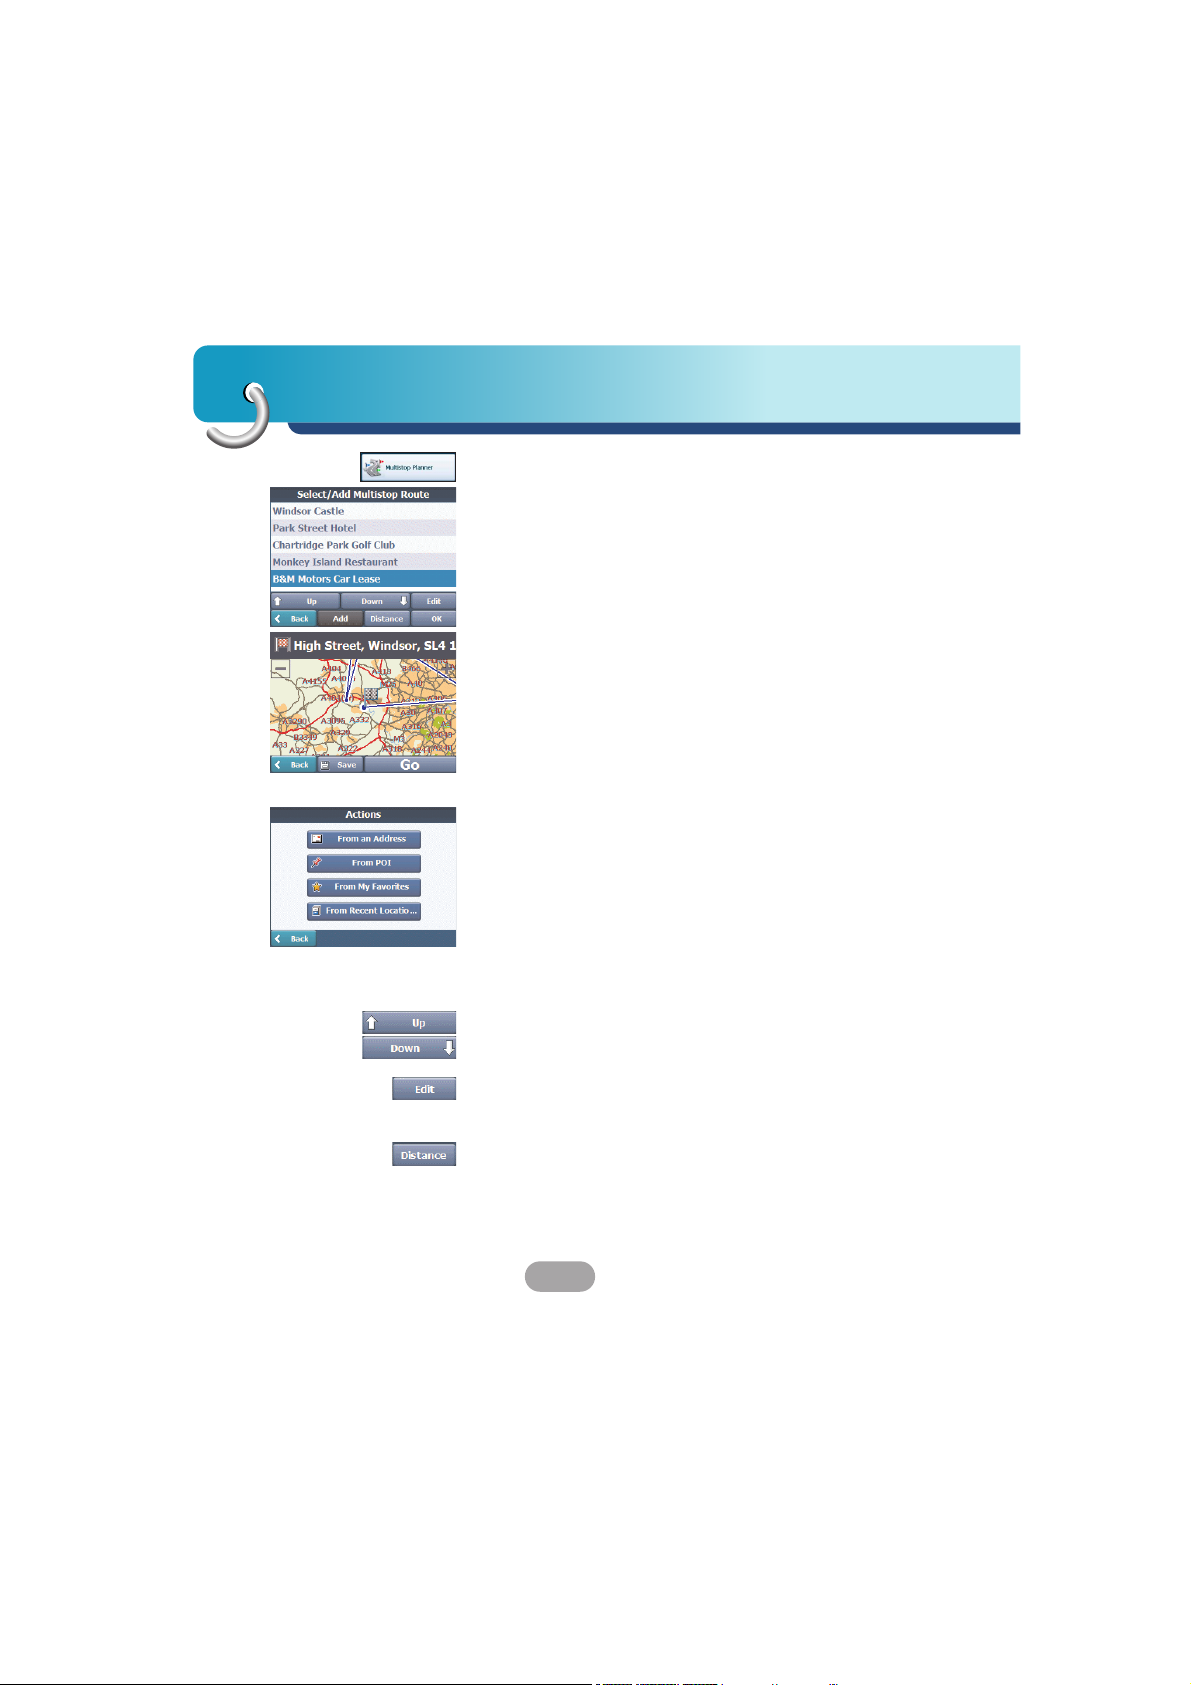
Multistop planner
Edit Way Points lets you plan a route with up to 5
stops.
When you tap the “Go” button, the route is
calculated in stages, from the departure point to the
first stop. When you reach the first stop, the route
recalculates to the second stop, and so on.
Setting Stops Along the Route
1. From the “Select/Add Multistop Route” screen, tap
the “Add” button to add a stop by Address, POI,
My Favorites, or Recent Locations.
2. Select one of these options, specify a location, and
tap the “OK” button.
3. The “Select/Add Multistop Route” screen appears
with the selected location.
Use the “Up” or “Down” buttons to change the order
of your itinerary.
Use the “Edit” button to show or delete a highlighted
entry.
Use the “Distance” button to organize your entries
from closest to farthest distance from your current
location.
53
Finding a location with navigation
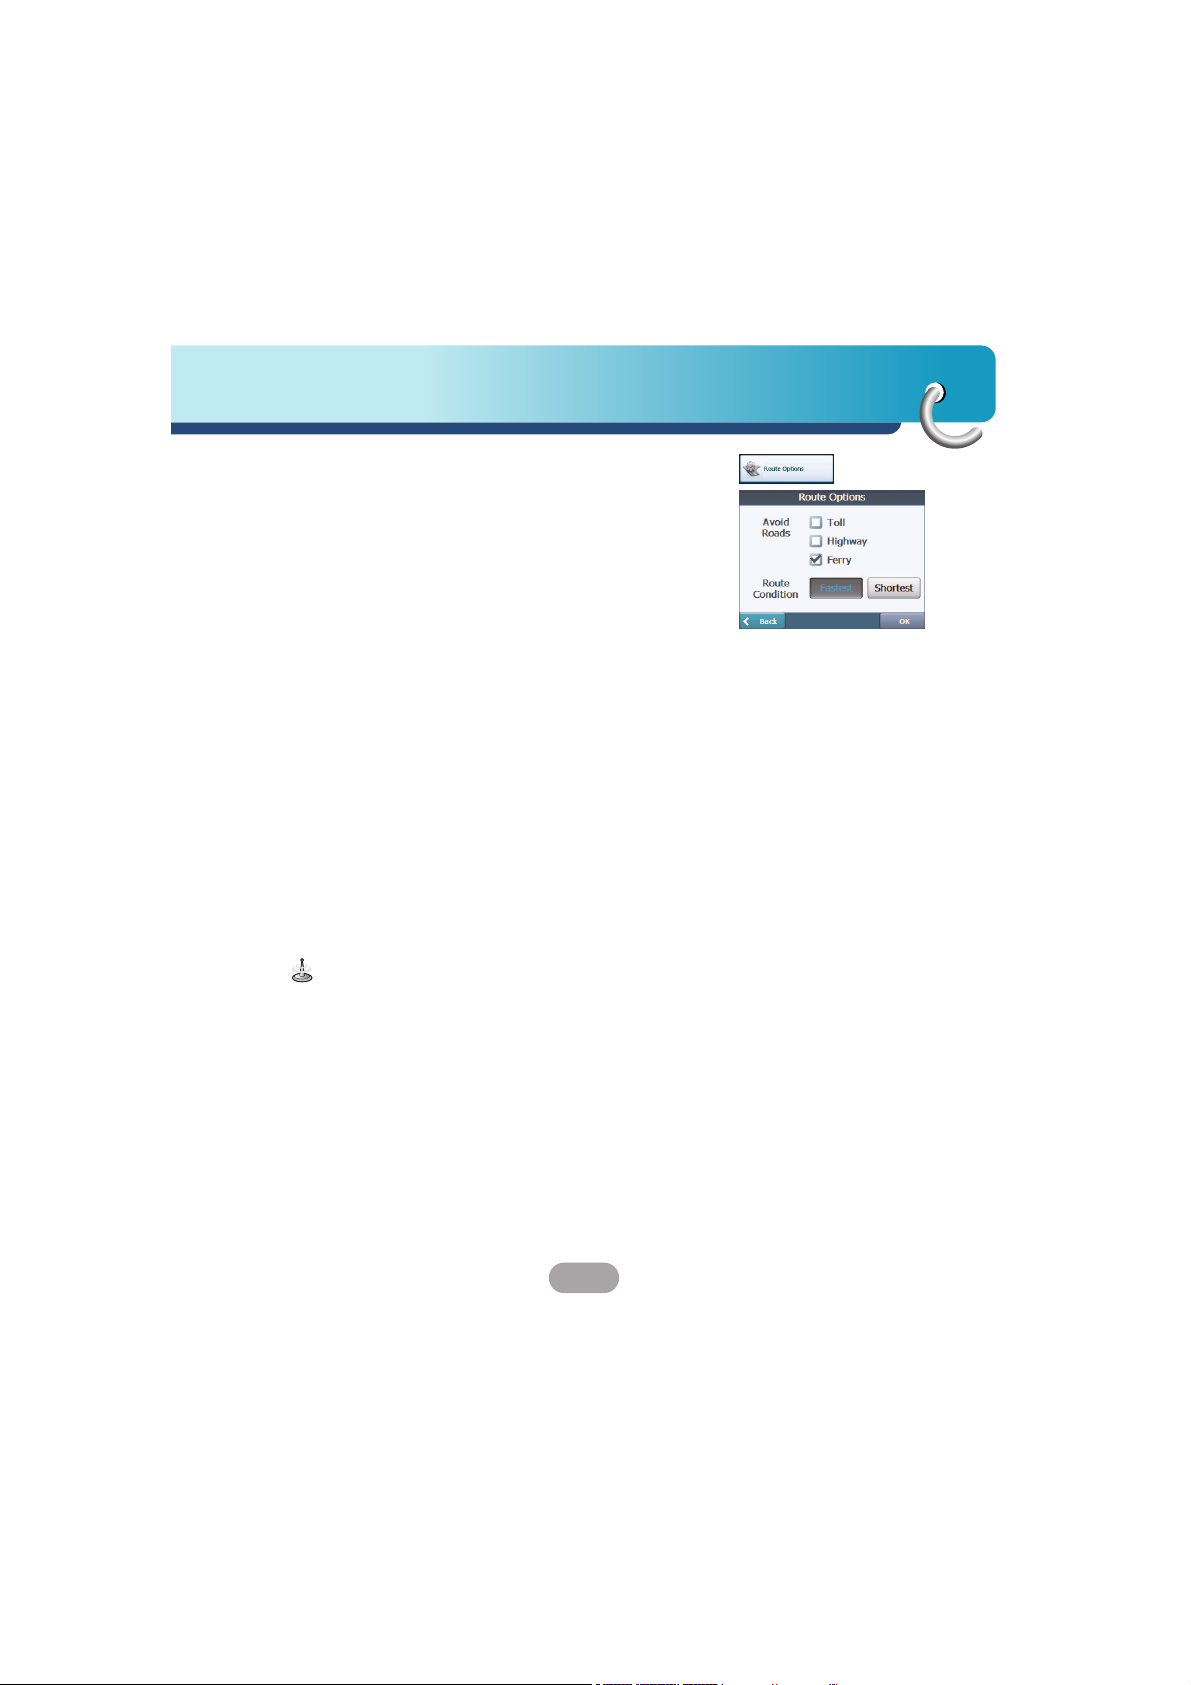
Route Options
You can use Route options to determine what road
categories to avoid or allow and to set the default
route type when Navigator calculates your selected
destination.
Avoid Roads
Toll, Highway, and Ferry route sections are avoided
or allowed as determined by whether they are
selected, when Navigator calculates a route.
You cannot allow or avoid specific toll roads or ferry
routes.
Route Condition
Fastest:
This option selects the route that takes the least
amount of time.
Fastest is the default value.
Shortest:
This option selects the route that is the shorter
distance. Remember, the shorter route may not
always be the quickest, as you are able to travel
faster on some roads than on others.
Route generation excludes any detours, stops or
delays along the route.

Setup
54
Display
Tap the “Display” button to determine how
Navigator’s map view is displayed, as shown below.
Dimension
The 2D and 3D Mode buttons lets you display the
map view in 2-dimensional or 3-dimensional views for
either day or night driving.
Day&Night
The Day and Night Mode buttons lets you display the
map view for either day or night driving.
The Auto button automatically adjusts the map view
for day or night driving.
The optimum level in accordance with the ambient
light based on the light sensor.
Map Display
The Pedestrian Mode button lets you toggle between
traveling as a pedestrian or in a vehicle.
When in Pedestrian Mode, you can generate a route
up to ten kilometers and you are not limited by
vehicle constraints, such as one way streets.
When creating a pedestrian route, the Navigator
avoids motorways or other roads where pedestrians
would not travel.
Voice prompts are deactivated in this mode.
Brightness
You can use the Brightness slide bar to adjust the
backlight level.

55
Setup
Map Views
The map views below let you see the differences
between 2d/3d day/night conditions.
2D Day Mode Map View
2D Night Mode Map View
3D Day Mode Map View
3D Night Mode Map View

Setup
56
Units & Time
You can tap the “Units & Time” button to specify units
of measure system and adjust the time as
displayed on your Navigator.
Distance Unit
Miles : Display and announce in miles
Kilometers : Display and announce in kilometers.
Adjust Hour
You will see the current values of GMT, and use one
time zone, Greenwich Mean TIME (GMT).
Language
Lets you select the language for text and voice travel
messages and driving directions.
Guidance
You can select the types of voice and visual
notifications that you would like to use while
navigating.
Speed Warning
Warns you when your car exceeds the speed limit.
This prompt is not active by default.
Route Recalculation
Activated when the Navigator recalculates a new
route.
This prompt is not active by default.
57
Setup
Unreliable GPS Signal
Warns that the GPS signal is too low and unreliable
for navigation.
This prompt is automatically active by default.
Traveling to...
Reminder at the start of each journey.
This prompt is automatically active by default.
Say Rd
You can set the type of the guidance name that you
will use to navigate the route.
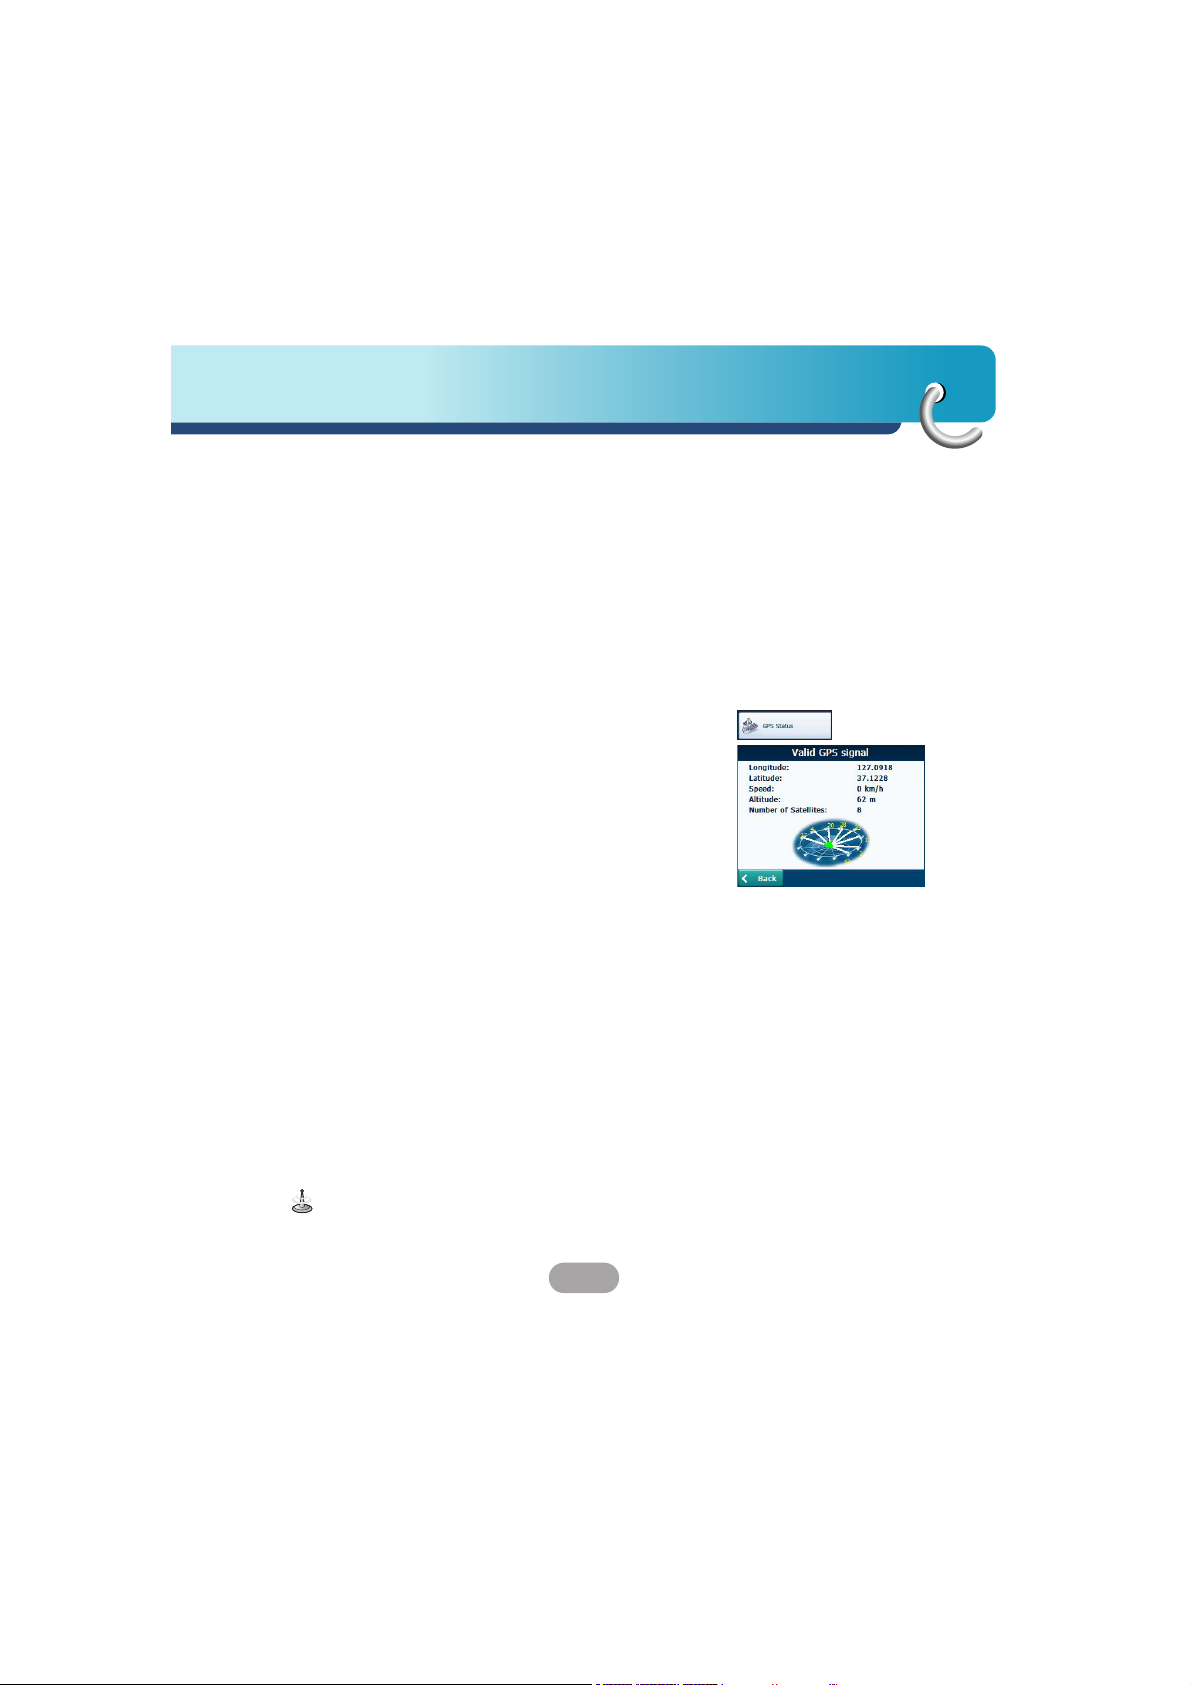
GPS Status
The Navigator uses the GPS receiver to pinpoint
your location. GPS signals are automatically
acquired and your vehicle's location and position are
constantly updated.
The GPS receiver may take a few minutes to find its
initial location.
For best results, ensure that the GPS receiver has a
clear view of the sky.
The following GPS information is displayed:
•
Longitude: The angular distance east or west on
the earth's surface.
•
Latitude: The location of a place north or south of
the earth's surface.
•
Speed: The rate of movement, as expressed by
kilometers or miles per hour.
•
Altitude: The height above sea level.
•
Number of Satellites:You can check reception
signals from the GPS satellite.
If GPS signal can not be acquired for long, please
restart whole navigation system by pressing Reset.
Setup
58
GPS Not Found
When you first start the Navigator you will hear the
message “Signal too low”. This message means that
your navigation device hasn’t yet located a reliable
GPS signal. Check that your device is connected to
the cigarette lighter and has a clear view of the sky.
The “GPS not found” message means that there is
not GPS antenna or the antenna is not properly
installed.
Please check that:
•
The GPS antenna has a clear view of the sky for
uninterrupted GPS reception. The Navigator cannot
calculate the route if there is no GPS reception
(for example, in a tunnel).
•
The navigation device is charged or connected to
the cigarette lighter.
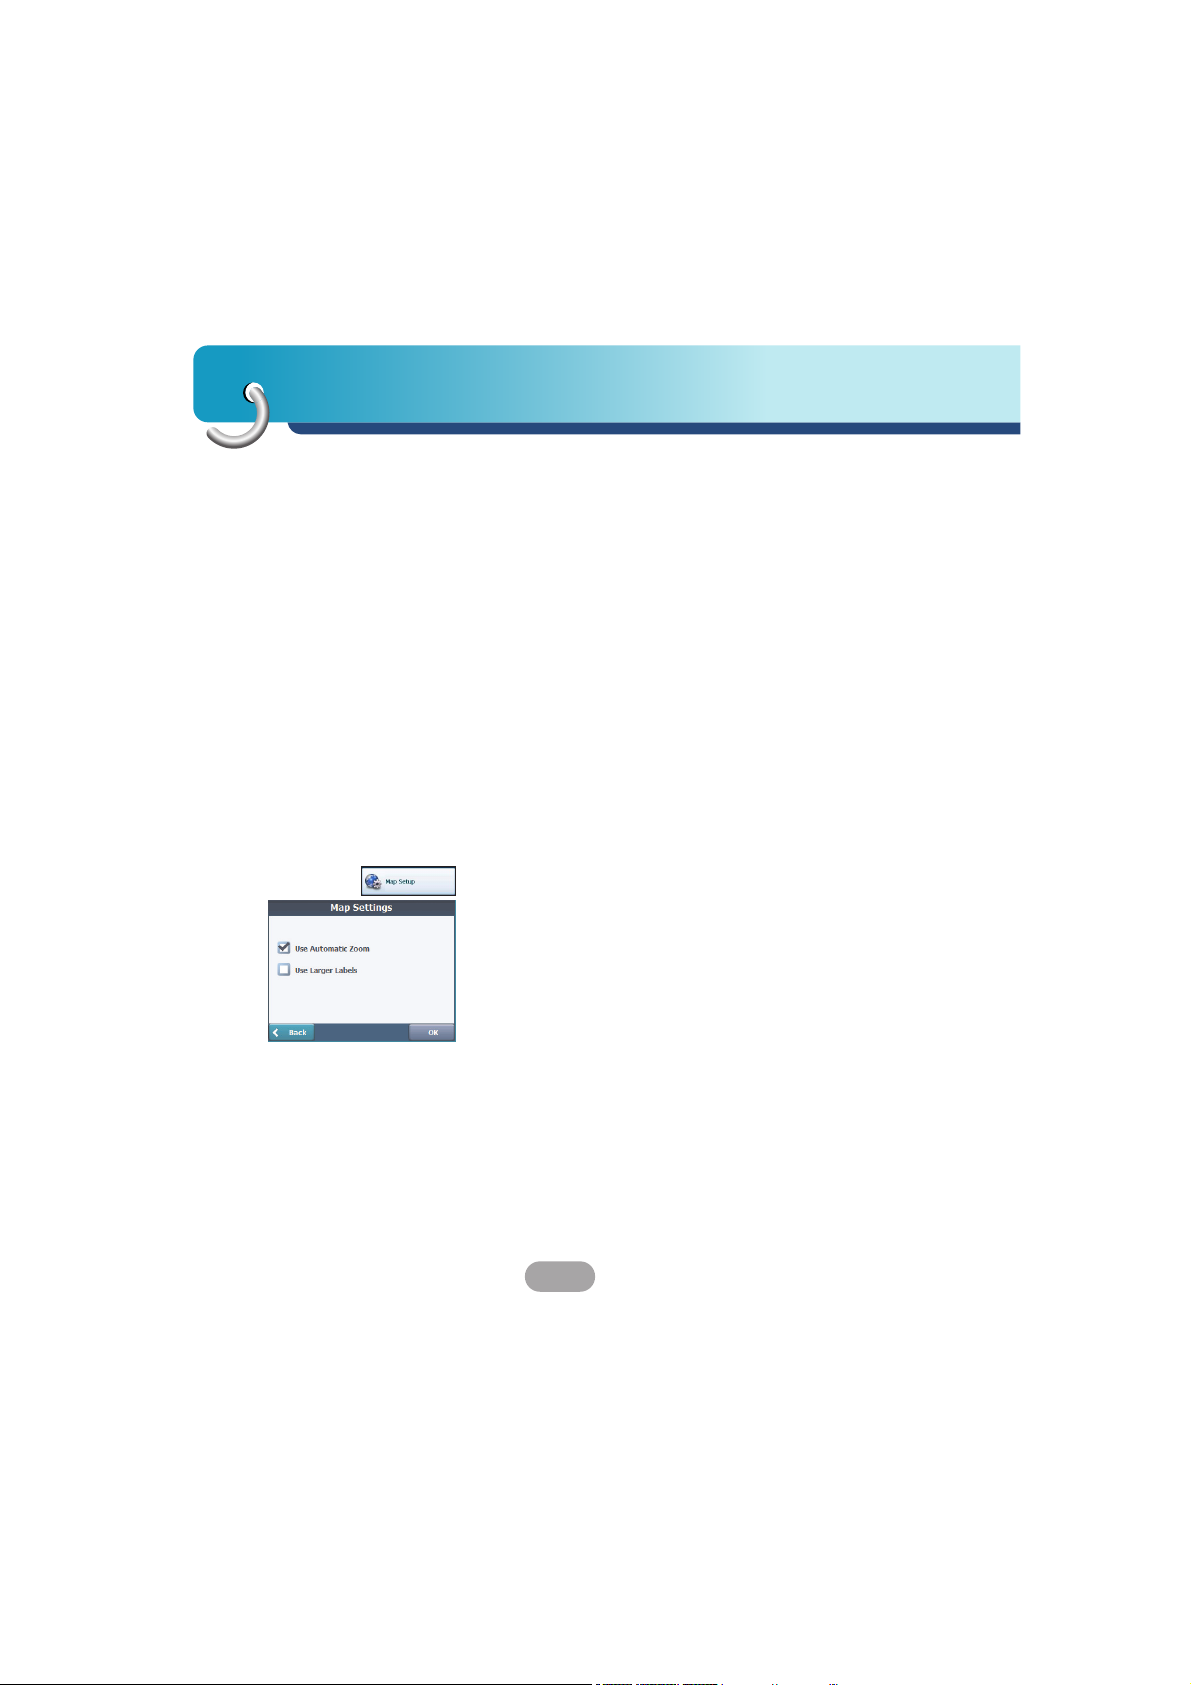
Map Setup
You can tap the “Map Setup” button to customize
your map display.
Use Automatic Zoom
When this option is selected, the zoom is speed
dependent. The map zooms out at higher speeds,
displaying a larger map area, and zooms in at slower
speeds, displaying a smaller map area.
If you manually change the zoom, the Automatic
Zoom returns to a system defined zoom level after
several seconds of inactivity.
Use Larger Labels
This option increases the size of street names to
make the map easier to read.
 Loading...