

Page 1
6-2. Setting the Password
This process is to set a password so that other people cannot use the notebook PC or change the settings.
The user can set a password while booting the system or setting up the system.
■
Without the registered password, if any, access to the system will be denied. Write down and keep the
password in a safe place.
▶
Supervisor password
The password prevents unauthorized people from accessing the notebook PC. By default, no password.is set for the machine.
In case an unauthorized person changes the CMOS setup while the notebook PC is on, a password will be set and the user
will be denied from the access to the system.
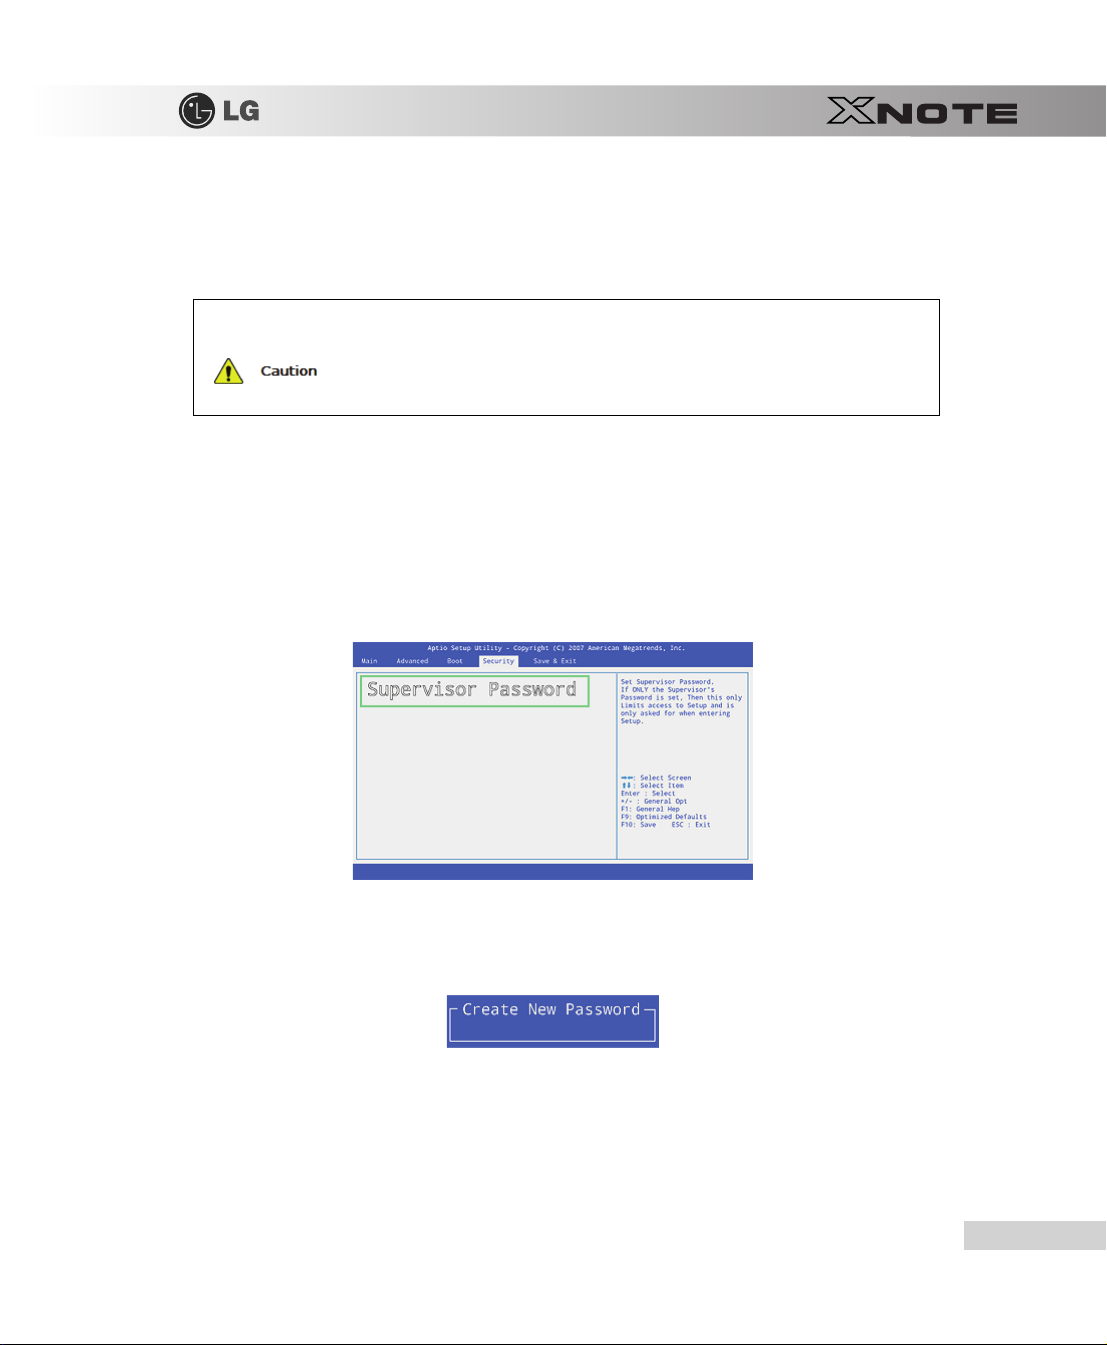
1.
After opening the system setup screen, use the arrow keys to move to
2.
When the following screen appears, select
Supervisor Password
Security
.
with the arrow keys and press [Enter].
3.
When the following message appears, input the password and press [Enter]. The password must not exceed 6 characters of
letter (A~Z), number (0~9) or their combination.
System Setup
79
Page 2
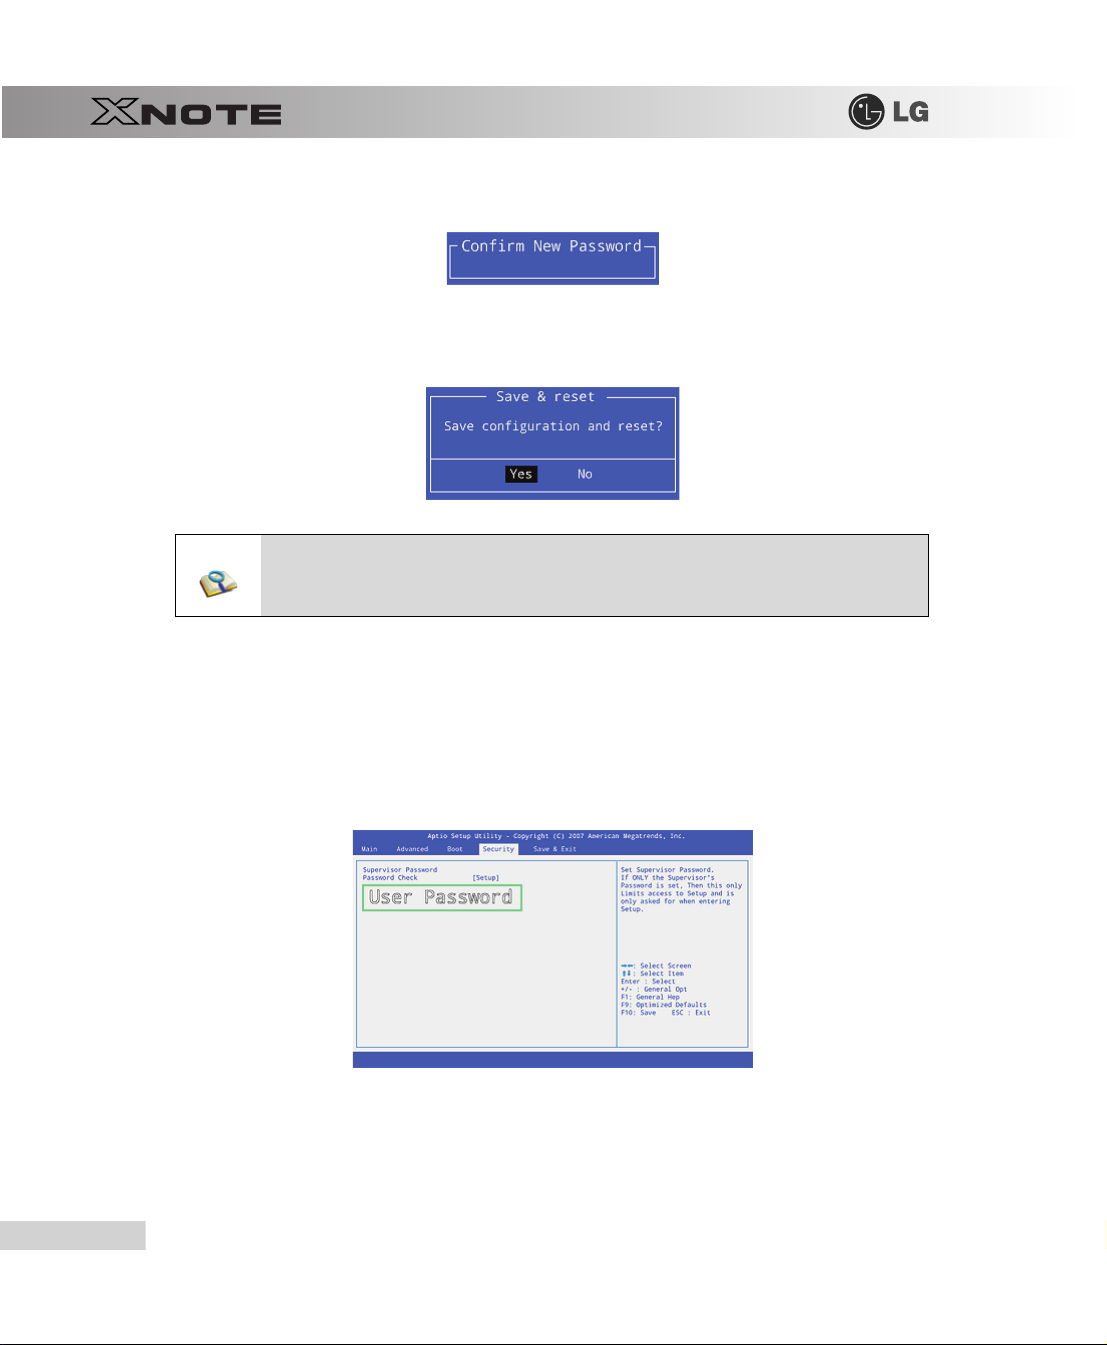
4.
When the password confirmation message appears, enter the password again and press [Enter].
5.
To save the changes in system setup, press [F10].
6.
When the following message appears, select [Ye s] and press [Enter]. The notebook PC will restart.
■ Supervisor Password has the privilege to set all the entries in CMOS Setup. It is
recommended to use User Password if people other than you use the system.
▶
User Password
The password set in the
so the user can use the
1.
After opening the system setup screen, use the arrow keys to move to Security.
2.
When the following screen appears, select the
User Password
User Password
menu is lower than that set in the
only after setting a password in the
User Password
item with the arrow keys and press [Enter].
Supervisor Password
menu, and
Supervisor Password
menu.
80
System Setup
Page 3

3.
When the following message appears, input the password and press [Enter]. The password must not exceed 6 characters of
letter (A~Z), number (0~9) or their combination.
4.
When the following message appears, press [Enter].
5.
To save the changes in system setup, press [F10].
6.
When the following message appears, select [Ye s] and press [Enter]. The notebook PC will restart.
■ User Password allows limited access to the entries in the CMOS Setup menu
compared to Supervisor Password.
▶
Password Check
Password on boot feature protects the system by requesting the Set Supervisor Password or Set User Password during boot up.
1.
After opening the system setup screen, use the arrow keys to move to Security.
System Setup
81
Page 4
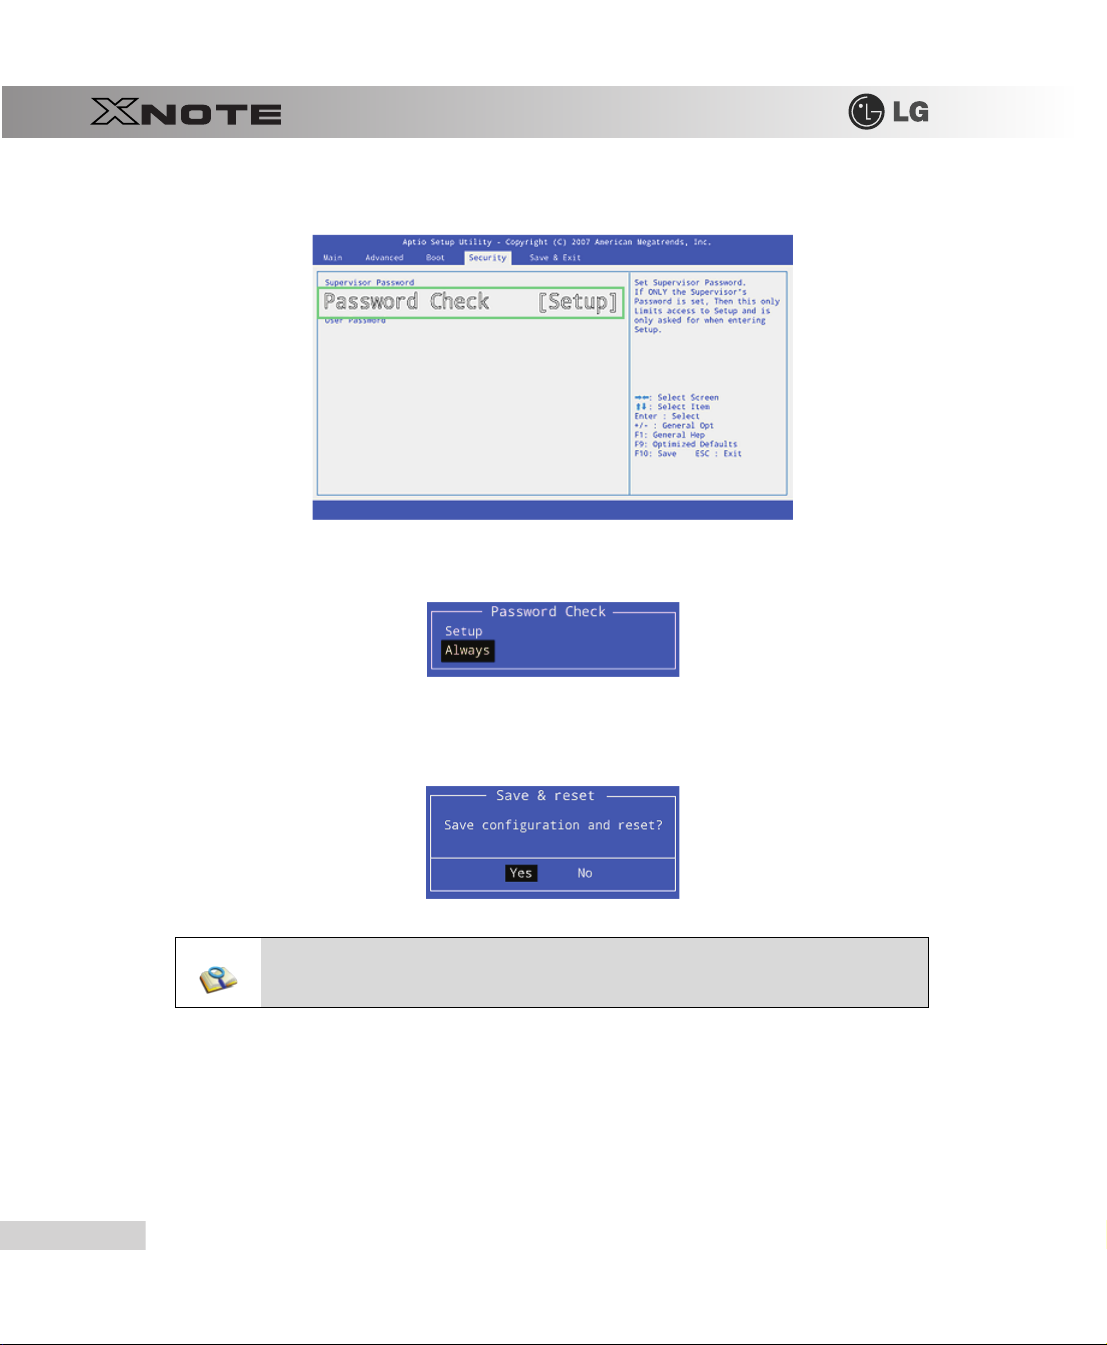
2.
Select
Password Check
3.
When the following screen appears, select [Always] and press [Enter].
4.
To save the changes in system setup, press [F10].
5.
When the following message appears, select [Ye s] and press [Enter]. The notebook PC will restart.
and press [Enter].
82
■ You may also press the [Shift] + [+] keys to toggle between [Setup] and [Always].
System Setup
Page 5

6-3. Changing or Deleting the Password
You can delete or change the password only after inputting the current password.
▶
Changing the Password
1.
Select [Security] > [Supervior Password]
2.
Change the password in the same way as setting one.
▶
Deleting the Password
1.
Select [Security] > [Supervior Password]
2.
When the following screen appears, press [Enter].
or [User Password]
or [User Password]
, press [Enter], and enter the password.
, press [Enter], and enter the password.
3.
When the following screen appears, press [Enter].
4.
The password is deleted.
System Setup
83
Page 6
6-4. Restore the Default Settings
If you have changed the system setup by mistake, you can restore the default settings.
1.
After opening the system setup screen, use the arrow keys to move to [Save & Exit].
2.
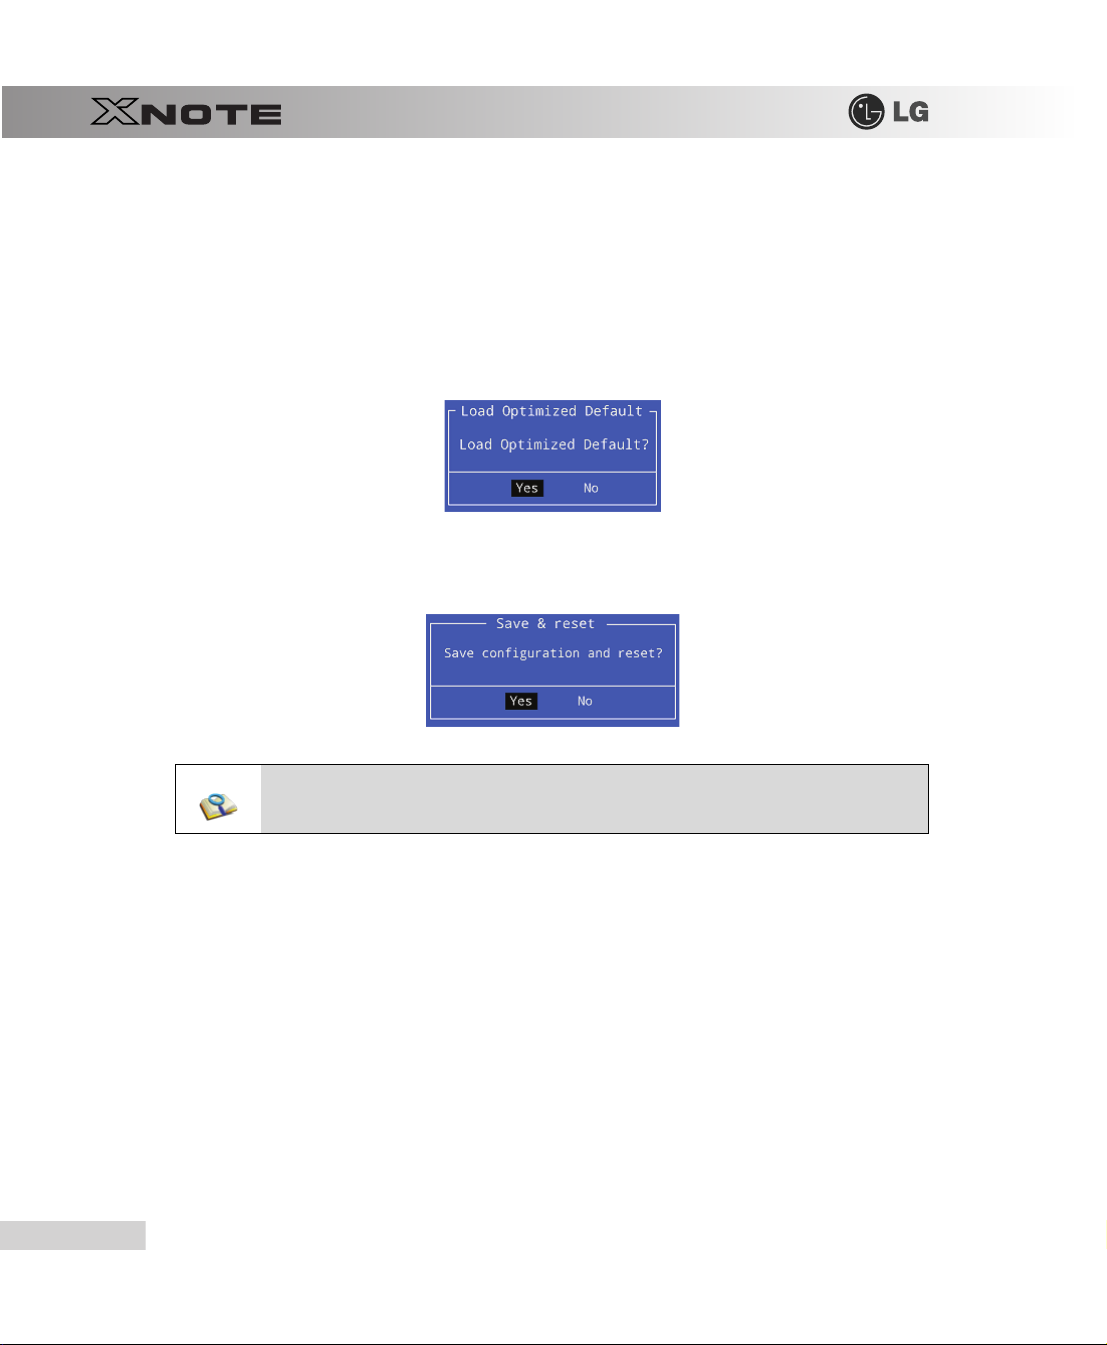
Use the arrow keys to select [Load Setup Defaults]
3.
When the following message appears, select [Ye s] and press the [Enter] key. The settings will be reset to their original
defaults.
4.
To save the changes in system setup, press [F10].
5.
When the following message appears, select [Ye s] and press [Enter]. The notebook PC will restart.
, and press [Enter].
84
■ You may also press [F9] to use Optimized Defaults.
System Setup
Page 7

Chapter 7. Restoring the System
Page 8

7-1. Restoring the System Using Restoration CD
To restore the hard disk, you need to back up necessary software and data files in advance. After completing Windows
installation, you need to register User Properties with Windows just as you do to the new system.
1.
Make backup copies of important data on the computer.
2.
Insert the restoration CD in the CD-ROM drive and reboot. When the [Press any key to boot from CD...] message
appears, press
3.
Follow the instructions on the screen to install
4.
After completing
User Properties according to the instructions on the screen.
-
To install Windows XP Media Center 2005 edition, you need to install DOTNETFX and Roll Up on OS CD No. 2 first.
Media Center 2005 may not be provided depending on the model.
Enter
.
Windows
MS-Windows
installation, remove the CD and reboot the system. When the following screen appears, register
.
86
5.
When
Windows
LG Intelligent Update
Restoring the System
has been installed, install necessary drivers and other applications with the provided
CD.
Page 9
7-2. Recovering System in General Case
1.
Check IMSM\F6Floppy\f6flpy32 on the LG Intelligent Update CD.
2.
Copy the Driver to the Floppy Disk by executing F6flpy32.exe in f6flpy32 folder.
3.
Installing with Windows XP CD and boot with the Floppy Disk by using USB Floppy Drive.
4.
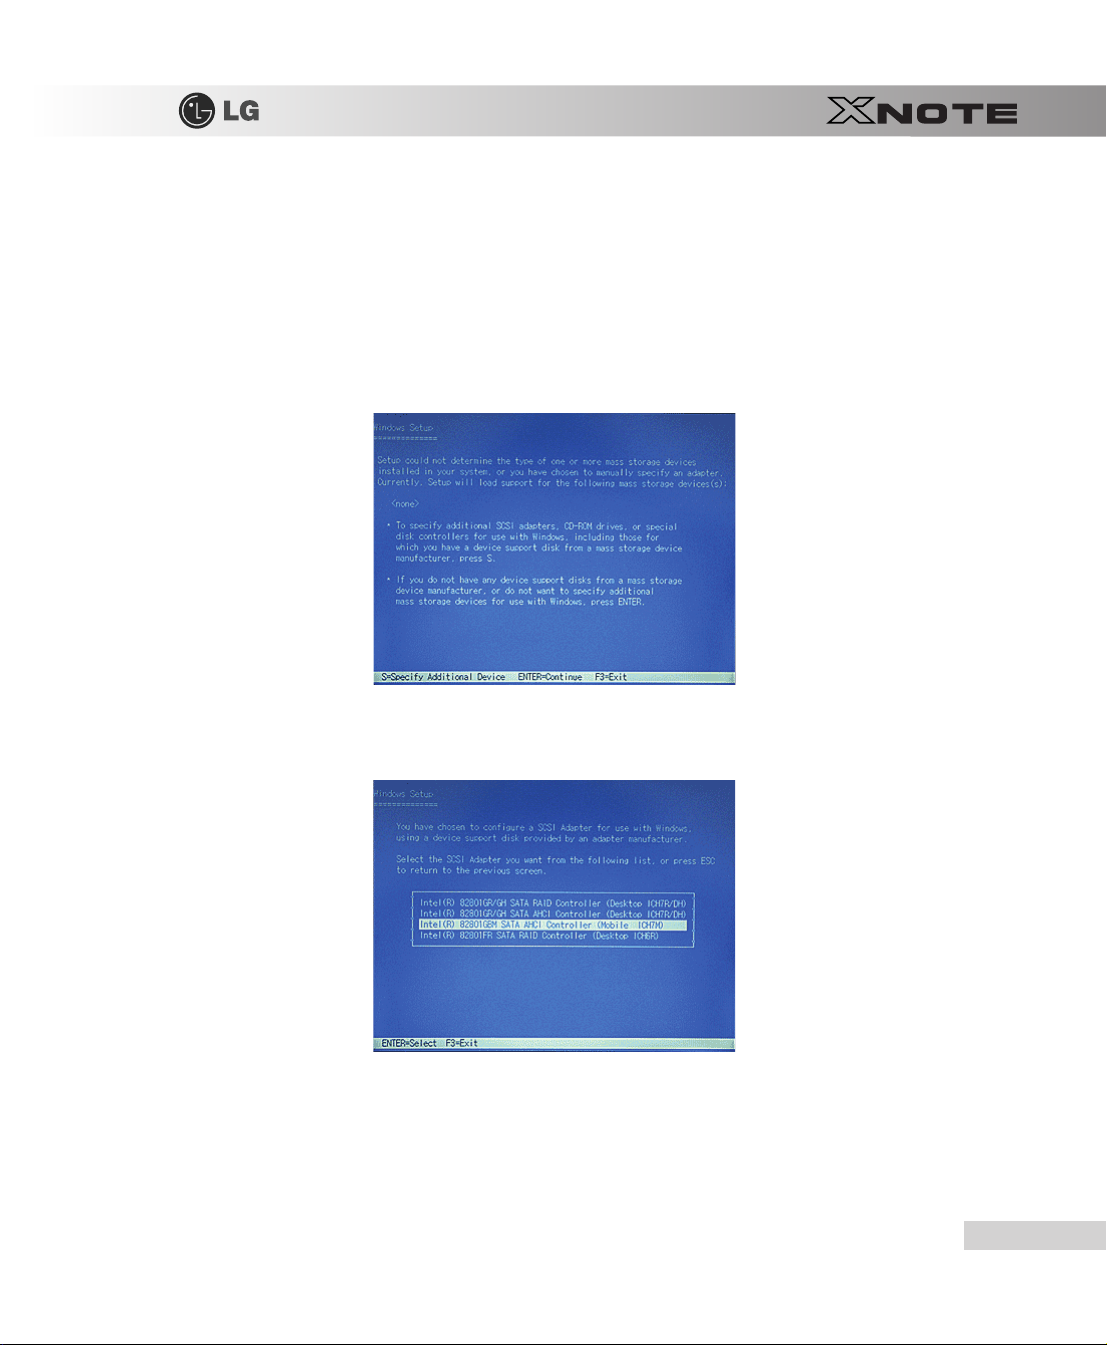
While booting with Windows XP CD, press F6 key right after the installing screen appears.
5.
When installation screen related SCSI and RAID appears, press 'S'.
6.
If another Controller selecting screen appears after those procedure, select 'Intel(R) 82801GBM SATA AHCI Controller
(Mobile ICH7M)'.
-
Intel(R) 82801GBM SATA AHCI Controller(Mobile ICH7M)
-
Intel(R) 82801GR/GH SATA RAID Controller(Desktop ICH7R/DH)
-
Intel(R) 82801GR/GH SATA AHCI Controller(Desktop ICH7R/DH)
-
Intel(R) 82801FR SATA RAID Controller(Desktop ICH6R)
-
Intel(R) 82801FR SATA AHCI Controller(Desktop ICH6R)
Restoring the System
87
Page 10

-
Intel(R) 82801FBM SATA AHCI Controller(Mobile ICH6M)
-
Intel(R) 82801ER SATA RAID Controller(Desktop ICH5R)
7.
If another select message appears after those procedure, select 'Enter' to proceed.
88
Restoring the System
Page 11
7-3. Upgrading Windows XP
If
Windows XP
disk. In the case that
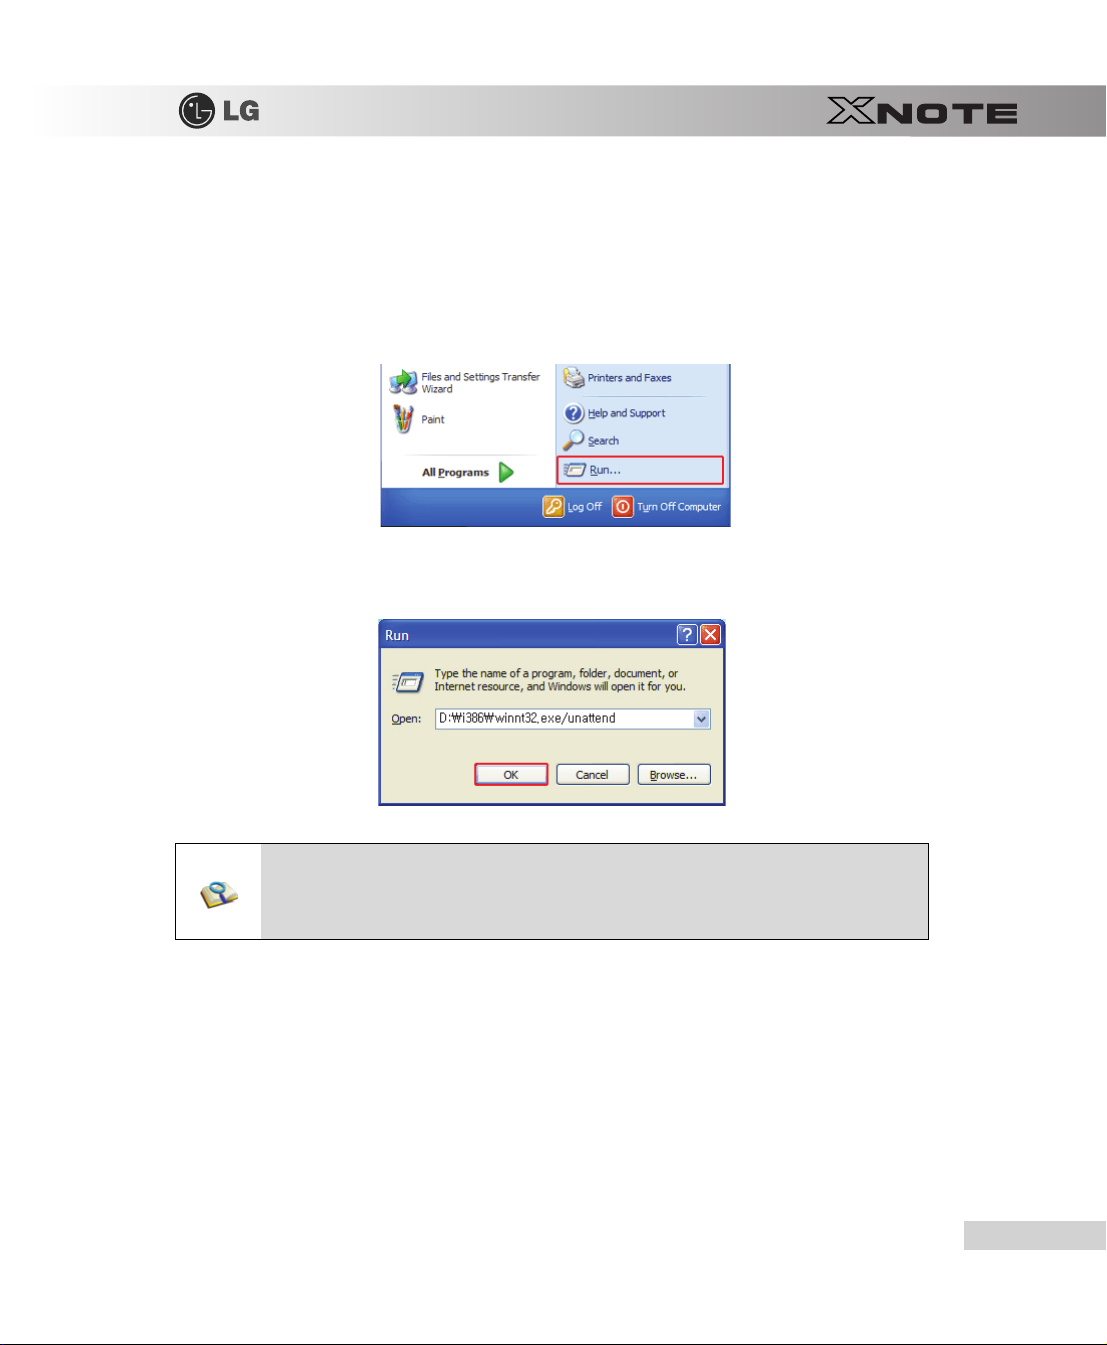
1.
Turn on the system where
2.
Click
3.
Insert the restoration CD, type D:\
OK
.
is al ready installe d, you can up grade existing
Sta rt
and
Run
Windows XP
Windows XP
buttons.
is already running on the hard disk, upgrade it as follows:
is installed.
i386\winnt32.exe/unattend
Windows XP
(When CD-ROM drive is Drive D), and click
with out fo rmatting the ha rd
■ To execute winnt32.exe without using Unattend option, you must input the Product Key
displayed on the computer case. In this case, you need to have the computer certified within 30
days after this.
Restoring the System
89
Page 12

90
Restoring the System
Page 13

Chapter 8. Reinstalling the Driver
Page 14

8-1. Reinstalling the Driver
The user can download drivers at www.lgepc.co.kr.
Windows XP SP3
The screen layout may differ by model type.
▶
Installation
1.
Insert
2.
When the installation screen appears, click
or higher version is recommended for driver installation.
LG Intelligent Update
CD in the optical disk drive.
Next
>
Next
>
Next
>
Finish
buttons or press
Enter
to install.
92
3.
Standard Installation
4.
Full Installation
Reinstalling the Driver
: Copy the files which will be needed only for execution to the hard disk.
: Copy the entire CD to the hard disk. Drivers can be installed out of the copy without the CD.
Page 15
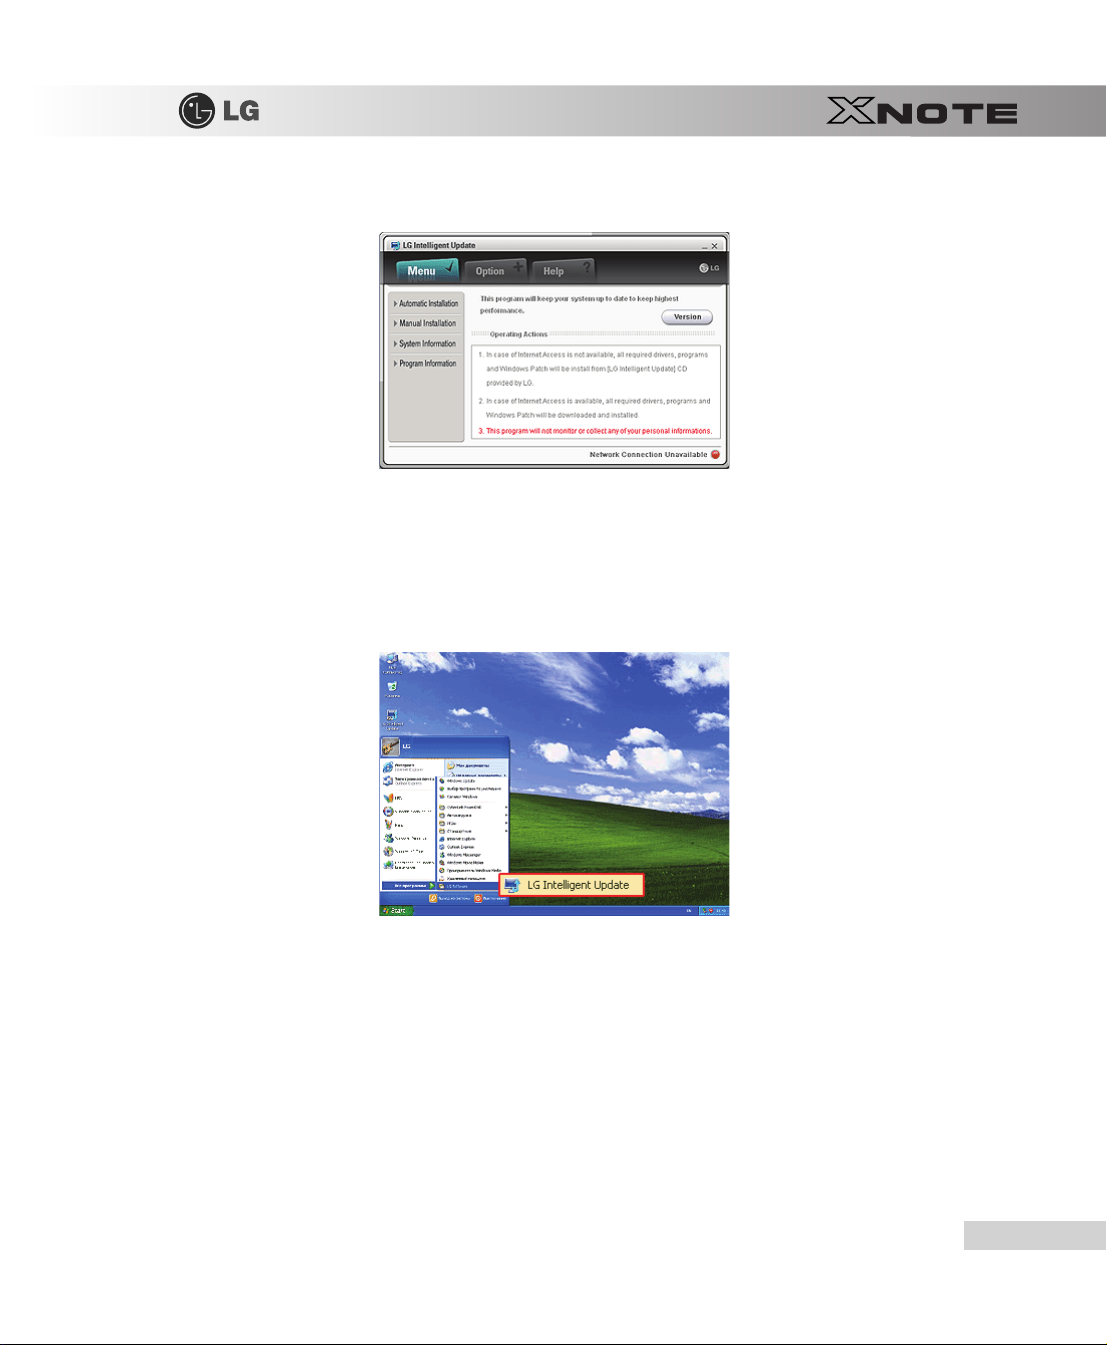
5.
LG Intelligent Update
▶
Execution
1.
Insert
LG Intelligent Update
If the
LG Intelligent Update
2.
Select
Sta rt
>
All Programs
screen appears.
CD in the optical disk drive. Then, the program will automatically start.
program is not installed,
>
LG Software
LG Intelligent Update
>
LG Intelligent Update
installation screen will appear.
to continue.
3.
Double-click
LG Intelligent Update
icon on desktop to run the program.
Reinstalling the Driver
93
Page 16

For more details, refer to Help.
4.
Now, you can install drivers and applications needed for the system.
■ The items that the user must install are automatically displayed on the Software Installation
Wizard screen. Read the screen carefully before installation.
94
Reinstalling the Driver
Page 17

Chapter 9. Using the Internet
Page 18
9-1. Using the Internet
There are various methods to access the Internet. Choose the most desirable method for user environments and system
specifications.
▶
Using LAN
LAN refers to high speed network environments linking companies and households.
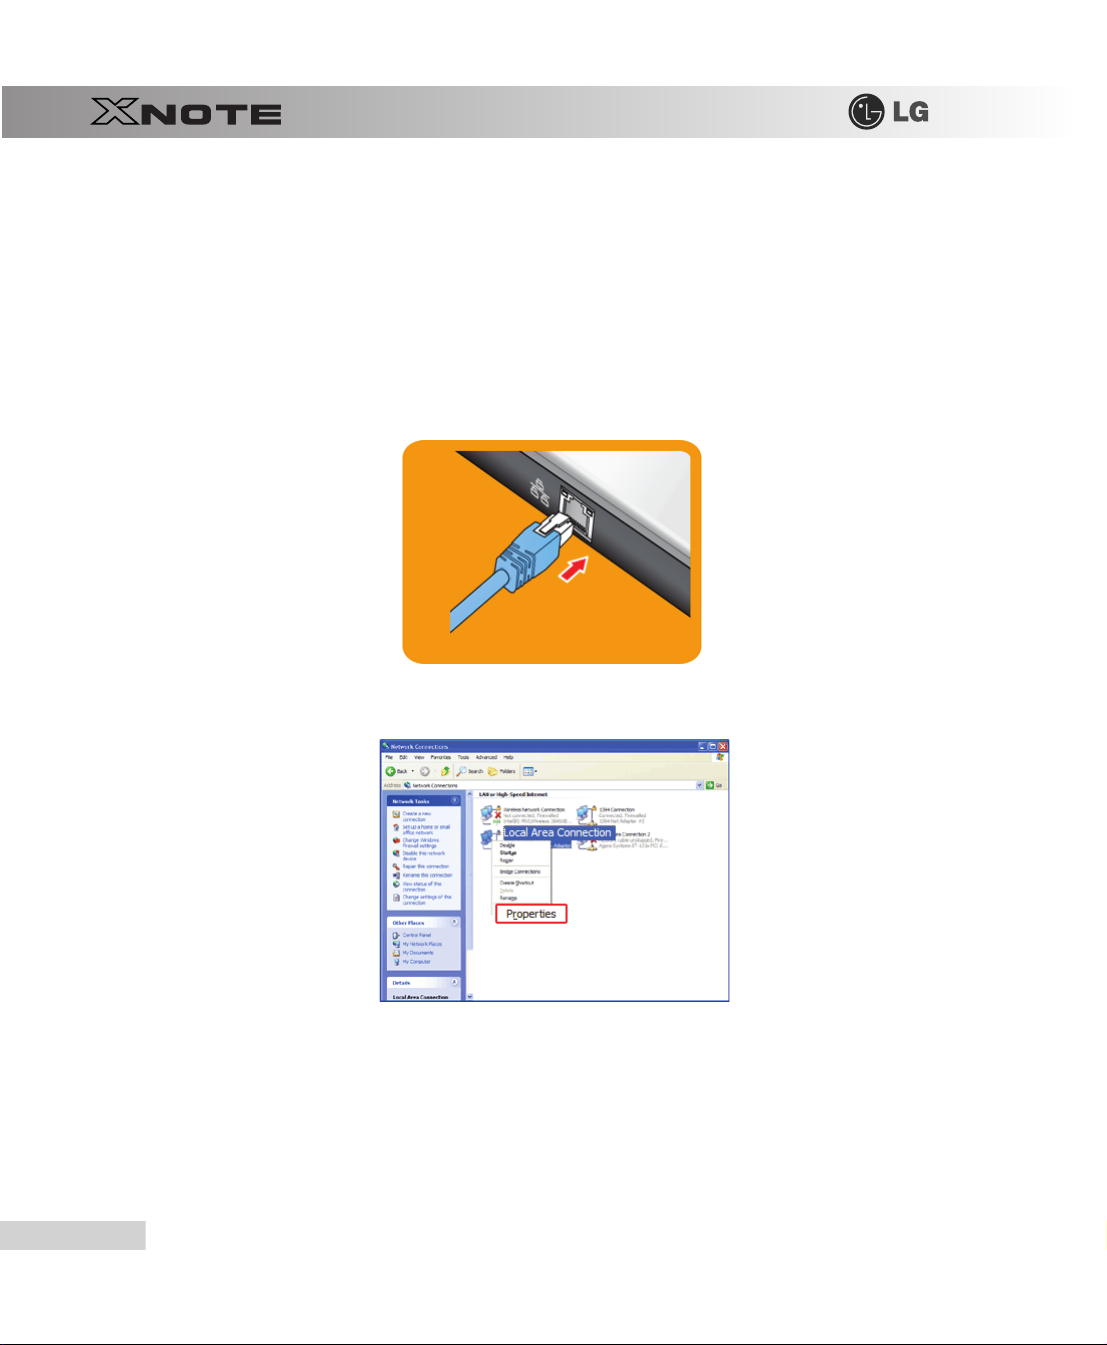
1.
Connect LAN cable to the LAN port. On the taskbar, click
Connection
2.
When the following screen appears, right-click Local Area Connection and click
.
Sta rt|Control Panel|Switch to Classic View|Network
Properties
in the list.
96
Using the Internet
Page 19

3.
When the following screen appears, on
RTL8102E Family PCI-E Fast Ethernet NIC
IP
), and then click Properties
.
General
tab, check Device List for Connection to see if
driver was installed, and select Internet Protocol (
Realtek
TCP
/
Using the Internet
97
Page 20

4.
On
Properties|General
5.
Click OK button to complete the registration of Internet Protocol (
■ For IP address registration, contact the network administrator or local network service engineer.
■ IP Operator provides a user-friendly environment to manage wired/wireless network setup. The
tab, click Obtain an IP address automatically.
provided IP Operator makes networking easy and convenient.
TCP/IP
) Properties.
98
▶
Using Wireless LAN
The
Wireless LAN
card is optional.
Wireless LAN supports multi-terminal networking at home and office.
Wireless network offers general network features (e.g. sharing files, folders, and a printer) and allows a computer without the
Internet connection in a small network to access the Internet through another terminal.
By default, this computer is set for wireless network on the
Windows
.
Using the Internet
Page 21

▶
Connecting Wireless Network By Using the Icon
1.
On the taskbar, right-click the connection icon and click
2.
Select an AP(
Access point
) and click
Connect
.
View available wireless networks
.
Using the Internet
99
Page 22

3.
To see the connection status, place the cursor over Wireless Network Connection icon on the taskbar.
■ If no network key is set for the selected AP, click "Allow me to connect to the selected wireless
network, even though it is not secure."
■ Click Advanced button to check Connection Properties, if needed.
■
Ensure the network is secured to share the computer and be careful not to share confidential data.
100
Using the Internet
Page 23

9-2. Using IP Operator
The
IP Operator
system. IP Operator stores customized network settings to apply and analyzes the network to automatically set up
for convenient use. The IP Operator also supports all types of
optimal wireless network environment and automatically switches the network environments.
For more information, refer to
▶
Using
IP Operator
manages the setting of the wired/wireless network in the system and helps the user easily operate the
IP Operator
IEEE 802.11a, b, g
Help.
wireless networks, sets the
IP Operator
displays the following icons describing the network status.
Icons Descriptions
TCP/IP
1.
Right-click
IP Operator
IP Operator
IP Operator
The network cable is connected.
The network cable is not connected.
The wireless network is not connected.
The signal strength of the current wireless network.
icon on the taskbar and select Open
is starting. (Blue)
is not available. (Grey)
IP Operator
.
Using the Internet
101
Page 24

2.
When the following screen appears, click No. Activate administration feature
network available. When a different screen appears, select the right wireless network device from
No.
3.
Click
Device Name
Add
button and click
drop-down list.
Next
when the settings have completed as shown below.
button to make the wireless
102
4.
Type the profile name.
5.
Select the wireless network type to search.
6.
Click to search the wireless network again.
7.
Select one of the searched wireless networks.
Using the Internet
Page 25

8.
Type the name of the wireless network.
9.
Type the wireless network key, if necessary.
10.
Set
TCP/IP
address and the printer for the profile and click
11.
Finish
.
To refer to the existing settings for
12.
13.
Set IP and DNS addresses.
14.
Select a default printer to apply the profile.
15.
Select a profile to use. The user can edit or delete the selected profile, or can apply the selected profile to the system by
clicking Apply button.
TCP/IP
and the printer, select the profile and click Get button.
Using the Internet
103
Page 26

New features provided by IP Operator are as follows:
■ 802.3 Automatic Switching: Analyzes the network when the network cable is connected and
automatically searches the optimal profile for the system. (Must be set in the Option menu.)
■ Automatic Wireless Network Switching: Searches the most suitable network for the use of a
wireless network in various locations without manual settings.
■ IP Supporting: Helps TCP/IP setup when another program, other than IP Operator, tries to set
the wireless network, or when the selected wireless network already exists in the profile.
■ Device Prioritizing: Prioritizes devices for more convenient use of multiple devices in the
system.
104
Using the Internet
Page 27
Chapter 10. Auxiliary Storage/Memory
Page 28

10-1. Using Memory Card
▶
Checking Available Memory Card
This model supports SD, MMC, Memory STick, and Memory Stick Pro.
xD, SD, MMC, Memory Stick
digital products.
To use a
Memory Stick Duo
mobile
card, mount it on the dedicated adapter and insert the adapter into the multi-card slot.
Directly applicable memory cards
Memory cards applicable indirectly
through dedicated adapter
(The available memory type and capacity may differ by the computer model type.)
Check availability before buying a memory card.
and
Memory Stick Pro
card,
Memory Stick Pro Duo
cards are mobile storage devices, currently widely used in many
card,
mini SD
card,
micro SD
card, or an
MMC
106
Auxiliary Storage/Memory
Page 29
▶
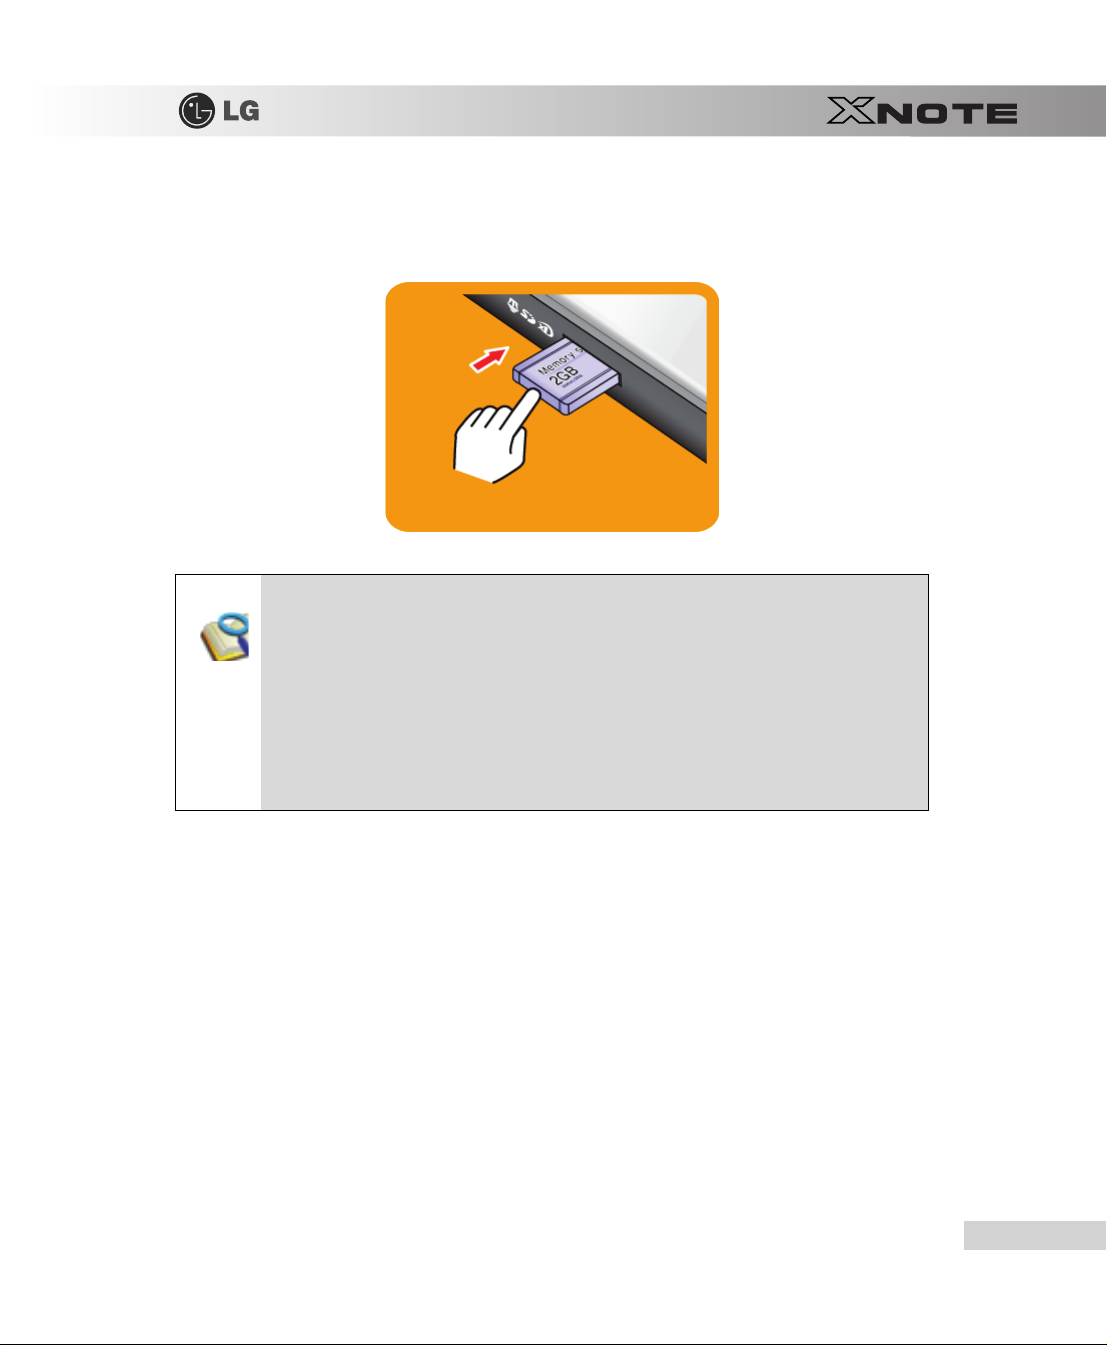
Mounting and Using Memory Card
Insert the card into the multi-card slot to the fullest in the right direction.
■ When the memory card is formatted, the data stored in the memory card will be deleted. Check
whether there are important data before formatting the memory stick.
■ To format a memory stick, right-click Memory Stick drive and select Format. When Format
window appears, click Start to continue.
■ The format feature may not be available on those Windows whose version is lower than
Windows XP. Format the card on other digital devices or format it after installing Memory Stick
Formatter.
■ If the writing prevention tab of Memory Stick is locked, the user cannot format the memory
stick nor write or delete the data.
■ xD, SD, MMC, Memory Stick and Memory Stick Pro cards can be used only as storage
devices, and don't support a copyright protection feature.
Auxiliary Storage/Memory
107
Page 30
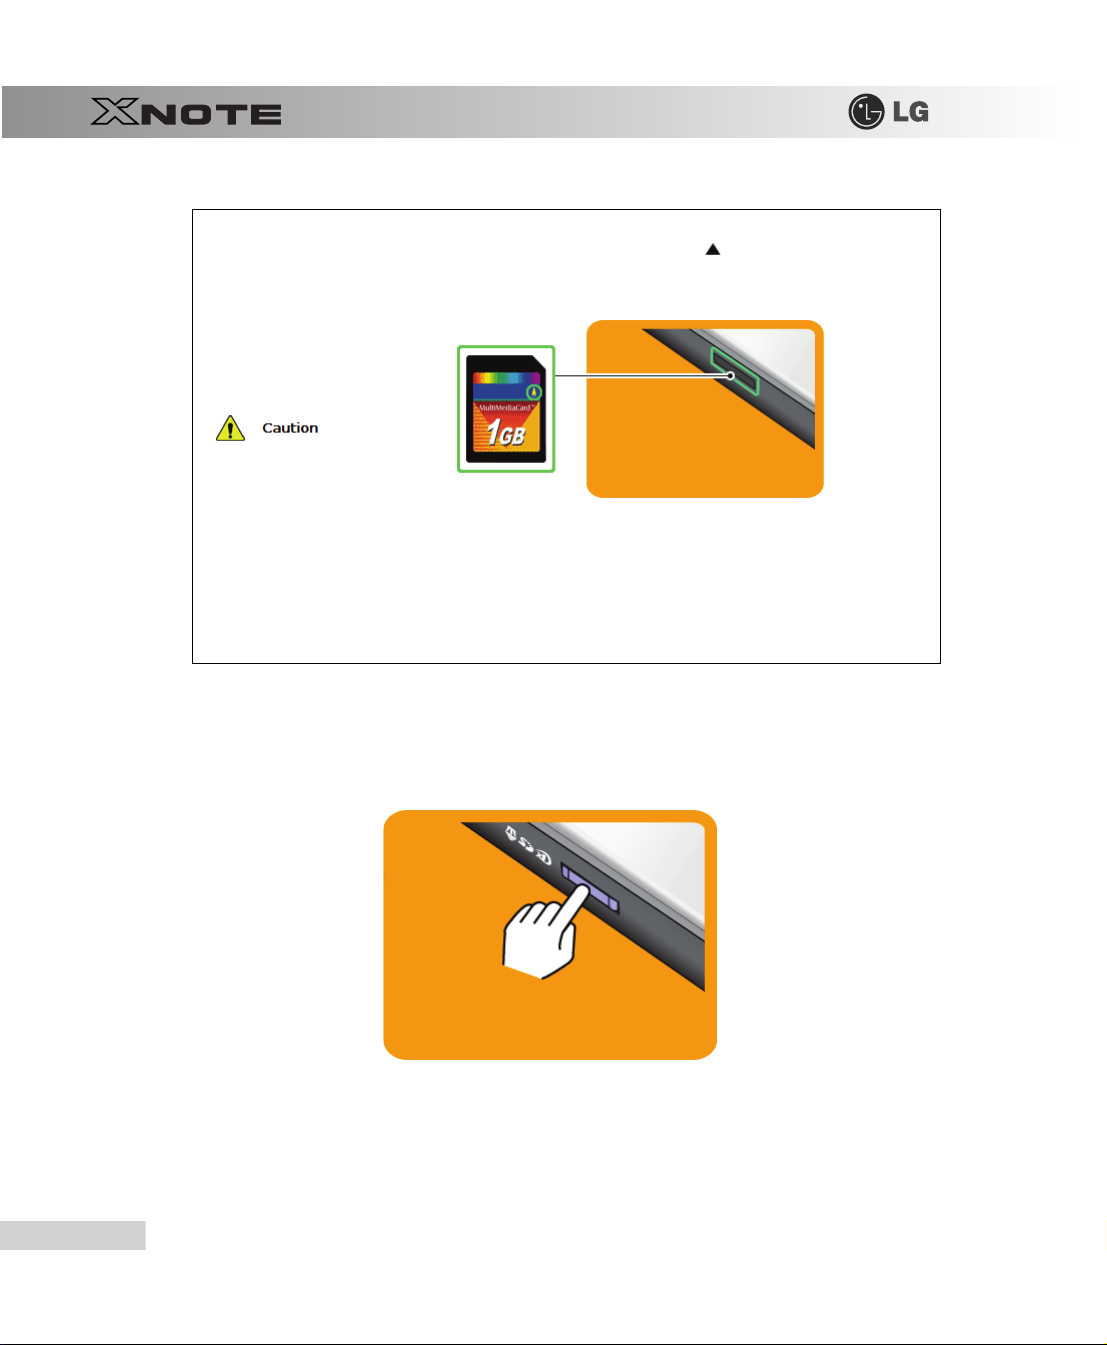
When using an MMC card:
■
Place the
MMC
card with th e arrow facing u pward ( ), and i nsert it into th e slot. Forcing
the
MMC
card into the slot may cause an impairment.
■
▶
Removing Memory Card
Some memory products manufactured by
when contacting with the connection port in the multi-card slot. Avoid using metallic-surfaced
memory products. They could offset the system performance.
When using a memory card through dedicated adapter:
■
Use the dedicated adapter. Otherwise a short-circuit may occur, causing damage to the computer and
the memory card.
Transcend
are made of metal and may cause a short circuit
Push the card as depicted in the following picture to make the card spring out of the slot. Pull the card out in the direction of
the arrow.
108
Auxiliary Storage/Memory
Page 31

To safely removing a memory card:
1.
Click
Safely Remove Hardware
2.
Click
Safely Remove Hardware (S)
3.
When
Safety Remove Hardware
4.
When
Stop Har dware
window appears, click OK.
icon on the taskbar.
.
window appears, click
Sto p
.
Auxiliary Storage/Memory
109
Page 32

110
Auxiliary Storage/Memory
Page 33

Chapter 11. Appendix
Page 34

11-1. Specifications
▶
Available Processors
Intel Atom
The user must not replace or expand the CPU capacity arbitrarily. The CPU capacity differs depends on model type.
▶
Main Memory
Main memory supports both 512 MB and 1024 MB. The expansion memory slot is not supported.
Memory types and specifications may differ depending on the model.
▶
Secondary Storage Devices
2.5" Hard Disk Drive (SATA)
The hard disk capacity and the type depend on the notebook PC model.
External Optical Disk Drive
▶
LCD
10" WSVGA(1024 x 600) TFT Color LCD
Some models are equipped with Glare Type LCD. This model is enhanced the sharpness compare to the other types of LCD. So, it may
The size and the resolution rate of the LCD depend on the notebook PC model.
Processor (L2 Cache Size: 512KB ) is supported.
It may not be provided depending on the model. Its specifications also differ depending on the model.
appears glaring a lot but this is the normal status.
112
▶
Authentication for
U.S Patent Nos.4,631,603;4,577,216;4,819,908;4,907,093;5,315,448;and 6,516,132. Patent number of
This product includes the technologies that are possessed by
protected by the US Patent Law and other related laws. Use of all technologies subject to the
copyrights must be approved by
display. Do not disassemble or remodel the product.
▶
Bluetooth
Bluetooth 2.0+EDR
Bluetooth is optional, and so it may not be installed in some models.
Appendix
Anticopy Technology
Macrovision
in advance. Otherwise, the technologies may only be used for internal
Macrovision
Macrovision
and corresponding companies and
.
Page 35

▶
Web Camera
1.3 Web Camera module
UVC (USB Video Class) driver supported
▶
External I/O Interface
External VGA Monitor Port: 1
Microphone: 1
Microphone Input Port (Mic in): 1
Headphone Port: 1
USB 2.0 Ports: 3
Multi-card Slot: 1
RJ 45 (LAN) Port: 1
USIM Card Slot: 1
USIM card slot may not be provided depending on the model.
▶
Video
Mobile Intel Graphic Media Accelerator 950 (Dynamic Video Memory Technology)
The DVMT actively utilizes part of the system memory when processing large graphic data like 3D graphics. Therefore, the size of the
graphic memory is displayed as the sum of the actual graphic memory size and the utilized amount of memory, which is decided by the
size of system memory.
Applications (graphics program, game, etc.) requiring strong graphic processing power may not work properly.
Specifications may differ by model type.
▶
Sound
Realtek High Definition Audio Codec (ALC888)
Built-in Stereo Speakers
▶
Modem
Ericsson F3507g (HSPA Modem)
The support availability may differ by model type.
▶
LAN
Realtek RTL 8102E PCI Express Fast Ethernet Controller (10/100mbps)
RJ 45 Jack
Appendix
113
Page 36

The LAN specifications may differ depending on the model.
▶
Wireless LAN
MS-6894 0A Wireless 802.11b/g mini-Card (PCIe interface, RTL8187SE single chip)
Wireless LAN specifications may differ by model type and cannot be arbitrarily changed by the user.
▶
Weight
Full Installation: About 1.19kg
Battery: Less than 250 g (3 cells)
Weight descriptions may differ by model type.
/
350 g (6 cells)
114
Appendix
Page 37

11-2. Power Supply and Environments
▶
AC Adapter (Free Voltage)
Power Capacity: 40W
Input: AC 100V ~ 240V, 1.7A, 50Hz ~ 60Hz
Output: 20V DC 2.0A
Caution: Use a rated and legitimate AC adapter, suitable for the model.
▶
Battery (Li-Ion)
Rated Capacity: 11.1V
Battery Make-up: 3-cell or 6-cell battery (the battery make-up may differ depending on the model.)
Charging Hours: At room temperature (0
Not charged under 0 .
The above temperatures are internal temperatures of the battery pack, and may be different from the actual room temperature.
▶
Operation and Storage Environments
Operating Temperature: 10 ~35
Operating Humidity: 20
Storage Temperature: -10 ~60
Storage Humidity: 10% RH ~ 80% RH
%
RH ~ 80% RH
~ 40
) and power turned off - Less than 3 hours (Time may differ by model type.)
▶
Power Consumption
Operating Conditions Approximately 30W When running moving image media
Standby mode (Idle state) Approximately 15W In Display Off mode
Power Saving mode (Sleep Mode) 1.5W or lower When entering S3(Suspend)
Off Mode (Standby(off) Mode) 1W or lower When terminating the system
The above power consumption is calculated on the assumption that the battery is fully charged.
Power consumption during operation or standby may differ depending on the programs the system is running and product specifications.
Even when the system is turned off, it consumes a minute amount of power, if supplied. To cut off power supply completely, disconnect the
power cord from the power outlet.
Appendix
115
 Loading...