

Page 1

•ADSL modem is required to use DSL service and a cable modem is
required to use cable modem service. Depending on the access method
of and subscriber agreement with your ISP, you may not be able to use
the internet connection feature contained in this player or you may be
limited to the number of devices you can connect at the same time.
(If your ISP limits subscription to one device, this player may not be
allowed to connect when a PC is already connected.)
• The use of a “Router” may not be allowed or its usage may be limited
depending on the policies and restrictions of your ISP. For details,
contact your ISP directly.
•Your ISP may protect this player from being connected to network when
confirming MAC ADDRESS. In that case, contact your ISP to request to
initialize MAC ADDRESS.
Setting the sound mode
You can select a suitable sound mode. Press SOUND repeatedly until the
desired mode appears on the front panel display or the TV screen.
The setting the sound mode is not available when [HDMI Audio] is set to
[On] (see page 24).
[Bypass] mode: Software with multichannel surround audio signals
is played according to the way it was recorded.
[Natural EQ] mode: You can enjoy comfortable and natural sound.
[Bass Booster] mode: Reinforce the treble, bass and surround sound
effect.
[PL ll Movie] mode: Performs Pro Logic ll movie mode decoding to
the input signal and produces five full-bandwidth output channels from
2 channel sources. This setting is ideal for watching videos of
overdubbed or old movies.
[PL ll Music] mode: Performs Pro Logic ll music mode decoding to
the input signal and produces five full-bandwidth output channels from
2 channel sources. This setting is ideal for normal stereo sources such
as CD.
[News] mode: This mode makes voice sound clear, improving the
quality of voice sound.
[Drama] mode: You can enjoy more dynamic sound with improved
center channel while watching a television drama.
[Sports] mode: This mode produces dynamic sound expansion for the
sports program.
[Game] mode: You can enjoy more virtual sound while playing video
games.
[Concert] mode: Creates the sound of concert hall.
[Music ReTouch] mode: When listening to MP3 files or other
compressed music, you can enhance the sound.
Adjust the speaker level settings
You can adjust the sound level of each speaker.
Press SPK LEVEL repeatedly to select a desired speaker to set.
Press VOL. (+/-) to adjust the sound level of the selected speaker while
the level setting menu is displayed on the front panel display or the TV
screen. Repeat and adjust the sound level of the other speakers.
Using the late night function
You can compress the dynamic range of the sound track.
Press NIGHT repeatedly.
This may be useful when you want to watch movies at low volumes late at
night.
[NIGHT OFF]: Late night function off.
[NIGHT ON]: Reduction in dynamic range.
Notes:
• The late night function may be less effective or have no effect depending on
the source.
• During the late night mode is on, the lighting of the touch buttons and the
volume knob are turned off and the front panel display is dimmed.
Using the sleep timer
You can set the system to turn off at a preset time, so you can fall asleep
listening to music.
- Press SLEEP repeatedly to select the desired time period options (in minutes):
(Dimmer on
tt
Sleep timer value
tt
Dimmer off)
Dimmer on:
The lighting of the touch buttons and the volume knob are turned
off and the front panel display is dimmed.
-To view the time countdown to the standby mode, press SLEEP again.
-To deactivate the sleep timer, press SLEEP until the previous status is displayed
or press POWER to switch the unit to standby.
19
HB954PA-AD.954SA-AP.BUSALL_ENG 12/18/08 5:31 PM Page 19
Page 2

20
Tip:
If you select the [Photo] or [Music] option when a USB Flash Drive is connected and a disc is inserted simultaneously, the menu for selecting a
media will appear. Select a media then press ENTER.
Insert/Remove a USB Flash Drive
Inserting an USB Flash Drive – Insert straight-in until it fits into place.
Removing an USB Flash Drive – Withdraw the USB Flash Drive
carefully.
Notes:
• This unit supports only USB Flash Drive and USB External HDD with
FAT16 or FAT32 format.
• The USB Flash Drive can be used for the local storage for enjoying
BD-Live discs with Internet
• Do not extract the USB Flash Drive during operation (play, etc.).
• An USB Flash Drive which requires additional program installation when
you have connected it to a computer is not supported.
• USB Flash Drive: USB Flash Drive that support USB1.1 and USB2.0.
• Music files (MP3/WMA) and photo files (JPEG/PNG) can be played. For
details of operations on each file, refer to relevant pages.
• Regular back up is recommended to prevent data loss.
• If you use an USB extension cable or USB HUB, the USB device may
not be recognized.
• Some USB Flash Drives may not work with this unit.
• Digital camera and mobile phone are not supported.
• USB Port of the unit cannot be connected to PC. The unit cannot be
used as a storage device.
• This unit does not support a multi card reader.
• This unit can support up to 4 partitions of the USB Flash Drive.
Using an USB Flash Drive
This unit can play the music and photo files contained on the USB Flash Drive.
ON REMOTE
1. Insert an USB Flash Drive to the USB port: –
2Displays the [Home Menu]: HOME
3 Select a main option:
bb BB
, ENTER
[Photo] or [Music] option
4 Select the [USB] option:
bb BB
5 Displays corresponding menu list: ENTER
[PHOTO] or [MUSIC] menu appears.
Details for the menu are on pages 33-37.
BD player
USB Flash Drive
HB954PA-AD.954SA-AP.BUSALL_ENG 12/18/08 5:31 PM Page 20
Page 3
21
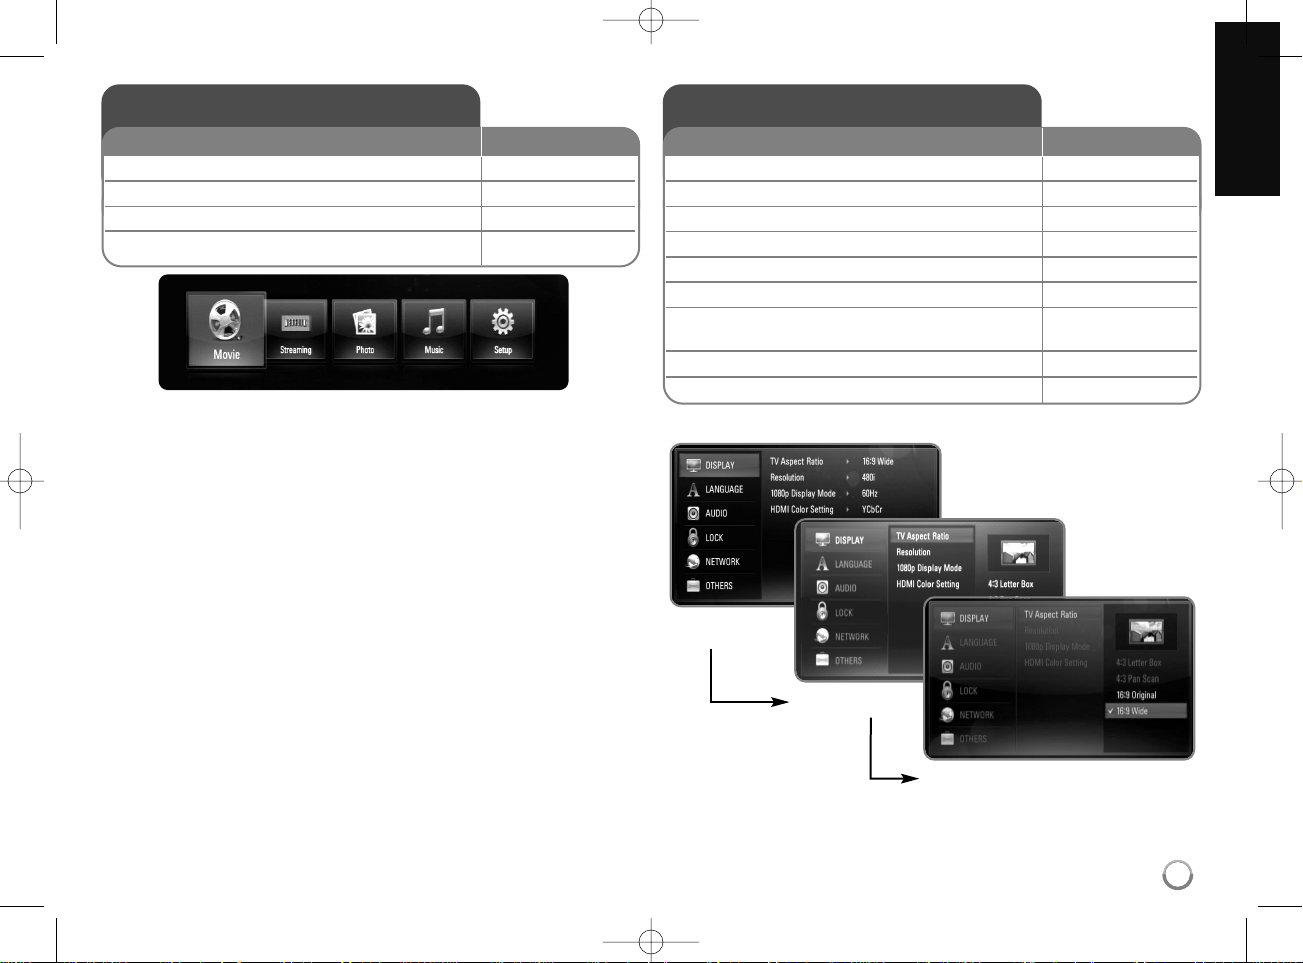
[Movie] – Start video media’s playback or displays the [MOVIE] menu.
[Streaming] – Instantly watch some movies & TV episodes streamed from
Netflix to your TV. (page 38-40)
[Photo] – Displays [PHOTO] menu. (page 36-37)
[Music] – Displays [MUSIC ]menu. (page 35-36)
[Setup] – Displays the [Setup] menu. (page 21-27)
Tips:
• If you select the [Photo] or [Music] option when an USB Flash Drive is
connected and a disc is inserted simultaneously, the menu for
selecting a media will appear. Select a media then press ENTER.
• If “Software Update” appears on the [Home Menu], it means there is a
software update available via network. To update the unit, press blue (D)
button. For details, see page 45.
Notes:
• The unit will be in stop mode then the [Home Menu] will appear if you
press HOME during playback.
• If you insert a DVD or an unplayable disc that is formatted as ISO9660
or UDF, the [Photo] or [Music] option can be selected in the [Home
Menu]. But you cannot play it.
Using the Home Menu
1Displays the [Home Menu]: HOME
2 Select an option:
bb BB
3Displays the selected option menu: ENTER
4 Exit the [Home Menu]: HOME
ON REMOTE
Adjust the Setup settings
1Displays the [Home Menu]: HOME
2 Select the [Setup] option:
bb BB
, ENTER
3 Select a desired option on the first level:
vv VV
4 Move to second level:
BB
5 Select a desired option on the second level:
vv VV
6 Move to third level:
BB
7 Adjust or confirm the setting:
vv VV
, ENTER
Some items require additional steps.
8 Go back to the previous level:
bb
9 Exit the [Setup] menu: HOME or RETURN
ON REMOTE
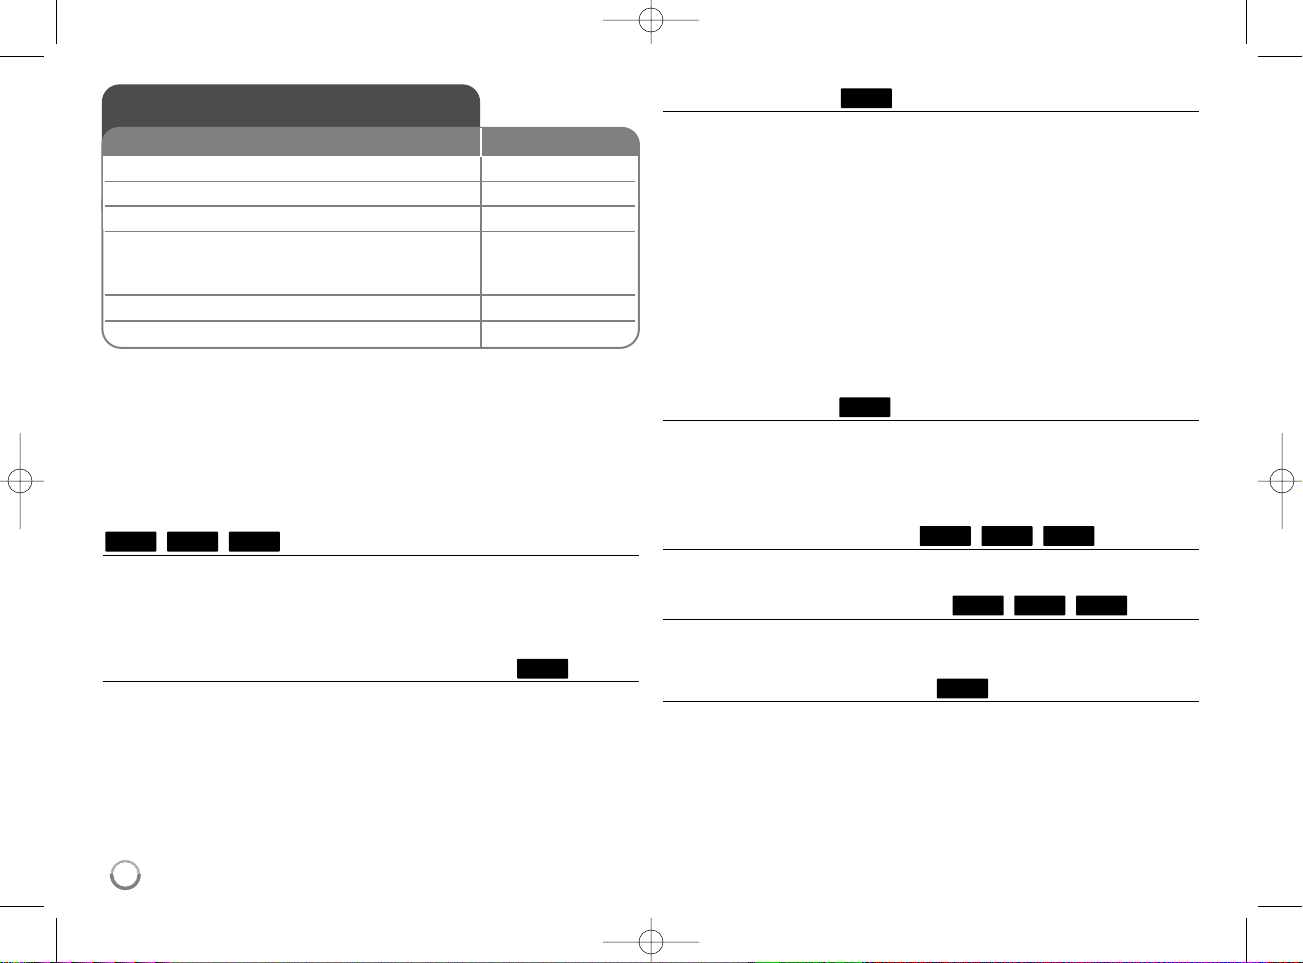
First level
Second level
Third level
HB954PA-AD.954SA-AP.BUSALL_ENG 12/18/08 5:31 PM Page 21
Page 4

22
[DISPLAY] Menu
TV Aspect Ratio
[4:3 Letter Box] – Select when a standard 4:3 TV is connected.
Displays theatrical images with masking bars above and below the
picture.
[4:3 Pan Scan] – Select when a standard 4:3 TV is connected.
Displays pictures cropped to fill your TV screen. Both sides of the
picture are cut off.
[16:9 Original] – Select when a 16:9 wide TV is connected. The 4:3
picture is displayed with an original 4:3 aspect ratio, with black bars
appearing at the left and right sides.
[16:9 Wide] – Select when a 16:9 wide TV is connected. The 4:3
picture is adjusted horizontally (in a linear proportion) to fill the entire
screen.
Note:
You cannot select [4:3 Letter Box] and [4:3 Pan Scan] option when the resolution is set to higher than 720p.
Resolution
Sets the output resolution of the Component and HDMI video signal.
Refer to “Resolution Setting” on page 16-17 for details about the
resolution.
[Auto] – If the HDMI OUT jack is connected for TVs providing display
information (EDID), automatically selects the resolution best suited to
the connected TV. If the COMPONENT VIDEO OUT is only connected,
this changes the resolution to 1080i as default resolution.
[1080p] – Outputs 1080 lines of progressive video (only for HDMI
connection).
[1080i] – Outputs 1080 lines of interlaced video.
[720p] – Outputs 720 lines of progressive video.
[480p] – Outputs 480 lines progressive video.
[480i] – Outputs 480 lines of interlaced video.
1080p Display Mode
When the resolution is set to 1080p, select [24Hz] for smooth presentation
of film material (1080/24p) with a HDMI-equipped display compatible with
1080/24p input.
Notes:
• When you select [24Hz], you may experience some picture disturbance
when the video switches video and film material. In this case, select
[60Hz].
• Even when [1080p Display Mode] is set to [24Hz], if your TV is not
compatible with 1080/24p, the actual frame frequency of the video
output will be 60Hz to match the video source format.
HDMI Color Setting
Select the type of output from the HDMI OUT jack. For this setting, please
refer to the manuals of your display device.
[YCbCr] – Select when connecting to a HDMI display device.
[RGB] – Select when connecting to a RGB display device.
HB954PA-AD.954SA-AP.BUSALL_ENG 12/18/08 5:31 PM Page 22
Page 5
23
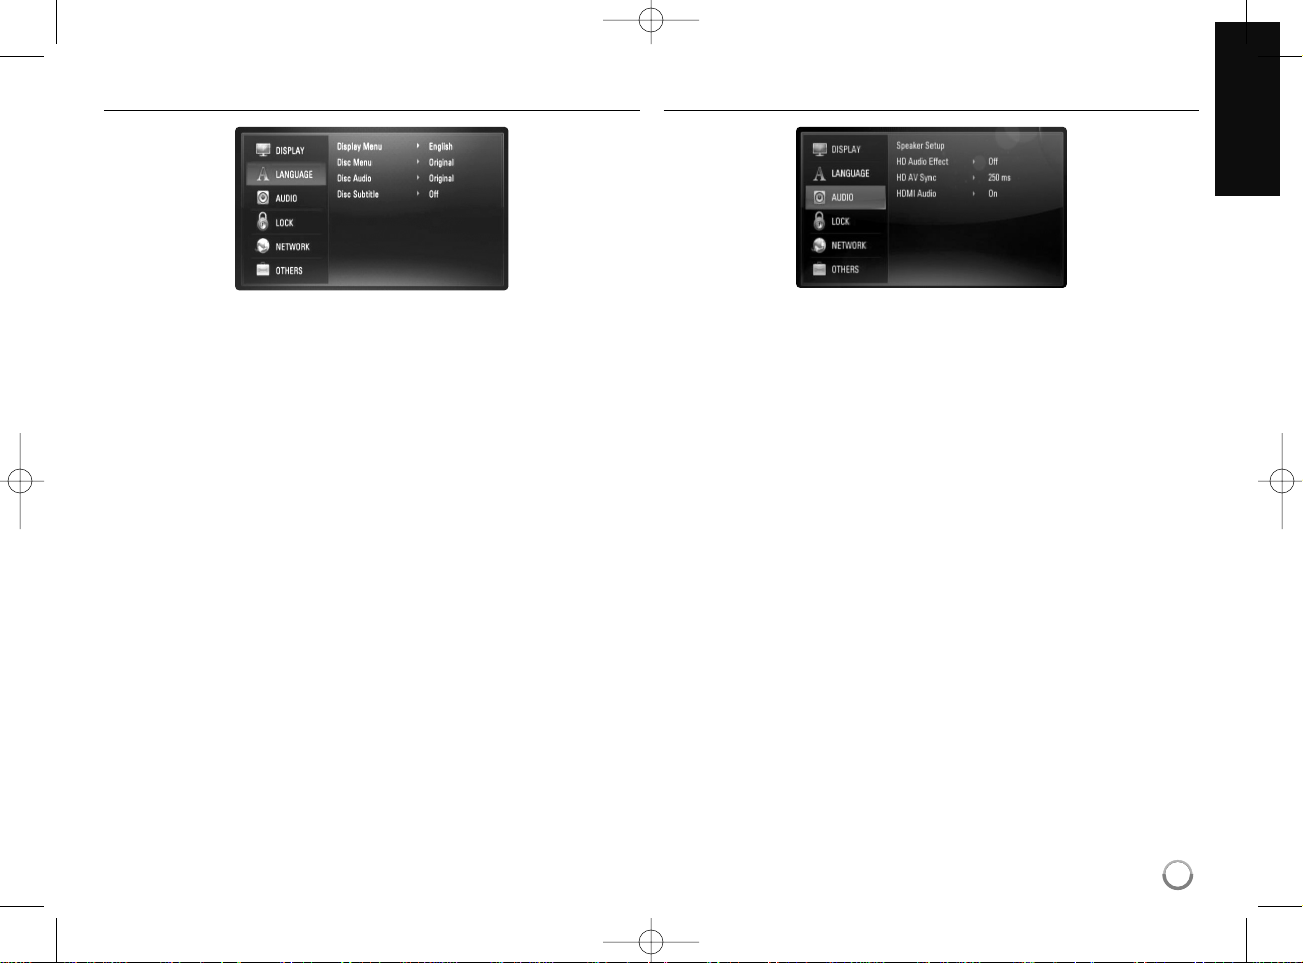
[LANGUAGE] Menu
Display Menu
Select a language for the [Setup] menu and on-screen display.
Disc Menu / Disc Audio / Disc Subtitle
Select the language you prefer for the audio track (disc audio), subtitles,
and the disc menu.
[Original] – Refers to the original language in which the disc was
recorded.
[Other] – Press ENTER to select another language. Use number
buttons then ENTER to enter the corresponding 4-digit number
according to the language code list on page 48.
[Off] (for Disc Subtitle) – Turn off Subtitle.
Note:
Depending on a disc, your language setting may not work for some disc.
[AUDIO] Menu
Speaker Setup
To obtain the best possible sound, use the Speaker Setup display to
specify the volume of the speakers you have connected and their distance
from your listening position. Use the Test to adjust the volume of the
speakers to the same level.
[Speaker] – Select a speaker that you want to adjust.
[Volume] –Adjust the output level of each speaker.
Be sure to set “Test” to “All” for easy adjustment.
[Distance] – Adjust the distance between each speaker and the
listening position.
[Test] – The speakers will emit a test tone.
All: The test tone is emitted from each speaker in sequence.
HB954PA-AD.954SA-AP.BUSALL_ENG 12/18/08 5:31 PM Page 23
Page 6
24
HD Audio Effect
Selects whether to mix or not mix primary audio and secondary audio.
[Off] – Outputs the primary audio only.
[On] – Outputs the audio obtained by mixing the primary audio and
secondary audio.
HD AV Sync
Sometimes Digital TV encounters a delay between picture and sound. If this
happens you can compensate by setting a delay on the sound so that it
effectively ‘waits’ for the picture to arrive: this is called HD AV Sync.
Use v V to scroll up and down through the delay amount, which you can set
at anything between 0 and 300m sec.
The delay will vary depending on which digital TV channel you are on. If you
change channel you may need to readjust the HD AV Sync.
HDMI Audio
You can set the output type for the audio signal from the HDMI OUT jack.
[Off] – HDMI audio signals are output to the system speakers only.
[On] – HDMI audio signals are output from the TV’s speaker and the
system’s speakers.
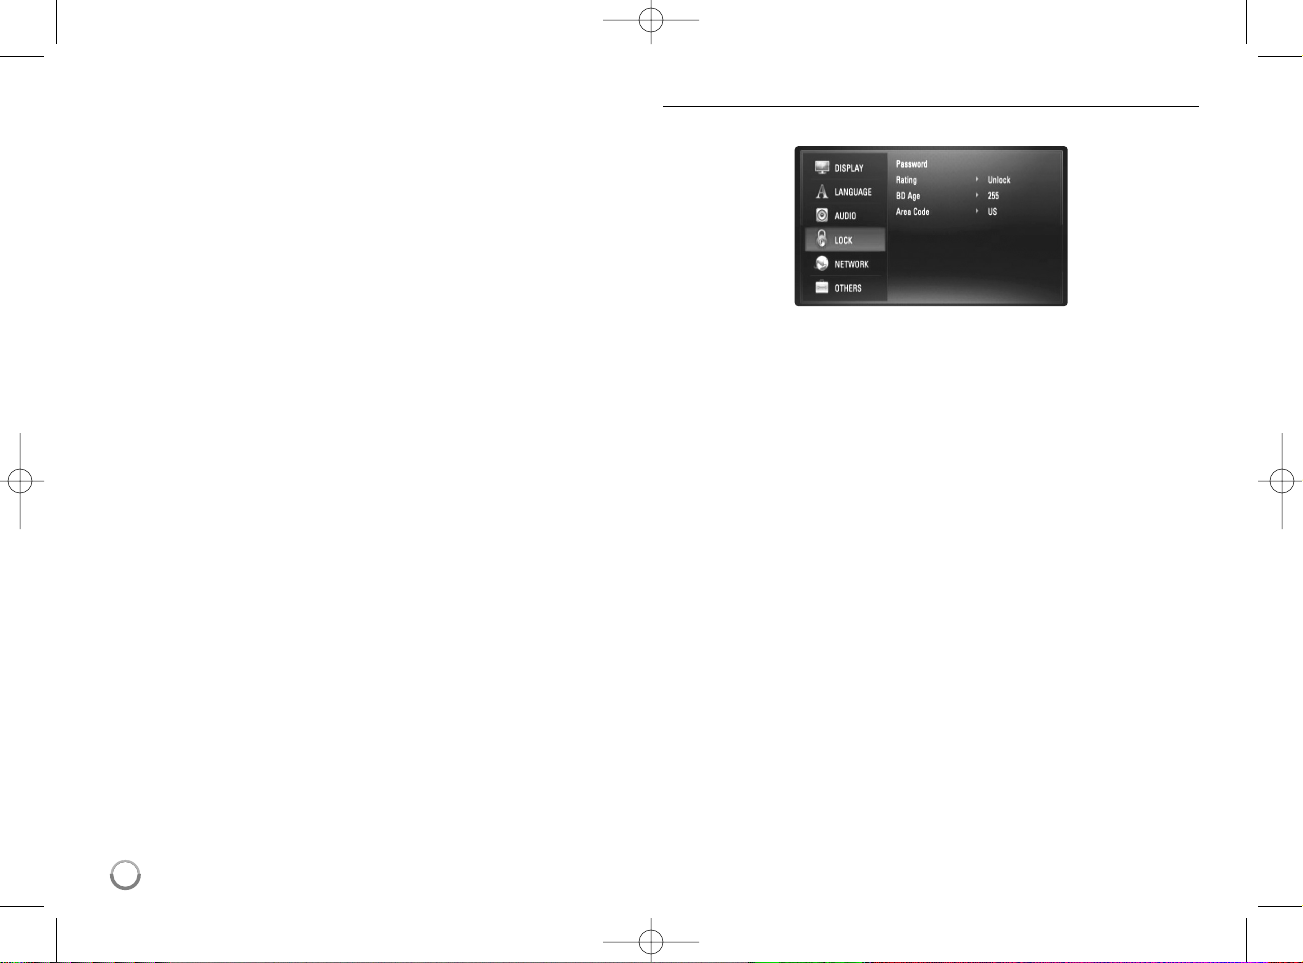
[LOCK] Menu (Parental Control)
The [LOCK] settings affect only Netflix movie, BD and DVD playback.
To access the any features in [LOCK] settings, you must enter the 4-digit
security code you have created.
If you have not entered a password yet, you are prompted to do so. Enter
a 4-digit password and press ENTER. Enter it again and press ENTER to
verify.
Password
You can create, change or delete the password.
[New] – Enter a 4-digit password and press ENTER. Enter it again and
press ENTER to create a new password.
[Change] – Enter the current password and press ENTER.
Enter a 4-digit password and press ENTER. Enter it again and press
ENTER to create a new password.
[Delete] – Enter the 4-digit password and press ENTER to delete the
password.
Tip:
If you make a mistake before pressing ENTER, press CLEAR. Then input
the correct password.
If you forget your password
If you forget your password, you can clear it using the following steps:
1 Remove any disc that might be in the player.
2 Select [Password] option.
3 Use Number buttons to enter “210499”. The password is cleared.
HB954PA-AD.954SA-AP.BUSALL_ENG 12/18/08 5:31 PM Page 24
Page 7

25
Rating
Blocks playback of rated disc based on their content. (Not all discs are
rated.)
[Rating 1-8] – Rating one (1) has the most restrictions and rating eight
(8) is the least restrictive.
[Unlock] – If you select unlock, parental control is not active and the
disc plays in full.
BD Age
Set an age limit of BD-ROM play. Use number buttons to input an age limit
for BD-ROM viewing.
[255] – All BD-ROM can be played.
[0-254] – Prohibits play of BD-ROM with corresponding ratings
recorded on them.
Area Code
Enter the code of the area whose standards were used to rate the DVD
video disc, based on the list on page 48.
HB954PA-AD.954SA-AP.BUSALL_ENG 12/18/08 5:31 PM Page 25
Page 8
26
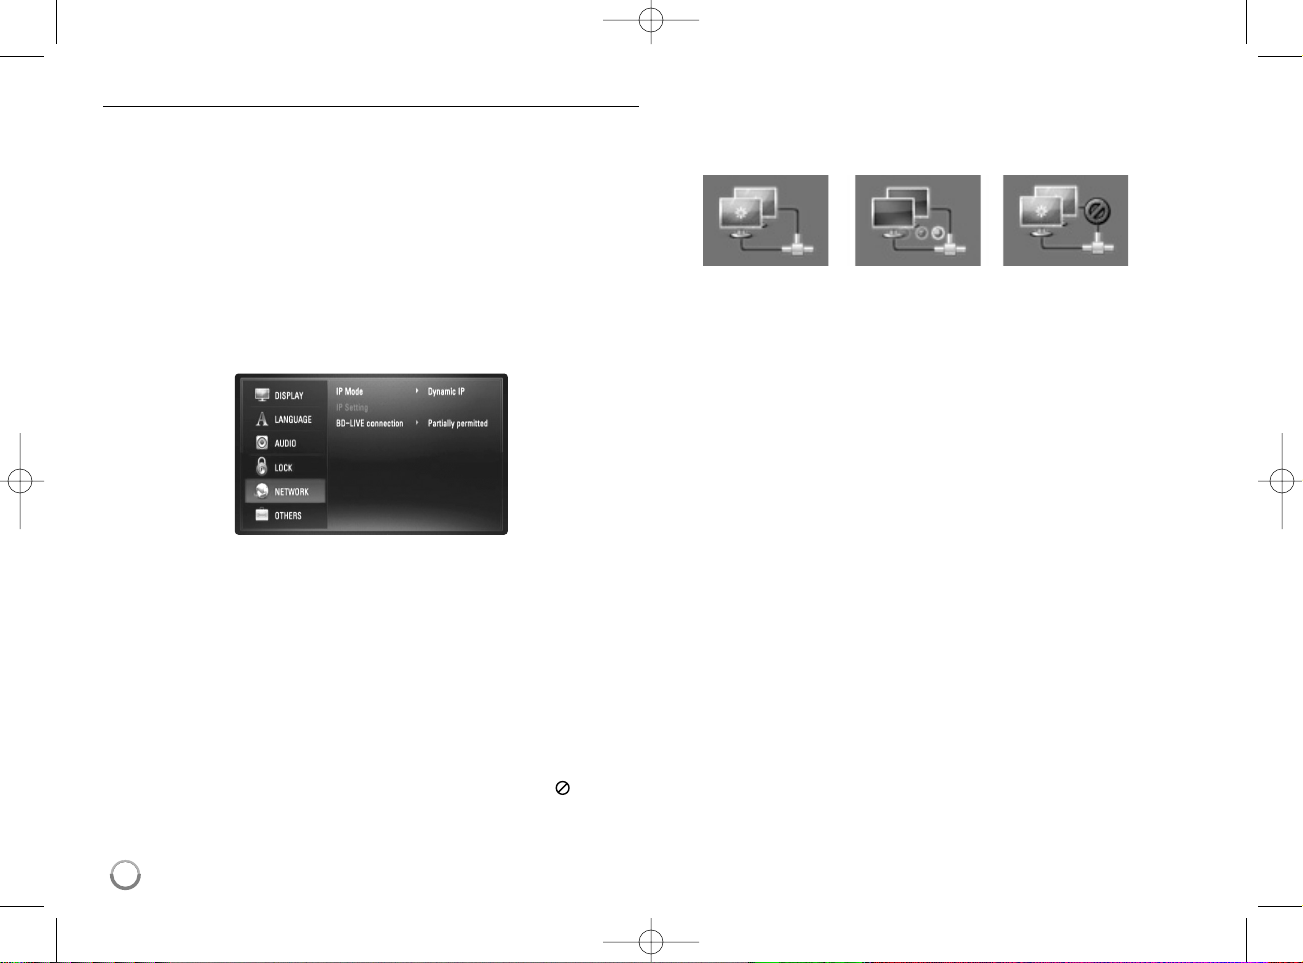
[NETWORK] Menu
The [NETWORK] settings are needed to use the software update, BD Live
and Netflix features.
Some BD-ROM discs may enable you to access special BD-ROM sites, if
you connect the player to the Internet. For example, if a BD-ROM site
includes content such as links to future movie trailers, you can watch the
downloaded on-line content on the player.
You do not need to connect to a PC to use this function.
Preparations:
• This feature requires an always-on broadband internet connection.
(see page 18-19.)
•ABD-ROM disc compatible with this feature is required. Not all BDROM discs are compatible.
IP Mode
If there is a DHCP server on the local area network (LAN), this player will
automatically be allocated an IP address. If you’re using a broadband
router or broadband modem that has a DHCP (Dynamic Host
Configuration Protocol) server function, select [Dynamic IP]. The IP
address will automatically be determined.
If there is no DHCP server on the network and you want to set the IP
address manually, select [Static IP] then set the [IPAddress], [Subnet
Mask], [Gateway] and [DNS Server] using [IP Setting] option.
Note:
The [IP Mode] menu shows if the internet is connected or not. “ ” will
appear when connection is failed.
How to check the network configuration
Select [IP Mode] option and check the Network status indicator shown
above the menu. (The Network status indicator changes according to
Network configuration.)
IP Setting
This option is available only if [IP Mode] option is set to [Static IP].
Use the v / V / b / B buttons to select a field; use the number buttons to
enter a value. Press ENTER when [OK] is highlighted to finish and exit the
screen.
BD-LIVE connection
You can restrict Internet access when BD-Live functions are used.
[Permitted] – Internet access is permitted for all BD-Live contents.
[Partially permitted] – Internet access is permitted only for BD-Live
contents which have content owner certificates. Internet access and
AACS Online functions are prohibited for all BD-Live contents without
a certificate.
[Prohibited] – Internet access is prohibited for all BD-Live contents.
Able to use network Testing Network Unable to use network
HB954PA-AD.954SA-AP.BUSALL_ENG 12/18/08 5:31 PM Page 26
Page 9
27
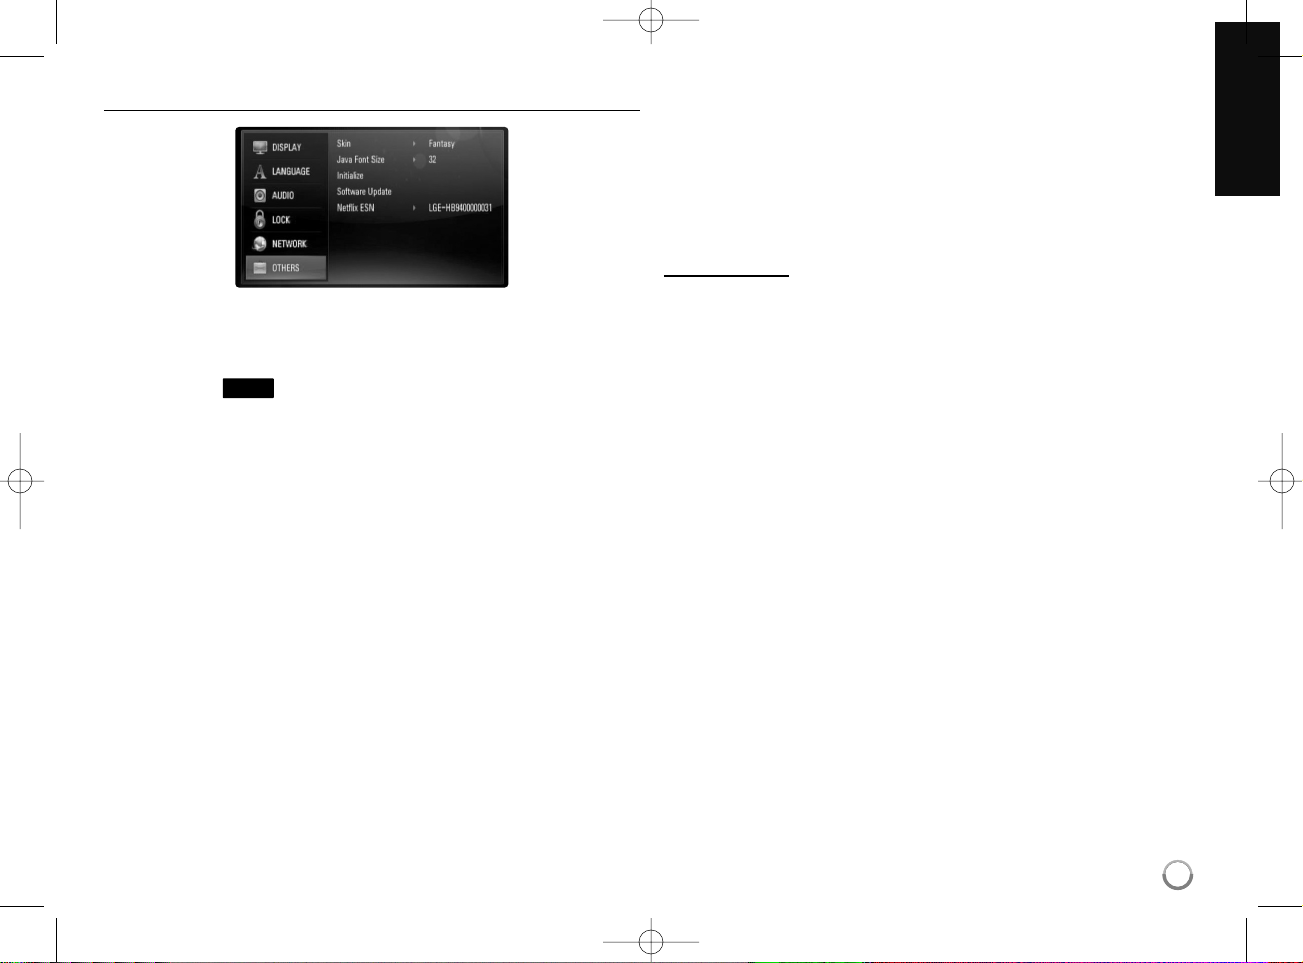
[OTHERS] Menu
Skin
Changes the background of the initial screen.
Java Font Size
You can adjust the default text size displayed for the BD-J contents during
BD-ROM playback.
This setting is only valid when BD-J contents do not set the size of text.
Please select a font size bigger than 24 when the player is connected with
an HD TV.
Initialize
You can reset the player to its original factory settings, initialize the BD
storage or deactivate the player.
[Factory Set] – If you need to, you can reset the player to all its factory settings. Some options cannot be reset. (Rating, Password and Area
Code, etc.)
[BD Storage Clear] – Initializes the BD contents from the connected
USB Flash Drive.
[Deactivate Netflix] – Deactivates your player. To activate the Netflix
again, see page 38.
Note:
If you reset the player to its original factory settings using [Factory Set]
option, Netflix is deactivated also. To activate the Netflix again, see page
38.
Software Update
You can update the software by connecting the unit directly to the software
update server (see page 45).
Netflix ESN
We provide you the Netflix ESN (Electronic Serial Number) that allows you
to rent and purchase videos using the Netflix website.
For more information, please visit:
www
.netflix.com
Select [Netflix ESN] option and the serial number will appear.
BD
HB954PA-AD.954SA-AP.BUSALL_ENG 12/18/08 5:31 PM Page 27
Page 10
28
Notes:
• When you turn on the player or replace a disc, the player returns to the
initial default setting. Depending on a disc, a specific type of audio that
the disc has is output.
• Depending on the pre-recorded contents of the BD-ROM, some functions may not be available or may be operated differently than other
media.
If a disc menu screen is displayed
The menu screen may be displayed first after loading a disc which contains
a menu.
Use b / B / v / V buttons to select the title/chapter you want to view, then
press ENTER to start playback.
Skip to the next/previous chapter/track/file
During playback, press . or > to go to the next chapter/track/file or
to return to the beginning of the current chapter/track/file.
Press . twice briefly to step back to the previous chapter/track/file.
Resume playback
During playback, press STOP (x) to stop playback.
The unit records the stopped point, depending on the disc. “Xx” appears
on the screen briefly. Press PLAY (N) to resume playback (from the
scene point). If you press STOP (x) again or unload the disc (“x” appears
on the screen.), the unit will clear the stopped point. (Xx = Resume Stop,
x = Complete Stop)
Notes:
• The resume point may be cleared when a button is pressed
(for example; POWER, OPEN/CLOSE, etc).
• On BD-Video discs including BD-J, the resume play function does not
work.
• On BD-ROM interactive title, the unit will be in Complete Stop mode if
you press STOP once during playback.
Pause a playback
During playback, press PAUSE (X) to pause playback. Press PLAY (N)
to continue playback.
Tip: During Audio CD or MP3/WMA playback, press X once again to
resume playback.
Frame-by-Frame playback
Press PAUSE (X) repeatedly to play Frame-by-Frame playback.
Slow down the playing speed
While the playback is paused, press SCAN M repeatedly to play in slow
motion (4 steps, forward only).
Fast forward or fast reverse
Press SCAN (m or M) to play fast forward or fast reverse during
playback.
You can change the various playback speeds by pressing SCAN (m or
M) repeatedly. Press PLAY (NN) to continue play at normal speed.
ALL
AVCHD
DVDBD
AVCHD
DVDBD
ALL
ALL
ALL
AVCHD
DVDBD
Play a disc
1 Open the disc tray: OPEN/CLOSE (ZZ)
2 Insert a disc: 3Close the disc tray: OPEN/CLOSE (ZZ)
4 Adjust the disc menu settings: v V b B, ENTER
A disc menu may not appear on the screen
depending on the disc.
5 Starts playback: PLAY (NN)
6 Stops playback: STOP (
xx
)
ON REMOTE
HB954PA-AD.954SA-AP.BUSALL_ENG 12/18/08 5:31 PM Page 28
Page 11
29
Playing repeatedly
Press REPEAT repeatedly to select a desired repeat mode. The current
title, chapter or track will be played back repeatedly. To return to normal
playback, press REPEAT repeatedly to select [OFF].
Note:
If you press > once during Repeat Chapter/Track playback, the repeat
playback cancels.
Viewing the Title menu or Popup menu
Press TITLE/POPUP to display the title menu or popup menu.
If the current DVD or BD-ROM disc has a menu, the Title menu or Popup
menu appears on the screen. Depending on the disc, the menu may not be
available.
Using the search menu
During playback, press SEARCH to display the search menu.
Press b / B to skip the playback 15 seconds forward or backward.
Tip:
You can select a point that you want to skip by pressing and holding b / B
button.
Marker Search
To enter a Marker
You can start playback from up to nine memorized points. To enter a marker, press MARKER at the desired point on the disc. The Marker icon
appears on the TV screen briefly. Repeat to enter up to nine markers.
To Recall or Clear a Marked Scene
Press SEARCH and the search menu appears on the screen.
Press a number button to select a marker number that you want to recall.
Playback starts from the marked scene.
OR
Press V to highlight a marker number. Use b / B to select a marked scene
that you want to recall or clear.
Press ENTER and playback starts from the marked scene. Press CLEAR
and the marked scene is erased from the search menu.
Notes:
• This function may not work on some disc or titles.
• All marked points are cleared if you press STOP (x) twice (complete
stop), the title is changed or if you unload the disc.
AVCHD
DVD
BD
AVCHD
DVDBD
AVCHD
DVD
BD
ALL
HB954PA-AD.954SA-AP.BUSALL_ENG 12/18/08 5:31 PM Page 29
Page 12
30
Selecting a subtitle language
During playback, press SUBTITLE repeatedly to select a desired subtitle
language.
OR
During playback, press DISPLAY to display the playback menu.
Use v V to select the [Subtitle] option then use bB to select desired
subtitle language.
Note:
Some discs allow you to change subtitle selections only via the disc menu.
If this is the case, press TITLE/POPUP or DISC MENU button and choose
the appropriate subtitle from the selections on the disc menu.
Hearing a different audio
During playback, press DISPLAY to display the playback menu.
Use v V to select the [Audio] option then use bB to select desired
audio language or audio track.
Notes:
• Some discs allow you to change audio selections only via the disc
menu. If this is the case, press TITLE/POPUP or DISC MENU button
and choose the appropriate audio from the selections on the disc menu.
• Immediately after you have switched sound, there may be a temporary
discrepancy between the display and actual sound.
• On BD-ROM disc, the multi audio format (5.1CH or 7.1CH) is displayed
with [MultiCH] in the on-screen display.
Using coloured (A, B, C, D) Buttons
These buttons are available only during BD-J contents playback. Use the
appropriate buttons as indicated by the display. Depending on the disc
contents, the functions of each button may differ.
Last Scene Memory
This unit memorizes last scene from the last disc that is viewed. The last
scene remains in memory even if you remove the disc from the unit or
switch off the unit. If you load a disc that has the scene memorized, the
scene is automatically recalled.
Notes:
• Settings are stored in memory for use any time.
• This unit does not memorize settings of a disc if you switch off the unit
before commencing to play it.
• Last Scene Memory function for a previous disc is erased once a
different disc is played.
• This function may not work depending on the disc.
Screen Saver
The screen saver appears when you leave the player in Stop mode for
about five minutes.
Note:
Depending on the unit status, the screen saver may not appear.
DVD
BD
BD
AVCHD
DVDBD
AVCHD
DVDBD
HB954PA-AD.954SA-AP.BUSALL_ENG 12/18/08 5:31 PM Page 30
Page 13

31
a Title – Current title number/total number of titles.
b Chapter – Current chapter number/total number of chapters.
c Time – Elapsed playing time.
d Audio – Selected audio language or channel.
e Subtitle – Selected subtitle.
f Angle – Selected angle/total number of angles.
Notes:
• If no button is pressed for a few seconds, the on-screen display
disappears.
•
A title number cannot be selected on some discs.
• An item may not be available on some discs or titles.
• If BD interactive title is playing back, some setting information is
displayed on the screen but prohibited to be changed.
Moving to another title/chapter
When a disc has more than one title/chapter, you can move to
another title/chapter/track.
Press DISPLAY during playback then use v / V to select the
[Title/Chapter] icon. Then, press the appropriate numbered button
(0-9) or b / B to select a title/chapter number.
Playing from selected time
Press DISPLAY during playback. The time search box shows the elapsed
playing time. Select the [Time] option and then input the required start time
in hours, minutes, and seconds from left to right. For example, to find a
scene at 2 hours, 10 minutes, and 20 seconds, enter “21020” and press
ENTER. If you enter the wrong numbers, press CLEAR and enter the
correct numbers.
Note:
This function may not work on some disc or titles.
Watching from a different angle
If the disc contains scenes recorded at different camera angles, you can
change to a different camera angle during playback.
During playback, press DISPLAY to display the playback menu. Use v V
to select the [Angle] option, then use bB to select desired angle.
DVDBD
AVCHD
DVDBD
AVCHD
DVDBD
Displaying disc information
1 Play the disc loaded on the unit: PLAY
2 Displays the playback menu: DISPLAY
3 Select an item:
vv VV
4 Adjust the playback menu settings:
bb BB
5 Exit the disc playback menu: DISPLAY
ON REMOTE
a
b
c
d
e
f
HB954PA-AD.954SA-AP.BUSALL_ENG 12/18/08 5:31 PM Page 31
Page 14

32
This unit allows you to enjoy functions such as picture-in-picture,
secondary audio and Virtual packages, etc., with BD-Video supporting
BONUSVIEW (BD-ROM version 2 Profile 1 version 1.1/ Final Standard
Profile). In addition to the BONUSVIEW function, BD-Video supporting
BD-Live (BD-ROM version 2 Profile 2) that has a network extension
function allows you to enjoy more functions such as online games by
connecting this unit to the Internet.
Enjoying BD-Live discs with Internet
This unit supports BD-Live, a new BD-Video function that allows you to use
the following interactive functions when connected to the Internet. (The
usable functions and the operating method may vary with each disc. For
details, refer to the instructions for the disc.)
– Additional contents such as movie’s trailer, subtitles and BD-J, etc. can
be downloaded to the USB Flash Drive to play them.
– Special video data, etc. may be played back while they are being
downloaded to a USB Flash Drive.
Preparations:
• The unit must be connected to the Internet and set up to use the
BD-Live functions (see page 18 and 26).
•AUSB Flash Drive is required to use this function. Connect a USB Flash
Drive (see page 20).
• The free space in the USB Flash Drive must be more than 1GB.
Caution:
Do not extract the USB Flash Drive while contents are being downloaded
to it. Doing so may result in malfunctions.
Notes:
• It may take up to several minutes to load and start enjoying BD-Live
contents.
• Depending on a disc, the BD-Live function may not be operated if [BDLIVE connection] option is set to [Partially permitted]. (See page 26.)
• The connection to the Internet may take time or the Internet may not
be connected depending on the connection environment. It is required
that you use a broadband connection.
• Do not remove the USB Flash Drive during operation. The USB Flash
Drive may be damaged. Stop playback and turn off the menu beforehand.
Tip:
Special video data, etc. may be played back while they are being downloaded to a USB Flash Drive using one function of BD-Live. The playback
may be paused depending on the communication environment.
Some functions may be disabled to prevent skipping to sections that have
not been downloaded, etc.
AACS Online
When discs supporting BD-Live are played back, the player or disc IDs
may be sent to the content provider via the Internet.
Services and functions to be provided differ depending on the disc.
–You can be introduced to other similar movies if you record your view-
ing history on the server by using these IDs.
– Game score histories can be saved.
Enjoying BD-LIVE™
1 Inserts a BD-ROM disc with BD-LIVE™ OPEN/CLOSE (Z)
features:
2 Check the network connection and settings: –
BD-Live features need the internet connection.
3 Inserts an USB Flash Drive to the USB port: –
BD-Live features need an USB Flash Drive.
4 Select a BD-LIVE™ features on the v V b B, ENTER
disc menu:
ON REMOTE
HB954PA-AD.954SA-AP.BUSALL_ENG 12/18/08 5:31 PM Page 32
Page 15

33
Playing secondary video (picture-in-picture)
Secondary video can be played from a disc compatible with the picture-inpicture function.
For the playback method, refer to the instructions for the disc.
To turn on/off secondary video, press PIP. Secondary video is played.
Press the button to turn it ON or OFF.
Notes:
• Discs may not always be played back according to the settings on this
unit, as certain playback formats are prioritized on certain discs.
• Only the primary video is played during search/slow-motion or frame-byframe.
• This function may not work depending on the disc.
Note:
•You can use various playback functions. Refer to pages 28-31.
• On the [MOVIE] menu, use red (A) or blue (D) button to move to the
previous or next page.
• Unfinalized DVD VR format discs may not be played in this player.
• Some DVD-VR disc are made with CPRM data by DVD RECORDER.
This unit cannot support these kinds of discs.
What is CPRM?
CPRM is a copy protection system (with scramble system) only allowing
the recording of ‘copy once’ broadcast programs. CPRM stands for
Content Protection for Recordable Media.
Playing a DVD VR Format Disc
1 Insert a disc containing movie contents. –
2Displays the [Home Menu]: HOME
3 Select the [Movie] option:
bb BB
, ENTER
4 Selects a movie from the [MOVIE] menu: v V
5 Plays the selected movie: PLAY
Press DISC MENU to move to the list menu.
6Stops the playback: STOP
The player can play video contents recorded on a
DVD-RW(VR mode) discs.
ON REMOTE
HB954PA-AD.954SA-AP.BUSALL_ENG 12/18/08 5:31 PM Page 33
Page 16

34
Movie List menu options
Use v / V to select a title on the [MOVIE] menu then press ENTER. The
menu options appear.
Use v / V to select an option, then press ENTER.
• [Play] Starts playback of the selected title.
• [Resume Play] Starts playback from where you stopped it previously.
• [Close] Exits menu options. Also you can disappear it by pressing
RETURN button.
HB954PA-AD.954SA-AP.BUSALL_ENG 12/18/08 5:31 PM Page 34
Page 17

35
Example) Audio CD
Note:
When the USB Flash Drive is connected and a disc is inserted simultaneously, the menu for selecting a media will appear. Select a media then
press ENTER.
Tips:
•To go directly to any track or file and play, enter the track/file number
using the numbered buttons (0-9).
• The playback may start automatically if the Audio CD inserted.
• Select a folder then press ENTER and you can view the files in the
folder. If you want to move to the upper directory, use b or v/V to
highlight
[UP Folder]
and press ENTER.
• On the [MUSIC] menu, use red (A) or blue (D) button to move to the
previous or next page.
• The equalizer indicator is not coupled with the music in play back.
• If there is impossible code to express in the file name, it may be
displayed as illegible.
The [MUSIC] menu options
Use v / V to select a track or file on the [MUSIC] menu then press
ENTER. The menu options appear.
Use v / V to select an option, then press ENTER.
• [Play] Starts playback the selected track or file.
• [Select Play] Plays back only the marked track(s) or file(s). Use
MARKER for selecting the multiple files or tracks.
• [Random] Starts or stops random playback.
By pressing > during random playback, the unit selects another
track and resumes random playback.
• [Unmark All] Unmarks all marked files or tracks.
• [Close] Exits menu options. Also you can disappear it by pressing
RETURN button.
Note:
You cannot use [Select Play] and [Random] functions simultaneously.
Listening to a music
1 Insert an Audio CD or a disc/USB Flash –
Drive containing MP3/WMA files.
2Displays the [Home Menu]: HOME
3 Select a [Music] option:
bb BB
, ENTER
4 Selects a music from the [MUSIC] menu: v V
5 Plays the selected music: PLAY
6Stops the playback: STOP
The player can play Audio CDs and MP3/WMA
files. Before playing MP3/WMA files, read
“MP3/WMA audio file requirement” on page 36.
ON REMOTE
HB954PA-AD.954SA-AP.BUSALL_ENG 12/18/08 5:31 PM Page 35
Page 18

36
MP3/WMA audio file requirement
File extensions: “.mp3”, “.wma”
Sampling frequency: 8 - 48 kHz
Bit rate: 8 - 320kbps
CD-R/RW, DVD±R/RW, BD-R/RE Format:
ISO 9660+JOLIET, UDF and UDF Bridge format
Maximum Files/Disc:
Less than 1999 (total number of files and folders)
Notes on MP3/WMA file
• Depending on the size and number of the MP3/WMA files, it may take
several minutes to read the contents of the media.
• This unit cannot support the ID3 Tag embedded in the MP3 file.
Note:
When the USB Flash Drive is connected and a disc is inserted
simultaneously, the menu for selecting a media will appear. Select a media
then press ENTER.
Tips:
•To go directly to any file and play, enter the file number using the
numbered buttons (0-9).
•You can advance to the previous or next file by pressing . or >
during viewing a photo file in full screen.
•You can start the slide show by pressing PLAY (N) while the
[PHOTO] menu appears.
Viewing a photo
1 Insert a disc/USB Flash Drive containing –
photo files.
2Displays the [Home Menu]: HOME
3 Select a [Photo] option: b/B, ENTER
4Selects a photo from the [PHOTO] menu: v/V/b/B
5Displays the selected photo in full screen: ENTER
6Displays the next or previous photo: . / >
7 Return to the [PHOTO] menu screen: STOP
This unit can play a photo files. Before playing
photo files, read “Photo file requirement” on page
37.
ON REMOTE
HB954PA-AD.954SA-AP.BUSALL_ENG 12/18/08 5:31 PM Page 36
Page 19

37
• Select a folder then press ENTER and you can view the files in the
folder. If you want to move to the upper directory, use v/V/b/B to
highlight
[UP Folder]
and press ENTER.
• On the [PHOTO] menu, use red (A) or blue (D) button to move to the
previous or next page.
• If there is impossible code to express in the file name, it may be displayed as illegible.
Options during viewing a photo file in full screen
You can use various options during viewing a picture in full screen.
Use v V b B to select an option and use the options as described below.
a Use b/B to advance to the previous or next file.
b Press ENTER to start or pause the slide show.
c Press ENTER to play or pause the background music. This option
is available after the background music is selected using
[Music Select] option.
d Press ENTER to rotate the picture clockwise.
This option is not available during slide show.
e Press ENTER to set the Slide Show speed.
f Selects the background music.
1) Press ENTER and the menu will appear.
2) Use v/V/b/B to select a media or folder that there are music
file(s).
3) Press ENTER to confirm your selection.
g Press ENTER to exit the option menu.
To appear the menu again, press ENTER.
Photo file requirement
File extensions: “.jpg”, “.jpeg”, “.png”
Recommended size:
Less than 3,000 x 3,000 x 24 bit/pixel
Less than 3,000 x 2,250 x 32 bit/pixel
CD-R/RW, DVD±R/RW, BD-R/RE Format:
ISO 9660+JOLIET, UDF and UDF Bridge format
Maximum Files/Disc:
Less than 1999 (total number of files and folders)
Notes on Photo file
• Progressive and lossless compression photo image files are not
supported.
• Depending on the size and number of the photo files, it may take
several minutes to read the contents of the media.
bcdefg
a
HB954PA-AD.954SA-AP.BUSALL_ENG 12/18/08 5:31 PM Page 37
Page 20

38
You can instantly watch movies (very few new releases) & TV episodes
from Netflix streamed over the internet to your TV via your LG BD player.
To become a Netflix member visit: www.netflix.com/LG
Activating your player
You must activate your player before you can use it to watch movies
streamed over the INTERNET from Netflix.
3. On your computer, visit
www.netflix.com/activate.
4. If necessary, enter your [Sign in Name] and [Password] to log into
your account.
6. When the “Congratulations” screen appears on your TV, you’re ready
to add movies to your instant Queue. See “Filling your instant Queue”
for instruction.
Notes:
• If newer software is needed, a software update screen will automatically
appear when you select [Streaming] from the home menu. For details on
software updates, see page 45.
•
For questions regarding the Netflix service please visit:
www.netflix.com/LG/help
or call 1-866-579-7113
• For questions regarding your player please visit:
www
.us.lgservice.com
or call 1-800-243-0000
• You can deactivate steraming from Netflix to your player using
[Deactivate Netflix] option on the setup menu (see page 27).
Playing Netflix Streaming
1 Check the network connection and settings: –
See page 18 and 26.
2 Check the network configurations: –
See page 26.
3Displays the [Home Menu]: HOME
4 Select the [Streaming] option:
bb BB
, ENTER
ON REMOTE
1.
2.
Use v / V to select the [yes activate instant streaming from
Netflix] then press ENTER.
Wait for the activation screen to
appear on your TV screen. You
are now ready to complete
activation on the Netflix website.
5.
Enter the activation code that
appears on your TV screen.
HB954PA-AD.954SA-AP.BUSALL_ENG 12/18/08 5:31 PM Page 38
Page 21

39
Using your player for Netflix
After you activate your player, you’re ready to add movies & TV episodes
to your instant Queue. You can then use your player’s remote to browse
your instant Queue and to select and watch titles on your TV. You will be
amazed at how quick and easy it is.
Filling your instant Queue
Your instant Queue works just like your DVD Queue. Add and manage the
movies & TV episodes in your instant Queue from the Netflix website on
your computer. Your instant Queue also appears on your TV via your
player, so your selections are available to watch anytime.
1. Visit the Netflix website on your computer: www
.netflix.com
5. Repeat step 4 to add more movies & TV episodes to your instant
Queue.
6. (Optional) Arrange your instant Queue by clicking the [Instant] subtab.
•To rearrange your instant Queue, drag and drop the titles in the
order you want them, or change the numbers to the left of the titles
and then click [Update Instant Queue] to your changes.
•To remove a title from your instant Queue, click the [Remove] check
box to the right of the title and then click [Update Instant Queue] to
your changes.
2.
If necessary, enter your Sign in
Name and Password to log
into your account.
3.
Click [Watch Instantly] tab.
4.
When you find a movie or TV
episode you want to watch,
mouse over the [Add/Play]
button to reveal additional
options, and then click [Add to
instant Queue].
HB954PA-AD.954SA-AP.BUSALL_ENG 12/18/08 5:31 PM Page 39
Page 22

40
Selecting a movie to watch on your TV
After you set up your player and add movies & TV episodes, you can
browse and watch them on your TV.
1. Press HOME and the home menu will appear.
3. Use b / B to highlight a movie on your instant Queue. Use m / M
button to move to the previous or next page.
The selected movie shows the title, rating and total time.
4. Do either of the following:
• Press PLAY (N) to play back the highlighted title.
• Press ENTER to view details for the highlighted title, and then use
v / V to choose any of the menu items:
[play] Starts playing the selected title.
[resume playing] Plays a previously paused title from the scene
where you paused it. This option is available only if you begin
watching a title and then pause it.
[play from beginning] Starts playing from the beginning of the
selected title.
[choose a different episode] (TV series only) Enables you to select
a specific show of a TV series. Press b / B to highlight the show
you want to view, and then press ENTER to choose it.
[rate] Enables you to rate a movie or show. The more stars, the
higher the rating. Press ENTER to access the rating feature, and
then press b / B to increase or decrease the rating. Press ENTER
again to confirm the selected rating.
[remove] Deletes the selected movie from your instant Queue.
[remove series] (TV series only) Deletes the selected TV series from
your instant Queue.
5. Press v to return to your instant Queue.
Playing a movie
While watching a movie or TV episode from Netflix via your player, you
have full control over your viewing experience. You can use the buttons
on the remote to pause and resume viewing and to scan forward and
backward, just like when you watch a DVD. While playing a movie, the
buttons on the remote do the following:
Button(s) Operations
N (PLAY) Starts playing back the movie.
X To pause a movie while it’s playing. To resume playing
a paused movie, press N (PLAY) again.
x / v Stops the movie and displays your instant Queue.
ENTER Pauses playing the movie and enters frame scanning
mode.
B Pauses playing the movie and enters frame scanning
mode. To scan forward one frame at a time, press the
button again.
b Pauses playing the movie and enters frame scanning
mode. To scan backward one frame at a time, press the
button again.
M / m Pauses playing the movie and scans forward or backward
through the movie. To scan faster, press the button again.
To play the highlighted scene, press ENTER or N.
To resume playing from the point you paused the movie,
press v.
HOME When you have finished watching movies streamed from
Netflix, simply press the HOME button on the remote
control to go to the Home Menu.
Note:
Even if you use a high-resolution setup, audio/video quality may be
compromised based on the speed of your broadband internet connection.
Your Internet Service Provider (ISP) determines your broadband speed.
We recommend a minimum connection speed of 1.5 Mbps. For the best
quality picture, a connection speed of 4.0 Mbps is required. Sometimes
your broadband speed varies based on your ISP’s network conditions.
Contact your ISP if you have problems maintaining a fast connection that
is reliable, or if you want to increase your connection speed. Many ISPs
offer a variety of broadband speed options.
2.
Use b / B to select the
[Streaming] then press
ENTER.
The instant Queue screen will
appear.
HB954PA-AD.954SA-AP.BUSALL_ENG 12/18/08 5:31 PM Page 40
Page 23

41
Listening to the radio - more you can do
Look for radio stations automatically
Press and hold TUN.-/TUN.+ for more than a second. The tuner will scan automatically and stop when it finds a radio station.
Choose a preset number for a radio station
When storing a radio station, the preset number can be chosen. When this unit
automatically shows a preset number, press PRESET
vv /VV
to change it. Press
ENTER to save your chosen number.
Delete all the saved stations
Press and hold ENTER for two seconds. ERASE ALL will flash up on the
display. Press ENTER to erase all saved radio stations.
Improve poor FM reception
Press MO./ST. This will change the tuner from stereo to mono and usually
improve the reception.
Listening to the radio
1 Select FM or AM: TUNER (INPUT)
2Select a radio station: TUN. -/+
3To save a radio station: ENTER
A preset number will show on the display.
Up to 50 radio stations can be saved.
4To confirm press: ENTER
5To select a saved station PRESET
vv /VV
ON REMOTE
Be sure that FM and AM antennas are connected.
Playing the iPod
For details about iPod, refer to the iPod User Guide.
Preparation
• To view videos and the menus of OSD IPOD mode on the TV screen.
- Make sure that the system is connected to the TV. (Refer to
“Connections to Your TV” on page 14-15). Select the appropriate video
input mode on the TV.
• To view videos on the TV screen if this unit is in REMOTE IPOD mode.
-
Be sure to use the video connection through the MONITOR OUTPUT jack.
- Make sure that select Videos > Video settings, and then set TV Out to
Ask or On from your iPod.
For details about Video Settings, refer to the iPod User Guide.
• Before connecting the iPod, turn this unit off and reduce the volume of
this unit to its minimum.
Connect the iPod firmly.
To open the iPod Dock:
Push the marked Z.
To close the iPod Dock:
Push the iPod Dock forward.
Select an iPod mode Press iPod.
•
REMOTE IPOD mode: You can operate your iPod through an iPod’s
display by using the supplied remote control and also control on your iPod.
• OSD IPOD mode: You can operate your iPod by controlling OSD menu
on the TV screen with the supplied remote control. The controls on
your iPod are not operational in the OSD iPod mode.
Do this on remoteTo
• If you turn this unit on, your iPod is automatically turned on and recharging starts.
HB954PA-AD.954SA-AP.BUSALL_ENG 12/18/08 5:31 PM Page 41
Page 24

Tip:
You may use the dock adapter which should be supplied with your iPod to
the dock for the stable use of the iPod.
If you need an adapter, consult your iPod dealer.
Notes:
• This unit does not support playing photos from your iPod.
•
Compatibility with your ipod may vary depending on the type of your iPod.
• iPod touch and iPhone have any difference in operation other than iPod.
You may need any additional control to use them with this unit.
(e.g. “slide to unlock”)
• Depending on your iPod’s software version, it may not be possible to
control your iPod from this unit. We recommend installing the latest
software version.
• If this unit displays an error message, follow the message.
An error message “CHECK IPOD” or “Please check your iPod.”
appears when:
- the communication between this unit and your iPod is failed.
tt
Undock & re-dock your iPod in this unit.
- your iPod is not connected firmly.
- this unit recognizes your iPod as unknown device.
- your iPod is exceptionally low on power.
tt
The battery needs to be charged.
An error message “CHECK IPOD” or “Connected iPod model is not
supported.” appears when:
- your iPod is not available for the function to be operated.
An error message
“CHECK IPOD” or
“Please update iPod’s software.”
appears when:
- your iPod has an old software version.
tt
Update your iPod software to latest version.
• If you have a problem with your iPod, please visit
www.apple.com/support/ipod.
42
Select a menu item Press v V and B or ENTER.
Go back to the previous menu
Press RETURN (OO) or DISC MENU or b.
Browse for a song From the main menu, select Music.
Browse for a video From the main menu, select Videos.
Play a song or video
Select the song or video and press ENTER.
Pause a song or video Press PAUSE/SETUP (XX) or PLAY (B).
To continue playback, press
PAUSE/SETUP (XX) or PLAY (B) again.
Skip to the next song or Press SKIP (>).
chapter in an audiobook or
podcast
Start a song or video over Press SKIP (.).
Play the previous song or Press SKIP (.) twice.
chapter in an audiobook or
podcast
Fast-forward or rewind a song Press and hold SCAN (m or M).
or video
Repeat a song Press REPEAT repeatedly to select a
desired repeat mode: Track (
1), All ( ),
Off (No display).
Do this on remoteTo
HB954PA-AD.954SA-AP.BUSALL_ENG 12/18/08 5:31 PM Page 42
Page 25

43
Listening to music from your
portable audio player
1 Connect the headphones (or line out ) jack
of the portable audio player into the PORT.
IN on the rear panel of this unit: 2Turn the power on: POWER
3 Select the [PORTABLE] option: INPUT
4Turn down the volume of this unit: VOL. (+/-)
5Turn the portable audio player on and start
it playing: 6 Adjust the volume of this unit and your VOL. (+/-)
portable audio player:
You can enjoy the sound of your portable audio player from the speakers
of the system.
ON REMOTE
Listening to the sound from
your component
1 Connect the analog audio output jacks of your
component into the AUX L/R (INPUT) on the rear
panel of this unit: 2Turn the power on: POWER
3 Select the [AUX] option: INPUT
4 Turn down the volume of this unit: VOL. (+/-)
5Turn your component on: 6 Adjust the volume: VOL. (+/-)
You can enjoy the sound of your component with the analog audio
output jacks from the speakers of the system.
ON REMOTE
3.5 mm stereo
miniplug cable
To the audio output jacks
of your component
(TV, VCR, etc.)
HB954PA-AD.954SA-AP.BUSALL_ENG 12/18/08 5:31 PM Page 43
Page 26

44
1 Connect the optical or coaxial output jack
of your component into the OPTICAL or
COAXIAL (DIGITALAUDIO IN) jack on the
rear panel of this unit. -
2Turn the power on: POWER
3 Select the [OPTICAL] or [COAXIAL] option: INPUT
4Turn down the volume: VOL.(+/-)
5Turn your component on: 6 Adjust the volume: VOL.(+/-)
You can enjoy the sound of your component with the digital
optical or coaxial output jack from the speakers of the system.
ON REMOTE
Using DIGITAL AUDIO IN jacks
To the digital optical output jack of your component
To the digital coaxial output jack of your component
or
1 Connect the HDMI OUT jack of your
component into the HDMI IN 1 or 2 jack on
the rear panel of this unit. 2Turn the power on: POWER
3
Select the [HDMI IN 1] or [HDMI IN 2] option:
INPUT
4Turn down the volume: VOL.(+/-)
5Turn your component on: 6 Adjust the volume: VOL.(+/-)
You can enjoy the sound of your component with the HDMI OUT jack
from the speakers of the system.
ON REMOTE
Using HDMI IN jacks (LHB977 only)
To the HDMI OUT jack of your component
(TV, set-top box, digital satellite receiver, video game machine, etc.)
HB954PA-AD.954SA-AP.BUSALL_ENG 12/18/08 5:31 PM Page 44
Page 27

Software Update
You can update the player using the latest software to enhance the
products operation and/or add new features. You can update the software
by connecting the unit directly to the software update server.
Step 1: Check the Network Connection and settings
See page 18 and 26.
Step 2: Checking Network Configuration
See page 26.
Step 3: Updating Software
Cautions:
• Before updating the software in your player, remove any disc and USB
Flash Drive from the player.
• Before updating the software in your player, turn the player off and then
turn it back on.
• During the software update procedure, do not turn off the player or
disconnect AC power, or do not press any button.
• If you cancel the update. turn off the power and turn it on for stable
performance.
• This unit cannot be updated to previous software version.
1. Select [Software Update] option in the [Setup] menu then press B or
ENTER.
2. The player will check for the newest update.
Caution: Pressing ENTER while checking for the update will end the
process.
Note: If there is no update available, the Message, “No update is
found.” appears. Press ENTER to return to the [Home Menu].
3. If newer version exists, the message “A new update was found. Do
you want to download it?” appears.
4. Select OK to download the update. (Selecting [CANCEL] will end the
update.)
5. The player starts downloading the newest update from the server.
(Downloading will take about 80 seconds at the network speed of
4Mbps Speed.)
6. When downloading is completed, the message, “Download is
complete. Do you want to update?” appears.
7. Select OK to start updating.
(Selecting [CANCEL] will end the update and downloaded file will not
be re-usable. To update software the next time, the software update
procedure has to be started from the beginning again.)
Caution: Do not turn off the power during the software update.
Note: If the software includes the driver update, disc tray may open
during the process.
8. When update is completed, the message, “Update is complete.” will
appear, and the power will turn off automatically after 5 seconds.
9. Turn the power back on. The system now operates with the new version.
10. After completing the update process, repeat procedures 1-4 in Step 4
and check if there are no more updates available.
Tip:
The Software Update function may not work properly depending on
your internet environment. In this case, you can obtain the latest software from the authorized LG Electronics Service Center then update
your player. Refer to “Customer Support” on page 50.
45
HB954PA-AD.954SA-AP.BUSALL_ENG 12/18/08 5:31 PM Page 45
Page 28

46
Reference
Controlling a TV with the Supplied Universal
Remote Control
You can control the volume, input source, and power state of your TV with
the supplied Universal Remote Control.
You can control your TV using the buttons below.
By pressing You can
TV POWER Turn the TV on or off.
INPUT Switch the TV’s input source between the
TV and other input sources.
PR/CH vv/
VV
Scan up or down through memorized
channels.
VOL +/– Adjust the volume of the TV.
MUTE Temporarily turns TV sound OFF, press
again to restore.
Note:
Depending on the unit being connected, you may not be able to control
your TV using some of the buttons.
To program the remote to control the TV using the
manufacturer code
If your TV is listed in the table on the next page, set the appropriate
manufacturer code.
1. While holding down TV POWER button, press the number buttons to
select the manufacturer code for your TV (Refer to table on the next
page).
• If more than one code number is listed, try entering them one at a
time until you find the one that works with your TV.
2. Release TV POWER button.
Notes:
• Depending on your TV, some or all buttons may not function on the TV,
even after entering the correct manufacturer code.
• If you enter a new code number, the code number previously entered
will be erased.
• When you replace the batteries of the remote, the code number you
have set may be reset to the default setting. Set the appropriate code
number again.
POWER
TV Control
Buttons
Number
Buttons
HB954PA-AD.954SA-AP.BUSALL_ENG 12/18/08 5:31 PM Page 46
Page 29

Manufacturer Code Number
A MARK 112 143
ADMIRAL 072 081 161
AKAI 006 146
AMPRO 073 167
AMSTRAD 052
ANAM 026 043 054 056 080 104 108 112 115
118 121 131
AOC 004 006 058 112
BLAUPUNKT 088
CANDLE 002 003 004 006
CAPEHART 058
CETRONIC 043
CITIZEN 002 003 004 006 043 101 103 143
CLASSIC 043
CONCERTO 004
CONTEC 039 043 050 051
CORONADO 143
CRAIG 043 054
CROWN 043 143
CURTIS MATHES
004 006 101 116 143
CXC 043
DAEWOO 004 016 017 043 044 055 071 076 103
107 111 114 117 120 123 125 127
128 136 143
DAYTRON 004 116 143
DYNASTY 043
DYNATECH 062
ELECTROHOME
024 077 143
EMERSON 004 005 006 028 043 047 048 050 051
096 116 143 151 153 154 155
FISHER 007 057
FUNAI 028 043
FUTURETECH 043
GE 004 006 008 009 034 056 073 074 091
116 130 144 155 160 161 165
HALL MARK 004 116
HITACHI 004 006 009 010 011 012 023 041 075
143 158 163 166 187
INFINITY 164
INKEL 129
JBL 164
JCPENNY 004 006 008 009 024 030 065 101 143
156 160
JENSEN 013
JVC 034 038 070 083 145
Manufacturer Code Number
KEC 043
KENWOOD 006 070
KLOSS 002 059
KMC 143
KTV 006 043 143 154
LG 001(Default) 004 102 106 110 112 113
116 119 122 127 137 143
LODGENET 072
LOGIK 072
LUXMAN 004
LXI 007 015 052 081 160 164 166
MAGNAVOX 003 004 006 022 059 060 061 063 064
127 143 160 164
MARANTZ 006 077 164
MATSUI 164
MEMOREX 004 007 072 116
METZ 088
MGA 004 006 024 028 042 049 077 116
MINERVA 088
MITSUBISHI
004 006 024 028 040 042 109 116 124 146
MTC 004 006 062 101
NAD 015 025
NEC
006 007 016 019 024 040 056 130 132 134
NIKEI 043
ONKING 043
ONWA 043
OPTONICA 019 081
PADIO SHACK 004
PANASONIC 034 056 080 092 164
PHILCO 003 004 006 024 043 056 059 060 063
064 127 143 164
PHILIPS 003 004 005 006 038 059 070 093 143
160 164
PIONEER 006 018 023 025 027 116 135 176
PORTLAND 004 143
PROSCAN 144 160 161 165 167
PROTON 004 058 116 131 143 171 173
QUASAR 034 056 092
RADIO SHACK
019 043 047 116 127 143
RCA 004 006 023 024 056 065 074 144 152
156 160 161 165
Manufacturer Code Number
REALISTIC 007 019 043 047
ROCTEC 186
RUNCO 168 169
SAMPO 004 006 058 116
SAMSUNG 004 050 089 101 105 113 116 127 133
137 143 160
SANYO 007 020 021 033 039 053 057 082 166
SCOTT 004 028 043 048 116 143
SEARS 004 007 015 028 030 057 082 094 101
116 143 160
SHARP
004 014 019 022 028 029 081 143 170 175
SIEMENS 088
SIGNATURE 072
SONY 041 070 079 085 126 139 147 185
SOUNDESIGN 003 004 028 043 116
SPECTRICON 112
SSS 004 043
SUPRE MACY 002
SYLVANIA 003 004 006 044 059 060 063 064 116
127 140 160 164
TANDY 081
TATUNG 056 062
TECHNICS 034 080 084
TECHWOOD 004
TEKNIKA 002 003 004 006 024 028 031 043 072
077 101 103 143
TELEFUNKEN 037 046 086 087
TELERENT 072
TERA 172
TMK 004 116
TOSHIBA 007 015 030 040 051 062 101 138
TOTEVISION 143
UNIVERSAL 008 009
VIDEO CONCEPTS
146
VIDIKRON 174
VIDTECH 004 116
WARDS 004 008 009 019 028 060 061 063 064
072 074 116 143 164
YAMAHA 004 006
YORK 004 116
YUPITERU 043
ZENITH 001 072 073 095 103 157
ZONDA 112
47
Code numbers of controllable TVs
HB954PA-AD.954SA-AP.BUSALL_ENG 12/18/08 5:31 PM Page 47
Page 30

48
Language Codes
Use this list to input your desired language for Disc Audio, Disc Subtitle and Disc Menu.
Area Codes
Choose an area code from this list.
Language Code
Afar 6565
Afrikaans 6570
Albanian 8381
Ameharic 6577
Arabic 6582
Armenian 7289
Assamese 6583
Aymara 6588
Azerbaijani 6590
Bashkir 6665
Basque 6985
Bengali; Bangla 6678
Bhutani 6890
Bihari 6672
Breton 6682
Bulgarian 6671
Burmese 7789
Byelorussian 6669
Chinese 9072
Language Code
Croatian 7282
Czech 6783
Danish 6865
Dutch 7876
English 6978
Esperanto 6979
Estonian 6984
Faroese 7079
Fiji 7074
Finnish 7073
French 7082
Frisian 7089
Galician 7176
Georgian 7565
German 6869
Greek 6976
Greenlandic 7576
Guarani 7178
Gujarati 7185
Language Code
Hausa 7265
Hebrew 7387
Hindi 7273
Hungarian 7285
Icelandic 7383
Indonesian 7378
Interlingua 7365
Irish 7165
Italian 7384
Japanese 7465
Kannada 7578
Kashmiri 7583
Kazakh 7575
Kirghiz 7589
Korean 7579
Kurdish 7585
Laothian 7679
Latin 7665
Latvian, Lettish 7686
Language Code
Lingala 7678
Lithuanian 7684
Macedonian 7775
Malagasy 7771
Malay 7783
Malayalam 7776
Maori 7773
Marathi 7782
Moldavian 7779
Mongolian 7778
Nauru 7865
Nepali 7869
Norwegian 7879
Oriya 7982
Panjabi 8065
Pashto, Pushto 8083
Persian 7065
Polish 8076
Portuguese 8084
Language Code
Quechua 8185
Rhaeto-Romance 8277
Rumanian 8279
Russian 8285
Samoan 8377
Sanskrit 8365
Scots Gaelic 7168
Serbian 8382
Serbo-Croatian 8372
Shona 8378
Sindhi 8368
Singhalese 8373
Slovak 8375
Slovenian 8376
Spanish 6983
Sudanese 8385
Swahili 8387
Swedish 8386
Tagalog 8476
Language Code
Tajik 8471
Tamil 8465
Telugu 8469
Thai 8472
Tonga 8479
Turkish 8482
Turkmen 8475
Twi 8487
Ukrainian 8575
Urdu 8582
Uzbek 8590
Vietnamese 8673
Volapük 8679
Welsh 6789
Wolof 8779
Xhosa 8872
Yiddish 7473
Yoruba 8979
Zulu 9085
Area Code
Afghanistan AF
Argentina AR
Australia AU
Austria AT
Belgium BE
Bhutan BT
Bolivia BO
Brazil BR
Cambodia KH
Canada CA
Chile CL
China CN
Colombia CO
Congo CG
Area Code
Costa Rica CR
Croatia HR
Czech Republic CZ
Denmark DK
Ecuador EC
Egypt EG
El Salvador SV
Ethiopia ET
Fiji FJ
Finland FI
France FR
Germany DE
Great Britain GB
Greece GR
Area Code
Greenland GL
Hong Kong HK
Hungary HU
India IN
Indonesia ID
Israel IL
Italy IT
Jamaica JM
Japan JP
Kenya KE
Kuwait KW
Libya LY
Luxembourg LU
Malaysia MY
Area Code
Maldives MV
Mexico MX
Monaco MC
Mongolia MN
Morocco MA
Nepal NP
Netherlands NL
Netherlands Antilles AN
New Zealand NZ
Nigeria NG
Norway NO
Oman OM
Pakistan PK
Panama PA
Area Code
Paraguay PY
Philippines PH
Poland PL
Portugal PT
Romania RO
Russian Federation RU
Saudi Arabia SA
Senegal SN
Singapore SG
Slovak Republic SK
Slovenia SI
South Africa ZA
South Korea KR
Spain ES
Area Code
Sri Lanka LK
Sweden SE
Switzerland CH
Taiwan TW
Thailand TH
Turkey TR
Uganda UG
Ukraine UA
United States US
Uruguay UY
Uzbekistan UZ
Vietnam VN
Zimbabwe ZW
HB954PA-AD.954SA-AP.BUSALL_ENG 12/18/08 5:31 PM Page 48
Page 31

49
Troubleshooting
Possible Cause
• The power cord is disconnected.
• No disc is inserted.
• The TV is not set to receive DVD signal output.
• The video cable is not connected securely.
• The selected resolution is not capable with your TV.
• The equipment connected with the audio cable is not
set to receive disc signal output.
•
The power of the equipment connected with the audio
cable is turned off.
• The [AUDIO] options are set to the wrong position.
• The player is in reverse play, fast forward, slow motion
or pause mode.
• The disc is upside down.
• An unplayable disc is inserted.
• The rating level is set.
• The disc was recorded on another unit and was not
finalized.
• The Remote Control is not pointed at the remote
sensor on the player.
• The Remote Control is too far from the player.
Symptom
No power.
The power is on, but the
player does not work.
No picture.
No sound.
The player does not start
playback.
The Remote Control does
not work properly.
Correction
• Plug the power cord into the wall outlet securely.
• Insert a disc. (Check the disc indicator in the display window is lit.)
• Select the appropriate video input mode on the TV.
• Connect the video cable securely.
• Select another resolution using RESOLUTION button.
• Select the correct input mode of the audio receiver so you
can listen to the sound from the player.
•Turn on the equipment connected with the audio cable.
• Set the [AUDIO] options to the correct position
(see page 23).
• Return to the normal playback.
• Insert the disc with the playback side down.
• Insert a playable disc. (Check the disc type and regional
code.)
• Change the rating level.
• Finalize the disc on that unit.
• Point the Remote Control at the remote sensor of the
player.
• Operate the Remote Control closer to the player.
HB954PA-AD.954SA-AP.BUSALL_ENG 12/18/08 5:31 PM Page 49
Page 32

50
Resetting the unit
If you observe any of the following symptoms.
• The unit is plugged in, but the power will not turn on or off.
• The front panel display is not working.
• The unit is not operating normally.
You can reset the unit as follows.
• Press and hold the POWER button for at least five seconds. This will
force the unit to power off then turn the unit back on.
• Unplug the power cord, wait at least five seconds, and then plug it in
again.
Customer Support
You can update the Player using the latest software to enhance the products
operation and/or add new features.
To obtain the latest software for this player (if updates have been made),
please contact the following:
Call 1 (800) 243-0000 or
Visit http://us.lgservice.com
and click on PRODUCT SUPPORT
→ Device Driver.
Design and specifications are subject to change without notice.
Troubleshooting
Possible Cause
•AUSB Flash Drive is not connected.
• The connected USB Flash Drive does not have
enough space.
• Internet connection is not established.
• The [BD-LIVE connection] option in the [Setup] menu
is set to [Prohibited].
•Your broadband speed is not fast enough
• The signal strength of the stations is too weak (when
tuning in with automatic tuning).
Symptom
BD-Live feature does not
work.
The Netflix Streaming video
playback is often buffering.
Radio stations cannot be
tuned in.
Correction
• Connect a FAT16 or FAT32 formatted USB Flash Drive to
the USB port (see page 20).
• Secure at least 1GB free space in the USB Flash Drive for
using BD-Live features
• Ensure that the unit is correctly connected to the local area
network and can access the internet (see page 18).
• Set the [BD-LIVE connection] option to [Permitted].
• Contact your Internet Service Provider (ISP) and increase
the broadband speed are recommended.
• Use direct tuning.
HB954PA-AD.954SA-AP.BUSALL_ENG 12/18/08 5:31 PM Page 50
Page 33

51
Specifications
General
Power requirements: AC 120 V~, 60 Hz
Power consumption: 130 W
Dimensions (W x H x D): Approx. 430 x 76 x 379 mm without foot
Net Weight (Approx.): 4.8 kg
Operating temperature: 41 °F to 95 °F (5 °C to 35 °C)
Operating humidity: 5 % to 90 %
Inputs/Outputs
VIDEO OUT: 1.0 V (p-p), 75 Ω, sync negative,
RCA jack x 1
COMPONENT VIDEO OUT: (Y) 1.0 V (p-p), 75 Ω, sync negative,
RCA jack x 1
(Pb)/(Pr) 0.7 V (p-p), 75 Ω, RCA jack x 2
HDMI OUT (video/audio): 19 pin (HDMI standard, Type A)
HDMI IN (video/audio): 19 pin (HDMI standard, Type A)
ANALOG AUDIO IN: 2.0 Vrms (1 kHz, 0 dB), 600 Ω,
RCA jack (L, R) x 1
DIGITAL IN (COAXIAL): 0.5 V (p-p), 75 Ω, RCA jack x 1
DIGITAL IN (OPTICAL): 3 V (p-p), Optical jack x 1
PORT. IN: 0.5 Vrms (
3.5 stereo jack)
Tuner FM/AM
FM Tuning Range: 87.5 - 108.0 MHz
AM Tuning Range: 520 - 1.710 kHz
Amplifier
Stereo mode: 155 W + 155 W (4Ω at 1 KHz, THD 10%)
Surround mode: Left+Right: 155 W + 155 W (THD 10%)
Center: 155 W
Surround: 155 W + 155 W
(4Ω at 1 KHz, THD 10%)
Subwoofer: 225 W (3Ω at 30 Hz, THD 10%)
System
Laser: Semiconductor laser,
wavelength: 405nm / 650 nm
Signal system: Standard NTSC colour TV system
Frequency response: 20 Hz to 20 kHz
(48 kHz, 96 kHz, 192 kHz sampling)
Signal-to-noise ratio: More than 100 dB
(ANALOG OUT connectors only)
Harmonic distortion: Less than 0.008%
Dynamic range: More than 95 dB
LAN port: Ethernet jack x 1, 10BASE-T/100BASE-TX
Speakers (LHB977)
Front Rear Center Passive
speaker Speaker Speaker Subwoofer
Type
2 Way 3 speaker 1 Way 1 speaker
2 Way 3 speaker
1 Way 1 speaker
Impedance 4Ω 4Ω 4Ω 3Ω
Rated
Input Power 155 W 155 W 155 W 225 W
Max.
Input power 310 W 310 W 310 W 450 W
Net Dimensions
(W x H x D)
210 x 1150 x 290 mm
96 x 240 x 108 mm
350x 105x 93mm216 x 405 x 360 mm
Net Weight 3.86 kg 0.8 kg 1.5 kg 7.1 kg
HB954PA-AD.954SA-AP.BUSALL_ENG 12/18/08 5:31 PM Page 51
Page 34

52
Speakers (LHB953)
Front Rear Center Passive
speaker Speaker Speaker Subwoofer
Type
1 Way 1 speaker 1 Way 1 speaker
1 Way 1 speaker
1 Way 1 speaker
Impedance 4Ω 4Ω 4Ω 3Ω
Rated
Input Power 155 W 155 W 155 W 150 W
Max.
Input power 310 W 310 W 310 W 300 W
Net Dimensions
(W x H x D)
96 x 240 x 108 mm
96 x 240 x 108 mm
350x 105x 93mm216 x 405 x 310 mm
Net Weight 0.8 kg 0.8 kg 0.9 kg 5.9 kg
Accessories
Speaker cable (6), Remote control (1), Battery (1), Component cable (1),
AM antenna (1), FM antenna (1)
HB954PA-AD.954SA-AP.BUSALL_ENG 12/18/08 5:31 PM Page 52
Page 35

53
Open source software notice
The following GPL executables and LGPL libraries used in this product are
subject to the GPL2.0/LGPL2.1 License Agreements:
GPL EXECUTABLES:
Linux kernel 2.6, bash, busybox, dhcpcd, mtd-utils, net-tools, procps, sysutils, tinylogin
LGPL LIBRARIES:
uClibc, DirectFB, iconv, cairo
LG Electronics offers to provide source code to you on CD-ROM for a
charge covering the cost of performing such distribution, such as the cost
of media, shipping and handling upon e-mail request to LG Electronics at:
opensource@lge.com
This offer is valid for a period of three(3) years from the date of the distribution of this product by LG Electronics.
You can obtain a copy of the GPL, LGPL licenses from
http://www
.gnu.org/licenses/old-licenses/gpl-2.0.html and
http://www.gnu.org/licenses/old-licenses/lgpl-2.1.html
This software is based in part on the work of the Independent JPEG Group
copyright © 1991-1998,
Thomas G. Lane.
This product includes
• Freetype library : Copyright © 2003 The FreeType Project
(www
.freetype.org).
• libpng library: Copyright © 2004 Glenn Randers-Pehrson
• Zlib compression library: Copyright © 1995-2002 Jean-loup Gailly and
Mark Adler
• cryptographic software written by Eric Young (eay@cryptsoft.com
).
• software written by Tim Hudson (tjh@cryptsoft.com).
• software developed by the OpenSSL Project for use in the OpenSSL
Toolkit. (http://www
.openssl.org)
This product includes other open source software.
• Copyright © David L. Mills 1992-2006
• Copyright © 1998-2003 Daniel Veillard.
• Copyright © 1998, 1999, 2000 Thai Open Source Software Center Ltd.
• Copyright © 1990 The Regents of the University of California.
• Copyright © 1998-2005 The OpenSSL Project.
All rights reserved.
Permission is hereby granted, free of charge, to any person obtaining a
copy of this software and associated documentation files (the “Software”),
to deal in the Software without restriction, including without limitation the
rights to use, copy, modify, merge, publish, distribute, sublicense, and/or
sell copies of the Software, and to permit persons to whom the Software is
furnished to do so, subject to the following conditions:
THE SOFTWARE IS PROVIDED “AS IS”, WITHOUT WARRANTY OF ANY
KIND, EXPRESS OR IMPLIED, INCLUDING BUT NOT LIMITED TO THE
WARRANTIES OF MERCHANTABILITY, FITNESS FOR A PARTICULAR
PURPOSE AND NONINFRINGEMENT. IN NO EVENT SHALL THE
AUTHORS OR COPYRIGHT HOLDERS BE LIABLE FOR ANY CLAIM,
DAMAGES OR OTHER LIABILITY, WHETHER IN AN ACTION OF CONTRACT, TORT OR OTHERWISE, ARISING FROM, OUT OF OR IN CONNECTION WITH THE SOFTWARE OR THE USE OR OTHER DEALINGS
IN THE SOFTWARE.
HB954PA-AD.954SA-AP.BUSALL_ENG 12/18/08 5:31 PM Page 53
Page 36

54
Network Service
You understand that usage of this product for network service requires
internet service, for which you are solely responsible. Operation of this
product for network service may be limited or restricted depending upon
the quality, capabilities or technical limitations of your internet service.
The content and/or services accessible through this product belong to third
parties and may be protected by copyright, patent, trademark and/or other
intellectual property laws. Such content and services are provided solely
for your personal and noncommercial use. Unless expressly authorized by
the respective content owner or service provider, you shall not modify,
copy, republish, upload, post, transmit, translate, sell, create derivative
works, exploit, or distribute in any manner or medium any content or services accessible through this product.
YOUR USE OF THE CONTENT AND/OR SERVICES IS ATYOUR OWN
RISK. THE CONTENT AND/OR SERVICES ARE PROVIDED “AS IS.” TO
THE FULLEST EXTENT PERMISSIBLE BY LAW, LG MAKES NO REPRESENTATIONS OR WARRANTIES OF ANY KIND WHATSOEVER (i)
FOR THE ACCURACY, VALIDITY, TIMELINESS, LEGALITY, OR COMPLETENESS OF ANY CONTENT OR SERVICE MADE AVAILABLE
THROUGH THIS PRODUCT; AND (ii) THAT THE CONTENT AND/OR
SERVICE AVAILABLE THROUGH THIS PRODUCTARE FREE OF
VIRUSES OR OTHER COMPONENTS THAT MAY INFECT, HARM, OR
CAUSE DAMAGE TO THIS PRODUCT, YOUR COMPUTER, TELEVISION, OTHER EQUIPMENT, OR ANY OTHER PROPERTY. LG
EXPRESSLY DISCLAIMS ANY IMPLIED WARRANTIES, INCLUDING BUT
NOT LIMITED TO, WARRANTIES OF MERCHANTABILITY OR FITNESS
FOR A P ARTICULAR PURPOSE.
UNDER NO CIRCUMSTANCES, INCLUDING BUT NOT LIMITED TO LG'S
NEGLIGENCE OR ISSUES RELATED TO THIRD PARTY CONTENT
PROVIDERS, SHALL LG BE LIABLE, WHETHER IN CONTRACT OR
TORT, FOR ANY DIRECT, INDIRECT, INCICENTAL, SPECIAL OR CONSEQUENTIAL DAMAGES, ATTORNEY FEES, EXPENSES, OR ANY
OTHER DAMAGES ARISING OUT OF, OR IN CONNECTION WITH, ANY
INFORMATION CONTAINED IN, OR AS A RESULT OF THE USE OF ANY
CONTENT OR SERVICE ACCESSIBLE THROUGH THIS PRODUCT BY
YOU OR ANY THIRD PARTY, EVEN IF ADVISED OF THE POSSIBLITY
OF SUCH DAMAGES.
The content and/or services provided by third party through this product
may be terminated or interrupted at any time, and LG makes no representation or warranty that any content or service will remain available for any
period of time. The content and services are transmitted by third parties by
means of networks and transmission facilities over which LG has no control. Without limiting the generality of this disclaimer, LG expressly disclaims any responsibility or liability for any interruption or suspension of
any content or service mad available through this device.
LG shall be neither responsible nor liable for customer service related to
the content and services accessible through this product. Any question or
request for such service relating to the content or services should be made
directly to the respective content and service providers.
HB954PA-AD.954SA-AP.BUSALL_ENG 12/18/08 5:31 PM Page 54
Page 37

55
Notes
HB954PA-AD.954SA-AP.BUSALL_ENG 12/18/08 5:31 PM Page 55
Page 38

56
This LG Electronics product, will be repaired or replaced, at LG’s option, if it proves to be defective in material or workmanship, under normal use, during the warranty period (“Warranty Period”) listed below, effective from the date (“Date of Purchase”) of original consumer purchase of the product. This warranty is good only
to the original purchaser of the product and effective only when used in the United States, excluding U.S. Territories.
THIS WARRANTY IS IN LIEU OF ANY OTHER WARRANTIES, EXPRESS OR IMPLIED, INCLUDING WITHOUT LIMITATION, ANY WARRANTY OF MERCHANTABILITY OR FITNESS FOR A PARTICULAR PURPOSE. TO THE EXTENT ANY IMPLIED WARRANTY IS REQUIRED BY LAW, IT IS LIMITED IN
DURATION TO THE EXPRESS WARRANTY PERIOD ABOVE. LG ELECTRONICS WILL NOT BE LIABLE FOR ANY INCIDENTAL, CONSEQUENTIAL, INDIRECT, SPECIAL OR PUNITIVE DAMAGES OF ANY NATURE, EVEN IF ADVISED OF THE POSSIBILITY OF SUCH DAMAGES, INCLUDING WITHOUT LIMITATION, LOST REVENUES OR PROFITS, LOST OR CORRUPTED PROGRAMMING OR DATA, OR ANY OTHER DAMAGE WHETHER BASED IN CONTRACT, TORT OR OTHERWISE. Some states do not allow the exclusion or limitation of incidental or consequential damages or limitation on how long an implied
warranty lasts, so the above exclusion or limitation may not apply to you. This warranty gives you specific legal rights and you may also have other rights that may
vary from state to state.
THIS LIMITED WARRANTY DOES NOT APPLY TO:
• Damages or operating problems that result from shipping, installation, adjustment of user controls, calibration, maintenance or failure to maintain, or separate
system components; and
• Damages or operating problems that result from normal wear and tear, misuse, abuse, operation outside environmental specifications or contrary to the
requirements or precautions in the Operating Guide, accident, lightning strikes or other natural causes, unauthorized modification or alteration, incorrect electrical current or voltage, reception problem caused by inadequate home antenna or faulty antenna connections, computer software, institutional or commercial
use, or other causes not arising out of defect in material or workmanship.
Therefore, the cost of repair or replacement of such defective product shall be borne by the consumer.
CUSTOMER INTER-ACTIVE CENTER NUMBERS:
LG ELECTRONICS U.S.A., INC.
1000 SYLVAN AVENUE
ENGLEWOOD CLIFFS, NJ
Issue O
Printed in Indonesia
WARRANTY PERIOD:
LABOR: 90 days from the Date of Purchase.
PARTS: One Year from the Date of Purchase.
* Parts replaced are warranted for the remaining portion of the original warranty
period.
HOW SER
VICE IS HANDLED:
Call 1-800-243-0000
for instructions on getting the defective unit repaired or
replaced.
Please retain dated sales receipt and your box to return the unit to LG for repair
or replacement.
Shipping both ways will be paid by LG during the Warranty Period. After the
Warranty Period, you pay inbound shipping charges and LG pays return shipping
charges.
Visit our website at: http://www.lgservice.com
For nearest Authorized Service Center, Where to buy, Product Assistance, or
Customer Assistance
Call
1-800-243-0000
(24 hours a day, 365 days per year) and select appropriate
options from the menu.
Or visit our website at http://us.lgservice.com
LG Electronics, Inc. Limited Warranty - USA
P/NO : MFL56962834
HB954PA-AD.954SA-AP.BUSALL_ENG 12/18/08 5:31 PM Page 56
Page 39

LG, Model Name: HB954PAW
General Specification
No. ITEM DESCRIPTIONS
1 Occupied Bandwidth
2 Transmitting Power
3
4 Channel Number 20
5 Modulation Type FHSS
6 Antenna Type Integrated PCB Antenna ( Internal antenna )
7 RF Operating Temperature 0℃ ~ + 55℃
Frequency Range 2400-2483.5MHz
≤ 2MHz
≤50mW
 Loading...