

Page 1
Owner’s Manual 41
Operation
SETUP
VIDEO
AUDIO
TIME
OPTION
LOCK
Previous
Audio Language
EZ SoundRite
EZ Sound
Balance
Treble
Bass
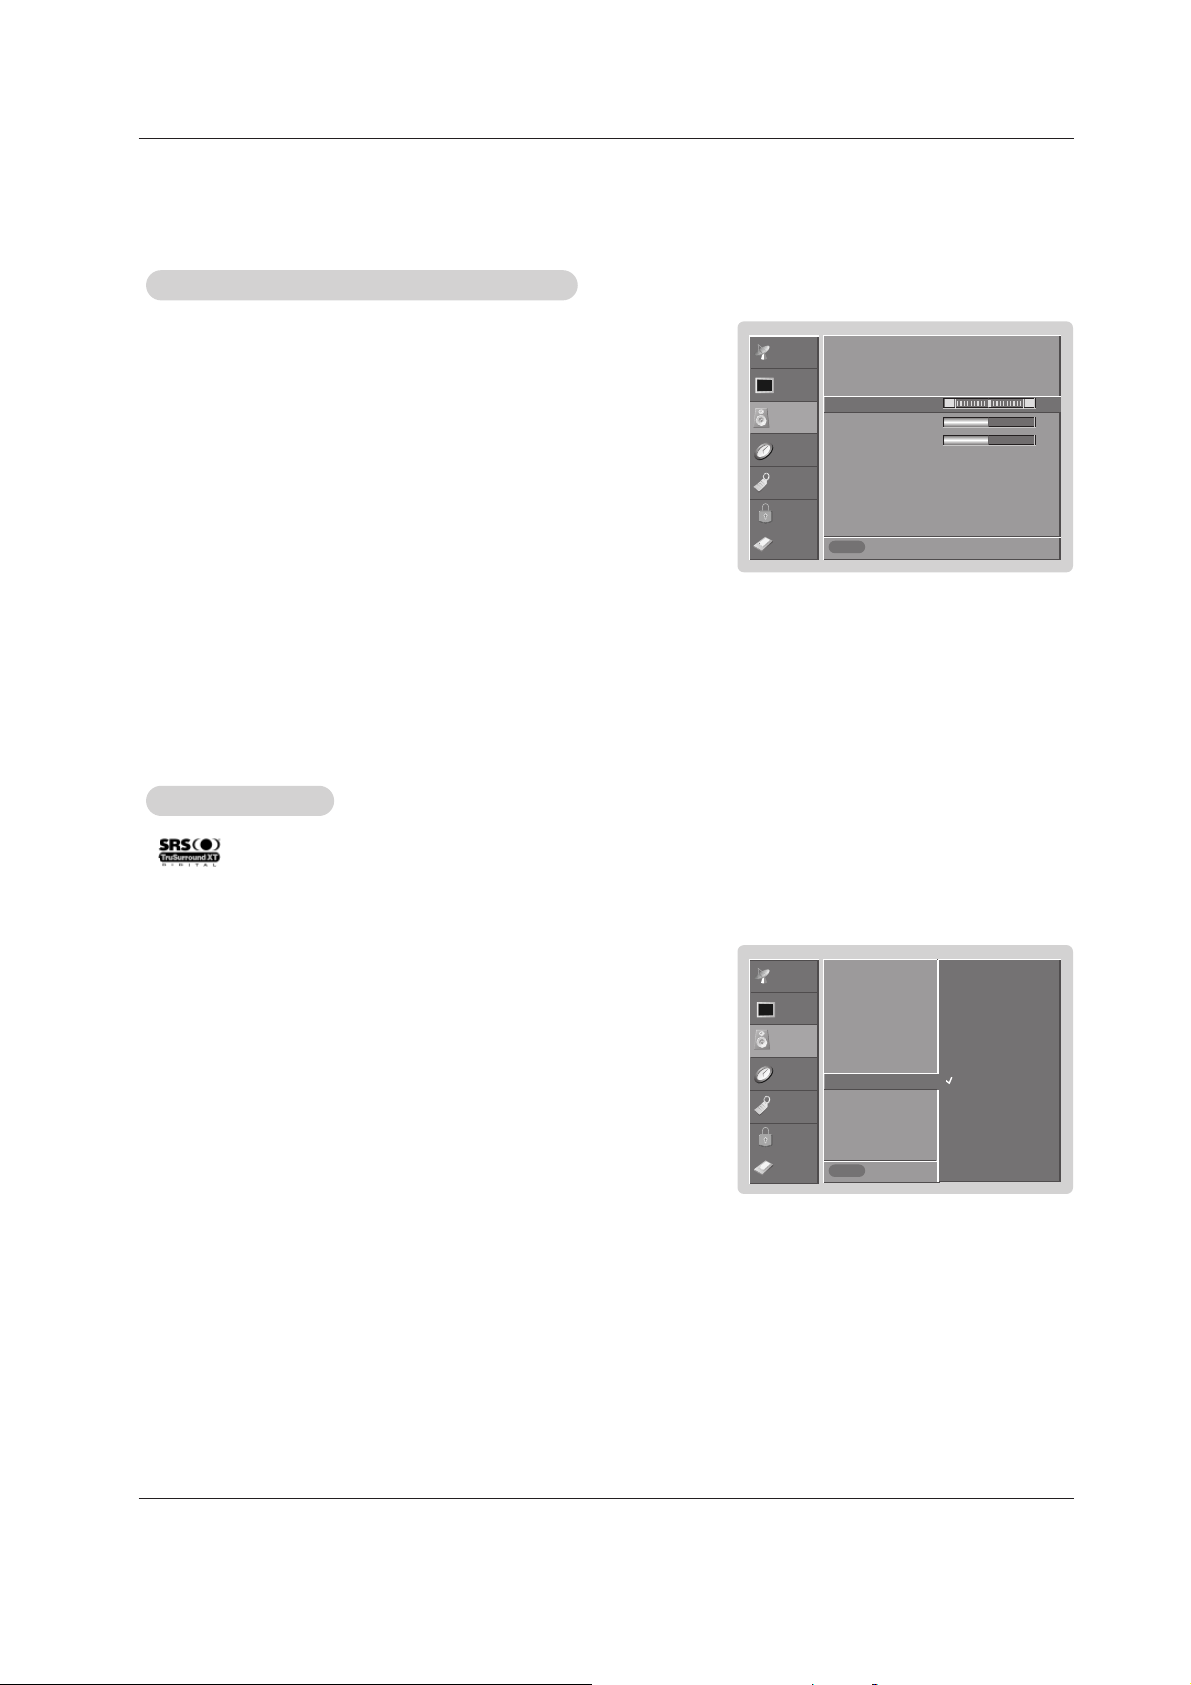
Front Surround G
TV Speaker
BBE
Off
3D EchoSound System
SRS TruSurround XT
MENU
1. Press the MENU button and then use
D / E
button to select the AUDIO menu.
2. Press the
G button and then use
D / E
button to select Front Surround.
3. Press the G button and then use
D / E
button to select Off, 3D EchoSound
System
or SRS (Sound Retrieval System) TruSurround XT..
• 3D EchoSound System
Creates a stunning simulated stereo effects from any mono sound and a realistic three-dimensional sound with a very wide and deep sound stage into
stereo sound.
• SRS TruSurround XT
Takes advantage of any multi-channel format without needing to add extra
speakers or equipment. Dialog clarity, bass enrichment, and the addition of
stereo audio enhancement that produces an immersive sound experience from
standard stereo material.
4. Press EXIT button to return to TV viewing or press MENU button to return to the
previous menu.
Front Surround
Front Surround
- is a trademark of SRS Labs, Inc.
- TruSurround XT technology is incorporated under license from SRS Labs, Inc.
- Manufactured under license from Dolby Laboratories. “Dolby” and the double-D symbol are trademarks of Dolby Laboratories.
CABLE
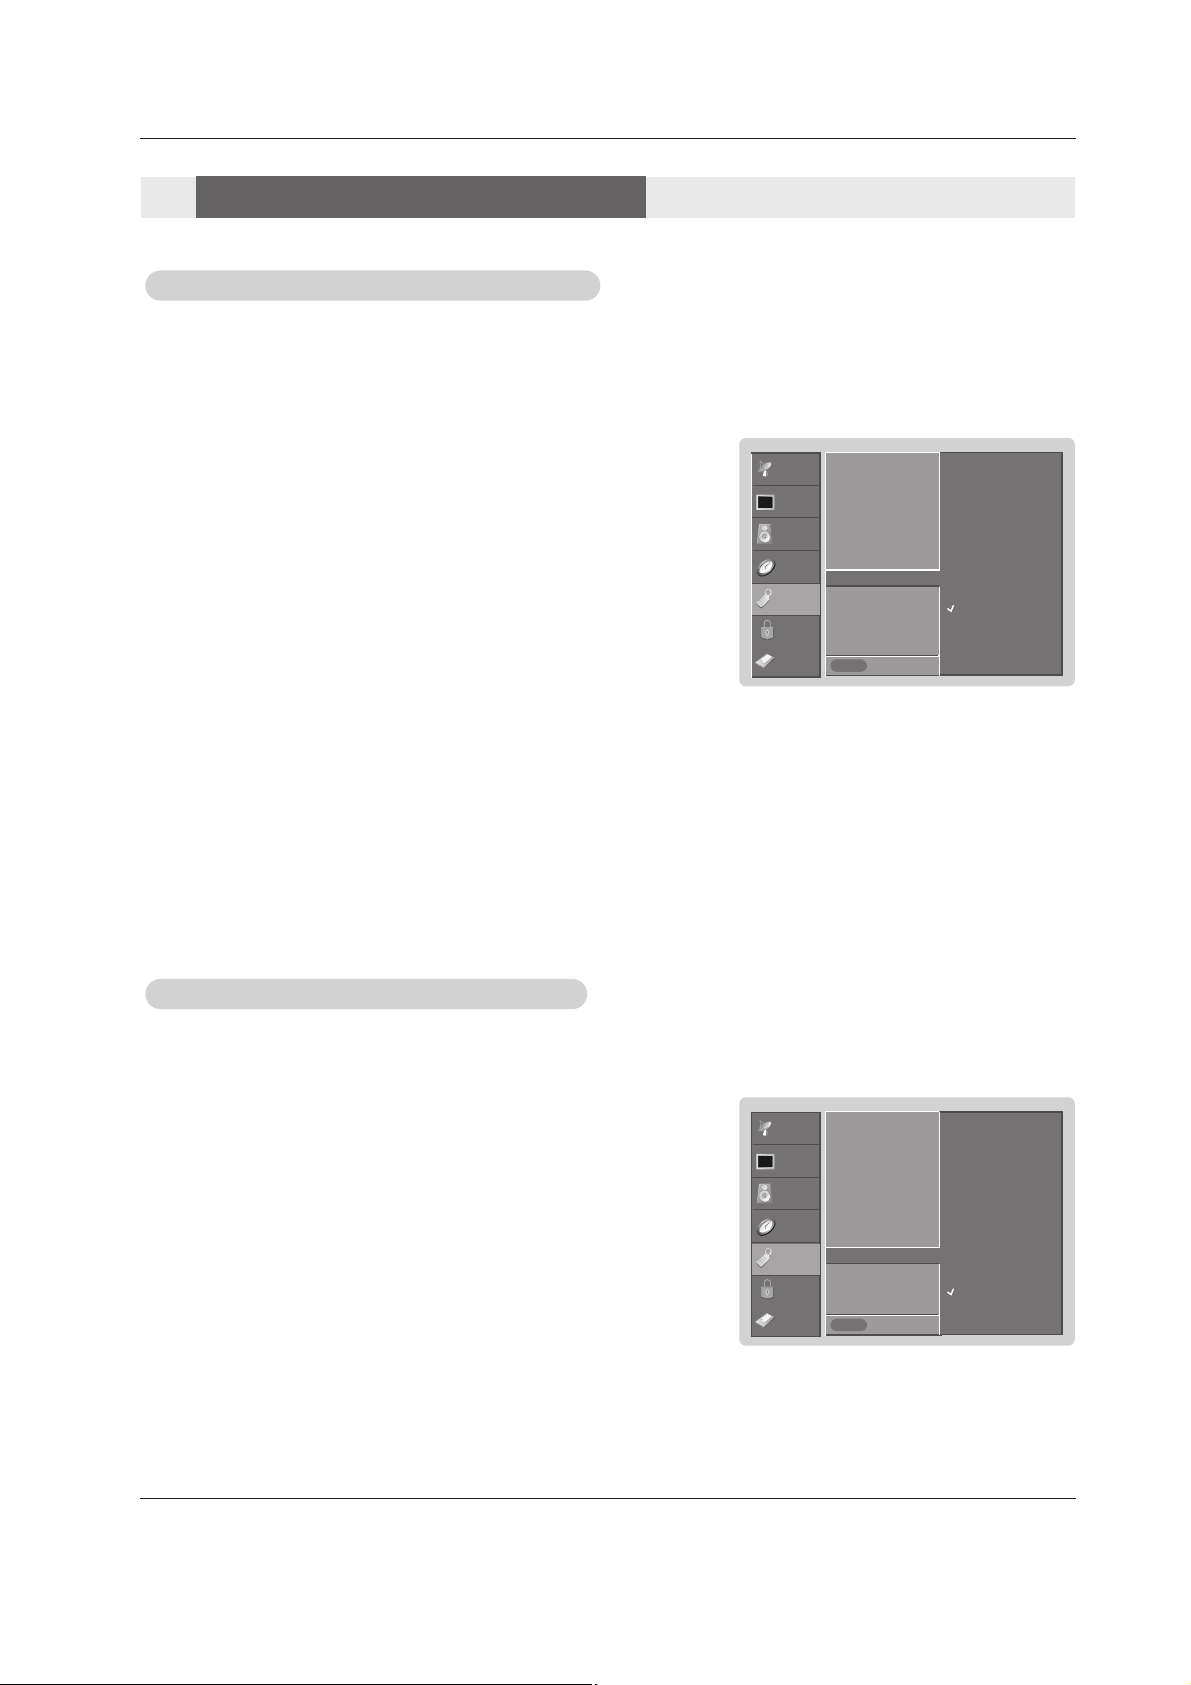
1.
Press the MENU button and then use
D / E
button to select the AUDIO menu.
2. Press the G button and then use
D / E
button to select the desired sound option
(
Balance, Treble, or Bass).
3. Press the G button and then use F / G button to make appropriate adjustments.
4. Press EXIT button to return to TV viewing or press MENU button to return to the
previous menu.
Manual Sound Control (
Manual Sound Control (Custom
option)
option)
SETUP
VIDEO
AUDIO
TIME
OPTION
LOCK
Previous
Audio Language
EZ SoundRite
EZ Sound
Balance 0 G
Treble 50
Bass 50
Front Surround
TV Speaker
BBE
MENU
L R
- Adjust the sound to suit your taste and room situations.
CABLE
Page 2

42 Plasma TV
Operation
1. Use the SAP button to select your desired MTS mode in analog signal. Each time you press the SAP button, Mono,
Stereo, or SAP appear in turn.
• If other languages available on the digital signal, select them with the SAP button.
2. Press EXIT button to save and return to TV viewing.
Stereo/SAP
Stereo/SAP
Broadcasts Setup
Broadcasts Setup
- This TV can receive MTS stereo programs and any SAP (Secondary Audio Program) that accompanies the stereo program; if
the station transmits an additional sound signal as well as the original one.
- When having selected Stereo or SAP button on the remote control, this TV can only receive the signal in case that the TV station transmits the proper signals.
- Mono sound is automatically received if the broadcast is only in Mono; even though Stereo or SAP has been selected.
- Select Mono if you want to listen to the mono sound in remote fringe areas during stereo/SAP broadcasting.
- Stereo or SAP can be received in Analog channel.
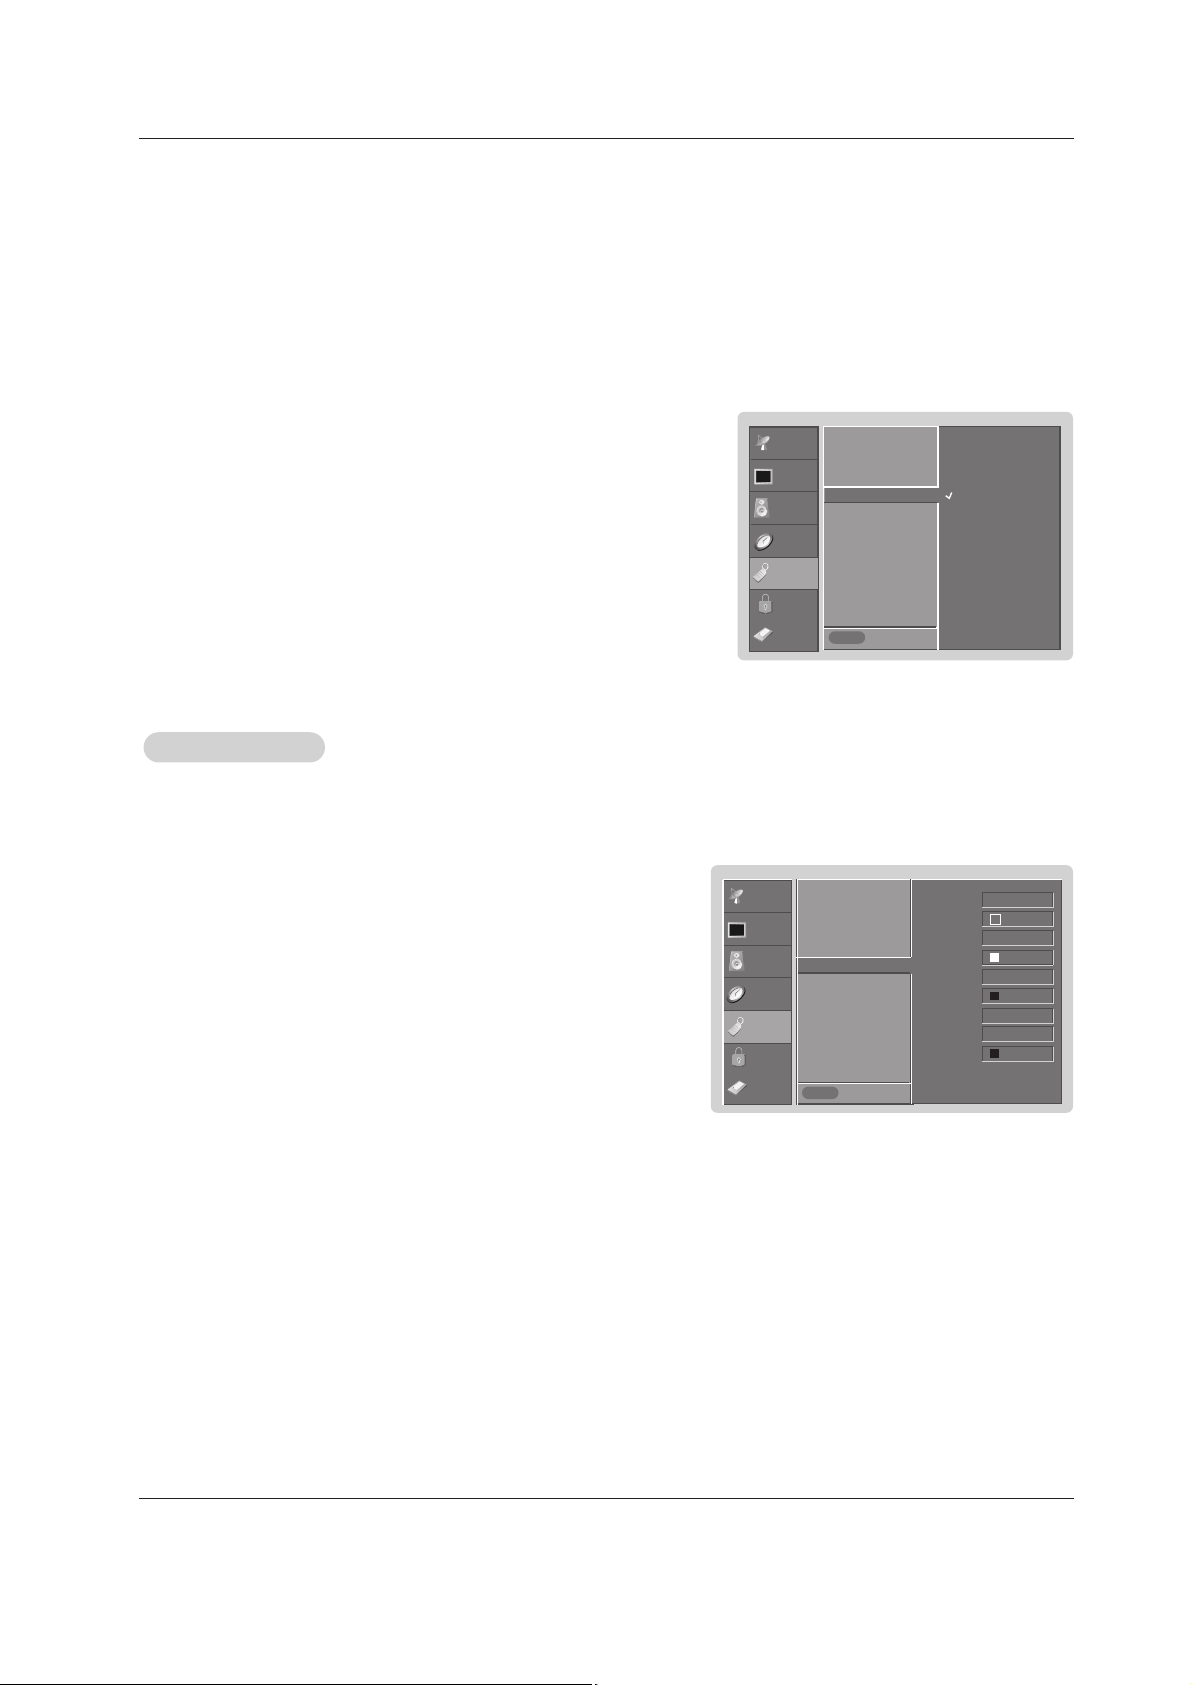
BBE
BBE
- BBE High Definition Sound restores clarity and presence for better speech intelligibility
and musical realism.
Manufactured under license from BBE Sound, Inc.
SETUP
VIDEO
AUDIO
TIME
OPTION
LOCK
Audio Language
EZ SoundRite
EZ Sound
Balance
Treble
Bass
Front Surround
TV Speaker G
BBE
Off
On
Prev.
MENU
CABLE
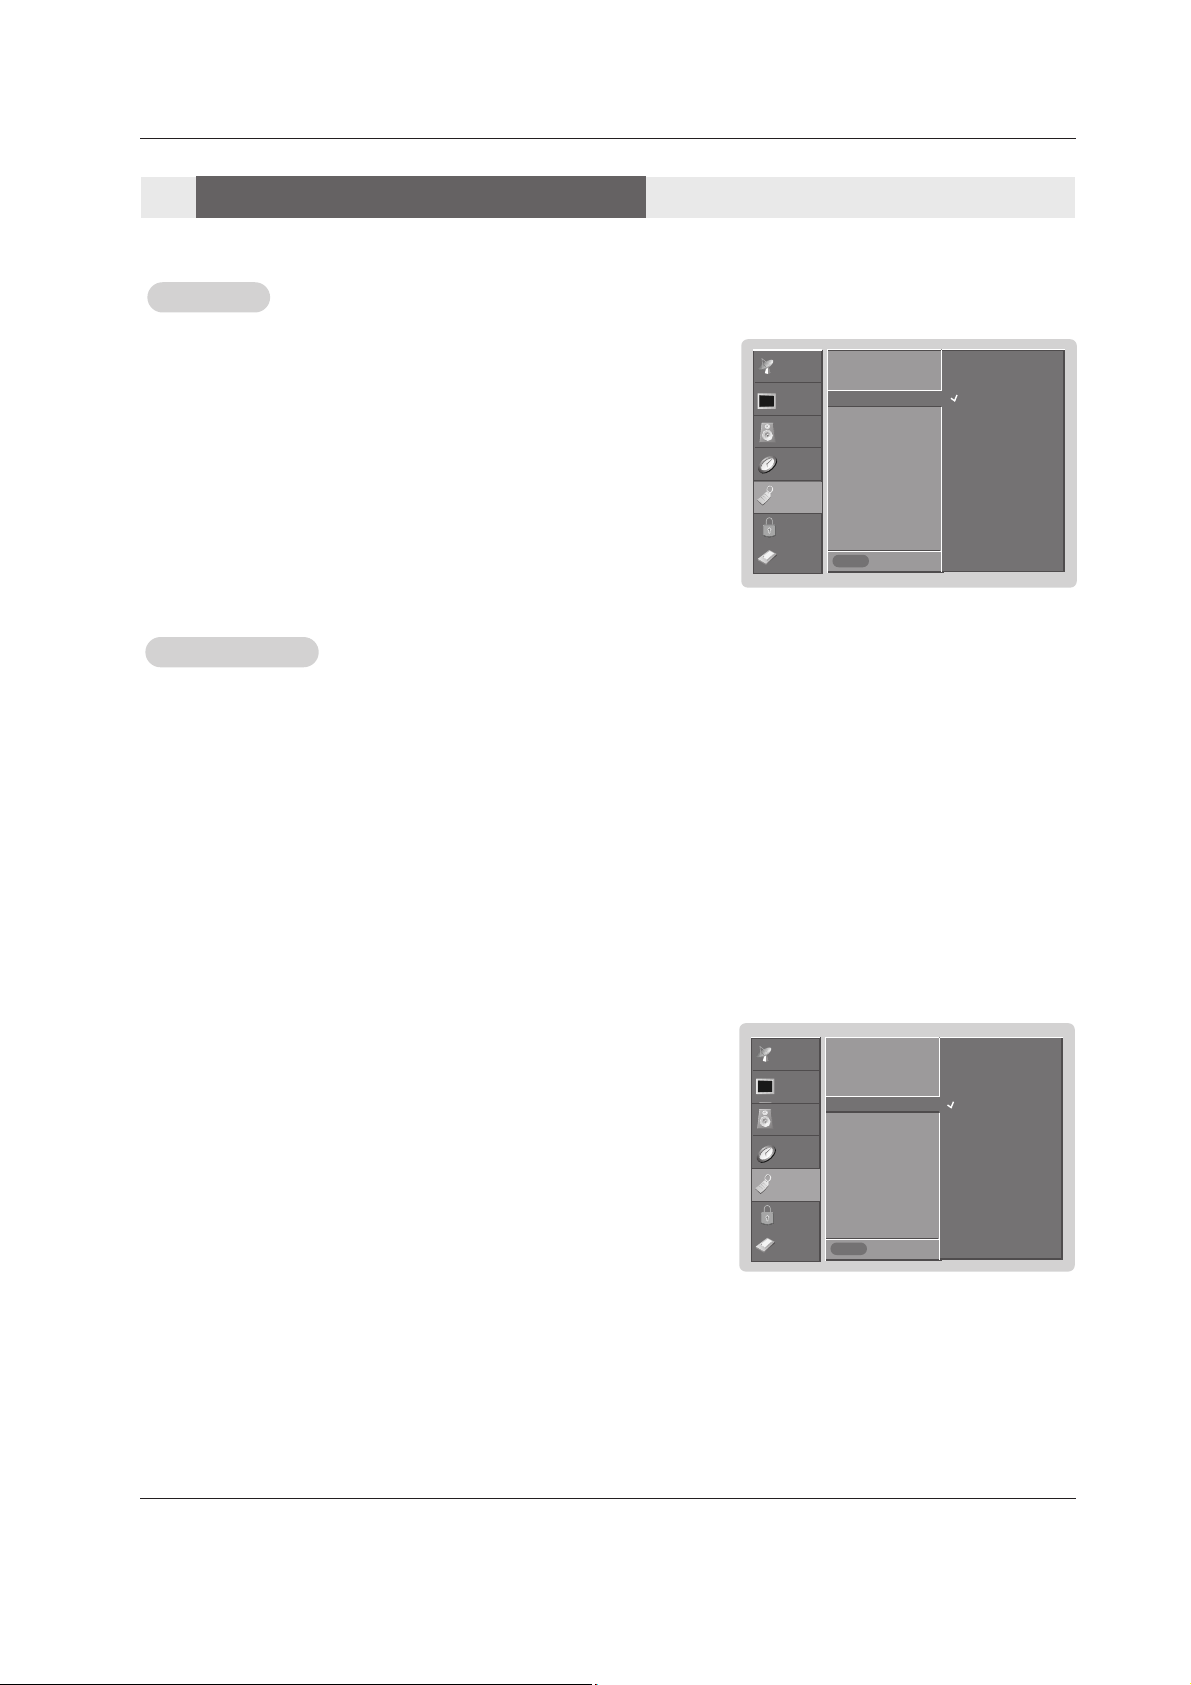
1. Press the MENU button and then use
D / E
button to select the AUDIO menu.
2. Press the
G button and then use
D / E
button to select TV Speaker.
3. Press the G button and then use
D / E
button to select On or Off.
4. Press EXIT button to return to TV viewing or press MENU button to return to the
previous menu.
TV Speakers On/Of
TV Speakers On/Of
f Setup
f Setup
- Turn TV speakers off if using external audio equipment. Feature turns the TV
Speakers option On or Off.
1. Press the MENU button and then use
D / E
button to select the AUDIO menu.
2. Press the G button and then use
D / E
button to select BBE.
3. Press the
G button and then use
D / E
button to select On or Off.
4. Press EXIT button to return to TV viewing or press ENTER button to return to the
previous menu.
SETUP
VIDEO
AUDIO
TIME
OPTION
LOCK
Audio Language
EZ SoundRite
EZ Sound
Balance
Treble
Bass
Front Surround
TV Speaker
BBE
G
Off
On
Previous
MENU
CABLE
Audio Menu Options
Audio Menu Options
Page 3

Owner’s Manual 43
Operation
SETUP
VIDEO
AUDIO
TIME
OPTION
LOCK
Previous
Auto Clock G
Manual Clock
Off Timer
On Timer
Sleep Timer
Auto Off
Off
On
Time Zone Eastern
Daylight Auto
Saving
MENU
SETUP
VIDEO
AUDIO
TIME
OPTION
LOCK
Previous
Auto Clock
Manual Clock
Off Timer
On Timer G
Sleep Timer
Auto Off
Off
On
Time 6 : 30 AM
Ch. TV 2-0
Vol 17
MENU
SETUP
VIDEO
AUDIO
TIME
OPTION
LOCK
Previous
Auto Clock
Manual Clock G
Off Timer
On Timer
Sleep Timer
Auto Off
Year - - - -
Date - - / - -
Time - - : - - - -
MENU
- Timer function operates only if current time has been set.
- Off-Timer function overrides On-Timer function if they are set both set to the same time.
- The TV must be in standby mode for the On-Timer to work.
- If you do not press any button within 2 hours after the TV turns on with the On Timer function, the TV will automatically revert to
standby mode.
On/Of
On/Off f TT
imer Setup
imer Setup
1. Press the MENU button and then use
D / E
button to select the TIME menu.
2. Press the
G button and then use
D / E
button to select Off Timer or On Timer.
3. Press the G button and then use
D / E
button to select On.
• To cancel
On/Off timer function, select Off.
4. Press the G button and then use
D / E
button to set the hour.
5. Press the G button and then use
D / E
button to set the minutes.
6. For only On timer function
Press the
G button and then use
D / E
button to select the channel at turn-on.
Press the
G button and then use
D / E
button to set the sound level at turn-on.
7. Press EXIT button to return to TV viewing or press MENU button to return to the
previous menu.
Auto Clock Setup
Auto Clock Setup
- The time is set automatically from a digital channel signal.
- The digital channel signal includes information for the current time provided by the broadcasting station.
- Set the clock manually, if the current time is set incorrectly by the auto clock function.
- When you set up TV guide on screen system, Auto Clock menu is not selected.
1. Press the MENU button and then use
D / E
button to select the TIME menu.
2. Press the G button and then use
D / E
button to select Auto Clock.
3. Press the
G button and then use
D / E
button to select On.
4. Press the G button and then use
D / E
button to select your viewing area time
zone:
Eastern, Central, Mountain, Pacific, Alaska, or Hawaii.
5. Press EXIT button to return to TV viewing or press MENU button to return to
the previous menu.
Manual Clock Setup
Manual Clock Setup
- If current time setting is wrong, reset the clock manually.
- When you set up TV guide on screen system, Manual Clock menu is not
worked.
1. Press the MENU button and then use
D / E
button to select the TIME menu.
2. Press the
G button and then use
D / E
button to select Manual Clock.
3. Press the G button and then use F / G button to select either the year, date, or
time option. Once selected, use the
D / E
button to set the year, date, and time
options.
4. Press EXIT button to return to TV viewing or press MENU button to return to
the previous menu.
CABLE
CABLE
CABLE
TTime Menu Options
ime Menu Options
Page 4

44 Plasma TV
Operation
Auto Of
Auto Offf
- If set to on and there is no input signal, the TV turns off automatically after 10
minutes.
1. Press the MENU button and then use
D / E
button to select the TIME menu.
2. Press the
G button and then use
D / E
button to select Auto Off.
3. Press the G button and then use
D / E
button to select On or Off.
4. Press EXIT button to return to TV viewing or press MENU button to return to the
previous menu.
Sleep
Sleep TT
imer
imer
- The Sleep Timer turns the TV off at the preset time. Note that this setting is cleared when the TV is turned off.
- You can also set up the Sleep Timer in the TIME menu.
1. Press the TIMER button repeatedly to select the number of minutes. First the
Off option appears on the screen,
followed by the following sleep timer options: 10, 20, 30, 60, 90, 120, 180, and 240 minutes.
2. When the number of minutes you want is displayed on the screen, press the ENTER button. The timer begins to
count down from the number of minutes selected.
3. To check the remaining minutes before the TV turns off, press the TIMER button once.
4. To cancel the Sleep Timer, press the TIMER button repeatedly to select
Off.
SETUP
VIDEO
AUDIO
TIME
OPTION
LOCK
Previous
Auto Clock
Manual Clock
Off Timer
On Timer
Sleep Timer
Auto Off G
Off
On
MENU
CABLE
TTime Menu Options
ime Menu Options
Page 5

Owner’s Manual 45
Operation
Cinema 3:2 Mode Setup
- Set up the TV for the best picture appearance for viewing movies.
1. Press the MENU button and then use
D / E
button to select the OPTION menu.
2. Press the
G button and then use
D / E
button to select Cinema 3:2 Mode.
3. Press the
G button and then use
D / E
button to select On or Off.
4. Press EXIT button to return to TV viewing or press MENU button to return to the previous menu.
SETUP
VIDEO
AUDIO
TIME
OPTION
LOCK
Previous
MENU
CABLE
Advanced G
Aspect Ratio
Caption
Caption / Text
Caption Option
Language
ISM Method
Front Display
Auto Demo
TimeShift Mode
Cinema 3:2 Mode G
Low Power
LG Logo
Off
On
Low Power
Low Power
- Low power reduces the plasma display power consumption.
1. Press the MENU button and then use
D / E
button to select the OPTION menu.
2. Press the
G button and then use
D / E
button to select Low power.
3. Press the G button and then use
D / E
button to select On or Off.
• When you select On, the screen darkens.
4. Press EXIT button to return to TV viewing or press MENU button to return to the previous menu.
SETUP
VIDEO
AUDIO
TIME
OPTION
LOCK
Previous
MENU
CABLE
Advanced G
Aspect Ratio
Caption
Caption / Text
Caption Option
Language
ISM Method
Front Display
Auto Demo
Auto Buffering
Cinema 3:2 Mode
Low Power G
LG Logo
Off
On
Option Menu Options
Option Menu Options
TimeShift Mode Setup
- Refer to the p.?
Page 6

46 Plasma TV
Operation
LG Logo
LG Logo
- This function is only applied TU-60PY22 model.
1. Press the MENU button and then use
D / E
button to select the OPTION menu.
2. Press the G button and then use
D / E
button to select LG Logo.
3. Press the G button and then use
D / E
button to select On or Off.
• When you select On, the Logo is lighting.
4. Press EXIT button to return to TV viewing or press MENU button to return to the previous menu.
SETUP
VIDEO
AUDIO
TIME
OPTION
LOCK
Previous
MENU
CABLE
Advanced G
Aspect Ratio
Caption
Caption / Text
Caption Option
Language
ISM Method
Front Display
Auto Demo
Auto Buffering
Cinema 3:2 Mode
Low Power
LG Logo G
Off
On
Option Menu Options
Option Menu Options
Page 7

Owner’s Manual 47
Operation
Aspect Ratio Control
Aspect Ratio Control
- Lets you choose the way an analog picture with a 4:3 aspect ratio is displayed on your TV with a 16:9 ratio picture format.
When you receive an analog picture with a 4:3 aspect ratio on your 16:9 TV, you need to specify how the picture is to be displayed.
- If you are viewing a picture with a 16:9 aspect ratio, you can’t use the Horizon aspect ratio option.
- Horizon aspect ratio is not available for Component 1-2 (720p/1080i)/RGB-DTV (720p/1080i)/HDMI1/DVI-DTV
(720p/1080i)/DTV(720p/1080i) input source.
- RGB-PC/DVI-PC input source use 4:3 or 16:9 aspect ratio.
- Note: If a fixed image is displayed on the screen for a long time, that fixed image may become imprinted on the screen and
remain visible.
•
Set By Program
Selects the proper picture proportion to match the source’s image. (4:3 → 4:3, 16:9 → 16:9)
• 4:3
Choose 4:3 when you want to view a picture with an original 4:3 aspect ratio, with black bars appearing at both
the left and right sides.
• 16:9
Choose 16:9 when you want to adjust the picture horizontally, in a linear proportion to fill the entire screen.
• Horizon
Choose Horizon when you want to adjust the picture in a non-linear proportion, that is, more enlarged at both
sides, to create a spectacular view.
• Zoom 1
Choose Zoom 1 when you want to view the picture without any alteration. However, the top and bottom portions
of the picture will be cropped.
• Zoom 2
Choose Zoom 2 when you want the picture to be altered, both vertically extended and cropped. The picture taking a halfway trade off between alteration and screen coverage.
• Cinema Zoom
Choose Cinema Zoom when you want to enlarge the picture in correct proportion. Note: When enlarging or
reducing the picture, the image may become distorted.
You can adjust the enlarge proportion of Cinema Zoom using
D / E
button. The adjustment range is 1~16.
1. Press the RATIO button repeatedly to select the desired picture format.
You can also adjust
Aspect Ratio in the OPTION menu.
Page 8
48 Plasma TV
Operation
Caption/T
Caption/T
ext
ext
Analog Broadcasting System Captions
- Select a caption mode for displaying captioning information if provided on a program.
- Analog caption displays information at any position on the screen usually the program's dialog.
- Text displays information, usually at the bottom position and is used for a data service, generally not program related.
- Caption/Text, if provided by the broadcaster, would be available for both digital and analog channels on the Antenna/Cable.
- This TV is programmed to remember the caption/text mode it was last set to, when you turn the power off.
SETUP
VIDEO
AUDIO
TIME
OPTION
LOCK
Previous
Advanced
Aspect Ratio
Caption
Caption / Text G
Caption Option
Language
ISM Method
Front Display
Auto Demo
MENU
CC 1
CC 2
CC 3
CC 4
Text 1
Text 2
Text 3
Text 4
1. Press the MENU button and then use
D / E
button to select the OPTION menu.
2. Press the
G button and then use
D / E
button to select Caption/Text.
3. Press the G button and then use
D / E
button to select caption: CC1, CC2, CC3,
CC4, Text1, Text2, Text3, or Text4.
• CAPTION
The term for the words that scroll across the bottom of the TV screen; usually
the audio portion of the program provided for the hearing impaired.
• TEXT
The term for the words that appear in a large black frame and almost cover
the entire screen; usually messages provided by the broadcaster.
4. Press EXIT button to return to TV viewing or press MENU button to return to the
previous menu.
CABLE
1. Use the CC button repeatedly to select Caption CC1, CC2, CC3, CC4, Text1, Text2, Text3, or Text4.
• EZ Mute shows the selected captions option (if available on program) when the TV sound is muted
.2. Press EXIT button to save and return to TV viewing.
• You can also use the OPTION menu to select Caption/Text.
Caption
Caption
1. Press the MENU button and then use
D / E
button to select the OPTION menu.
2. Press the G button and then use
D / E
button to select Caption.
3. Press the
G button and then use
D / E
button to select On or Off.
4. Press EXIT button to return to TV viewing or press MENU button to return to the
previous menu.
SETUP
VIDEO
AUDIO
TIME
OPTION
LOCK
Previous
Advanced
Aspect Ratio
Caption G
Caption / Text
Caption Option
Language
ISM Method
Front Display
Auto Demo
MENU
Off
On
CABLE
Option Menu Options
Option Menu Options
Page 9
Owner’s Manual 49
Operation
SETUP
VIDEO
AUDIO
TIME
OPTION
LOCK
Previous
Advanced
Aspect Ratio
Caption
Caption / Text
Caption Option G
Language
ISM Method
Front Display
Auto Demo
Style Custom
Size A Standard
Font Font 0
Text Color White
Text Opacity Solid
Bg Color Black
Bg Opacity Solid
Edge Type None
Edge Color Black
MENU
Caption Option
Caption Option
- Customize the DTV/CADTV captions that appear on your screen.
1. Press the MENU button and then use
D / E
button to select the OPTION
menu.
2. Press the G button and then use
D / E
button to select Caption Option.
3. Press the
G button and then use F / G button to select Custom.
4. Use
D / E
button to customize the Style, Font, etc., to your preference. A preview icon is provided at the bottom of the screen, use it to see the caption language.
• Size: Set the size the words will appear in.
• Font: Select a typeface for the words.
• Text Color: Choose a color for the text.
• Text Opacity: Specify the opacity for the text color.
• Bg (Background) Color: Select a background color.
• Bg (Background) Opacity: Select the opacity for the background color.
• Edge Type: Select an edge type.
• Edge Color: Select a color for the edges.
5. Press EXIT button to return to TV viewing or press MENU button to return
to the previous menu.
CABLE
SETUP
VIDEO
AUDIO
TIME
OPTION
LOCK
Previous
Advanced
Aspect Ratio
Caption
Caption / Text G
Caption Option
Language
ISM Method
Front Display
Auto Demo
MENU
English
Spanish
French
Digital Broadcasting System Captions
- Choose the language you want the DTV/CADTV Captions to appear in.
- Languages can be chosen for digital sources only if they are included on the program.
1. Press the MENU button and then use
D / E
button to select the OPTION menu.
2. Press the
G button and then use
D / E
button to select Caption/Text.
3. Press the G button and then use
D / E
button to select available caption lan-
guages:
English, Spanish, or French.
4. Press EXIT button to return to TV viewing or press MENU button to return to the
previous menu.
CABLE
Page 10
50 Plasma TV
Operation
- A frozen still picture from a PC/video game displayed on the screen for prolonged periods will result in an ghost
image remaining; even when you change the image. Avoid allowing any fixed image to remain on the TV's screen
for a long period of time.
1. Press the MENU button and then use
D / E
button to select the OPTION menu.
2. Press the G button and then use
D / E
button to select ISM Method.
3. Press the G button and then use
D / E
button to select either Normal, White
wash
, Orbiter or Inversion .
• Normal
If image sticking is never a problem, ISM is not necessary - set to Normal.
• White wash
White Wash removes permanent images from the screen.
Note: An excessive permanent image may be impossible to clear entirely with
White Wash. To return to normal viewing, press the any button.
• Orbiter
Orbiter may help prevent ghost images. However, it is best not to allow any
fixed image to remain on the screen. To avoid a permanent image on the
screen, the image will move once per minute: Right → Right → Downside →
Downside → Left → Left → Upside → Upside.
• Inversion
Inversion will automatically invert the plasma display panel color every 30 minutes.
4. Press EXIT button to return to TV viewing or press MENU button to return to
the previous menu.
ISM (Image Sticking Minimization) Method
ISM (Image Sticking Minimization) Method
SETUP
VIDEO
AUDIO
TIME
OPTION
LOCK
Previous
Advanced
Aspect Ratio
Caption
Caption / Text
Caption Option
Language
ISM Method G
Front Display
Auto Demo
MENU
Normal
White Wash
Orbiter
Inversion
CABLE
Front LED (Light Emitting Diode) Display
Front LED (Light Emitting Diode) Display
SETUP
VIDEO
AUDIO
TIME
OPTION
LOCK
Previous
Advanced
Aspect Ratio
Caption
Caption / Text
Caption Option
Language
ISM Method
Front Display G
Auto Demo
MENU
Off
Dark
Normal
Bright
CABLE
1. Press the MENU button and then use
D / E
button to select the SETUP menu.
2. Press the
G button and then use
D / E
button to select Front Display.
3. Press the
G button and then use
D / E
button to select Off, Dark, Normal, and
Bright.
4. Press EXIT button to return to TV viewing or press MENU button to return to the
previous menu.
- Illuminates brightly when the set is turned on. The LED displays current TV sta-
tus.
Option Menu Options
Option Menu Options
Page 11

Owner’s Manual 51
Operation
Auto Demo
Auto Demo
- Displays the slide show to explain the main features of this TV.
1. Press the MENU button and then use
D / E
button to select the OPTION menu.
2. Press the G button and then use
D / E
button to select Auto Demo.
3. Press EXIT button to stop Auto Demo.
SETUP
VIDEO
AUDIO
TIME
OPTION
LOCK
Previous
Advanced
Aspect Ratio
Caption
Caption / Text
Caption Option
Language
ISM Method
Front Display
Auto Demo G
MENU
CABLE
Selection ( Gor ) leads you
to the demo.
Page 12

52 Plasma TV
Operation
Parental Control can be used to block specific channels, ratings and other viewing sources.
The Parental Control Function (V-Chip) is used to block program viewing based on the ratings sent by the broadcasting station.
The default setting is to allow all programs to be viewed. Viewing can be blocked by the type of program and by the categories
chosen to be blocked. It is also possible to block all program viewing for a time period. To use this function, the following must be
done :
1. Set ratings and categories to be blocked.
2. Specify a password
3. Enablethe lock
V-Chip rating and categories
Rating guidelines are provided by broadcasting stations. Most television programs and television movies can be blocked by TV
Rating and/or Individual Categories. Movies that have been shown at the theaters or direct-to-video movies use the Movie Rating
System (MPAA) only.
Ratings for Movies previously shown in theaters:
Movie Ratings :
• Blocking Off (Permits all programs)
• G (General audience)
• PG (Parental guidance suggested)
• PG-13 (Parents strongly cautioned)
• R (Restricted)
• NC-17 (No one 17 and under admitted)
• X (Adult only)
If you set PG-13 : G and PG movies will be available , PG-13, R, NC-17 and X will be blocked.
Ratings for Television programs including made-for-TV movies :
• TV-G (General audience)
• TV-PG (Parental guidance suggested)
• TV-14 (Parents strongly cautioned)
• TV-MA (Mature audience only)
• TV-Y (All children)
• TV-Y7 (Children 7 years older)
TV Rating Children:
• Age (applies to TV-Y, TV-Y7)
• Fantasy Violence (applies to TV-Y7)
TV Rating General:
• Age (applies to TV-G, TV-PG, TV-14, TV-MA)
• Dialogue - sexual dialogue (applies to TV-PG, TV-14)
• Language - adult language (applies to TV-PG, TV-14, TV-MA)
• Sex - sexual situations (applies to TV-PG, TV-14, TV-MA)
• Violence (applies to TV-PG, TV-14, TV-MA)
Input Block
• Video, Front Video (On, Off)
• Component 1, 2 (On, Off)
• RGB, HDMI1/DVI,HDMI2 (On, Off)
Lock Menu Options
Lock Menu Options
Page 13

Owner’s Manual 53
Operation
Parental Lock Setup
Parental Lock Setup
1. Press the MENU button and then use
D / E
button to select the LOCK menu.
Then, press the
G button
• If Lock is already set, enter the password as requested.
• The TV is set up with the initial password “0-0-0-0”.
2. Use the
D / E
button to choose from the following Lock Menu options. Once the
option is selected, change the settings to your preference.
• Lock System: Activates or disables the blocking scheme you set up previ-
ously.
• Set Password: Change the password by inputting a new password twice.
• Movie Rating (MPAA): Blocks movies according to the movie ratings lim-
its specified, so children cannot view certain movies. You can set the ratings limit by blocking out all the movies with the ratings above a specified
level. Keep in mind that the movie ratings limit only applies to movies
shown on TV, not TV programs, such as soap operas.
• TV Rating-Children: Prevents children from watching certain children's TV
programs, according to the ratings limit set. The children rating does not
apply to other TV programs. Unless you block certain TV programs intended for mature audiences in the TV Rating - sub menu, your children can
view those programs.
• TV Rating-General: Based on the ratings, blocks certain TV programs that
you and your family do not want to view.
• Input Block: Enables you to select a source to block from the external
source devices you have hooked up.
3. Press EXIT button to return to TV viewing or press MENU button to return to
the previous menu.
Note:
• If you ever forget your password, key in ‘7’, ‘7’, ‘7’, ‘7’ on the remote control.
- Set up blocking schemes to block specific channels, ratings, and external viewing sources.
- A password is required to gain access to this menu if the Lock System is turned on.
SETUP
VIDEO
AUDIO
TIME
OPTION
LOCK
Prev.ious
Lock System G
Set Password
Block Channel
Movie Rating
TV Rating-Children
TV Rating-General
Input Block
MENU
Off
On
CABLE
Page 14

54 Plasma TV
Home Menu
1. Select the Recorded TV in HOME menu or press the REC LIST button to view the recording list as shown below.
A.
B.
- When you press the button, HOME menu is displayed. From here, you can view the recorded program list.
- Or pressing the REC LIST button, you directly enter the recording list.
3. Select the desired folder in the folder list and then press the ENTER button to view the detailed menu.
• Create: Create new folder.
• Delete: Delete folder (except ‘My TV’).
•
Rename: Edit folder name.
•
Cancel: Close the detailed menu.
-> Use the
D / E /
F / G
button to input the
wanted name.
-> And then move the
OK and press the
ENTER button to save.
C.
C.
Recorded TV
Recorded TV
Page 15

Owner’s Manual 55
Home Menu
- The current thumbnail recorded list is shown above.
1. Use the CH +/- button to navigate thumbnail photo in pages.
2. Use MARK button to add or delete the marked photo to the mark list and only marked photos are toggling.
3. Use
D / E
/ F / G button to navigate the appropriate thumbnail photo, then press the ENTER button to open the pop-up
menu.
• Play: Begin playback of selected recording.
•
Mark All: mark all photos on the screen.
•
Unmark All: Change marked photos to unmarked photos.
• Move: Move program saved in HDD to the other folder.
•
Delete: Delete the selected recording. This menu is only available in HDD mode.
•
DVHS Out: When DVHS is connected, selected program is saved to the DVHS.
• Rename: Edit recorded name.
•
Cancel: Close the Pop-up menu.
4. Repeatedly, press REC LIST button or EXIT button to return to TV viewing or press button to return to the
previous menu.
D.
D.
• Through the 1394, can be recorded the desired program.
When a device is not connected
to the 1394 port, “No DVHS
Connected
” is dis-played on the
screen.
Page 16

56 Plasma TV
Operation
This is a device equipment to communicate the data between AV external equipment. It’s used to a
digital camera, camcorder, MP3 player, notebook or PDA.
- Insert the memory card correctly.
- Don’t insert the metal substances into the slots of the memory card.
- Do not bend, drop or apply strong shock to memory card.
- After pulling the memory card out from the TV, please keep the memory stick in a appropriate case to
prevent static shock.
- The stored data may be changed or lost as a result of misuse, static electricity.
- Do not turn the power off while using the memory card (loading or erasing).
- Don’t eject the memory card while using the it. Otherwise, it may cause a data loss or card damage.
- Only Insert one card to each slot.
- To prevent a change or loss for stored data, don’t mis-use the TV or don’t let static electricity or electrical noise for TV.
- This Company takes no responsibility for problems such as the damage or malfunction that occurs
while using the TV set, inappropriate TV settings, or any other rea-sons, except for defects or malfunctions intrinsic to the product.
- Ensure to use a memory card that lists the manufacturers name and serial number.
- The manufacturer shall not be responsible for damaged data. Be careful to avoid data damage, and
back up your files.
- Make sure to comply with the following steps when ejecting a memory card.
What is Memory Card
What is Memory Card
Precaution for Using the Memory Card
Precaution for Using the Memory Card
Using the Memory Card
Using the Memory Card
Page 17

Owner’s Manual 57
Home Menu
W
W Inserting a Card
1. Insert the Memory Card to Memory card slots of TV side panel, refer to the
figure shown on the left.
2. Two slots support defferent types of the Memory Cards.
3. If Memory Card is not inserted, each slot is disable.
W
W Ejecting a card
1. Press the M/C EJECT button on the remote control.
2. Select the Memory 1 or Memory 2 based on the inserted card location.
If selecting Cancel, OSD is disappeared.
3. Eject the card with the hand.
Notes:
• If you insert or eject a card in one slot while the card in another slot (slot 1 or
slot 2) is in use, the product can run abnormally.
• Screen saver will be work if you don’t eject the memory card with the hand
after operating the eject function.
A.
A.
1.Using the Memory Card
Entry Modes- 1.Using the Memory Card / 2. Enter the HOME Menu
Caution: Before you remove the memory card from the slot, do
not forget to press the M/C EJECT button on the
remote control and make it safe to eject the memory
card, or the memory card may be damaged.
How to insert and eject the Memory Card
How to insert and eject the Memory Card
label-side
upward
Memory Card type and Memory Card capacity
Memory Card type and Memory Card capacity
Slot 1 Slot 2
•
CF (CompactFlash) : 2GB
• MD (Microdrive) : 2GB
• CF+|| (magicstor) :2.2GB
• SD (Secure Digital) : 512MB
• MMC (MultiMedia Card) : 256MB
• MS (Memory Stick) :128MB
• MS Pro (Memory Stick Pro) : 1GB
• SMC (Smart Media Card) : 128MB
• XD (XD-Picture Card) : 512MB
- 9 types of Memory Card can be used for this Plasma TV.
- Playback speed can vary dependent on the card type.
CompactFlash
Microdrive
magicstor
SmartMedía
M
EMORY
S
TICK
PRO
Secure Digtal
TM
xD-Picture Card
MultiMediaCard
TM
MEMORY STICK
Page 18

58 Plasma TV
1. In HOME menu, use
D / E
button and then use the ENTER or
G button to select the Photo List .
2. Use
D / E
button to select the HDD/ Memory Card 1/
Memory Card 2 and then you will see a screen filled with
thumbnail photos (pic.C,D).
B.
B.
-2.
Enter the HOME Menu
Enter the HOME Menu
- When you press the button, HOME menu is displayed.
It’s available to play and copy the Photo file of Memory Card.or HDD.
- When you plug the Memory Card, this screen is displayed, automatically.
B.
B.
C.
C.
W
W Select the Photo or Music
1. Press the F / G button to select Photo/Music. and use
D / E
button to select Slot1 or Slot2.
2. Press ENTER button to move Photo List/Music List of the each slot. (Directly move to p.41_pic.C)
Photo List
Photo List
Page 19

Owner’s Manual 59
Home Menu
C.
C.
3. Select the desired folder in the folder list and then press the ENTER button to view the detailed menu.
• Create: Create new folder.
•
Delete: Delete folder (except ‘My Photo' )..
•
Rename: Edit folder name.
• Cancel: Close the detailed menu.
D.
D.
-> Use the
D / E /
F / G
button to input the
wanted name.
-> And then select OK
and press the ENTER
button to save.
E.
E.
Screen Components
Screen Components
Usable HDD
Folder List
Current page/Total page
Marked thumbnail photo number
Current page/Total page
Page 20

60 Plasma TV
Home Menu
- As shown, up to current thumbnail photos listed per page.
1. Use the CH
D / E
button to navigate in the thumbnail photo page.
2. Use MARK button to mark or unmark a photo. When one or more photos are marked, you can view or slide show only
the marked ones. If no photo is marked, you can view or slide show all photos in the folder.
3. Use
D / E
/ F / G button to navigate the appropriate thumbnail photos, then press the ENTER button to show the PopUp
menu
• View: Display the selected item.
Change from still image to slide show by pressing the PLAY (
G) button.
• Slide Show: Start a slide show of all photos in the folder. The slide show state can be changed to the view state by
pressing the Pause (||) button. Before start a slide show, you can choose the slide show interval (3,6 or
9 seconds).
• Mark All: Mark all photos on the screen.
•
Unmark All: Unmark all marked photos.
•
Move: Only HDD mode, move photo of this folder to another folder.
• Delete: Delete the selected thumbnail photo. This menu is only available in HDD mode.
•
Send to: Copy the photo in the HDD to the Memory Card.
This menu is only appeared in HDD.
•
HDD Backup: Copy the photo in the Memory Card to the HDD. At this time, you can also make new folder. This menu
is only available in Memory Card mode.
• Cancel: Close the pop-up menu.
4. Repeatedly, press EXIT button to return to TV viewing or press button to return to the previous menu.
FF.
.
or
HDD mode
Memory Card
1or 2
Page 21

Owner’s Manual 61
Home Menu
Music List
Music List
A.
A.
1. Use
D / E
button and then use the ENTER button or G button
to select the Music List .
2. Use
D / E
button to select the HDD/ Memory Card 1/
Memory Card 2 and then you will see a list of music titles
(pic.C,D).
B.
B.
C.
C.
3. Select the desired folder in the folder list and then press the ENTER button to view the detailed menu.
• Create: Create new folder.
• Delete: Delete folder (except ‘My Photo’).
•
Rename: Edit folder name.
•
Cancel: Close the detailed menu.
D.
D.
-> Use the
D / E /
F / G
button to input the
wanted name.
-> And then select OK
and press the ENTER
button to save.
E.
E.
- When you press the button, HOME menu is dis-
played.
It’s available to play and copy the Photo / Music file of
Memory Card.or HDD.
Page 22

62 Plasma TV
Home Menu
- As shown , up to 8 music titles are listed per page.
1. Use the CH
D / E
button to navigate in the music titles page.
2. Use MARK button to mark or unmark a music title. When one or more music titles are marked, the marked music will
be played by turns. For example, if you want to hear only 1 music repeatedly, just mark the music only and play it. If
no music title is marked, all the music in the folder will be played by turns.
3. Use
D / E
/ F / G button to navigate the appropriate music titles, then press the ENTER button to show up the pop-up
menu.
• Play: Play the selected music.
• Stop Play: Stop playback.
• With Photo: Start playing the selected music and then move to the Photo List.
• Mark All: Mark all music titles in the folder.
• Unmark All: Change marked musics to unmarked music titles.
• Move: Move music titles of this folder to another folder.
• Delete: Delete the selected music titles. This menu is only available in HDD mode.
• Copy: Copy the music titles in the HDD to Memory Card.
This menu is only available in HDD mode.
• HDD Backup: Copy the music titles in the Memory Card to the HDD. At this time, you can also make new folder.
This menu is only available in Memory Card mode.
• Cancel: Close the pop-up menu.
FF.
.
or
HDD mode
Memory Card
1or 2
Page 23

Owner’s Manual 63
Home Menu
4. Repeatedly, press EXIT button to return to TV viewing or press button to return to the previous menu.
- If you don't press any button for 40 seconds, the play information box(as shown in the below) will float
as a screen saver.
(a) For example :
Note:
• When music is playing, is displayed in front of the music title.
• Press any button except VOL
D / E
, MUTE, Play (G), Pause (||), Stop (V),Skip Next and Skip Previous ( FF,
GG
) but-
tons, to stop the screen saver.
• Play (
G
), Stop (V), Pause (||), Skip Next and Skip Previous ( FF,
GG
) buttons on the remote control are also available in
this mode.
Page 24

64 Plasma TV
Operation
TTimeShift Mode
imeShift Mode
SETUP
VIDEO
AUDIO
TIME
OPTION
LOCK
Previous
MENU
CABLE
Advanced G
Aspect Ratio
Caption
Caption / Text
Caption Option
Language
ISM Method
Front Display
Auto Demo
Auto Buffering G
Cinema 3:2 Mode
Low Power
LG Logo
Off
On
- This function allows the unit to automatically record live TV and make it available for reviewing at any time.
With Auto Buffering turned on, you may pause and rewind normal TV viewing at any time without missing
any of the live broadcast.
1. Press the Menu button and then use
D / E
button to select the OPTION menu.
2. Press the G button and then use
D / E
button to select Advanced.
3. Press the
G button and then use
D / E
button to select the Auto Buffering.
4. Press the G button and then use
D / E
button to select On or Off.
1. When turning the TV on, Timeshift function is progressing .
• As soon as Timeshift starts, a progress bar indicating current recording status is displayed in the bottom of
the screen. ( Timeshift ‘Progress Bar’ is shown below)
• Press the EXIT button to hide the ‘Progress Bar’. Pressing the ENTER button will display the 'Progress Bar'.
• Stay The TimeShift even change a channel on Timeshift.
1
2
* The ‘Progress Bar’?
This function indicates a possible
PVR reshowing section ,a current on-screen and real onbroadcasting position, a section
of section-recording.
1. Indicates status of current displayed video.
2. Indicates current save time.
3. Indicates 15 minute intervals from Timeshift start time. (Total - one hour).
4. Indicates Timeshift elasped time.
5. Indicates current Timeshift position.
W
W Progressing the Timeshift function
5
4
3
TTimeShift
imeShift
Page 25

Owner’s Manual 65
Operation
1. You can shift playback to any point within the recording time .
• When playing, press the REW (
FF ) or FF (GG) button.
Searching speed changes with each press of the button.
Like -> -> -> -> in a row.
2 times 5 times 20 times 50 times 300 times
If the button is pressed continuously, it changes like above. If the button is taken away, it changes a nor-
mal playing.
• During playback, press the Pause ( II ) button.
Still screen is displayed.
Repetedly press the Pause ( II ) button to advance frame by frame.
• If you wish to return to the current live broadcast, press the
GG button. (Indicator will change to LIVE)
2. Press the PLAY ( G) button to return to normal play.
W
W On progressing the Timeshift, play
- On progressing Timeshift, It can do a diversified playing .
Notes:
•PVR (Personal Video Recorder) : A device which records and plays broadcast program contents
onto a hard disk in TV or SET TOP BOX.
•When the TimeShift closes, the file (min. 10 seconds) is automatically stored in the record list.
•If available hard-disk space is low when TimeShift is initiated, It will disappear automatically from the oldest part.
•In order to save hard-disk space, no storage is done when there is no signal.
•The total storing space of hard-disk is160GB, there are 4GB minimum reserved for TimeShift.
•When turning power on, it may take up to 3 minutes to initialize the HDD.
•The TimeShift function will not initiate for a copy-protected program.
•Because an analog broadcast is transfered to a digital signal, video that contains rapid movement may
show "cross stripes". This happen when the analo signal is compressed and then retored in the digital
signal. The unit will attempt to soften the video in order to reduce this effect of excessive picture noise.
•When using the PIP/POP mode, TimeShift is stopped.
2. When finishing the Timeshift function, enter the Menu and then Timeshift Mode is to be Off.
Indicates that he current broadcast
and displayed video differ.
Page 26

66 Plasma TV
Operation
Recording
Recording
- This function is able to record channel watched on main screen of an Analog or Digital broadcasting.
W
W Instant Record
- This function records the currently displayed channel.
1.Select the desired channel to record while watching program.
2. Use the
F / G button to select the OK ( as illustrated pic.A.) or Options or Stop Record. If you select the OK or press
the RECORD (
Ó) button in the TV mode, recording will start as marking , and recording will begin with
basic settings.
3. You can select the Stop Record to stop the recording.
4. You can set the duration of the recording by selecting Options and then ENTER button, then the recording time is dis-
played. Press the F / G repeatedly to adjust the recording length. Each press of F / G button changes the recording
duration in the sequence shown below.
No Limit -> 30min -> 1hour -> 1hr 30min -> 2hr -> 2hr 30min -> 3hr
A.
B.
Page 27

Owner’s Manual 67
Operation
5. After adjusting the recording time, select OK and the progress bar will be displayed.
Total recording duration
Elapsed recording time
• Press the EXIT button to hide the Progress Bar. Press the ENTER button to display the progress bar.
5. Press the STOP (
V ) to stop recording, or, when the recording duration is reached, the HD DVR will stop recording
and power off. Although recording has stopped, the Timeshift features remain active.
Notes:
•When recording, if the available storage space becomes low, the recording will be automatically end.
•Once recording has finished, " A recording is finished, will you put the power off?" will be displayed.
•If power is interrupted or turned off too soon after recording, the program may not be saved. Therefore, first press the
(
V
) button and confirm the recording list, before powering the unit off.
•If you press the POWER button while recording, the Screen Saver will initiate and recording will continue.(However,
if recording with the duration set to [no limit], recording will stop and the unit will power off.)
•Recordings of less than 10 seconds will not be saved.
•To save the disk space while recording a digital screen, no data is saved when no signal is present.
•The recording function will not initiate for a copy-protected program.
C.
4. You can also add recording time by pressing the RECORD (
Ó) button during the Instant Record. Press the F / G repeat-
edly to add to the recording time. Each press of F / G button changes the recording duration in the sequence shown
below.
basic value-> +10min -> +20min -> +30min -> +40min ->+50min -> +1hr
The extra recording time added to existed setting value makes final recording time length.
Page 28

68 Plasma TV
Record
W
W
Watching & Record
- While recording, you can change channel s or inputs, without disturbing the recording.
The program being recorded will show in the lower-right corner of the main screen.
1. After starting an Instant Recording or Reserved Recording, change the channel or input
• Check screen of recording is shown in the lower-right corner the screen (as shown below).
• Pressing the PIP button will toggle the check screen on or off.
• Pressing the SWAP button will return the main screen to display the program being recorded.
• In order to change the channel being recorded, Instant Record or Reserved Record ’s must be stopped.
screen being recorded
• Watch & Record Input port
0
X
0
0
Digital
Analog
Video1
Video2
Component1
Component2
RGB-PC/DTV
DVI-PC/DTV
Digital Analog Video1 Video2
00
00
00
00
00
00
00
00
00
00
00
00
00
00
Watch
Note: When digital broadcast is being recorded, another digital broadcast can not be tuned.
Page 29

Owner’s Manual 69
TV Guide On Screen System
TV Guide On Screen
TV Guide On Screen
®
System
System
Overview
Overview
- Your new TV contains the TV Guide On Screen Interactive Program Guide.
-
The TV Guide On Screen system has features that help you get the most out of your viewing
experience.
TV Guide On Screen Overview
The TV Guide On Screen system has the following features:
•Eight days of show listings (today plus seven days).
•Icons that indicate show rating, stereo, HDTV, new episode, etc.
•Intuitive up/down/left/right navigation using your remote control.
•Set shows to Record.
•Schedule show Reminders.
•Search shows by category (e.g., Movies, Sports, Children, etc.).
•Search for shows based on keywords or alphabetically by title.
•Direct tuning to a channel.
•Show information while watching TV.
•Streamlined System Setup and default setting options.
•Channel lineup customization.
•Help screens while in the Guide.
Page 30

70 Plasma TV
TV Guide On Screen System
Screen Components
Screen Components
TV Guide On Screen
TV Guide On Screen
®
System continued
System continued
- The screens displayed in the TV Guide On Screen system share many of the same compo-
nents, as shown in the following figure:
•Video Window - displays TV video while the Guide is displayed
•Service Bar - provides access to the 4 main Guide Services
•Current Service Label - indented to indicate current Service displayed
•Tile - displays show title
•Highlight - indicates an active tile
•Info Box - provides information for a highlighted item
•Info Button - cycles through the various Info Box sizes
•Channel Logo - identifies network
•Record/Remind Icons - indicates a show is set to Record or set as a Reminder
•Panel Ad - location where show- or product-specific information appears (and also where Panel Menu appears)
Page 31

Owner’s Manual 71
TV Guide On Screen System
TV Guide On Screen
TV Guide On Screen
®
System continued
System continued
•A Panel Menu appears when the Menu key is pressed on a highlighted tile and additional options are available. It also
appears when you press ENTER on a show starting in the future.
•When a Panel Menu appears, the highlighted tile changes color to indicate the Panel Menu relates to this tile.
•The Panel Menu displays below the Video Window.
•Help is available for a displayed Panel Menu by pressing the INFO button.
•The
D / E
button move between the options within the Panel Menu.
•The left and right arrows move to adjacent options unless the highlight is on an odometer, where these arrows change the
odometer choice.
•Pressing ENTER from an odometer or number entry box moves the highlight to the default command button of that Panel
Menu, for example, Schedule Reminder.
•Pressing ENTER from a highlighted command button executes the action and closes the Panel Menu (e.g., Schedule
Reminder, Cancel).
•Select Cancel to cancel any changes and press ENTER to close this menu.
•Pressing Menu is a shortcut to Cancel. Press Menu to cancel any changes and close the menu.
•If a Panel Menu contains more menu options than can be displayed on a single screen,
D / E
button appear at the top or
bottom of a menu. Simply scroll down to access these options.
• Panel Menu
Panel Menu
Default
Command
Button
Hightlight
Entry Box
Odometer
Page 32

72 Plasma TV
TV Guide On Screen System
TV Guide On Screen
TV Guide On Screen
®
System continued
System continued
- Access Listings by pressing the TV Guide button on your remote or on the front panel of your TV.
- Listings is always the first Service displayed in the Guide.
- With Listings highlighted, press the Info button to display a Help screen.
Press the Info button again to close the screen.
•View 8 days of show listings
•Read show descriptions
•Tune directly to a show currently airing
•Set a show to Remind
•Set a show to Record
•Lock and unlock the Video Window
•Access Panel and Channel Ads
Use the
D / E
/ F / G buttons to move the highlight
within Listings to:
Main Services
Main Services
V < Listings >
Notes: There may be times when the TV Guide On
Screen system could display partial or no program list-
ings. The reasons for this include:
• Program schedule information was not provided to TV
Guide On Screen.
• The transmission of the program listings was inter-
rupted.
The phrase “No Listings” will be replaced with program
information during the next transmission, which should
occur within the next 24 hours.
Please remember to turn off your TV when not in use
in order to receive program listings.
Page 33

Owner’s Manual 73
TV Guide On Screen System
- Search lets you find shows by category (Alphabetical, Movies, Sports, Children, Educational, News, Variety, Series, HDTV) or by
Keyword.
- With Search highlighted, press the Info button to display a Help screen.
Press the Info button again to close the screen.
•Category Search Example: Movies
1. From Search, use the Ebutton to highlight Movies.
V < Search >
TV Guide On Screen
TV Guide On Screen
®
System continued
System continued
Page 34

74 Plasma TV
TV Guide On Screen System
2. Use the Ebutton to highlight a subcategory (for example, All).
3. Press ENTER to display a list of all Movies, organized by date
and time.
TV Guide On Screen
TV Guide On Screen
®
System continued
System continued
You can choose to set a recording, a reminder, or tune to the
channel.
4. Highlight a show and press ENTER to watch (if on now) or
the Menu key to display the Episode Options menu.
Go to Service Bar - closes the menu, changes no infor-
mation, and returns to the Search Service Bar.
Tune to Channel - exits the Guide and tunes to the chan-
nel of the highlighted show (show airs in the future).
Note: This option reads Watch Now if the show is cur-
rently airing.
Set Recording - displays the Record Options menu, from
which you can set frequency, start and end time, etc.
Set Reminder - displays the Remind Options menu, from
which you can set frequency, when, automatically power
On, and auto-tune the TV.
Cancel - closes the menu, changes no information, and
returns to the highlighted show.
Page 35

Owner’s Manual 75
TV Guide On Screen System
TV Guide On Screen
TV Guide On Screen
®
System continued
System continued
- Keyword search lets you enter a word(s) to look for a particular show by category or for every show title that matches.
• Keyword Search
1. Highlight the Keyword navigation label, and press
ENTER button to display the Keyword Search menu.
2. Highlight New Search, and press ENTER button.
3. The Search Options menu is displayed.
4. Highlight Category, and use the
F / G button to select
a category to search (e.g. All, HDTV, Children, Sports,
etc.). When finished, use the Ebutton to highlight
Enter Keyword.
5. Highlight Enter Keyword, and press ENTER.
Then the keyboard is displayed.
6. Use the
D / E
/ F / G button to highlight a character,
and press ENTER to display it. When complete, high-
light Done and press ENTER.
Page 36

76 Plasma TV
TV Guide On Screen System
The TV guide on screen system stores all the keywords
you create. To edit or delete a keyword, highlight the
keyword and press the Menu key. A Search Options
menu is displayed.
Go to Service Bar - closes the menu, changes no infor-
mation, and returns to the Search Service Bar.
Edit Search - displays the keyboard, where you can
change the keyword.
Delete Search - A Confirm menu is displayed.
•Yes - deletes the Search
•No - closes the panel menu
Cancel - closes the menu, changes no information, and
returns to the highlighted show.
7. A list of all matching shows for that keyword is dis-
played.
Like the Category Search Example, you can highlight
a show, and press ENTER to display all airings. You
can then highlight a specific listing and press ENTER
to watch (if On now) or the Menu key to display the
Episode Options menu.
From the Episode Options menu, choose to set a
recording, a reminder, or tune to the channel, as pre-
viously described.
TV Guide On Screen
TV Guide On Screen
®
System continued
System continued
Page 37

Owner’s Manual 77
TV Guide On Screen
TV Guide On Screen
®
System continued
System continued
Recordings displays a list of previously recorded or currently
recording shows on a DVR or the currently inerted DVD in a DVD
recorder.
With Recordings highlighted, press the INFO button to display a
Help screen. Press the INFO button again to close the screen.
Choose the way Recordings are displayed by highlighting
Recordings on the Service Bar and then press the MENU button
to display the Recordings Options menu. Use the
D / E
buttons
to choose between the following:
• In View As, use the F / G buttons to choose between
W Group - recorded shows are listed without listing every
recorded episode (see example in Screen A)
W List - displays a complete list of every recorded
episode for a show(see example in Screen B)
• In Sort By, use the F / G buttons to choose between
W Title - shows are displayed in alphabetical order (see
example in Screen A)
W Date - shows are displayed by date and time, with
most recent date and time first (see example in Screen B)
When finished, press ENTER to hightlight Done. Press
ENTER again to close the menu and display the
Recordings with the selected options.
In List View, highlight an episode and ab Info box provides
show information. Press the MENU button to display the
Episode Options menu.
In Group View, highlight a show and press ENTER to view
a summary for the all the recorded shows along with the
episode list (pres ENTER again to collapse the episode
list).
Highlight a specific episode and press the MENU buttos to
display the Episode Options menu.
V < Recordings >
Screen A
Screen B
Page 38

78 Plasma TV
TV Guide On Screen
TV Guide On Screen
®
System continued
System continued
To view an episode, you can do one of the following:
• highlight an episode, and press ENTER to view it now. The
episode either starts from where it was last stopped(if
viewed previously) or from the brginning.
W Go th Service bar - close the menu, changes no infor-
mation, and returns to th Schedule Service Bar.
W Resume - starts from where it was last stopped(if
viewde previously) or from the beginning.
W Play from Beginning - starts from the beginning, even
if stopped previously.
W Delete Episode - deletes the episode from the
Recordings, A Confirm menu is displayed.
W Yes - deletes the episode.
W No - closes the panel menu.
W Cancel - closes the menu, changes no information,
and returns to the highlighted show.
Page 39

Owner’s Manual 79
TV Guide On Screen System
TV Guide On Screen
TV Guide On Screen
®
System continued
System continued
- After you initially complete Guide Setup, you can make changes to Guide settings in the following areas:
• Change System Settings
• Change Channel Display
• Change Default Options
Highlight a choice, press ENTER, and follow the on-screen
instructions.
• Change System Settings
This option appears after you have completed the initial Guide
Setup process.
Press ENTER to display the Confirming Your Settings screen. You
see your current settings.
V < Setup >
With Setup highlighted, press the Info button to display a Help
screen. Press the Info button again to close the screen.
Choose one of the options, press ENTER, and follow the on-
screen instructions.
Page 40

80 Plasma TV
TV Guide On Screen System
Press ENTER to display the Channel Editor screen.
Then, highlight a channel and press Menu. A Grid Options
menu is displayed.
Highlight Go Back to Setup to close the menu, change no
information, and return to the Setup Service Bar.
Or make changes and when finished, press ENTER to high-
light Done. Press ENTER again to close the menu and accept
the changes.
Highlight Cancel to close the menu, change no information,
and return to the highlighted channel.
• Change Channel Display
Change Channel Display lets you edit channel information
that appears in Listings. With Change Channel Display you
can :
• Re-order the position or the channel appears in Listings
• Change the tune channel number
• Switch a channel
W On - the channel is always displayed
W Off - the channel is never displayed
W Auto-Hide - the channel is only displayed when
program information is available.
TV Guide On Screen
TV Guide On Screen
®
System continued
System continued
 Loading...