

LG X320APM Users manual

USER GUIDE
LM-X320APM
ENGLISH
Copyright ©2019 LG Electronics Inc. All rights reserved.
MFLXXXXXXXX (1.0)
www.lg.com

ENGLISH
About this user guide
Thank you for choosing this LG product. Please carefully read this
user guide before using the device for the first time to ensure safe
and proper use.
• Always use genuine LG accessories. The supplied items are
designed only for this device and may not be compatible with
other devices.
• Descriptions are based on the device default settings.
• Default apps on the device are subject to updates, and support for
these apps may be withdrawn without prior notice. If you have any
questions about an app provided with the device, please contact
an LG Service Center. For user-installed apps, please contact the
relevant service provider.
• Modifying the device’s operating system or installing software
from unofficial sources may damage the device and lead to data
corruption or data loss. Such actions will violate your LG license
agreement and void your warranty.
• Some content and illustrations may differ from your device,
depending on the area, service provider, software version, or OS
version, and are subject to change without prior notice.
• Software, audio, wallpaper, images, and other media supplied with
your device are licensed for limited use. If you extract and use
these materials for commercial or other purposes, you may be
infringing copyright laws. As a user, you are fully responsible for
the illegal use of media.
• Additional charges may incur for data services, such as messaging,
uploading, downloading, auto-syncing and location services. To
avoid additional charges, select a data plan suitable to your needs.
Contact your service provider to obtain additional details.
1
Instructional notices
WARNING: Situations that could cause injury to the user and third
CAUTION: Situations that may cause minor injury or damage to the
NOTE: Notices or additional information.
parties.
device.
2

Table of contents
01
Custom-designed
Features
6 Multi-tasking feature
7 Fingerprint recognition
11 Quick share
02
Basic Functions
13 Product components and
accessories
14 Parts overview
16 Turning the power on or off
17 Inserting the memory card
18 Removing the memory card
19 Charging the battery
20 Optimizing battery life
21 Touch screen
24 Home screen
31 Screen lock
33 Memory card encryption
34 Taking screenshots
35 Entering text
40 Do not disturb
3

03
04
Useful Apps
42 Installing and uninstalling
apps
43 App trash
44 Phone
48 Messages
49 Camera
56 Gallery
59 Email
61 Clock
62 QuickMemo+
64 Calculator
64 Downloads
64 File Manager
65 LG Mobile Switch
65 FM Radio
66 Audio Recorder
67 Contacts
69 Music
70 Google apps
Phone Settings
73 Settings
73 Networks
84 Sound & notification
85 Display
86 General
05
Appendix
96 Phone software update
98 FAQ
101 Anti-Theft Guide
102 More information
06
For Your Safety
07
LIMITED WARRANTY
STATEMENT
4

01
Custom-designed
Features
Multi-tasking feature
Multi-Window
You can use two apps at the same time by separating the screen into
multiple windows.
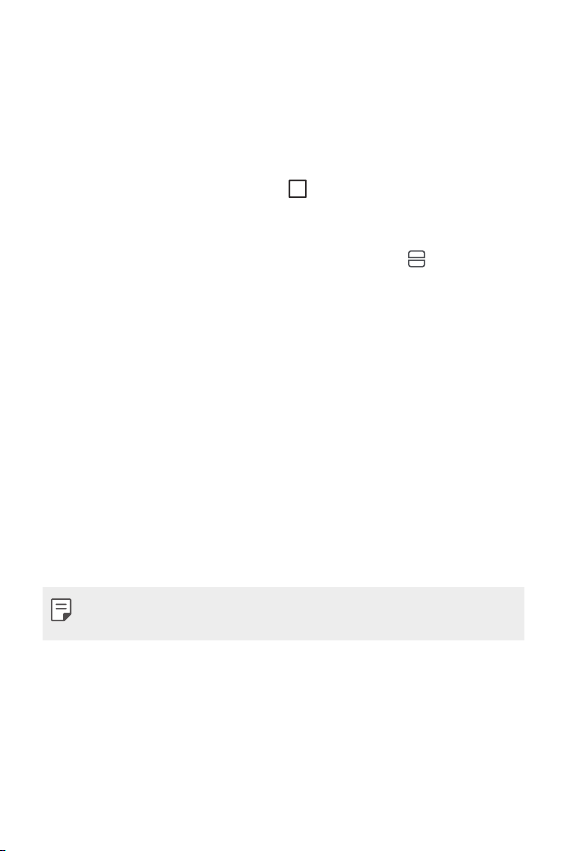
While using an app, touch and hold
then select an app from the recently-used apps list.
• You can use two apps at the same time.
• To exit the Multi-Window feature, touch and hold
• The Multi-Window feature is not supported by some apps,
including downloaded apps.
from the Home touch buttons,
.
Custom-designed Features 6
Overview screen
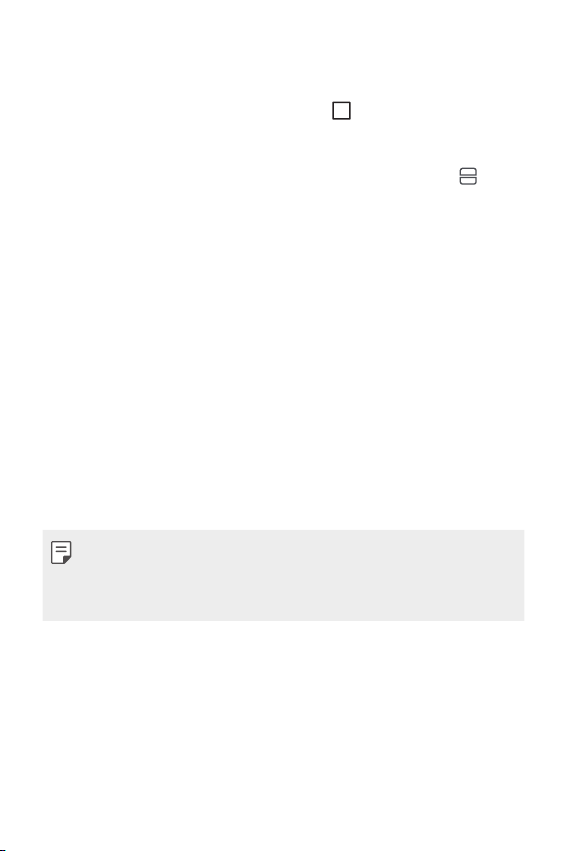
The Overview screen provides a preview of your recently-used apps.
To view the list of recently-used apps, tap
buttons.
• Touch and hold an app and drag it to the top of the screen to start
the app with the Multi-Window feature. You can also tap
top of each app preview.
on the Home touch
at the
Fingerprint recognition
Fingerprint recognition overview
You must register your fingerprint on your device first before using
the fingerprint recognition function.
You can use the fingerprint recognition function in the following
cases:
• To unlock the screen.
• To view the locked content in QuickMemo+.
• Confirm a purchase by signing in to an app or identifying yourself
with your fingerprint.
• Your fingerprint can be used by the device for user identification.
Very similar fingerprints from different users may be recognized by
the fingerprint sensor as the same fingerprint. To ensure security,
set the screen lock using a pattern, PIN or Password.
Custom-designed Features 7

Precautions for fingerprint recognition
Fingerprint recognition accuracy may decrease due to a number of
reasons. To maximize the recognition accuracy, check the following
before using the device.
• The device’s Power/Lock key has a fingerprint sensor. Ensure that
the Power/Lock key is not damaged by a metallic object, such as
coin or key.
• When water, dust or other foreign substance is on the Power/Lock
key or your finger, the fingerprint registration or recognition may
not work. Clean and dry your finger before using the fingerprint
sensor.
• A fingerprint may not be recognized properly if the surface of your
finger has a scar or is not smooth due to being soaked in water.
• If you bend your finger or use the fingertip only, your fingerprint
may not be recognized. Make sure that your finger covers the
entire surface of the Power/Lock key.
• Scan only one finger for each registration. Scanning more than one
finger may affect fingerprint registration and recognition.
• The device may generate static electricity if the surrounding air
is dry. If the surrounding air is dry, avoid scanning fingerprints,
or touch a metallic object, such as coin or key, to remove static
electricity before scanning fingerprints.
Custom-designed Features 8
Registering fingerprints
You can register and save your fingerprint on the device to use
fingerprint identification.
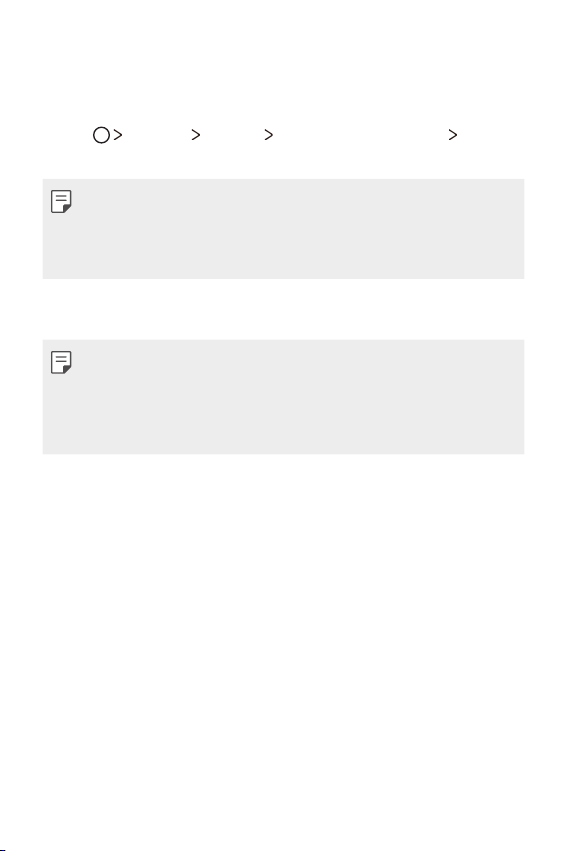
Tap Settings General Fingerprints & security
1
Fingerprints.
• This feature is available when the screen lock is set.
- Lock the device with a Pattern, PIN or Password.
• If the screen lock is not set, configure the lock screen by following
the on-screen instructions. See
Locate the Power/Lock key on the back of the device and gently
2
put your finger on it to register the fingerprint.
• Gently press the Power/Lock key so that the sensor can recognize
your fingerprint. If you press the Power/Lock key with an excessive
force, the screen lock function may start or the screen may turn off.
• Ensure that your fingertip covers the entire surface of the sensor
on the Power/Lock key.
Setting a screen lock
for details.
Follow the on-screen instructions.
3
• Repeat scanning the fingerprint by moving your finger little by
little until the fingerprint registers.
Custom-designed Features 9
When the fingerprint registration is done, tap OK.
4
• Tap ADD MORE to register another fingerprint. If you register
only one fingerprint and the corresponding finger is not in
a good condition, the fingerprint recognition may not work
well. As the preventive measure against this kind of situation,
register multiple fingerprints.
Managing fingerprints
You can edit or delete registered fingerprints.
Tap Settings General Fingerprints & security
1
Fingerprints.
Unlock according to the specified lock method.
2
From the fingerprint list, tap a fingerprint to rename it. To delete
3
it, tap
.
Unlocking the screen with a fingerprint
You can unlock the screen or view the locked content by using your
fingerprint.
Tap Settings General Fingerprints & security
1
Fingerprints.
Unlock according to the specified lock method.
2
On the fingerprint settings screen, activate the desired function:
3
• Screen lock: Unlock the screen with a fingerprint.
• Content lock: Access locked content in QuickMemo+ with a
fingerprint.
Custom-designed Features 10
Quick share
You can share a photo or video using a desired app immediately after
taking it.
Tap , then take a photo or record a video.
1
Tap the app icon that appears on the screen to share it using that
2
app.
You can also swipe the icon towards the opposite direction to see
what other apps you can use to share your photos and videos.
• The app displayed by the quick share icon may vary, depending
on the type and frequency of access to the apps installed on the
device.
Custom-designed Features 11

02
Basic Functions
Product components and
accessories
The following items are included with your device.
• Device
• Ejection pin
• USB cable
• The items supplied with the device and any available accessories
may vary depending on the area and service provider.
• Always use genuine LG Electronics accessories. Using accessories
made by other manufacturers may affect your device's call
performance or cause malfunctions. This may not be covered by
LG's repair service.
• If any of these basic items are missing, contact the dealer from
which you purchased your device.
• To purchase additional basic items, contact an LG Customer Service
Center.
• To purchase optional items, contact an LG Customer Service Center
for available dealers.
• Some items in the product box are subject to change without
notice.
• The appearance and specifications of your device are subject to
change without notice.
• Device specifications may vary depending on the area or service
provider.
• Be sure to use authentic accessories provided by LG Electronics.
Using third-party accessories may damage the device or cause
malfunctions.
• Remove the protective film on the camera lens if necessary.
• Charger
• Quick Start Guide
Basic Functions 13

Parts overview
Proximity/Ambient
light sensor
Front camera lens
Stereo headset jack
Flash
Power/Lock key
Earpiece
SIM/microSD card
slot
Touch screen
Microphone
Rear camera lens
Volume keys (+/-)
Speaker
Charger/USB cable port
Basic Functions 14
• Proximity/Ambient light sensor
- Proximity sensor: During a call, the proximity sensor turns off
the screen and disables touch functionality when the device is
in close proximity to the human body. It turns the screen back
on and enables touch functionality when the device is outside a
specific range.
- Ambient light sensor: The ambient light sensor analyzes the
ambient light intensity when the auto-brightness control mode
is turned on.
• Volume keys
- Adjust the volume for ringtones, calls or notifications.
- While using the Camera, gently press a Volume key to take a
photo. To take continuous shots of photos, press and hold the
Volume key.
- Press the Volume Down (-) key twice to launch the Camera app
when the screen is locked or turned off. Press the Volume Up (+)
key twice to launch Capture+.
• Power/Lock key
- Briefly press the key when you want to turn the screen on or off.
- Press and hold the key when you want to select a power control
option.
• Some functions may be restricted for access, depending on the
device specifications.
• Do not put heavy objects on the device or sit on it. Doing so may
damage the touch screen.
• Screen-protective film or accessories may interfere with the
proximity sensor.
• If your device is wet or is being used in a humid place, the touch
screen or buttons may not function properly.
Basic Functions 15

Turning the power on or off
Turning the power on
When the power is turned off, press and hold the Power/Lock key.
• When the device is turned on for the first time, initial configuration
takes place. The first booting time for the smartphone may be
longer than usual.
Turning the power off
Press and hold the Power/Lock key, then select Power off.
Power control options
Press and hold the Power/Lock key, then select an option.
• Power off: Turn off the device.
• Power off and restart: Restart the device.
• Turn on Airplane mode: Block telecommunication-related
functions, including making phone calls, messaging and browsing
the Internet. Other functions remain available.
Basic Functions 16
Inserting the memory card
The device supports up to a 2 TB microSD card. (Not included)
Depending on the memory card manufacturer and type, some
memory cards may not be compatible with your device.
• It is recommended to use an exFAT file system when using an
external memory card of more than 32GB.
• Some memory cards may not be fully compatible with the device.
If you use an incompatible card, it may damage the device or the
memory card, or corrupt the data stored in it.
Insert the ejection pin into the hole on the card tray.
1
Pull out the card tray.
2
Put the memory card on the card tray with the gold-colored
3
contacts facing downwards.
• The memory card is an optional item and is sold separately.
• Frequent writing and erasing of data may shorten the memory card
lifespan.
Insert the card tray back into the slot.
4
Basic Functions 17
Removing the memory card
Unmount the memory card before removing it for safety.
Tap Settings General Storage .
1
Insert the ejection pin into the hole on the card tray.
2
Pull out the card tray and remove the memory card.
3
• Do not remove the memory card while the device is transferring
or accessing information. This may cause data to be lost or
corrupted, or may damage the memory card or the device. LG is not
responsible for losses that result from the abuse or improper use of
memory cards, including the loss of data.
Basic Functions 18

Charging the battery
Before using the device, fully charge the battery. Connect one end of
the charging cable to the charger, insert the other end of the cable
into the cable port, and then plug the charger into a power socket.
• When connecting a USB cable, make sure that the icon on the cable
faces up. Connecting the cable in the wrong way may damage the
device.
• Make sure to use an LG-approved charger and charging cable.
Charging the battery with a third-party charger may cause the
battery to explode or may damage the device.
• Using the device when it is charging may cause electric shock.
To use the device, stop charging it.
• A charging adapter that supports fast charging is included with
the product. The fast charging feature may not function if a fast
charging adapter other than the genuine adapter provided with the
product is used.
The charger connector is located at the bottom of the device. Insert
the charger and plug it into a power outlet.
Basic Functions 19

Optimizing battery life
Extend your battery’s power by turning off features that you do
not need to run constantly in the background. You can monitor how
applications and system resources consume battery power.
Extending your device battery life
• Turn off radio communications when you are not using. If you are
not using Wi-Fi, Bluetooth® or GPS, turn them off.
• Reduce screen brightness and set a shorter screen timeout.
• Turn off automatic syncing for Gmail, Calendar, Contacts and other
applications.
• Some applications you download may consume battery power.
• Check the battery usage details and close any downloaded apps
that are draining the battery.
Basic Functions 20

Touch screen
You can familiarize yourself with how to control your device by using
touch screen gestures.
Tapping
Lightly tap with your fingertip to select or run an app or option.
Touching and holding
Touch and hold for several seconds to display a menu with available
options.
Basic Functions 21

Double-tapping
Tap twice quickly to zoom in or out on a web page or map.
Dragging
Touch an item, such as an app or widget, then move your finger to
another location in a controlled motion. You can use this gesture to
move an item.
Swiping
Touch the screen with your finger and move it quickly without
pausing. You can use this gesture to scroll through a list, a web page,
photos, screens, and more.
Basic Functions 22

Pinching and spreading
Pinch two fingers to zoom out, such as on a photo or map. To zoom
in, spread your fingers apart.
• Do not expose the touch screen to excessive physical shock. You
might damage the touch sensor.
• A touch screen failure may occur if you use the device near a
magnetic, metallic or conductive material.
• If you use the device under bright lights, such as direct sunlight,
the screen may not be visible, depending on your position. Use the
device in a shady location or a location with an ambient light that is
not too bright and bright enough to read books.
• Do not press the screen with excessive force.
• Gently tap with your fingertip on the option you want.
• The touch control may not work properly if you tap while wearing a
glove or by using the tip of your fingernail.
• Touch control may not work properly if the screen is moist or wet.
• The touch screen may not function properly if a screen-protective
film or accessory purchased from a third party store is attached to
the device.
Basic Functions 23
Home screen
Home screen overview
The Home screen is the starting point for accessing various functions
and apps on your device. Tap
Home screen.
You can manage all apps and widgets on the Home screen. Swipe the
screen left or right to view all installed apps at a glance.
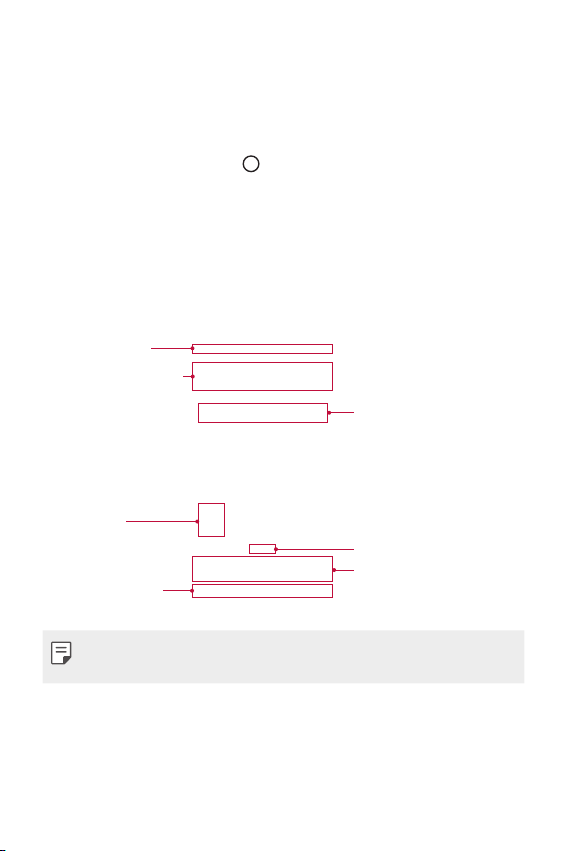
Home screen layout
You can view all apps and organize widgets and folders on the Home
screen.
Status bar
Weather widget
Folder
Home touch
buttons
on any screen to directly go to the
Google search widget
Page icon
Quick access area
• The Home screen may vary, depending on the service provider or
software version.
• Status bar: View status icons, the time and the battery level.
• Weather widget: View the weather information and time for a
specific area.
Basic Functions 24

• Google search widget: Perform a Google search by inputting
spoken or written keywords.
• Folder: Create folders to group apps by your preferences.
• Page icon: Display the total number of Home screen canvases. Tap
the desired page icon to go to the page. The icon reflecting the
current canvas will be highlighted.
• Quick access area: Fix main apps at the bottom of the screen so
that they can be accessed from any Home screen canvas.
• Home touch buttons
: Return to the previous screen. Close the keypad or pop-up
windows.
: Tap to go to the Home screen. To launch Google Assistant,
touch and hold.
: Tap to view a list of recently used apps or run an app from
the list. To delete all the recently used apps, tap CLEAR ALL. To
use two apps at the same time with the Multi-Window feature,
touch and hold the button while using an app.
Editing the Home touch buttons
You can rearrange the Home touch buttons or add frequently used
functions to the Home touch buttons area.
Settings Display Home touch buttons Button
Tap
combination and customize the settings.
• Several functions, including QSlide, Notification, and Capture+, are
Basic Functions 25
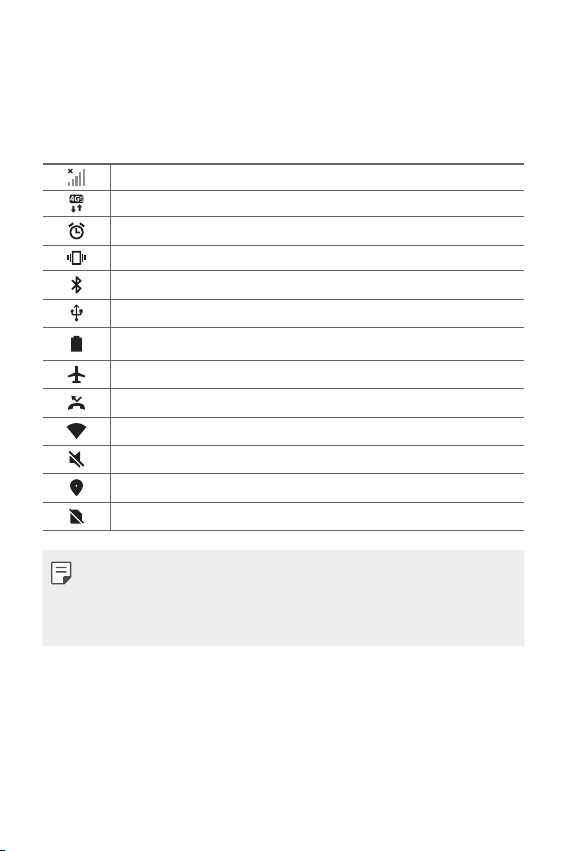
Status icons
When there is a notification for an unread message, calendar event
or alarm, the status bar displays the corresponding notification icon.
Check your device's status by viewing notification icons displayed on
the status bar.
No signal
Data is being transmitted over the network
Alarm is set
Vibrate mode is on
Bluetooth is on
Connected to a computer via USB
Battery level
Airplane mode is on
Missed calls
Wi-Fi is connected
Mute mode is on
GPS is on
No SIM card
• Some of these icons may appear differently or may not appear at
all, depending on the device's status. Refer to the icons according to
the actual environment in which you are using the device.
• Displayed icons may vary, depending on the area or service provider.
Basic Functions 26

Notifications panel
You can open the notifications panel by dragging the status bar
downward on the main screen.
• To open the quick access icons list, drag the notifications panel
downwards or tap
• To rearrange, add, or remove icons, tap EDIT.
• If you touch and hold the icon, the settings screen for the
corresponding function appears.
.
Basic Functions 27

Switching the screen orientation
You can set the screen orientation to automatically switch, according
to the device's physical orientation.
On the notification panel, tap Rotation from the quick access icon list.
You can also tap
Auto-rotate screen.
Settings Display and activate
Editing the Home screen
On the Home screen, touch and hold on an empty space, then select
the desired action from below.
• To rearrange the Home screen canvases, touch and hold on a
canvas, then drag it to a desired location.
• To add a widget to the Home screen, touch and hold on a blank
area of the Home screen, then select Widgets.
• To change a theme, touch and hold on a blank area of the Home
screen, then select Theme.
You can also tap
theme to apply to the device.
• To configure the Home screen settings, touch and hold on a blank
area of the Home screen, then select Home screen settings. See
Home screen settings
• To view or reinstall the uninstalled apps, touch and hold on a blank
area of the Home screen, then select App trash.
Settings Display Theme, then select a
for details.
Basic Functions 28

Viewing the background theme
You can view only the background image by hiding the apps and
widgets on the Home screen.
Spread two fingers apart on the Home screen.
• To return to the original screen, which displays apps and widgets,
pinch your fingers on the Home screen or tap
.
Moving apps on the Home screen
On the Home screen, touch and hold an app, then drag it to a desired
location.
• To keep frequently used apps at the bottom of the Home screen,
touch and hold an app, then drag it to the quick access area at the
bottom.
• To remove an icon from the quick access area, drag the icon to the
Home screen.
Using folders from the Home screen
Creating folders
On the Home screen, touch and hold an app, then drag it over
another app.
Basic Functions 29
 Loading...