How it Works
Log In / Sign Up
Buy Points
How it Works
FAQ
Contact Us
Questions and Suggestions
Users
LG
Loading...
W
WS0805WH
2
WS0906WHT
WS0906XM
WS0965WH
3
WS10
WS-14035GDN
WS1408XMT
2
WS1509WH
WS1509XM
WS1610XM
WS1710WHT
WS1710XM
2
WS1810XM
WS1910HXM
WS1910XM
2
WS1911XMT
WS2011XM
WS-2080
WS2212XM
2
WS27WI
WS3010ST
WS410GN
WS-5550
WS960H
WSC0805WH
2
WSC0805WHN
2
WSC0905WHN
2
WSC0905XMN
2
WSC0906WH
2
WSC1107WHN
2
WSEX200HNA
3
WSG0906XM
2
WSG1208XMN
WSGX201HNA
3
WSS1207WHTN
2
WST2112XM
WST2112XMN
WSTK1
3
WSV0805WH
WSV0906WH
3
WSV0906XM
3
WSV1107XMT
2
WT-101N
WT-13SNSV
WT-32Q81IP
WT-32Q82IP
WT-60PW
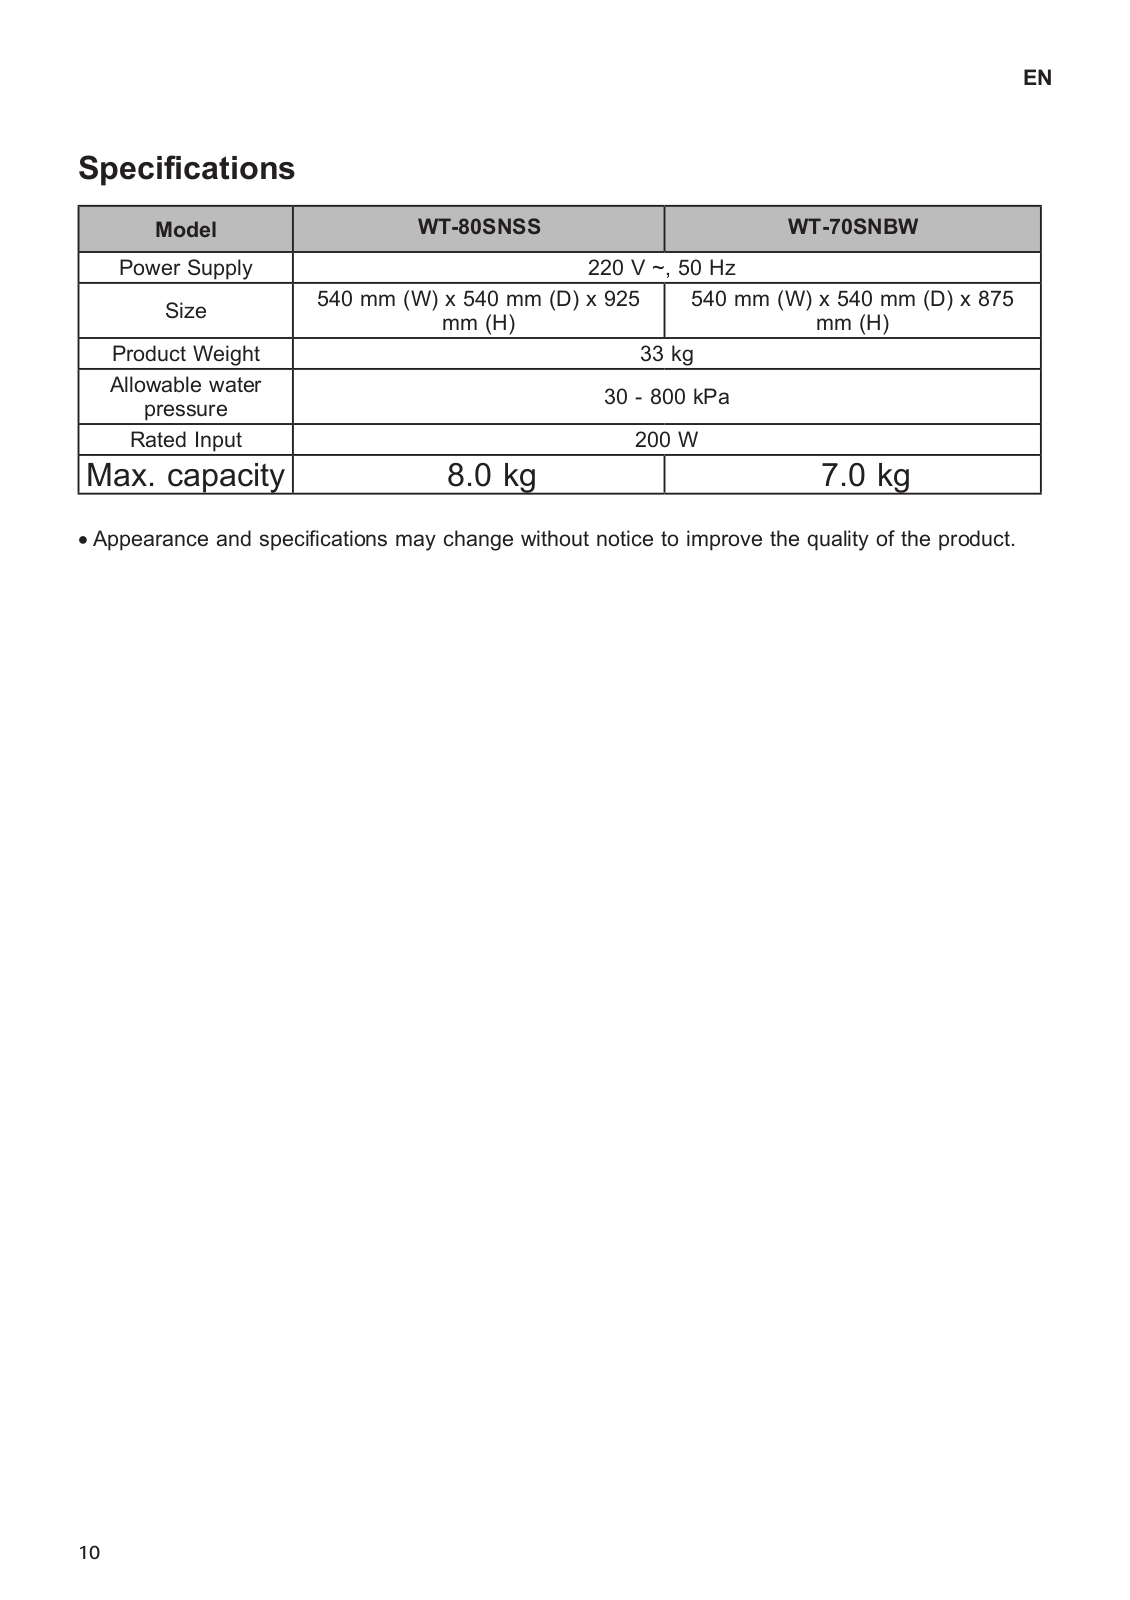
WT-70SNBW
2
WT-80PV
WT-80SNSM
WT-80SNSS
WT-90WC
WT-D082WG
WT-D102SG
WT-D105SG
WT-D1071TC
WT-D110CG
WT-D112WG
WT-D115MG
WT-D120PG
WT-D125SG
WT-D130PG
WT-D130VG
WT-D135SG
WT-D135VG
WT-D140GG
WT-D140PG
WT-D145SG
WT-D147MG
WT-D150GG
WT-D150PG
WT-D150RG
WT-D150VG
WT-D156SG
WT-D160MG
WT-D160VG
WT-D165WG
WT-D169SG
WT-D175RG
WT-D178GV
WT-D200HV
WT-D200SHW
WT-D250HB
WT-D250HV
WT-D250HW
WT-D350V
WT-E1170TP
WT-H550
WT-H550W1
WT-H555TH
WT-H6506
WT-H655
WT-H755
WT-H755A
WT-H755TH
2
WT-H756
WT-H756TH
WT-H9556
3
WT-HDS10SV
WT-ID108WG
Loading...
Loading...
Nothing found
WT-80SNSS
Owner’s Manual
82 pgs
8.4 Mb
0
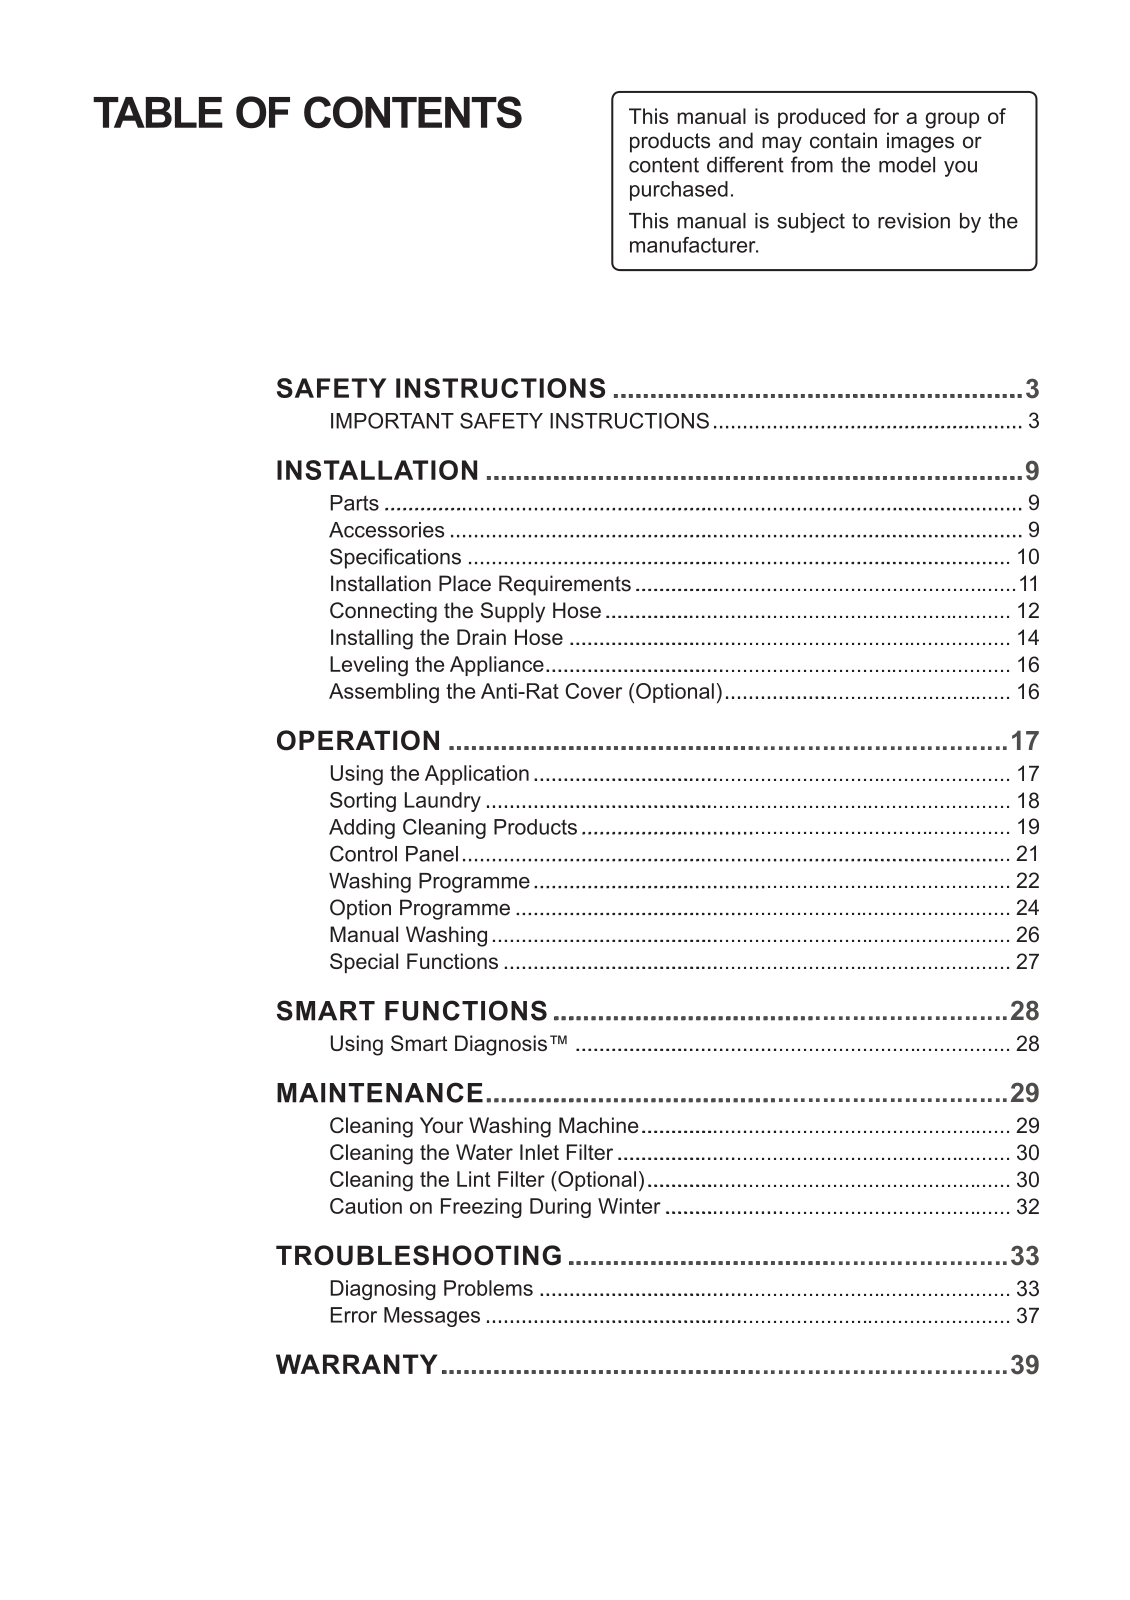
Table of contents
Loading...
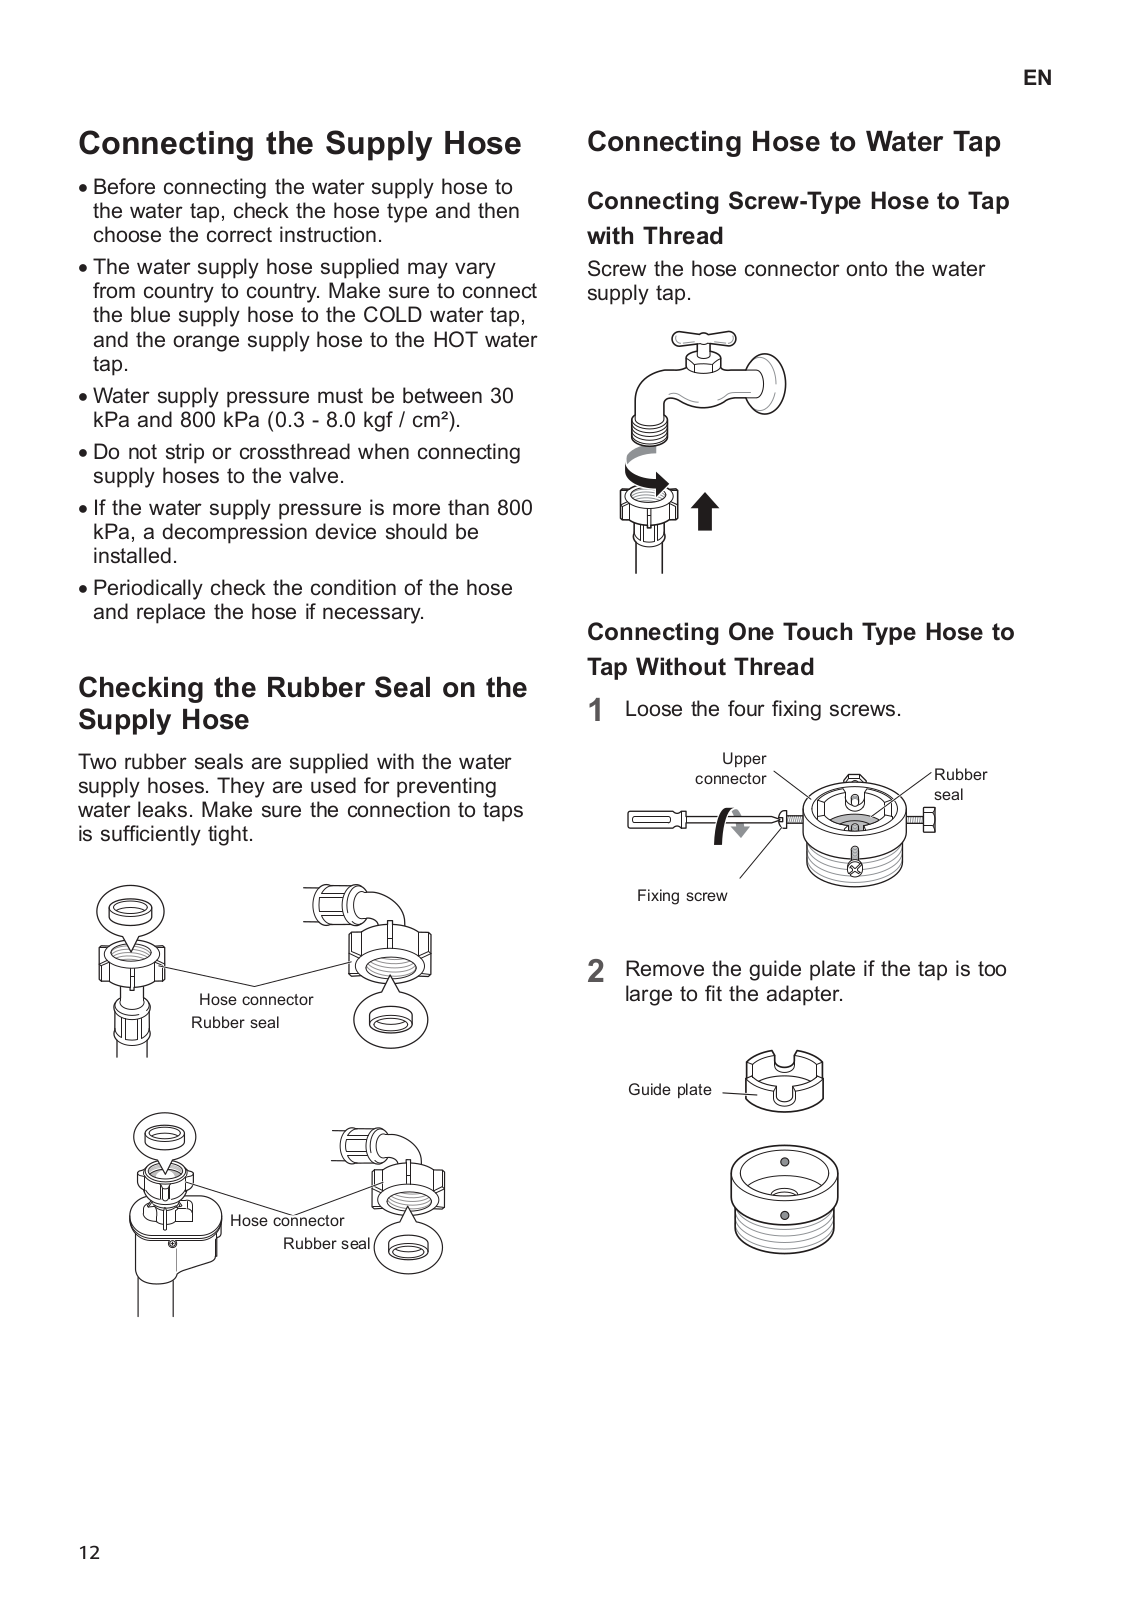
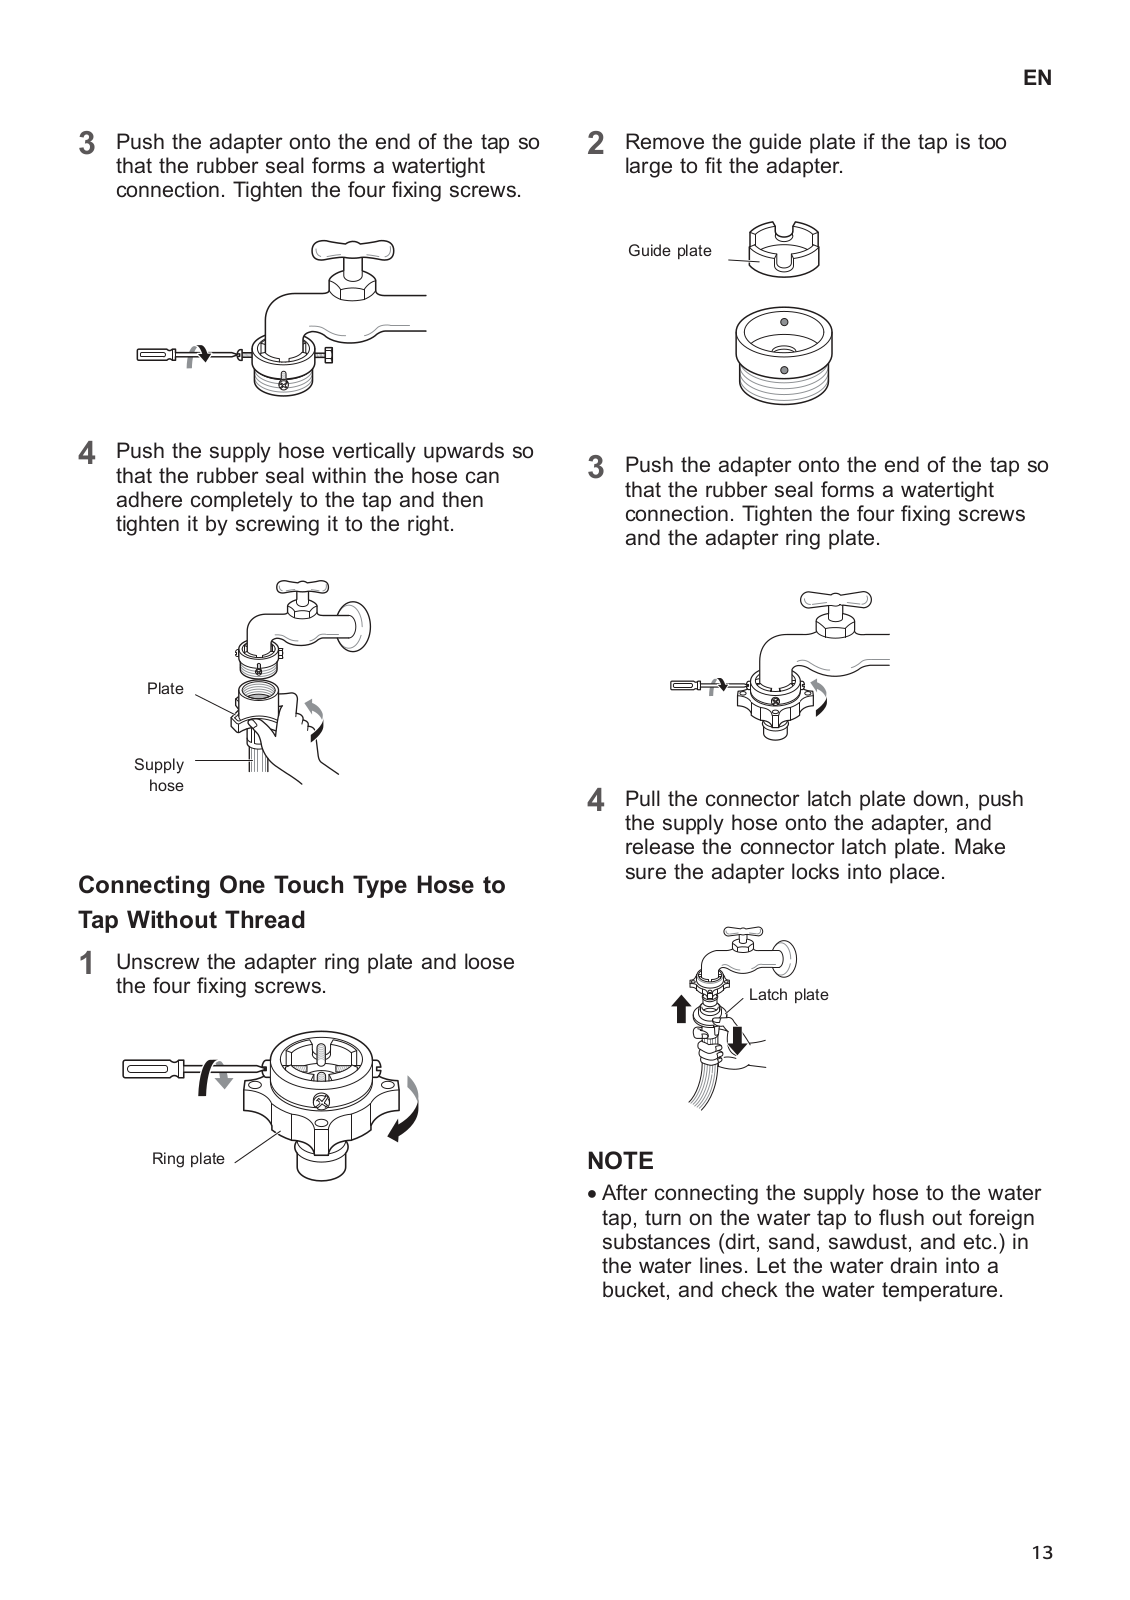
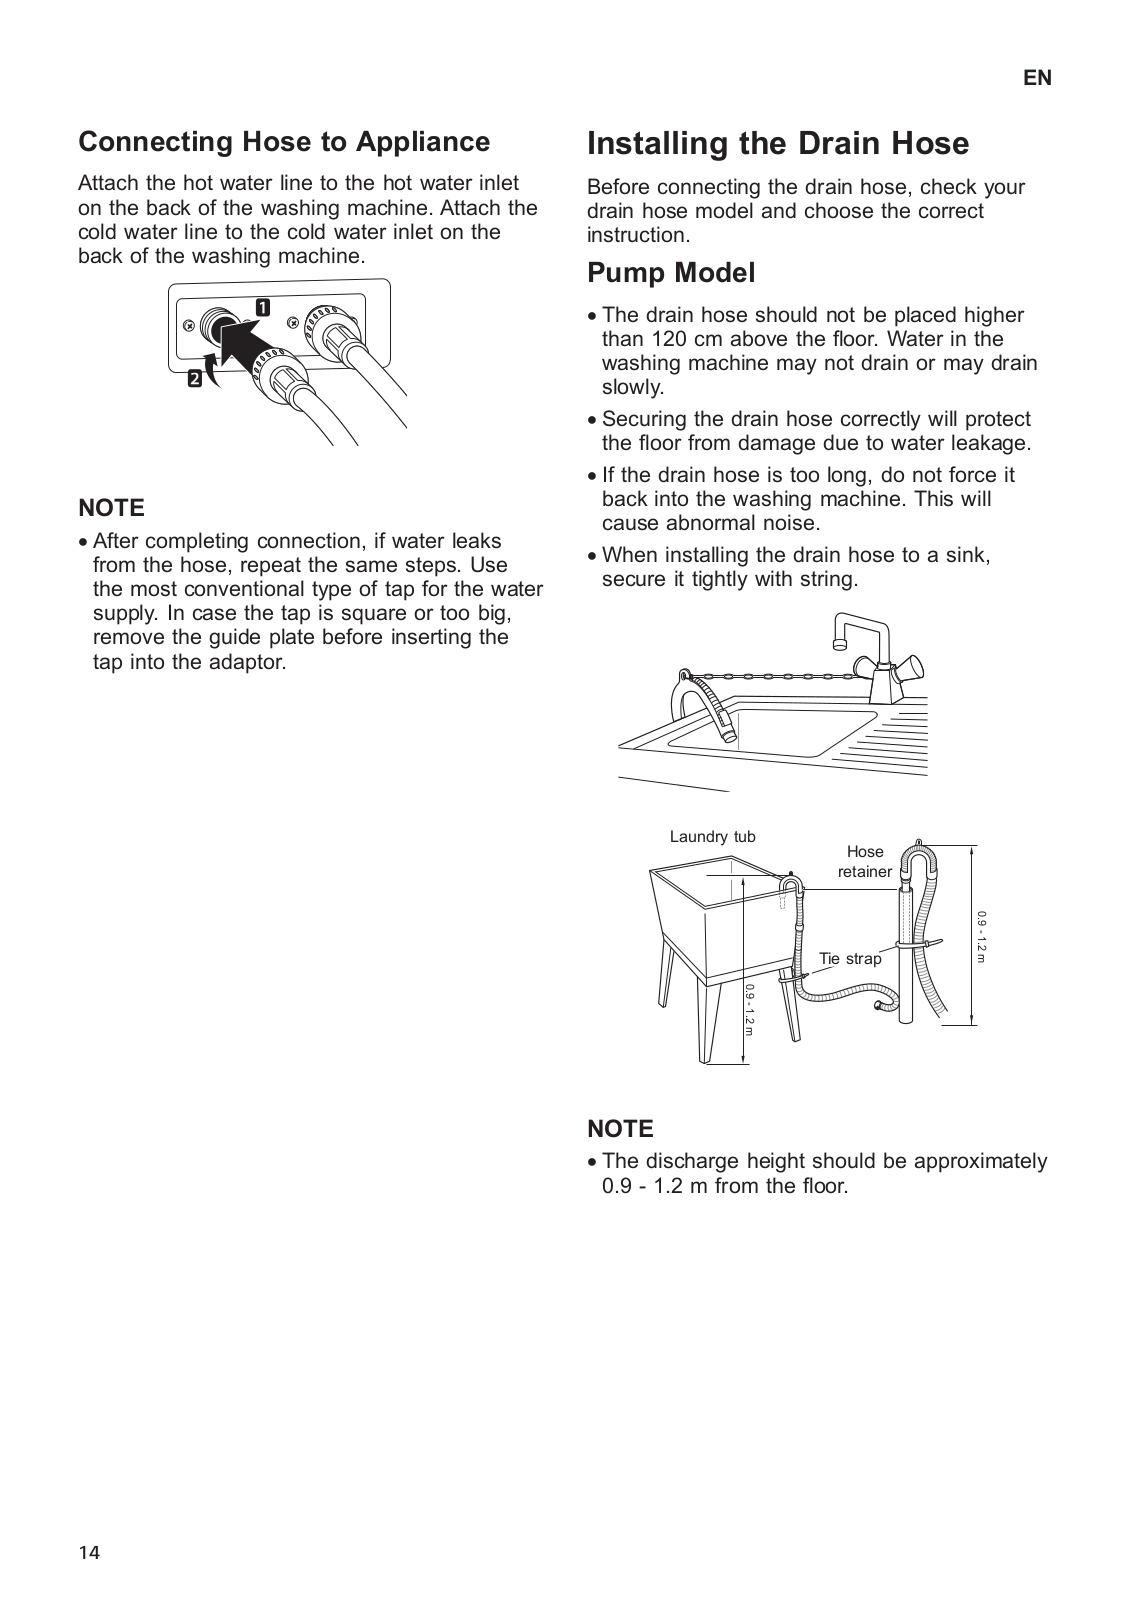
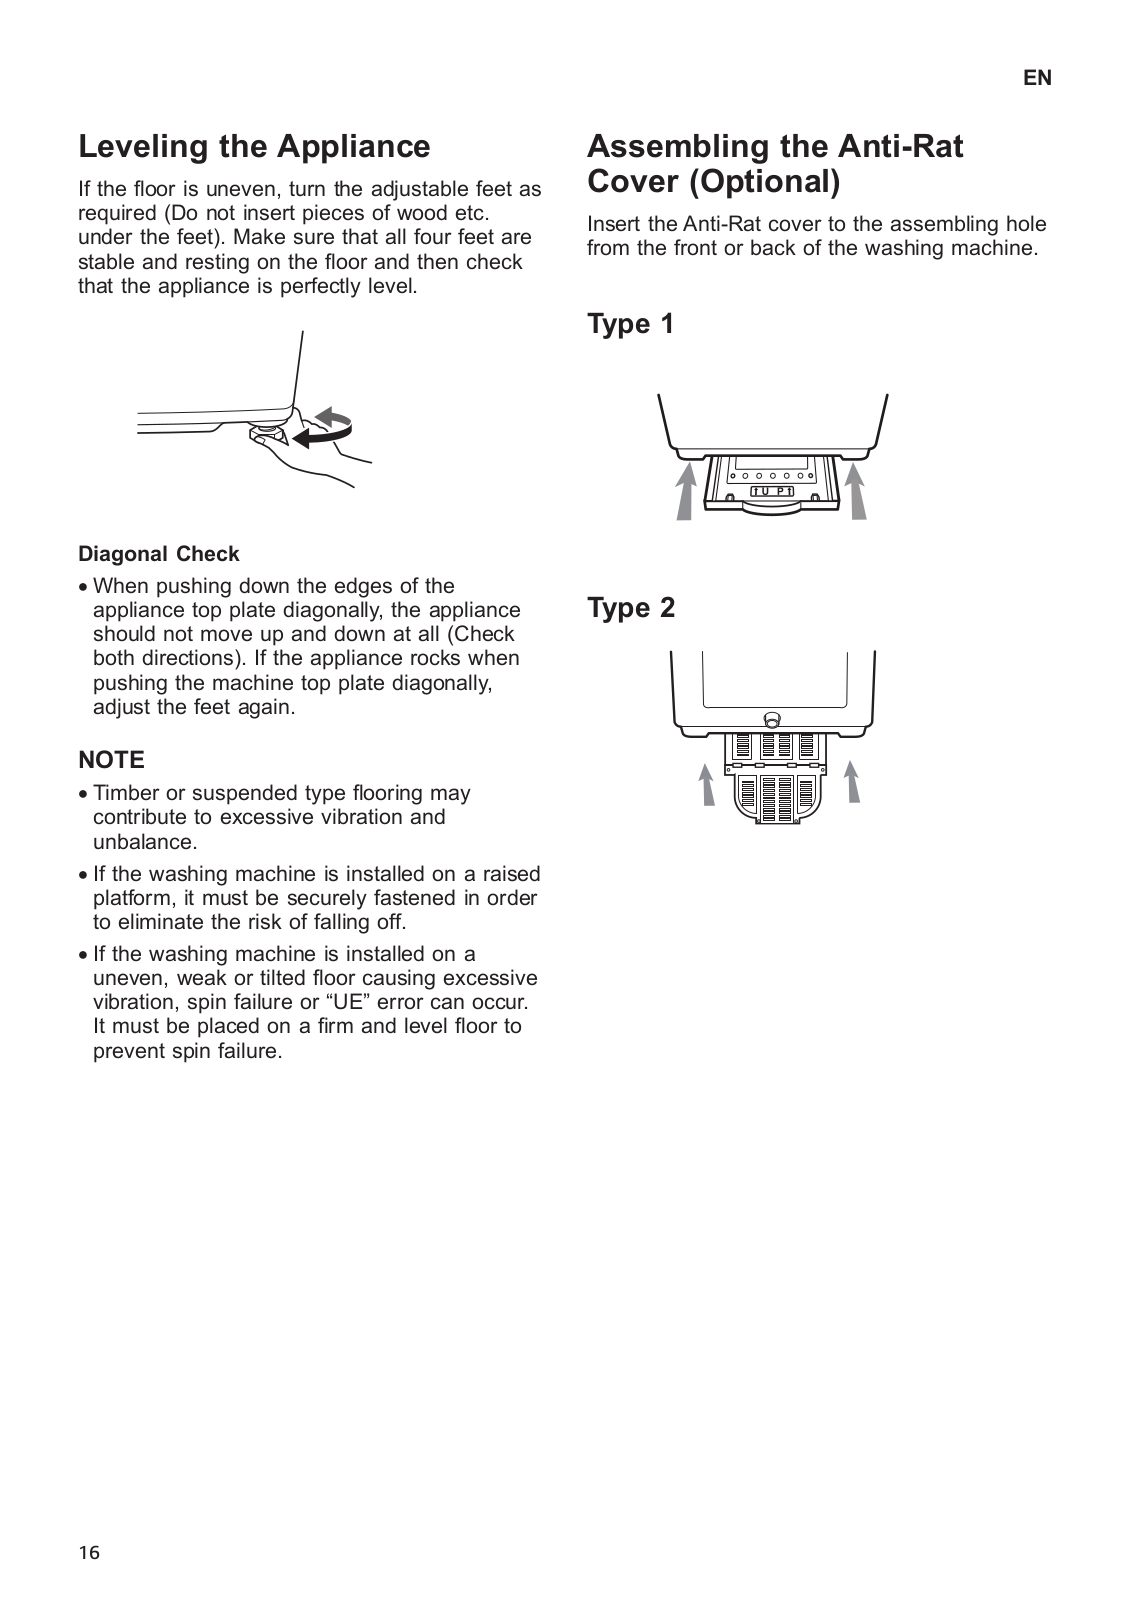
LG WT-70SNBW, WT-80SNSS Owner’s Manual
...
LG Owner’s Manual
Download
Specifications and Main Features
Frequently Asked Questions
User Manual
Download
Loading...
+
57
hidden pages
Unhide
You need points to download manuals.
1 point = 1 manual.
You can buy points or you can get point for every manual you upload.
Buy points
Upload your manuals
 Loading...