

LG WP-1690RWN Owner’s Manual
WP-1690RWN/ WP-1700RWN
WP-1800RWN/WP-1970RWN
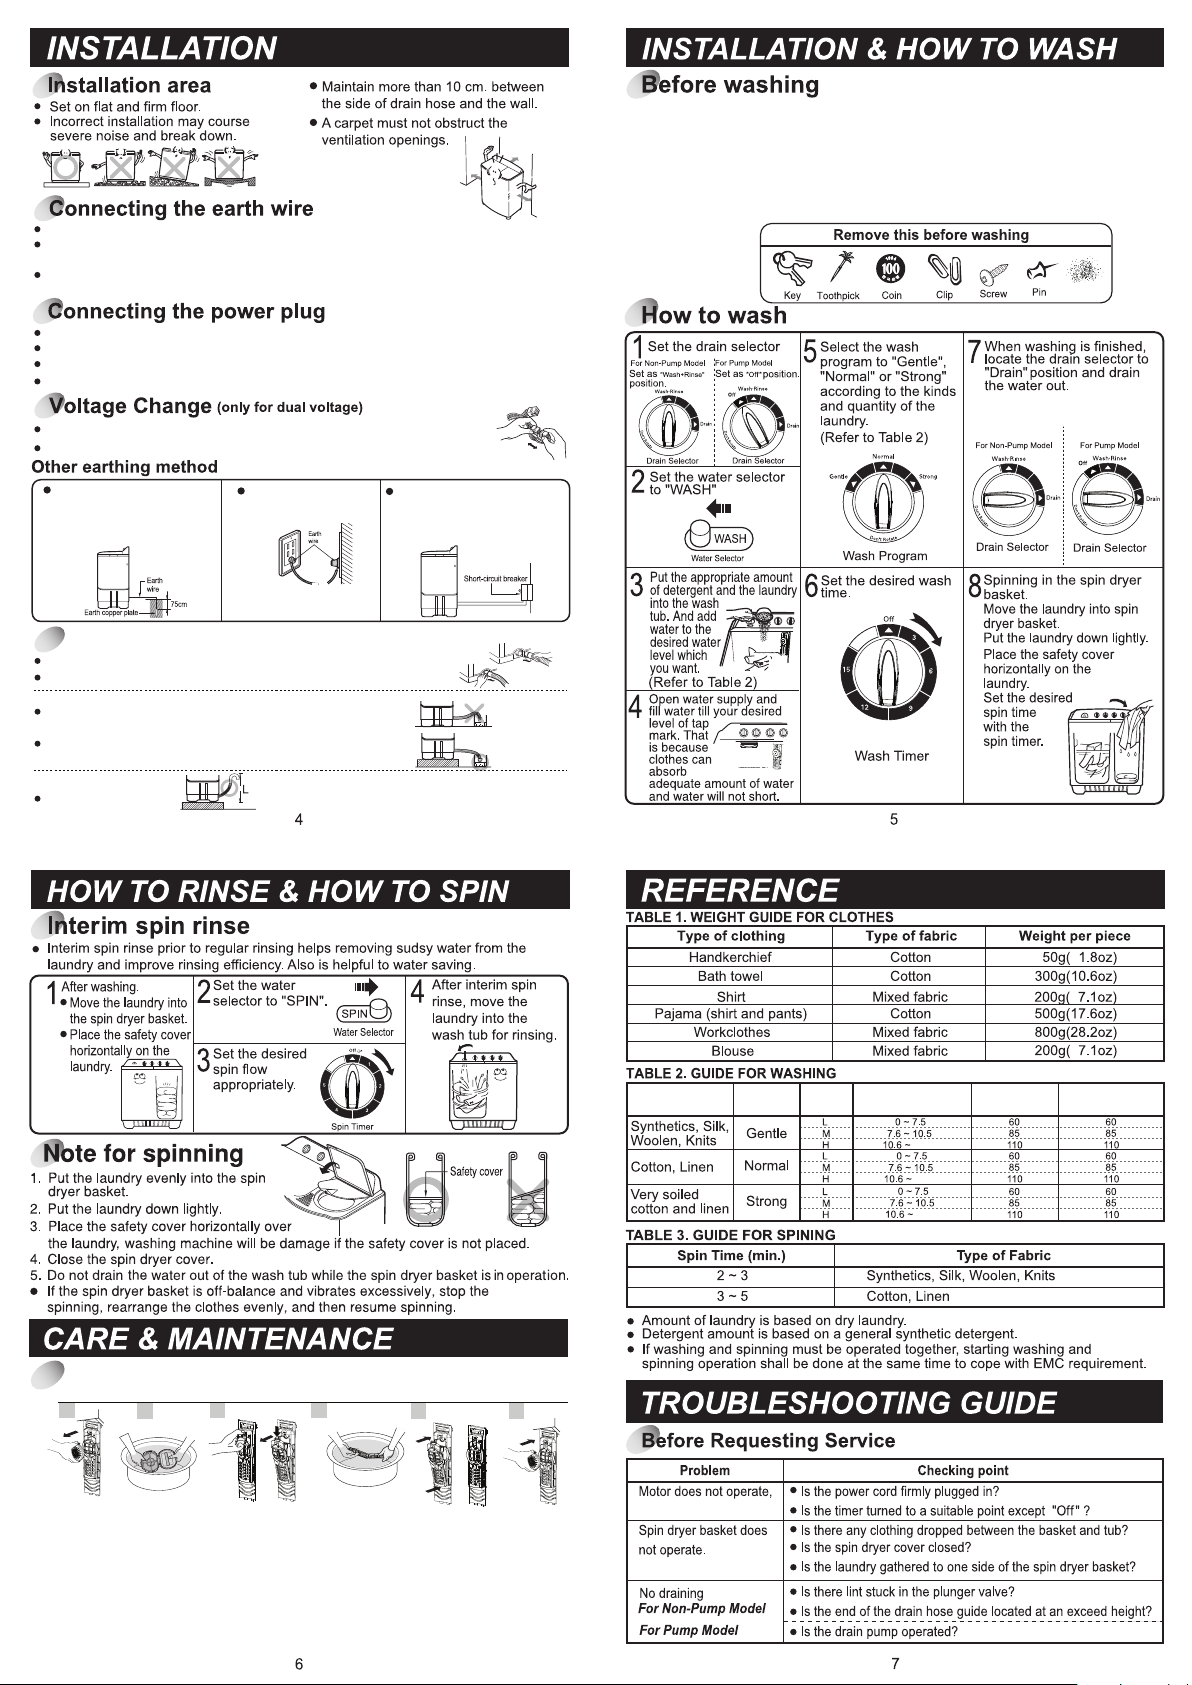
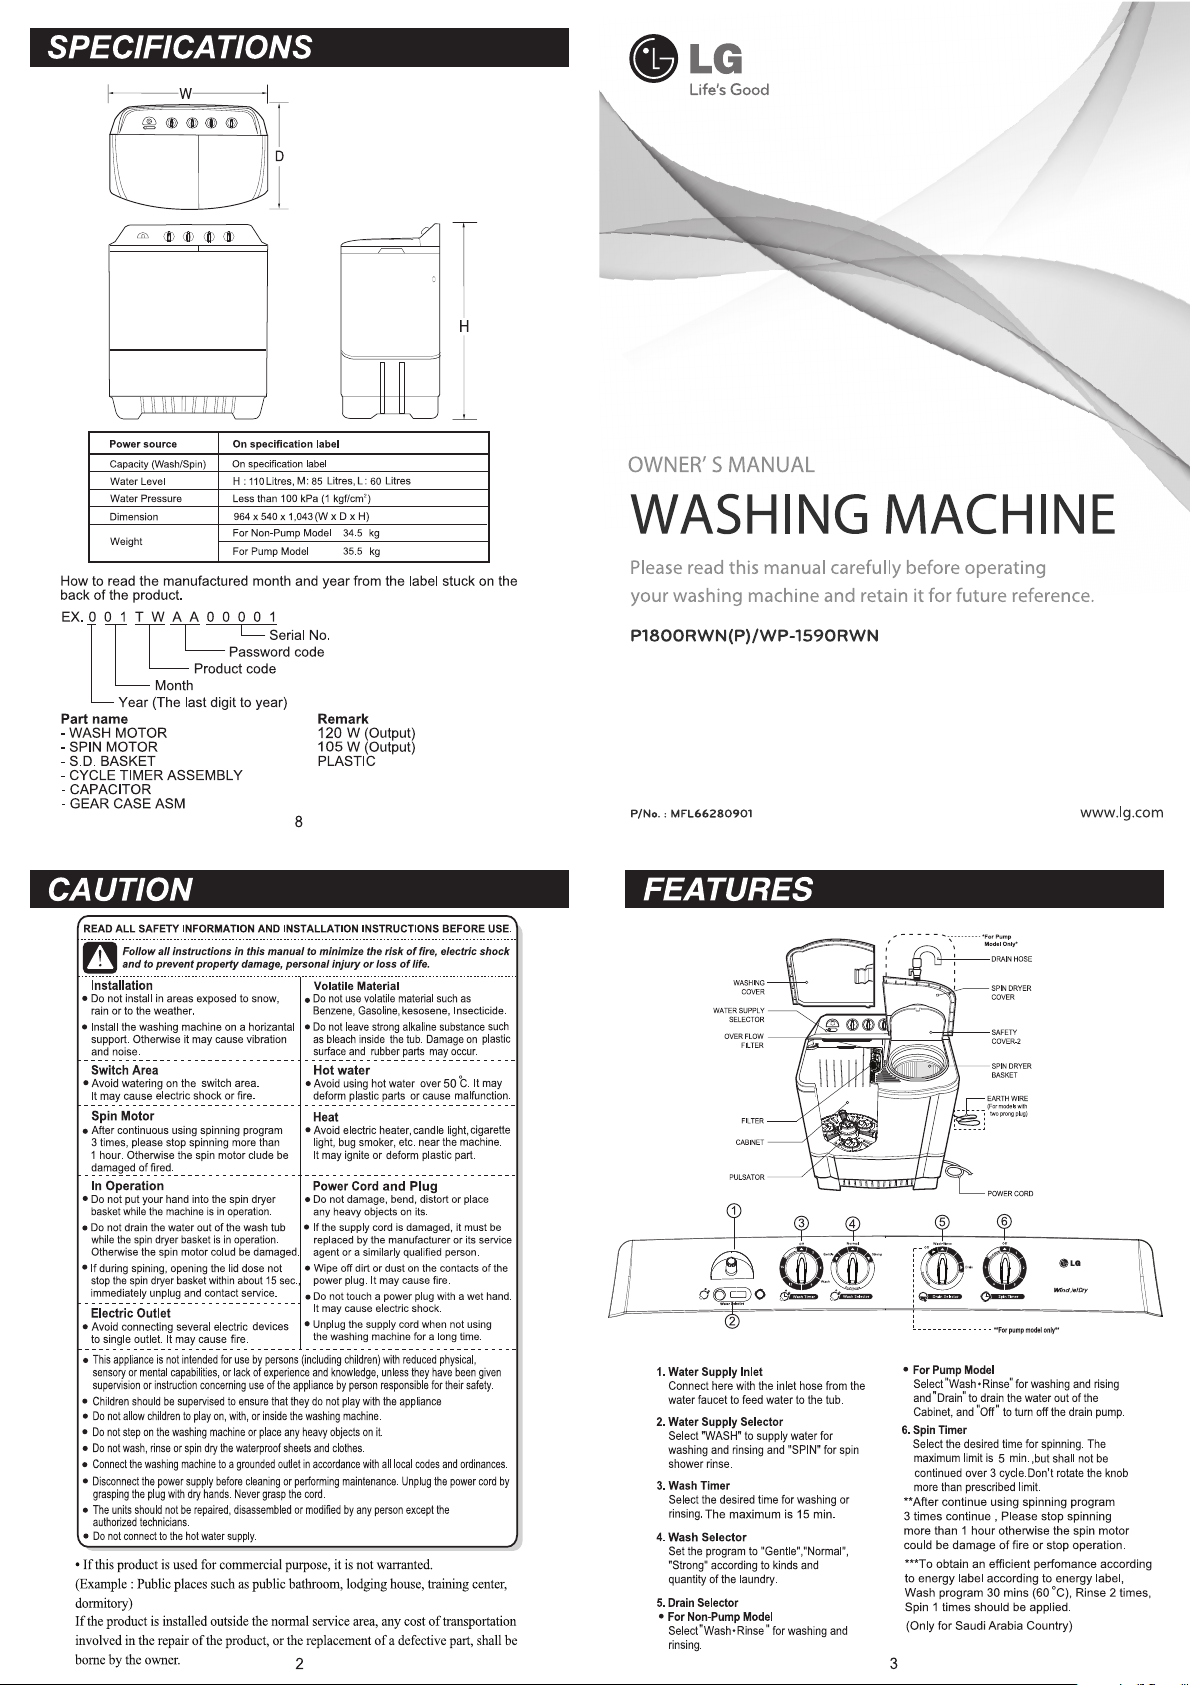
Install the earth wire to prevent short-circuit due to leaking current and electric shock.
It is attached at the back of the washer. Connect it to the metal water pipe.
If the water pipe is made of plastic, it does not have the earth effect.
Do not connect the earth wire to the gas pipe, lightning arrester, telephone connecter, etc..
*Warning - the appliance with two pronged plug must be grounded.
Insert the power plug into the outlet.
Before connecting the power plug, check if the voltage setting of the washer matches the outlet voltage.
If AC outlet with ground terminal is used, grounding is not needed. if not, never forget earthing.
The appliance must be positioned so that the plug is accessible.
This washer is assembled for 220V, but can be changedfrom 220V to 110V ( or 127V).
Check your electrical source and follow the diagram below to convert voltage.
1.Look for a care label on your clothes. This will tell you about the fabric content of your garment
and how it should be washed.
2.Check all pockets to make sure that they are empty. Objects left in the pockets can damage both
your washer and your clothes. (could be cause the drain hose to clogg).
3.Sort clothes into loads that can be washed with the same wash cycle.
4.For you convenience hang up the wash cover on the right or left side of the washing machine tub
when not in use.
5.The washing machine is to be connected to the water mains using new hose-sets and old hose-sets
should not be reused.
Sand
After connecting the earth wire
to the earth copper plate, bury
it at least 70cm deep under
the wet ground.
Connecting to the When installing it in an area
earthing-only outlet.
where earthing is not possible,
purchase a short-circuit
breaker connect it to the outlet.
Connecting the drain hose
Connect the drain hose to the outlet of the plunger valve located at the back side.
Push the clamp toward the body of the washing machine as shown in the figure.
For Non-Pump Model
Be sure to reroute the hose so that it is not kinked, kinks or sharp
bending in the hose will prevent proper drainage.
Make sure water is drained smoothly by placing a base under the
machine or by applying other appropriate mean.
For Pump Model
L <= 1 m.
e
t
a
t
o
R
t
’
n
o
D
Type of Fabric
e
t
a
t
o
R
t
’
n
o
D
Water
Wash Amount of
Selector
Level
Laundry (kg)
Amount of
Water (l)
Amount of
Detergent (g)
To Clean the Filter
1
2
1. Push the upper and lower part of the filter down and pull forward.
2. Open the lid and remove lint and then wash out.
3. Push the upper part of overflow filter down and pull forward.
4. Open the lid and remove lint and then wash out.
5. Close the lid and then insert the lower part of the overflow filter into the wash tub
and press down then press top part into position until you hear a click sound.
6. Replace the filter to the original position
3 4
5 6
 Loading...