

Page 1

WFS1838EKD
MFL68019778
WASHING MACHINE
OWNER’S MANUAL
Please read this manual carefully before operating
your washing machine and retain it for future reference.
Page 2
roduct Features
START
WASHING
AUTO
POWER
OFF
SENSING
L
aundry Sensor
W
ater Level Sensor
SETTING
O
ptimum
W
ashing
Condition
P
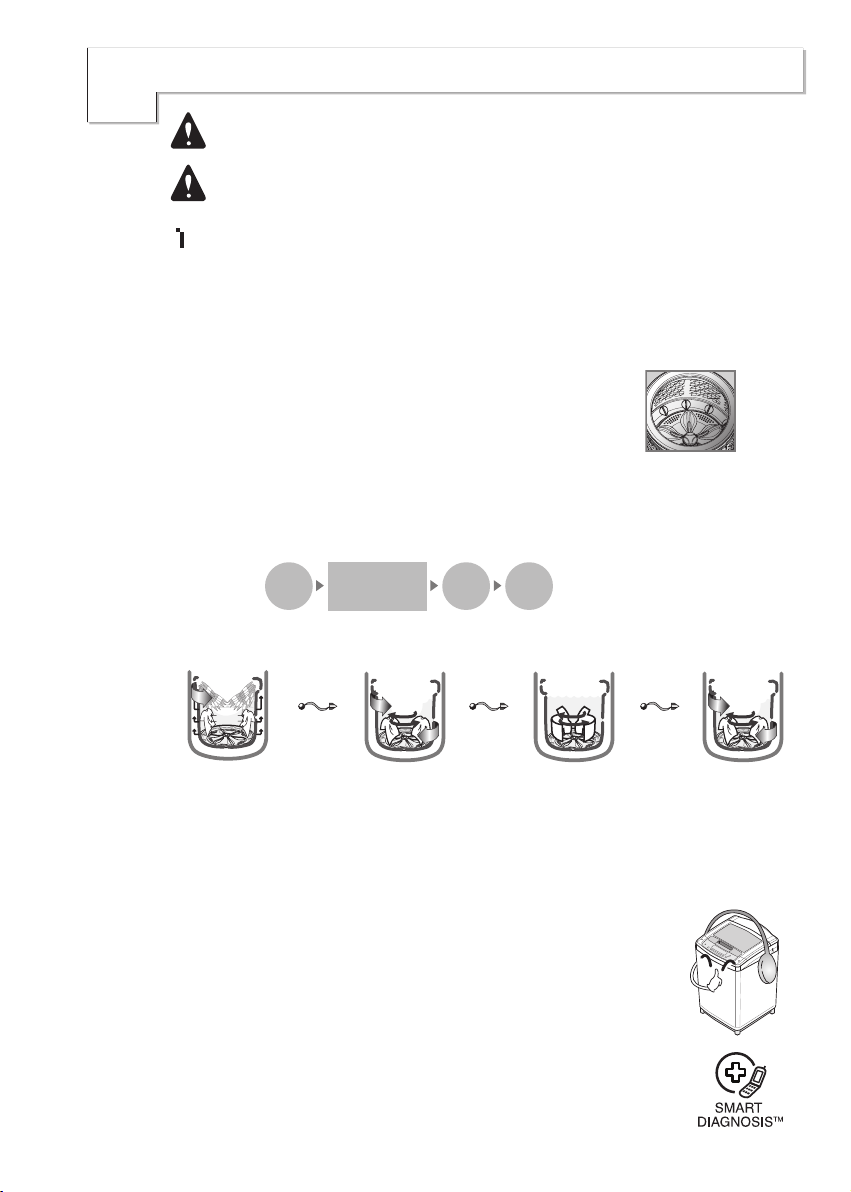
The Turbo Drum DD washing machine does not operate with the lid open.
If the lid is opened during wash, rinse and spin cycles, the machine will stop automatically.
Please close the door gently. Closing the door in an agressive manner can cause damage
and or injury.
sensors
The sensor automatically detects the quantity of Detergent put in by a user and the
●
temperature and quality of the water to produce the best algorithm for washing and
rinsing, to give the best washing results.
Smart Drum achieved by DD Motor Technology
Smart Drum with Drum Washing Type is more hygienic
●
and cleaner washer tub that protects the fabric and
prevents damages.
FUZZY logic control
●
A built-in load sensor automatically detects and measures the laundry load and amicroprocessor
optimizes washing conditions such as ideal water consumption and washing time.
●
Advanced technology is built into the Electronic Control System which ensures the best washing
result.
New DD type washing with fabric care
It rotates the tub and
creates cannon water
flow making the effect
of the detergent faster
improving the washing
effect and preventing
fabric damages
Low Noise Direct Drive System
●
The advanced Brushless DC motor rotates the Tub directly without belt and
The half cycle rotation
of the tub to the
left/right helps the melting of the detergent for
easy washing
The half cycle rotation
of the washing rotors to
the left/right removes
the stains
clutch, thereby reducing the noise of the washer.
●
The washing machine adjusts to optimum speed according to the type of
clothing in the load.
SMARTDIAGNOSIS
● It is the technology to transmit the anomalies to the service center
TM
when there is a problem with the washer. It provides the service
that gives faith and trust to the customers through precise and fast
analysis.
The half cycle r
otation of the tub
to the left/right
balances the
laundry
Page 3

ontents
C
READ THIS MANUAL
Inside you will find many helpful hints on how to use and maintain your washer properly. Just a little preventive care on your part can save you a great deal of time and
money over the life of your washer. You will find many answers to common problems
in the Troubleshooting section. If you review our chart of Troubleshooting Tips first, you
may not need to call for service at all.
Introduction
Before Starting to
Wash
Washing Programs
Additional Function
Program
Installation
Care and Maintenance
Troubleshooting
Specification
Safety Information 4
Identification of Parts 7
Function Information 8
Preparation Before Washing 9
Use of Water, Dispenser Drawer, Detergent, Bleach and Softener 10
Special Guide for Stain Removal 13
Function of each Button 14
FUZZY Wash (Normal Wash) 16
WOOL Wash 16
QUICK WASH 16
JEANS Wash 16
SMART CLEANING 16
SOAK Wash 18
FAVORITE Wash 19
SILENT Wash 20
TUB CLEAN 21
AIR DRY 22
TUB DRY 22
Option Washing 23
DELAY START (RESERVATION) Wash 24
Other Useful Functions 25
Placing and Leveling 26
Connecting Water Supply Hose 27
Connecting Drain Hose 30
Grounding Method 31
Cleaning and Maintenance 32
Use of Handle Locker 34
Common washing problems 35
Troubleshooting 36
SmartDiagnosis
Specification 38
TM
37
Page 4

4
afety Information
S
Read carefully and thoroughly through this booklet as it contains important safety information
that will protect the user from unexpected dangers and prevent potential damages to the product.
This booklet is divided into 2 parts : Warning and Caution.
Introduction
WATER
HEATER
SAFETY
PROPER
INSTALLATION
: This is a warning sign specifying user’s applications which might
be dangerous.
: This is a sign specifying ‘Strictly Forbidden’ applications.
Warning
Caution
: Failure to comply with the instructions under this
sign may result in major physical injuries or death.
: Failure to comply with the instructions under this
sign may result in minor physical injuries or
damages to the product.
Warning
• Under certain conditions hydrogen gas may be produced in a water heater that has not been
used for two weeks or more. Hydrogen gas can be explosive under these circumstances.
If the HOT water has not been used for two weeks or more, prevent the possibility of
damage or injury by turning on all Hot water faucets and allowing them to run for several
minutes. Do this before using any electrical appliance which is connected to the HOT
water system. This simple procedure will allow any built-up hydrogen gas to escape. Since
the gas is flammable, do not smoke or use an open flame or appliance during this process.
Caution
• The base opening must not be obstructed by carpeting when the washing machine is installed on a
carpeted floor.
• Install or store where it will not be exposed to temperatures below freezing or exposed to the weather.
If the product is exposed to such conditions, electric shock, fire, break down or
deformation may occur.
• Properly ground washer to conform with all governing codes and ordinances. Follow details in Instal-
lation Instructions.
If not grounded properly, break down and leakage of electricity may occur, which may
cause electric shock.
• Must be positioned so that the plug is accessible.
If the plug is placed between the wall and the machine, it may get damaged, possibly
causing fire or electric shock.
• Make sure the plug is completely pushed into the outlet.
Failure to do so may cause electric shock and fire due to overheating.
Page 5
afety Information
S
5
Introduction
YOUR
LAUNDRY
AREA
WHEN USING
THE WASHER
Warning
• Keep the area underneath and around your appliances free of combustible
materials such as lint, paper, rags, chemical, etc.
Operating with such materials around the machine may trigger
explosion or fire.
• The appliance is not intended for use by young children or infirm persons
without supervision.
• Young Children should be supervised to ensure that they do not play with
appliance.
There is potential danger that children might drown in the tub.
Do not touch the power plug with a wet hand.
It will cause electric shock
Do not put your hand, foot or anything under the washing machine while
the washing machine is in operation.
There is a rotating mechanism under the machine, so you could be injured.
Caution
• Use this appliance only for its intended purpose as described in this Owner’s Manual.
• The laundry process can reduce the flame retardancy of fabrics. To avoid such a result,
carefully follow the garment manufacturer’s wash and care instructions.
• To minimize the possibility of electric shock, unplug this appliance from the power
supply or disconnect the washer at the household distribution panel by removing the
fuse or switching off the circuit breaker before attempting any maintenance or cleaning.
NOTE : Pressing Circuit button to turn off does NOT dis-
connect the appliance from the power supply.
• Make sure that drainage is working properly.
If water is not drained properly, your floor may get flooded. Flooded floors
may induce electricity leakage, further resulting in electric shock or fire.
• If, during spinning, opening the lid does not stop the tub within about 15 seconds,
immediately discontinue operating the machine.
Call for repair. A machine that spins with its door open may cause injuries.
Never reach into washer while it is moving.
Wait until the machine has completely stopped before opening the lid.
Even slow rotation can cause injury.
Never attempt to operate this appliance if it is damaged, malfunctioning, partially
disassembled, or has missing or broken parts, including a damaged cord or plug.
Operating with a damaged plug may cause electric shock.
Do not use water hotter than 50°C.
Use of excessively hot water may cause damage to fabrics or cause
leakage of water.
Page 6
6
afety Information
S
WHEN USING
THE WASHER
Introduction
WHEN NOT
IN USE
• Turn off water faucets to relieve pressure on hoses and valves and to minimize leakage
if a break or rupture should occur. Check the condition of the fill hoses; they may need
replacement after 5years.
• When the air temperature is high and the water temperature is low, condensation may
occur and thus wet the floor.
• Wipe off dirt or dust on the contacts of the power plug.
Using unclean power plug may cause fire.
• Before discarding a washer, or removing it from service, remove the washer lid to
prevent children from hiding inside.
Children may be trapped and suffocated if the lid is left intact.
Warning
Do not use a plug socket and wiring equipment for more than their rated capacity.
Exceeding the limit may lead to electric shock, fire , break down, and/or
deformation of parts.
Do not mix chlorine bleach with ammonia or acids such as vinegar and/or rust remover.
Mixing different chemicals can produce toxic gases which may cause death.
Do not wash or dry articles that have been cleaned in, washed in, soaked in, or spotted
with combustible or explosive substances (such as wax, oil, paint, gasoline, dry-cleaning
solvents, kerosene, etc). Do not add these substances to the wash water.
Do not use or place these substances around your washer or dryer during operation.
It may ignite or explode.
Caution
Do not attempt to repair or replace any part of this appliance unless specifically
recommended in this Owner’s Manual, or in published user-repair instructions
that you understand and have the skills to carry out.
Operating the machine with improperly replaced parts may be a
cause for fire or electric shock.
Do not tamper with controls.
It may lead to electric shock, fire , break down, deformation.
Do not yank the power cord in an attempt to disconnect the power plug.
Securely hold the power plug to unplug the machine.
Failure to observe these instructions may cause electric shock or fire
due to short-circuit .
When you are cleaning the washing machine, do not apply water directly to any
part of the washing machine.
It will cause short circuit and electric shock.
Page 7
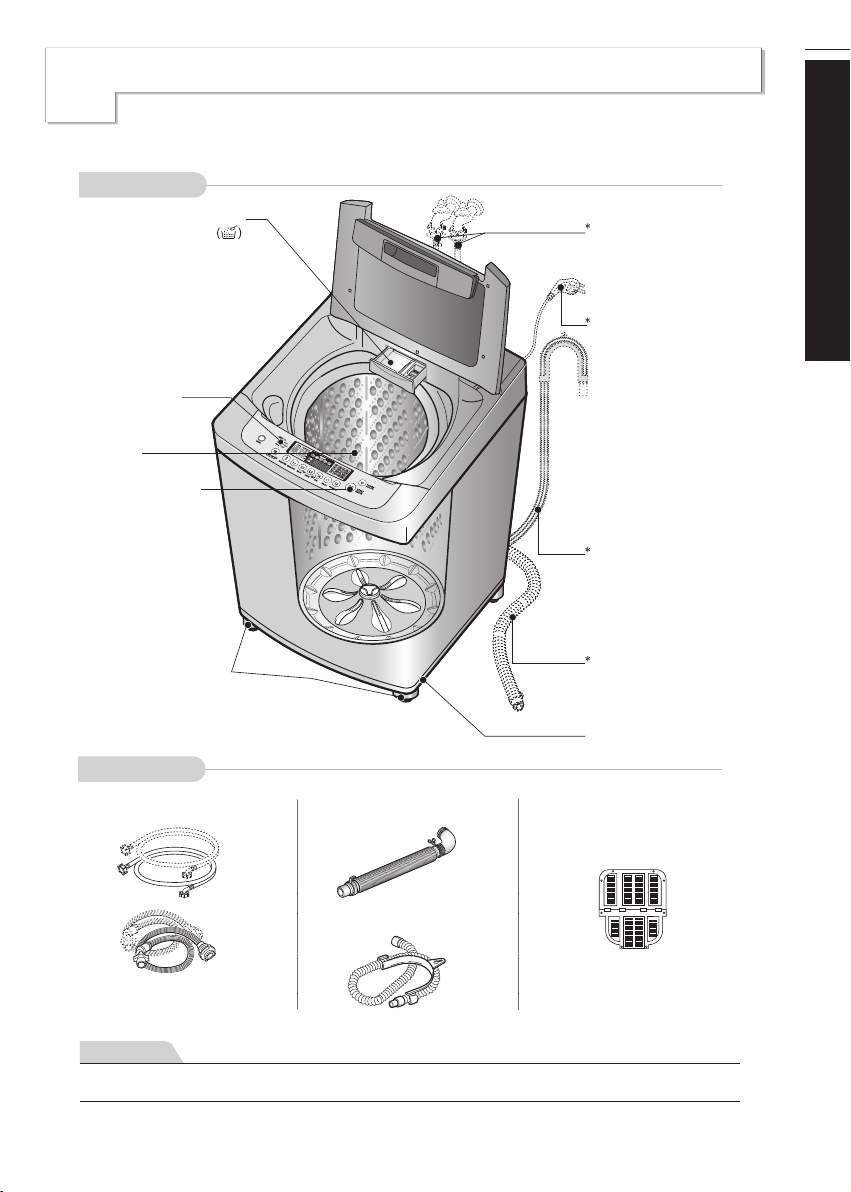
dentification of Parts
W
ATER SUPPLY
HOSE
FUNCTION
SELECTOR
TUB
BASE
ADJUSTABLE LEGS
DRAIN HOSE
for pump model
Check if the drain
hose is hung up
before operating the
washing machine.
DRAIN HOSE
POWER PLUG
START/PAUSE
BUTTON
Use to start or
stop the washing
machine
temporarily.
Make sure the
w
ater does not
leak.
If the supply cord is
damaged, it must be
replaced by the
manufacturer or its
service agents or
similarly qualified
person in order to
avoid a hazard.
for non pump
model
Use to level the washing
machine for correct
balance & spin
operation.
POWDER AND LIQUID
DETERGENT BOX
I
Body
7
Introduction
Accessories
Water supply hoses
1 Each for COLD and
HOT water
NOTE
“✽” Part can be different according to the model.
Drain hose Anti-rat cover (option)
or
or
Page 8

8
unction Information
F
Our machine provides various washing methods which suits various conditions
and types of laundry.
Different types of laundry washing
FUZZY(Normal) Wash
se this Program for everyday washing e.g. sheets, towels, T-shirts. (refer to page 16)
U
Introduction
Washing according to the condition of laundry
JEANS Wash
Use this Program for heavily soiled durable garments e.g. overalls, jeans.
Thick and heavy clothes or those which are excessively dirty like jeans or working uniforms can be washed. (refer to page 16)
SMART CLEANING
Use this program to get better rising performance.
WOOL Wash
Wool clothes (lingerie, wool, etc.) which may be easily damaged can be washed. (refer to page 16)
The fibers of machine washable woolens have been specifically modified to prevent felting when they are machine washed.
Most handknitted garments are not made of machine washable wool and we recommend that you hand wash them
• Before washing your woolens check the care label for the washing instructions.
• When washing woolens use a mild Detergent recommended for washing wool.
• Hand washed woolens may be spun in a washing machine to reduce the time they take to dry.
• To dry woolens lay down them flat on a towel and pat into shape. Dry woolens out of direct sunlight.
(The heat and tumble action of a dryer may cause shrinkage or felting of woolen garments.)
Some wool underlays and sheepskin products can be washed in a washing machine but may cause pump blockages.
(Ensure that the whole article is suitable for machine washing and not just the backing material.)
You may wish to handwash these articles and place them in the machine to spin dry.
FAVORITE Wash
This setting allows you to store your FAVORITE wash conditions in the normal cycle memory. (refer to page 19)
SILENT Wash
Use this program to wash quietly at night. (refer to page 20)
(refer to page 16)
QUICK WASH
QUICK WASH can be selected to wash lightly soiled clothes of less than 2.0 kg in a short time. (refer to page 16)
SOAK Wash
SOAK Wash can be selected to wash heavily soiled laundry by soaking in water for some time to remove dirt and
grime. (refer to page 18)
Other washing method
TUB CLEAN
Use this program to clean the inside of washing machine especially Inner tub & Outer tub . (refer to page 21)
DELAY START Wash
DELAY START Wash is used to delay the finishing time of the operation.
The number of hours to be delayed can be set by the user accordingly. (refer to page 24)
OPTION WASH
When the user needs only SPIN, RINSE/SPIN, RINSE, WASH/RINSE, WASH, WASH/RINSE/SPIN,
SOAK/WASH/RINSE/SPIN. (refer to page 23)
Page 9

9
reparation Before Washing
P
Care Labels
* Look for a care label on your clothes. This will tell you about the fabric content of your garment
and how it should be washed.
Sort clothes into loads that can be washed with the same wash cycle, Water Temperature and spin speed.
Sorting
To get the best results, different fabrics need to be washed in different ways.
• SOIL (Heavy, Normal, Light)
• COLOR (Whites, Lights, Darks) Separate white fabrics from colored fabrics.
• LINT (Lint producers, Collectors) Separate lint producers and lint collectors.
Lint Producers Terry cloth, Chenille, Towels, Nappies, Diapers
Lint Collectors Synthetics, Corduroy, Permanent Press, Socks
Check before Loading
• Check all pockets to make sure that they are empty. Things such as nails, hairclips, matches,
pens, coins, and keys can damage both your washer and your clothes.
• Mend any torn garments or loose buttons. Tears or holes may become larger during washing.
• Remove belts, underwires, etc. to prevent damage to the machine or your clothes.
• Pretreat any dirt and stains.
• Make sure the clothes are washable in water.
• Check the washing instructions.
• Remove tissue in pockets.
CAUTION
Do not wash or spin any item labeled or known to be water-proof or water-resistant, even if the product care
label on the item permits machine washing. Failure to follow these instructions could result in severe damage to
your laundry, your washer and/or property damage as a result of abnormal vibration of the washer.
- Examples of water-proof or water-resistant items include certain mattress pads, mattress covers, rain gear, camping
gear, skiing apparel , outdoor gear and similar items.
Pretreatment on stains or heavy soil
• Pretreat shirt collars and cuffs with a pre-wash product or liquid Detergent when placing them in the washer.
Before washing treat special stains with bar soaps, liquid Detergent or a paste of water and granular Detergent.
• Use a pretreat soil and stain remover.
Treat stains AS SOON AS POSSIBLE. The longer they are left the harder they are to remove.
(For more detail refer to page13)
Loading
Do not wash fabrics containing flammable materials (waxes, cleaning fluids, etc.).
Load Size
The WATER LEVEL should just cover the clothes. Adjust the load size accordingly. Loosely load clothes no higher than the top row of holes in the
washer tub. To add items after washer has started, press Start button and submerge additional items. Close the lid and press Start button again to restart.
Light and Large-sized clothing
Clothes like downs and woollens are light weight, large and float easily. Use a nylon net and
wash them in a small amount of water. If the laundry floats during the wash cycle, it may become damaged. Use dissolved Detergent to prevent the Detergent from clumping.
Long laundry items
Use nylon nets for long, DELICATE items. For laundry with long strings or long length, a net will
prevent tangling during washing.
snag on other clothes.
※ Nylon net is not supplied by LG.
Separate clothes according to the type and amount of soil.
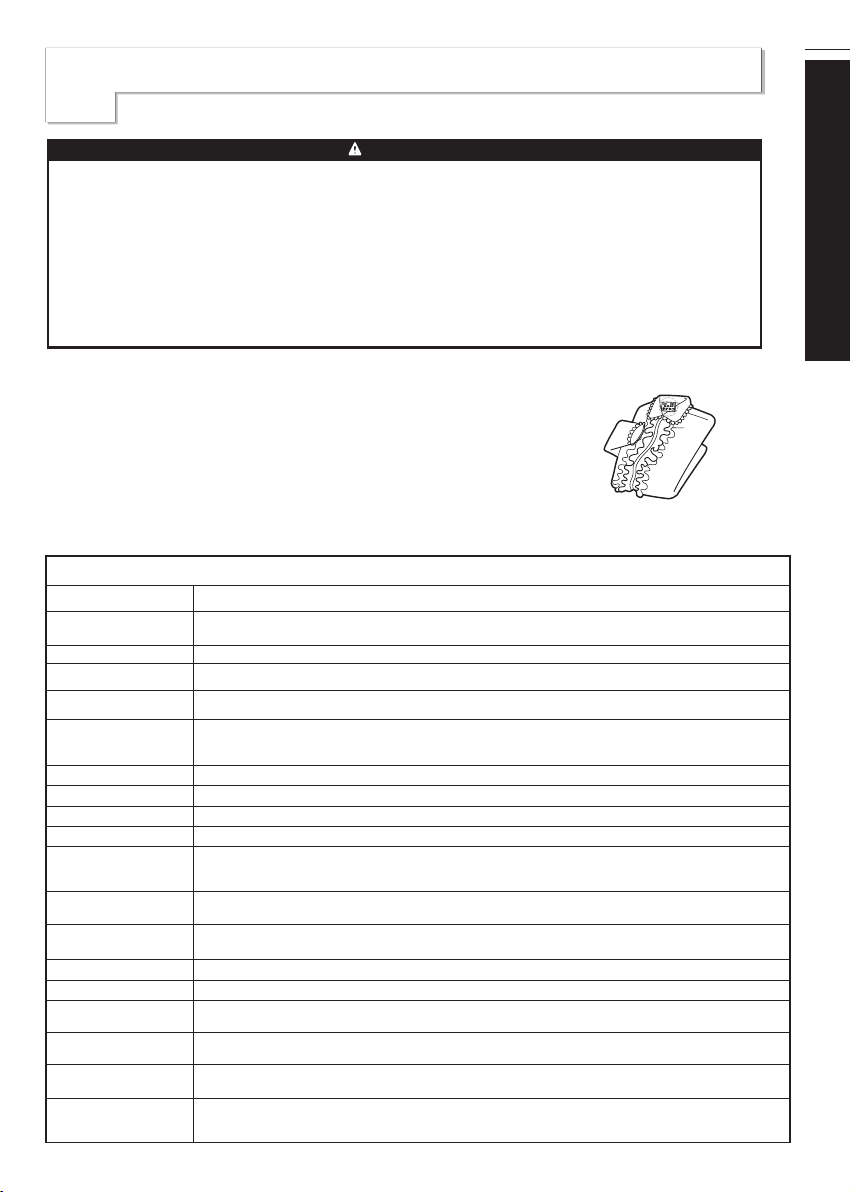
WARNING
Never place items in the washer that are
dampened with gasoline or other flammable
fluids.
No washer can completely remove oil.
Do not dry anything that has ever had any type
of oil on it (including cooking oils).
Doing so can result in death, explosion, or fire.
Fasten zippers, hook, and strings to make sure that these items don't
Fire Hazard
Before Starting to Wash
Page 10
10
Before Starting to Wash
se of Water, Dispenser Drawer, Detergent, Bleach and Softener
U
Using Water
Amount of WATER LEVEL
• This machine detects the quantity of laundry automatically, then sets the
WATER LEVEL and proper amount of Detergent.
• When you select a wash program, the WATER LEVEL will be shown on the
control panel.
• The following table shows the amount of water.
• When the WATER LEVEL is automatically detected, it may differ depending
on the quantity of laundry even though the same WATER LEVEL is indicated
on the control panel.
NOTE
[ Minimum water amount ]
It depends on laundry load and washer model. Or manually you can pour a certain amount water into tub directly to some height. That’s because if water level reaches to the some height sensed by washer itself, washer
automatically operates. In other words, it is needed to pour water to the point when washer starts operating.
Water Temperature
• The machine sets the appropriate temperature automatically according to the wash program .
• The temperature of the water impacts the effectiveness of all laundry additives and therefore, the cleaning results.
We recommend temperatures of:
- HOT 49~60°C…(120-140˚F) White items, diapers, underclothing and heavily soiled, colorfast items.
- WARM 29~40°C…(85-105˚F) Most items
- COLD* 18~24°C…(65-75˚F) Only very bright colors with light soil.
• When washing in COLD water additional steps may be needed:
- Adjust Detergent amount and pre-dissolve Detergent in WARM water
- Pretreat spots and stains
- Soak heavily soiled items
- Use appropriate bleach
* Temperature below 18°C…(65˚F) will not activate laundry additives and may cause lint, residue, poor cleaning, etc.
In addition, Detergent manufactures and care labels define COLD water as 26~29°C…(80-85˚F).
If the temperature of the water in the tub is too cold for your hands, the Detergent will not activate and clean effectively.
NOTE
If iron is present in the water the clothes may become an all-over yellow or they may be stained with brown or orange
spots or streaks. Iron is not always visible. Installation of water softener or an iron filter may be necessary for severe cases.
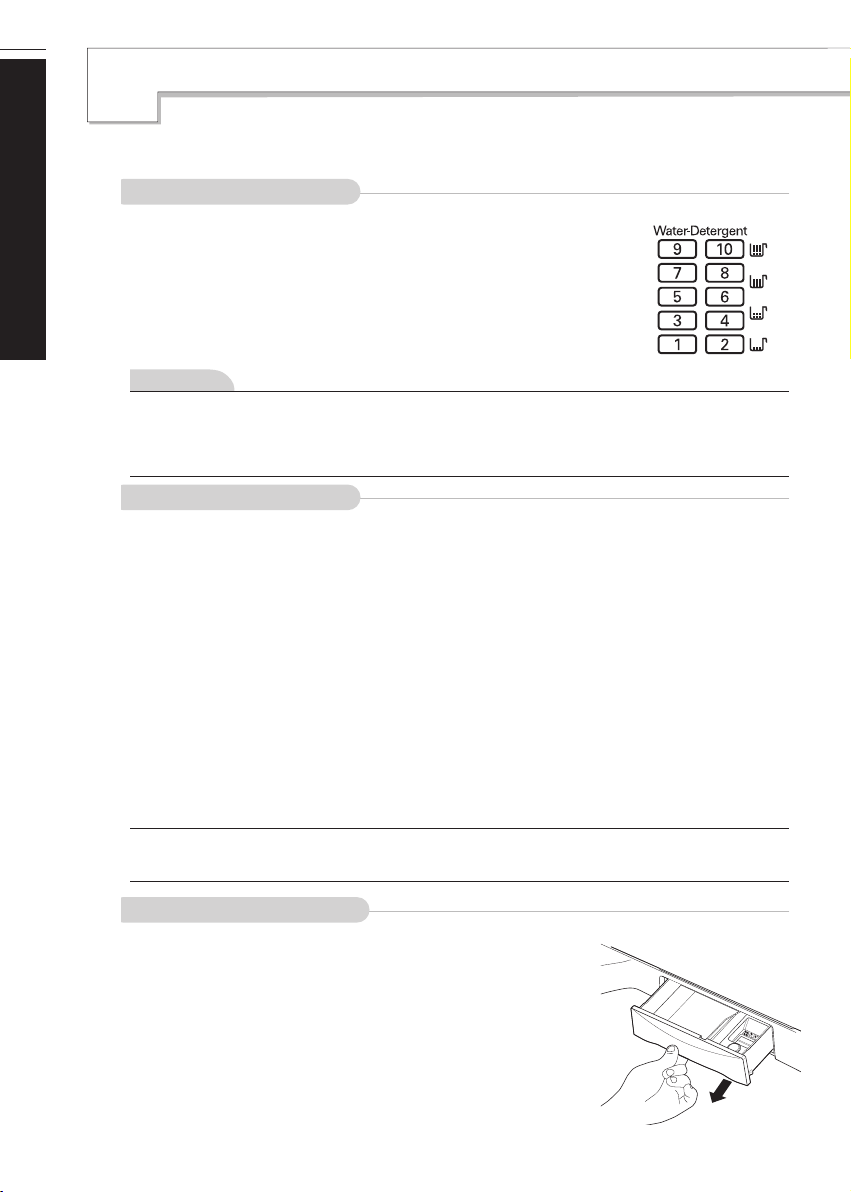
Using the Dispenser Drawer
The dispenser drawer contains 2 compartments:
• Liquid Fabric Softener
• Liquid or Powder Low-Sudsing, High-Efficiency Detergent
The dispenser automatically dispenses additives at the proper time in the wash cycle.
1. Slowly open the dispenser drawer by pulling the drawer out until it stops.
2. After adding laundry products, slowly close the dispenser drawer. Closing the
drawer too quickly could result in early dispensing of additives.
• Avoid overfilling or splashing when adding laundry products to the dispenser. Doing
so could result in early dispensing of laundry products.
At the end of the cycle, you may see water in the compartments. This is part of the
normal operation of the washer.
NOTE : Do not use bleach in the dispenser drawer.
Page 11
Using Detergent
Detergent
Follow the Detergent package directions. Using too little Detergent is a common cause of laundry problems.
Use more Detergent if you have hard water, large loads, greasy or oily soils or lower Water Temperature.
Choosing the right Detergent
We recommend the use of domestic Detergent, (powder, liquid or concentrated). Soap flakes or granulated
soap powders should not be used in your washing machine. When washing woolens remember to use
Detergent suitable for washing woolens.
Using Detergent
How much Detergent
The correct amount of Detergent will vary depending on the amount of soil in your clothes (Jeans and work
cloches may need more Detergent, while bath towels usually need less.).
For liquid and concentrated Detergents, follow the recommendations of the Detergent manufacturer.
Note: To check you are using the correct amount of Detergent, lift the lid of your machine about
half-way through the wash. There should be a thin layer of foam over the surface of the water.
Lots of foam may look good, but it does not contribute to cleaning your clothes. No foam means not
enough Detergent has been used; soil and lint can settle back on the clothes or the washing machine.
If excess Detergent is used, the rinse will not be as clean and efficient. Also, it could cause
environmental pollution, so use it accordingly.
11
Before Starting to Wash
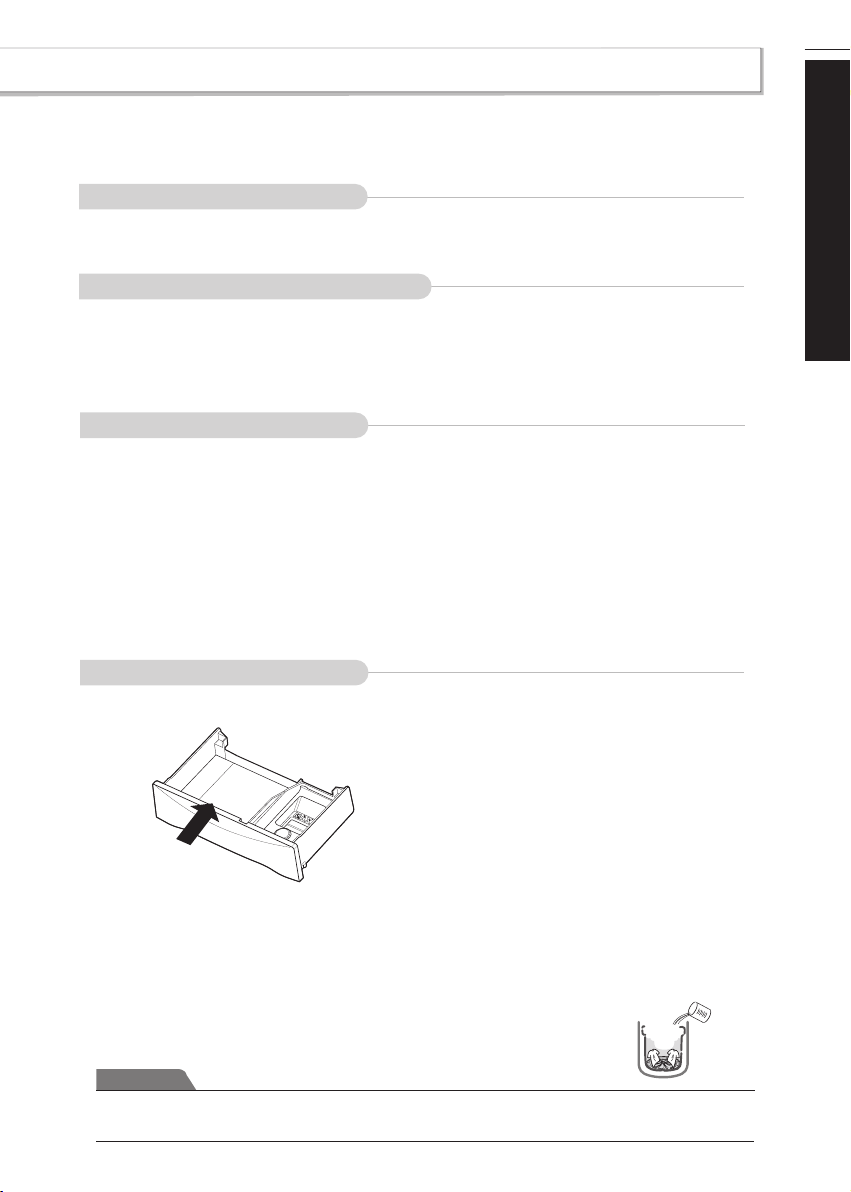
Adding Detergent
Add measured detergent to the detergent compartment of the dispenser drawer.
Detergent is flushed through the dispenser at the beginning of the wash phase.
Detergent usage may need to be adjusted for water temperature, water hardness, size and soil level of the load.
Avoid using too much detergent in your washer, as it can lead to oversudsing and detergent residue being left on
the clothes.
Note : Using Liquid detergent
- Dilute Liquid detergent with water and pour into the tub, start the cycle.
- Delay wash course is not available if you use liquid detergent.
Attention
Using liquid detergent without diluting, or leaving laundry for a long time after pouring
diluted liquid detergent into the tub might cause damage, bleaching or discoloration of cloth.
Page 12

12
se of Water, Dispenser Drawer, Detergent, Bleach and Softener
U
Using Bleach Check fabric care labels for special instructions.
AVAILABLE BLEACH TYPE
• Use oxygenated bleach.
• Do not use liquid bleach.
• For more details refer to the products instruction for use.
DEPOSITING BLEACH
Before Starting to Wash
• Separate the laundry to be bleached.
• Measure powdered bleach carefully, following instructions on the box.
• Before starting the washer, pour measured amount of bleach following instructions on the box.
Attention
■ Never pour undiluted liquid bleach directly onto clothes or into the wash basket.
This may affect colors or damage clothing.
■ Do not mix chlorine bleach with ammonia or acids such as vinegar and/or rust remover.
Mixing can produce a toxic gas which may cause death.
■ Do not pour liquid bleach into bleach dispenser.
Using Fabric Softener
If desired, pour the recommended amount of liquid
fabric softener into the right-hand compartment.
Use only liquid fabric softener.
Dilute with water to the maximum fill line.
• Do not exceed the maximum fill line.
Overfilling can cause early dispensing of the fabric
softener, which could stain clothes.
NOTE : Do not pour fabric softener directly on the
wash load. It may stain the clothes.
Attention
■ Do not mix with Detergent or bleach.
■ Never pour fabric softener directly on clothes. It may stain them.
■ Do not stop the washer during the first spin for timely dispensing.
■ Option washing is not designed to be used with fabric softener dispenser.
Scrud(Waxy Build up)
Scrud is the name given to the waxy build-up that can occur within any washer when the fabric softener comes into
contact with Detergent. This build-up is not brought about by a fault in the machine.
If scrud is allowed to build-up in the machine it can result in stains on your clothes or an unpleasant smell in
your washer.
If you wish to use fabric softener we recommend
• Using fabric softener sparingly.
• When filling the dispenser, do not splash or overfill.
• Clean dispenser as soon as the cycle is finished.
• Clean your machine regularly. (refer to page 21 or 32)
• Cold water washing increases the chance of this build-up occurring. We recommend a regular WARM or HOT wash
e.g. every 5th wash should be at least a warm one.
• Fabric softener of thinner consistency is less likely to leave residue on the dispenser and contribute to a build-up.
Page 13
13
pecial Guide for Stain Removal
S
WARNING
■
Do not use or mix liquid chlorine bleach with other household chemicals such as toilet cleaners, rust removers, acid or
products containing ammonia. These mixtures can produce dangerous fumes which can cause serious injury or
eath.
d
■
To reduce the risk of fire or serious injury to persons or property, comply with the basic warnings listed below:
• Read and comply with all instructions on stain removal products.
• Keep stain removal products in their original labeled containers and out of children’s reach.
• Thoroughly wash any utensil used.
• Do not combine stain removal products, especially ammonia and chlorine bleach. Dangerous fumes may result.
• Never wash items which have been previously cleaned in, washed in, soaked in or spotted with gasoline, dry cleaning solvents
or other flammable or explosive substances because they give off vapors that could ignite or explode.
• Never use highly flammable solvents, such as gasoline, inside the home. Vapors can explode on contact with flames or sparks.
For successful stain removal:
• Remove stains promptly.
• Determine the kind of stain, then follow the recommended treatment in the stain
removal chart below.
• To pretreat stains, use a prewash product, liquid Detergent, or a paste made from
granular Detergent and water.
• Use COLD water on unknown stains because HOT water can set stains.
• Check care label instructions for treatments to avoid on specific fabrics.
• Check for colorfastness by testing stain remover on an inside seam.
• Rinse and wash items after stain removal.
Stain Removal
STAIN
Adhesive tape, chewing gum, rubber cement
Baby formula, dairy products, egg
Beverages (coffee, tea, soda, juice,
alcoholic beverages)
Blood
Candle wax, crayon
Chocolate
Collar or cuff soil, cosmetics
Dye transfer on white fabric
Grass
Grease, oil, tar (butter, fats, salad
dressing, cooking oils, car grease,
motor oils)
Ink
Mildew, scorch
Mud
Mustard, tomato
Nail polish
Paint, varnish
Rust, brown or yellow
discoloration
Shoe polish
Apply ice. Scrape off excess. Place stain face down on paper towels. Saturate with prewash stain remover or
nonflammable dry cleaning fluid.
Use product containing enzymes to pretreat or soak stains.
Pretreat stain. Wash using COLD water and bleach safe for fabric.
Rinse with COLD water. Rub with bar soap. Or pretreat or soak with product containing enzymes. Wash using
bleach safe for fabric.
Scrape off surface wax. Place stain face down between paper towels. Press with warm iron until wax is absorbed.
Replace paper towels frequently. Treat remaining stain with prewash stain remover or nonflammable dry cleaning
fluid. Hand wash to remove solvent. Wash using bleach safe for fabric.
Pretreat or soak in WARM water using product containing enzymes. Wash using bleach safe for fabric.
Pretreat with prewash stain remover or rub with bar soap.
Use packaged color remover. Wash using bleach safe for fabric.
Pretreat or soak in WARM water using product containing enzymes. Wash using bleach safe for fabric.
Scrape residue from fabric. Pretreat. Wash using hottest water safe for fabric. For heavy stains and tar, apply
nonflammable dry cleaning fluid to back of stain. Replace towels under stain frequently. Rinse throughly. Wash
using hottest water safe for fabric.
Some inks may be impossible to remove. Washing may set some inks. Use prewash stain remover, denatured
lcohol or nonflammable dry cleaning fluid.
Wash with chlorine bleach if safe for fabric. Or, soak in oxygen bleach and HOT water before washing. Badly
mildewed fabrics may be permanently damaged.
Brush off dry mud. Pretreat or soak with product containing enzymes.
Pretreat with prewash stain remover. Wash using bleach safe for fabric.
May be impossible to remove. Place stain face down on paper towels. Apply nail polish remover to back of stain.
Repeat, replacing paper towels frequently. Do not use on acetate fabrics.
WATER BASED : Rinse fabric in cool water while stain is wet. Wash. Once paint is dry, it cannot be removed,
OIL BASED AND VARNISH : Use solvent recommended on can label. Rinse throughly before washing.
For spots, use rust remover safe for fabric. For discoloration of an entire load, use phosphate Detergent and
nonchlorine bleach. Do not use chlorine bleach because it may intensify discoloration.
LIQUID : Pretreat with a paste of granular Detergent and water. PASTE : Scrape residue from fabric. Pretreat with
prewash stain remover or nonflammable dry cleaning fluid. Rub Detergent into dampened area, Wash using bleach
safe for fabric.
TREATMENT
Follow fabric care label
instructions
Before Starting to Wash
Page 14
14
unction of each Button
F
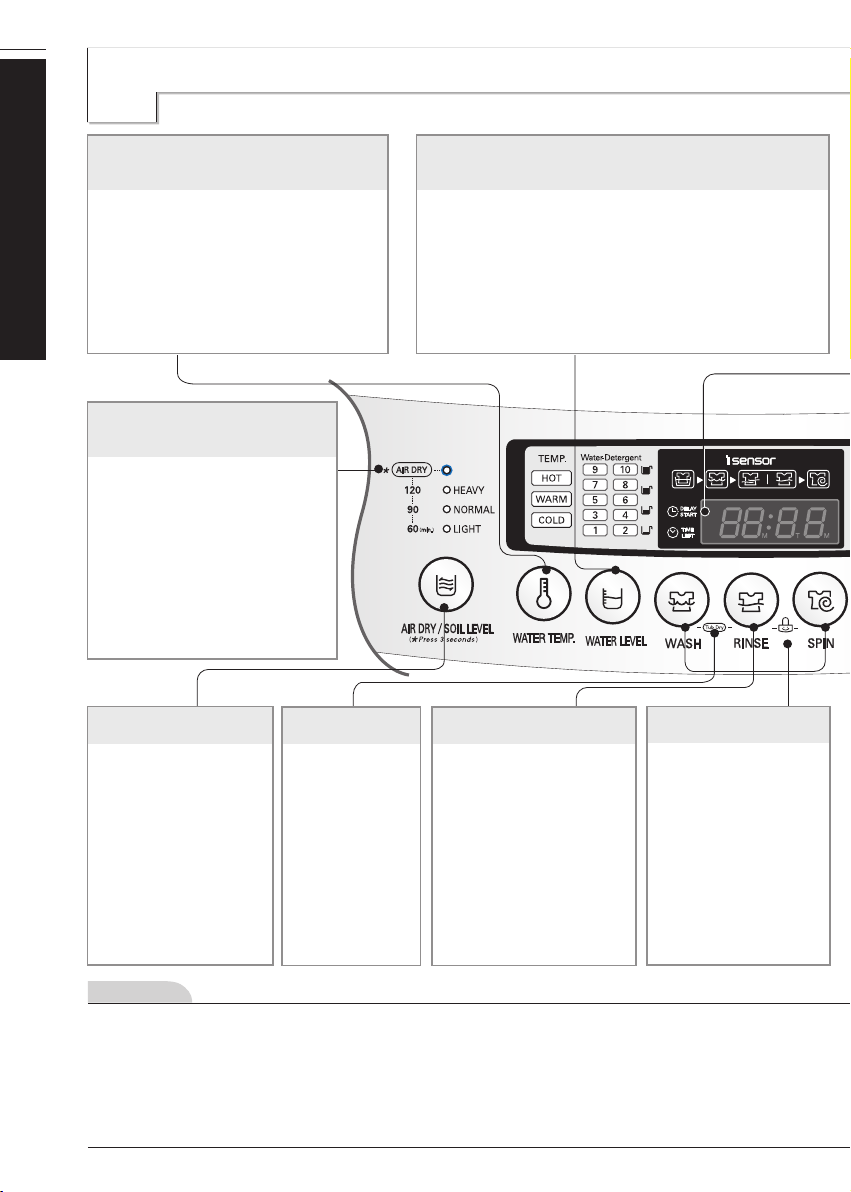
WATER TEMPERATURE BUTTON
• Use to select Water Temperature.
Pressing the button allows you to select
COLD ▶ WARM (HOT&COLD) ▶
HOT ▶ COLD respectively.
Before Starting to Wash
• Use to select the proper amount of water in relation to the
weight and type of laundry.
• Automatically controlled,but can be selected manually by
pressing the WATER LEVEL Botton.
• WATER LEVEL is automatically selected for
FUZZY(normal) program.
The following settings are indicated as the button is pushed
7 ▶ 8 ▶ 9 ▶ 10 ▶ 1 ▶ 2 ▶3 ▶ 4 ▶ 5 ▶6 ▶ 7
WATER LEVEL BUTTON
AIR DRY
• This function is used to reduce the drying time
of the laundry by allowing air to circulate
within the bowl in order to reduce moisture
levels.It does not dry the clothes completely.
• Air dry selections light up in sequence as follows.
60 ▶ 90 ▶ 120 ▶ 60 as the button is pushed.
• Press the button for 3 seconds to select and
press the Power botton to cancel the operation.
(refer to page 22)
SOIL LEVEL BUTTON
• This button allows you to
select the strength of the
wash action.
• Power option selections
light up in sequence as
follows Normal ▶ Heavy
▶ Light ▶ Normal as the
button is pushed.
This can be selected for any
program.
• Adjustment can be made
while washing.
TUB DRY
• Use this when you
want to dry the
empty tub after a
wash.
• This can be
set/canceled by
pressing the Wash
button and Rinse
button
simultaneously.
(refer to page 22)
WASH. RINSE. SPIN BUTTON
• Use when wash, rinse, spin
time need to be adjusted.
• The time increases when the
button is pressed .
• If adjustments are needed
during the wash,press the
[start/pause ] button before
making any changes.
• When the button is pressed
during washing,the
remaining time is displayed.
CHILD LOCK FUNCTION
• Use to lock or unlock the
control buttons to prevent
settings from being
changed by a child.
To lock,push the RINSE
and SPIN buttons
simultaneously and to
unlock push them one
more time during the
washing process.
(refer to page 25)
NOTE
* For optimizing the washing algorithm, the displaying time may be changed during washing-increased by
8minutes at maximum and decreased by 4 minutes at maximum.
* If the Detergent quantity is put more than the standard, for increasing the rinsing performance, it automatically
adds rinsing, and the remaining time may be increased.
* The standard detected by the sensor changing the algorithm is set by the normal standard. It may not be same to
the washing habit of a specific user. So, it does not matter that the user uses it according to her/his washing habit.
* The sensor for a Detergent quantity is designed to detect based on a synthetic Detergent powder. If you put a
liquid one or a natural one or too much bleaching agent, the detecting ability of the sensor may be decreased.
Page 15
TIME LEFT, DELAY START(RESERVATION), ALARM INDICATION
• Time left - During operation, the remaining time is indicated.
• DELAY START INDICATION (RESERVATION) - When
DELAY START (RESERVATION) program is selected, it indicates
the finishing time. (RES.=DELAY)
• Alarm indication - When an error occurs, an error message appears
to indicate the abnormality.
For example, DEindicates that the lid is open.
M
SMARTDIAGNOSIS
T
FUNCTION DISPLAY
•
It marks the place to put the
phone to receive signal when a
problem occurs.
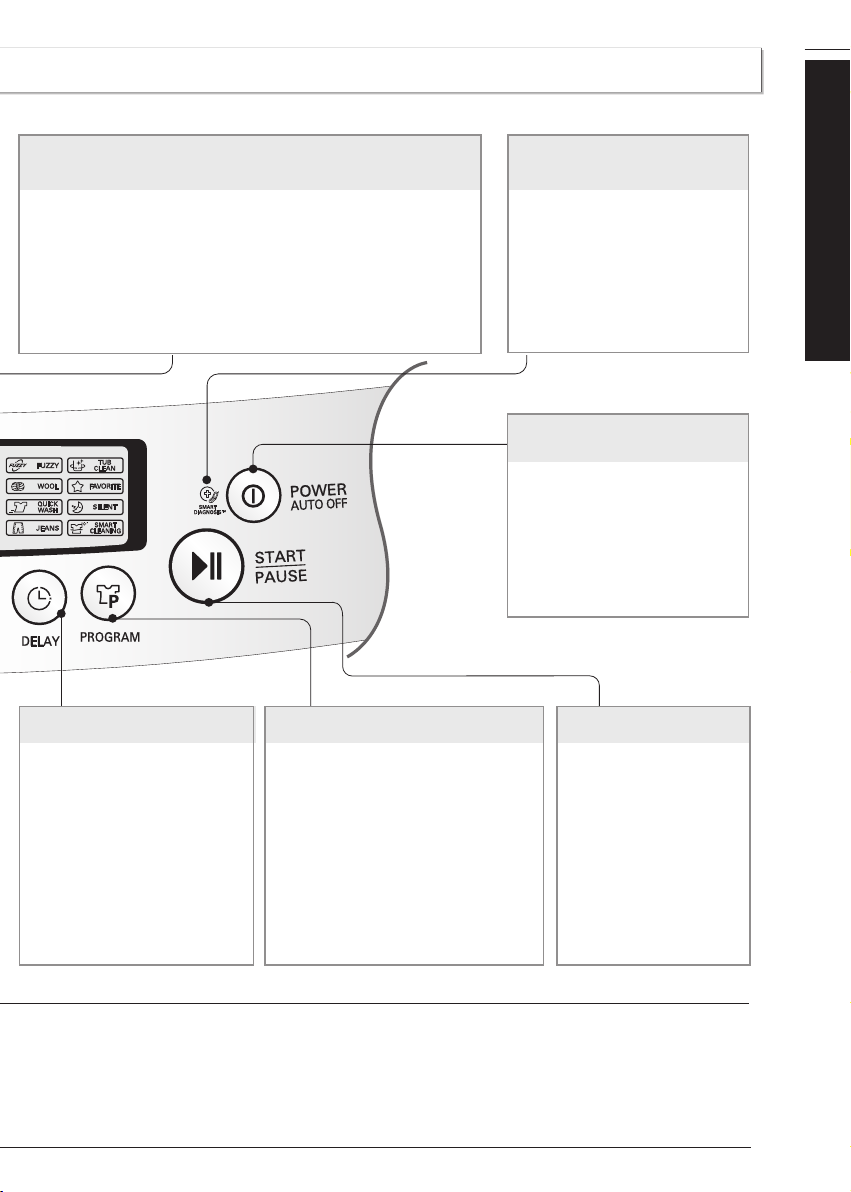
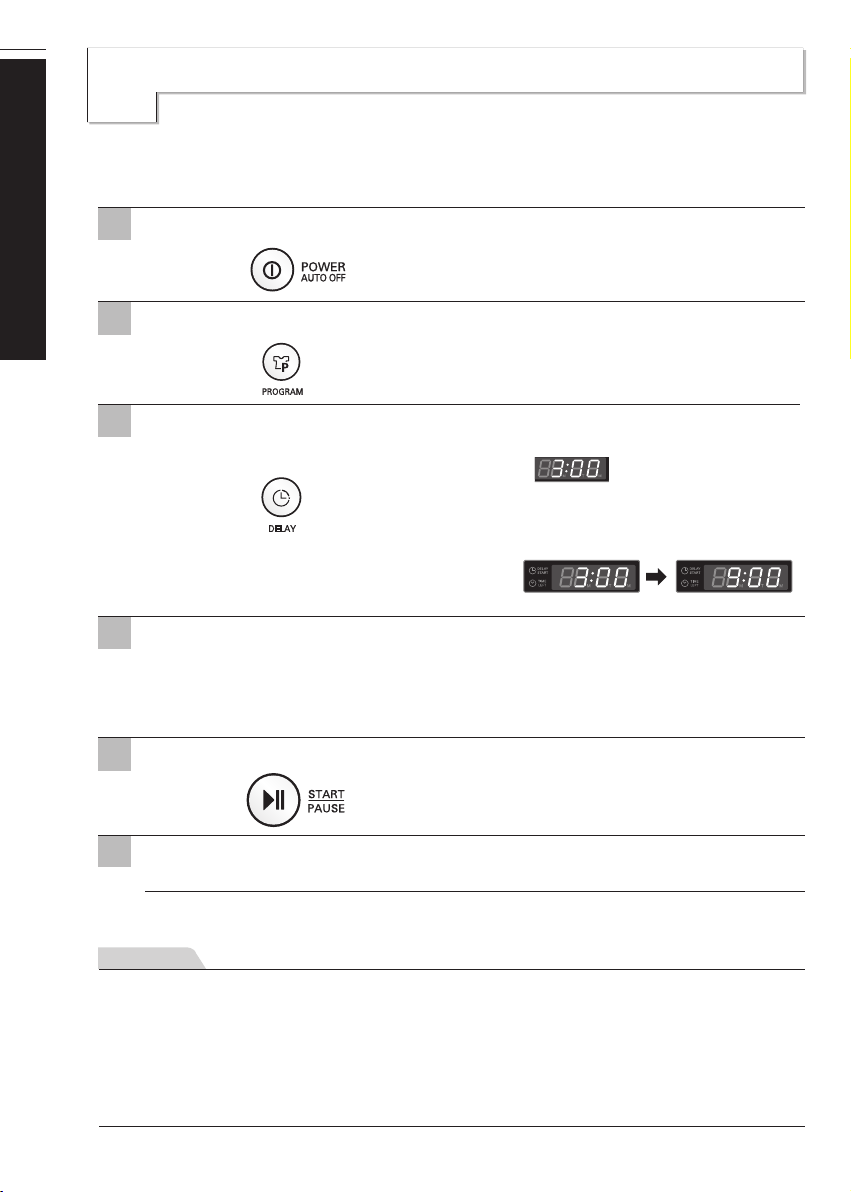
POWER (AUTO OFF)
BUTTON
•
Use to turn the power on or off.
•
Push again and power goes on or off
• The power goes off automatically
about 10 seconds after the wash is
finished.
15
Before Starting to Wash
DELAY START (RESERVATION) BUTTON
• Use to set a delayed finishing time.
• The time increases when the button
is pushed.
• The following settings are indicated
as the button is pushed 3▶4
▶5▶ ... 11 ▶ 12 ▶ 14▶
16▶ ...46▶48▶3 HOUR.
• To cancel delay time, turn the power
switch off.
(refer to page 24)
* Because the detecting ability of the sensor may be decreased by using it for a long time, periodically use
TUB CLEAN course to clean the tub. (refer to page 21)
* Even if the water level is changed by the user in FUZZY(Normal) Program,
the sensor will still work. The sensor algorithm may differ according to models.
* The control panel may differ according to different models.
PROGRAM BUTTON
• Use for selecting wash program.
• This button allows you to select 8
different programs for different kinds of
laundry and dirtiness.
• program selections light up in sequence as
follows: FUZZY(Normal) ▶ WOOL▶
QUICK WASH ▶ JEANS ▶SMART
CLEANING ▶ SILENT ▶ FAVORITE
▶ TUB CLEAN ▶ FUZZY(Normal) etc.
Select the desired program by pressing the
button.
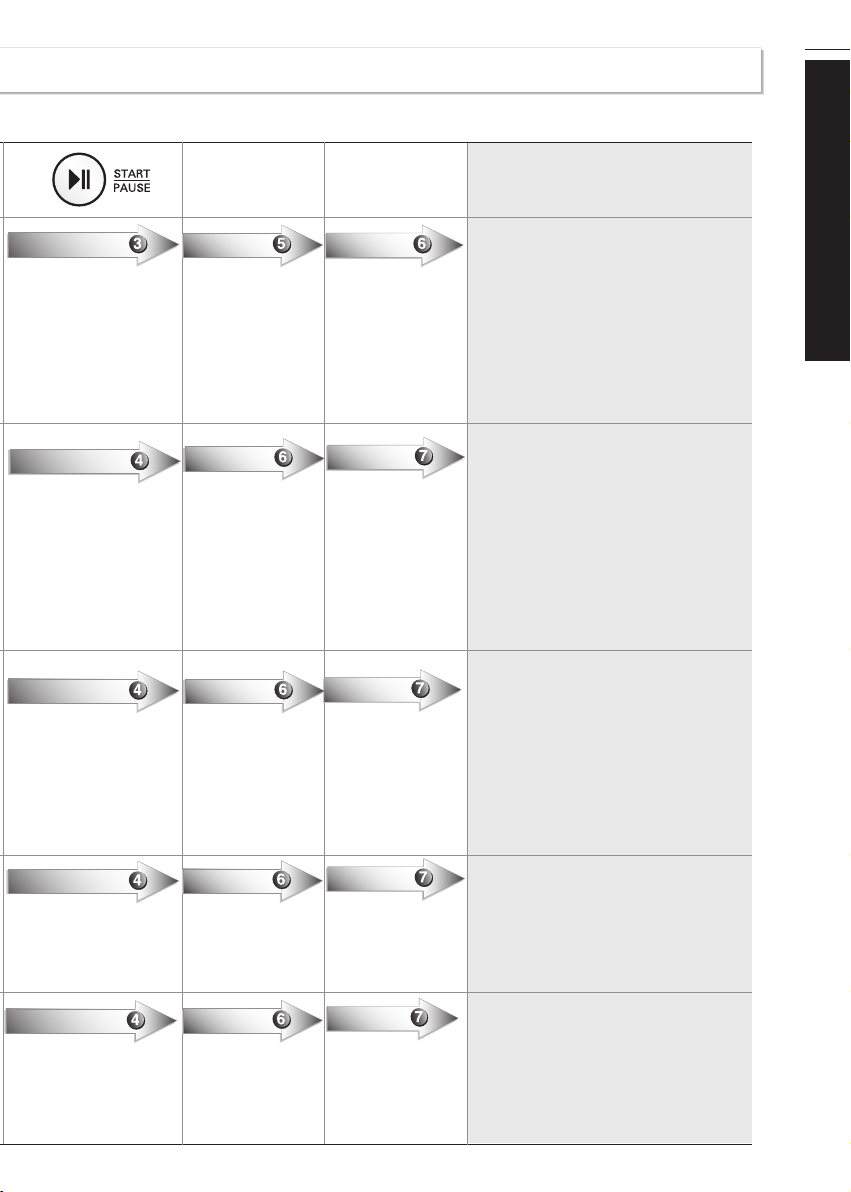
START/PAUSE BUTTON
• Use to start or pause the
washing process.
• Repeats start and pause by
pushing the button.
Page 16
16
ashing Programs
W
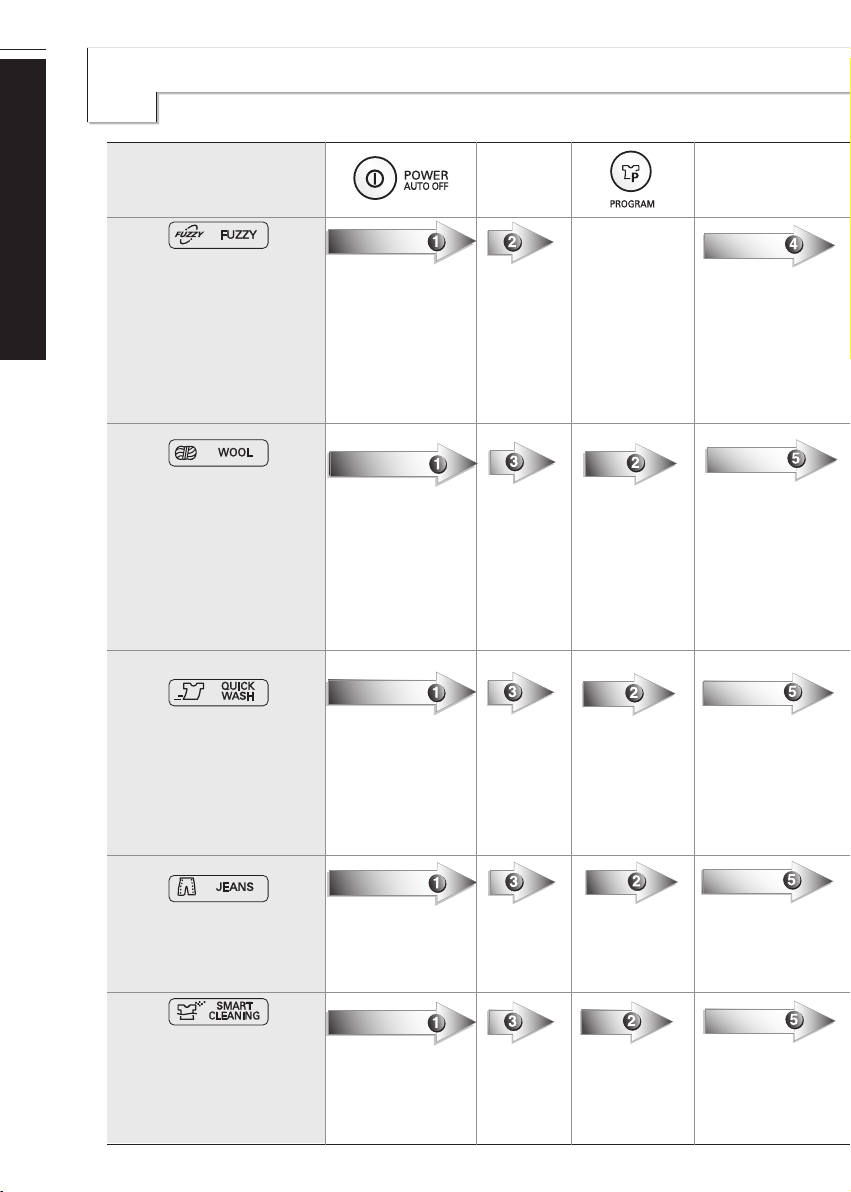
Washing
Programs
(Normal Wash)
Washing Programs
Used for normal loads, this
mode automatically selects the
most appropriate conditions
and completes the sequence
in one operation. The built-in
sensor detects the size of the
load and the ideal wash power
and wash, rinse and spin times
are set accordingly.
Use this program for washing
delicate fabrics such as lingerie and
woolens. (wash only “water
washable” clothes)
Before washing your woolens
check the care label for the
washing instructions.
(wash only water washable clothes)
Use this mode when washing
lightly soiled clothes for a short
time. The highly recommended
laundry amount is under 2.0kg.
Add
the
laundry
• Select the
WOOL program on the
Control
panel.
• Select the
QUICK
WASH
program on
the Control
panel.
Add
the Detergent
•
Add the appropriate
quantity of Detergent
as indicated by the
WATER LEVEL.
Or follow the
Detergent
manufacturer’s
instructions
• Use neutral
Detergent
appropriate for the
laundry.
• When washing
woolens use a mild
Detergent
recommend- ed for
washing wool.
•
Add the appropriate
quantity of Detergent
as indicated by the
WATER LEVEL.
Or follow the
Detergent
manufacturer’s
instructions
Use Jean program when
washing Jeans of different sizes
Use this program to increase
rinsing performance.
This would include underwear
and baby clothes.
If someone has sensitive skin or
skin trouble,use this program.
• Spread
the jean
evenly in
the tub
•
Select the
JEANS
program on
the Control
panel.
• Select the
SMART
CLEANING
program on the
Control panel.
Page 17
• The pulsator rotates for
8 seconds to detect the
laundry load.
• Then the WATER LEVEL
and the amount of
Detergent to be used
will be shown and water
will be supplied.
Close the lid Finish Caution & Note
If water is already in the tub, or putting wet
•
laundry into the tub before starting will
increase the WATER LEVEL.
• Water will be supplied for 2 minutes
after the start of the
wash to supplement
the water the laundry
has absorbed.
• When the wash
program ends, the
buzzer will ring
for 10 seconds
before the Power
goes off automatically.
• With lightweight bulky loads, WATER LEVEL
can be set low.
• Changes to Water Temperature (HOT/COLD)
and wash level are possible during operation.
(refer to page 14)
• When setting the WATER LEVEL manually,
do not set to Medium to prevent damage to
laundry.
• Washing with HOT water may damage the
laundry (Water is set to cold automatically).
Ensure that the load is under 2kg.
• In order to avoid damage to laundry,
the spin cycle may appear slow.
This also avoids wrinkles and clothing may
still contain some water. This is normal.
17
Washing Programs
• When static pressure of water is more than
2
2kg/cm
, the QUICK WASH course will be
within 19min.
Page 18
18
minmin min minminmin min min min min min min min
Lamp
Off
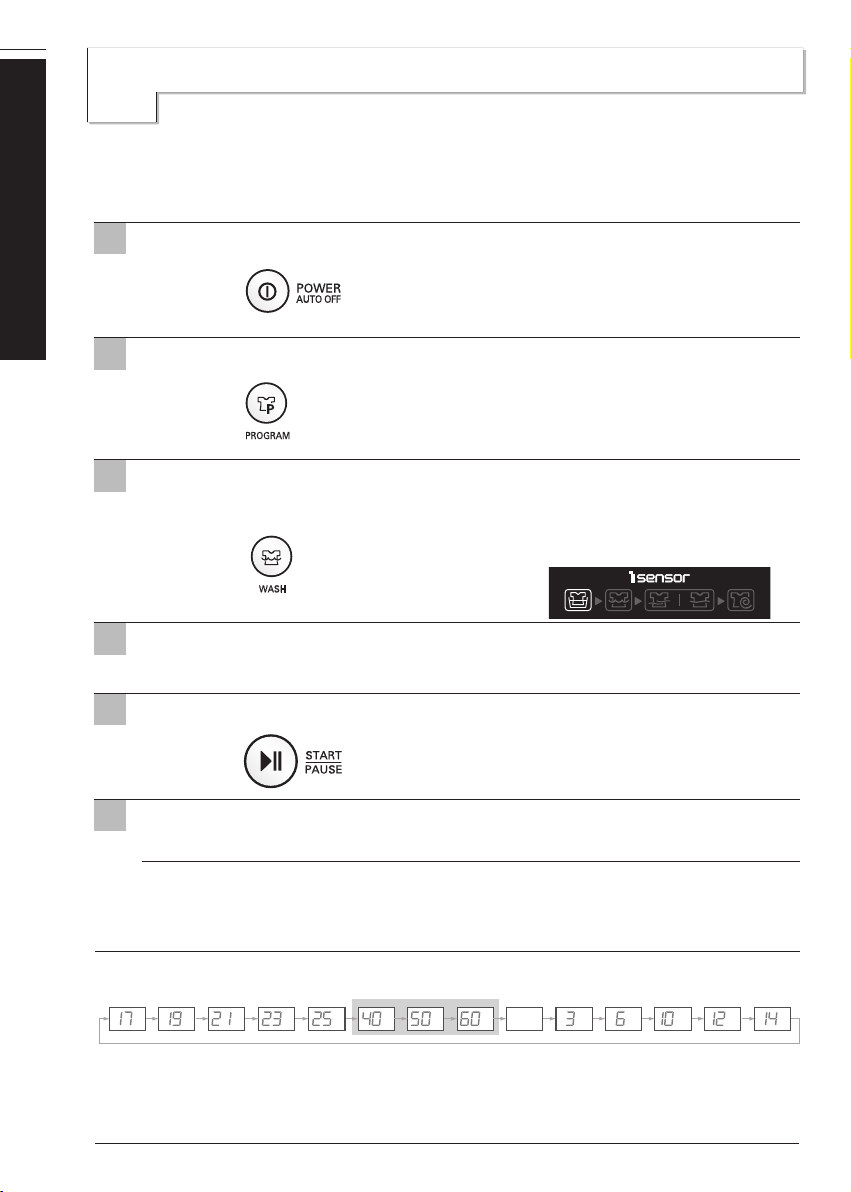
OAK Wash
S
Use this mode to wash normal clothes or thick and heavy clothes which are excessively dirty.
SOAK mode can be used with FUZZY or JEAN or SMART CLEANING or SILENT or FAVORITE program.
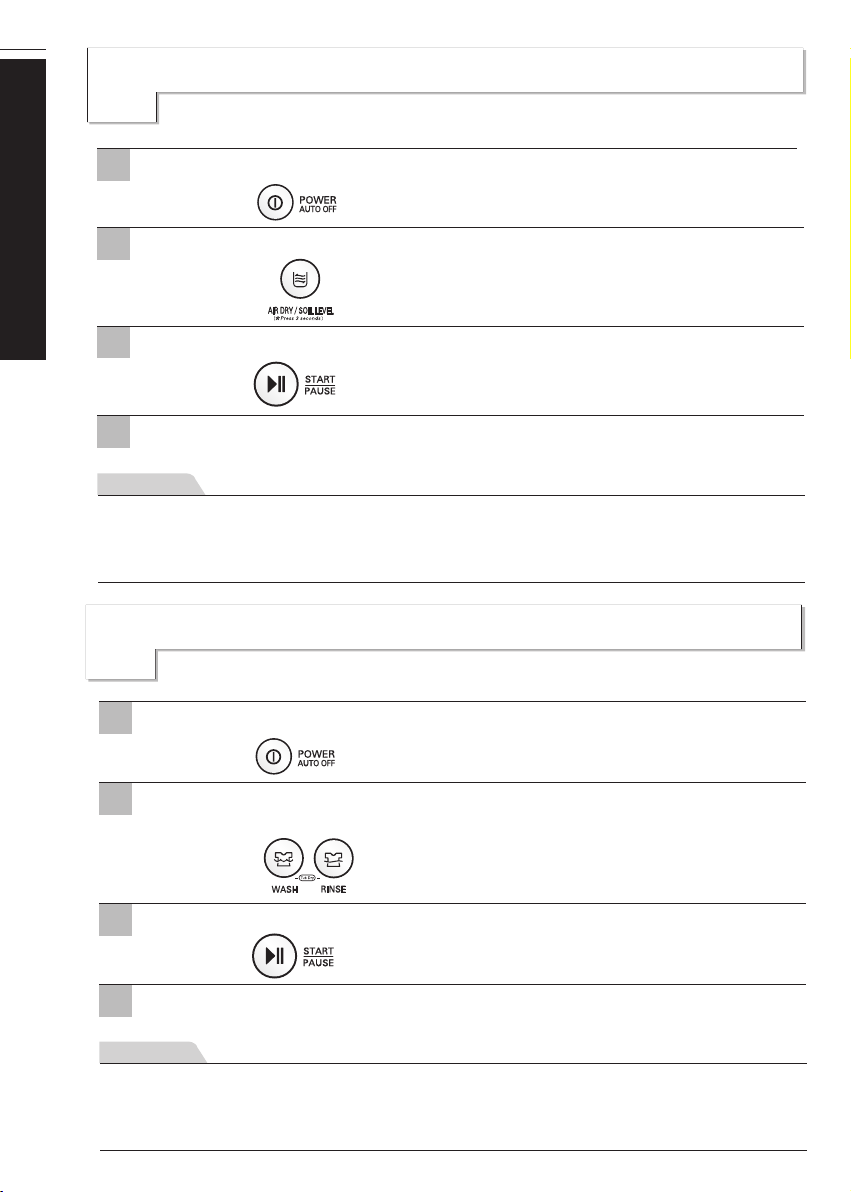
1
Press the POWER (AUTO OFF) button to turn power on.
Washing Programs
2
Press the
3
Press the WASH button, to select SOAK program.
4
Add the Detergent.
5
Add the laundry and press the
6
Close the lid.
Finish
PROGRAM button to select the washing program.
• Keep pressing the WASH button until the light turns on
‘SOAK’ and‘WASH’ simultaneously as next image.
• SOAK program only works when socking time is 40, 50 or
60 minutes.
• Add the appropriate quantity of Detergent as the Detergent
manufacture instruction.
START/PAUSE button.
• The WATER LEVEL will be shown and water will be
supplied.
• Water will be supplied for 2 minutes after the start of the
wash to supplement the absorbed water by the laundry.
• When the wash program ends, the buzzer will ring for
10seconds before the Power goes off automatically.
NOTE
• Order of Soak-Wash timing
• Select soaking time 40minutes, 50minutes, or 60minutes (including washing time) by pressing
the Wash button repeatedly.
• If necessary, select the times of Rinse and the time for Spinning by pressing the Rinse or Spin
buttons till you reach the desired times.
Soak-Wash
Page 19

AVORITE Wash
F
Pressing the FAVORITE button allows you to store your FAVORITE wash conditions in the
normal cycle memory and then recall it for use at a later time.
1
Press the POWER (AUTO OFF) button to turn power on.
2
Select the FAVORITE program.
19
Washing Programs
Select your
3
4
Press the
Power turns off automatically after wash.
NOTE
To recall your FAVORITE cycle.
1. Press POWER on.
2. Select the FAVORITE cycle by pressing the PROGRAM.
3. Press the START/PAUSE button. Then the wash cycle starts.
FAVORITE wash conditions.
• Press the TEMP. button to select wash Water
Temperature.
• Press the WATER LEVEL button to select
WATER LEVEL.
• Press the WASH button, the RINSE button &
the SPIN button to select wash time, rinse time &
spin time respectively you want to store.
START/PAUSE button to store & start your FAVORITE wash cycle.
Page 20
20
ILENT Wash
S
Use this program to wash quietly in SILENT especially during late night and dawn.
1
Press the POWER (AUTO OFF) button to turn power on.
Washing Programs
2
Press the PROGRAM button to select SILENT program.
3
Add the laundry into the washing tub.
4
Press the START/PAUSE button.
5
Add the Detergent and close the lid.
NOTE
• SILENT program takes longer washing time than FUZZY(Normal) program.
• To reduce noise in spinning, spin rpm is lower than normal spinning rpm. So the laundry has
more moisture than normal.
Page 21
21
UB CLEAN
T
If scrud is allowed to build-up in the machine it can result in stains on your clothes or unpleasant smell
in your washer.
Scrud is the way build-up that can occur within any washer when the fabric softener comes into contact
with Detergent, and according to particular degree of dirtiness or quality of water to be use, in these
case, use this program to clean inner tub and outer tub.
1
Press the POWER (AUTO OFF) button to turn power on.
2
Press the PROGRAM button to select the TUB CLEAN program.
3
Press the START/PAUSE button.
4
After 10 minutes of water supplement. Add the oxygenated bleach (about 300m ).
• Do not use Detergent box.
• Do not place any laundry inside tub.
• Left time is displayed.
Additional Function Program
5
Close the lid.
NOTE
• Before using this program remove lint inside lint filter.
• When using this program, do not place any laundry inside tub.
• After using this program, remove dirt inside filter.
• After finishing this program, open the lid of wash to remove irritant odor.
• Do not pour bleach into the tub directly. It might cause damage the tub.
• Do not leave diluted oxygenated bleach inside tub for long time.
It rusts the tub must drain the remained diluted oxygenated water out.
• Use this program once for every month.
• Do not use this program repeatedly.
• When the lid is open the machine will not operate, and an
alarm signal will remind you to close the lid.
Page 22
22
IR DRY
A
1
2
AIR DRY for your laundary.
Press the POWER (AUTO OFF) button to turn power on.
When you press the Air dry button for 3 seconds, the Air dry course will be selected.
• When the Air dry is selected, other buttons will be inactive.
• If you want to cancel the Air dry function, press the Power button.
Additional Function Program
Press the
3
When the Complete buzzer goes off, the power will automatically be turned
4
off in 10 seconds.
NOTE
■ When you select Air dry foir more than 60 minutes
1) You can reduce the drying time by minimizing the moisture in the laundry.
2) Always keep the laundry amount to 2kg or less and make sure to spread it out evenly.
3)Select 60 minutes for cotton laundry and 120 minutes for synthetic fiber laundry for effective Moisture removal.
START/PAUSE button.
UB DRY
T
Press the POWER (AUTO OFF) button.
1
When you press the Wash and Rinse button simultaneously, the Tub Dry course will
2
be set or canceled.
• When you select the Tub Dry, do not put any laundry in the drum.
• When Tub Dry is selected, other buttons will be inactive.
Press the
3
When the Complete buzzer goes off, the poser will automatically be turned off in
4
10 seconds.
NOTE
■ When you select Tub Dry
1) Use this function to minimize the growth of mold from the residual moisture within the laundry.
2) When you select the Tub Dry course, do not put any laundry or detergent in the drum.
3) It is good to use this about once a week.
START/PAUSE button.
Page 23
23
ption Washing
O
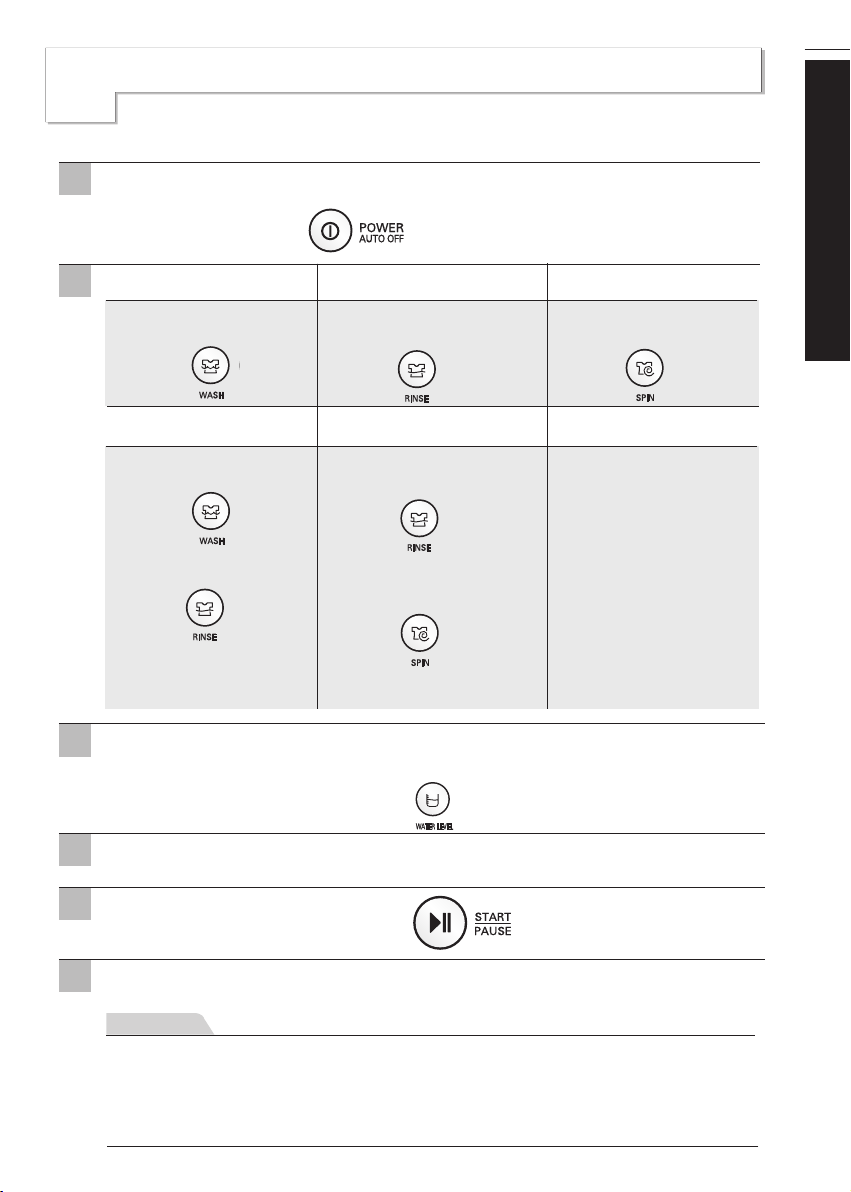
1
2
When you only need the Wash, Wash/Rinse or Rinse cycles, these can be set manually.
Press the POWER (AUTO OFF) button to turn power on.
Only Wash
Press the
select the desired timing.
Only Wash,Rinse
Press the
select the desired timing.
Press the
select the desired times of
rinse.
WASH
WASH
RINSE
button to
button to
button to
Only Rinse
Press the
select the desired times of
rinse.
Press the
select the desired times of
rinse.
Press the
lect the desired times of
spin.
RINSE
button to
Only Rinse,Spin
RINSE
button to
SPIN
button to se-
Only Spin
Press the
lect the desired times of
spin.
When you want to only
drain, wait until the water
in the washing tub drains
completely.
SPIN
button to se-
Only Drain
Additional Function Program
You can use this option
for preventing wrinkles of
laundry
Press the WATER LEVEL button, to control the water level according to the
3
amount of laundry. If you do not choose anything, it is set the middle water
level automatically.
4
Add the laundry into the washing tub.
5
Press the START/PAUSE button.
6
Add the detergent and close the lid.
NOTE
• When a Wash, Wash/Rinse or Rinse only option is selected, after the wash is completed the water will not
be drained off. If you wish to drain the water, press SPIN button and wait until the water in the tub has drained
completely. Then press the START/PAUSE button.
• If you do not specify the water level, then Medium will be automatically selected.
• If only Rinse is selected, the process will start from Water Supply.
Page 24
24
ELAY START (RESERVATION) Wash
D
1
DELAY START (RESERVATION) Wash is used to delay the finishing time of the operation.
The hours to be delayed can be set by the user accordingly.
The time on the display is the finishing time , not the start time.
Press the POWER (AUTO OFF) button to turn power on.
Additional Function Program
Press the
2
Press the DELAY START (RESERVATION) button.
3
Add the Detergent.
4
Add the laundry and press the
5
6
Close the lid.
PROGRAM button to select the washing program.
• Select the program for laundry on the Control panel.
This program will not work in WOOL and TUB CLEAN
Program.
• The light will ‘DELAY’ turn on and
‘TIME LEFT’ will be marked.
• Press the button repeatedly to set the desired finishing time.
For example, To finish washing in 9 hours from now, by
make the number 9:00 pressing the DELAY START
(RESERVATION ) button repeatedly.
(RES.=DELAY)
•
Add the appropriate quantity of Detergent as the Detergent
manufacture instruction.
• When the lid is open the machine will not operate, and an
alarm signal will remind you to close the lid
START/PAUSE button.
• When you press the START/PAUSE button the light will
blink.
• Water will be supplied for 2 minutes after the start of the
wash to supplement the water the laundry has absorbed.
Finish
NOTE
• Finishing time can be delayed from 3~48 hours. Delaying from3~12 hours can be done in 1 hour time intervals
and from 12~48 hours in 2 hour time intervals.
• If the lid is open, the machine will not work, and an alarm signal will alarm to remind you to close the lid.
• To select washing time, rinsing times, spinning time, water level, hot/cold or wash power manually, press the
DELAY START (RESERVATION) button and select the desired option. Then press the START/PAUSE button.
• When the laundry cannot be taken out immediately after the wash program ends, it is better to omit the spinning
program . (The laundry will be wrinkled if left for a long time after spinning.)
• The washing will be finished according to the delayed time.
Page 25

25
ther Useful Functions
O
Child Lock Function
If you want to lock all the keys to prevent settings from being changed by a child, you can use the
child lock option.
How to Lock
Press the POWER (AUTO OFF) button.
1
Press the
2
3
Press both the RINSE button and the SPIN button simultaneously.
START/PAUSE button to start washing.
• Turn Power on.
• After all washing conditions are set according to the manual.
•
The button lock is set, it will not be released automatically if the cycle is terminated.
•
Thus, you should turn power on washing machine
and then terminate the function by pushing "Rinse &
Spin" button.
Additional Function Program
How to Unlock
If you want to unlock during wash, press both the RINSE and the SPIN button simultaneously again.
NOTE
• “CJ” & the remaining time are alternatively shown on the display while they are locked.
Seeing Remaining Time
To see the remaining time for each process, press one of the WASH, RINSE and SPIN buttons.
The remaining time for each process will appear for about 1 second.
Page 26

26
SETTING SCREW
ANTI-RAT COVER
BACK
lacing and Leveling
P
1
Installation
Please ensure that transit restraint has been removed before operating your machine.
Place the machine on a flat and firm surface which allows proper clearance.
We suggest a minimum clearance of 2 cm to the
right side and left sides of the machine for ease of
installation.
At the rear, a minimum clearance of 10 cm is suggested.
NOTE
If the washer is installed on a uneven,weak or tilted floor causing excessive vibration,
spin failure or “UE” error can happen to it.
It must be placed on a firm and level floor to prevent spin failure.
more
than
2 cm
more than 10 cm
more than
2 cm
Check that the machine is level
2
Open the lid and look from above to see if it is
same as shown.
Leveling the machine
3
Lift the front of the washing machine and twist
the Adjustable Leg until the surface bubble is
placed in the center.
Adjustable legs
※ Installing the Anti-Rat Cover (option) Insert the anti-rat cover to be firmly fixed from the back or
front of washing machine and screw it
Caution
If the power is supplied from a cord extension set or generator, the cord extension set or electrical
portable outlet device should be positioned so that it is not exposed to splashing or ingress of moisture.
Top view of the machine
Level indicator
(2pcs)
Page 27

onnecting Water Supply Hose
C
Connecting Water Supply Hose to water tap
Before connecting the Water Supply Hose to the water tap, check the hose type and then
choose the correct instruction here under.
Note that the Water Supply Hose supplied may vary from country to country, Make sure to
connect the blue inlet hose to the COLD water tap, and the orange inlet hose to the HOT
water tap.
27
Installation
Normal Type
Untighten the screw
1
Untighten the screw of the connector so that the
tap can be placed in the middle.
Fixing the connector to the tap
2
Push the upper connector up till the rubber
packing is in tight contact with the tap. Then
tighten the 4 screws.
Attach the water supply hose securely to the con-
3
nector
Push the water supply hose vertically upwards so
that the rubber seal within the hose can adhere
completely to the tap.
Fixing the connector to the water supply hose
4
Attach the water supply hose to the connector and
then tighten it by screwing it to the right.
(Normal tap without thread & screw type inlet hose.)
Rubber packing
screw
Connector
Connector
Water Supply Hose
Check the connection of water supply hose and the connector
5
After connecting the hose, open the tap to check
for any water leakage.
If the water leaks, close the tap and start again
from step 1
NOTE
The washing machine is to be connected to the water mains using new hose-sets and old hose-sets should
not be reused.
Page 28

28
onnecting Water Supply Hose
C
Normal Type
Separate Middle connector from Water Supply Hose
1
Installation
Separate Middle connector from the Water
Supply Hose by pulling the Pressing Rod and the
Pressing Handle that is attached to the Water
Supply Hose.
Loosen the fixed nuts to connect the connector to the tap
2
Untighten the screw of the connector so that the
tap can be placed in the middle.
NOTE
In case tap is too large.
If the tap diameter is too large or is square,
untighten the 4 screws and remove the guide
plate. Then follow step1.
Fixing Connectors to the Tap
3
Push the upper connector up till the rubber
packing is in tight contact with the tap. Then
tighten the 4 screws.
Fixing Upper Connector and Middle Connector
4
Remove the fixed sticker in between the Upper
and Middle Connectors. Tighten the connectors
by holding one connector and twist middle
connector to the right.
Connecting Middle Connector and Water Supply Hose
5
Press down the pressing rod of the Water Supply
Hose which was separated from middle connector
(refer to Step1) and then join it to the middle
connector.
(Normal tap without thread & one touch type inlet hose.)
Middle
connector
Guide plate
Connector
Connector
Middle
Fixed sticker
Pressing rod
Water Supply Hose
Connector
Fixed Sticker
Pressing Handle
Pressing Rod
Water Supply Hose
Rubber packing
screw
Fixed sticker
Rubber packing
Connector
Middle
Connector
Pressing handle
Check for water leakage
6
After connecting the hose, open the tap to check
for any water leakage.
If the connection leaks, close the tap and start
again from step 1.
If you skip step 1, water leakage may occur.
Page 29

Screw Type
Attach the water supply hose to the tap.
1
Push the water supply hose up so that the rubber
packing within the hose can adhere completely to
the tap.
Connect the water supply hose to the tap.
2
Connect the water supply hose to the tap and then
tighten it by screwing it to the right.
Check water leakage.
3
After connecting the hose, open the tap to check
for any water leakage.
29
Installation
Water
tap
Rubber Packing
Water Supply Hose
Connecting Water Supply Hose to the machine
• Connect the water supply hose to inlet valve of
the washing machine, and then lock it by turning
the hose connecting part.
• Check to see if there is a rubber seal inside the
connector.
Hose connector
Rubber seal
Page 30

30
Bottom
0.9~1.2m
Within 50mm
Hose
Guide
Bottom
H
oles
For Holder
Bottom
B
ottom
onnecting Drain Hose
C
Installation
1
2
3
Caution
• The outlet should be placed 0.9~1.2m higher than the floor.
• To prevent siphon, the drain hose should not be extended more
than 50mm from the end of the hose guide.
• The hanging down drain hose might cause poor drainage.
Before connecting Drain Hose, check your Drain Hose model and choose the correct
instructions.
Pump Model
Insert the plastic holder into hole
in the back side toward the stand
pipe direction. Adjust the holder
by pressing the both sides to
push in.
Push the end part of the drain hose in the
outlet of the drain pump and tighten with
the clamp to fit in.
Put the other end of the drain hose over the
standpipe or wash tub. To prevent the hose that
is connected with pump hanging down, push the
hose into the holder to fix.
Non-Pump Model
Before connecting
1
Ensure that the hose clip is set as indicated here.
Connect the Elbow Hose
2
Push the elbow hose toward the body of the washing machine.
Place the Drain Hose
3
To change the direction of the hose, pull out the
elbow hose and change the direction.
Repeat Step 2.
Clip
Page 31

31
75cm
rounding Method
G
Grounding Method with Ground insert space Terminal
Oth
Earth wire should be connected.
If the earth wire is not connected, there is possible a danger of electric shock caused by
the current leakage .
If the AC current outlet has a ground terminal, then separate grounding is not required. Note that AC power outlet
configurations may differ from country to country
Caution
CAUTION concerning the Power Cord
Most appliances recommend they be placed upon a dedicated circuit; that is, a single outlet circuit which powers
only that appliance and has no additional outlets or branch circuits. Check the specification page of this owner's
manual to be certain. Do not overload wall outlets. Overloaded wall outlets, loose or damaged wall outlets,
extension cords, frayed power cords, or damaged or cracked wire insulation are dangerous. Any of these
conditions could result in electric shock or fire. Periodically examine the cord of your appliance, and if its
appearance indicates damage or deterioration, unplug it, discontinue use of the appliance, and have the cord
replaced with an exact replacement part by an authorized servicer. Protect the power cord from physical or
mechanical abuse, such as being twisted, kinked, pinched, closed in a door, or walked upon. Pay particular
attention to plugs, wall outlets, and the point where the cord exits the appliance.
e
r Gro
u
n
d
in
g
Me
th
o
d
Burying Copper Plate
Connect the Ground Wire to a Ground Copper
Plate and bury it more than 75cm in the ground.
Care and Maintenance
Ground
Terminal
Outlet with ground terminal.
Ground Wire
Ground Copper Plate
Using Ground Wire
Connect the ground Wire to the socket provided
exclusively for Grounding.
Using a Short Circuit Breaker
If grounding methods described above are not
possible, a separate circuit breaker should be employed and installed by a qualified electrician
Caution
• To prevent a possible explosion, do not connect ground to a gas pipe
• Do not connect ground to telephone wires or lightning rods. This may be dangerous during electrical
storms
• Connecting ground to plastic has no effect
• Ground wires should be connected when an extension cord is used.
Ground
Wire
Short-circuit
breaker
Page 32

32
Cap
Filter
Cap
Filter
Guide rib
Filter
Filter
Cap
Filter
Filter
Guide rib
Filter
leaning and Maintenance
C
Cold water washing
• If you always use COLD water, we recommend that a WARM or HOT wash be used at a regular intervals
e.g. every 5th wash should be at least a WARM one.
When you have finished
Care and Maintenance
• Turn off taps to prevent the chance of flooding should a hose burst.
• Always unplug the power cord after use.
When water supply into the tub is not clean or the filter is clogged with particles (such as sand), clean the
filter in the inlet valve occasionally.
(The figure of power cord and water tap may vary according to the country)
To Clean the Filter in the Inlet Valve
Close the tap before turning off the power.
1 2
HOT/COLD(WARM) and then press the
[START/PAUSE] button to remove water
from the machine completely.
Turn off the power before
pulling out the cord.
After removing the water supply
3 4
hose pull out the filter.
Then use a brush to clean the filter.
NOTE
• Before cleaning the filter, the impurities in the water supply hose should be removed.
To Clean the Pump casing (for pump model)
Place a towel on the
1 2 3 4
floor under the drain
pump cap. Excess
water may flow out.
NOTE
• Check if water leaks after reassembling. (The Rubber ring is in the cap)
Turn the cap
counterclockwise and
pull it out.
Replace the filter after cleaning it.
Remove any foreign
objects and fluff inside
pump casing and from the
filter.
Replace the cap. Insert the filter along
the guide ribs inside the pump casing.
Filter must face the guide ribs inside
pump casing and securely turn the cap
clockwise.
Page 33

33
leaning and Maintenance
C
When there is a fear of freezing
• Close the water taps and remove the Water Supply Hose.
• Remove the water which remains in the water supply.
• Lower the drain hose and drain the water in the bowl and the drain hose by spinning.
If frozen
• Remove the water supply hose, and immerse it in HOT water at approx.. 40˚C.
• Pour approx.. 2 liters of HOT water at approx.. 40˚C, into the bowl and let it stand for 10 minutes.
• Connect the water supply hose to the water tap and confirm that the washing machine performs the
supply and drainage of water.
Wash Inner-tub Leave the lid open after washing to allow moisture to evaporate. If you want to clean
the inner-tub use a clean soft cloth dampened with liquid Detergent, then rinse. (Do not
use harsh or gritty cleaners.)
Inlet Hoses Hoses connecting washer to faucet should be replaced every 5 years.
Exterior Immediately wipe off any spills. Wipe with damp cloth. Try not to hit surface with sharp
objects.
Long Vacations Be sure water supply is shut off at faucets. Drain all water from hoses if weather will be
below freezing.
Cleaning the Inside of your Washer
Care and Maintenance
If you use fabric softener or do regular COLD water washing, it is very important that you occasionally clean the
inside of your washer.
• Fill your washer with HOT water.
• Add about two cups of a powdered Detergent that contains phosphate.
• Let it operate for several minutes.
• Stop the washer, open the lid and leave it to soak overnight.
• After soaking, drain the washer and run it through a normal cycle.
Or use TUB CLEAN PROGRAM periodically.
We do not recommend that you wash clothes during this procedure.
Products that might damage your washing machine
• Concentrated bleaches and diaper sanitizer will cause damage to the paintwork and components of your washer.
• Hydrocarbon solvents i.e. petrol, paint thinners and lacquer thinners, etc. can dissolve plastic and blister paint
(Be careful when washing garments stained with these solvents as they are flammable DO NOT put them in
washer or dryer.)
• Some pretreatment sprays or liquids can damage your washer’s control panel.
• Use of dyes in your washer may cause staining of the plastic components. The dye will not damage the machine
but we suggest you thoroughly clean your washer afterwards. We do not recommend the use of dye strippers in
your washer.
• Do not use your washer lid as a work surface.
Page 34

34
se of Handle Locker
U
You can use handle hold function if you like to use.
Handle hold function is operated by holder under the handle.
• Slide holder to left/right side until you listen to “ Click” sound to holding handle.
• Do opposite to loose the Handle holding.
Care and Maintenance
<State of fixing handle> <State of unfixing handle>
NOTE
If you operate door like the below picture that, you can hurt so use after check locker was fixing or not.
Page 35

ommon washing problems
C
Many washing problems involve poor soil & stain removal, residues of lint and scum, and
fabric damage. For satisfactory washing results, follow these instructions.
WASH PROBLEM
Problems
Possible Causes
35
Troubleshooting
Solutions & Preventive Measures
Poor soil removal
Blue Stains
Black or gray
marks on
clothes
Yellow or
brown rust
stains
Lint
Residue or Detergent
• Not enough Detergent
• Wash Water Temperature
too low.
• Overloading the washer
• Incorrect wash cycle
• Incorrect sorting
• Do not pretreat stain
• Undiluted fabric softener
dispensed directly onto
fabric
• A buildup caused by the
interaction of fabric softener
and Detergent can flake off
and mark clothes
• Not enough Detergent
• Iron or manganese in
water supply, water pipes,
or water heater
• Incorrect sorting
• Tissues left in pocket
• Overloading the washer
• Overloading the washer
• Undissolved Detergent
• Use too much Detergent
• Use correct amount of Detergent for load size, amount of
soil and water Hardness.
• Different Water Temperature may be required according to
soil type.
• Reduce load size.
• Wash with JEAN or SOAK & JEAN wash cycle for heavy
soiled laundry.
• Separate heavily soiled items from lightly soiled ones.
• Pretreat stain and heavy soil according to directions shown
on page 9.
• Rub the stain with bar soap. Wash.
• Do not overfill fabric softener dispenser and do not pour
liquid fabric softener directly onto fabric.
See page 12 for more instructions.
• Keep the recommendations against Scrud(waxy buildup).
(refer to scrud page12.)
• Use correct amount of Detergent for load size, amount of soil
and water Hardness.
• To restore discolored load of whites, use rust remover safe
for fabric.
• Install nonprecipitating water softener or an iron filter in
your water supply system for an ongoing problem.
• Before washing, run water for a few minutes to clear lines.
• Wash lint givers eg towels, flannelette sheets, separately
from lint collectors eg synthetic fabrics and remove tissues in
pockets before wash. See page 9 for sorting and caring before loading.
• Do not overload the washer
• Do not overload the washer.
• Some Detergents need to be pre-dissolved, check the Detergent
instructions. Try pre-dissolving the Detergent.
• Increase Water Temperature using HOT water safe for fabric.
• Use proper amount of Detergent.
Holes, tears,
or snags
• Incorrect use of chlorine
bleach.
• Unfastened zippers,
hooks, buckles
• Ribs, tears and broken
threads
• Overloading the washer
• Degradation of fabric
• Never pour chlorine bleach directly on fabric.
See page 11 for adding liquid bleach.
• Fasten zippers, hooks, and buckles.
• Remove objects in pockets. See page 9 for caring before
loading.
• Do not overload the washer.
Page 36

36
roubleshooting
T
Before calling for service, check the problem against the list bellows.
Symptom Error Message
Water Supply
Failure
• Is the water tap shut off?
• Is the water supply cut off ?
• Is the tap or water supply hose frozen ?
Check up
Troubleshooting
• Is the water pressure low or is the filter of the inlet
valve clogged with impurities?
• Is the Hot hose connected to cold?
• Is the Cold hose connected to hot?
Drainage Failure
Spin Failure
Door(Lid) Open
• Is the drain hose positioned correctly?
• Is the drain hose bent or placed too high?
• Is the internal part of the hose or drain pump
(only pump model) clogged with impurities?
• Check if electric power has gone off.
• Is the laundry evenly balanced?
• Is the washing machine placed on a flat surface?
• Is the lid closed?
Abnormal water
level sensing
Overflow failure
Abnormal motor
Clutching Error
• Please call your nearest LG Electronics service
center for help.
Page 37

martDiagnosis
S
1
Close the washer door, and press the
M
T
POWER (AUTO OFF)
•
If you manipulated other button or dial before
pressing WATER TEMP. button, turn off the
power and start again from the beginning.
37
Troubleshooting
button.
2
Place the phone to SMARTDIAGNOSIS
3
Long press
Hold the phone while data is transmitted.
4
After the data transmission is completed, listen to the diagnosis result from the consultant.
5
WATER TEMP. button to activate smart diagnosis.
TM
display.
•
Make sure that the
speaking side of the
phone to face
SMARTDIAGNOSIS
display
•
Place the phone near the
SMARTDIAGNOSIS
display, and long press
WATER TEMP. button
until tak tatk tak sounds.
•
Keep placing phone to SMARTDIAGNOSIS
display while data for smart diagnosis is being
transmitted. The time remaining for data
transmission will be displayed on screen.
•
Transmission sound may be irritating. For
proper diagnosis, do not take off the phone.
You can press power button to stop diagnosis
function and the sound.
•
When data transmission is completed, the
power is automatically turned off with“End”
display after a few seconds.
TM
TM
TM
NOTE
Smart Diagnosis is a troubleshooting feature designed to assist, not replace, the traditional method of
troubleshooting through service calls. The effectiveness of this feature depends upon various factors,
including, but not limited to, the reception of the cellular phone being used for transmission, any
external noise that may be present during the transmission, and the acoustics of the room where the
machine is located. Accordingly, LG does not guarantee that Smart Diagnosis would accurately
troubleshoot any given issue.
Page 38

38
H
D
W
pecification
S
Specification
Model
Power supply
Rate output
Motor output
Water tab pressure
Revolution speed
Weight
Size
Wash capacity
※ In our continuing effort to improve the quality of our appliances, it may be necessary to make changes to the appliance without
revising this manual.
30 - 800 kPa (0.3 - 8.0 kgf/cm
632(W) x 670(D) x 1020(H)
WFS1838EKD
110V, 50/60Hz
400 W
150 W
135 rpm
50 kg
18.0kg (40 lbs)
2
)
Page 39

emo
M
Page 40

emo
M
Page 41

MFL68019778
WFS1838EKD
Page 42

aracterísticas del Producto
C
La lavadora no funcionará con la tapa abierta. Si se abre la tapa durante el
lavado, el enjuague o el , la operación se detendrá por seguridad.
Por favor cierre la puerta de forma suave porque se puede lastimar al cerrarla
con fuerza.
sensors
El sensor detecta automáticamente la cantidad de detergente, temperatura y
●
calidad (dureza) del agua para efectuar el mejor programa de lavado y enjuague, resultando en el mejor programa de lavado.
Smart Drum logrado con tecnología de Motor DD
El Smart Drum con tipo de lavado de tambor es una cuba de lavadora más
●
higiénica y limpia que protege os tejidos y evita que se dañen.
Control de lógica FUZZY
●
Un sensor de carga y un microprocesador en el controlador detectan la carga de lavado y
fijan las condiciones óptimas de lavado, tales como nivel de agua, tiempo de lavado, etc.
●
La tecnología más avanzada en sistema de control electrónico proporciona el
mejor rendimiento de lavado.
Nuevo lavado de tipo DD con cuidado de los tejidos
Gira la cuba y crea
un flujo de agua de
cañón que acelera el
efecto del detergente
y mejora el lavado,
además de evitar que
se dañen los tejidos.
El giro de medio ciclo
de la cuba a izquierda
y derecha ayuda a deshacer el detergente
y hace el lavado más
fácil
El giro de medio
ciclo de los rotores
de lavado a
izquierda/derecha
elimina las manchas
El giro de medio
ciclo de la cuba a
derecha/izquierda
equilibra la colada
Sistema de mecanismo directo, reduce el ruido
●
El motor avanzado BLDC gira directamente la tina sin la correa y el
embrague, de tal modo que reduce el ruido de la lavadora.
●
La lavadora ajusta la velocidad óptima según el tipo y carga de ropa.
SMARTDIAGNOSIS
● Se trata de una tecnolog
de servicio cuando existe un problema con la lavadora. Ofrece
un servicio que da confianza a los clientes, mediante un an
preciso y r
á
ido.
ía
TM
que transfiere las anomalís al centro
á
isis
Page 43

ontenidos
C
LEA ESTE MANUAL
En él usted encontrará muchos consejos útiles de cómo usar y mantener
apropiadamente su lavadora. Con sólo un poco de cuidado preventivo de su parte
puede ahorrarle un gran gasto de tiempo y dinero durante la vida de su lavadora.
Encontrará muchas respuestas a problemas comunes en la sección de Detección de
Fallas. Si revisa primero nuestra carta de Consejos de Detección de Fallas, puede que
no necesite llamar al Servicio Técnico.
Introducción
Antes de comenzar el
lavado
Programas de Lavado
Opciones de función
adicionales
Instalación
Cuidado y Mantenimiento
Detección de fallas
Especificación
Información de Seguridad 4
Identificación de Partes 7
Información de Función 8
Preparación antes de Empezar el Lavado 9
Uso del Agua, Detergente, Blanqueador y Suavizante
Guía Específica para Quitar las Manchas 13
Función de cada botón 14
Lavado FUZZY (Lavado NORMAL) 16
Lavado de LANA 16
Lavado de LAVADO RÁPIDO 16
Lavado de JEANS 16
Lavado de LIMPIEZA INTELIGENTE 16
Lavado de REMOJO 18
Lavado de FAVORITO 19
Lavado SILENCIOSO 20
LIMPIEZA TAMBOR 21
PRE-SECADO 22
SECAR TINA 22
Opción de Lavado 23
Lavado con Reserva (Inicio diferido) 24
Otras funciones útiles 25
Instalación y Nivelación 26
Conexión de la manguera de suministro de agua 27
Conexión de la manguera de drenaje 30
Método de puesta a tierra 31
Limpieza y Mantenimiento 32
Uso del Seguro en la Tapa 34
Problemas Comunes de Lavadora 35
Diagnósticointeligente
Especificación 38
TM
37
10
Page 44

4
nformación de Seguridad
I
Leer detallada y completamente este manual que contiene información importante acerca de la
seguridad, que protegerá al usuario de peligros inesperados y prevendrá daños potenciales al
producto.
Este manual está divido en dos partes: Advertencia y Precaución.
: Esta es una señal de advertencia especificando las aplicaciones
Introducción
del usuario que pueden ser peligrosas.
: Esta es una señal especificando aplicaciones "Estrictamente Pro-
hibidas".
Advertencia
Precaución
SEGURIDAD DEL
CALENTADOR DE
AGUA
INSTALACIÓN
APROPIADA
: El no llevar a cabo las instrucciones que han
sido dadas puede resultar en graves lesiones
físicas o muerte.
: El no llevar a cabo las instrucciones que han
sido dadas puede resultar en lesiones físicas
o daños al producto.
Advertencia
• Bajo ciertas condiciones puede producirse gas hidrogeno en el calentador de agua
que no ha sido usado por 2 meses o más. El gas hidrogeno puede ser explosivo bajo
estas circunstancias. Si el agua caliente no ha sido usada por 2 meses o más, hay que
prevenir la fuga o daño abriendo completamente la llave de agua caliente y
enseguida dejarla correr por unos minutos. Hacer esto antes de usar un artefacto
eléctrico en el cual está conectado el sistema de agua caliente. Este simple
procedimiento permitirá alguna fuga de gas hidrogeno. Como el gas es inflamable,
no fume o encienda la llama de un artefacto durante este proceso.
Precaución
• Cuando la lavadora este instalada sobre un piso alfombrado, la abertura de la base no
debe estar obstruida por la alfombra.
• Instalar o guardar donde no este expuesta a temperaturas bajo congelamiento o
expuesta a la interperie.
Si es que el producto es expuesto a estas condiciones pueden suceder
descargas eléctricas (corto circuito), incendio, averías o deformaciones.
• Para una apropiada instalación a tierra de la lavadora conforme con todas las normas,
siga los detalles de las instrucciones de instalación.
Si no esta apropiadamente instalado, averías y fugas de electricidad pueden
ocurrir, lo cual puede causar una descarga eléctrica.
• La apertura de la base no debe quedar obstruida por la alfombra cuando la lavadora
esté instalada en un piso alfombrado.
Podría haber una avería y descarga eléctrica por una fuga de energía si no se ejecuta.
• Asegurarse que el enchufe está completamente introducido en el toma corriente.
El no llevar a cabo estas instrucciones puede causar un descarga eléctrica
o incendio debido a un sobrecalentamiento.
Page 45

nformación de Seguridad
I
5
Introducción
AREA DE LAVADO
CUANDO USE LA
LAVADORA
Advertencia
• Mantener el área limpia y alrededor de su electrodoméstico, y libre de combustible o materiales tales como papeles,
pelusillas de ropa, químicos, etc.
El operar con ese tipo de materiales alrededor de la máquina puede ocasionar una explosión o incendio.
• Es necesario supervisar al máximo, si el artefacto es usado por menores o si ellos están cerca. No permita que los
niños jueguen con o en el interior de su lavadora.
Existe un peligro potencial que los niños se puedan ahogar en la tina.
No tocar el enchufe con la mano mojada.
Esto causará un descarga eléctrica.
No debe de poner su mano, pie o cualquier cosa debajo la máquina lavadora mientras la máquina esta
operando.
Existe un mecanismo de rotación debajo de la máquina, por eso Usted puede resultar lesionado.
Precaución
• Use este artefacto solo para los fines descritos en el manual de usuario.
• El proceso de lavado de la ropa puede reducir el brillo de las telas deteriorándolas.
Para evitar este resultado, siga cuidadosamente las instrucciones de lavado y
cuidados dadas por el fabricante de la prenda.
• Para minimizar la posibilidad de choque eléctrico, desenchufe este artefacto desde la
toma de corriente o desconecte el panel distribuidor de la casa, para cortar momentáneamente el circuito eléctrico cuando proceda a limpiarla.
NOTA :
• Asegurarse que el drenaje esta trabajando correctamente.
Si el agua no está drenando apropiadamente, tu piso puede inundarse.
Los pisos inundados pueden causar fuga de electricidad y en consecuencia una
descarga eléctrica o incendio.
• Si al abrir la tapa la lavadora no se detiene durante los primeros 15 segundos de la fun-
ción de centrifugado, proceda a desconectar su aparato.
Llamar a su agente de servicio. Una máquina que gira con su puerta abierta
puede causar lesiones.
Apáguela presionando el botón Power, No la
desconecte del suministro de energía.
Nunca introduzca las manos en la lavadora mientras este funcionando. Para
abrir la tapa espere hasta que la máquina esté completamente detenida.
Hasta la rotación lenta puede causar lesiones.
Nunca intente operar este artefacto si está dañado o funcionado mal,
particularmente si tiene partes quebradas, incluyendo el cordón dañdo.
Operar con un enchufe dañado puede causar una descarga eléctrica.
No usar agua que este más caliente que 50 grados centígrados.
El uso excesivo de agua caliente puede causar daños a los tejidos
de la ropa o causar fuga de agua.
Page 46

6
nformación de Seguridad
I
USE LA
NDO
UA
C
RA
DO
A
V
LA
Introducción
TE
ES
NO
NDO
UA
C
EN USO
Cierre
•
minimizar
es
Cuando
•
dens
Limpiar
•
El
• A
atrap
Los niños se
Advertencia
Po
n
co
Exced
eform
d
No
a
L
cau
No
b
su
ales
cu
ar
u
g
te
Es
ectad
ezcle
m
ezcla
m
ar
s
lav
stan
e
d
p
er
la
o
e
cias
u
p
estas
u
u
a s
el
acion
clo
d
u
m
seq
ex
en
ed
su
e
ed
lav
lím
r
e
erte.
e
u
p
ar
b
p
es
b
o
iferen
d
en
siv
lo
d
stan
ren
co
o
r n
o
r fav
Precaución
agua
de
llave
la
ario
neces
la
ación
la
un
ar
us
es de desech
t
n
s en su
o
ad
puede
i
s
goteo
el
reemplazarlas
temperatura
ocurrir
o
uciedad
s
e
enchuf
na lavad
u
ar
i
ter
n
i
den quedar atrapados y ahogarse si la tapa es dejada abierta.
pue
ecte más
n
ra.
o
ad
u
p
ite
las
e
d
ead
u
q
lan
tes
lav
su
tales
(
as,
p
ex
o
er
cer
cias
ers
d
para
ocurriera
del
mojar
y
polvo
no
que
.
r
o
ma d
la to
en
s
eléctrico
s
arato
ap
eléctrica,
carga
es
d
a
n
u
ar
s
cau
e
ed
.
artes
p
o
m
co
tales
s
o
ácid
o
iaco
n
o
am
n
co
r
o
tóxico
gas
n
u
cir
u
rod
p
e
ed
u
p
icos
ím
u
q
s
o
iad
p
lim
o
sid
an
h
e
u
q
s
lo
tícu
ar
a
r
o
ad
aceite,
o
m
co
ag
No
.
tar
lo
lav
la
e
d
ca
lotar.
exp
o
e
la
aliviar
ruptura.
una
5
de
luego
alta
es
aire
pis
los
contactos
los
en
m
i
l
á
t
es
te la tapa para prevenir que los niños queden
i
u
a, q
r
o
p
e
u
eg
r
a
r
o
ad
ión
pres
años
temperatura
la
y
.
os
puede
o
pi
tu
in
estas
o
Revis
de
a,
r
u
d
obre
s
us
del
su
r
lin
aso
g
stan
b
la
te
an
la
la
ar
o.
enchufe.
caus
esen
d
a,
ag
al
cias
ació
er
p
o
manguera
condición
agua
del
un
ar
e co
in
v
u
q
o
r
g
a
u
n
ncendi
i
ag
e
asan
d
e
d
rrien
fu
e
r
el
co
e
secad
y
de
es
ego,
p
cu
tien
n
tes,
lav
las
baja,
te d
ar
ad
las
e tien
d
n
o
averías
iar
p
lim
a
u
p
le
al
lv
so
en
a
in
af
ar
p
u
No
.
o
.
o
válvulas
mangueras
una
o.
.
ed
en
etc)
se
con
e
y/o
,
e
o
tes
s
lo
o
i
as
y
,
,
-
N
al
el manu
id
Lea cu
ar la máqu
Oper
r un incen
causa
esarme los cont
No d
de lle
e
Pu
e i
d
samen
o
ad
var a u
cci
u
str
n
t
in
io o d
d
na d
especifique.
o
nes l
o
as instrucciones de seguridad.
a est
g
si
e y
a con repuestos que no son los apropiados puede
rga eléctrica.
esca
es.
l
ro
rga eléctrica, fuego, avería, deformación.
a
esc
azar alguna parte de este artefacto, a menos que
reempl
a o
l
ar
epar
e r
t
en
nt
i
o
No jalar el cordón de electricidad en un intento de desconectar el
enchufe. Agarre firmemente el enchufe para desenchufar la máquina.
El no observar estas instrucciones puede causar una descarga
eléctrica o incendio debido a un corto circuito.
Cuando este limpiando la lavadora, no aplique agua directamente
a ninguna parte de la máquina.
Esto causará un corto circuito y una descarga eléctrica.
Page 47

dentificación de Partes
Manguera de suministro
de agua *
Indicador de nivel
Tambor *
Pata ajustable
Manguera de*
drenaje para el
modelo con bomba
Manguera de*
drenaje para el
modelo sin bomba
Cable eléctrico *
Si el cable de alimentación
se encuentra dañado,
deberá cambiarse por
parte del fabricante o
de sus agentes de servicio
técnico autorizado u otra
persona calificada para
evitar potenciales peligros.
Panel de control *
Caja de detergente en
polvo y liquido
I
7
o
p
r
e
u
C
Introducción
Accesorios
Mangueras de suministro
1 de c/una para agua fría
La figura de las partes con “✽” puede ser diferente de la imagen de arriba según el modelo.
y caliente
Nota
de agua
u
Manguera de drenaje Cubierta anti-ratas (opcional)
u
Page 48

8
nformación de Función
I
Nuestra máquina propor ciona varios métodos de lavado que se adaptan a diversas
condiciones y tipos de ropa.
Lavado FUZZY (Normal)
Use este programa para el lavado diario, o sea, sábanas, toallas, camisetas. (refiérase a la página 16)
Introducción
Lavado de JEANS
Use este programa para prendas de vestir fuertemente manchadas, por ejemplo overoles, jeans. Se pueden ropas gruesas
y pesadas o aquellas que están muy manchadas, tales como jeans o uniformes de trabajo.
LIMPIEZA INTELIGENTE
Utilice esta función para obtener un mejor desempeño del ciclo de enjuague. (refiérase a la página 16)
Lavado de LANA
Se pueden lavar ropas delicadas (ropa interior, lana, etc.) que pueden dañarse fácilmente.
Las fibras de lana lavables a máquina han sido modificadas especificamente para prevenir que se dañen cuando son lavadas a
máquina. Hay telas que no están diseñadas para lavar a máquina, y se recomienda el lavado a mano, por lo que: Antes de lavar su
lana revise las instrucciones de lavado indicadas en la etiqueta de la prenda.
Cuando lave lana use un detergente líquido recomendado para lavado de lanas. La lana lavada a mano puede ser colocada en una
malla y centrifugada en la máquina lavadora para reducir el tiempo de secado. Para el proceso de secado de la lana, extiéndala sobre
una toalla en una superficie plana y a la sombra. Secar la lana fuera de los rayos directos del sol. El uso de secadoras puede causar
deterioro de la lana y deformaciones de la prenda. Algunas productos de lanas de oveja pueden ser lavados en la máquina, pero es
posible la formación de motas, (asegúrese que la prenda de lana es adecuada para lavado a máquina y no se deteriorara el material).
Si prefiere lave estos artículos a mano y colóquelos luego en la máquina para un centrifugado.
Lavado de FAVORITO
Este programa le permite almacenar las condiciones de su lavado favorito en la memoria de ciclo normal.
Lavado SILENCIOSO
Use este programa para lavar silenciosamente durante la noche. (refiérase a la página 20)
(refiérase a la página 16)
(refiérase a la página 16)
(refiérase a la página19)
Lavado de acuerdo a las condiciones de la ropa
Lavado LAVADO RÁPIDO
Se puede seleccionar el lavado LAVADO RÁPIDO para lavar ropa poco manchada o de menos de 2 kg en un tiempo corto. (refiérase a la página 16)
Lavado REMOJO
El lavado de Remojo puede seleccionarse para lavar ropa muy sucia remojándola en agua por algún tiempo
para quitar suciedad y tizne (refiérase a la página 18)
Otros métodos de lavado
LIMPIEZA TAMBOR
Use este programa para limpiar la lavadora por dentro, especialmente el interior y exterior del tambor. (refiérase a la página 21)
Lavado con RESERVA
El lavado con reserva se usa para diferir el tiempo de finalización de la operación.
El número de horas a ser diferido puede ajustarse por el usuario según desee. (refiérase a la página 24)
Lavado OPCIONAL
Cuando el usuario necesita sólo Centrifugado, Enjuague/Centrifugado, Enjuague, Lavado/Enjuague, Lavado,
Lavado/Enjuague/Centrifugado, Remojo/Lavado/Enjuague/Centrifugado. (refiérase a la página 23)
Page 49

9
reparación antes de Empezar el Lavado
P
Etiqueta
Busque la etiqueta de la ropa. Ésta le avisará del contenido de tejido de su vestido y en qué manera debe ser lavado eso.
*
Clasifique la lavandería que pueda ser lavado al mismo cíclo de lavado, misma temperatura del agua y misma velocidad
de centrifugado.
Clasificación
Para obtener el mejor resultado, los tejidos diferentes se necesitan ser lavado en modos diferentes.
• Suciedad (Pesada, Normal, Ligera) : Separe las ropas de acuerdo con el tipo y la intensidad de sucidad.
• Color (Blancos, Claros, Obscuros) : Separe los tejidos blancos desde los tejidos en colores.
• Pelusas (Productores de Pelusas, Coleccionistas de Pelusas) : Separe los productores de pelusas desde los
coleccionistas de pelusas.
Productores de Pelusas : Tejido Terry, Chenille, Toallas, Pañales
Coleccionistas de Pelusas : Tejidos Sintéticos, Pana, Presión Permanente, Medias
Revisión antes de cargar
• Revise todos los bolsillos para asegurar que estén vacíos. Los artículos como clavos, horquillas, fósforos, plumas, monedas y
llaves pueden provocar un daño a su lavadora y a su lavandería.
• Repare cualquiera ropa rasgada y los botones perdidos. Las rasgaduras o los agujeros pueden ser agrandados durante el lavado.
• Quite los cinturones, adornos metálicos, etc. para prevenir el daño a la máquina o a su ropa.
• Pre-lave la suciedad y las manchas.
• Asegúrese que la ropa es lavable con agua.
• Revise las instrucciones para el lavado.
• Saque de los bolsillos los pañuelos de papel.
PRECAUCIÓN
No lave o seque por centrifugado ningún artículo etiquetado o que se sabe que es a prueba de agua o resistente al agua, aún cuando
la etiqueta de cuidados del producto permita usar lavadora. El no seguir estas instrucciones puede resultar en da
su lavadora y/o propiedad como resultado de la vibración anormal de la lavadora.
- Ejemplos de artículos a prueba de agua o resistente al agua incluyen ciertos tapetes para colchón, fundas para colchones, equipo para la lluvia,
equipo para acampar, ropa para esquiar, equipo para exteriores y artículos similares.
Pre-lavado de la suciedad y las manchas
• Prelave los cuellos y puños de camisa con el uso de un producto para pre-lavado o un detergente en líquido al poner la lavandería dentro de la máquina. Antes de iniciar el lavado, trate algunas manchas especiales usando la pastilla, el detergente en líquido o una pasta
de agua y detergente en gránulo.
• Use el eliminador de suciedad y manchas del tipo pre-tratado. Lave las manchas LO MÁS PRONTO POSIBLE. Cuanto más tiempo
se quedan las manchas, tanto más difícil quitarlas. (Para las informaciones más detalladas, véase la página 13.)
Colocación de ropa
No lave el tejido que contiene las materiales inflamables (cera, producto de limpieza, etc.)
Cantidad de lavandería
El nivel de agua debe llegar hasta un nivel para cubrir la lavandería.
Ajuste apropiadamente la cantidad de lavandería para cargar.
Coloque libremente la ropa de modo que su parte superior no supere la cima del
tambor de la lavadera. Si requiere añadir más ropa una vez que se ha iniciado el
funcionamiento de la máquina, presione el botón Inicio (Start) y póngala dentro
del agua.
Cierre la tapa y pulse de nuevo el botón Inicio pare reiniciar.
Lavandería ligera y del tamaño grande
La ropa de plumas y de lana son ligeras pero de tamaño grande y fáciles a frotar. Use la red de
nilon y lávelos en poca cantidad del agua. Si se frota la lavanderia durante el ciclo de lavado, ésta
puede llegar a dañarse. Use un detergente en solución para evitar la acumulación de este.
Ropa larga
Use la red de nilón para los artículos largos y delicados. Para ropa larga o con cuerdas largas, la red evitará el
enredo durante el lavado. Cierre la cremallera y abroche el corchete y la cuerda para asegurarse de que estos
artículos no hagan rasgones a otra ropa.
※ La red de nilón no será suministrada por LG.
ñ
o severo para sus prendas,
Advertencia
Riesgo de Incendio
Nunca ponga dentro de la carga artículos que
estén mojados con gasolina u otros productos
inflamables.La lavadora no puede limpiar perfectamente la gasolina.
No seque cualquier ropa que ha tenido contacto
con aceite (incluyendo el aceide comestible).
De no observar esta advertencia, puede haver
el riesgo de una explosión, incendio o incluso
la muerte.
Antes de comenzar el lavado
Page 50

10
so del Agua, Detergente, Blanqueador y Suavizante
U
Uso del Agua
Cantidad de Agua
• Este aparato detecta automáticamente la cantidad de ropa, ajustando el nivel de agua
y la cantidad apropiada de detergente.
• Cuando usted seleccione un programa de lavado, el nivel de agua y la cantidad de
detergente (a usar) serán mostrados en el panel de control.
• La tabla que aparece a la derecha de esta página muestra la cantidad de agua.
• La cantidad de una copa del diagrama es de unos 40 g del detergente concentrado.
Antes de comenzar el lavado
Temperatura del Agua
• La máquina ajusta automáticamente la temperatura apropiada según el programa de lavado.
• Usted puede cambiar la temperatura del agua pulsando el botón TEMP. DEL AGUA (WATER TEMP).
• La temperatura del agua afecta a la eficiencia de todo tipo de aditivos de lavandería y, por consecuencia, al
resultado del lavado. Recomendamos las temperaturas siguientes de acuerdo con el tipo de tejido :
- Caliente 49 - 60 ˚C (120 - 140 ˚F) Artículos blancos, pañuelos, ropa interior y los artículos con
suciedad pesada y no decolorables.
- Tibia 29 - 40 ˚C (85 -105 ˚F) La mayoría de la lavandería
- Fría 18 -24 ˚C (65 -75 ˚F) Solamente la lavandería de color claro con la suciedad ligera.
• Para el lavado con agua fría, se necesita utilizar pasos adicionales, tales como :
-Ajuste la cantidad de detergente y pre-disuleva el detergente en el agua caliente.
-Pre-trate las manchas.
-Remoje los artículos con suciedad pesada.
-Use el blanqueador apropiado.
* La temperatra inferior a 18 ˚C (65 ˚F) no va a activar los aditivos de lavado y probablemente causará pelusas,
residuos, lavado no perfecto, etc. Por añadidura, los fabricantes de detergente y las etiquetas de la ropa definen
el agua fría como el de 26 - 29 ˚C (80 - 85 ˚F). Si el agua esté demasiado fría para sus manos, el detergente no
se activará ni limpiará efectivamente.
Atención
Si el agua contiene una alta cantidad de hierro, la lavandería podría tornarce amarillenta enteramente o manchada o
rayada en color naranja o marrón. El hierro no es siempre visible. Así que la instalación del suavizante del agua o
un filtro de hierro será necesaria en casos graves.
Usando el cajón del dispensador
El cajón del dispensador tiene 2 compartimientos:
• Para suavizante líquido de telas
• Para detergente líquido o en polvo
El dispensador automáticamente agrega en el ciclo correcto tanto el detergente como el
suavizante.
1. Para abrir, jale lentamente el cajón del dispensador hasta que se detenga.
2. Después de agregar el detergente y el suavizante, cierre lentamente el cajón. Si se
cierra demasiado rápido, puede vaciarse antes de tiempo el contenido de este.
• Evite salpicar o llenar demasiado el dispensador ya que esto puede ocasionar que se
derramen tanto el detergente como el suavizante antes de tiempo.
Al terminar el ciclo, puede encontrar agua en el compartimiento.
Esto es un procedimiento normal en la operación de lavado.
NOTA: No use cloro en el cajón del dispensador.
Page 51

Uso de Detergente
Detergente
Siga las instrucciones del paquete de detergente. El uso de poca cantidad de detergente causará problemas
del lavado.
Use más detergente si usted tiene agua dura, gran cantidad de ropa o suciedad causada por el aceite o
temperatura baja del agua.
Selección del detergente correcto
Recomendamos el uso de detergente doméstico, (en polvos, líquido o concentrado). El copo de jabón o
los polvos granulados de jabón no deben ser usados en su lavadora. Cuando usted quiere lavar las lanas,
recuerde que debe usar el detergente apto para el lavado de lanas.
Uso de Detergente
Cuánta cantidad de detergente
Cuando usted seleccione el programa de lavado, el nivel de agua y la cantidad de detergente (a usar) serán mostrados en el panel
de control. La cantidad de una copa del diagrama es de unos 40 g del detergente concentrado.
La cantidad correcta de detergente será variable dependiendo de la intensidad de suciedad de su lavandería (las mezclillas y las
ropas del trabajo probablemente neceitarán más detergente, mientras que las toallas necesitarán menos.)
Para los detergentes líquidos y concentrados, siga las recomendaciones del fabricante de detergente.
Nota : Para confirmar que usted está usando una cantidad correcta de detergente, abra un poco la tapa del tambor
durante el proceso de lavado. Allí debe haber una capa escasa de espumas sobre la superficie del agua. Una gran cantidad
de espumas parecería bien aparentamente, pero ésta no sirve para limpiar su lavandería. Sin espuma quiere decir que no
se ha usado bastante detergente: la suciedad y las pelusas pueden pegarse de nuevo a la ropa o a la máquina.
Si usa el detergente en cantidad excesiva, el enjuague no será suficiente para limpiar la ropa. Asi mismo, esto puede
provocar una contaminación del medio ambiente, por lo tanto es recomendable usar el detergente apropiadamente.
11
Antes de comenzar el lavado
Agregar detergente
Agregar la cantidad adecuada de detergente en el compartimiento.
El detergente es llevado por el agua a través del dispensador al principio de lavado.
La cantidad de detergente debe ajustarse de acuerdo a la temperatura del agua, tipo de lavado, tamaño y suciedad
de la carga. Evite usar demasiado detergente en su lavadora ya que puede ensuciarla y dejar residuos en la ropa.
Nota : Usando detergente en liquido
- Si usa el detergente en liquido, necesita disolverlo en agua y ponerlo directamente en la tina.
- No se puede programar "delay start" cuando usa el detergente en liquido.
Atención
Si no lo disuelve en agua antes de ponerlo en la tina o no lava durante mucho tiempo poniendo el detergente junto con la
ropa, la ropa se puede sufrir da
ñ
o.
Page 52

12
so del Agua, Detergente, Blanqueador y Suavizante
U
Uso Del Blanqueador
Tipos De Blanqueador
• Usar blanqueador oxigenado
• No usar blanqueador líquido
• Para más detalles, favor de consultar las instrucciones de producto.
Al Depositar El Blanqueador
Antes de comenzar el lavado
• Separar las prendas en las que utilizará blanqueador.
• Determinar la cantidad de blanqueador necesaria siguiendo las instrucciones de producto.
•
Antes de iniciar algún ciclo de lavado, favor de utilizar la cantidad de blanqueador necesaria siguiendo las instrucciones de producto.
Atención
■ Nunca verter blanqueador sin diluir directamente sobre las prendas o en la tina.
Esto podría decolorar o dañar sus prendas.
■ Nunca mezclar blanqueador con amoníaco o ácidos, como vinagre o removedor de óxido.
La mezcla de estas sustancias produce un gas tóxico que podría causar la muerte.
■ Nunca verter blanqueador líquido dentro del despachador del blanqueador.
Uso de suavizante
En caso de ser necesario, agregue la cantidad recomendada de suavizante
dentro de su dispensador.
Use solamente suavizante líquido para telas.
• No exceda el límite máximo de llenado.
Sobrepasar el límite de llenado puede ocasionar que se derrame con antici-
pación el suavizante, lo que puede ocasionar manchas en la ropa.
NOTA: No vacíe directamente el suavizante a la ropa ya que puede oca-
sionar manchas.
Favor de revisar las recomendaciones en la etiqueta para un mayor cuidado de sus prendas
Atención
■ No mezcle con detergente o blanqueador.
■ Nunca vierta directamente el suavizante de tejido a la lavandería. Eso podrá provocar las manchas a la la-
vandería.
■ No pare el lavado durante el primer centrifugado para la distribución a tiempo.
■ El lavado de opción no está diseñado para ser usado con el distribuidor de suavizante de tejido.
Scrud (Cera construida)
Scrud es un nombre dado por la cera construida la cual puede presentarse en cualquier lavado cuando el
suavizante de tejido tiene contacto con el detergente. Esta construcción no es causada por un fallo de la
máquina.
Si el scrud está se puede presentar dentro de su aparato, esto puede resultar en manchas o un olor desagradable a su ropa.
Si usted quiere usar el suavizante de tejido, le recomendamos que :
• El uso frugal de un suavizante de tejido.
• Cuando está lleno el distribuidor, no lo salpique ni lo derrame.
• Limpie el distribuidor lo más pronto pisible después de terminar el cíclo.
• Limpie regularmente su lavadora.
• El lavado con agua fría las probabilidades de construcción de cera. Le recomendamos un lavado regular con
agua caliente.
(Refiérase a la página 21 u 32)
Page 53

13
uía Específica para Quitar las Manchas
G
Advertencia
■
No use o mezcle el blanqueador líquido de cloro con otros químicos del uso doméstico tales como el líquido de limpieza del
año, eliminador de orín, ácido o los productos que contienen el amonio. Este tipo de mezclaje puede producir el humo
b
peligroso el cual puede causar una lesión seria o la muerte.
■ Para reducir el riesgo del incendio o las lesiones serias a las personas o a la propiedad, cumpla las advertencias básicas
alistadas abajo :
•Lea y cumpla todas las instrucciones escritas en los productos de eliminar las manchas.
•Guarde los productos para eliminar las manchas dentro del contenedor original con la etiqueta y fuera del alcance de los niños.
•Solamente para el uso de lavado o de utensilios.
•No combine los productos para eliminar las manchas, en especial con el amonio y el blanqueador de cloro. Puede provocar el humo
peligroso.
•Nunca lave los artículos que se han previamente limpiado, lavado, remojado o manchado por gasolina, solventes de limpieza en
seco o otras substancias inflamables o explosivas porque ellos emiten vapores que pueden ser encendidos o explotados.
•Nunca use los solventes muy inflamables como gasolina dentro de casa. Los vapores pueden ser explotados teniendo contacto con
las llamas o chispas.
Para la eliminación exitosa de manchas :
•Elimine las manchas puntualmente.
•Determine el tipo de manchas, y luego siga el tratado recomendado en el cuadro abajo de instrucciones
para eliminar las manchas.
•Para pre-tratar las manchas, use el producto de pre-lavado, detergente líquido, o una pasta hecha por el detergente granulado y el agua.
•Use el agua fría para eliminar las manchas desconocidas porque el agua caliente puede fijar slidamente las
manchas.
•Chequee las instrucciones de etiqueta al tratar las manchas para evitar el daño al tejido específico.
•Chequee el descoloramiento haciendo un test del eliminador de manchas a la costura interior.
•Enjuague y lave los artículos después de eliminar las manchas.
Eliminación de Manchas
Manchas
Cinta de adhesión, chicle, cemento de goma
Fórmula de bebé, productos lecheros, huevo
Bebida (café, té, sopa, jugo,
bebida alcohlica)
Sangre
Cera de cándela, lápiz de color
Chocolate
Suciedad en collar o en puño, cosméticos
Teñido al tejido blanco
Hierba
Grasas,aceite,alquitrán(mantequilla, grasas,
aliño de ensalada, aceite para la cocción,
gasolina de coche, gasolina de motocicleta)
Tinta
Moho, chamusquina
Barro
Mostaza, tomate
Esmalte de uñas
Pintura, barniz
Orín,decoloración del castaño
o amarillo
Betún
Aplique el hielo. Frote los excedentes. Mantega el lado manchado abajo del toalla de papel. Sature con el eliminador
de manchas pre-lavado o el producto inflamable de limpieza en seco.
Use el producto que contiene enzimas pare pre-tratar o remojar las manchas.
Pre-trate las manchas. Lave con el uso del agua fría y el blanqueador seguro para el tejido.
Enjuague con el agua fría. Frote con el jabón. O pre-trate o remoje con los productos que contienen enzimas. Lave
con el uso de blanqueador seguro para el tejido.
Frote la cera de superficie. Mantega el lado manchado abajo del toalla de papel. Reemplace con mucha frecuencia las toallas de
papel. Trate las manchas quedadas con el eliminador de manchas de pre-lavado o el producto inflamable de limpieza en seco.
Lave con la mano para quitar el solvente. Lave con el uso de blanqueador seguro para el tejido.
Pre-trate o remoje dentro del agua calurosa con el uso de productos que contienen enzimas. Lave con el uso de blanqueador seguro para el tejido.
Pre-trate con el eliminador de manchas de pre-lavado o frote con el jabón.
Use el eliminador de color en paquete. Lave con el uso de blanqueador seguro para el tejido.
Pre-trate o remoje dentro del agua calurosa con el uso de productos que contienen enzimas. Lave con el uso de blanqueador seguro para el tejido.
Quite el residuo desde el tejido. Pre-trate. Lave con el uso del agua más caliente segura para el tejido. Para las manchas y el
alquitrán, aplique el producto de limpieza en seco no-inflamable al lado revés de las manchas. Reemplace con frecuencia las
toalla de abajo. Enjuague enteramente. Lave con el uso del caliente más caliente segura para el tejido.
Algunas tintas pueden ser imposible a eliminar. El lavado puede fijar de vez en cuando las manchas de tintas. Use el eliminador de manchas de pre-lavado, alcohól transformado o el producto de limpieza en seco no-inflamable.
Lave con el blanqueador de cloro si éste sea seguro al tejido. O, vierta el blanqueador el oxígeno y el agua caliente antes del
lavado. El tejido mal suavizado puede ser dañado permanentemente.
Quite el barro seco. Pretrate o vierta con el producto que contiene enzimas.
Pre-trate con el eliminador de manchas de pre-lavado. Use con el blanqueador seguro para el tehido.
Puede ser imposible quitar. Mantega el lado manchado abajo del toalla de papel. Aplique el esmalte de uñas al lado revés de
manchas. Repite, reemplace con frecuencia las toallas de papel. No se use sobre los tejidos de acetato.
BASADO DEL AGUA : Enjuague el tejido en el agua fría mientras que esté mojada la mancha. Lave. Una vez esté seca la pintada, ésto no puede ser
quitado. BASADO DEL ACEITE Y BARNIZ : Use el solvente recomendado en la etiqueta. Enjuague enteramente antes del lavado.
Para las manchas, use el eliminador de manchas seguro para el tejido. Para la decoloración de la lavandería entera, use el detergente
de fosfato y el blanqueador de no-cloro. No se use el blanqueador de cloro porque esto puede intensificar la decoloración.
LÍQUIDO : Pre-trate con una pasta de detergente granulado y el agua. PASTA: Frote el residuo el tejido. Pro-trate con el
eliminador de manchas demanchas de pre-lavado o el producto de limpieza en seco no-inflamable. Frote el detergente dentro
del area húmeda, lave con el uso del blanqueador seguro para el tejido.
Eliminación de Manchas
Antes de comenzar el lavado
Page 54

14
unción de cada botón
F
Botón de Temperatura de agua
• Úselo para seleccionar la temperatura del agua. Presionar este botón le permite seleccionar
Fría
▶
Tibia (Caliente y Fría)▶ Caliente▶ Fría.
respectivamente.
(Indicación de cantidad de detergente)
• Úselo para ajustar el nivel de agua que necesite ; la
cantidad de detergente adecuada se muestra al lado del
nivel de agua en el diagrama Agua-Detergente.
El nivel de agua es seleccionado automáticamente en los
programas FUZZY(normal) y JEANS
• Los siguientes ajustes se indican cuando se presiona el
botón :7
Botón de nivel de agua
▶ 8 ▶ 9 ▶ 10 ▶ 1 ▶ 2 ▶ 3 ▶ 4 ▶ 5 ▶6 ▶ 7
Antes de comenzar el lavado
PRE-SECADO
• Este boton se utliza para operar la funcion de secado de su lavadora.
• La duracion del periodo de secado se
presenta en la pantalla como sigue, esto
a medida que se oprima el boton.
60 ▶ 90 ▶ 120 ▶ 60
• Presiona el botón por 3 segundos para
seleccionar la función y presiona el
botón de encendido para cancelarla.
(refiérase a la página 22)
Potencia de
Lavado
•Utilice este botón para ajustar
la fuerza del chorro de agua.
•Si se pulsa este botón, Se
efectuará un ciclo [Normal ▶
Intensa ▶ Suave ▶ Normal]
•La fuerza de la corrente de
agua puede ajustarse en
cualquier momento del
lavado. Al proncipio .
conienza con [Normal]
Nota
* Para optimizar el programa de lavado, se puede cambiar el tiempo de lavado, pudiéndose aumentar en 8 min como
máximo, o disminuirlo en hasta 4 min
* Si la cantidad de detergente puesto es superior a la cantidad standard, para aumentar el ciclo de enjuague la
lavadora agrega enjuague adicional en forma automática, y el tiempo restante se puede aumentar.
* El estándar detectado por el sensor que cambia el algoritmo es fijado por el estándar normal.
Puede no ser igual al hábito de lavado de un usuario específico. Por lo tanto, no importa que el usuario lo utilice de
acuerdo a sus propias preferencias.
Secar Tina
•Úsalo cuando quieras secar la
tina vacía después de lavar.
•Para encender/cancelar(la
función) mantén presionado el
botón de lavado y enjuague
simultáneamente.
(refiérase a la página 22)
Función de bloqueo para niños
• Úselo para bloquear o
desbloquear los botones de
control para evitar que los ajustes
sean cambiados por un niño.
Para bloquear, presione los
botones ENJUAGUE y
CENTRIFUGADO
simultáneamente y para
desbloquear presiónelos una vez
más durante el lavado.
(refiérase a la página 25)
Botón de Lavado - En-
juague - Centrifugado
• Se usa para cambiar el tiempo del lavado y el
tiempo de enjuague y centrifugado.
• Para cambiar estos programas hágalo después
de presionar el botón de inicio/pausa.
• El tiempo aumenta cuando se oprime el botón.
• Remojo es utilizado para remover manchas
antiguas o difíciles. Usted puede cambiar el
tiempo de lavado después del remojo
• Escoja 1 min de centrifugado para evitar que
se marquen los pliegues.
Page 55

15
Antes de comenzar el lavado
Tiempo restante, Inicio Demorado(Reservación),
Indicación de Alarma
Tiempo restante - Durante la operación, el tiempo restance es indicado.
•
• Indicación de Inicio Demorado (Reservación) - Cuando el programa inicio demorado
(reservación) es seleccionado, éste indica el tiempo de inicio.
• Indicación de alarma - Cuando ocurre un error, um mensaje de error aparece para indicar
la condición no normal. Por ejemplo,
Botón de reserva
• Utilice esta función para el lavado
retardado.
•
Úsela para establecer el tiempo de retardo.
• Si se pulsa este botón, se efectuará
un ciclo de [3
▶ 14 ▶ 16 ▶ ... 46 ▶ 48 ▶ 3]
horas. Podrá establecerse un retardo
máximo de 48 horas.
• Para cancelar el tiempo de retardo,
apague el interruptor de alimentación.
(refiérase a la página 24)
▶ 4 ▶ 5 ▶ ... 11 ▶ 12
DE indica que la tapa está abierta.
Botón de programa
• Úselo para seleccionar el programa de
lavado.
• Este botón le permite seleccionar 8
programas diferentes para diversas clases de
ropa y de suciedad.
• Al comienzo, la luz se enciende en Fuzzy y,
al presionar el botón, los programas
se seleccionan como FUZZY(Normal) ▶
LANA▶ LAVADO RÁPIDO ▶ JEANS
▶ LIMPIEZA INTELIGENTE ▶
SILENCIOSO ▶ FAVORITO ▶
LIMPIEZA TAMBOR ▶ FUZZY(Normal)
Visualización de
la función SMATDIAGNOSIS
• Indica el sitio donde ubicar el teléfono a
fin de recibir la senal en caso de problema.
Encendido Botón
(Apagado Automático)
• Úselo para apagar o encender la
lavadora.
• Se repite encendido apagado al
persionar el botón.
• La energía se apaga automáticamente
unos 10 s después de que el lavado ha
terminado.
Botón Inicio / Pausa
• Úselo para iniciar o detener
el proceso de lavado.
• El inicio y la pausa se
repiten al presionar este
botón.
TM
* El sensor de cantidad de detergente detecta en base a detergente en polvo sintético. Si usted coloca detergente
líquido o uno natural o uno muy fuerte, la capacidad de detección del sensor puede disminuir.
* Debido a que la capacidad de detección del sensor puede disminuir al usarse por mucho tiempo, use periódicamente
la función Limpieza Tambor para mantenerlo limpio
* Aun cuando el usuario cambie el nivel/temperatura del Agua en un Programa FUZZY (Normal), el sensor
funcionará igualmente. El programa del sensor puede diferir de acuerdo a los modelos.
* Según el modelo de la máquina, la figura del panel de control puede ser diferente.
Page 56

16
rogramas de Lavado
P
Programas de
Lavado
Agregue
la ropa a
lavor
Agregue el
detergente.
(Lavado Normal)
En este modo se puede realizar un
lavado normal. En el lavado fuzzy, la
Programas de Lavado
máquina selecciona automáticamente
las condiciones más propiadas para la
ropa en una operación. Para el lavado
fuzzy, un sensor detecta la cantidad de
ropa y fija las más apropiadas
características de potencia de lavado,
tiempo de lavado, número de enjuagues
y tiempo de centrifugado.
Éste es un método de lavado para
géneros fácilmente dañables, tales
comor ropa interior y lana. Antes de
lavar su ropa de lana, verifique la
etiqueta de advertencia para las
instrucciones de lavado (lave sólo
ropa lavable en agua)
Use este modo cuando lave
ropa ligeramente manchada,
por un corto tiempo.
Se recomienda un peso por
carga de lavado inferior a 2 kg
• Presione el
botón
PROGRAMA
para
seleccionar
LANA.
•
Seleccione el
programa
LAVADO
RÁPIDO
Panel de
Control.
•
Se indica la cantidad
apropiada de detergente
al lado del nivel de agua
de Agua-Detergente se
agrega de acuerdo a las
instrucciones de uso del
detergente.
• Cuando lave ropa de lana use
un detergente suave
recomendado para lavar
lana.Use la cantidad
apropiada de detergente
marcada junto al nivel de
agua de agua-detergente o la
indicada en las instrucciones
de uso del detergente.
Use detergente neutral
apropiado para el lavado.
•
Se indica la cantidad
apropiada de etergente al
lado del nivel de agua de
en el
Agua-Detergente o se
agrega de acuerdo a las
instrucciones de uso del
detergente.
Se puenden lavar fácilmente
Jeans de diferentes tamaños.
Use esta función para aumentar el
desempeño de enjuague.
Puede lavarse ropa interior y de
bebé.
Este programa es adecuado para
personas con alergias o piel
delicada.
•
Seleccione el
programa JEANS
en el Panel de
Control.
• Seleccione el
programa de
LIMPIEZA
INTELIGENTE
en el panel de
Control
Page 57

• El pulsador gira por 8 s
para detectar la carga
de lavado.
• Luego se mostrará el
nivel de agua y la
cantidad.
Cierre la tapa. Finalización Precaución & Nota
• Controlar el NIVEL DE AGUA cuando el agua
permanece en el tambor o poniendo la ropa
mojada antes de anunciar el lavado aumentará
• El agua se suministrará por
2 min después del
inicio del lavado
para suplir el agua
que ha absorbido la
ropa.
•
Cuando termina el
programa de
lavado, el zumbador suena por 10
s antes de que la
energía eléctrica se
apague automáticamente.
el NIVEL DE AGUA.
• En caso de ropa voluminosa y liviana,el nivel de
agua puede ser bajo.
• Son posibles alteraciones de agua caliente/fría y
de nivel de agua durante la operación. (refiérase
a la página 14)
• Cuando fije el NIVEL DE AGUA manualmente, no
seleccione el nivel de agua bajo Medio porque puede
dañar la ropa. Cuando se lava con agua caliente, la
ropa se quede dañar (El agua suministrada será
siempre fijada en Fría). Asegúrese de que la carga de
ropa sea menor de 2,0 kg
• Para evitar un daño de la ropa, se fija un centrifugado
libre de arrugas. Por lo tanto, el centrifugado puede
ser débil y la ropa puede contener algo de agua, pero
eso es normal. El lavado con remojo no puede ser
seleccionado para el programa de lavado de lana.
• Si se selecciona el lavado de Lanas, se fijará
automáticamente el Suave.
17
Programas de Lavado
•
Cuando la presión estática del agua es
más que 2kg/cm
RÁPIDO
2
el ciclo
estará dentro de 19 min
LAVADO
Page 58

18
minmin min minminmin min min min min min min min
Lamp
Off
avado de Remojo
L
Use esta modalidad para lavar prendas normales, o gruesas y pesadas, que estén
excesivamente sucias. El modo Remojo se puede usar con los programas FUZZY o JEANS
o LIMPIEZA INTELIGENTE o SILENCIOSO o FAVORITO.
1
Presione el botón ENCENDIDO(AUTO OFF) para encender la lavadora.
Programas de Lavado
2
Presione el botón
3
Presione el botón LAVADO para seleccionar el programa de remojo
4
Agregue detergente
5
Agregue la ropa para lavar y presione el botón de INICIO/PAUSA
6
Cierre la tapa.
Terminación
PROGRAMA para seleccionar el programa de lavado.
• Mantenga presionado el botón de LAVADO hasta que se
encienda la lámpara en ‘REMOJO’ y ‘LAVADO’ simultáneamente
como en el siguiente imagen.
• El programa de remojo funciona únicamente cuando el tiempo de
remojo es 40, 50 o 60 min
• La cantidad apropiada de detergente marcada cerca del
NIVEL DE AGUA de AGUA – DETERGENTE.
• El NIVEL DE AGUA y la cantidad de detergente a ser usado, será
mostrado y será suministrado el agua
• El agua será suministrada por 2 min después de iniciar el lavado para
suplementar el agua que la ropa haya absorbido.
• Cuando el programa de lavado termine, el sonido será escuchado por
10 s antes de que la Energía se apague automáticamente
Nota
• Orden de la distribución de Remojo-Lavado
Remojo – Lavado
• Seleccione el tiempo de remojo en 40 min 50 min o 60 min (incluyendo el tiempo de lavado)
presionando repetidamente el botón de Lavado.
• Si es necesario, seleccione el tiempo de Enjuague y el tiempo de Spinning (secado) presionando
los botones de Enjuague o Centrifugado hasta obtener los tiempos deseados.
Page 59

avado de Favorito
L
Presionar el botón Favorito le permite almacenar las condiciones de lavado favoritas en la
memoria de ciclo normal y luego re-llamarlo para usarlo en una oportunidad posterior.
1
Presione el botón ENCENDIDO(AUTO OFF) para encender la lavadora.
2
Seleccione el programa FAVORITO.
Seleccione sus condiciones de lavado preferidas.
3
• Presione el botón TEMP. DE AGUA para seleccionar la temperatura
del agua de lavado.
• Presione el botón NIVEL DE AGUA para seleccionar el nivel de
agua.
• Presione el botón LAVADO, el ENJUAGUE y CENTRIFUGADO
para seleccionar los tiempos de lavado, de enjuague y de rotación
respectivamente que desea almacenar.
19
Programas de Lavado
4
Presione el botón
FAVORITO. La lavadora se apagará automáticamente después que haya
finalizado el Lavado.
Nota
Para re-llamar su PROGRAMA FAVORITO.
1. Presione botón de ENCENDIDO(AUTO OFF).
2. Seleccione el ciclo FAVORITO presionando el botón PROGRAMA.
3. Presione el botón INICIO/PAUSA. Luego el ciclo de lavado se inicia.
INICIO/PAUSA para almacenar e iniciar su ciclo de lavado
Page 60

20
avado Silencioso
L
Use este programa para lavar en Silencio, especialmente durante la noche.
1
Presione el botón ENCENDIDO(AUTO OFF) para encender la lavadora.
Programas de Lavado
2
Presione el botón de
3
Agreque la ropa en el tambor.
4
Presione el botón de
5
Agregue el detergente y cierre la tapa.
Nota
• El programa Silencio toma mayor tiempo de lavado que el programa FUZZY(Normal).
• Para reducir el ruido del centrifugado, las revoluciones de la tina son más bajas que en el proceso de
centrifugado normal. Por lo tanto, la ropa queda más húmeda que en el programa normal.
PROGRAMA para seleccionar programa SILENCIOSO.
INICIO/PAUSA.
Page 61

UB CLEAN
T
Si se produce sarro en el tambor, podría manchar su ropa o producir un desagradable aroma en
su lavadora.
El sarro se puede producir dentro de cualquier lavadora cuando el suavizante de fábrica entra
en contacto con el detergente , y de acuerdo con el grado particular de suciedad o calidad del
agua a usarse; en ese caso, use este programa para limpiar el interior y exterior del tambor.
1
Presione el botón ENCENDIDO(AUTO OFF) para encender la lavadora.
2
Presione el botón PROGRAMA para seleccionar el programa
de LIMPIEZA TAMBOR.
3
Presione el botón INICIO/PAUSA.
• El tiempo remanente aparece en el indicador.
21
Opciones de función adicionales
Si va a usar blanqueador (300 ml) agréguelo 10 min después de la
4
alimentación de agua.
• No use detergente en caja.
• No coloque ninguna prenda dentro del tambor.
5
Cierre la tapa.
Nota
• Antes de usar este programa, se deben sacar las pelusas o hilachas dentro del filtro.
• Al usar este programa, no coloque ninguna prenda dentro del tambor.
• Después de usar este programa, saque la suciedad del interior del filtro.
• Después de finalizar este programar, abra la tapa de la lavadora para sacar cualquier olor irritante.
• No coloque blanqueador dentro del tambor directamente, ya que podría dañarlo.
• No deje blanqueador diluido en el interior del tambor por un tiempo prolongado, ya que puede producir
oxidación en el tambor. Se debe drenar el blanqueador remanente.
• Use este programa una vez al mes.
• No use este programa repetidamente.
• Cuando la tapa está abierta, la lavadora no funcionará, y la
señal de alarma le recordará que se debe cerrar la tapa.
Page 62

22
re-Secado
P
Presione el botón ENCENDIDO(AUTO OFF) para encender la lavadora.
1
Al pulsar el botón de aire seco durante 3 segundos, el Pre-Secado curso serán seleccionados.
2
• Cuando la función Pre-Secado sea seleccionada, otras fun-
ciones serán desactivadas.
• Si quieres cancelar la función Pre-Secado, solo presiona el
botón de Encendido.
Opciones de función adicionales
Presione el botón de INICIO/PAUSA.
3
Cuando la función
4
segundos.
Nota
■ Cuando tu seleccionas PRE-SECADO por mas de 60 minutos
1) Puedes reducir el tiempo de secado minimizando la humedad en el lavado.
2) Mantener 2 kilos de ropa o menos cerciorándose de separarla uniformemente.
3) Seleccionar 60 minutos para una carga de algodón y 120 minutos para fibras sin téticas para reducir la
humedad eficientemente.
PRE-SECADO
finalice se apagará automáticamente en 10
ecar Tina
S
Presione el botón ENCENDIDO(AUTO OFF) para encender la lavadora.
1
Cuando oprimas el botón de LAVADO y ENJUAGUE simultáneamente, el secado
2
de la tina empezará a funcionar o será cancelado.
• Cuando tú seleccionas la función Secar Tina no coloques
ninguna prenda dentro de la tina.
• Cuando la función Secar Tina sea seleccionada, otras funciones
serán desactivadas.
Presione el botón de
3
INICIO/PAUSA.
Cuando la función Secar Tina finalice se apagará automáticamente en 10 segundos.
4
NOTE
■ Cuando tú seleccionas
1) El uso de esta función reduce al mínimo la humedad ocasionada por el lavado
2) Cuando tú selecciones la función
de la tina.
3) Se sugiere usar esta función una vez por semana
Secar Tina
Secar Tina
, no pongas detergentes, suavizantes , cloro, etc dentro
Page 63

pción de Lavado
TEMP. DE AGUA
NIVEL DE AGUANIVEL DE AGUA
O
1
Cuando sólo necesite Lavado, Lavado/Enjuague o ciclos de Enjuague, éstos pueden ser
determinados manualmente.
Presione el botón ENCENDIDO(AUTO OFF) para apagar.
23
Opciones de función adicionales
2
3
Sólo Lavado
Presione el botón LAVADO
para seleccionar el tiempo
deseado.
Sólo Lavado, Enjuague
Presione el botón LAVADO
para seleccionar el tiempo
deseado.
Presione el botón ENJUAGUE
para seleccionar el tiempo
deseado de enjuague.
Puede usar esta opción para
evitar arrugas en la ropa
Presione el botón NIVEL DE AGUA para controlar el nivel de
Sólo Enjuague
Presione el botón ENJUAGUE
para seleccionar los tiempos
deseados de enjuague.
Sólo Enjuague, Centrifugado
Presione el botón ENJUAGUE
para seleccionar los tiempos
deseados de enjuague.
Presione el botón CENTRIFU-
GADO para seleccionar los
tiempos deseados de
centrifugado.
agua conforme a la cantidad de ropa a lavarse. Si no elige nada,
se determina automáticamente el nivel medio de agua.
4
Agregue la ropa a lavarse en la tina de lavado.
Sólo Centrifugado
Presione el botón
CENTRIFUGADO
para seleccionar los
tiempos deseados de
centrifugado.
Sólo Desagotar
Cuando desea sólo quitar agua,
espere hasta que el agua en la
tina de lavado se drene
completamente.
5
6
Presione el botón INICIO/PAUSA.
Agregue el detergente y cierre la tapa.
Nota
• Después de haber completado el lavado y cuando las únicas opciones seleccionadas son
Lavado, Lavado/Enjuague o Enjuague, el agua no se drenará. Si desea hacerlo, presione
ROTAR(y espere hasta que el agua en la tina se desagite completamente. Luego presione el
botón INICIO/PAUSA.
• Si no especifica el nivel de agua, se seleccionará automáticamente Medio.
• Si se selecciona solamente Enjuague, el proceso comenzará por la provisión de agua.
Page 64

24
TEMP. DE AGUA
NIVEL DE AGUA
avado con Reserva (Inicio diferido)
L
El lavado con reserva se usa para retardar el tiempo de finalización de la operación.
Las horas a ser diferido pueden fijarse por el usuario según desee.
El tiempo mostrado en el indicador es el tiempo de finalización, no el de inicio.
Presione el botón ENCENDIDO(AUTO OFF) para encender la lavadora.
1
Presione el botón
Opciones de función adicionales
2
Presione el botón de RESERVA (Retardado).
3
• Se encenderá la lámpara ‘RESERVA’ y será marcado ‘Tiempo Restante’
• Presione repetidamente el botón para fijar el tiempo de terminación deseado. Por ejemplo, para
terminar el lavado en 9 horas desde ahora, coloque el número 9 presionando repetidamente el
botón RESERVA.
Agregue detergente.
4
Agregue la ropa y presione el botón
5
6
Cierre la tapa.
Finalización.
PROGRAMA para seleccionar el programa de lavado.
• Seleccione el programa para el lavado en el panel de control.
Este programa no funcionará en los Programas
LANA y LIMPIEZA TAMBOR.
• La cantidad apropiada de detergente marcada junto al NIVEL
DE AGUA de AGUA-DETERGENTE.
• Mientras la tara esté abierta, la máquina no trabajará y una
señal dará la alarma para recordarle que cierre la tapa.
INICIO/PAUSA.
• Cuando presione el botón INICIO/PAUSA la luz destellará y se
mostrará el tiempo.
• El agua será suministrada por 2 min después del inicio del lavado
para suplir el agua que absorbe la ropa.
• Cuando termina el programa de lavado, el zumbador sonará por
10 s antes de que la energía eléctrica se apague automáticamente.
Nota
• El tiempo de finalización puede ser demorado desde 3 - 48 horas. El retardo entre 3 -12 horas puede hacerse en intervalos
de tiempo de 1 hora y para 12 hasta 48 horas, en intervalos de tiempo de 2 horas. Si se abre la tapa, la máquina no trabajará
y una señal darál la alarma para recordarle que cierre la tapa.
• Para seleccionar el tiempo de lavado, cantidad de enjuagues, tiempo de centrifugado, nivel de agua, caliente/fría o potencia
de agua, presione el botón RESERVA y seleccione la opción deseada. Luego presione el botón INICIO/PAUSA.
• Cuando la carga de ropa no pueda ser sacada inmediatamente después de que el programa de lavado finalice, es mejor
omitir el programa de centrifugado. (La ropa se arrugará si se deja mucho tiempo en la lavadora después del centrifugado.)
Page 65

tras funciones útiles
O
Función de bloqueo para niños
Si desea bloquear todos los botones para evitar que los ajustes sean cambiados por un niño, puede usar
la opción de bloqueo para niños.
25
Opciones de función adicionales
Nota
• "CJ" (bloqueo para niños) y el tiempo sobrante se muestran alternativamente en la
pantalla mientras están bloqueados.
Ver el tiempo restante
Para ver el tiempo restante para cada proceso, presione uno de los botones de LAVADO,
ENJUAGUE y CENTRIFUGADO. El tiempo restante para cada proceso aparecerá durante 1 s
aproximadamente.
Page 66

26
nstalación y Nivelación
I
Asegúrese de sacar todos los accesorios de traslado, antes de operar la máquina.
Instalación
Si su producto cuenta con aberturas de ventilación
en la base, éstas no deben de obstruirse por ningún
medio (una alfombra por ejemplo)
Advertencia
Si la lavadora esta instalada sobre una superficie dispareja, debil o inclinada, se podria producir una
vibracion excesiva, una falla en la funcion de Centrifugado, o puede aparecer error "UE" en el visor.
Esta debe colocarse sobre un piso firme y nivelado para evitar una falla en el centrifugado.
※ Instalación de la cubierta anti-roedores (opcional)
La cubierta anti roedores debe ser fijada firmemente a la parte frontal de la lavadora.
Page 67

onexión de la manguera de suministro de agua
C
Conexión de la manguera de suministro de agua a la llave
Antes de conectar la manguera de suministro de agua a la llave, revise el tipo de
manguera y escoja la instrucción correcta. Las mangueras de suministro de agua
pueden variar de acuerdo al país.
27
Instalación
Atención
La lavadora debe ser conectada a las llaves del agua usando el paquete de mangueras nuevo, y los antiguos
no deben re-utilizarse.
Page 68

28
onexión de la manguera de suministro de agua
C
Instalación
Page 69

29
Instalación
Page 70

30
onexión de la manguera de drenaje
C
Instalación
Antes de conectar la manguera de drenaje, revise modelo de manguera de drenaje
y escoja la instrucción correcta de las siguientes.
Page 71

31
étodo de puesta a tierra
M
Debe conectarse un cable a tierra.
Si el cable a tierra no está conectado, hay un peligro de golpe eléctrico causado
por la fuga de corriente de la lavadora.
Precaución
Precauciones de los Cordones de Enchufes
En la mayoría de los electrodomésticos se recomienda que sean puestos en un circuito que sea dedicado sólo para ellos;
esto significa, un solo circuito de salida el cual sólo le da energía a eseelectrodoméstico y no tiene salidas adicionales o
sucursal de circuitos (otras sucursales de circuitos). Chequear la página de las especificaciones en este manual de usuario
para estar seguro.
No se debe sobre cargar la pared de las salidas de energía. Sobrecargar la pared de salida de energía es peligroso, también
lo es tener la pared de salida de energía suelta o dañada, cordones de extensión, cordones deshilachados, o el aislamiento
de cordones dañados o rajados. Cualquiera de estas condiciones pueden resultar en un corto circuito o un incendio.
Periódicamente examine los cordones de sus electrodomésticos, y si parece que están dañados o deteriorados,
desconéctelos, deje de usar el electrodoméstico, y reemplace el cordón con otro cordón de la mismas características de un
servidor autorizado.
Proteger el enchufe y cordones de maltratos físicos o mecánicos, tales como ser doblados, retorcidos, peñiscados,
dañados con la puerta al cerrarla, o caminar por encima de los mismos. Prestarle una atención particular a los enchufes,
en las paredes de salida de energía, y el punto de donde el cordón sale del electrodoméstico.
Cuidado y Mantenimiento
Page 72

32
L
Lavado con agua fría
Cuidado y Mantenimiento
Cuando el suministro de agua al tambor no es limpio o el filtro se obstruye con partículas (arena,
piedrecillas...), limpie el filtro de la válvula de entrada ocasionalmente. La forma del cable elétrico y de
la llave de agua puede variar de acuerdo al país
Paralimpiar el filtro en la válvula de entrada
1 2
impieza y Mantenimiento
• Si usted usa siempre agua fría, le recomendamos usar agua tibia o caliente a intervalos regulares.
Ejm. Cada 5 lavados a lo menos 1 deberá ser con agua tibia
Cuando usted finalizo el lavado
• Cerrar las llaves para prevenir posibles inundaciones si se abre la manguera inesperadamente.
• Siempre desenchúfela desde el toma corriente cuando no la use.
Cierre la llave antes de apagar la energía
eléctrica. Seleccione caliente/fría y luego
presione el botón [INICIO/PAUSA] para
sacar el agua completament.
Apague la energía eléctrica
antes de desenchufar el cable
eléctrico.
Después de desconectar la
3 4
manguera de suministro de agua
saque el filtro. Luego sua una escobilla para limpiar el filtro.
Vuelva a poner el filtro después de
limpiarlo.
Limpie la bomba casing (cuando el drenado sea malo)
Coloque una toalla en el piso
1 2 3 4
bajo el casco de la bomba de
agua, ya que podria escurrir
exceso de agua.
• Cuando el filtro para pelusas se encuentre gastado, etc., póngase en contacto con un Centro de Servicio
Técnico Autorizado de LG para obtener uno nuevo.
Gire la tapa de
la bomba en el
del reloj, y tire
hacia afuera.
Tapa
Saque cualquier objeto
extrano o pelusas que
haya dentro de la bomba
y sobre el filtro.
Filtro
Vuelva a colocar la tapa. Inserte el filtro a lo
largo de las canaletas guia dentro de la cubierta
de la bomba. El filtro debe mirar hacia las
canaletas guia dentro de la cubierta de la
bomba. Luego gire fuertemente la tapa de la
bomba en el sentido de las manecillas del reloj.
Filtro
Canaletas guia
Page 73

33
impieza y Mantenimiento
L
Cuando hay un riesgo de conhelación
• Cierre el grifo y quite la Manguera del Suministro del Agua
• Elimine el agua que se queda dentro del camino de suministro del agua.
• Baje la manguera de desagüe y quite todo el agua dentro de cazoleta y la manguera de desagüe haciendo
el centrifugado.
En el caso de conhelamiento
• Quite la manguera de suministro del agua y la sumerja dentro del agua caliente de la temperatura de unos 40 ˚C
• Eche unos 2 litros del agua caliente de la temperatura de unos 40 ˚C dentro de cazoleta y la mantenga en ese estado
durante 10 min
• Conecte la manguera de suministro de agua al grifo y asegúrese si funciona bien el suministro y desagüe del agua.
Limpieza del Tambor
Manguera de Entrada
del Agua
Exterior
Vacaciones de Largo
Período
Mantenga abierta la tapa del tambor después de lavado para permitir la
evaporación de la humedad. Si usted quiere limpiar el tambor, use un
tejido suave y limpio mojado por el detergente líquido y lo enjuague.
(No se use los productos de limpieza duros o arenáceos.)
Las mangueras de la lavadora conectadas al grifo deben ser
reemplazadas cada 5 años.
Limpie inmediatamente las manchas. Limpie con un tejido mojado. No
intente a golpear la superficie de lavadora con los objetos puntiagudos.
Asegúrese si el suministro del agua está cortado del grifo. Desagüe
todo el agua desde las mangueras cuando el clima pueda ser congelado.
Cuidado y Mantenimiento
Limpieza del Interior de su Lavadora
Si usted usa el suavizante de tejido o hace regularmente un lavado con el agua fría, es muy importante
limpiar periódicamente el interior de su lavadora.
• Llene su lavadora con el agua caliente.
• Añada las dos copas de detergente en polvo que contiene fosfato.
• Haga operar durante unos minutos.
• Pare el funcionamiento de lavadora, abra la tapa y manténgala mojada durante toda la noche.
• Después de la mojada, desagüe el agua de lavadora y funcione todo el ciclo del aparato.
O bien, use el Programa Limpieza Tambor periódicamente.
No le recomendamos que usted limpie el tambor con el tejido durante este proceso.
Productos que posiblemente dañen su maquina lavadora
• Blanqueadores concentrados y zanitizador de pañales causaran daño en la pintura y componentes de su lavadora
• Solventes de hidrocarburo : ejm. Petróleo, diluyentes, etc. pueden disolver el plástico y arruinar la pintura.
(Tenga cuidado de no lavar prendas con estos solventes ellos son inflamables NO los ponga en la lavadora ni
secadora.)
• Algunos pre-tratamientos en sprays o líquidos pueden dañar el panel de control de su lavadora.
• El uso de tinturas en su lavadora puede causar manchas en los componentes del plástico. La tintura no dañara su
máquina pero nosotros le sugerimos limpiar prolijamente su lavadora. No recomendamos el uso de tinturas de
limpieza en su lavadora.
• No use la tapa de su lavadora como mesa de trabajo.
Page 74

34
so del Seguro en la Tapa
U
Usted puede usar la función de bloqueo manual si lo desea.
El bloqueo de mano es activado por un seguro deslizante bajo la tapa.
• Deslizar a la izquierda/derecha hasta que escuche un “click”.
• Hacer lo opuesto para desbloquearlo.
Cuidado y Mantenimiento
<Tapa bloqueada> <Tapa desbloqueada>
Nota
Para evitar daños, asegúrese de enganchar correctamente el seguro.
Page 75

roble
P
La mayor parte de los problemas de lavado trae los resultados tales como la
eliminación no suficiente de suciedad, manchas, residuos de pelusas y
espumas y el daño a la lavandería. Para un resultado satisfactorio del lavado,
siga las instrucciones siguientes :
PROBLEMAS
Problemas
Eliminación
insuficiente
de suciedad
Manchas
Azules
Marcas Negras
o Grises sobre
la lavandería
Manchas
Amarillas o
de Marrón
Pelusas
Residuo o detergente
Agujeros,
rasgones
Com
s
a
m
DEL
LAVADO
Causas Posibles
• Detergente no-suficiente
• Temperatura del agua
demasiado baja
• Demasiado lavandería
• Cíclo incorrecto
• Clasificación incorrecta
• No pre-tratar las manchas
• El suavizante de tejido no
diluido distribuye
directamente al tejido
• Una construcción de cera
causada por la interacción del
suavizante de tejido y el
detergente puede ser quedada y
marcada a la lavandería
• Detergente no-suficiente
• El hierro o el manganeso
dentro del agua
suministrada, pipas del
agua o calentador del
agua
• Clasificación incorrecta
• Tisú quedado en el bolsillo
• Demasiado lavandería
• Demasiado lavandería
• Detergente no-disuelto
• Uso del detergente
excesivo
• Uso incorrecto del
blanqueador de cloro
• Cremallera, corchete y hebilla
no cerradas perfectamente
• Costillas, rasgones e hilos
rotos
• Demasiado lavandería
• Degradación de tejidos
une
dora
a
v
a
L
de
s
Solución y Medidas Preventivas
• Use la cantidad correcta de detergente de acuerdo con la
cantidad de lavandería, intensidad de suciedad y la dureza del
agua.
• Use el agua calurosa o caliente para la suciedad normal.
La temperatura diferente de agua será requerida de acuerdo
con el tipo de suciedad. (Véase la página 10)
• Reduzca la cantidad de lavandería.
• Lave usando el cíclo de Vaqueros o Mojada(Remojo)
y Vaqueros para la lavandería de suciedad pesada.
• Separe los artículos muy sucios desde los poco sucios.
• Pre-trate las manchas y suciedad pesada de acuerdo con las
instrucciones mostradas en la página 9.
• Frote las manchas con el jabón. Lave.
• No llene excesivamente el distribuidor del suavizante de
tejido y no vierta directamente el suavizante de tejido líquido
al tejido.
Véase la página 12 para más instrucciones.
• Guarde las recomendaciones contra Scrud (construcción de
cera). (Vease la página 12)
• Use la cantidad correcta de detergente para la cantidad
correspondiente de lavandería, intensidad de suciedad y la
dureza del agua.
• Para recuperar el color de los artículos blancos, use el
eliminador de manchas seguro para el tejido.
• Instale el suavizanante de tejido no precipitado o el filtro de
hierro dentro de su sistema de suministro del agua para
resolver el problema.
• Antes de lavar, suministre el agua por unos minutos para
limpiar las líneas.
• Lave los productores de pelusas como toallas, flanela de
algodón separadamente de los colecionistas de pelusas como
tejidos sintéticos y saque el tisú desde los bolsillos antes de
empezar el lavado. Véase la página 9 para la clasificación de
la lavandería antes de empezar el lavado.
• No ponga demasiado lavandería.
• No ponga demasiado lavandería.
• Algunos detergentes se necesitan ser pre-disueltos, por lo
tanto, chequee las instrucciones de detergente. Intente a
pre-disolver el detergente.
• Alce la temperatura de agua usando el agua caliente segura
para el tejido.
• Use la cantidad apropiada de detergente.
• Nunca vierta el blanqueador de cloro directamente al tejido.
Véase la página 11 para añadir el blanqueador líquido.
• Cierre la cremallera, la corchete y la hebilla.
• Saque los objetos de bolsillos. Véase la página 9 para tener
cuidado antes de poner la lavandería.
• No ponga demasiado lavandería.
35
Detección de fallas
Page 76

36
roblemas Comunes de Lavadora
P
PROBLEMA DE OPERACIÓN
Síntoma Mensaje de error
Posibles causas y soluciones
Falla en el
suministro de agua
Detección de fallas
Falla en el drenaje
Falla en el
centrifugado
Puerta (tapa) abierta
• Está cerrada la llave de agua?
• Está cortado el suministro de agua?
• Están la llave o la manguera de suministro de agua
congeladas?
• Es muy baja la presión de agua o está obstruido el
filtro de la válvula de entrada con impurezas?
• Está seleccionado Caliente/Fría en Caliente cuando la
manguera está conectada a Fría?
• Está la manguera Caliente conectada a Fría?
• Está la manguera de drenaje ubicada correctamente?
• Está la manguera de drenaje doblada o puesta muy
alta?
• Está la parte interior de la manguera o la bomba de
drenaje (sólo el modelo con bomba) obstrida con
impurezas?
• Revise si la energía eléctrica se ha cortado.
• Está equilibrada la carga de lavado?
• Está la lavadora puesta en una superficie plana?
• Cierre la puerta (tapa).
Detección de nivel
anormal
Nivel de sobreflujo
anormal
Anormal de motor
Error de embrague
• Pida ayuda al servicio técnico.
Page 77

37
iagnósticointeligente
TM
D
Cierre la puerta de la lavadora, y pulse el botón de encendido.
1
•
Si manipuló otro botón o marcó antes de
pulsar el botón TEMP. DE AGUA, Apague y
vuelva a empezar desde el principio.
2
Ponga el teléfono cerca del visualizador SMART DIAGNOSIS
•
Asegúrese de que el
micrófono haga frente
al visualizador
SMART DIAGNOSIS
3
Pulse el botón TEMP. DE AGUA un largo rato para activar el diagnostico inteligente.
•
Ponga el teléfono cerca
del visualizador
SMART DIAGNOSIS
y pulse el botón TEMP.
DE AGUA un largo rato
hasta oír "tac tac tac".
Sostenga el teléfono mientras se transmiten los datos.
4
•
Mantenga el teléfono cerca des visualizador
SMART DIAGNOSIS
para el diagnostico inteligente se transmiten.
El tiempo restante para la transmisión de datos
pe visualizará en pantalla.
•
El sonido de la transmisión puede parecer irritante. Para un diagnostico apropiado, no descuelgue el teléfono.
Puede pulsar el botón de encendido para parar
la función diagnostico y el sonido.
TM
.
TM
.
TM
TM
mientras que los datos
Detección de fallas
Al acabar la transmisión de datos, escuche el resultado del diagnostico del consultor.
5
•
Al acabar la transmisión de datos, el dispositivo
se apaga automáticamente y "End" se visualiza
tras unos segundos.
Nota
SmartDiagnosis (Diagnóstico Inteligente) es una función de resolución de problemas diseñada para asistir, no
reemplazar, al método tradicional de resolución de problemas a través de llamadas de servicio técnico. La
efectividad de esta función depende de diversos factores, entre los cuales se incluyen, la recepción del teléfono
celular utilizado para la transmisión, cualquier ruido externo que pueda presentarse durante la transmisión, y la
acústica de la habitación donde está ubicada la lavadora. Por lo tanto, LG no garantiza que SmartDiagnosis
resuelva con precisieón cualquier cuestión dada.
Page 78

38
Al
Pr
An
specificación
E
Especificación
Modelo
Voltaje y frecuencia
Potencia nominal
Salida del motor
Rango de presión de Alimentación del agua
Velocidad de centrifugado
Peso del producto
Dimensiones
Capacidad de Lavado
※La especificaciones técnicas están suietas a cambios sin aviso previo.
30 - 800 kPa (0,3 kgf /cm2- 8 kgf /cm2)
632(Anchura) x 670(Profundidad) x 1 020(Altura)mm
110V, 50/60Hz
135 revoluciones por minuto
18,0kg (40 libras)
WFS1838EKD
400 W
150 W
50 kg
Page 79

emo
M
Page 80

emo
M
 Loading...