

LG WD(M)-1026(0~9)S, WD(M)-1026(0~9)T, WD(M)-8026(0~9)S, WD(M)-8026(0~9)T, WD(M)-1026(0~9)N Service Manual
...
100
WASHING MACHINE
SERVICE MANUAL
READ THIS MANUAL CAREFULLY TO DIAGNOSE TROUBLE
CORRECTLY BEFORE OFFERING SERVICE.
website : http://www.LGEservice.com
e-mail : http://LGEservice.com/techsup.html
MODEL : WD(M
)
-
1026(0~9)S
WD
(M)
-
8026(0~9)S
WD
(M)
-
1026(0~9)N
WD
(M)
-
8026(0~9)N
WD
(M)
-1026(0~9)T
WD(M)-8026(0~9)T
WD-10260(5)F
WD-80260F
CAUTION

101
2004 PRINTED IN KOREA
P/No.:3828ER3027M

2
CONTENTS
1. SPECIFICATION............................................................................................................................3
2. FEATURES & TECHNICAL EXPLANATION ................................................................................ 4
3. PARTS IDENTIFICATION ............................................................................................................ 6
4. INSTALLATION ............................................................................................................................. 7
5. OPERATION ................................................................................................................................10
6. WIRING DIAGRAM/PROGRAM CHART.....................................................................................12
7. TROUBLESHOOTING.................................................................................................................13
7-1.BEFORE PERFORMING SERVICE ....................................................................................13
7-2.TEST MODE ........................................................................................................................13
7-3.HOW TO KNOW THE WATER LEVEL FREQUENCY.........................................................13
7-4.ERROR DISPLAY ................................................................................................................14
8. ERROR DIAGNOSIS AND CHECK LIST ....................................................................................15
8-1. DIAGNOSIS AND ANSWER FOR ABNORMAL OPERATION ...........................................15
8-2. FAULT DIAGNOSIS AND TROUBLESHOOTING ..............................................................18
9. DISASSEMBLY INSTRUCTIONS ...............................................................................................24
10. EXPLODED VIEW .....................................................................................................................31
10-1. THE EXPLODED VIEW OF CABINET ASSEMBLY .........................................................31
10-2. THE EXPLODED VIEW OF CONTROL PANEL & DISPENSER ASSEMBLY..................32
10-3. THE EXPLODED VIEW OF DRUM & TUB ASSEMBLY...................................................33
APPENDIX (Replacement parts list).........................................................................................34
3
ITEM
POWER SUPPLY 220-240V~, 50Hz
PRODUCT WEIGHT 52kg 57kg 64kg
WASHING 190W
SPIN (800rpm) 300W
DRAIN MOTOR 32W
WASH HEATER 1900W 2000W
WASH 50rpm
SPIN
WD(M)-8026(0~9)S(N,T)/80260F
400/600/800rpm
WD(M)-1026(0~9)S(N,T)/10260(5)F
400/800/1000rpm
OPERATION WATER PRESSURE 0.3-10kgf/cm
2
(
30-1000kPa
)
CONTROL TYPE Electronic
3.5kg 5.0kg 7.0kg
Synthetic(1.5), Delicate(1.0) Synthetic(1.7), Delicate(1.5)
Synthetic(3.0), Delicate(2.0)
Wool(1.0), Hand Wash(1.0) Wool(1.5), Handwash(1.5) Wool(2.0), Handwash(2.0)
Quick 30(1.0) Quick 30(1.5) Quick 30(2.0)
DIMENSION
600mm(W)360mm(D)850mm(H)600mm(W)440mm(D)850mm(H)600mm(W)550mm(D)850mm(H
)
WASH PROGRAM
Cotton, Synthetic, Delicate, Wool, Hand Wash, Quick 30, Rinse+Spin, Drain
OPTION Pre Wash, Rinse+, Crease Care, Intensive
DOOR SWITCH TYPE Bi-Metal type
WATER LEVEL 9 steps
(
by sensor
)
RESERVATION From 3 hours to 19 hours
SENSING OF THE LAUNDRY AMOUNT Adopted
FUZZY LOGIC Adopted
DISPLAY OF THE REMAINING TIME Adopted
ERROR DIAGNOSIS 10 items
POWER AUTO OFF Adopted
CHILD LOCK Adopted
AUTO RESTART Adopted
1. SPECIFICATION
ELECTRICITY
CONSUMPTION
REVOLUTION
SPEED
WASH CAPACITY
WD(M)-1026(0~9)T
WD(M)-10260(5)F
WD(M)-8026(0~9)T
WD(M)-80260F
WD(M)-1026(0~9)S
WD(M)-8026(0~9)S
WD(M)-1026(0~9)N
WD(M)-8026(0~9)N
4
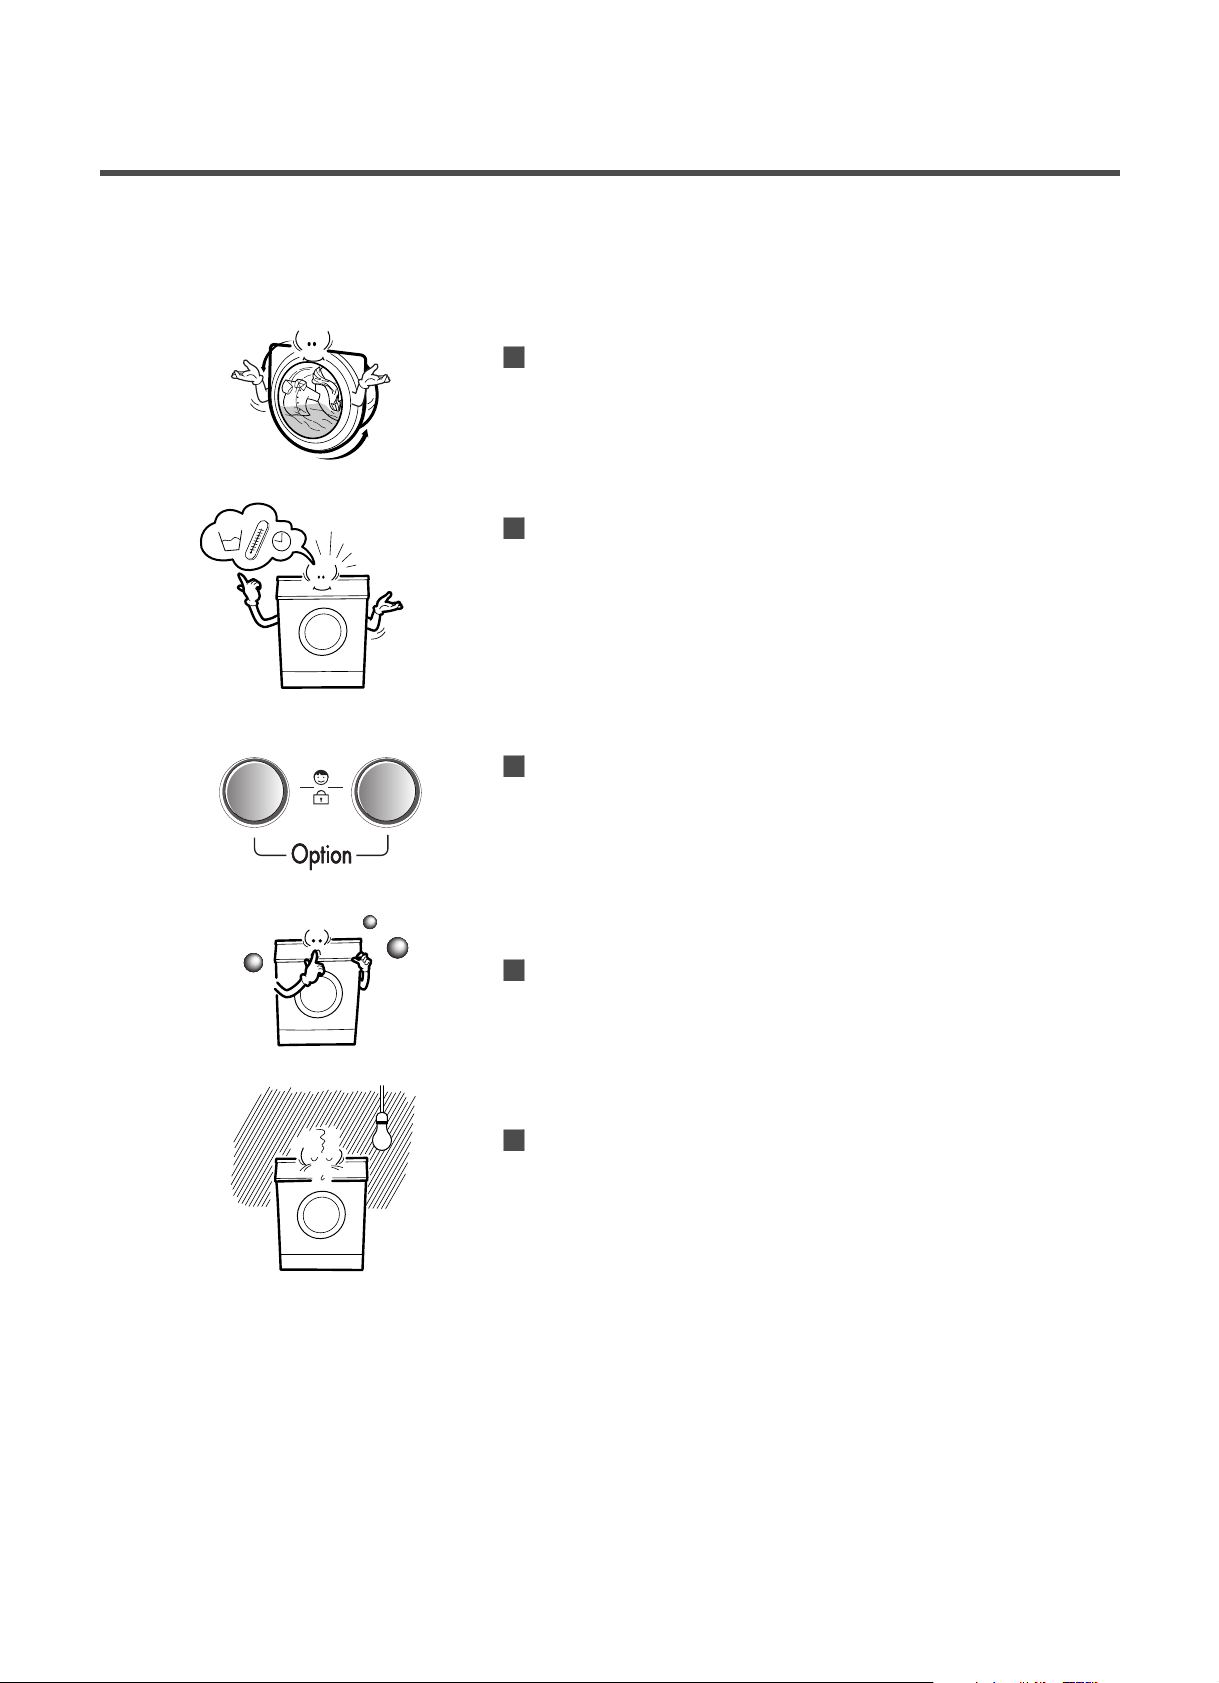
Protection against creases
With the alternate rotation of the drum, creasing in the laundry
is minimized.
More economical by Fuzzy Logic System
FUZZY Logic System detects the amount of load and water
temperature, and then determines the optimum water level
and washing time to minimize energy and water
consumption.
Child-Lock
The Child-Lock system has been developed to prevent
children from pressing any button
(except Power button)
to change the programme during operation.
Low noise speed control system
By sensing the amount of load and balance, automatical
distributes load evenly to minimize the spinning noise level.
Auto Restart
Although the washing machine is turned off by a power failure,
it restarts automatically where it stopped when power is
supplied again. and it will be the same the machine is
unplugged and is plugged in again.
2. FEATURES & TECHNICAL EXPLANATION
2-1.FEATURES
5
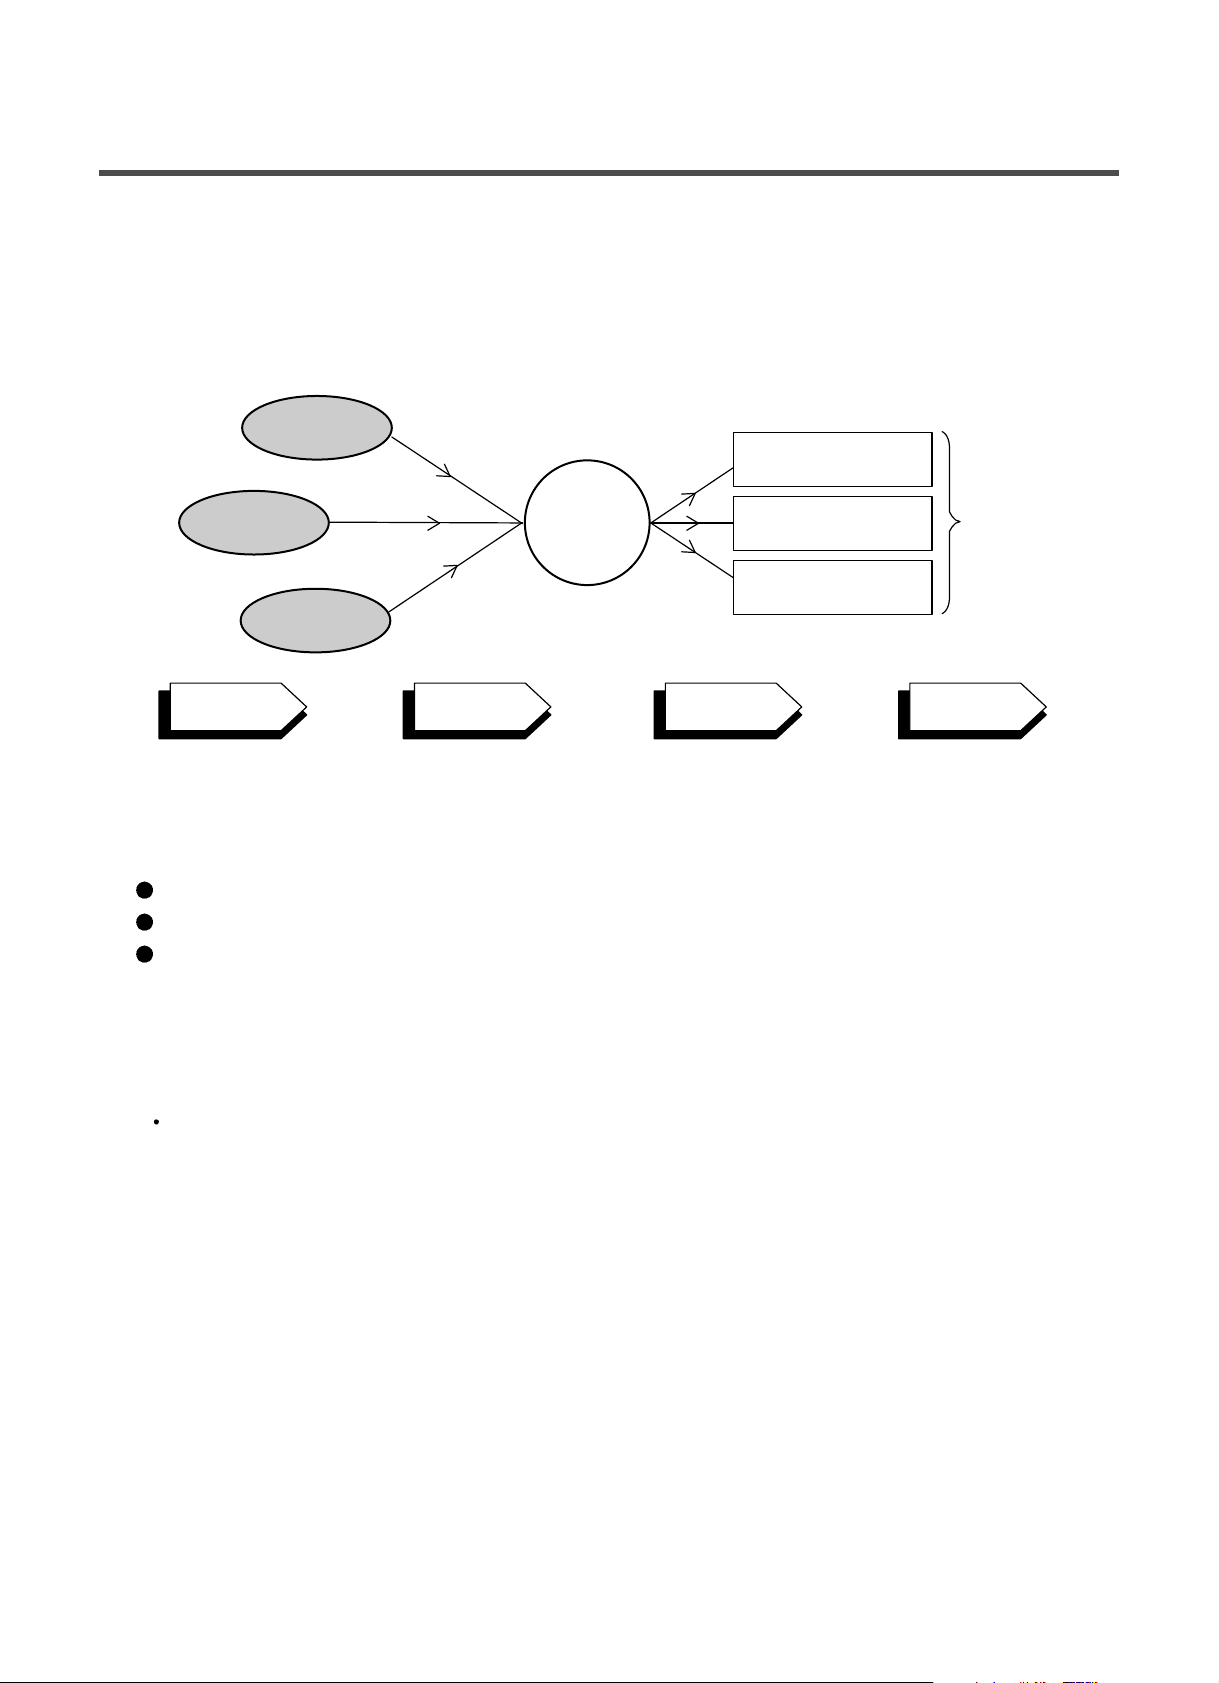
2-2.DETERMINE WASHING TIME BY FUZZY LOGIC
To get the best washing performance optimal time is determined by sensing of water temperature,
selected washing temperature and laundry amount.
2-3.WATER LEVEL CONTROL
This model adopts a pressure sensor which can sense the water level in the tub.
When the water level reaches to the preset level the water supply is stopped, then the washing program proceeds.
Spinning does not proceed until the water in the tub reduces a certain level.
2-4.THE DOOR CAN NOT BE OPENED
While program is operating.
FUZZY
LOGIC
laundry
amount
selected
washing
temperature
water
temperature
washing time
rinse time
spin rhythm, time
the best
washing
performance
SENSING
PROCESSING
DETERMINATION
EFFECT
6
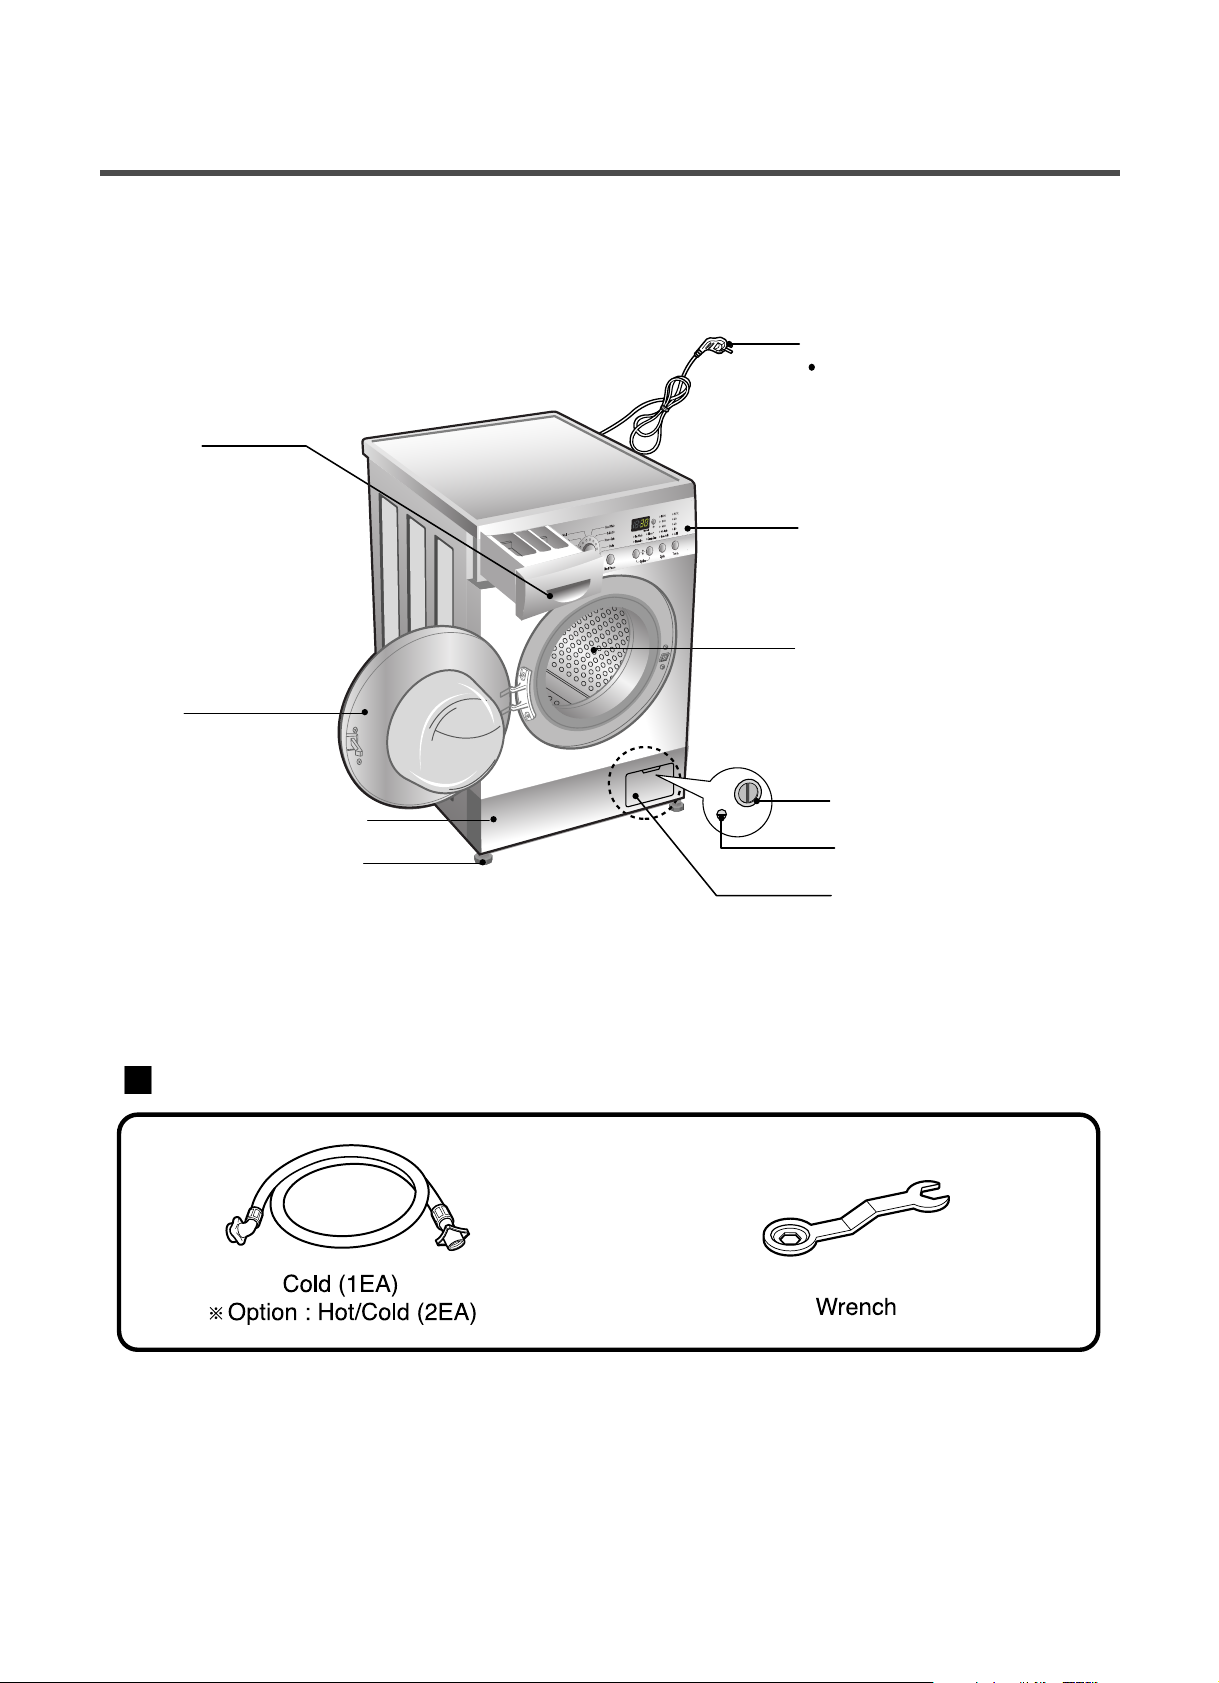
3. PARTS IDENTIFICATION
Power plug
Control panel
Door
Lower cover
Adjustable feet
(For detergent and
fabric softener)
Drawer
Drum
Lower cover cap
Drain pump filter
Drain plug
If the supply cord is damaged,
it must be replaced by the
manufacturer or its service agents
or a similarly qualified person in
order to avoid a hazard.
ACCESSORIES

7
Before servicing ask the customer what the trouble is.
Check the adjustment (power supply is 220-240V, remove the transit bolts....)
Check the troubles referring to the troubleshooting.
Decide service steps referring to disassembly instructions.
Then, service and repair.
After servicing, operate the appliance to see whether it works O Kor NOT.
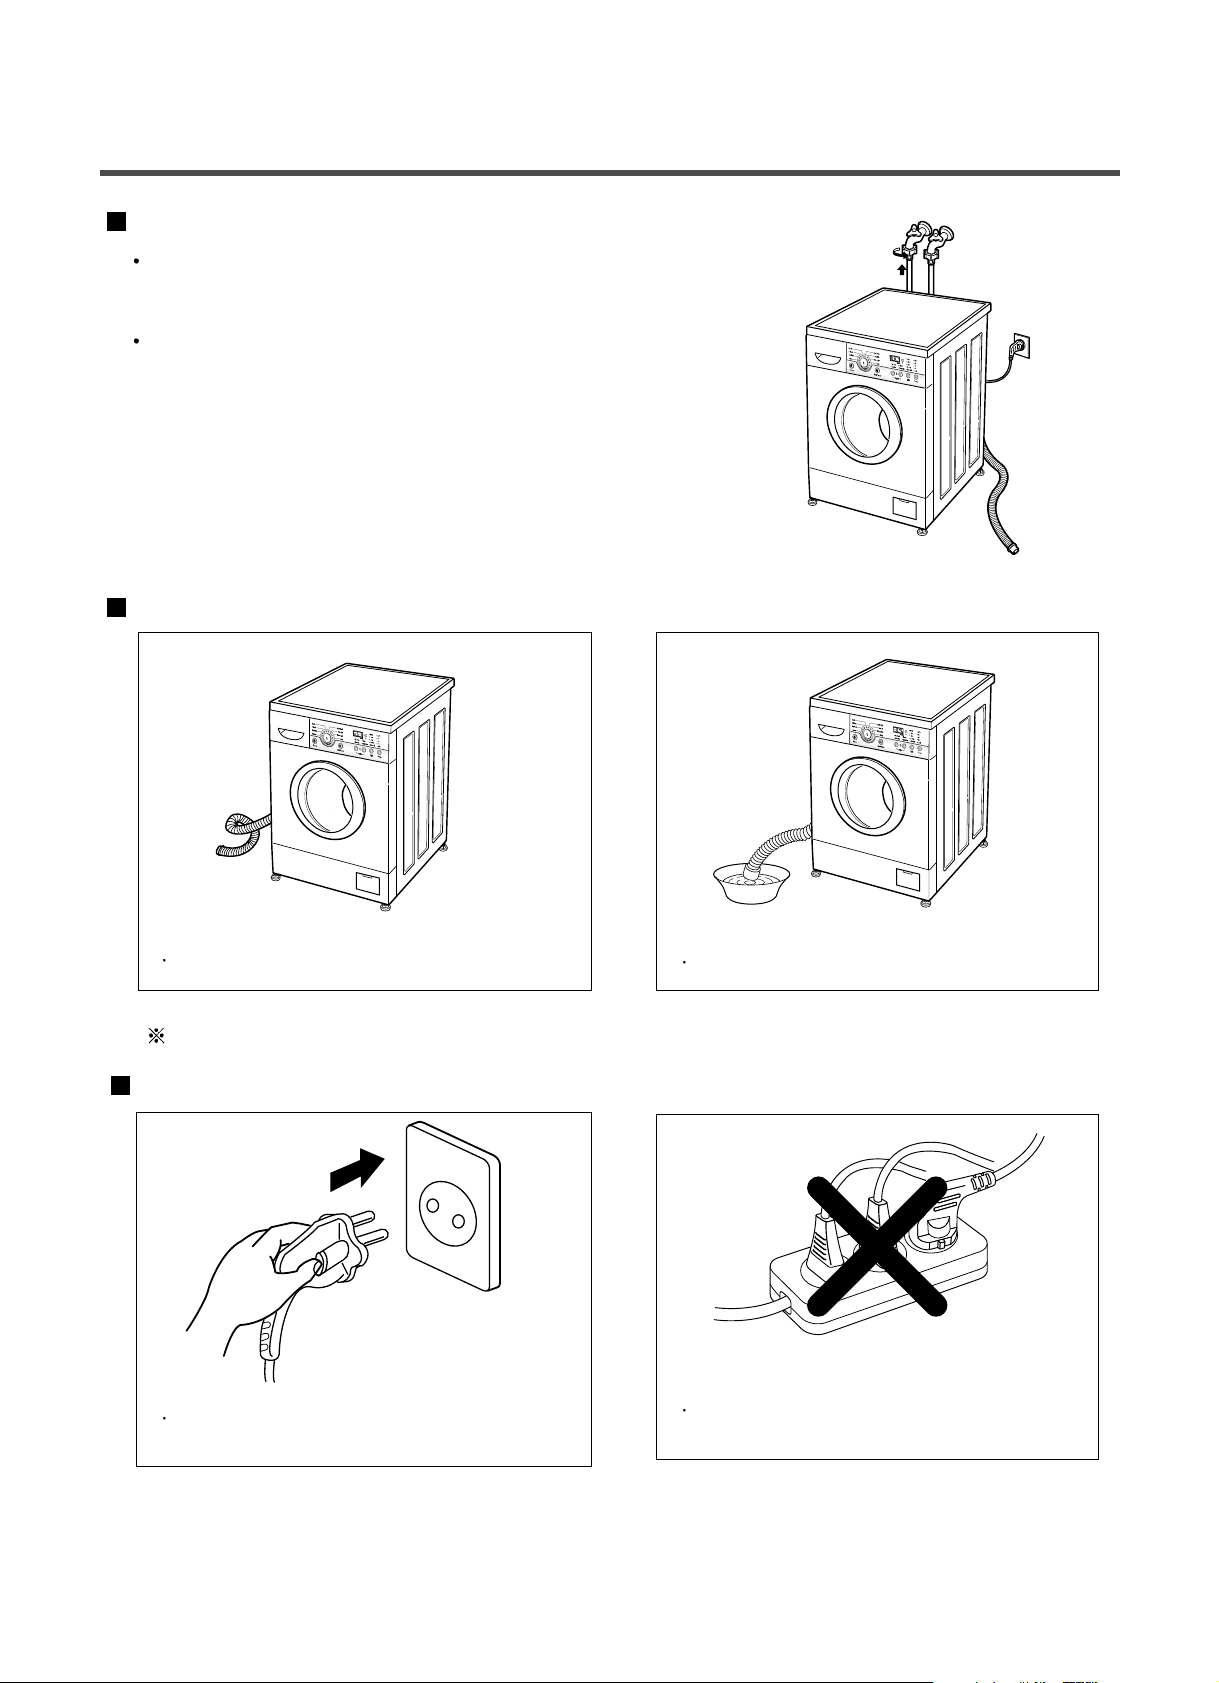
STANDARD INSTALLATION
The appliance should be installed as follows.
REMOVE THE TRANSIT INSTALL THE APPLIANCE ADJUST THE
BOLTS ON FLAT AND FIRM SURFACE HORIZONTAL
Remove the transit bolts Turn the adjustable feet to
(4EA:
) with supplied wrench. set the appliance horizontally.
Keep the transit bolts and
wrench for future use.
Insert the 4 caps provided
into the hole.
The appliance goes up by
rotating the feet clockwise.
The appliance comes down by
rotating the feet counter-
clockwise.
4. INSTALLATION
1
High
Low
8
HOW TO CONNECT INLET HOSE
Check that the rubber washer is inside of the
valve connector.
Connect the inlet hose firmly to prevent leak.
CONNECT DRAIN HOSE
CONNECT POWER PLUG
Make sure that the hose is not twisted.
The drain hose should be placed under 100cm from the floor.
Connect the power plug to the wall outlet.
Avoid connecting several electric devices,
It may be the cause of a fire.
Avoid submerging the end of the hose.
9
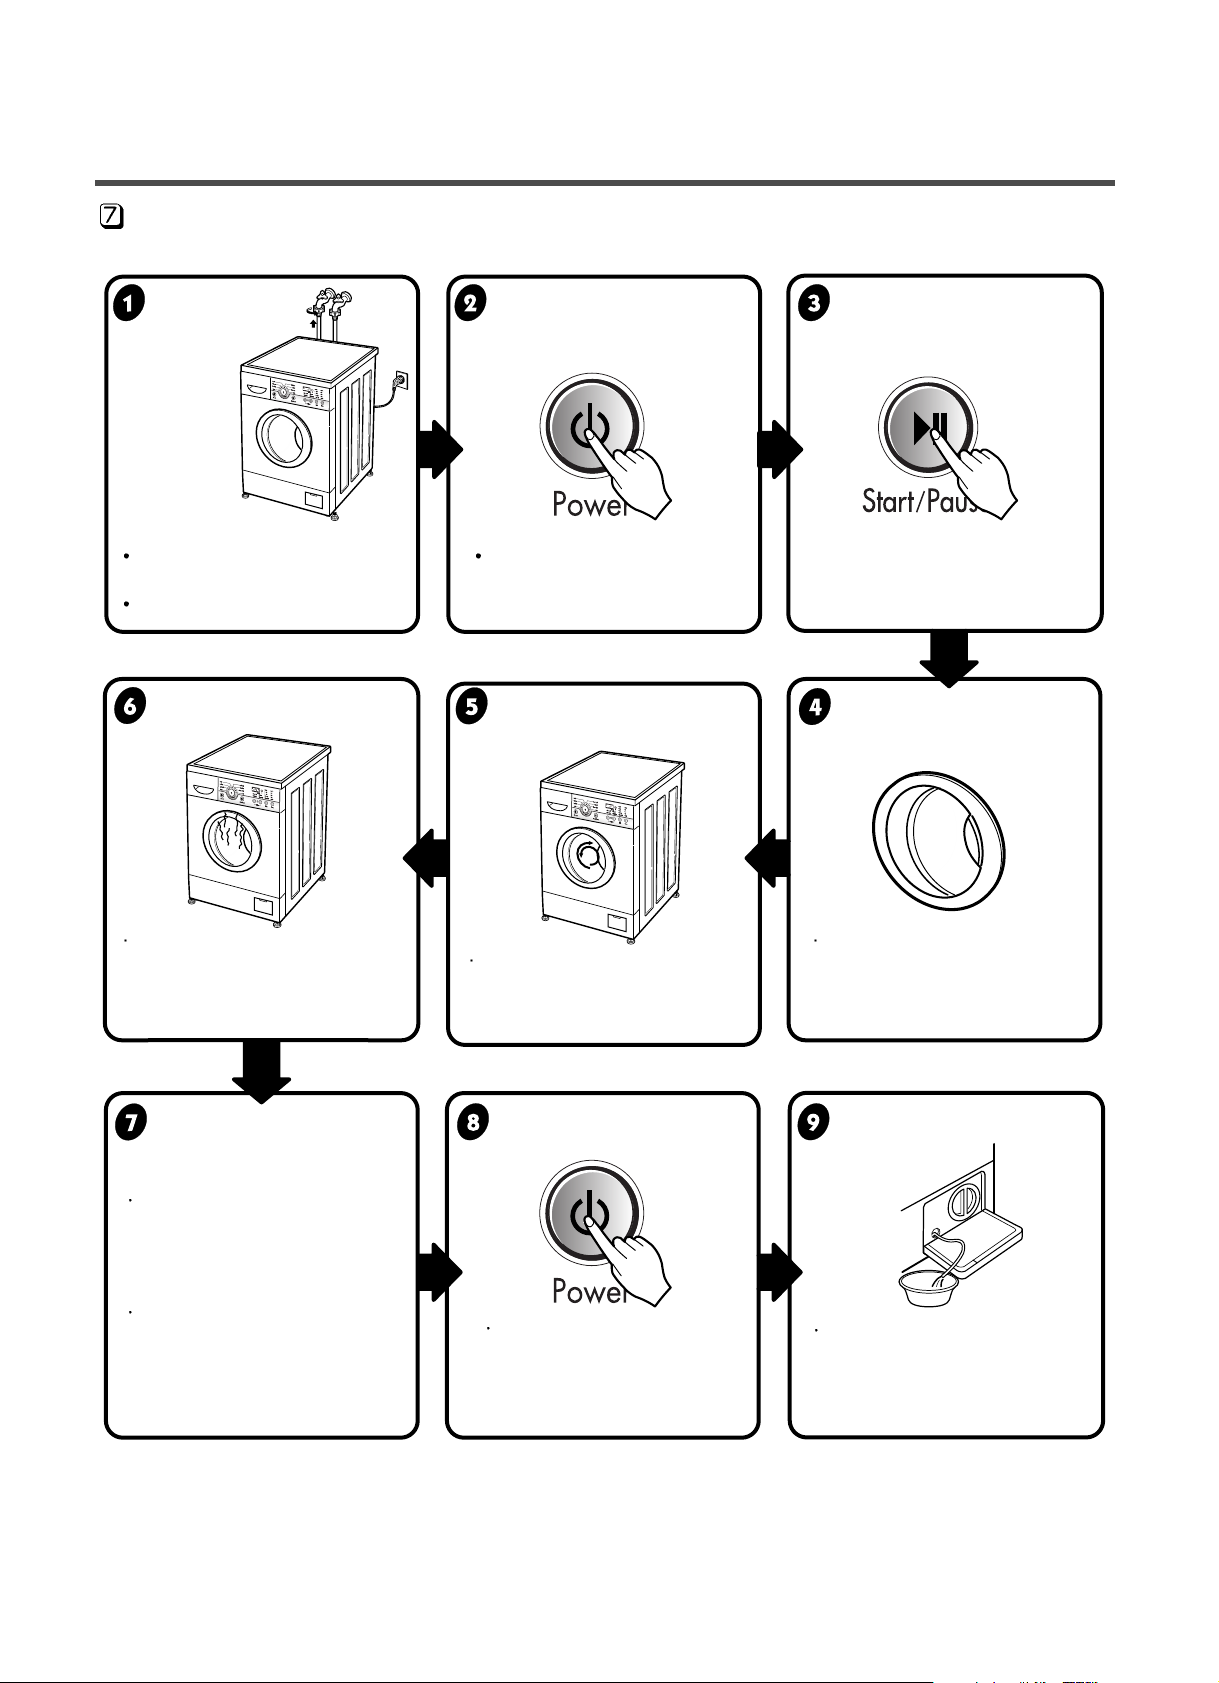
TEST OPERATION
Connect the power plug to In case of cotton program.
the outlet.
Connect the inlet hose.
Preparation for Press the power button. Press
the
START/PAUSE
washing. button.
Press Temp. button simultaneously
the present temperature will be
displayed.
Check if the drum rotates clockwise
and counterclockwise.
Check if water is supplied through
the detergent dispenser.
Power off and then power on.
Power off and then power on.
Turn on Spin lamps after
pressing the Start/Pause button
and Start the machine again.
Check drain and spin.
If SVC is needed during
check, remove
the remaining water by pulling
out the hose cap.
Check the water heating. Check automatic reverse Check the water supply.
turn.
Check drain and spin
Power off and open the
Water removal
door

10
5. OPERATION
Intensive
Intensive
extended
 Loading...