How it Works
Log In / Sign Up
Buy Points
How it Works
FAQ
Contact Us
Questions and Suggestions
Users
LG
Loading...
W
WD2100VM
WD2100VMA
WD210AN
WD22BV2S6
2
WD22RV2S6
WD22VTS6
3
WD22VTS6M
WD22VVS6
WD22WV2S6
WD2500CS
WD282TP
WD3250HSA
WD3250HWA
WD3632HS
2
WD3632HW
WD405
WD4370HVA
WD482TP
WD485
WD512AN
WD515AN
WD521276RC
2
WD551206RC
2
WD551276RCS
2
WD55H206RCS
2
WD581202RC
2
WD60J6WY1W
WD6-12795SR
3
WD6-12880SR
3
WD6-12895SR
3
WD62J6WY1W
4
WD6G1H2N1C
WD6G1H6N1C
WD700-MG-5021M
WD700-MG-5021SD
WD700-MG-5021T
WD700-MG-5041M
WD700-MG-5041T
WD800-MG-5510SD
WD800-MG-5511M
WD800-MG-5511T
WD800-MG-5520M
WD800-MG-5521SD
WD801202CP
2
WD80151TP
WD80160NUP
2
WD80264TP
3
WD900
2
WD90155 FB
2
WD951606RCH
2
WD95H606RCH
WD95H676RCH
WD961436AP
2
WD961446AP
2
WD991276RCS
2
WD991276RCT
WD9DBS6
WD9EP6A
WD9WE6
2
WD9WE6A
WD9WP6
WDA81406RC
2
WDA81456RC
2
WDA81456YC
2
WDC1215HSVE
2
WDC1409HCW
2
WDC1475NCW
WDC9H067HTS
WDD16431RD
WDD16511RDS
WDD16515BD
WDD16516RDS
WDD16517BD
WDD16519RDS
WDD17436RD
WDD71H02KC
WDD71H62KC
WDE13896RD
WDFH053D7SW
WDFH457C0SW
WDGH451B7YW
WDGH457C0SW
WDJ7141WTHP
2
WDJ8142SDJH
2
WDJ8142SFHP
2
WDJ8142SJHP
2
WDJ9142TJHP
2
WDK1102TRHC
WDK2102TRHC
WDK2102WRHC
WDK2105TPHC
WDL91H02PN
2
WDM-101305F
WDM-10131F
WDM-102205FD
WDM-10705FHB
WDM-10746FHB
WDM-11705FHB
WDM-11746FHB
WDM-122205FD
Loading...
Loading...
Nothing found
WD95H606RCH
Owner's Manual
92 pgs
2.37 Mb
0
Table of contents
Loading...
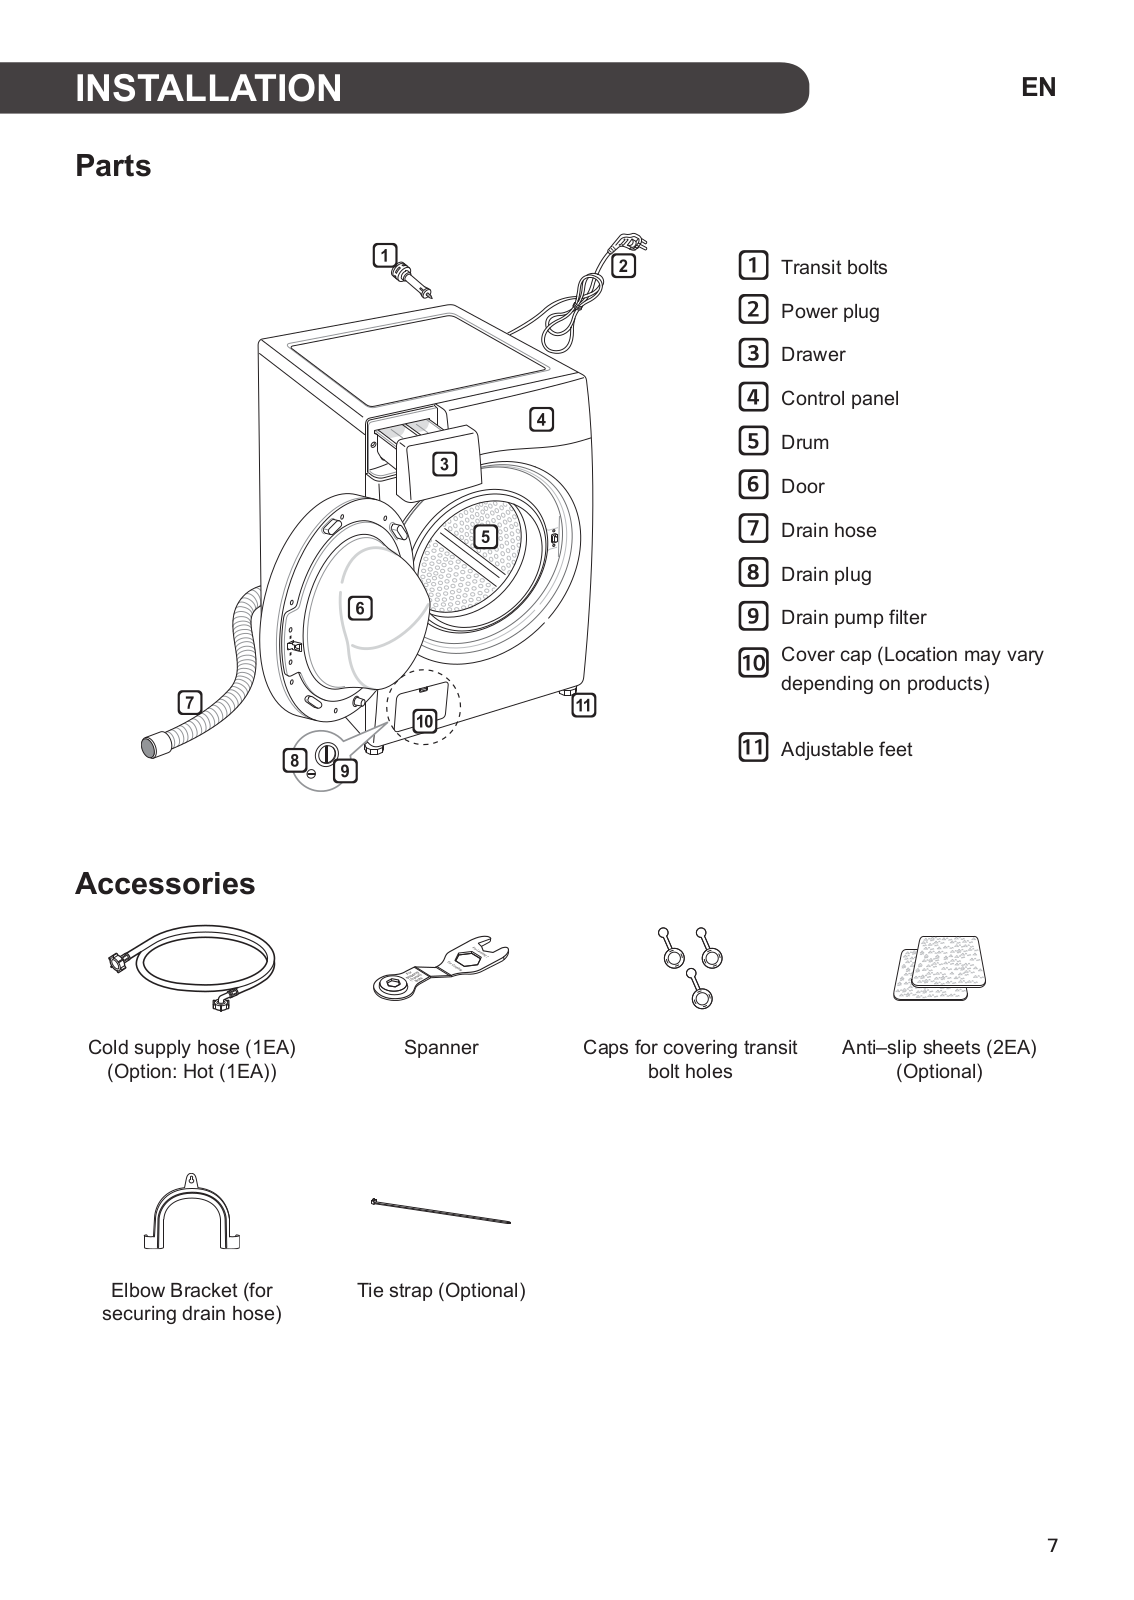
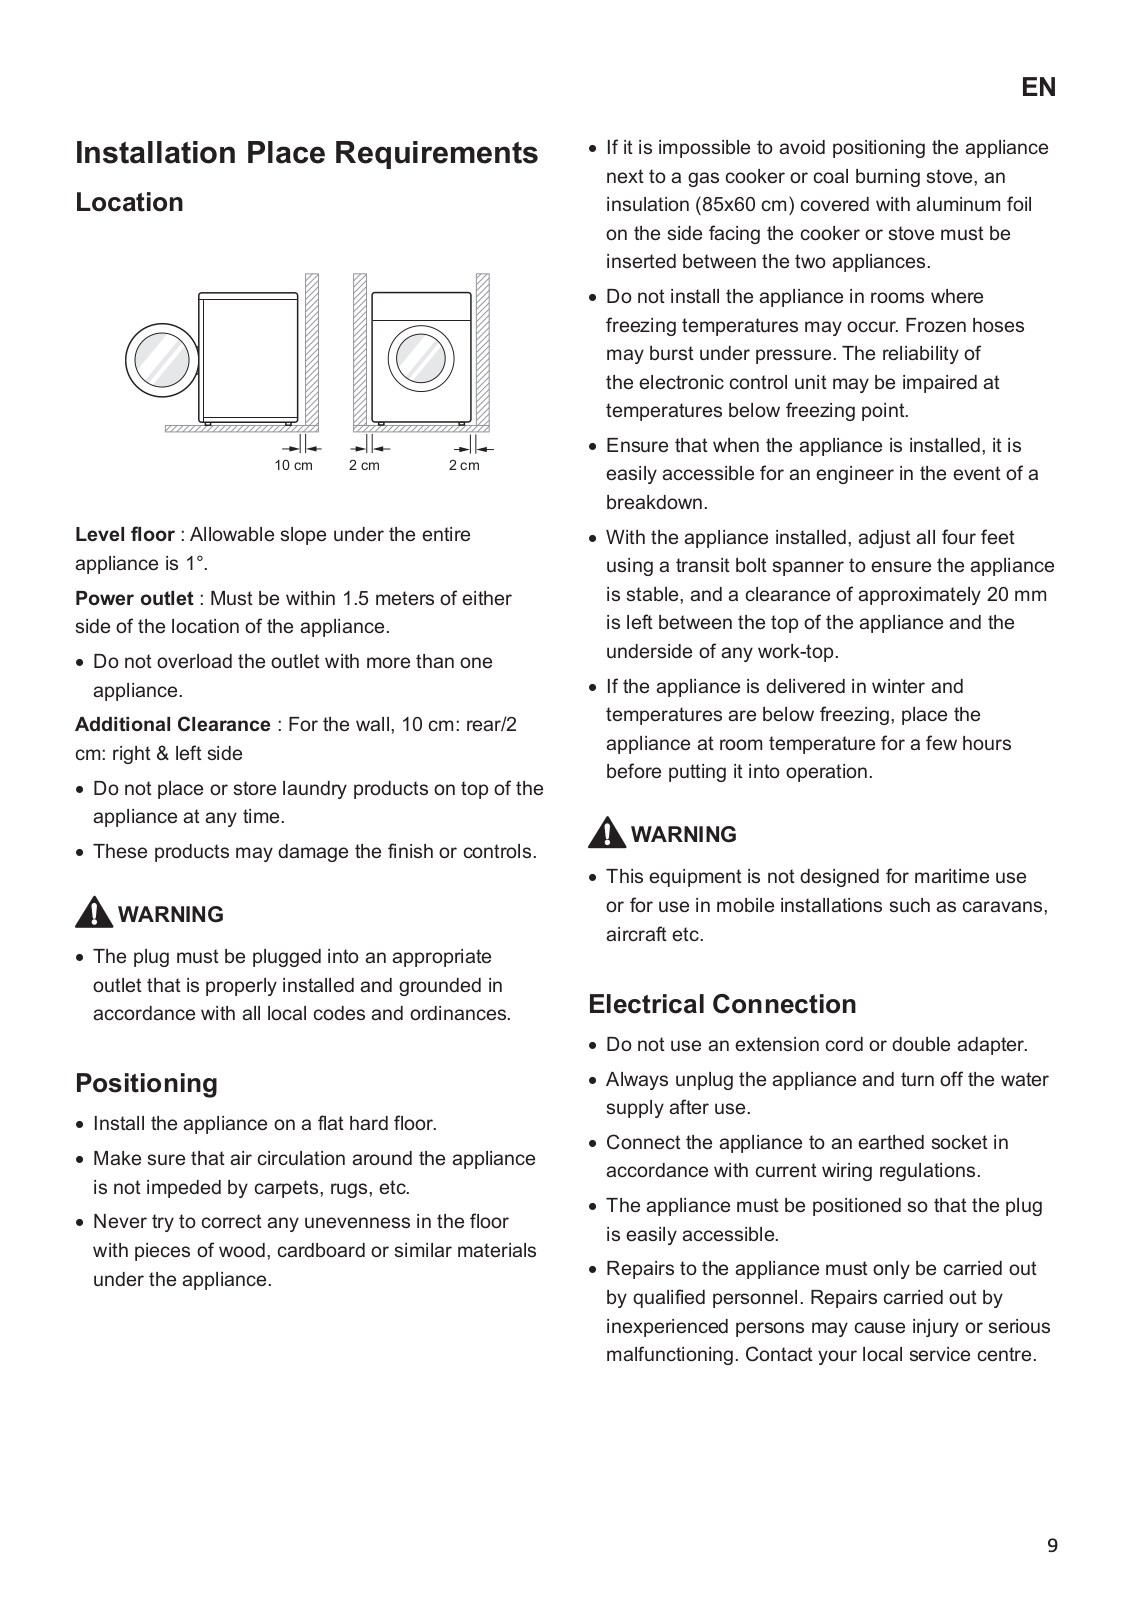
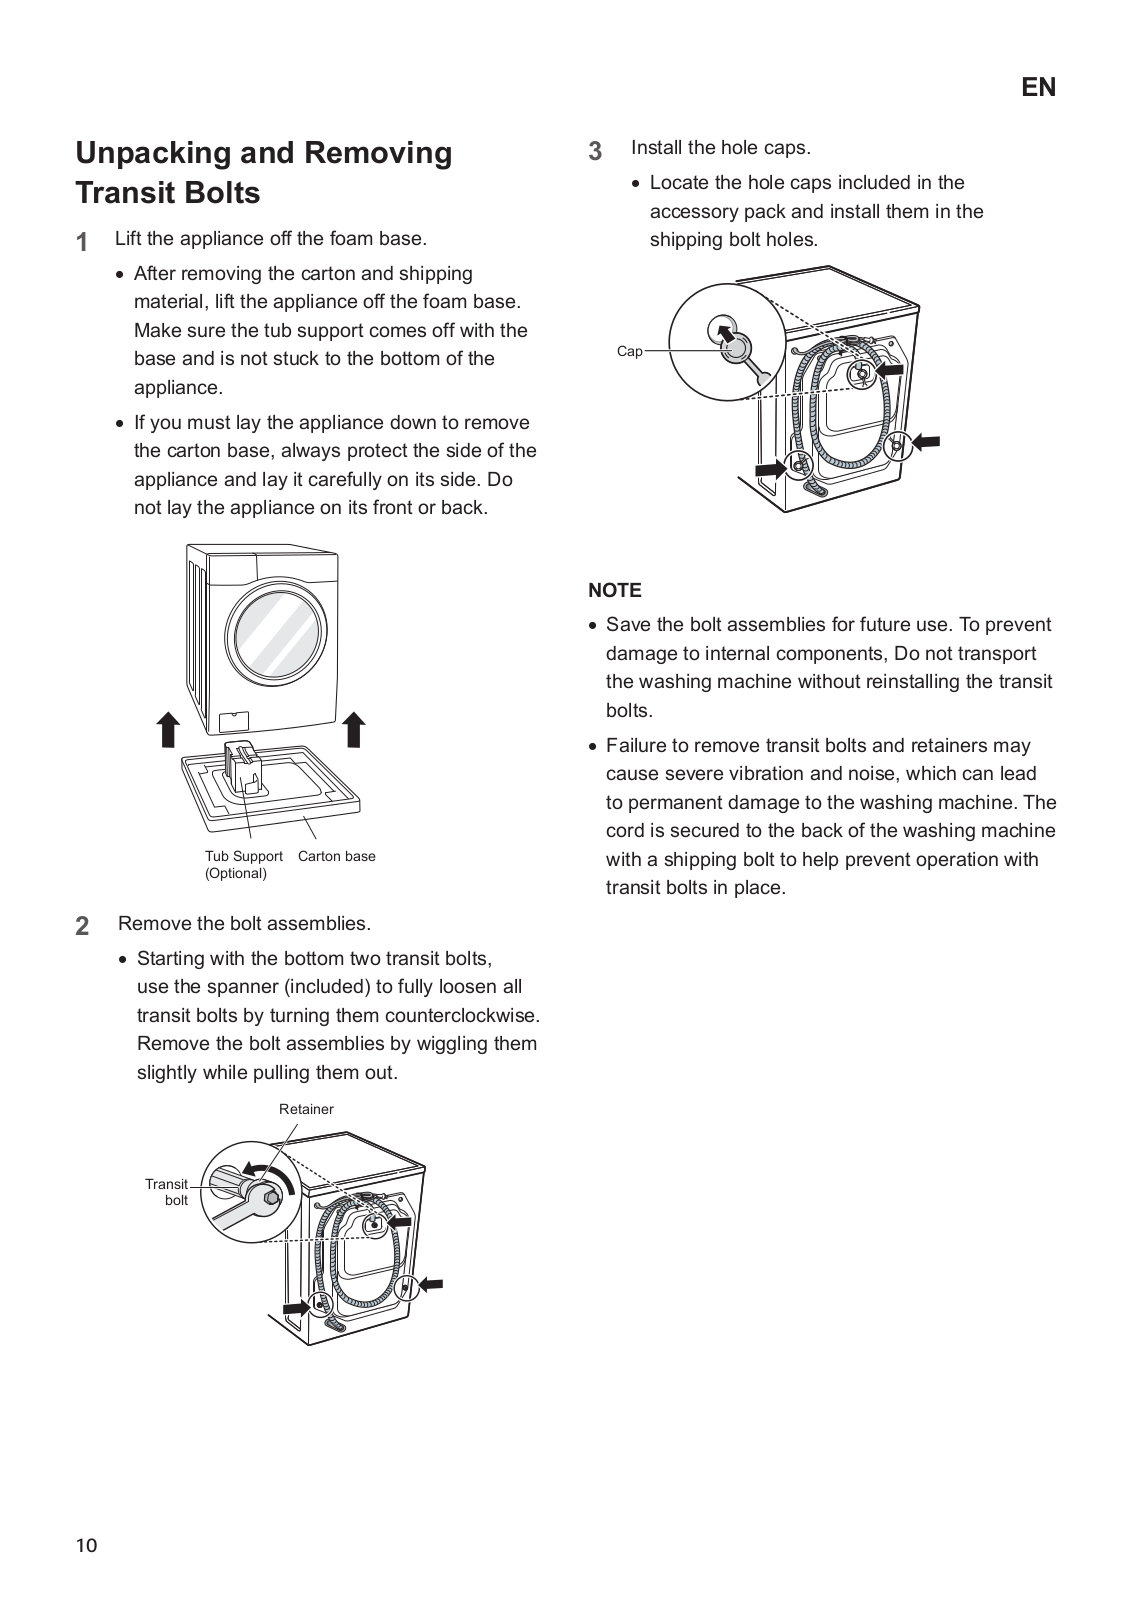
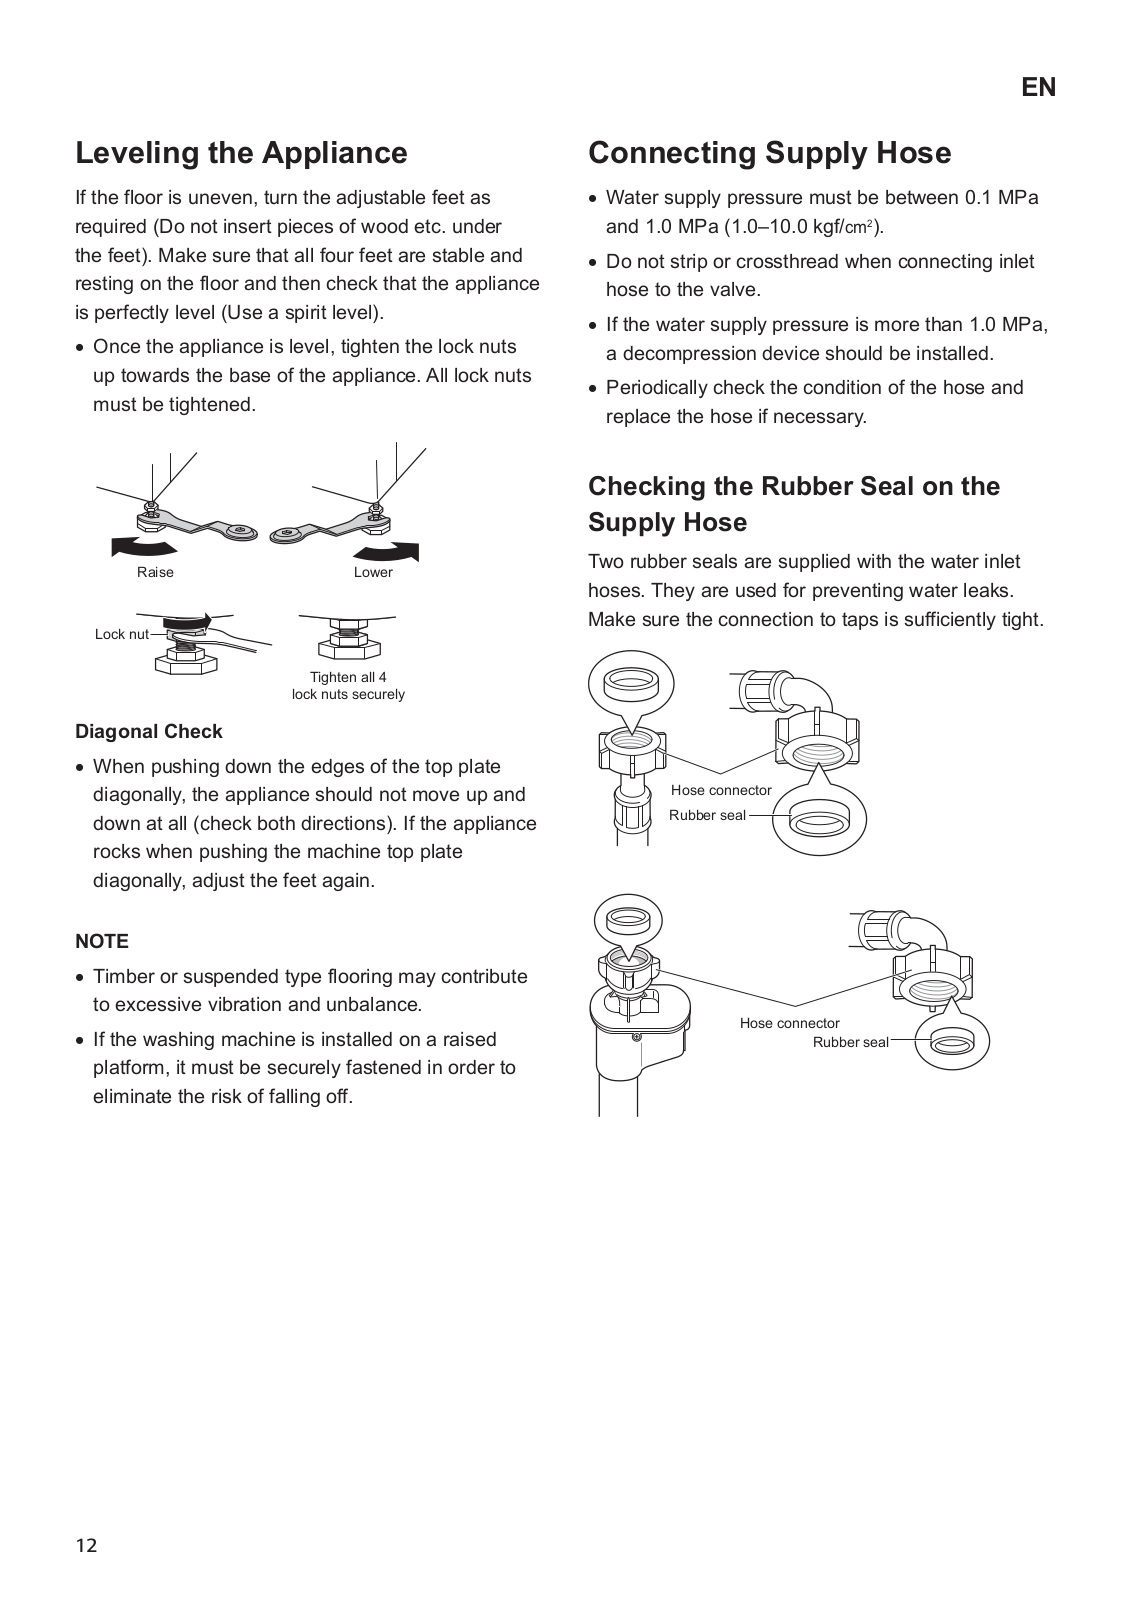
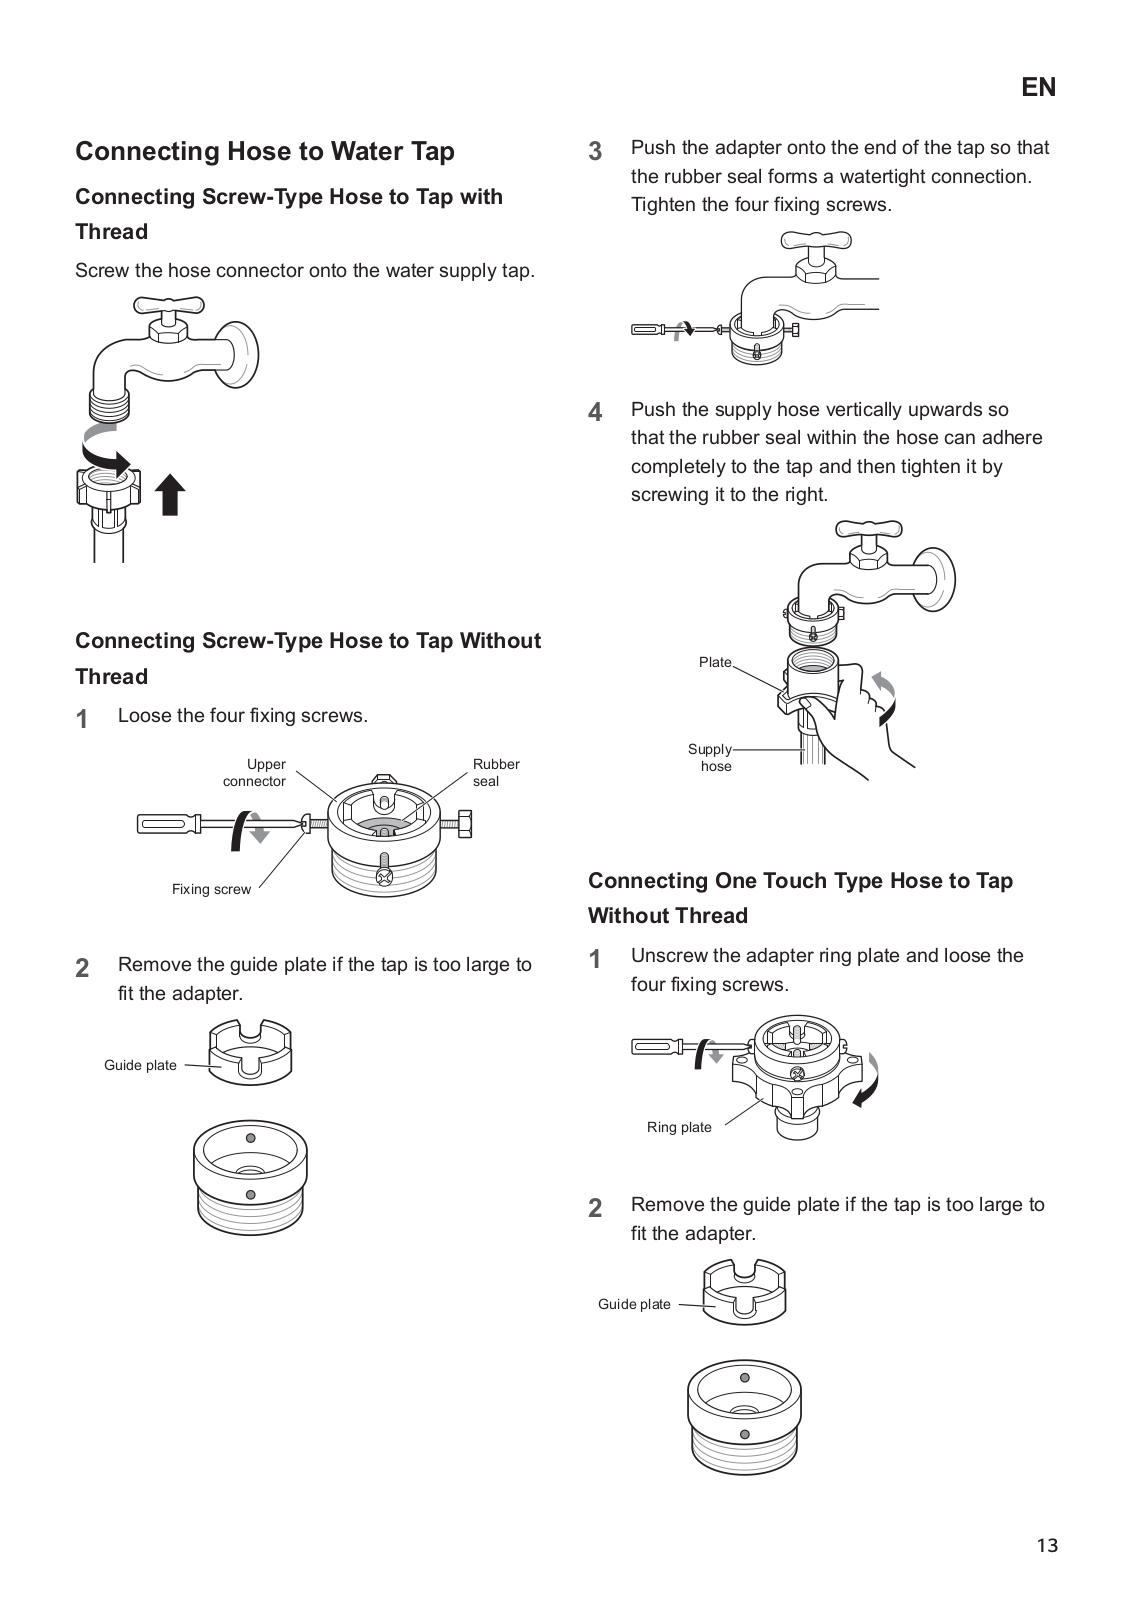
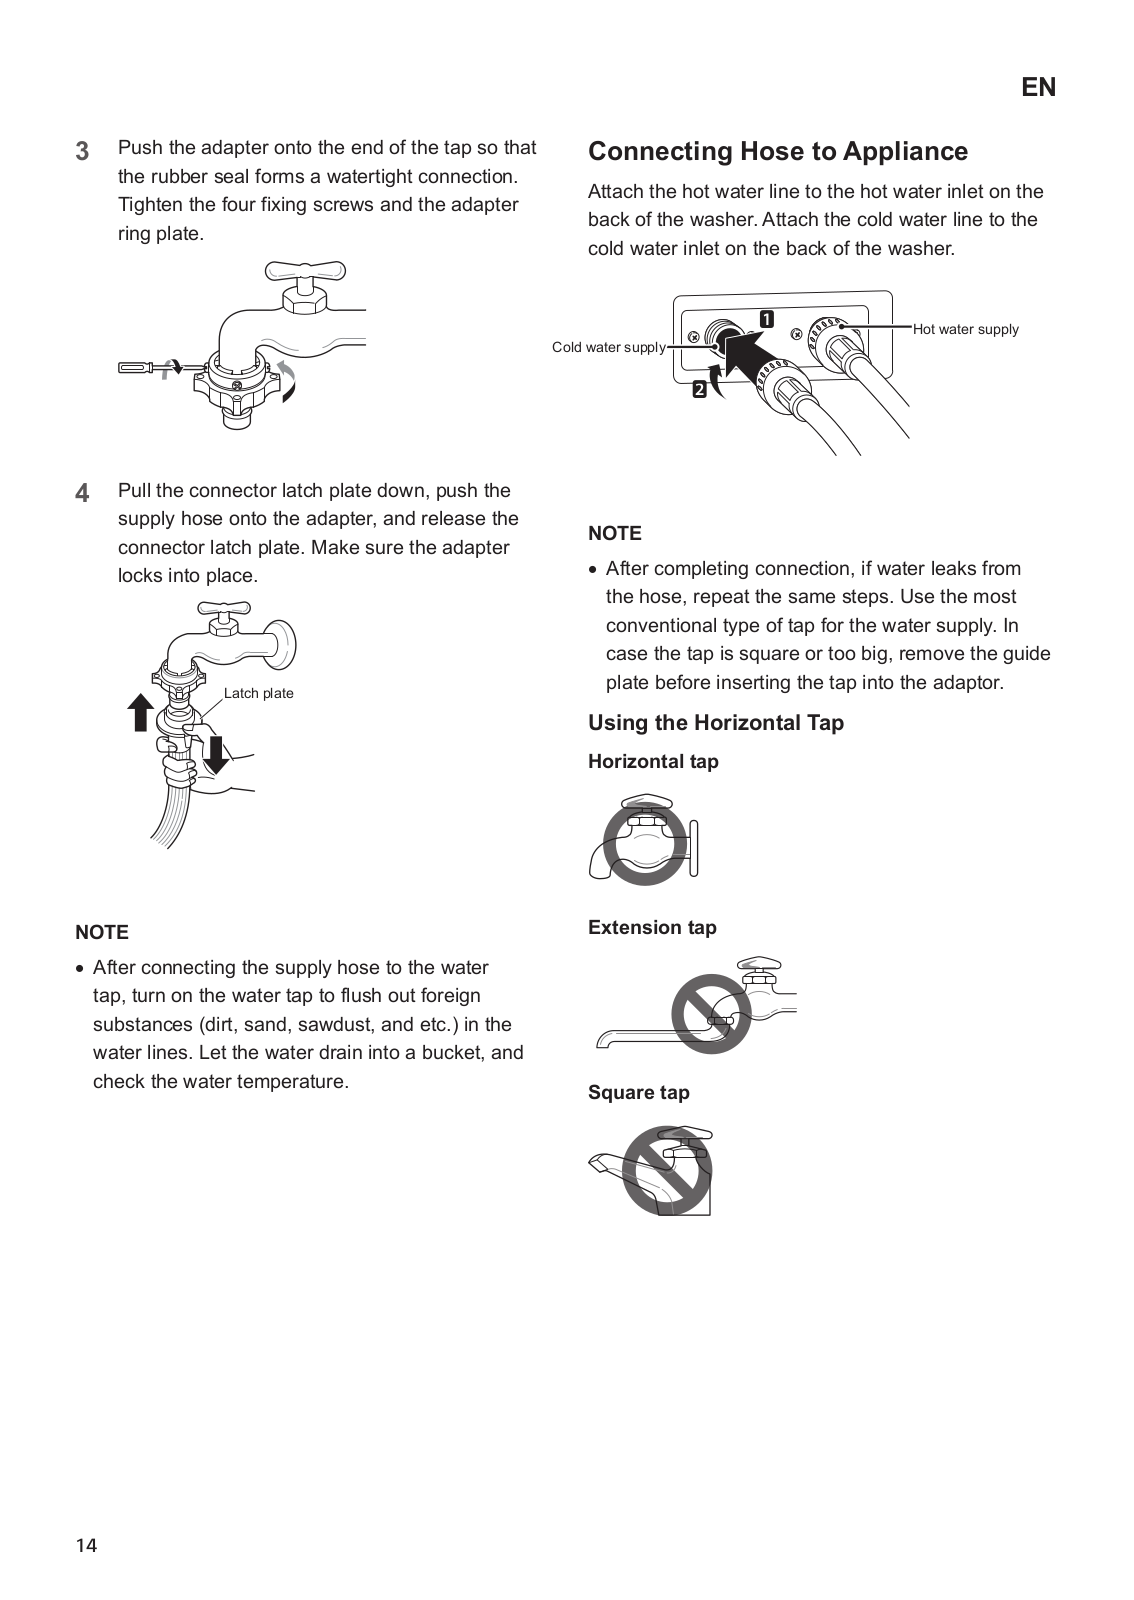
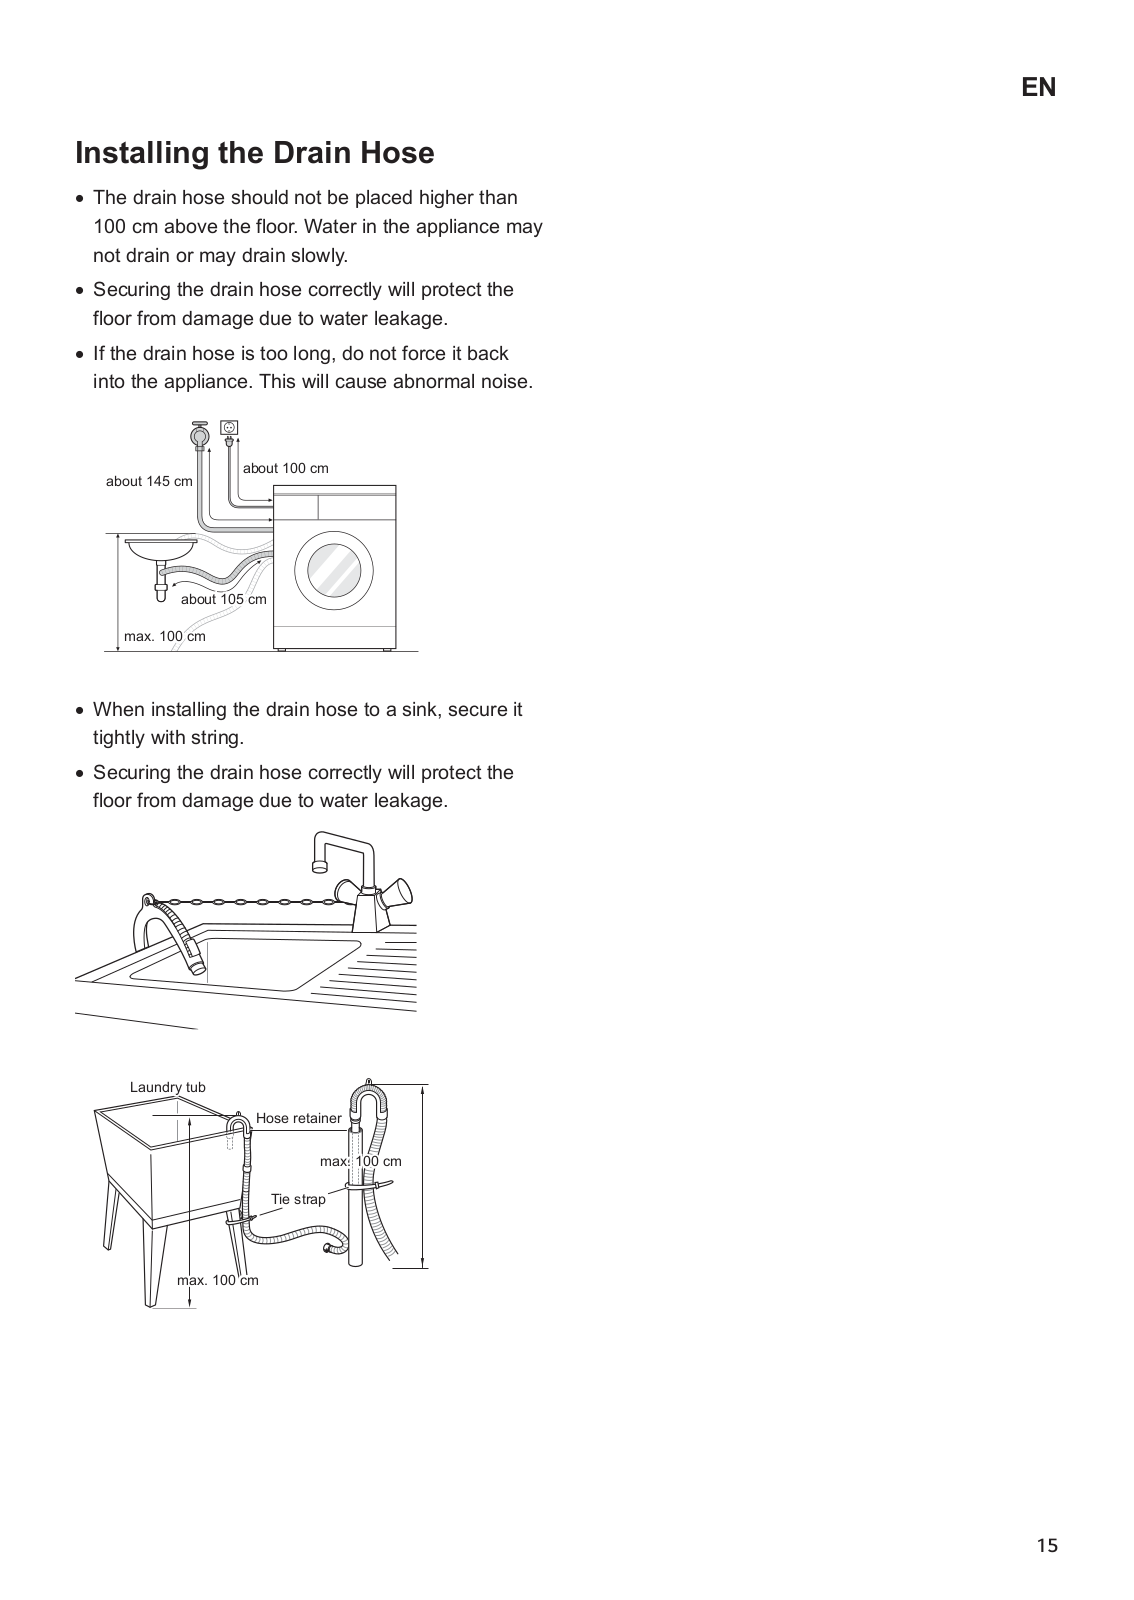
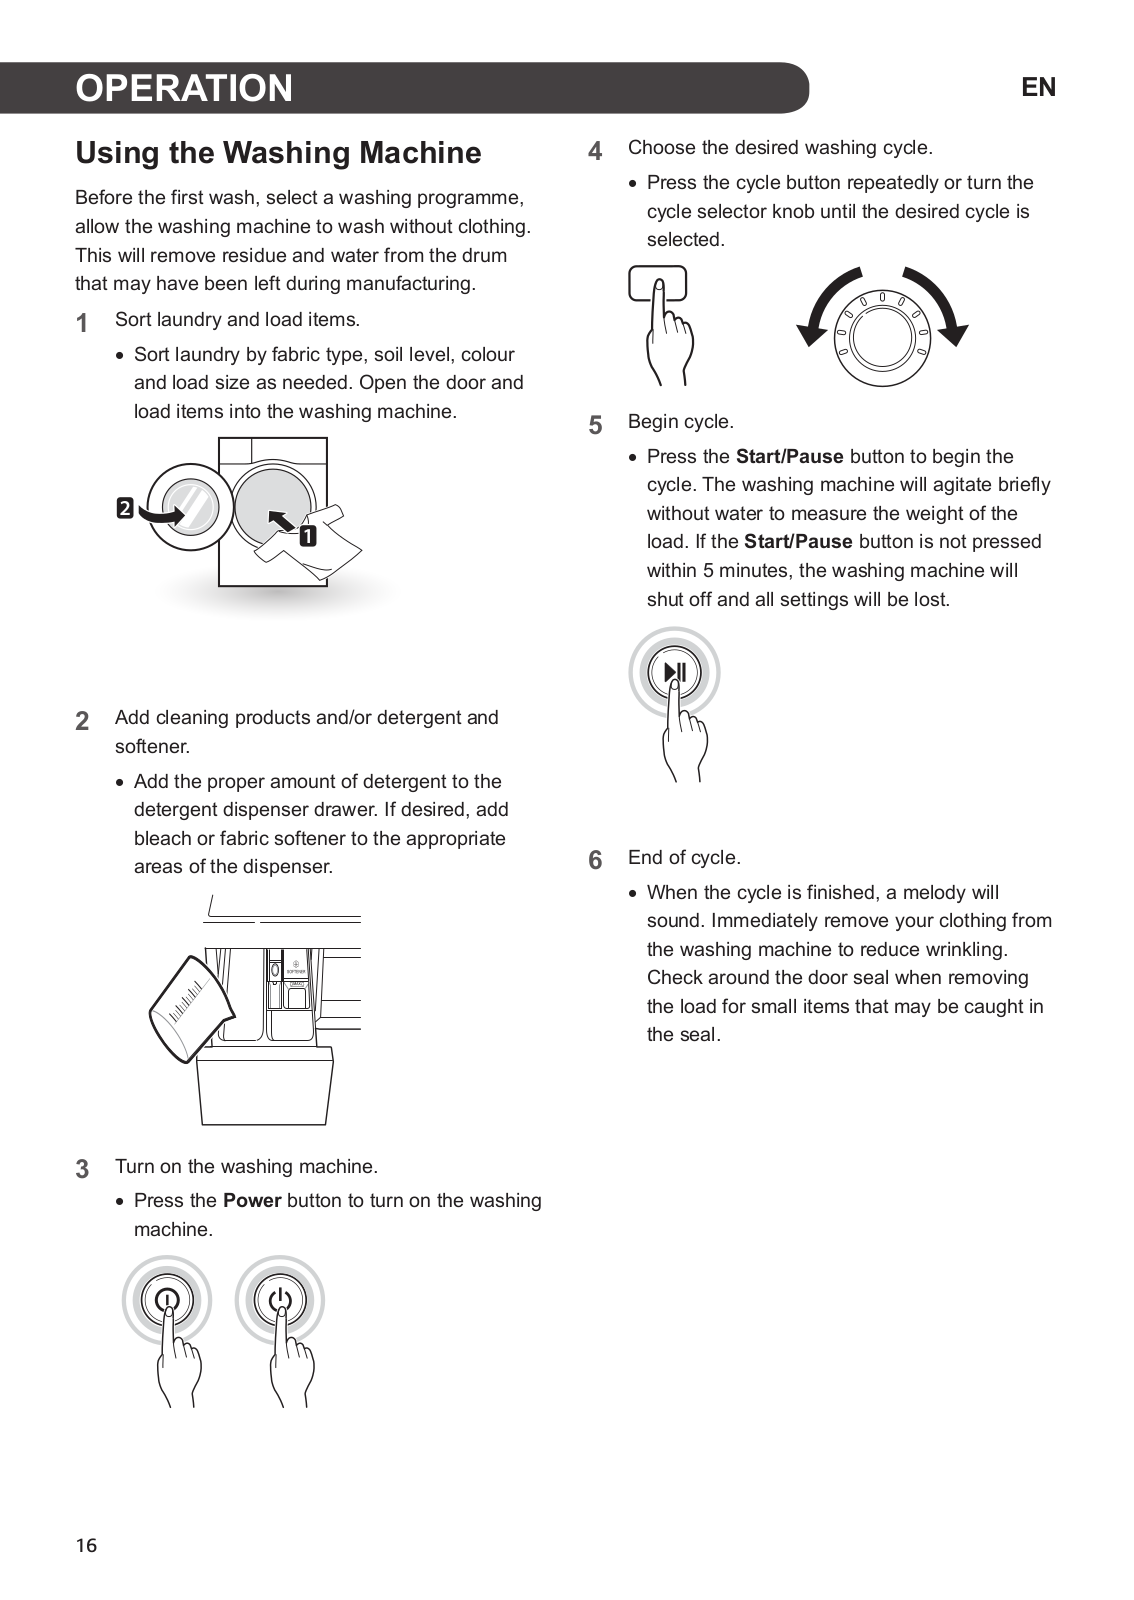
LG WD95H606RCH, WD95H676RCH Owner's Manual
...
LG Owner's Manual
Download
Specifications and Main Features
Frequently Asked Questions
User Manual
Download
Loading...
+
64
hidden pages
Unhide
You need points to download manuals.
1 point = 1 manual.
You can buy points or you can get point for every manual you upload.
Buy points
Upload your manuals
 Loading...