

LG WD-6003C, WD-8003C, WD-6004C, WD-8004C, WD-1004C Instructions Manual
FULLY AUTOMATIC
WASHING MACHINE
WD-6003C
WD-8003C
WD-6004C
WD-8004C
WD-1004C
Dear Customer,
We wish that this product, manufactured at modern facilities with total quality notions, will deliver you the best
performance. In order to guarantee this, please read this instruction booklet thoroughly
and keep it for your future reference.
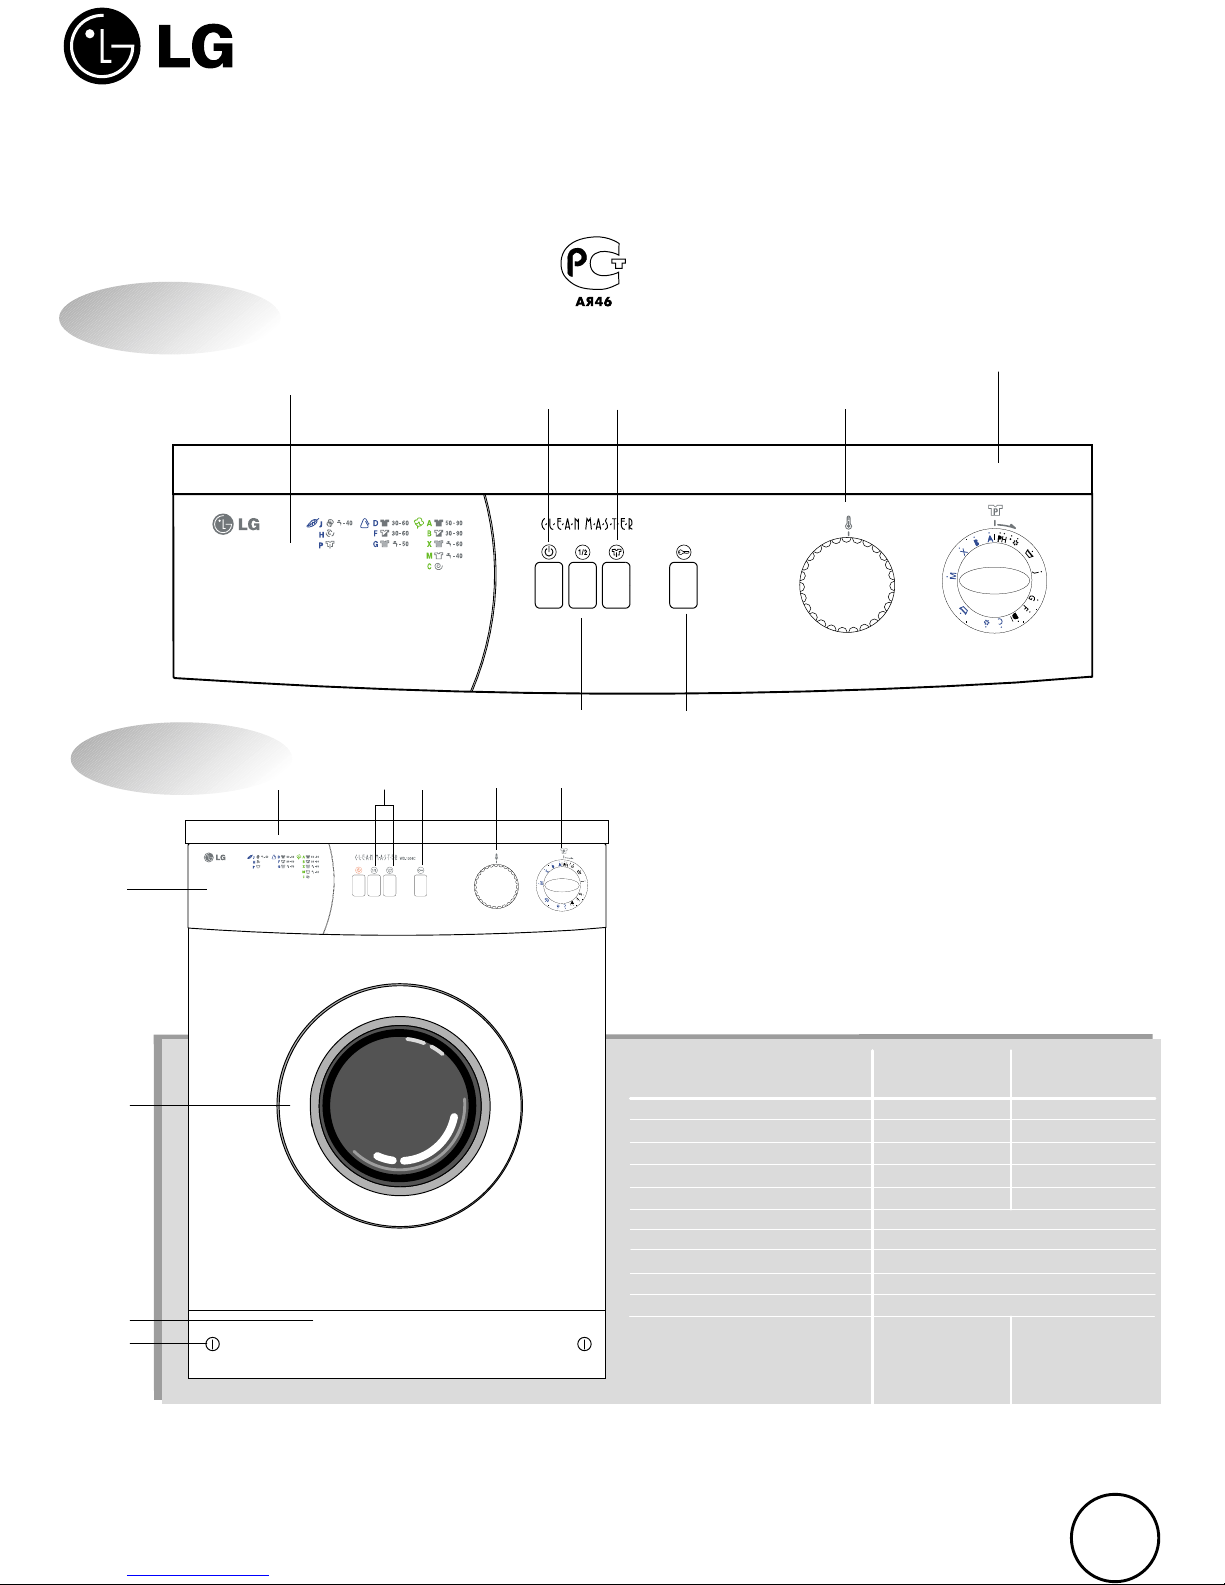
Control Panel
1. Top lid
2. Auxiliary function buttons
3. Door open button
4. Thermostat adjustment knob
5. Program selection knob
6. Detergent dispenser
7. Front door
8. Kick plate
9. Kick plate opening screw
Capacity (dry fabric) (kg.)
Height (cm.)
Width (cm.)
Depth (cm.)
Net weight (kg.)
Power requirement
Nominal current (A)
Motor power (W)
Heater power (W)
Washing speed (rpm)
Spin speed (rpm)
4.5
85
60
45
57
5.0
85
60
54
60
Technical
Features
600 (WD-6004C)
800 (WD-8004C)
1000 (WD-1004C)
3
600 (WD-6003C)
800 (WD-8003C)
Door open
button
Program selection
knob
Temperature
adjustment knob
On/off
button
Rinse hold
button
Detergent drawer
Half load
button
7
8
9
245
6
1
GB
WD-6004C
WD-8004C
WD-1004 C
WD-6003C
WD-8003C
220-230 V,50 Hz.
10
300
1900
50
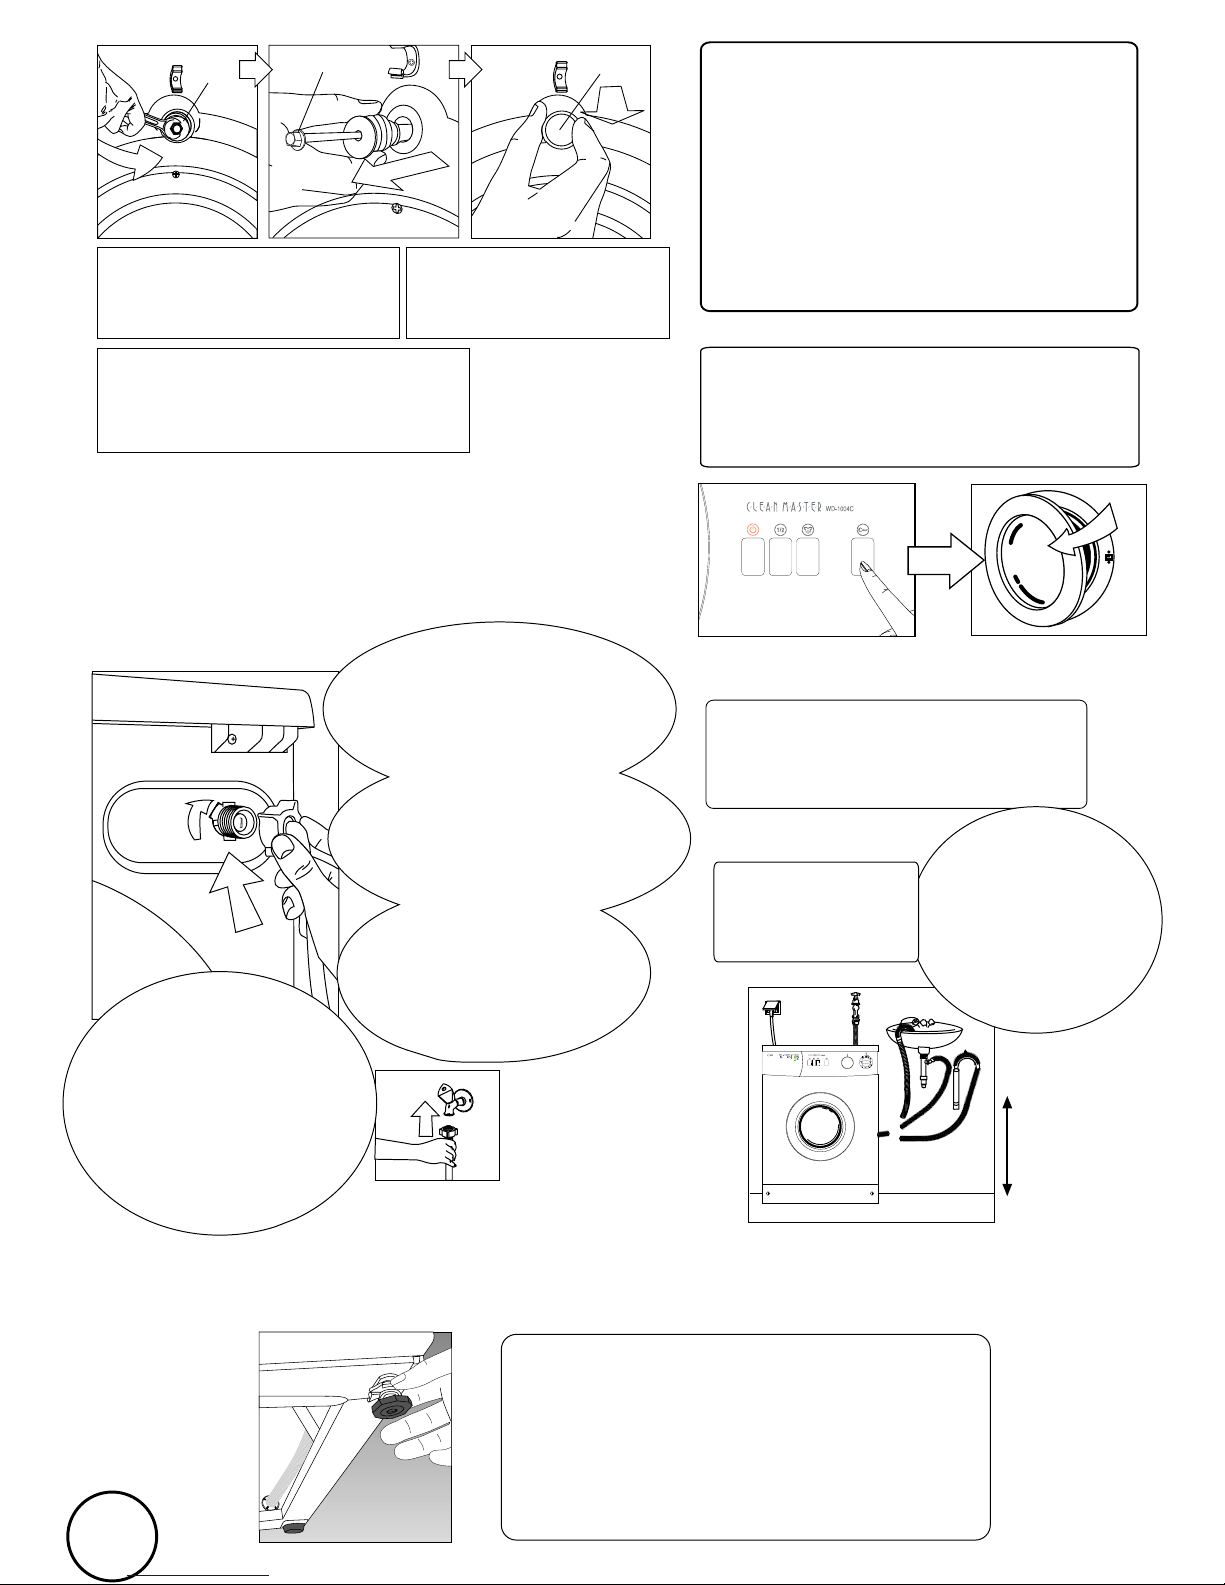
Plastic plugs, supplied inside the protective bag and
designated as “P”, should be placed in the safety bolt
holes according to the direction shown.
Attention! Please keep the safety bolts for
future transportation
and reinstate them before transporting your
machine. Never transport your machine
without the transport bolts in position. Any
resultant damage is not covered by the
warranty.
1. Removing transport safety bolts at the rear of the machine
3. Water connections
a) Water inlet hoses
Feet adjustment
b) Drain hose
4. Stability
To ensure quiet and stable operation, the machine should be
positioned correctly and levelled on its feet. Your machine
comes with two adjustable feet. If the machine is unstable,
loosen the plastic lock nut and screw or unscrew the
adjustable foot until the machine is levelled perfectly. After
positioning, tighten the lock nut for stability. Ensure a
clearance is present each side of the machine to allow slight
side ways movement during washing and spin drying
operations.
2. To open the door,
make sure the on/off switch is in
the off position, always allow one
to two minutes for the door
safety lock to release the lock.
Press the door knob the door will
spring open.
Washing Machine is to be connected to the
water mains using new hose-sets and that
old hose-sets should not to be reused.
The transport safety bolts must be
removed before any operation of the
machine. Bolt heads, marked “C”.
“C”, should be turned in an anti
clockwise direction until the bolt
can be partially withdrawn.
Remove transport safety bolts and rubber
bushes by pulling outwards. (An up/down
action and a small squirt of washing up
liquid should ease removal.)
The drain hose should be placed and secured
either at the side of the hand basin or directly
to the drain. The hose should not be bent.
The hose should
be placed between
60 and 100 cm.
from the ground.
And must not be extended
otherwise the machine
may not empty the waste
water.
The waste pipe must only
be connected into the
foul drains not surface
water drainage system.
60-100 cm
P
C
C
Tick
..
GB
Attention!
Never place your machine
on a carpet. This prevents air circulation.
The electrical components of the machine may
overheat and may cause damage.
For proper operation,
the pressure of water should be
between 1 and 10 atm. (1 atm
corresponds to more than 8 liters per
minute flow rate at fully open tap.)
To prevent water
leaks two rings are supplied
with the water inlet hose inside the
machine, Place these rings on
each side of the hose and tighten
both ends fully.
In order to
prevent any water leak damages,
keep the water taps closed when
not in use. Connect the cornered
end of the hose to the machine
water inlet.
Your machine
comes with only cold
water connection. Find the blue
hose supplied by the
manufacturer for water
connection. Connect the
cold water using the
blue hose.
 Loading...