How it Works
Log In / Sign Up
Buy Points
How it Works
FAQ
Contact Us
Questions and Suggestions
Users
LG
Loading...
V
VR62701LVMB
2
VR6270LVM
7
VR6270LVMB
5
VR6270LVOB
VR6271LVMB
VR63406LV
2
VR63409LV
2
VR6340LV
9
VR63455LV
VR63475LV
VR6347LV
VR63485LV
VR6400PB HOMBOT
VR64604LV
VR64607LV
VR6460 LV
VR64701LVM
VR64701LVMP
VR64702 LVM
3
VR64702LVMP
VR64703LVM
VR6470LVM
VR6480MS
VR6480RR
VR6530LVM
VR6540LV
VR6540LVID
VR6570LVM
VR6570LVMB
VR65710LVMP
6
VR65713LVM
3
VR65715LVM
VR65820LVWP
VR65860LVWP
VR6600PG
VR6640LV
VR6640LVM
VR66413LVM
VR66530LVW
VR6670LVMP
VR66713LVM
VR66715LVM
VR66750LVWP
VR66800VWP
2
VR66801VMIP
2
VR66802VMWP
VR66803VMNP
2
VR6680TAR
VR6680TMAR
VR6680TMRW
VR66820VMNC
2
VR6685TWARV
VR66900TWA
VR66900TWVV
VR6690LVTM
2
VR6690TWVV
VR66930VWNC
VR6694TWR
VR6698TWAR
VR7410RB
VR7412RB
VR7428SP
VR7621SPG
VR8600OB
VR8600RB
2
VR8600RR
VR8600RR HOM-BOT SQUARE
VR86010RR
VR8602RR
VR8604OB
VR8604OB HOM-BOT SQUARE
VR8604PR
VR880
VR94070NCAG
VR94070NCAQ
7
VR9622PR
VR9624PR
VR9627PG
3
VR9647PS
7
VRA211
VRA211C
VRA411
VRA411C
VRA412
VRA412C
VRA422
VRA423C
VRA424
VRA424C
VRB210
VRB210C
VRB410
VRB410C
VRB411
VRB411C
VRB412
VRB412C
VRB420C
VRB421
VRB4215
Loading...
Loading...
Nothing found
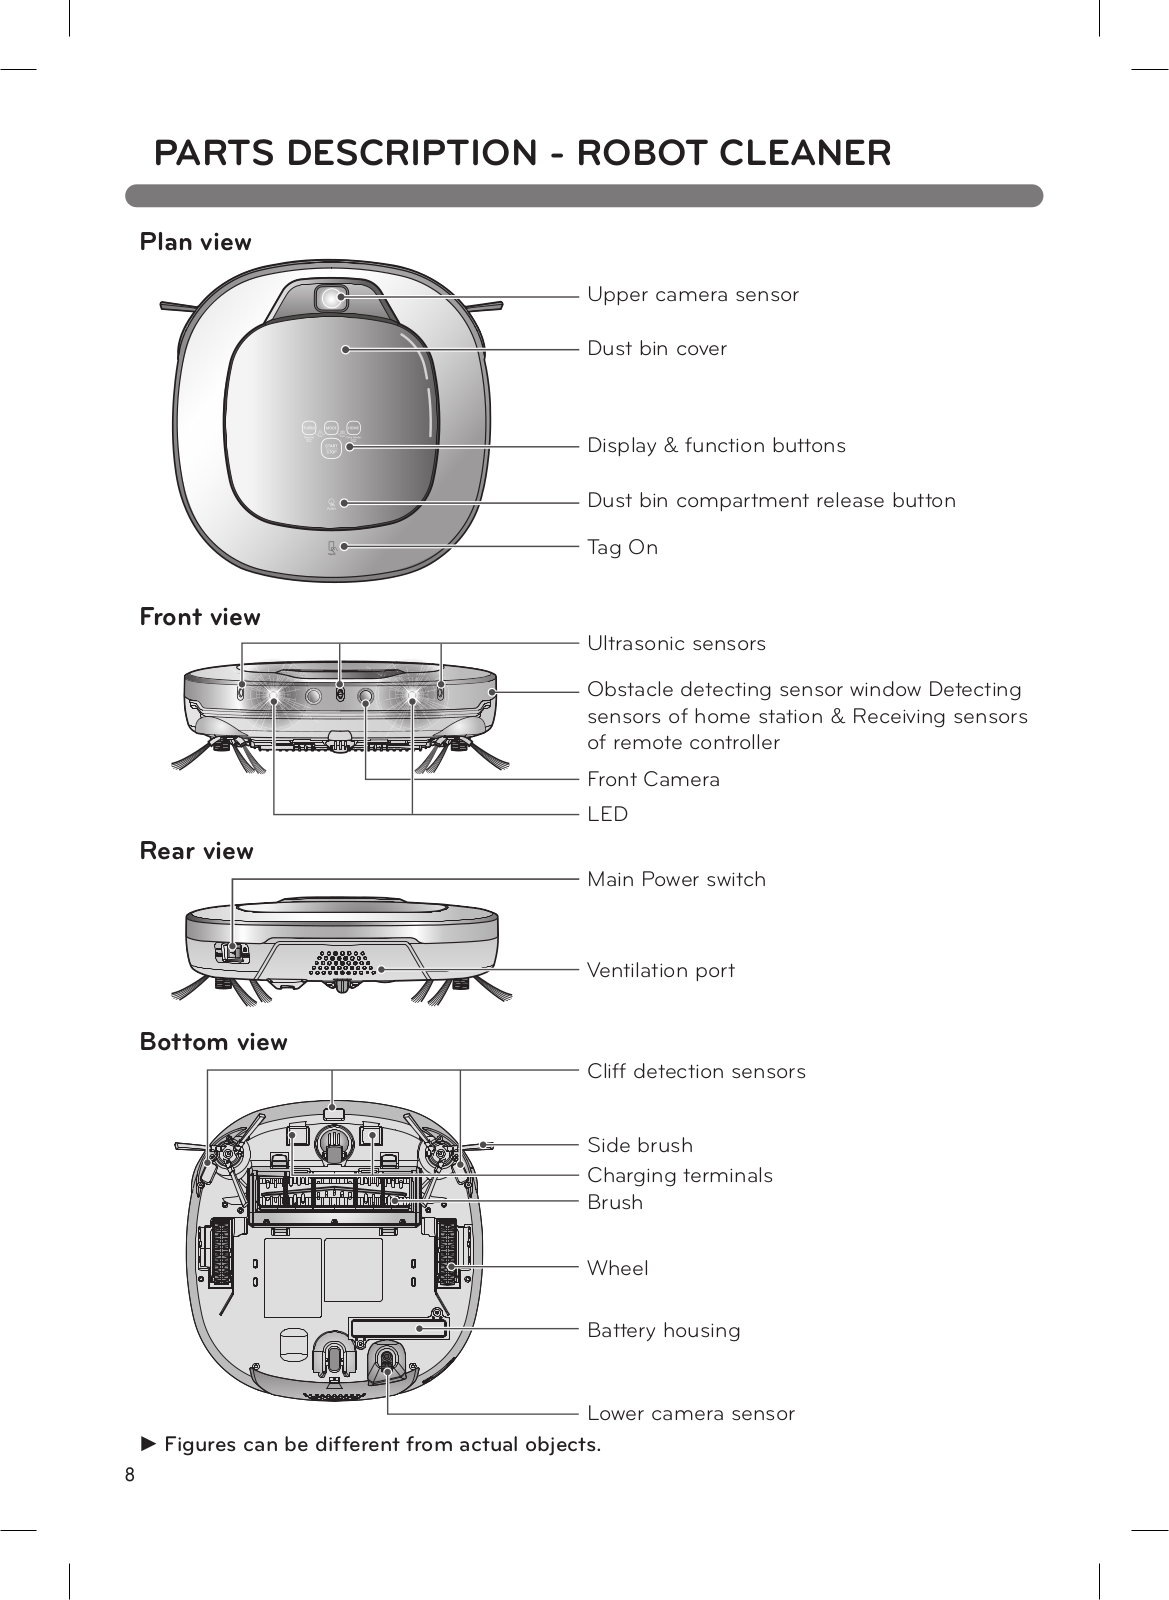
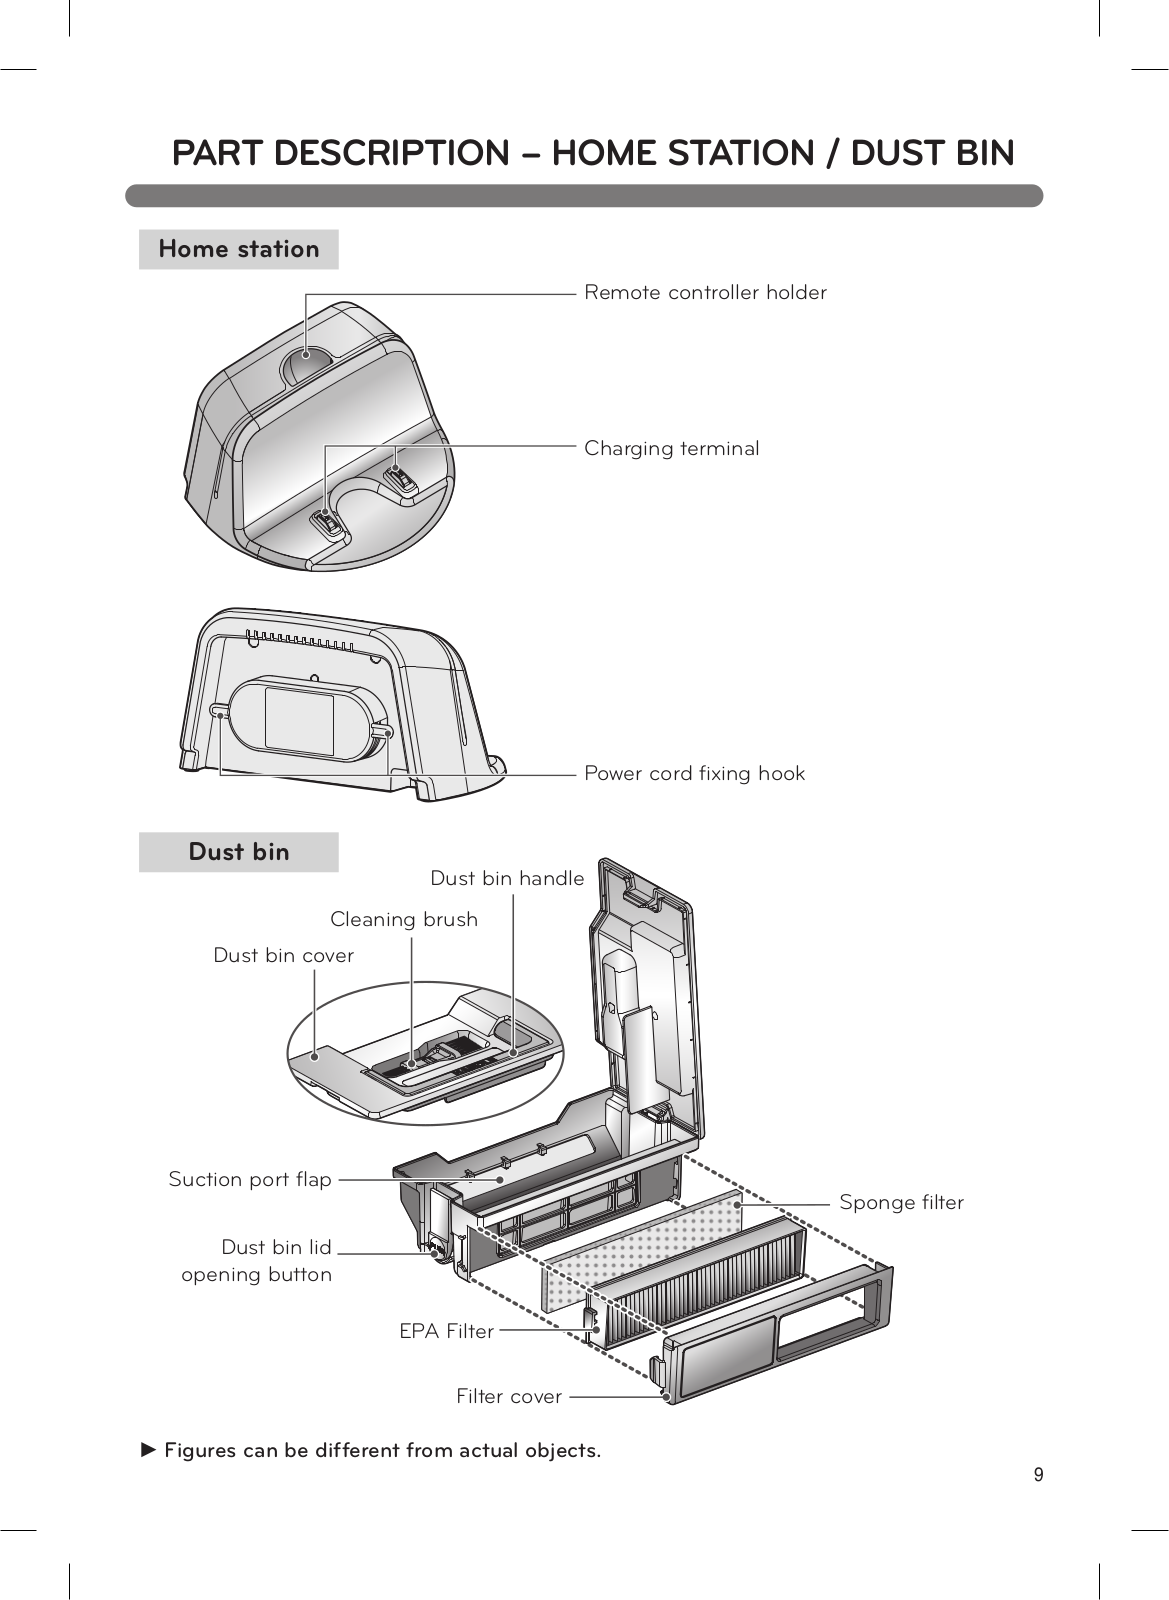
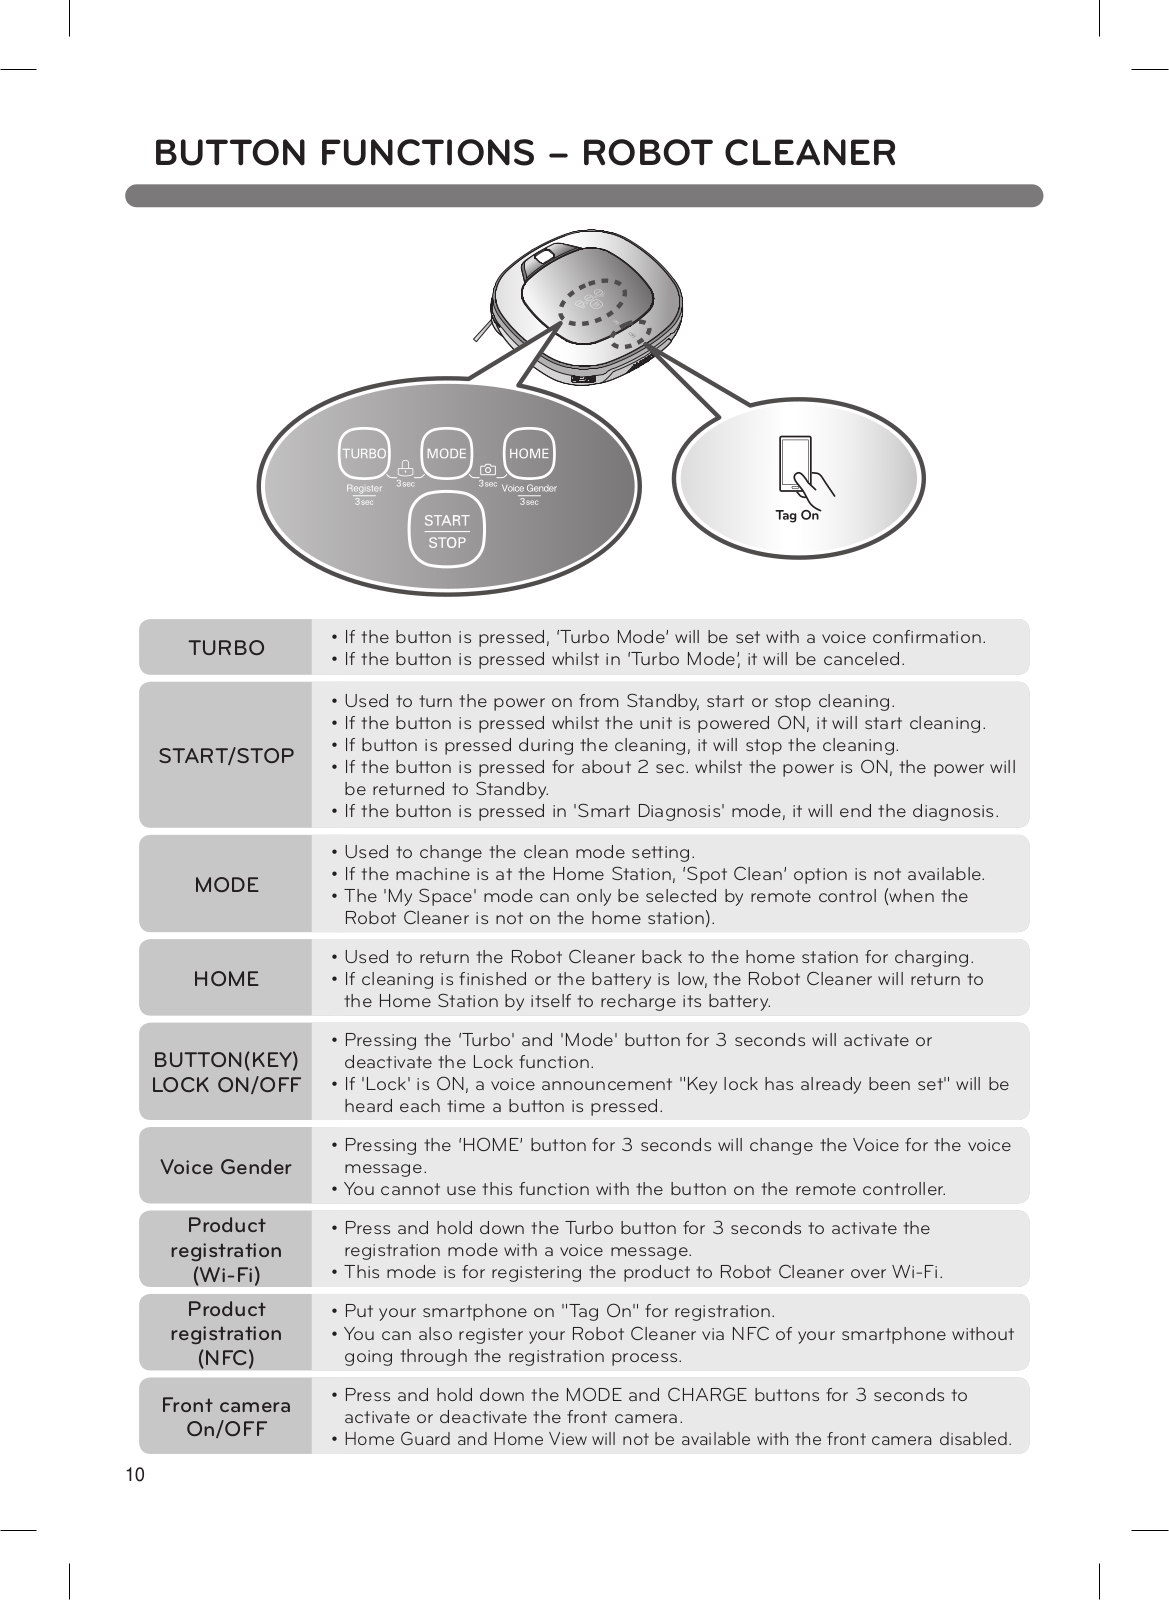
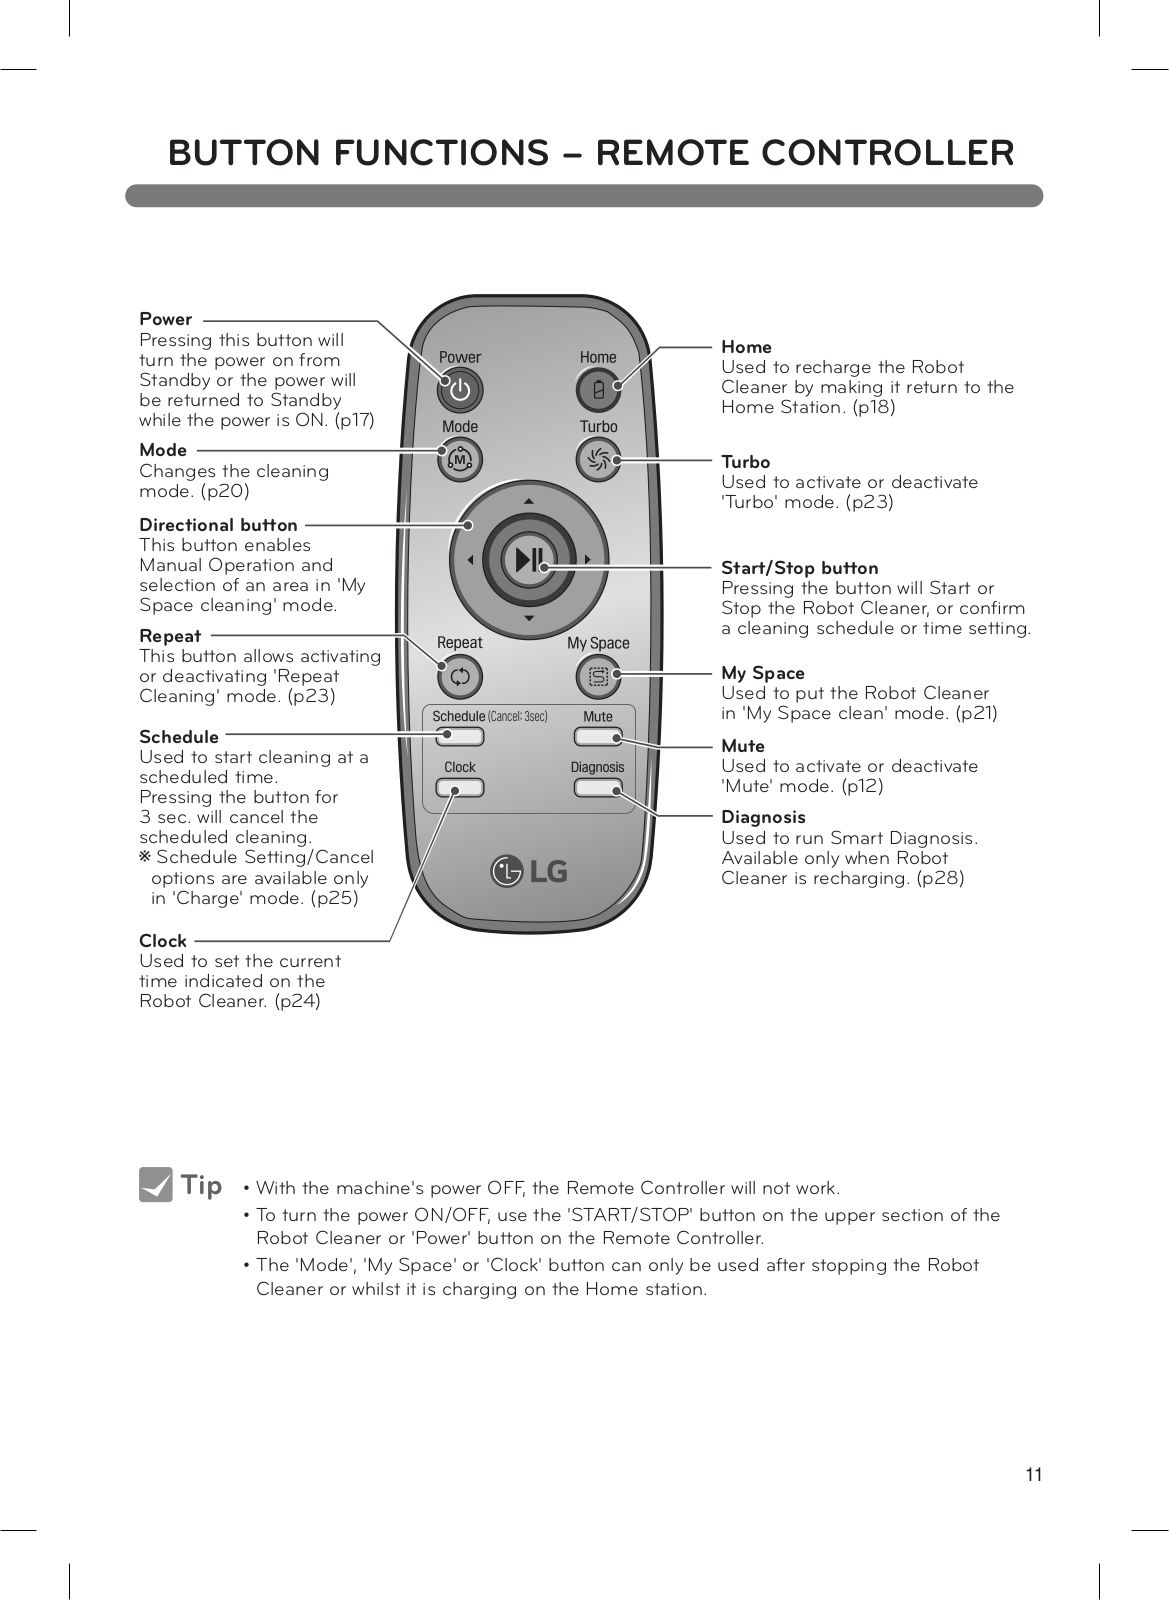
VR66820VMNC
Owner’s Manual
68 pgs
30.58 Mb
0
User manual [zh]
68 pgs
28.51 Mb
0
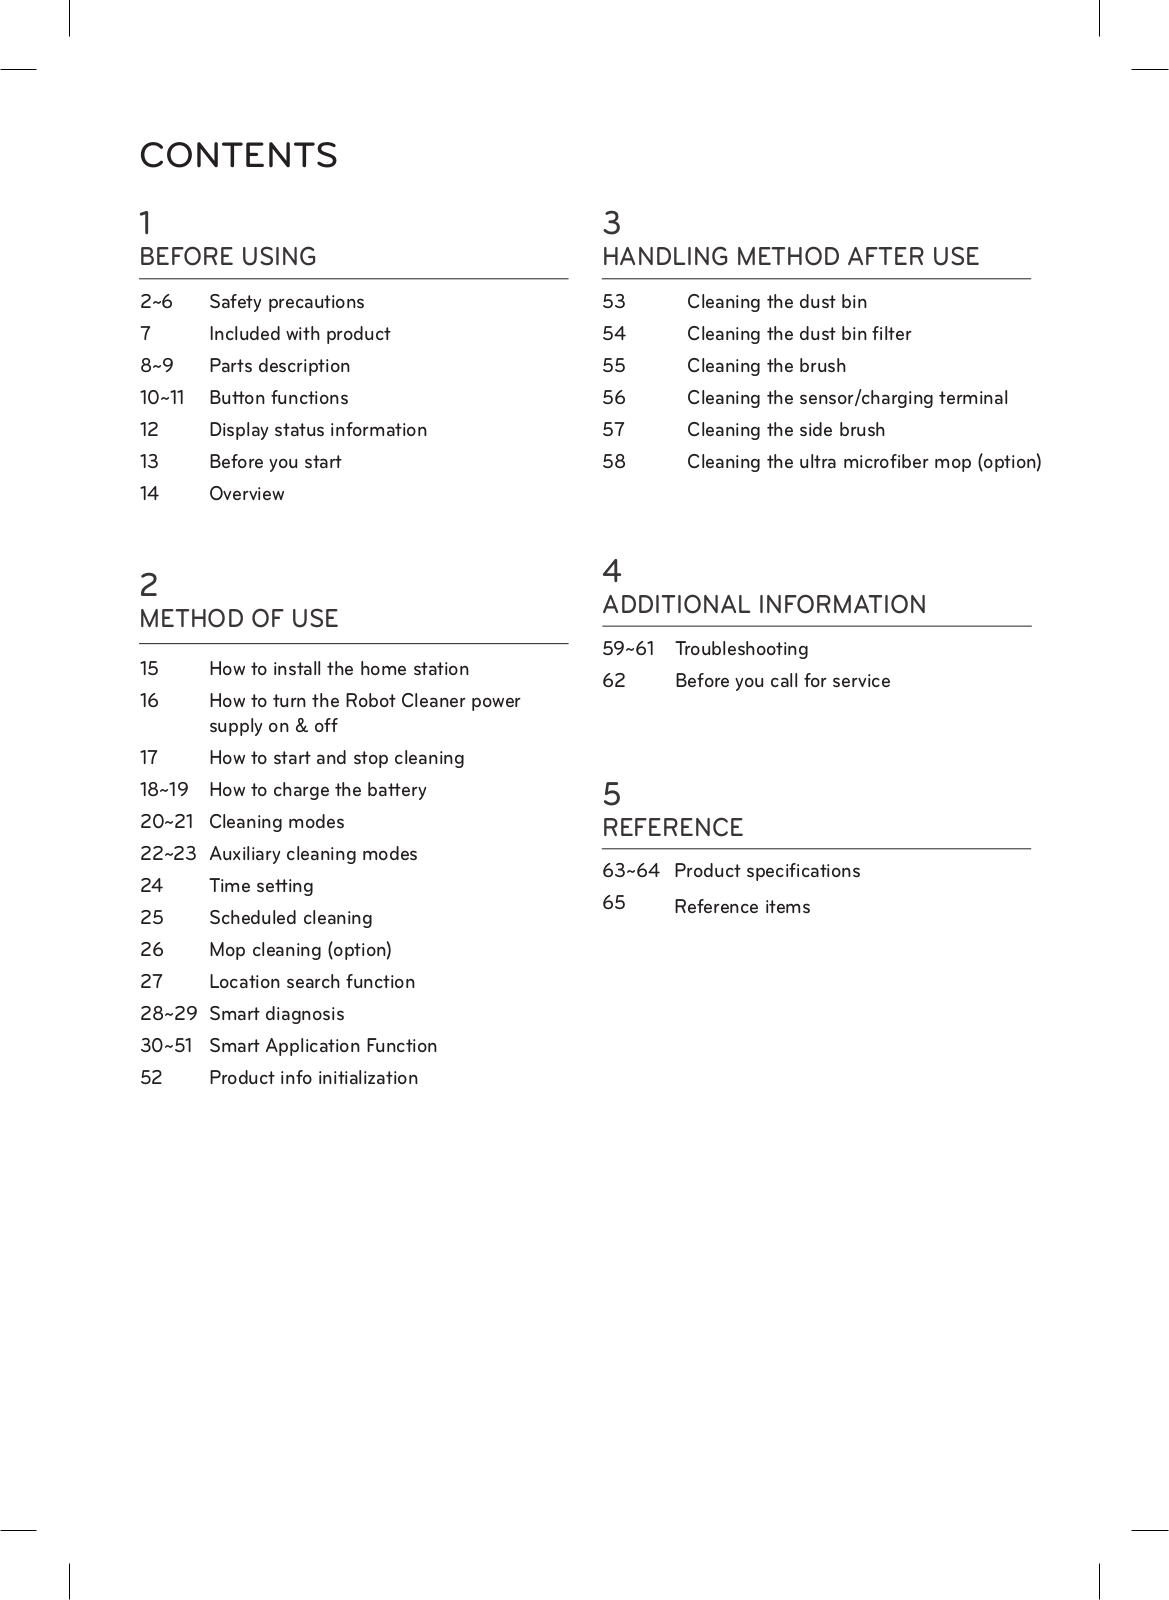
Table of contents
Loading...
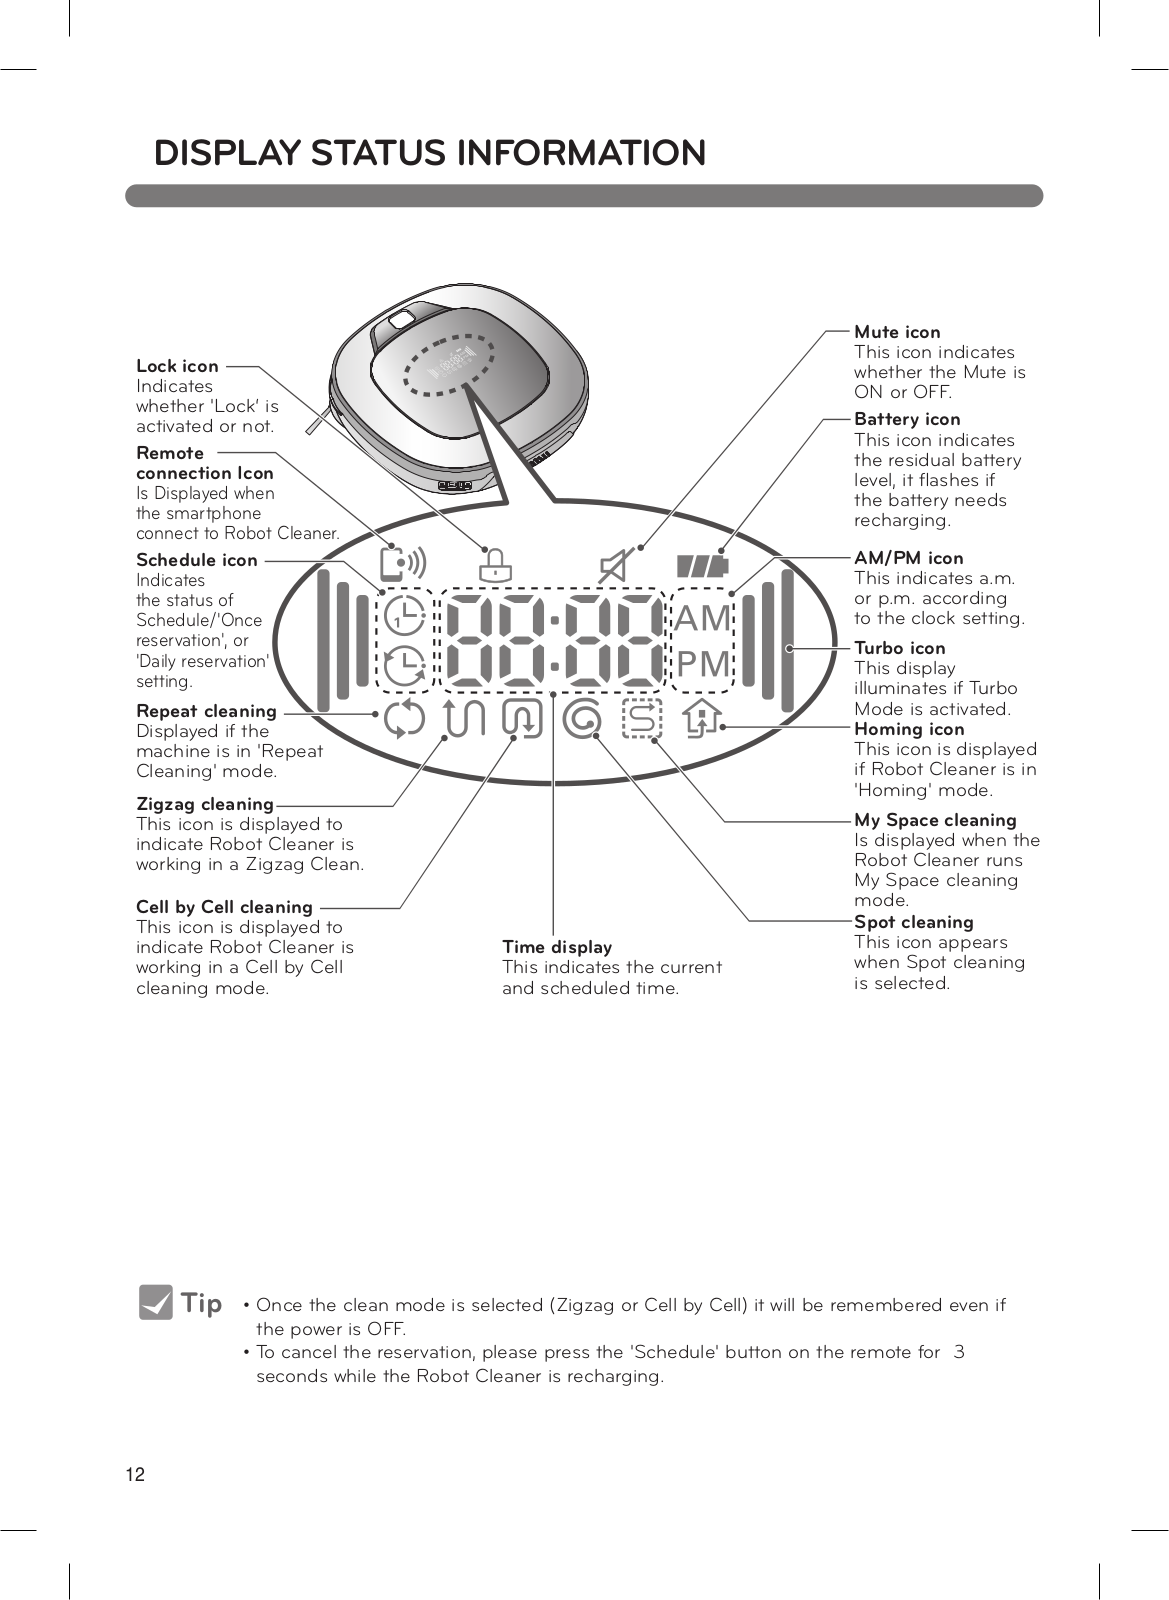
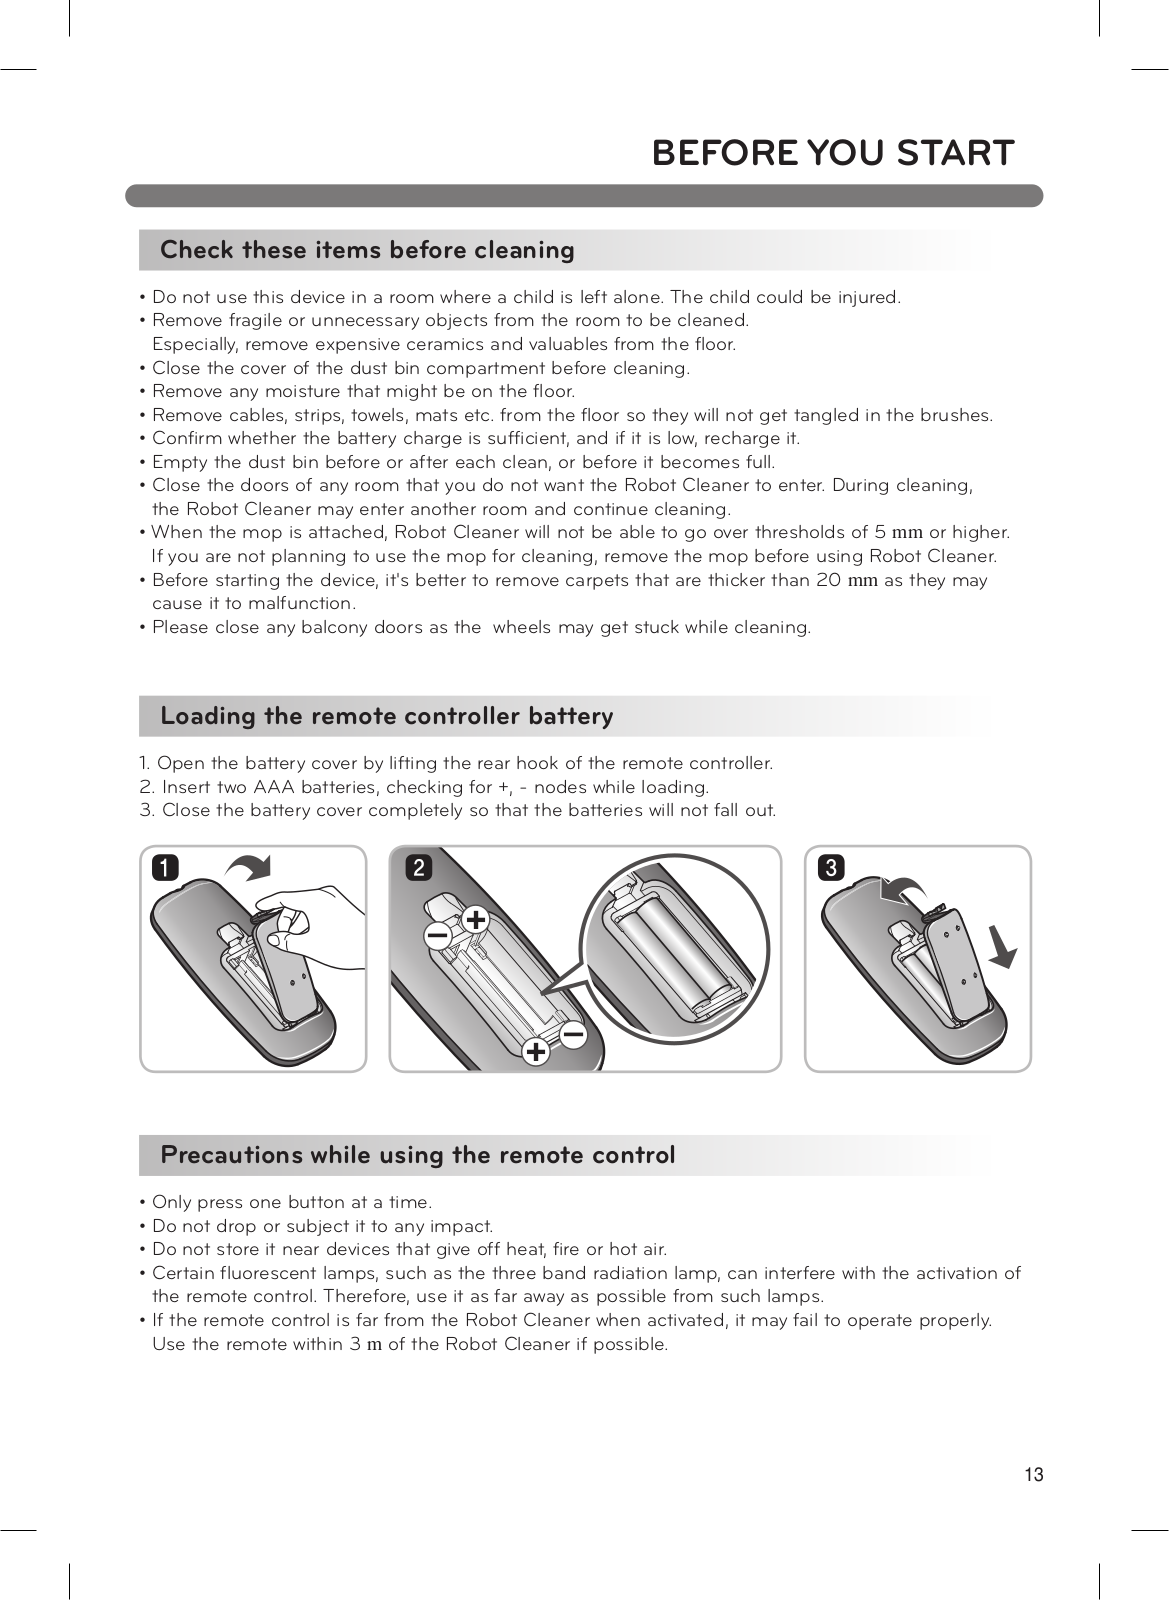
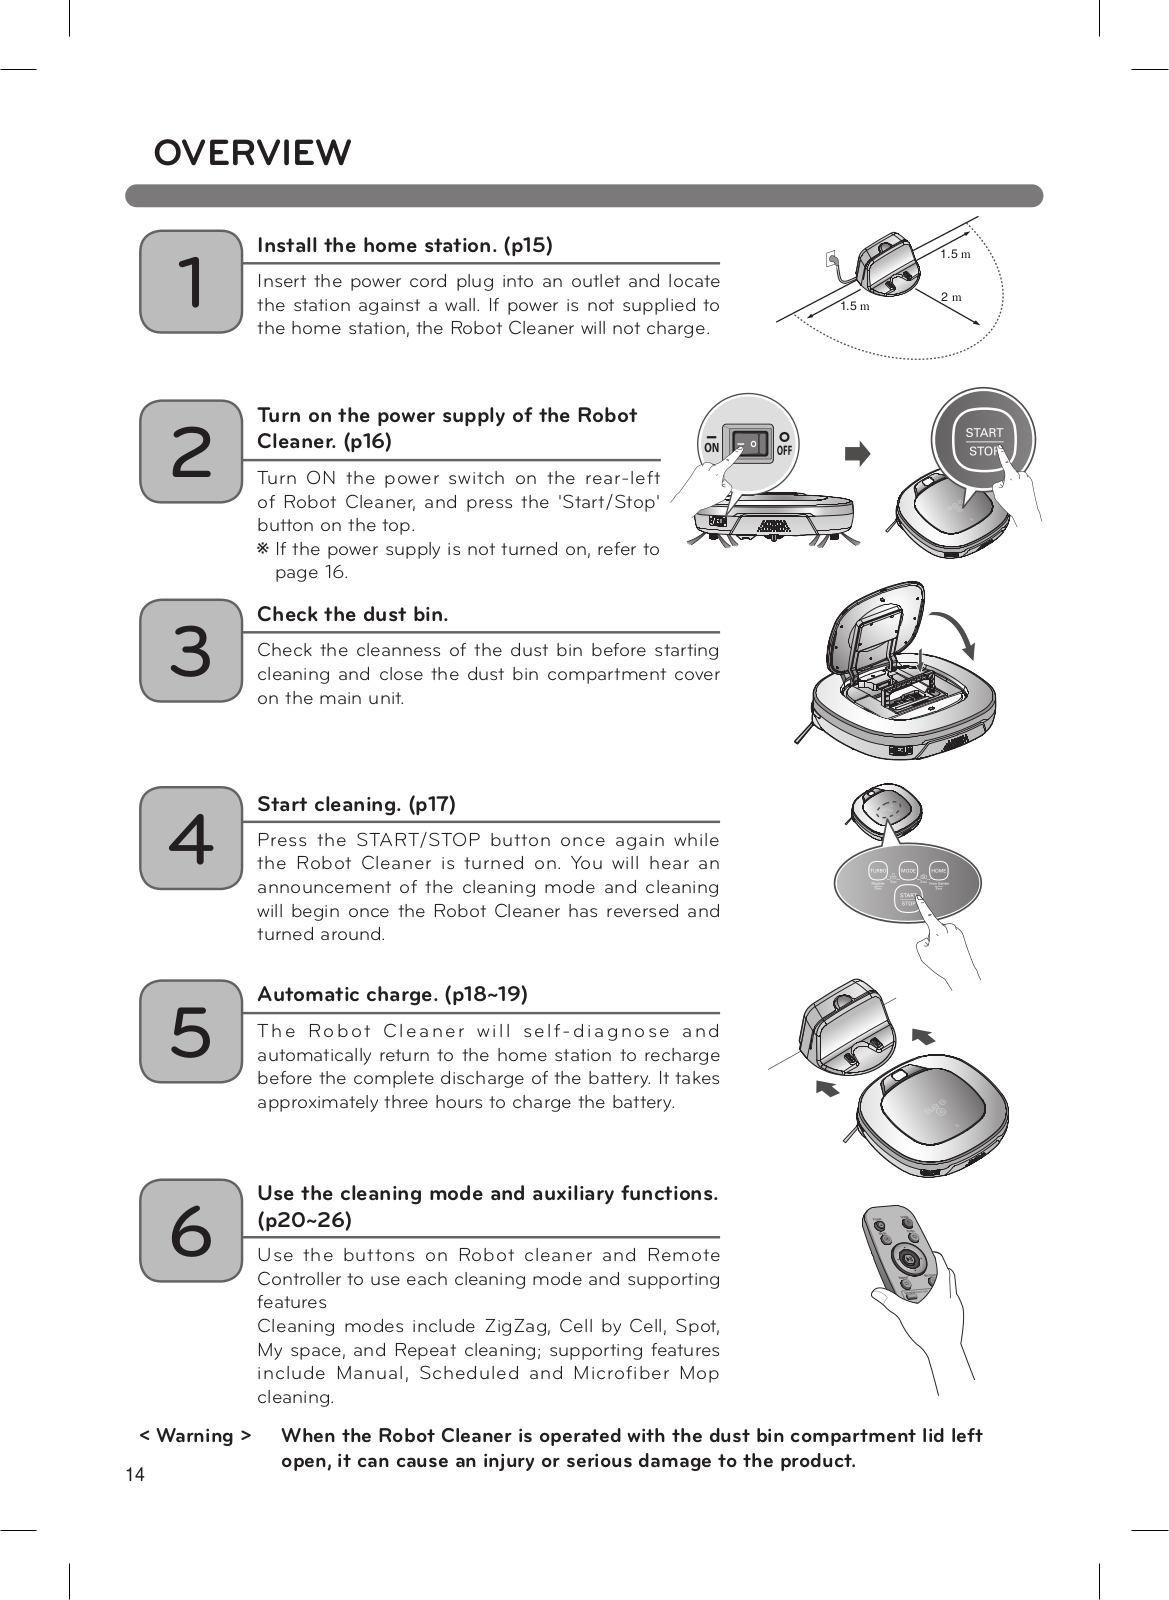
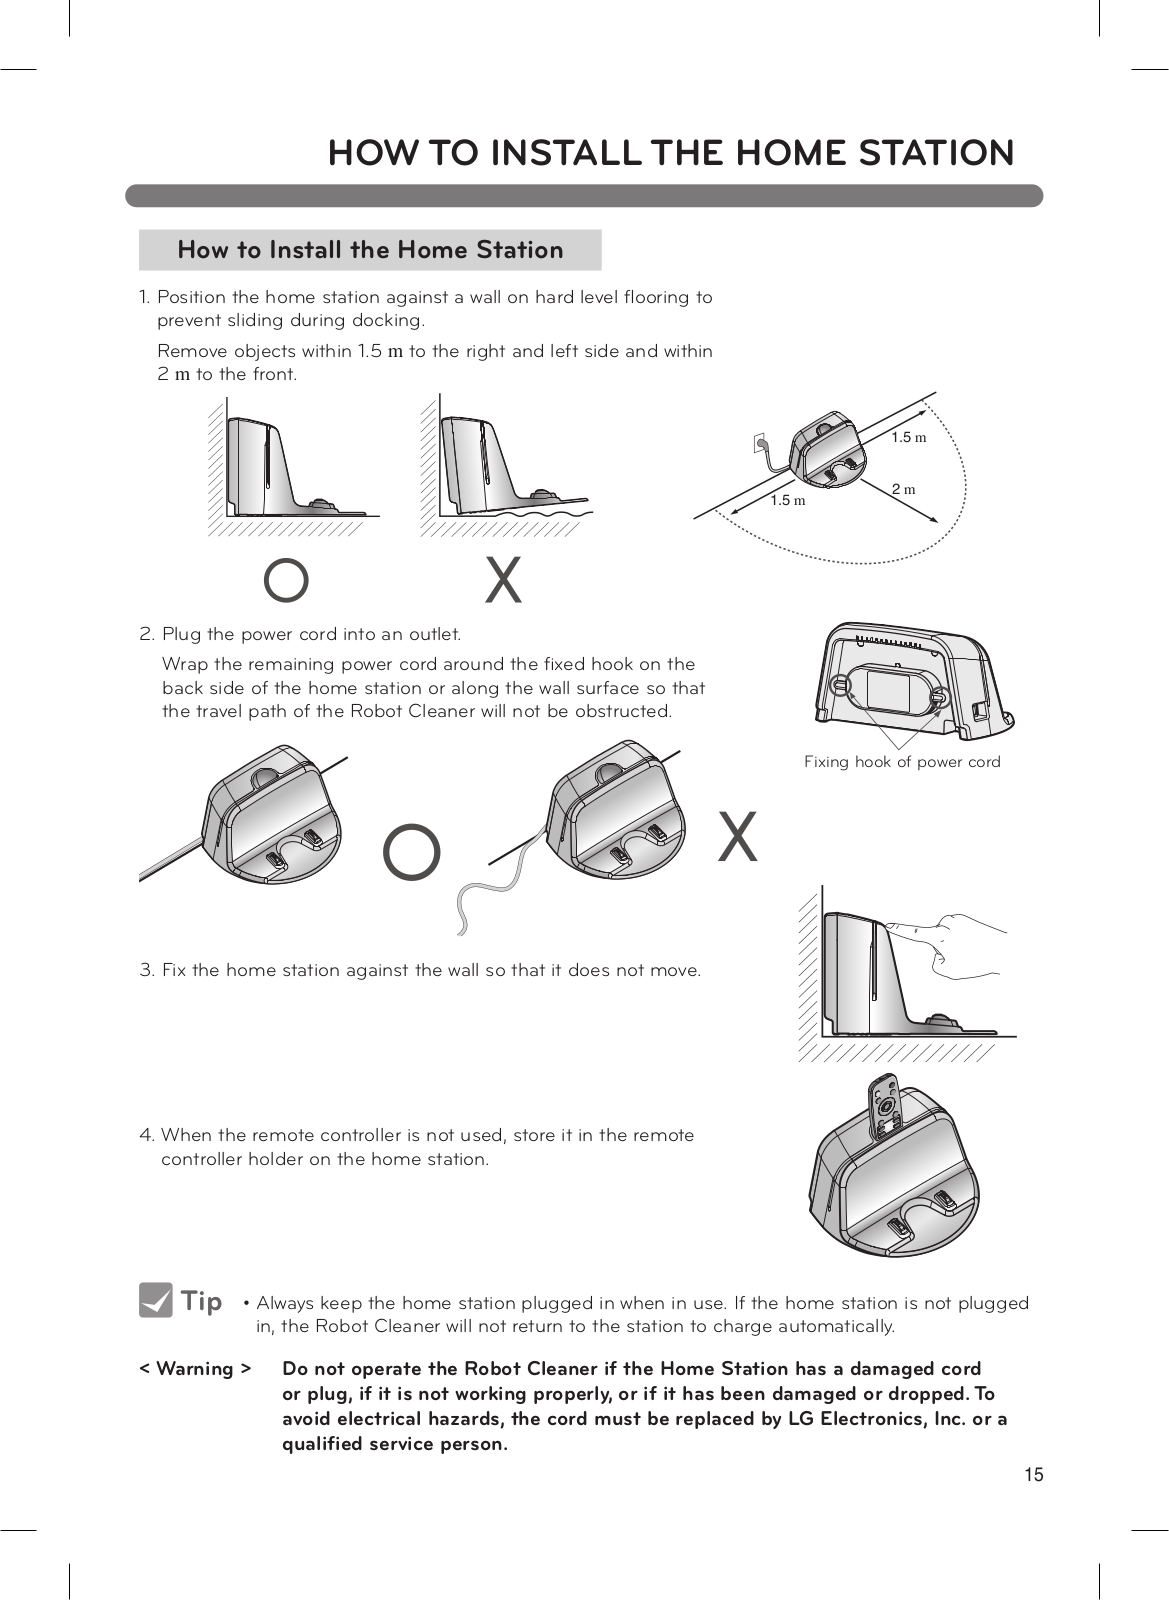
LG VR66820VMNC Owner’s Manual
...
LG Owner’s Manual
Download
Specifications and Main Features
Frequently Asked Questions
User Manual
Download
Loading...
+
47
hidden pages
Unhide
You need points to download manuals.
1 point = 1 manual.
You can buy points or you can get point for every manual you upload.
Buy points
Upload your manuals
 Loading...