

Page 1
Model
Language
Page
Material
Date
Part No.
V-C32**N**/R**
English+Russian+Ukrainian+kazakh
28
Weight 100g
2009.06.23
AFN33422401
Color(cover/body)
Size(W*H)
Designer
Description
Chage Record
No. Date
1
2
3
4
5
6
7
8
9
Change content
ECO No.
add certificate image ACTT008835 10.12.04 jinyinyi cuiyt
change certificate image ACTT009060 10.12.09 jinyinyi cuiyt
2/1
150 x 220(mm)
YangFan
Owner's manual
Designer
Confirm
Page 2
V-C32**N**/R**
E English
PкyТТНЛИ flБ˚Н
Page 3
– 2 –
9
9
4
4
2
1
3
5
6
10
11
17
12
18
13
3
1
2
6
5
7
8
7
8
Page 4
– 3 –
12
15
14
11
10
13
13
18
21
16
17
19
20
22
V-C32**N**/R**
V-C32**N**/R**
Page 5
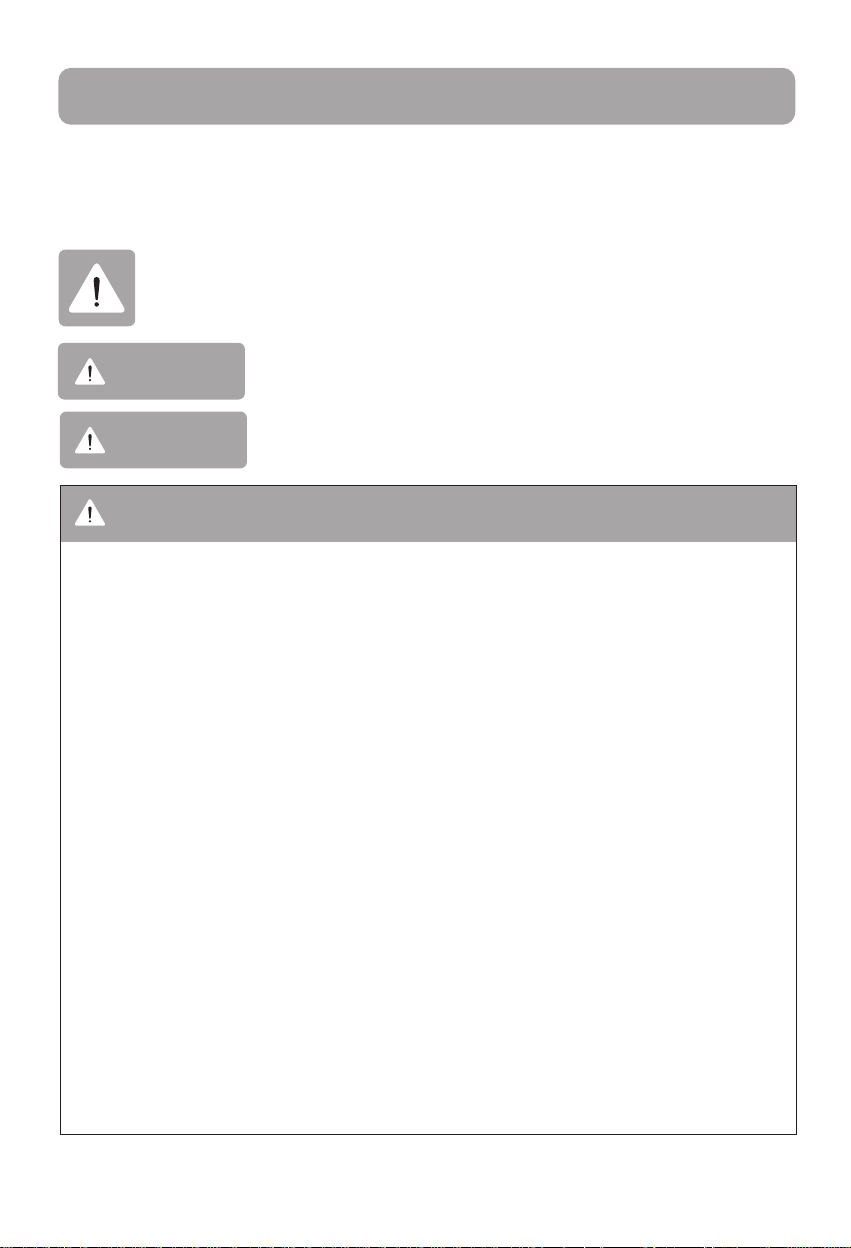
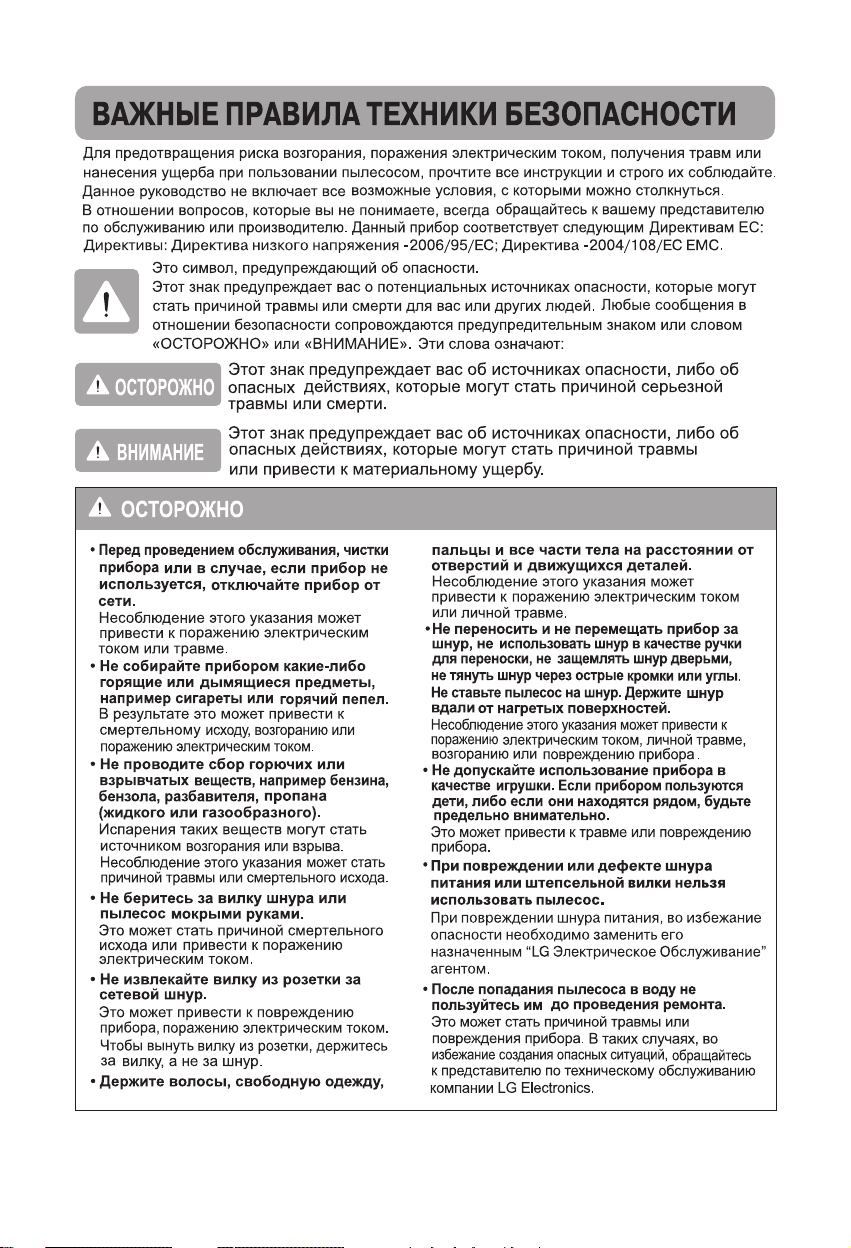
IMPORTANT SAFETY INSTRUCTIONS
Read and follow all instructions before using your vacuum cleaner to prevent the risk of fire,electric
shock, personal injury,or damage when using the vacuum cleaner.This guide do not cover all possible
conditions that may occur.Always contact your service agent or manufacturer about problems that you do
not understand. This appliance complies with the following ECDirectives:-2006/95/EC Low Voltage
Directive-2004/108/EC EMC Directive.
This is the safety alert symbol.
This symbol alerts you to potential hazards that can kill or hurt you and others.
All safety messages will follow the safety alert symbol and either the word “WARNING” or
“CAUTION.” These words mean:
WARNING
CAUTION
This symbol will alert you to hazards or unsafe practices which could cause
serious bodily harm or death.
This symbol will alert you to hazards or unsafe practices which could cause
bodily injury or property damage.
WARNING
•
Disconnect electrical supply before servicing
or cleaning the unit or when cleaner is not in
use.
Failure to do so could result in electrical shock or
personal injury.
•
Do not use vacuum cleaner to pick up anything
that is burning or smoking such as cigarettes,
or hot ashes.
Doing so could result in death, fire or electrical shock.
•
Do not vacuum flammable or explosive
substances such as gasoline, benzene, thinners,
propane (liquids or gases).
The fumes from these substances can create a fire
hazard or explosion. Doing so could result in death
or personal injury.
Do not handle plug or vacuum cleaner with
•
wet hands.
Doing so could result in death or electrical shock.
• • Do not unplug by pulling on cord.
Doing so could result in product damage or electrical
shock. To unplug, grasp the plug, not the cord.
Keep hair, loose clothing, fingers, and all parts
of the body away from openings and moving
parts.
Failure to do so could result in electrical shock or
personal injury.
•
Do not pull or carry by cord, use cord as a
handle, close a door on cord, or pull cord
around sharp edges or corners. Do not run
vacuum cleaner over cord. Keep cord away
from heated surfaces.
Failure to do so could result in electrical shock
or personal injury or fire or product damage.
•
Do not allow to be used as toy. Close
attention is ne cessary when used by or
near childre n.
Personal injury or product damage could result.
•
Do not use the vacuum cleaner if the
power cord or plug is damaged or faulty.
If the power cord is damaged, it must be
replaced by an approved LG Electronics Service
Agent to avoid a hazard.
•
Do not use vacuum cleaner if it has been
under water.
Personal injury or product damage could result.
In these cases, contact LG Electronics Service
Agent to avoid hazard.
– 4 –
Page 6

WARNING
•
Do not continue to vacuum if any parts
appear missing or damaged.
Personal injury or product damage could result.
In these cases, contact LG Electronics Service
Agent to avoid hazard.
•
Do not use an extension cord with this
vacuum cleaner
Fire hazard or product damage could result.
•
Using proper voltage.
Using improper voltage may result in damage
to the motor and possible injury to the user.
Proper voltage is listed onthe bottom of vacuum
cleaner.
•
Turn off all controls before unplugging.
Failure to do so could result in electrical
shock or personal injury.
•
Do not change the plug in any way.
Failure to do so could result in electrical
shock or personal injury or product damage.
Doing so result in death. If plug does not fit,
contact a qualified electrician to install the
proper outlet.
•
Repairs to electrical appliances may
only be performed by qualified service
engineers.
Improper repairs may lead to serious hazards
for the user.
•
Do not plug in if control knob is not in
OFF position.
Personal injury or product damage could result.
(Depending on model)
•
Keep children away and beware of
obstructions when rewinding the cord
to prevent personal injury.
The cord moves rapidly when rewinding.
(Depending on model)
•
The hose contains electrical wires. Do not
use it if it is damaged, cut or punctured.
Failure to do so could result in death,or electrical
shock. (Depending on model)
– 5 –
Page 7
CAUTION
•
Do not put any objects into openings.
Failure to do so could result in product
damage.
•
Do not use with any opening blocked:
keep free of dust, lint, hair, and anything
that may reduce air flow.
Failure to do so could result in product
damage.
•
Do not use vacuum cleaner without
dust tank and/or
filters in place.
Failure to do so could result in product
damage.
•
Always clean the dust bin after vacuuming
carpet cleaners or fresheners, powders
and fine dust.
These products clog the filters,reduce airflow
and can cause damage to the cleaner.
Failure to clean the dust bin could cause
permanent damage to the cleaner.
(Depending on model)
•
Do not use vacuum cleaner to pick up
sharp hard objects, small toys, pins,
paper clips, etc.
They may damage the cleaner or dust bin.
•
Store the vacuum cleaner indoors.
Put the vacuum cleaner away after use to
prevent tripping over it.
•
This appliance is not intended for use
by persons (including children) with
reduced physical, sensory or mental
capabilities, or lack of experience and
knowledge, unless they have been
given supervision or instruction
concerning use of the appliance by a
person responsible for their safety.
Children should be supervised to ensure
that they do not play with the appliance.
•
Only use parts produced or
recommended by LG Electronics
Service Agents.
Failure to do so could result in product
damage.
• Use only as described in this manual.
Use only with LG recommended or
approved attachments and accessories.
Failure to do so could result in personal
injury or product damage.
•
To avoid personal injury and to prevent
the machine from falling when cleaning
stairs, always place it at the bottom of
stairs.
Failure to do so could result in personal
injury or product damage.
•
Use accessory nozzles in sofa mode.
Failure to do so could result in product
damage.
•
Don ’t grasp the tank handle when you
are moving the vacuum cleaner.
The vacuum cleaner s body may fall when
separating tank and body. Personal injury
or product damage could result. You should
grasp the carrier handle when you
aremoving the
vacuum cleaner.
(Depending on model)
•
If after emptying the dust tank the
indicator light is on(red), clean the dust
tank.
Failure to do so could result in product
damage. (Depending on model)
•
Make sure the filters (exhaust filter and
motor safety filter) are completely
dry before replacing in the machine.
Failure to do so could result in product damage.
•
Do not dry the filter in an oven or
microwave.
Failure to do so could result in fire hazard.
•
Do not dry the filter in a clothes dryer.
Failure to do so could result in fire hazard.
• Do not dry near an open flame.
Failure to do so could result in fire hazard.
IMPORTANT SAFETY INSTRUCTIONS
– 6 –
Page 8

IMPORTANT SAFETY INSTRUCTIONS
CAUTION
Thermal protector :
This vacuum cleaner has a special thermostat that protects the vacuum cleaner in case of
motor overheating. If the vacuum cleaner suddenly shuts off, turn off the switch and unplug
the vacuum cleaner. Check the vacuum cleaner for possible source of overheating such as
a full dust tank, a blocked hose or clogged filter. If these conditions are found, fix them and
wait at least 30 minutes before attempting to use the vacuum cleaner. After the 30 minute
period, plug the vacuum cleaner back in and turn on the switch.
– 7 –
Page 9
– 8 –
Page 10

– 9 –
Page 11

– 10 –
Page 12

– 11 –
Page 13

– 12 –
Page 14

– 13 –
Page 15

– 14 –
Page 16

– 15 –
Page 17

– 16 –
Page 18

– 17 –
Page 19

– 18 –
Page 20

– 19 –
Page 21

E
How to Use
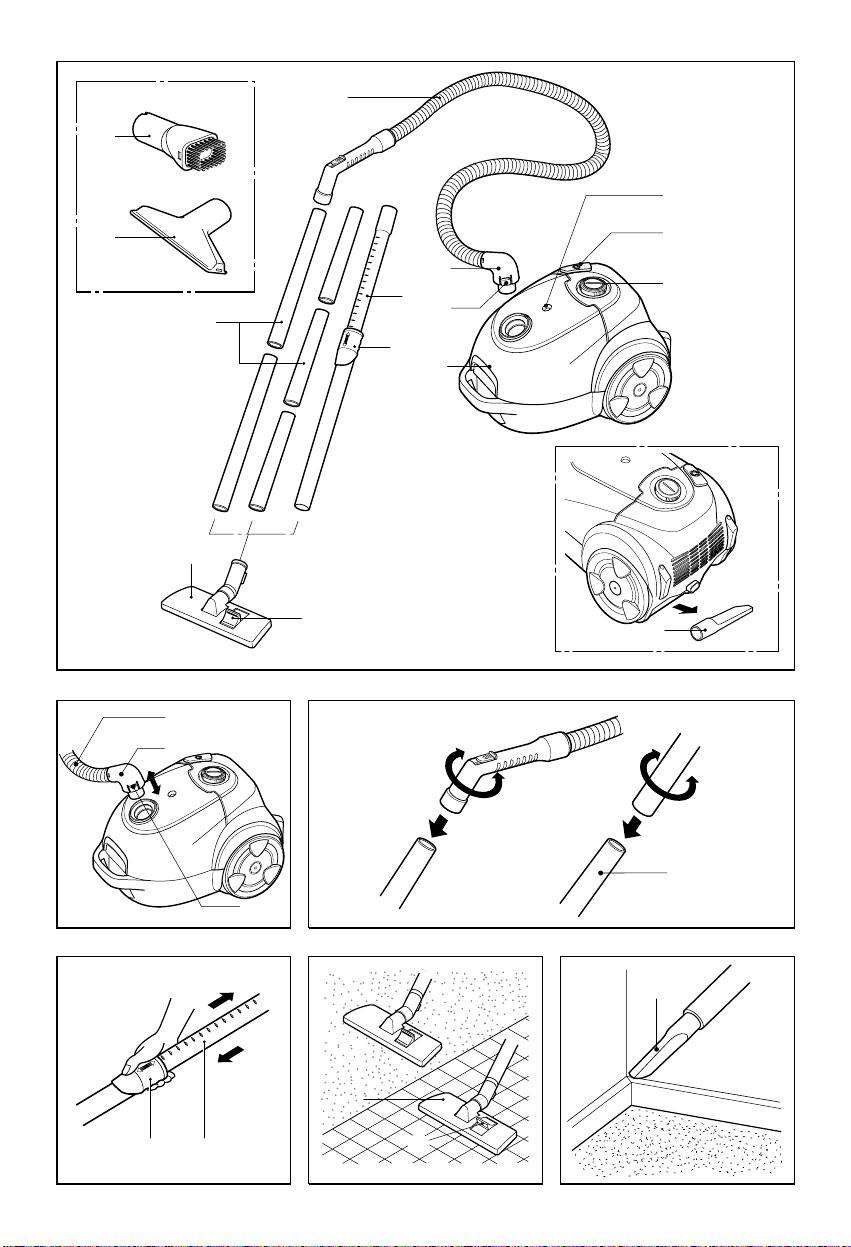
Connecting the flexible hose
Push the end of the head(1) on the flexible
hose(2) into the attachment point on the
vacuum cleaner.
To remove the flexible hose from the
vacuum cleaner, press on the button(3) situated on the head, then pull upwards.
Assembling the tubes
(depending on model)
• Metal tube(4)
- Fit together the two tubes by twisting
slightly.
•Telescopic tube(5)
- Push spring latch(6) forward.
- Pull out tube to required length.
- Release spring latch to lock.
Using the cleaning head and Accessory
Nozzles
Fit the large cleaning head onto the end of
the tube.
• The 2 position head(7) is equipped with a
pedal or two pedals(8) which allows you to
alter its position according to the type of
floor to be cleaned.
Hard floor position(tiles, parquet
floors...). Press on the pedal to lower the
brush.
Carpet or rug position. Press on the
pedal to lift the brush up.
• Crevice Tool(9)
For vacuuming in those normally inaccessible places i.e. reaching cobwebs, or down
the side of a sofa!
• Dusting brush(10)
For vacuuming picture frames furniture
outlines, books and other uneven objects.
• Upholstery Nozzle(11)
For vacuuming uphostery, mattresses, etc.
The thread collectors help to pick up the
threads and fluff.
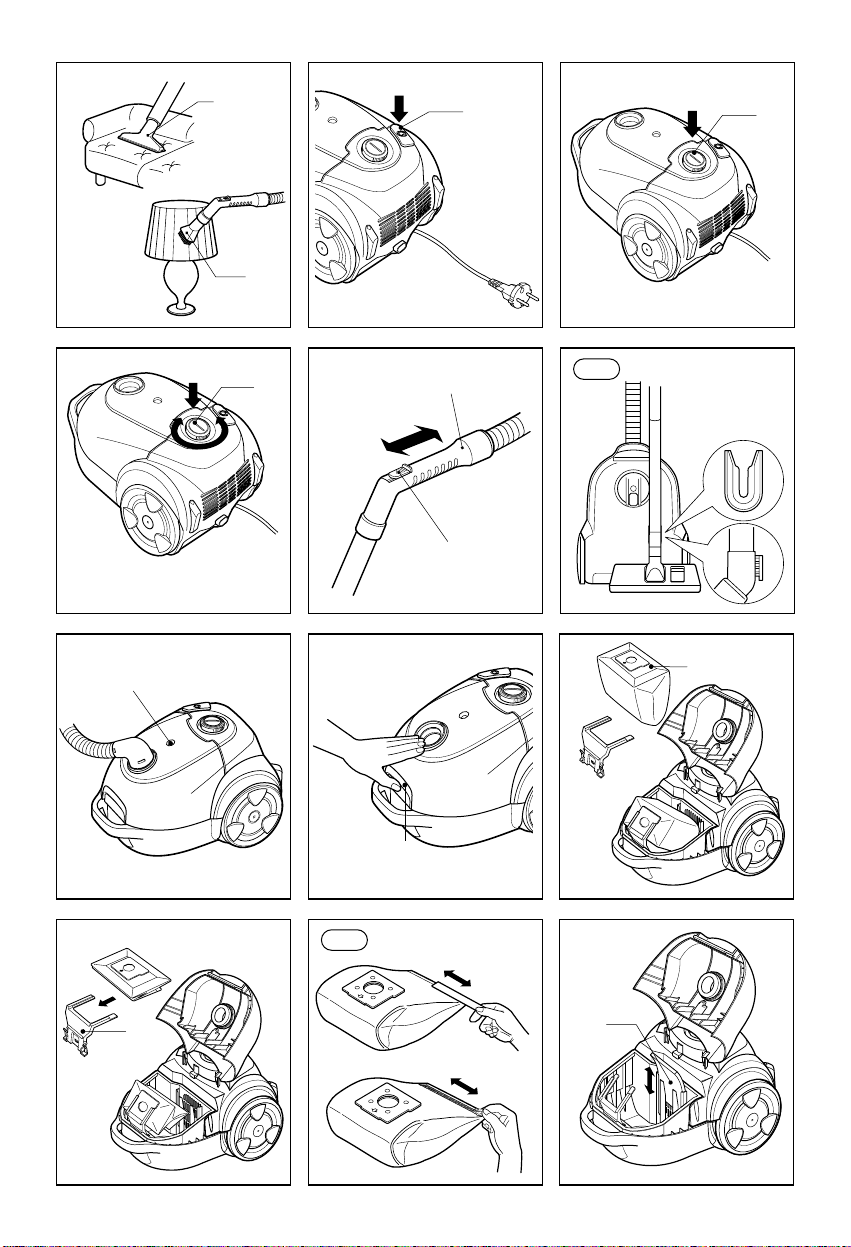
How to plug in and use
Pull out the supply cord to the desired
length and plug into the socket.
Press button (13) to start the vacuum cleaner.
To stop it press the button (13) again.
(depending on model)
Adjusting the power level
• If your appliance is equipped with an elec-
tronic variable power control(13), you can
choose the power appropriated for the
(depending on model)
task.
•
The flexible hose handle(14) has a manual
air flow regulator(15) which allows you to
briefly reduce the suction level.
Storage(16)
When you have switched off and unplugged
the appliance, press on the button (12) to
automatically rewind the cord.
You can move or store your appliance in a
vertical position by sliding the hook on the
large cleaning head into the clip on the
underside of the appliance.
Changing the dust bag
The dustbag needs changing when the cleaner
is set to maximum power and the cleaner head
is off the floor but the “bag full” indicator window(17) is completely coloured red.
Even if the dustbag does not appear to be
full at this stage, it should be changed.
It could be that a great deal of very fine dust
has clogged up the pores of the dust bag.
• Turn off the appliance and unplug it.
• Open the cover by pressing the hook(18)
and lifting it up until it snaps into place.
Your appliance is equipped with either a
paper dust bag (19) or a fabric dust bag
(21)(depending on model).
• Take hold of the dust bag by the handle
and pull.Remove the bag and throw it
away.
• To refit a new bag push the cardboard
support of a new bag into the bag mount
(20)until it will go no furthe
r.
If your appliance is fitted with a fabric dust bag follow the same instructions
as above.
Empty it and replace it(21).
Note: as the appliance is fitted with a safety
device which checks that the bag is in place
you cannot close the lid if the bag is not fitted correctly.
– 20 –
Page 22

E
Cleaning the motor filter
The motor filter is situated inside the appliance between the dust bag and the motor.
Each time that you change the air outlet filter we advise you to remove the motor filter(22) and to clean it by tapping to remover
the dirt and then replacing it in the vacuum
cleaner.
■ The working life of this set is 7 years since
the date of delivery to the consumer.
Upon the expiry of the said period, it
might be unsuitable for the use according
to their destination.
What to do if your appliance
does not work?
Check that the appliance is correctly plugged
in and that the electrical socket is working.
What to do when the suction
performance reduces?
• Stop the appliance and unplug it.
• Check that the tubes, flexible hose and
cleaning tool are not blocked.
• Check that the dust bag is not full.Replace
if necessary.
– 21 –
Page 23

P
аТФУО¸БУ‚‡МЛВ Ф˚ОВТУТ‡
иЛТУВ‰ЛМВМЛВ „Л·НУ„У ¯О‡М„‡
ÇÒÚ‡‚¸Ú ̇ÍÓ̘ÌËÍ (1) „Ë·ÍÓ„Ó ¯Î‡Ì„‡ (2)
‚У ‚ıУ‰МУВ УЪ‚ВТЪЛВ Ф˚ОВТУТ‡.
уЪУ·˚ УЪТУВ‰ЛМЛЪ¸ ¯О‡М„ УЪ Ф˚ОВТУТ‡,
М‡КПЛЪВ НМУФНЫ (3) ̇ ̇ÍÓ̘ÌËÍ Ë
ÔÓÚflÌËÚÂ Â„Ó ‚‚Âı.
ë·Ó͇ ÚÛ·
(Á‡‚ËÒËÚ ÓÚ ÏÓ‰ÂÎË)
• åÂÚ‡Î΢ÂÒ͇fl ÚÛ·‡ (4)
- ÇÒÚ‡‚¸Ú ӉÌÛ ‚ ‰Û„Û˛ Ë Ò΄͇
ÔÓ‚ÂÌËÚÂ.
• ê‡Á‰‚Ë„‡˛˘‡flÒfl Ú۷͇ (5)
- з‡КПЛЪВ М‡ ФЫКЛММЫ˛ Б‡˘ВОНЫ (6).
- Ç˚ÚflÌËÚ ÚÛ·ÍÛ Ì‡ Ú·ÛÂÏÛ˛ ‰ÎËÌÛ.
- йЪФЫТЪЛЪВ ФЫКЛММЫ˛ Б‡˘ВОНЫ, ˜ЪУ·˚
Б‡ЩЛНТЛУ‚‡Ъ¸ ЪЫ·НЫ.
аТФУО¸БУ‚‡МЛВ ˘ВЪНЛ Л ‰УФУОМЛЪВО¸М˚ı
М‡Т‡‰УН (‚ Б‡‚ЛТЛПУТЪЛ УЪ ПУ‰ВОЛ)
мНВФЛЪВ ·УО¸¯Ы˛ ˘ВЪНЫ М‡ НУМˆВ ЪЫ·НЛ.
• Ñ‚ÛıÔÓÁˈËÓÌ̇fl ̇҇‰Í‡
Ó‰ÌÓÈ ËÎË ‰‚ÛÏfl (8) ФВ‰‡ОflПЛ, ˜ЪУ
ФУБ‚УОflВЪ ‚‡П ПВМflЪ¸ ФУОУКВМЛВ ˘ВЪНЛ ‚
Б‡‚ЛТЛПУТЪЛ УЪ ЪЛФ‡ ФУО‡.
ÑÎfl ڂ‰˚ı ÔÓÍ˚ÚËÈ (ФОЛЪНЛ, Ф‡НВЪ‡...).
з‡КПЛЪВ М‡ ФВ‰‡О¸, ˜ЪУ·˚ ‚˚‰‚ЛМЫЪ¸
˘ВЪНЫ.
ÑÎfl ÍÓ‚Ó‚˚ı ÔÓÍ˚ÚËÈ. з‡КПЛЪВ М‡
ФВ‰‡О¸, ˜ЪУ·˚ ФУ‰МflЪ¸ ˘ВЪНЫ.
• ôÂ΂‡fl ̇҇‰Í‡ (9)
СОfl Ы·УНЛ ‚ ЪЫ‰МУ‰УТЪЫФМ˚ı ПВТЪ‡ı,
М‡ФЛПВ, ‚ УНУММ˚ı ‡П‡ı ЛОЛ Ы„О‡ı ТЪВМ˚.
• ôÂÚ͇ ‰Îfl Ô˚ÎË (10)
СОfl ˜ЛТЪНЛ ‡П Н‡ЪЛМ, Н‡В‚ ПВ·ВОЛ, НМЛ„
Л ‰Ы„Лı МВУ‚М˚ı ФВ‰ПВЪУ‚.
• фВЪН‡ ‰Оfl ˜ЛТЪНЛ У·Л‚НЛ ПВ·ВОЛ (11)
СОfl ˜ЛТЪНЛ У·Л‚НЛ, П‡Ъ‡ТУ‚ Л Ъ.Ф.
ЗНО˛˜ВМЛВ Л ЛТФУО¸БУ‚‡МЛВ Ф˚ОВТУТ‡
З˚ЪflМЛЪВ ¯МЫ ФЛЪ‡МЛfl М‡ ЪВ·ЫВПЫ˛
Л ‚НО˛˜ЛЪВ В„У ‚ УБВЪНЫ.
уЪУ·˚ ‚НО˛˜ЛЪ¸ Ф˚ОВТУТ, М‡КПЛЪВ НМУФНЫ
(13). СОfl ‚˚НО˛˜ВМЛfl Ф˚ОВТУТ‡ М‡КПЛЪВ
НМУФНЫ (13) ¢ ‡Á.
(7) Ò̇·ÊÂ̇
‰ÎËÌÛ
кВ„ЫОЛУ‚Н‡ ПУ˘МУТЪЛ
• ЦТОЛ ‚‡¯‡ ПУ‰ВО¸ Ф˚ОВТУТ‡ У·УЫ‰У‚‡М‡
˝ОВНЪУММ˚П В„ЫОflЪУУП ПУ˘МУТЪЛ (13),
‚˚ ТПУКВЪВ ЛБПВМflЪ¸ ВВ ФУ ПВВ
МВУ·ıУ‰ЛПУТЪЛ. (‚ Б‡‚ЛТЛПУТЪЛ УЪ ПУ‰ВОЛ)
• Ç ÛÍÓflÚÍ „Ë·ÍÓ„Ó ¯Î‡Ì„‡ (14) ЛПВВЪТfl
Ы˜МУИ В„ЫОflЪУ ФУЪУН‡ ‚УБ‰Ыı‡ (15),
НУЪУ˚И ФУБ‚УОflВЪ Н‡ЪНУ‚ВПВММУ
ТМЛК‡Ъ¸ ТЛОЫ ‚Т‡Т˚‚‡МЛfl.
п‡МВМЛВ (16)
З˚НО˛˜Л‚ Ф˚ОВТУТ Л ‚˚МЫ‚ ‚ЛОНЫ В„У
ТВЪВ‚У„У ¯МЫ‡ ЛБ УБВЪНЛ, М‡КПЛЪВ НМУФНЫ
(12) ‰Оfl ‡‚ЪУП‡ЪЛ˜ВТНУ„У ТП‡Ъ˚‚‡МЛfl ¯МЫ‡.
и˚ОВТУТ ПУКМУ ı‡МЛЪ¸ ‚ ‚ВЪЛН‡О¸МУП
ФУОУКВМЛЛ, ‚ТЪ‡‚Л‚ ·УО¸¯Ы˛ М‡Т‡‰НЫ
‚˚ТЪЫФУП ‚ Ф‡Б М‡ В„У ‰МЛ˘В.
á‡ÏÂ̇ Ô˚ÎÂÒ·ÓÌË͇
ЦТОЛ ПУ˘МУТЪ¸ Ф˚ОВТУТ‡ ЫТЪ‡МУ‚ОВМ‡ М‡
П‡НТЛПЫП Л М‡Т‡‰Н‡ ФЛФУ‰МflЪ‡ М‡‰ ФУОУП,
МУ ЛМ‰ЛН‡ЪУ "Б‡ФУОМВМЛВ Ф˚ОВТ·УМЛН‡"
(17) ФУОМУТЪ¸˛ Н‡ТМ˚И, Ф˚ОВТ·УМЛН
ЪВ·ЫВЪ Б‡ПВМ˚.
С‡КВ ВТОЛ ФЛ ˝ЪУП Ф˚ОВТ·УМЛН МВ ФУОУМ,
В„У МВУ·ıУ‰ЛПУ Б‡ПВМЛЪ¸.
н‡Н‡fl ТЛЪЫ‡ˆЛfl ПУКВЪ ·˚Ъ¸ ТОВ‰ТЪ‚ЛВП ЪУ„У,
˜ЪУ УЪ‚ВТЪЛfl Ф˚ОВТ·УМЛН‡ Б‡·ЛОЛТ¸
ПВОНУИ Ф˚О¸˛.
• З˚НО˛˜ЛЪВ Ф˚ОВТУТ Л УЪТУВ‰ЛМЛЪВ ‚ЛОНЫ УЪ
УБВЪНЛ.
• éÚÍÓÈÚ Í˚¯ÍÛ, ÔÓÚflÌÛ‚ Á‡˘ÂÎÍÛ (18) Ë
ÔÓ‰Ìfl‚  ‚‚Âı.
З Ф˚ОВТУТВ ПУКВЪ ·˚Ъ¸ ЫТЪ‡МУ‚ОВМ
·ÛχÊÌ˚È ËÎË Ú͇Ì‚˚È Ô˚ÎÂÒ·ÓÌËÍ (21) ‚
Б‡‚ЛТЛПУТЪЛ УЪ ПУ‰ВОЛ.
• ЗУБ¸ПЛЪВТ¸ Б‡ Ы˜НЫ Ф˚ОВТ·УМЛН‡ Л
ФУЪflМЛЪВ.
Ç˚Ú‡˘ËÚ Ô˚ÎÂÒ·ÓÌËÍ Ë ‚˚·ÓÒ¸Ú „Ó.
• ÑÎfl ÚÓ„Ó, ˜ÚÓ·˚ ‚ÒÚ‡‚ËÚ¸ ÌÓ‚˚È
Ô˚ÎÂÒ·ÓÌËÍ (19), ‚ТЪ‡‚¸ЪВ В„У Н‡ЪУММЫ˛
УТМУ‚Ы ‚ Ф˚ОВТУТ (20) ‰Ó ÛÔÓ‡.
ЦТОЛ ‚ Ф˚ОВТУТВ ЫТЪ‡МУ‚ОВМ ЪН‡МВ‚˚И
Ф˚ОВТ·УМЛН, ‚УТФУО¸БЫИЪВТ¸ ЛМТЪЫНˆЛВИ,
ФЛ‚В‰ВММУИ ‚˚¯В. й˜ЛТЪЛЪВ Ф˚ОВТ·УМЛН Л
‚ТЪ‡‚¸ЪВ В„У У·‡ЪМУ (21).
èËϘ‡ÌËÂ: Ъ‡Н Н‡Н Ф˚ОВТУТ ТМ‡·КВМ
ЫТЪУИТЪ‚УП, ФУ‚Вfl˛¯ЛП М‡ОЛ˜ЛВ ПВ¯Н‡
‰Оfl Ф˚ОЛ, З‡П МВ Ы‰‡ТЪТfl Б‡Н˚Ъ¸ Н˚¯НЫ
Ф˚ОВТУТ‡, ÂÒÎË Ï¯ÓÍ Б‡НВФОВМ
МВФ‡‚ЛО¸МУ.
– 22 –
Page 24

P
é˜ËÒÚ͇ ÙËθڇ ÏÓÚÓ‡.
оЛО¸Ъ ПУЪУ‡ ‡ТФУОУКВМ ‚МЫЪЛ Ф˚ОВТУТ‡,
ПВК‰Ы Ы˜НУИ Л НУФЫТУП. д‡К‰˚И ‡Б ФЛ
УТ‚У·УК‰ВМЛЛ НУМЪВИМВ‡ ‰Оfl Ф˚ОЛ П˚
ВНУПВМ‰ЫВП ‚˚МЛП‡Ъ¸ ЩЛО¸Ъ ПУЪУ‡ (22),
‚˚ÚflıË‚‡Ú¸ Ë ÒÚ‡‚ËÚ¸ Â„Ó Ó·‡ÚÌÓ.
■
ëÓÍ ÒÎÛÊ·˚ ‰‡ÌÌÓ„Ó ÚÓ‚‡‡ - 7 ÎÂÚ ÒÓ ‰Ìfl
Ô‰‡˜Ë ÚÓ‚‡‡ ÔÓÚ·ËÚÂβ.
иУ ЛТЪВ˜ВМЛВ ˝ЪУ„У ТУН‡ ЪУ‚‡ МВ ПУКВЪ
·˚Ъ¸ ЛТФУО¸БУ‚‡М ЛУ М‡БМ‡˜ВМЛ˛.
уЪУ ‰ВО‡Ъ¸, ВТОЛ Ф˚ОВТУТ
МВ ‡·УЪ‡ВЪ?
иУ‚В¸ЪВ Ф‡‚ЛО¸МУТЪ¸ ФУ‰НО˛˜ВМЛfl
Ф˚ОВТУТ‡ Н ТВЪЛ Л ЛТФ‡‚МУТЪ¸ УБВЪНЛ.
уЪУ ‰ВО‡Ъ¸, ВТОЛ ТМЛКВМ‡
ТЛО‡ ‚Т‡Т˚‚‡МЛfl?
• З˚НО˛˜ЛЪВ Ф˚ОВТУТ Л ‚˚М¸ЪВ ‚ЛОНЫ ЛБ
УБВЪНЛ.
• èӂ¸ÚÂ, Ì Á‡·ËÚ˚ ÎË ÏÛÒÓÓÏ ÚÛ·ÍË,
„Ë·ÍËÈ ¯Î‡Ì„ Ë ˜ËÒÚfl˘‡fl ̇҇‰Í‡.
• иУ‚В¸ЪВ, МВ ФВВФУОМЛОТfl ОЛ НУМЪВИМВ
‰Оfl Ф˚ОЛ. иЛ МВУ·ıУ‰ЛПУТЪЛ УТ‚У·У‰ЛЪВ
В„У.
– 23 –
Page 25

y
Використання пилососа
Приєднання гнучкого шланга
Вставте кінець патрубка
шлангу
корпусі пилососа.
Для від’єднання гнучкого шлангу від
пилососа кнопку
на себе.
(2)
у з’єднувальний отвір на
(3)
Приєднання трубок
(залежить від моделі)
• Металева або пластикова трубка (4)
- З’єднайте дві трубки між собою,
злегка скрутивши
• Телескопічна трубка (5)
- Натисніть пружинний фіксатор (6)
вперед.
- Витягніть трубку до потрібної довжини.
- Для фіксації відпустіть кнопку
фіксатора.
Використання щітки та додаткових
насадок (в залежності від моделі)
Встановіть щітку на кінець трубки.
• Двопозиційна насадка (7) обладнана
педаллю (8) для зміни позиції щітки
відповідно до типу підлоги.
Для твердих поверхонь (кахель,
паркет тощо). Натисніть педаль, щоб
висунути щітку
Для килимів. Натисніть педель, щоб
сховати щітку.
• Насадка для щілин (9)
Для чищення важкодоступних місць,
наприклад рами вікон, кути стін.
• Щітка для видалення пилу (10)
Для чищення рам картин, книг, меблів
та інших нерівних предметів
• Щітка для меблів (11)
Для чищення обшивки меблів,
матраців та ін.
Підключення та користування
Витягніть шнур живлення на потрібну
довжину та підключить до розетки.
Натисніть кнопку (13) для ввімкнення
пилососа. Для вимкнення натисніть
кнопку (13) ще раз.
(1)
гнучкого
, потім потягніть
Регулювання потужності
всмоктування
- Якщо ваш пристрій обладнаний
електронним регулятором потужності
(13), ви можете вибирати потужність
у відповідності до умов прибирання.
Пересуваючи повзункову кнопку
вправо ви збільшуєте потужність.
- Ручка на гнучкому шлангу (14)
обладнана ручним регулятором
повітряного потоку
знижувати потужність всмоктування.
(15)
, який дозволяє
Зберігання (16)
Після того, як ви вимкнули пилосос та
відключили шнур від розетки, натисніть
кнопку (12), щоб автоматично змотати
шнур. Ви можете переміщати та зберігати
прилад у вертикальній позиції, вставивши
виступ на двопозиційній щітці у паз на
нижній частині пилососа.
Заміна мішка пилозбірника
При піднятій щітці над підлогою на повній
потужності індикатор наповнення мішку
(17) буде повністю червоним, мішок
потрібно замінити.
Навіть якщо у цій ситуації мішок пило
збірника не здається повним, його однак,
слід замінити. Вірогідніше за все, що пори
мішка забиті дуже дрібним полом.
• Вимкніть пилосос та відключіть від розетки.
• Відкрийте кришку, натиснувши фіксатор
(18) до упору.
Ваш пилосос може бути обладнаний
паперовим або тканинним (21) в залежності
від моделі.
• Візьміть мішок за пластикову основу та
потягніть. Вийміть старий мішок та викиньте.
• Щоб встановити новий мішок (19), вставте
картонну основу в пилосос (20) до упору.
Якщо ваш пристрій обладнаний
тканинним мішком, дотримуйтесь тих
же інструкцій, що і для паперового мішка.
Очистите мішок та встановіть його на
місце
(21).
Примітка:
запобіжним пристроєм, який контролює
наявність мішка на місці, ви не зможете
закрити кришку, якщо мішок не встановлено
правильно.
оскільки прилад обладнаний
– 24 –
Page 26

y
Чищення фільтра мотора.
Фільтр мотора розташований всередині
приладу між мішком та мотором. При кожній
заміні випускного повітряного фільтра ми
радимо вам зняти фільтр мотора
почистити під проточною водою для
видалення бруду, а потім встановити на
місце у пилосос.
■ Термін служби даного товару - 7 років з
дня покупки. Після закінчення цього строку,
товар не може бути використаний за
призначенням.
(22)
та
Що робити, якщо прилад
не працює?
Перевірте, чи правильно прилад
підключений до електромережі, та чи
справна розетка.
Що робити у випадку
зниження потужності
всмоктування?
- Вимкніть пилосос та відключіть від
розетки.
- Перевірте, и не забиті трубки, гнучкий
шланг та насадки
- Перевірте, чи не переповнений мішок.
При необхідності замінить його.
– 25 –
– 7 –
Page 27

– 26 –
Page 28

– 27 –
Page 29

Утилізація старого приладу
1. Символ на приладі, що зображує перекреслене відро для сміття на
колесах, означає, що на виріб поширюється Європейська Директива
2002/96/ЕС.
2. Електричні й електронні пристрої повинні утилізуватися не разом з
побутовим сміттям, а через спеціальні місця, призначені урядовими або
місцевими органами влади.
3. Правильна утилізація старого приладу допоможе запобігти потенційно
шкідливому впливу на навколишнє середовище й здоров’я людини.
4. Для одержання більш докладних відомостей про утилізацію старого
приладу зерниться в адміністрацію міста, службу, що займається
утилізацією або в магазин, де був придбаний продукт.
http://www.lg.com
P/No.: AFN73342401
 Loading...