

LG VC200 Users manual
User Guide
MFLXXXXXXXX (1.0)
ME
User Guide
VC200
This booklet is made from 90% post-consumer recycled paper.
This booklet is printed with soy ink. Printed in Mexico
Guía del
Usuario
VC200

Copyright©2015 LG Electronics, Inc. All rights reserved.
LG and the LG logo are registered trademarks of LG Corp.
All other trademarks are the property of their respective
owners.

1
Table of contents
Table of contents .........................................................................1
What you’ll find in the box ........................................................2
VC200 parts and functions ......................................................3
Charging the battery ..................................................................4
Turning your VC200 on and off ................................................5
Connecting your VC200 ............................................................6
The VC200 app ..........................................................................8
Caregivers and Approved contacts ......................................... 14
Adding a VC200 security PIN ................................................ 16
Using the VC200 ..................................................................... 17
Adding and removing Bands ................................................... 19
LED Colors and the VC200 Status ........................................ 21
Getting help ............................................................................. 22
Safety ........................................................................................ 23
LIMITED WARRANTY STATEMENT .....................................48

2
What you’ll find in the box
What you’ll find in the box
Check that all of the following components are included in the VC200 box:
#
The VC200 Wristband
#
Charging Cord
#
Charging Adapter
#
Get to Know Your Device Guide
#
Product Safety & Warranty Brochure
NOTE If any component is missing, please contact the store from which you bought it.
CAUTION Component Compatibility
VC200 is subject to change without prior notice. The components, appearance, and
dimensions may change for improved performance and usability.
Therefore, the components of this VC200 may not be compatible with other VC200
units. To use this VC200, please use only the components provided in this box. Using
the components from another VC200 unit may damage this VC200 or cause it to
malfunction.

3
VC200 parts and functions
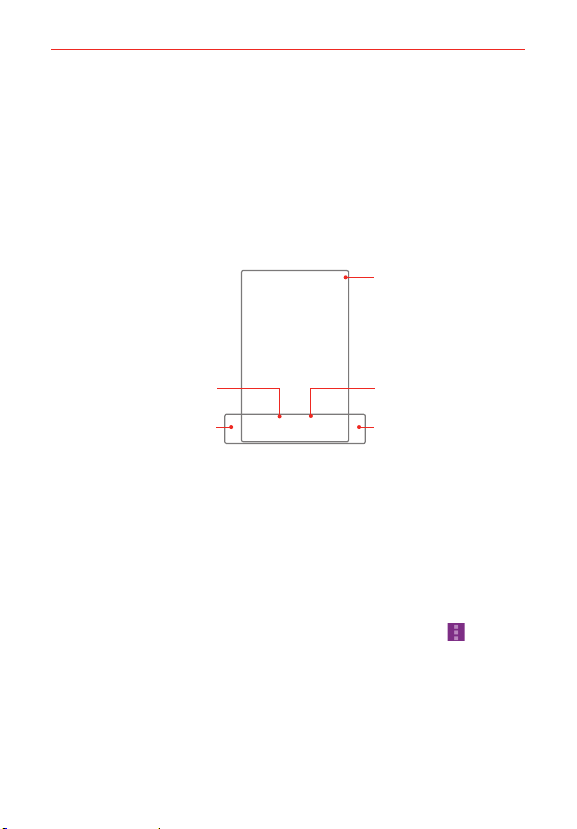
VC200 parts and functions
Front View
Microphone
Band Fastener
Speaker
Power/Call Button
Fixing Pin
Wristband
Right Side View
USB/Charging Port

4
Charging the battery
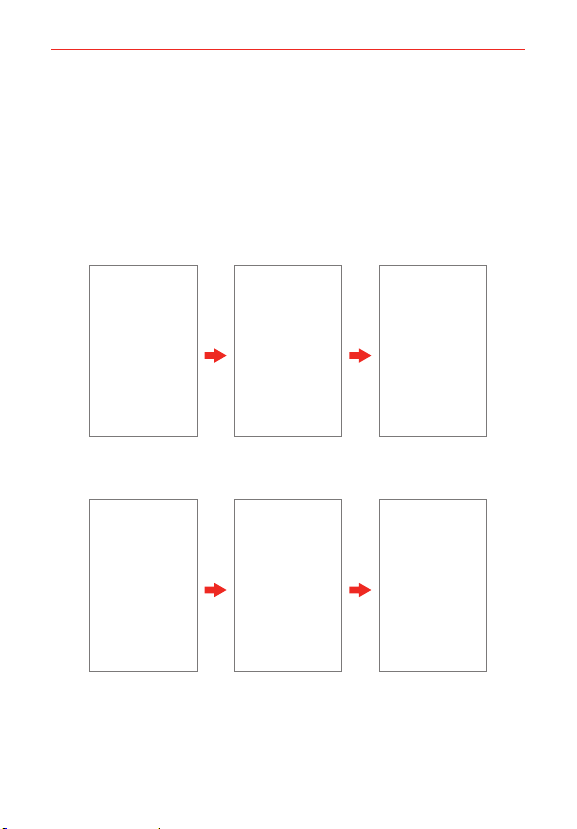
Charging the battery
To charge the battery, open the USB/Charging port cover and:
1. Plug the charging cord to the VC200.
2. Plug the other end of the cord into the charging adapter
3. Plug the charging adapter into an electrical outlet.
(The light will blink red while the unit is charging then will be a solid
green once charging is complete. See page 21 for more info on VC200
lights.)
USB/Charging
Port Cover
NOTE • Don’t use the VC200 while it’s being charged.
• Only use the charging cord and adapter included in the box to charge your VC200.
• The light on the VC200 will be a solid green when the VC200 is fully charged.
• Make sure that you close the USB/Charging port cover completely to keep out dirt and
water.

5
Turning your VC200 on and off
Turning your VC200 band on and off
To turn your band on:
#
Press and hold the Power/Call button on your VC200 for 4 seconds.
To turn your band off:
#
Press and hold the Power/Call button on your VC200 for about
8 seconds. Keep holding through the time announcement until VC200
turns off.
#
You can also use the VC200 app to turn off the band from your
smartphone.
Power/Call Button
6
Connecting your VC200
Connecting your VC200
Step 1: Download and install the VC200 App on your smartphone.
Step 2: Activate the VC200 band.
Step 3: Register as a caregiver using the app.
To use the VC200 band, it must be registered with the VC200 smartphone
companion app. To register it, install the VC200 app on the legal caregiver’s
smartphone, which must support Android OS 4.0 (or higher) or iOS7 (or
higher). The person who installs the VC200 app on their smartphone and
completes the registration will automatically be the first caregiver. If
another person downloads the app and registers the same VC200 band
later, they will be the second caregiver. Only two caregivers can be
registered for each VC200.
NOTES • The smartphone must have access to the Internet for registration to succeed.
• The VC200 app is free but data usage will apply for downloading the app.
Step 1: Download and install the VC200 app on your smartphone
Using the primary caregiver's smartphone, download and install the VC200
app from the Google Play Store or Apple App Store.
Apple App StoreGoogle Play Store
NOTE Data usage applies for app download and use.
7
Connecting your VC200
Step 2. Activate the VC200 band
Once the band is turned on, press the Power/Call button twice quickly to
start the activation process.
Step 3: Register as a caregiver using the app
NOTE Descriptions and screen images in this user guide may differ due to VC200 app
upgrades.
1. Enter your phone number, your association to the VC200 user, and the
VC200 user’s name.
2. Enter the VC200 phone number given to you by your retailer and enter
the band code from the VC200 you’re registering.
NOTE Additional privacy and information security options are available (see page 16 for more
information).
8
The VC200 app
The VC200 app
#
The caregivers use the VC200 app to connect and communicate with the
VC200 band.
#
The VC200 app home screen provides a location map showing the
location of the VC200 band.
#
The icons at the bottom of the screen allow the caregiver to call, check
the VC200’s current location, view its location history and open VC200
settings.
Call
Find Location
Location History
Settings
Menu Icon
VC200 App Home Screen
Accessing multiple VC200 wristbands
The map and icons on the app home screen apply to only one VC200 band.
If you have registered two or more bands, swipe left and right across the
icon bar to see other VC200 bands registered in your VC200 app.
Options menu
From the VC200 app on the caregiver’s smartphone, tap Menu to open
the Options menu. The Options menu includes Add VC200 band, Set up
PIN for security, and Help.

9
The VC200 app
Making calls from the VC200 app
From the VC200 app on the caregiver’s smartphone, tap Call to call the
VC200 band.
Call ScreenVC200 App Home Screen
NOTE When the Auto-answer calls setting is turned on, the VC200 band will automatically
answer the call in 10 seconds even if the Power/Call button isn't pressed. The call will
automatically end after 1 minute.
Checking the VC200 current location
When the caregiver opens the VC200 app, the VC200’s last known location
is displayed on the map. Tap Find
to search for its current location. The
location marker is displayed on the map.
VC200 App Home Screen

10
The VC200 app
Location information
The location of the VC200 wristband is primarily determined using Google’s
GPS location service. If unsuccessful, the VC200 app will attempt to locate
the VC200 wristband using a different method.
#
When the VC200 is located in a place where GPS or Wi-Fi isn’t available
(or if the VC200 is turned off), the VC200 app won’t be able to display
location information.
#
Location information may be unavailable, inaccurate, or incomplete
depending on your surroundings. Note that location information may
take up to 3 minutes to become available.
#
A location error of up to several miles can occur.
#
If the VC200 is indoors, the location can be inaccurate or unavailable.
NOTE The Wi-Fi connection for this VC200 is reception only. (There is no Wi-Fi signal
transmission.)
Viewing the location search history
From the VC200 app on the caregiver’s smartphone, tap History to
show a list of the caregiver’s previous location requests. Each entry
includes the location, date, and time of the location request.
Location Search History ScreenVC200 App Home Screen
NOTE If the location request was unsuccessful, a search result message is displayed in place
of the location.
11
The VC200 app
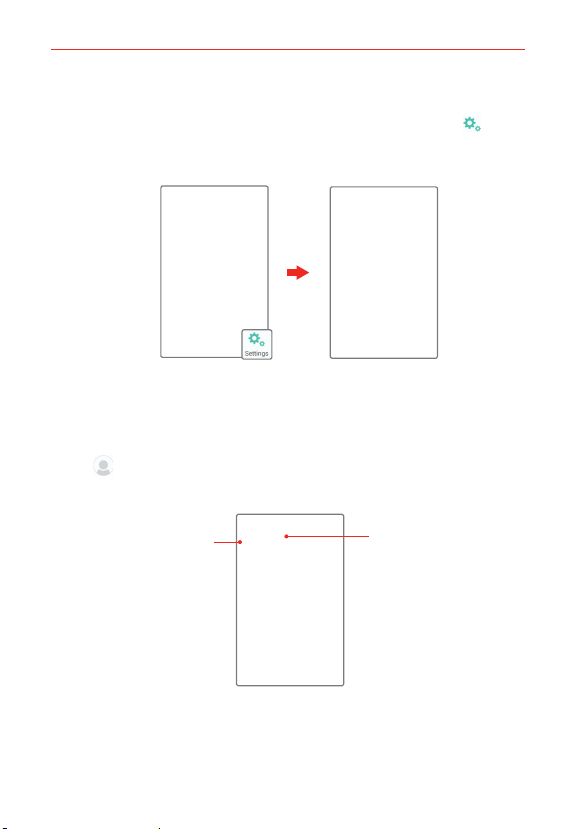
Settings
From the VC200 app on the caregiver’s smartphone, tap Settings to
configure various settings for VC200 including notification, smartphone, and
volume settings.
Settings ScreenVC200 App Home Screen
Changing the VC200 user information
The VC200 user information can be changed from the Settings screen.
#
Tap
to add a photo of the user.
#
Tap the name area to edit the child’s name.
VC200 App Settings Screen
Tap here to add a
photo of the user.
Tap here to edit the
child’s name.
12
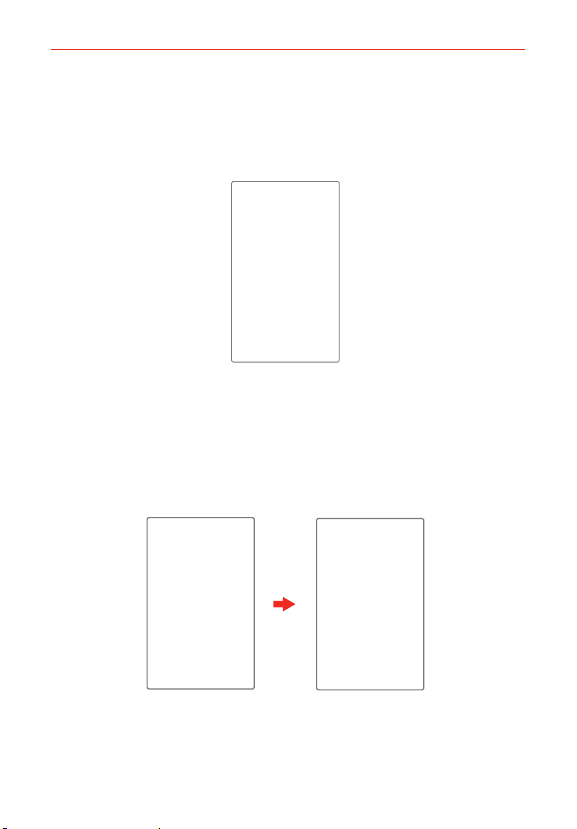
The VC200 app
Places
Allows the caregiver to set familiar names for the locations frequented by
the VC200 user for easy identification when viewing the Location Search
History list. Set names such as Home, Soccer Field, School etc.
NOTE Some house numbers or street name locations may be difficult for the VC200 app to
identify via GPS.
Location check
Allows the caregiver to set specific day(s) and time(s) to automatically
request a location check. Automatic location request results are displayed
in the Notification panel of the caregiver's smartphone.

13
The VC200 app
Your Settings
(Both caregivers can access these)
#
Auto-answer calls: When this settings is on, VC200 will automatically
answer your call after 10 seconds even if the Power/Call button isn't
pressed.
#
Show battery life: Displays the VC200's current battery charge level.
NOTE A low battery notification message will be sent to the caregivers smartphone when the
VC200 band's battery level drops below 20%.
VC200 Band Settings
(Only the first caregiver can access these)
#
Caregivers: Use this to add or change the second caregiver.
#
Approved contacts: Use this to add or remove approved contacts who
can also call the VC200 band.
#
Quiet mode: Use this to silence all the VC200 sounds.
#
Ringtone on: Use this to turn on or off the VC200 band's ringtone.
#
Fun Sounds: Use this to choose the sound played when the band's
Power/Call button is pressed briefly.
#
Volume: Use this to set the volume of the sounds played by the VC200
band (e.g., ringtone, call tone and fun sounds). This setting is only
available to the first caregiver.
#
Turn off band: Use this to turn off the VC200 band remotely. Note that
the band cannot be turned back on using the app. The only way to turn
the band on is to press the Power/Call button on the band for
4 seconds.
#
Band software version: Use this to see the current VC200 app software
version.
#
Check if a software update is available: Use this to check for available
software updates so you can upgrade to the latest software and keep
the VC200 operating with the latest features.
NOTE If the settings on the caregiver's smartphone and on the VC200 band aren't in sync, turn
off the VC200 band and then turn it back on again or close the app and open it again to
sync them.

14
Caregivers and Approved contacts
Caregivers and Approved contacts
What is the difference?
The 2 Caregivers will have the VC200 app on their smartphones. Both
Caregivers can:
#
Receive calls from the VC200 band.
#
Call the band from their smartphone.
#
Use the VC200 app to locate the band.
The first Caregiver can also change the VC200 band settings or use the app
to turn off the band.
You can add 2 Approved Contacts. Approved Contacts can call the VC200
band by dialing the band’s mobile number from the Approved Contact’s
registered phone number. Approved contacts can’t use the VC200 app,
locate the band, or receive calls from the band.
Adding a second caregiver
1. From the caregiver's VC200 app, tap Settings > Caregivers > Add
Second Caregiver.
2. Enter the name and the phone number of the contact, then tap Next.
3. Confirm the phone number on the pop-up and tap OK.
4. Read the information on the screen and tap Done.
15
Caregivers and Approved contacts
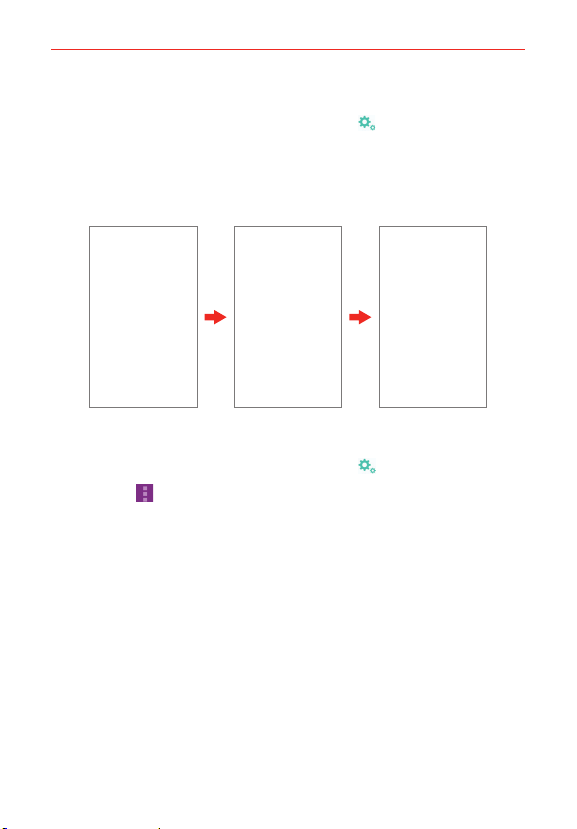
Adding approved contacts
1. From the caregiver’s VC200 app, tap Settings > Approved contacts.
2. Enter the name and the phone number of the contact, then tap Done.
3. Enter an additional name and number, if desired.
4. Tap Save, then tap Done.
Editing approved contacts
1. From the caregiver’s VC200 app, tap Settings > Approved contacts.
2. Tap Menu
, then tap Remove first contact.
3. If desired, enter the new contact name and phone number, then tap
Done.
4. Tap Save, then tap Done.
 Loading...