How it Works
Log In / Sign Up
Buy Points
How it Works
FAQ
Contact Us
Questions and Suggestions
Users
LG
Loading...
V
V134MEA
V144XG
V144XGA
V1502KP4Z
2
V1502P1Z
2
V1502P4Z
2
V152XD
V152XDA
V154MG
V154MGA
V155MH
V155MHA
V160
2
V1600MZ
V1602P2Z
4
V1602P3Z
2
V161
V1610W1Z
V1612P1Z
V1612P2Z
4
V1612W1Z
2
V164XK
V164XKA
V170XG
V170XGA
V1742TABB
V174NAA
V177ZL
V177ZLA
V180
5
V1801P1Z
6
V1802KP4Z
2
V1802P1Z
2
V1802P2Z
10
V1802SZ
3
V181
3
V1810KMZ
2
V1810MZ
2
V1812P2Z
4
V1812W
V1812W1Z
2
V18CDT-N
V18CFB-N
V18E
V18ENBN
V18LH
V190
7
V1900P1R
2
V1902SZ
2
V1920P1H
2
V192B
V192H
3
V1942P4H
2
V194H
2
V194XH
V20
12
V2020
V2020N
V2020R
V204FSA
V204NTA
V204XJ
V204XJA
V204ZL
V204ZLA
V2060
V2060N
V2060R
V226ZP
V2272TAB
V24CDT-N
V24CFB-N
V24CRH-U
V24ENBN
V24LH
2
V25
9
V25EEE2K
2
V25REE2K
V25SEE2K
4
V25SEE4K
3
V270
2
V270N-P2
3
V271
4
V271K-W1
V271-W1
2
V271-W1Z
V280
17
V280B
2
V280N-P1
2
V280N-P1Z
2
V280N-P2
4
V280N-P2Z
2
V280N-S
3
V280-P4Z
V281
3
V281-M
2
V281-P3
2
V281-W1
3
V281-W2
V2-B12X3W
2
Loading...
Loading...
Nothing found
V192B
Owner’s Manual
24 pgs
9.01 Mb
0
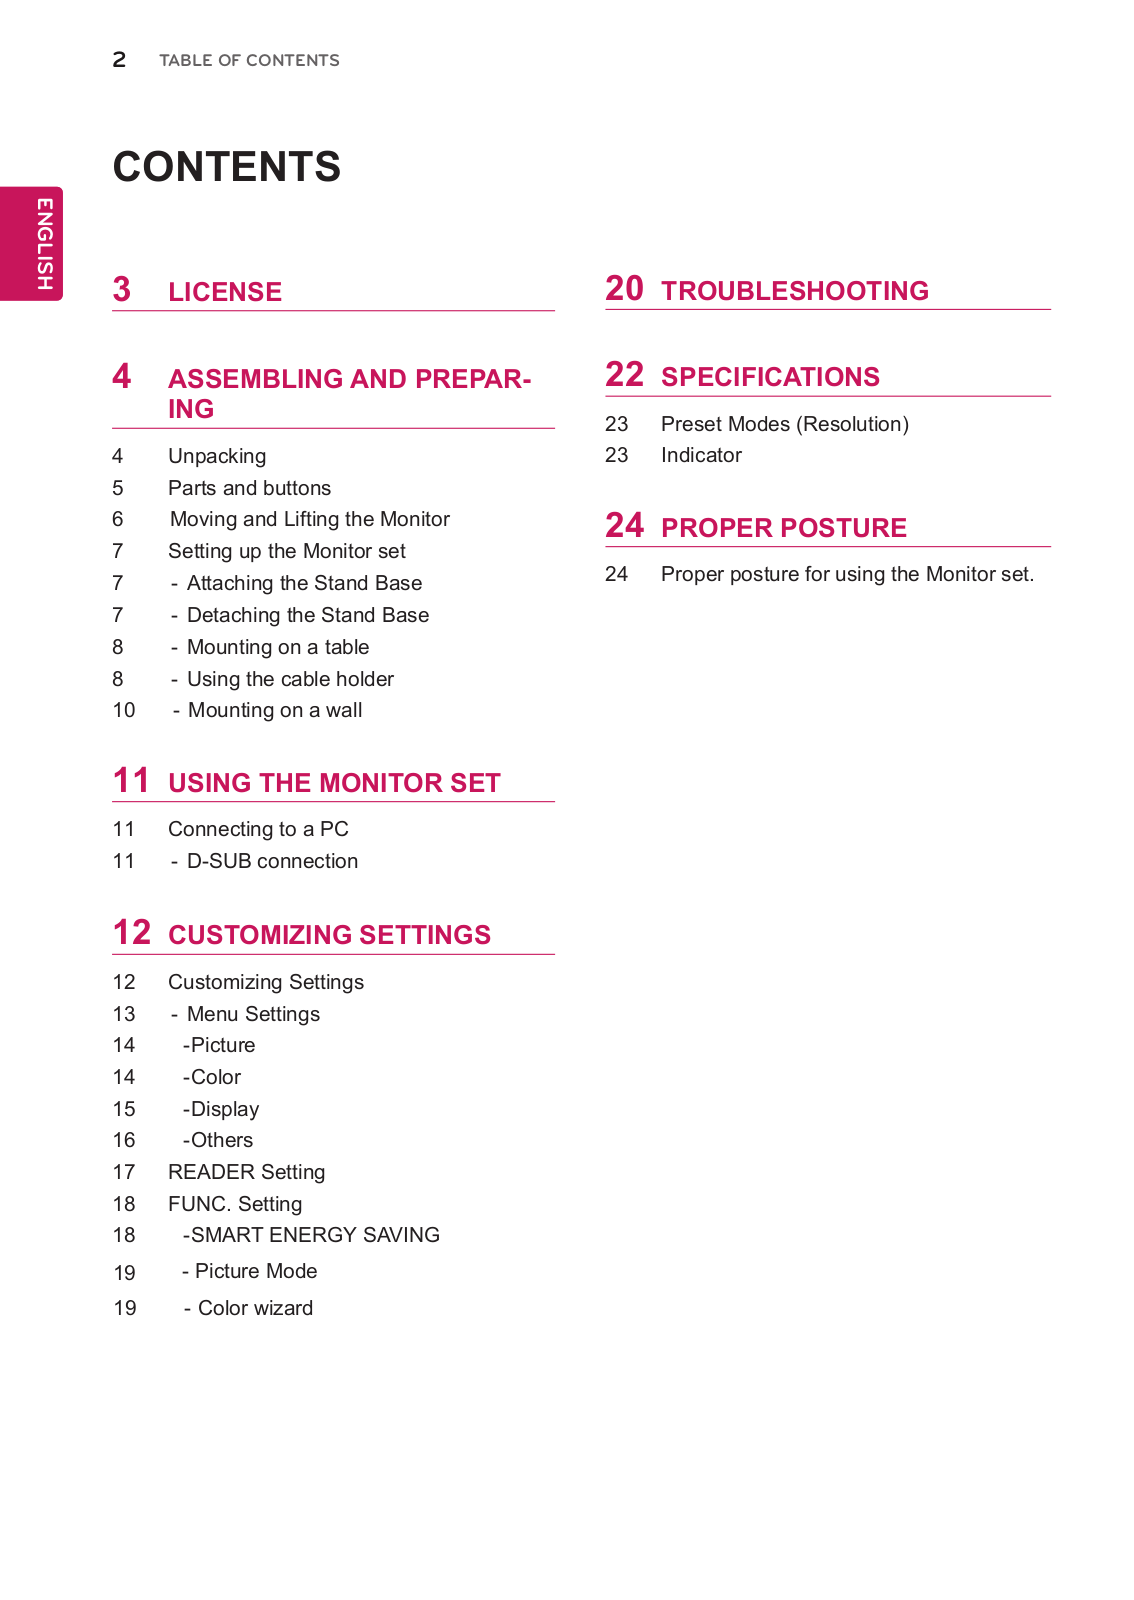
Table of contents
Loading...
LG V192B Owner’s Manual
...
LG Owner’s Manual
Download
Specifications and Main Features
Frequently Asked Questions
User Manual
Download
Loading...
+
16
hidden pages
Unhide
You need points to download manuals.
1 point = 1 manual.
You can buy points or you can get point for every manual you upload.
Buy points
Upload your manuals
 Loading...