

LG TVBR2742Z User Manual
OWNER’S MANUAL
MANUAL DE INSTRUCCIONES
COMBINA TION 27" COLOR TELEVISION AND VIDEO CASSETTE
RECORDER WITH GLOW ILLUMINA TED REMOTE CONTROL
COMBINACION DE 27" TELEVISOR A COLOR CON GRABADOR
DE VIDEOCASSETTE CON CONTROL REMOTO ILUMINADO
ENGLISHESPAÑOL
TVBR2742Z
HIGH QUALITY
Before operating the unit, please read this manual thoroughly.
Antes de usar la unidad, lea detenidadmente este manual de instrucciones.
ENGLISH
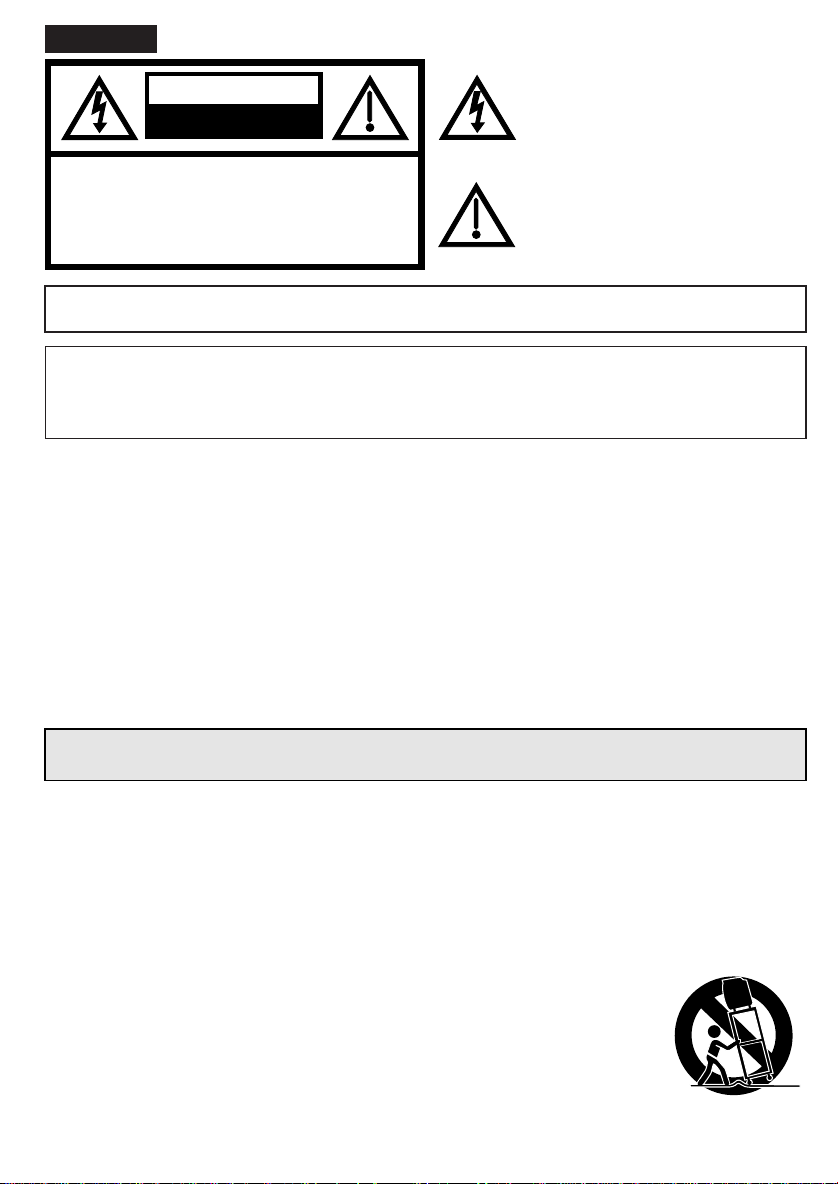
CAUTION
RISK OF ELECTRIC SHOCK
DO NOT OPEN
CAUTION: TO REDUCE THE RISK OF ELECTRIC
SHOCK, DO NOT REMOVE COVER
(OR BACK). NO USER-SERVICEABLE
PARTS INSIDE. REFER SERVICING
TO QUALIFIED SERVICE PERSONNEL.
The lightning flash with arrowhead symbol,
within an equilateral triangle is intended to
alert the user to the presence of uninsulated
dangerous voltage within the product's
enclosure that may be of sufficient magnitude
to constitute a risk of electric shock.
The exclamation point within an equilateral
triangle is intended to alert the user to the
presence of important operating and
maintenance (servicing) instructions in
the literature accompanying the appliance.
WARNING: TO PREVENT FIRE OR SHOCK HAZARD, DO NOT EXPOSE THIS APPLIANCE TO RAIN OR
MOISTURE.
POWER CORD POLARIZATION
CAUTION: TO PREVENT ELECTRIC SHOCK, MATCH WIDE BLADE OF PLUG TO WIDE SLOT, FULL Y INSERT .
ATTENTION: POUR ÉVITER LES CHOC ÉLECTRIQUES, INTRODUIRE LA LAME LA PLUS LARGE DE LA
WARNING:
This equipment has been tested and found to comply
with the limits for a Class B digital device, pursuant to
Part 15 of the FCC Rules. These limits are designed to
provide reasonable protection against harmful interference in a residential installation. This equipment
generates, uses and can radiate radio frequency energy
and, if not installed and used in accordance with the
instructions, may cause harmful interference to radio
communications.
However, there is no guarantee that interference will not
occur in a particular installation. If this equipment does
cause harmful interference to radio or television reception, which can be determined by turning the equipment
off and on, the user is encouraged to try to correct the
FICHE DANS LA BORNE CORRESPONDANTE DE LA PRISE ET POUSSER JUSQU'AU FOND.
interference by one or more of the following measures:
- Reorient or relocate the receiving antenna.
- Increase the separation between the equipment and
receiver.
- Connect the equipment into an outlet on a circuit
different from that to which the receiver is connected.
- Consult the dealer or an experienced radio/TV
technician for help.
CAUTION:
Changes or modifications not expressly approved by the
party responsible for compliance with the FCC Rules
could void the user's authority to operate this equipment.
IMPORTANT SAFEGUARDS
1. READ INSTRUCTIONS
All the safety and operating instructions should be
read before the unit is operated.
2. RETAIN INSTRUCTIONS
The safety and operating instructions should be
retained for future reference.
3. HEED WARNINGS
All warnings on the unit and in the operating
instructions should be adhered to.
4. FOLLOW INSTRUCTIONS
All operating and use instructions should be followed.
5. CLEANING
Unplug this unit from the wall outlet before cleaning.
Do not use liquid cleaners or aerosol cleaners.
Use a damp cloth for cleaning the exterior cabinet only.
6. ATT ACHMENTS
The manufacturer of this unit does not make any
recommendations for attachments, as they may
cause hazards.
2
7. WA TER AND MOISTURE
Do not use this unit near water. For example, near a
bathtub, washbowl, kitchen sink, laundry tub, in a
wet basement, or near a swimming pool.
8. ACCESSORIES
Do not place this unit on an unstable cart, stand,
tripod, bracket, or table.
The unit may fall, causing serious injury, and
serious damage to the unit.
8A. An appliance and cart
combination should be
moved with care.
Quick stops, excessive
force, and uneven
surfaces may cause
the appliance and cart
combination to overturn.
PORTABLE CART WARNING
(symbol provided by RETAC)
S3126A

IMPORTANT SAFEGUARDS
9. VENTILATION
Slots and openings in the cabinet back or bottom
are provided for ventilation, and to ensure reliable
operation of the unit, and to protect it from overheating. These openings must not be blocked or
covered. The openings should never be blocked by
placing the unit on a bed, sofa, rug, or other similar
surface. This unit should never be placed near or
over a radiator or heat source. This unit should not
be placed in a built-in installation such as a bookcase or rack unless proper ventilation is provided or
the manufacturer’s instructions have been adhered
to.
10. POWER SOURCES
This unit should be operated only from the type of
power source indicated on the rating plate. If you
are not sure of the type of power supply to your
home, consult your appliance dealer or local power
company. For units intended to operate from battery
power, or other sources, refer to the operating
instructions.
11. GROUNDING OR POLARIZATION
This unit is equipped with a polarized alternatingcurrent line plug (a plug having one blade wider
than the other). This plug will fit into the power outlet
only one way. This is a safety feature. If you are
unable to insert the plug fully into the outlet, try
reversing the plug. If the plug should still fail to fit,
contact your electrician to replace your obsolete
outlet. Do not defeat the safety purpose of the
polarized plug, if your unit is equipped with a 3-wire
grounding-type plug, a plug having a third (grounding) pin. This plug will only fit into a grounding-type
power outlet. This too, is a safety feature. If you are
unable to insert the plug into the outlet, contact your
electrician to replace your obsolete outlet.
Do not defeat the safety purpose of the groundingtype plug.
12. POWER-CORD PROTECTION
Power-supply cords should be routed so that they are
not likely to be walked on or pinched by items placed
upon or against them, paying particular attention to
cords at plugs, convenience receptacles, and the point
where they exit from the appliance.
13. LIGHTNING
To protect your unit from a lightning storm, or when
it is left unattended and unused for long periods of
time, unplug it from the wall outlet and disconnect
the antenna or cable system. This will prevent
damage to the unit due to lightning and power line
surges.
14. POWER LINES
An outside antenna system should not be located in
the vicinity of overhead power lines or other electric
light or power circuits, or where it can fall into such
power lines or circuits. When installing an outside
antenna system, extreme care should be taken to
keep from touching such power lines or circuits, as
contact with them might be fatal.
15. OVERLOADING
Do not overload wall outlets and extension cords, as
this can result in a risk of fire or electric shock.
16. OBJECT AND LIQUID ENTRY
Do not push objects through any openings in this unit,
as they may touch dangerous voltage points or short
out parts that could result in fire or electric shock. Never
spill or spray any type of liquid into the unit.
17. OUTDOOR ANTENNA GROUNDING
If an outside antenna or cable system is connected
to the unit, be sure the antenna or cable system is
grounded to provide some protection against
voltage surges and built-up static charges, Section
810 of the National Electrical Code, ANSI/NFPA 70,
provides information with respect to proper grounding of the mast and supporting structure, grounding
of the lead-in wire to an antenna discharge unit, size
of grounding conductors, location of antenna
discharge unit, connection to grounding electrodes,
and requirements for the grounding electrode.
18. SERVICING
Do not attempt to service this unit yourself as
opening or removing covers may expose you to
dangerous voltage or other hazards. Refer all
servicing to qualified service personnel.
ENGLISH
3
IMPORTANT SAFEGUARDS
19. DAMAGE REQUIRING SERVICE
Unplug this unit from the wall outlet and refer
servicing to qualified service personnel under the
following conditions:
a. When the power-supply cord or plug is damaged.
b. If liquid has been spilled, or objects have fallen
into the unit.
c. If the unit has been exposed to rain or water.
d. If the unit does not operate normally by
following the operating instructions. Adjust only
those controls that are covered by the operat-
ing instructions, as an improper adjustment of
other controls may result in damage and will
often require extensive work by a qualified
technician to restore the unit to its normal
operation.
e. If the unit has been dropped or the cabinet has
been damaged.
f
. When the unit exhibits a distinct change in
performance, this indicates a need for service.
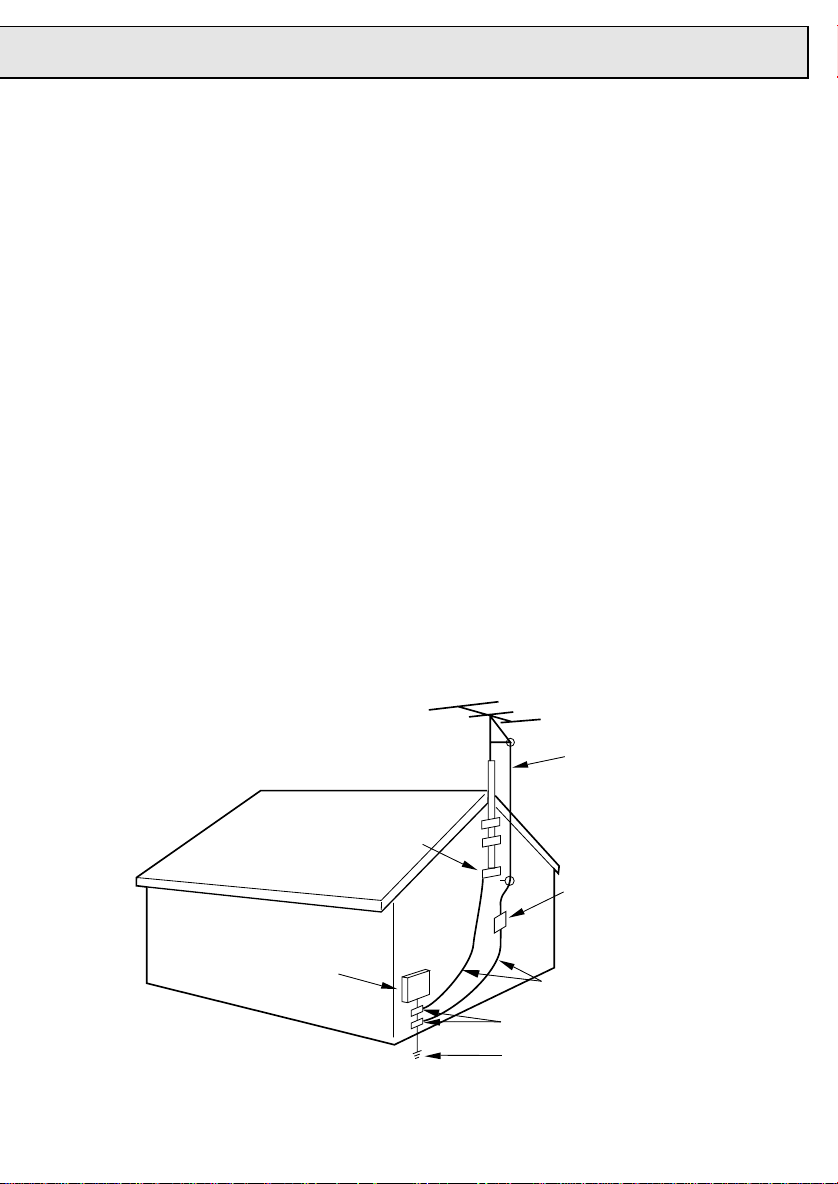
EXAMPLE OF ANTENNA GROUNDING AS PER THE
NATIONAL ELECTRICAL CODE
20. REPLACEMENT PARTS
When replacement parts are required, be sure the
service technician uses replacement parts specified
by the manufacturer or those that have the same
characteristics as the original part.
Unauthorized substitutions may result in fire, electric
shock or other hazards.
21. SAFETY CHECK
Upon completion of any service or repairs to this
unit, ask the service technician to perform safety
checks to determine that the unit is in proper
operating condition.
22. HEAT
The product should be situated away from heat
sources such as radiators, heat registers, stoves, or
other products (including amplifiers) that produce heat.
23. NOTE TO CATV SYSTEM INSTALLER
This reminder is provided to call the CATV system
installer’s attention to Article 820-40 of the NEC that
provides guidelines for proper grounding and, in
particular, specifies that the cable ground shall be
connected to the grounding system of the building,
as close to the point of cable entry as practical.
4
GROUND CLAMP
ELECTRIC SERVICE
EQUIPMENT
NEC-NATIONAL ELECTRICAL CODE
S2898A
ANTENNA LEAD IN WIRE
ANTENNA DISCHARGE UNIT
(NEC SECTION 810-20)
GROUNDING CONDUCTORS
(NEC SECTION 810-21)
GROUND CLAMPS
POWER SERVICE GROUNDING
ELECTRODE SYSTEM
(NEC ART 250, PART H)
SAFETY PRECAUTIONS
FEATURES
MOISTURE CONDENSATION
DO NOT OPERATE ANY FUNCTIONS ON THIS UNIT
FOR AT LEAST TWO OR THREE HOURS WHEN
MOISTURE IN THE AIR CONDENSES ON IT. LET THE
UNIT STAND WITH POWER ON (SEE BELOW).
■ WHAT IS MOISTURE CONDENSATION?
When a cold liquid is poured into a glass, for example,
water vapor in the air will condense on the surface of
the glass. This is called moisture condensation.
■ MOISTURE WILL CONDENSE ON THE UNIT IN
THE FOLLOWING CASES:
• When you move the unit from a cold to a warm place.
• After heating a cold room or under extremely humid
conditions.
■ WHEN YOU EXPERIENCE THE ABOVE CONDI-
TIONS,
Plug the power cord into an AC outlet, press the
POWER button to turn on and leave the unit at room
temperature until moisture condensation disappears.
Depending on the surrounding conditions, this may
take two or three hours.
LOCA TION AND HANDLE
• If you cause a static discharge when touching the unit,
and the unit fails to function, simply unplug the unit
from the wall outlet, wait 10 minutes and plug it back
in. The unit should return to normal operation.
• Avoid extreme heat or cold.
• Do not place the unit on or near appliances which may
cause electromagnetic interference (e.g. speakers,
etc). Doing so may cause erratic operation of the unit
including picture and/or sound distortion or noise.
• Avoid extreme moisture and dust.
• The ventilation holes prevent overheating. Do not
block or cover these holes. Especially avoid covering
the holes with soft materials such as cloth or paper.
• Do not insert fingers or any other objects into the
cassette loading slot. Do not spray cleaner or wax
directly on the unit or use forced air to remove dust.
• Avoid places subject to strong vibration. Use in a
horizontal (flat) position only.
• Keep the unit away from flower vases, sinks, etc.
If liquids should be spilled into the unit, serious damage
will result. If you spill any liquids into the unit, unplug the
AC power cord immediately and consult qualified
service personnel before attempting to use it again.
• When you finish operating the unit, always unload the
cassette and turn off the power.
• When you leave your home for a long time, unplug the
AC power cord.
• To protect the unit from a lightning storm, unplug the
AC power cord from the wall outlet and disconnect the
antenna.
Color TV With Video Cassette Recorder - Unique space
saving design combines a color TV and a video cassette
recorder.
High Quality Picture Technology - This TV/VCR equipped
“HQ” incorporates VHS High Quality technology. A built-in
detail enhancer is used to boost the recorded signal and
provide maximum picture quality during playback. It is
compatible with other VHS video cassette recorders.
181 Channel Tuner - Receives standard VHF and UHF
broadcast channels and up to 113 cable channels. The
actual number of channels received depends upon channel
reception in your area or your cable system.
Glow Illuminated Remote Control - The Glow buttons
guarantee easy viewing and identification.
Closed Caption Decoder With Full Text Mode - Displays
text captions or full screen text on the screen for hearing
impaired viewers.
8-Programs/1-Month Programmable Timer With Everyday/Every Week Capability - The built-in timer allows
automatic absentee recording of up to 8 TV programs within
1 month. It is also possible to record a program which is
broadcast at the same time everyday or every week.
Automatic Clock Set - Once your TV/VCR is plugged into
the AC outlet, it automatically sets the correct date and time.
On-Screen TV Display And VCR Programming - When
you select a channel or make other changes, the TV will
show an indicator on the screen for a few seconds. Timer
recording can be programmed and confirmed on the
screen.
Picture Adjustments Using The Remote Control - The
On-Screen display allows precise remote control adjustment of BRIGHTNESS, CONTRAST, COLOR, TINT and
SHARPNESS.
Automatic Playback/Rewind-Stop-Eject - When loading a
cassette tape without the erase prevention tab, this TV/VCR
will automatically play back the cassette tape at the correct
speed. When a tape reaches its end during play-back,
recording
forward, it will automatically stop, rewind, stop and eject the
tape.
Programmable ON/OFF Timer - Allows you to automatically
turn on or off the TV/VCR at a set time.
Programmable TV Sleep Timer - Operable from the remote
control, the TV can be programmed up to 120 minutes to turn
off automatically.
Automatic Repeat Play System - When Auto Repeat
option is turned on, the TV/VCR will automatically play back
the same cassette tape repeatedly.
(except during OTR and Timer Record) and fast
ENGLISH
5

FEATURES TABLE OF CONTENTS
One-touch Timer Recording (OTR) - Simply by pressing
the REC/OTR button, the TV/VCR can be programmed for
up to 5 hours of recording with an immediate start.
Audio/Video Input/Output Jacks - A VCR or other video
device may be hooked up to this TV/VCR for dubbing or
playback purposes.
Commercial Skip - When the CS button on the remote
control is pressed during playback, the TV/VCR will
automatically search forward in 30 second increments to a
maximum of 3 minutes with each press of the CS button,
and then return to normal playback.
2 Speed Picture Search - 3 or 5 times normal speed in SP
mode (7X or 9X in LP and 9X or 15X in SLP).
3 Speed Playback - Plays three tape speeds (SP, LP, SLP).
2 Speed Record - Records two tape speeds (SP , SLP).
Real Time Tape Counter With Zero Return - The counter
displays the real tape time and the zero return can be used
to return the tape to a pre-selected position (00:00:00) while
the counter can be used to locate programs.
Digital Auto Tracking - Automatically adjusts tracking
during playback for the best possible picture.
On-Screen 3 Language Display - You can select one of 3
languages, English, Spanish or French for on-screen
programming.
TV Monitor - When the TV/MONITOR button on the remote
control is pressed during playback, the TV channel selected
on the TV/VCR can be viewed.
V-Chip - The V-Chip function can read the rating of a TV
program or movie content if the program is encoded with this
information. V-chip will allow you to set a restriction level.
CAUTIONS
IMPORTANT SAFEGUARDS ..................................... 2
SAFETY PRECAUTIONS ........................................... 5
PREP ARATION
FEATURES................................................................. 5
LOCATION OF CONTROLS....................................... 7
REMOTE CONTROL .................................................. 8
POWER SOURCE...................................................... 9
ANTENNA CONNECTIONS ..................................... 10
CABLE TV CONNECTIONS ..................................... 11
SETTING THE LANGUAGE ..................................... 1 1
AUTO CLOCK SETTING.......................................... 12
MANUAL CLOCK SETTING ..................................... 13
TV OPERATION
TV OPERATION ....................................................... 13
TO MEMORIZE CHANNELS.................................... 15
SETTING THE V-CHIP ............................................. 16
TO SET THE ON TIMER .......................................... 17
TO SET THE OFF TIMER......................................... 18
PICTURE CONTROL ADJUSTMENTS .................... 18
PLAYBACK
LOADING AND UNLOADING.....................................
PLAYBACK............................................................... 19
SPECIAL PLAYBACK ............................................... 20
19
RECORDING
RECORDING A TV PROGRAM ................................ 20
ONE-TOUCH TIMER RECORDING (OTR).............. 21
TIMER RECORDING................................................ 21
ADDITIONAL INFORMATION
USING THE REAL TIME TAPE COUNTER.............. 22
USING ZERO RETURN ........................................... 22
AUTO REPEAT......................................................... 23
DUPLICATING A VIDEO TAPE................................. 23
TROUBLESHOOTING GUIDE ................................. 24
RECEPTION DISTURBANCES................................ 26
VIDEO HEAD CLEANING ........................................ 26
SPECIFICATIONS.................................................... 27
6

LOCATION OF CONTROLS
REARFRONT
ENGLISH
1
2 4
35
power
power
rec/otr
9
10
67
t.rec rec/otr
volume
channel
12 13 15
11
8
stop/eject
rew f.fwd
play
phones
audioin
videoin
14
DESCRIPTION OF CONTROLS
FRONT:
1. Cassette Loading Slot - To insert or remove a
video tape.
2. POWER Button - Press to turn the TV/VCR on or off.
3. POWER Indicator - Light when the power is turned
on.
4. T.REC Indicator - This lights when the TIMER REC
button is pressed.
5. REC/OTR Indicator - Lights when the TV/VCR is
recording.
6. PLAY Button - Press to play a prerecorded tape.
7. REW (Rewind) Button - In the Stop mode, this but-
ton rapidly winds the tape backwards. In the Play
mode, this button activates reverse search.
8. PHONES Jack - Plug monaural headphones or an
earphone with an 1/8" miniplug into this jack for private
listening.
9. Remote Sensor - Signals from the Remote Control
are received here.
10. REC/OTR Button - Press once to start normal
recording. Additional presses activate Instant Timer
Recording.
11. VOLUME ▲ / ▼ Buttons - Press to raise or lower
the volume of the sound.
VIDEO
UHF/
VHF
AUDIO
OUT LINE1
16 1817 19
12. CHANNEL ▲ / ▼ Buttons - Press to select a
channel for viewing or recording.
13. STOP/EJECT Button - Press once to stop the tape
in any mode. Press again to eject the tape.
14. F.FWD (Fast Forward) Button - In the Stop mode,
this button rapidly winds the tape forward. In the
Play mode, this button activates forward search.
15. AUDIO/VIDEO IN (LINE 2) Jacks - Audio and video
signal cables from an external source can be
connected here.
REAR:
16. VHF/UHF Antenna Jack - Connect the 75 ohm
coaxial cable from the antenna or Cable TV service
to this jack.
17. AUDIO/VIDEO OUT Jacks - Used to output audio
and video signals to a TV, amplifier or VCR.
18. AUDIO/VIDEO IN (LINE 1) Jacks - Audio and
video signal cables from an external source can be
connected here.
19. AC Power Cord - Connect to a 120V, 60Hz outlet.
7
POWER
ENTER
TV/MONITOR
EJECT MUTE
REW
REC/OTR
STOP PAUSE/STILL
PLAY F.F
CALL
MENU
CH.
VOL. VOL.
CANCEL
SET
-
SET
+
C.S
CH.
TRACKING
ZERO
RETURN
RESET
AUTO
COUNTER
TIMERREC
PROG.
1
4
7
2
5
8
0
3
6
9
TV/CAP/TEXT
INPUT SEL.
SLEEP
SPEED
Q.VIEW
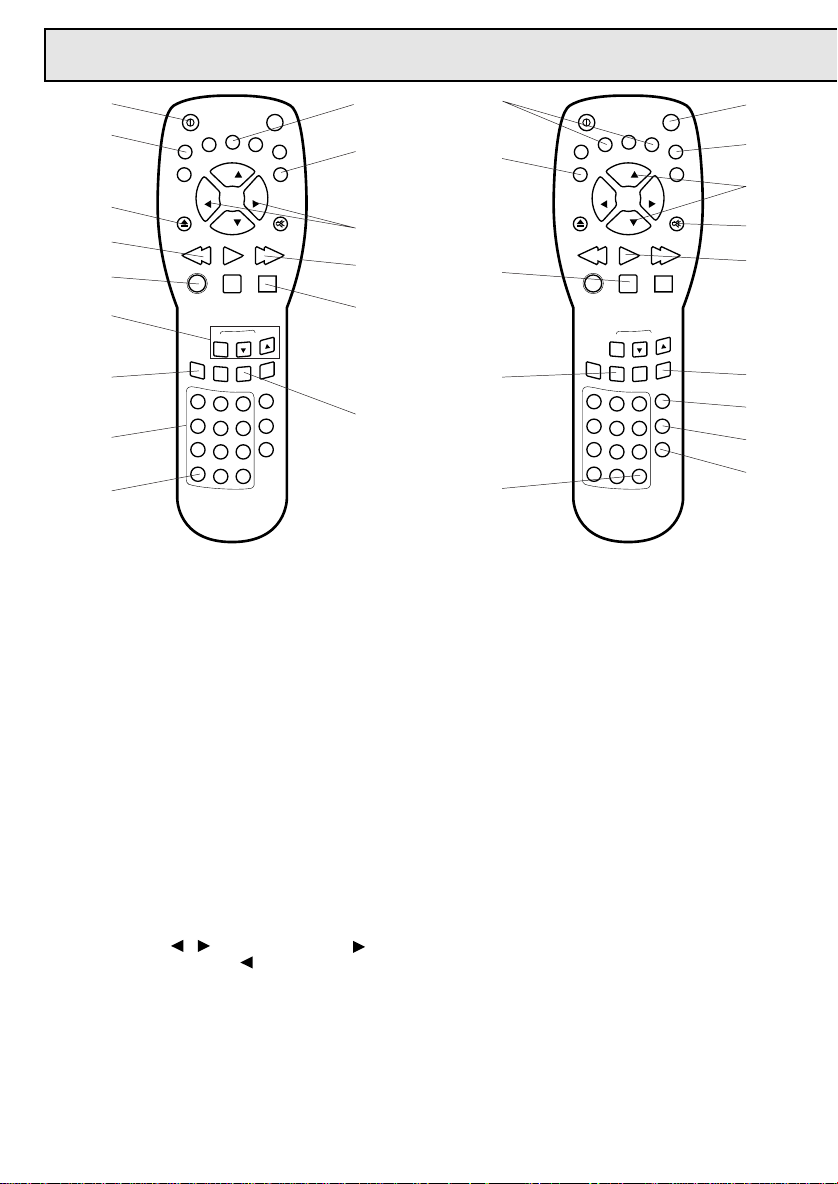
REMOTE CONTROL
1
2
3
4
5
POWER
MENU
SET
-
CH.
VOL. VOL.
CH.
REW
PLAY F.F
STOP PAUSE/STILL
SET
ENTER
TV/MONITOR
EJECT MUTE
REC/OTR
+
C.S
CANCEL
CALL
6
AUTO
TRACKING
ZERO
7
8
RETURN
SPEED
1
4
7
COUNTER
RESET
PROG.
TIMERREC
INPUT SEL.
2
3
TV/CAP/TEXT
5
6
SLEEP
8
9
Q.VIEW
0
10
11
12
13
14
15
9
DESCRIPTION OF CONTROLS
1. POWER Button - Press to turn the TV/VCR on.
Press again to turn the TV/VCR off.
2. ENTER Button - Press to enter or select information
for on-screen operations.
3. EJECT Button - Press to eject the tape.
4. REW (Rewind) Button - In the Stop mode, this
button rapidly winds the tape backwards. In the Play
mode, this button activates reverse search.
5. REC/OTR Button - Press once to start normal
recording. Additional presses activate One-touch
Timer Recording.
6. Digital TRACKING Buttons - Allows automatic or
manual adjustment of tracking to minimize picture
noise during playback.
7. ZERO RETURN Button - Use to stop the tape when
the counter reaches 00:00:00.
8. Direct Channel Selection Buttons (0-9) - Allows
direct access to any channel.
9. SPEED Button - Sets the tape speed for recording.
10. MENU Button - Press to display the On-Screen
menu function.
11. CALL Button - Displays the present time/day of the
week, channel, counter, speed selection (and VCR
mode if VCR is playing) on the TV screen.
12. VOL.(Volume)
button to increase, or the button to decrease the
volume level.
13. F.F (Fast Forward) Button - In the Stop mode, this
button rapidly winds the tape forward. In the Play
mode, this button activates forward search.
14. PAUSE/STILL Button - During recording, this button
temporarily stops the tape. During playback, it stops
the tape and displays a still image on the TV screen.
15. TIMER REC Button - Used to set the TV/VCR to
start recording at a preset time.
/ Buttons - Press the
16
17
21
22
23
24
18
19
25
26
27
28
20
16. SET + / – Buttons - Used to set or adjust in the
menu mode.
17. TV/MONITOR Button - Used to temporarily view a
TV channel selected on the VCR while in the playback mode.
18. STOP Button - Press once to stop the tape.
19. COUNTER RESET Button - Used to reset the
counter to "00:00:00".
20. Q.VIEW Button - Switches between the present
channel and the last channel selected.
21. CS Button - Press in the playback mode to search
forward in 30 second increments to a maximum of 3
minutes.
22. CANCEL Button - Used to clear the selected
program and to move the cursor backward.
23. CH.(Channel) ▲ / ▼ Buttons - Press the ▲ button
to change to a higher numbered channel set into
memory. Press the ▼ button to change to a lower
numbered channel set into memory.
24. MUTE Button - Press to turn off the sound. Press
again to turn the sound back on.
25. PLAY Button - Press to play a prerecorded tape.
26. PROG. Button - Press to confirm the programmed
timer recording and ON/OFF timer.
27. INPUT SEL. Button - Switches the program for
viewing between the VCR and external input sources.
28. TV/CAP/TEXT Button - Switches between Caption,
Text and TV modes for Closed-Captioned programs.
29. SLEEP Button - Sets the TV to turn off automatically
after up to 120 minutes.
29
8

POWER SOURCE
BATTERY INSTALLATION
Slide the battery compartment cover.
Install two “AA” batteries (not supplied), paying attention
to the polarity diagram in the battery compartment.
Replace the compartment cover.
BATTERY PRECAUTIONS
The precautions below should be followed when using
batteries in this device:
1 Use only the size and type of batteries specified.
2 Be sure to follow the correct polarity when installing
the batteries as indicated in the battery compartment.
Reversed batteries may cause damage to the device.
3 Do not mix different types of batteries together (e.g. Al-
kaline and Carbon-zinc) or old batteries with fresh ones.
4 If the device is not to be used for a long period of time,
remove the batteries to prevent damage or injury from
possible battery leakage.
5 Do not try to recharge batteries not intended to be
recharged; they can overheat and rupture (Follow
battery manufacturer’s directions).
Use the AC polarized line cord provided for operation on
AC. Insert the AC cord plug into a standard 120V 60Hz
polarized AC outlet.
NOTES: • Never connect the AC line cord plug to
anything other than the specified voltage (120V
60Hz). Use the attached power cord only.
• If the polarized AC cord does not fit into a
nonpolarized AC outlet, do not attempt to file
or cut the blade. It is the user's responsibility
to have an electrician replace the obsolete
outlet.
• If you cause a static discharge when touching
the unit, and the unit fails to function, simply
unplug the unit from the wall outlet, wait 10
minutes and plug it back in. The unit should
return to normal operation.
AC Outlet
Wider Hole
and Blade
Polarized AC Cord Plug
(One blade is wider than the other.)
ENGLISH
EFFECTIVE DISTANCE OF THE
REMOTE CONTROL
15 FEET (5m)
30˚
30˚
NOTES: • When there is an obstacle between the TV/VCR
and the remote control, the remote control may
not operate.
• When direct sunlight, an incandescent lamp,
fluorescent lamp or any other strong light
shines on the Remote sensor of the TV/VCR,
the remote operation may be unstable.
9
 Loading...