How it Works
Log In / Sign Up
Buy Points
How it Works
FAQ
Contact Us
Questions and Suggestions
Users
LG
Loading...
T
T1207TEFTH
T1208TEFT
T1209DB
T1209DBA
T1209DSA
T1209TDFT
T1211TEFT1
T1213TEFT0
T1226AFPP5
T1226AFPP6
T1232AFDS5
T1232AFF5
T1232AFFSP5
T1258AFPT
T1264HFFSP5
T1265TP
T1266NEFT
2
T1266NEFTF
T1266NEFV
T1266TEFT
T1269NEFT0
T1282WFDSD
T1288NEHGE
T1288NEHTA
T1288NEHVA
T12AH
T12EV4
T1301DPE
T1303ADP4
T1303TEFT1
2
T1304DPE
2
T1305DPE
T1308TEFT0
T1332AFFSP5
2
T1332AFPSP5
2
T1332HFFP
T1349TEFT
2
T1349TEFT1
T1365NTP
T1366NEFT
T1366NEFT0
T1366NEFT1
2
T1366NEFTF
2
T1366NEFVF
2
T1366NEHV
T1366NEHV2
3
T1366NTP
T1369NEFT
2
T1369NEFTF
T1369NEHT
2
T1369NEHTF
4
T1377NEHV
T1377NEHVE
T1388NEHGE
T1388NEHVA
T1388NEHVE
2
T13EV3
T13EV4
2
T1402TPX
T1403ADP5
T1403ADP6
2
T1403TEF0
T1403TEF1
2
T1403TEFT1
T1404DPE
T1407TPX
T1409DB
T1409DBA
T1409DS
T1409DSA
T1409TPX
T1432AFPS5
T1443TEFT0
T1449TEFT1
T1466NEFT
T1466NEFT0
T1466NEFT1
T1466NEHGU
T1466NEHT2B
T1482WFFP
T1488NEHT1
T1499NEHTF1
T14SS5FDH
T1503TEF0
T1503TEF1
2
T1503TEF3
2
T1503TEFT
T1503TEFT3
T1504DPE
T1507TEFT
T1507TEFT1
T1507TPX
T1532AFF6
T1532AFPS5
2
T1566NEFTC
T1566TEFT1
T1577NEHT
T15DL15A
T15LA
T15QA
Loading...
Loading...
Nothing found
T1369NEHTF
Owner’s Manual [ar]
76 pgs
3.86 Mb
0
Owner’s Manual [fr]
116 pgs
6.85 Mb
0
Owner’s Manual
36 pgs
8.68 Mb
0
Owner’s Manual
40 pgs
2.13 Mb
0
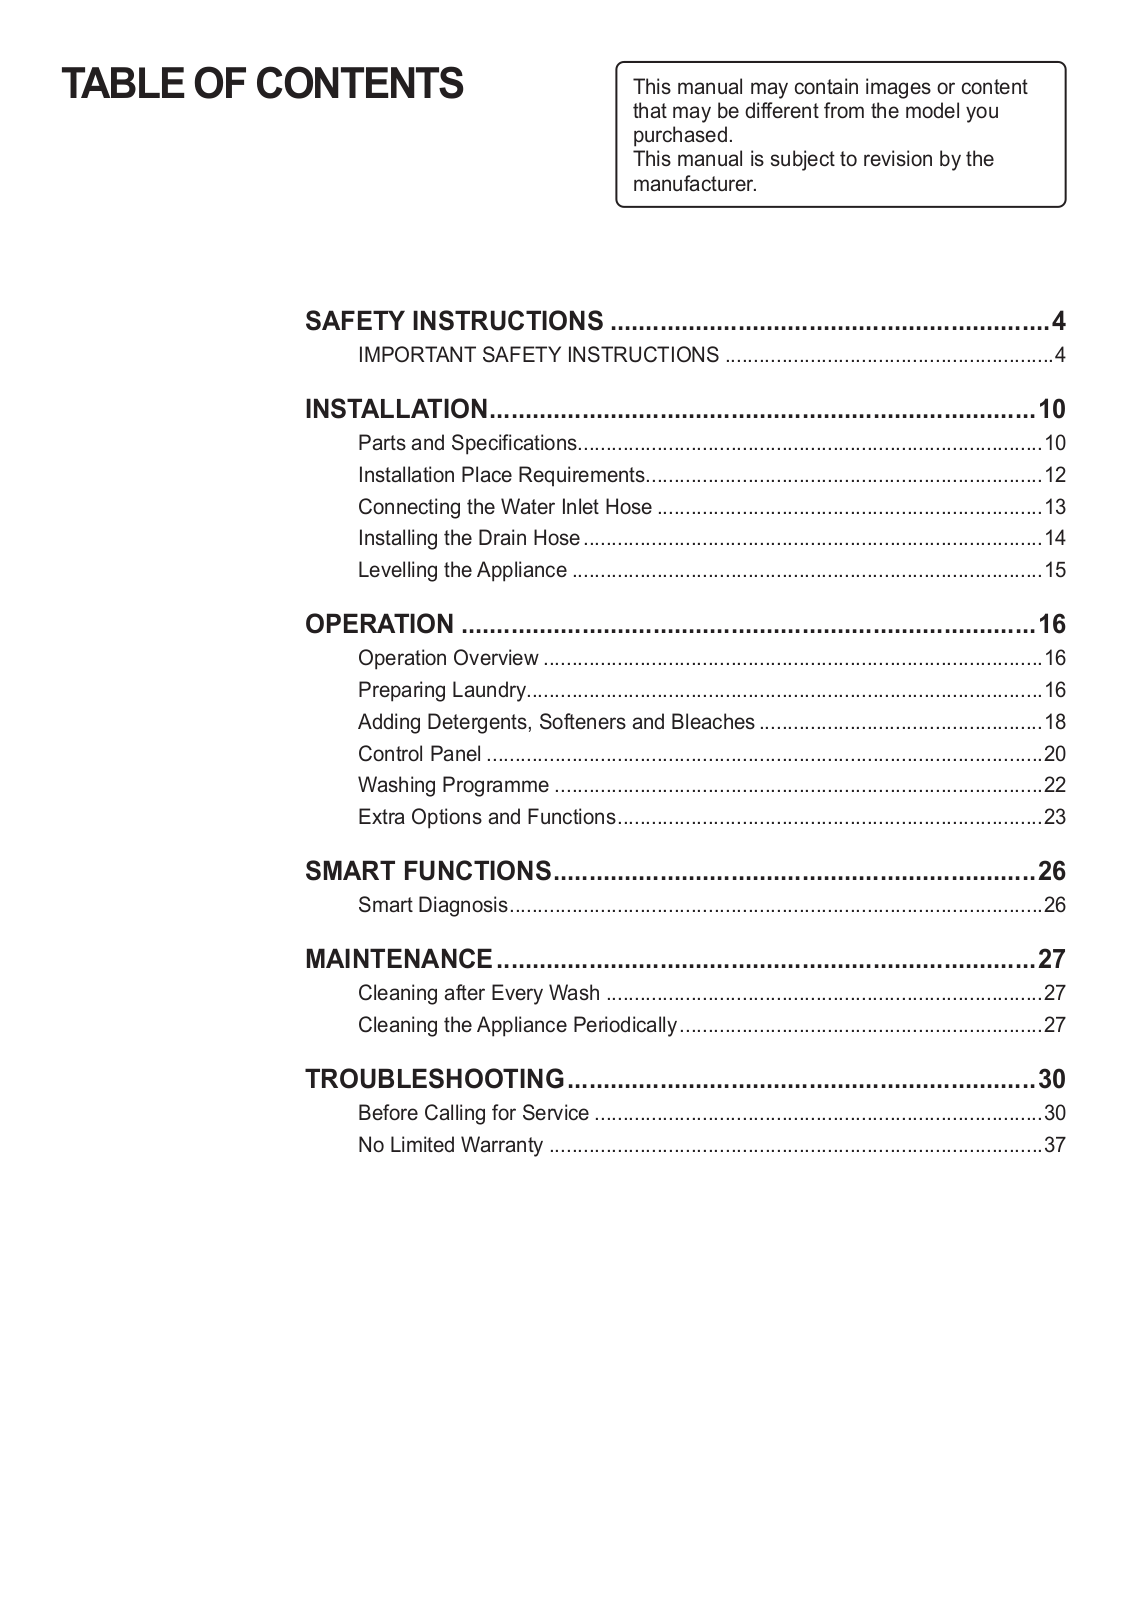
Table of contents
Loading...
LG T1369NEHTF Owner’s Manual [ar]
...
LG Owner’s Manual [ar]
Download
Specifications and Main Features
Frequently Asked Questions
User Manual
Download
Loading...
+
53
hidden pages
Unhide
You need points to download manuals.
1 point = 1 manual.
You can buy points or you can get point for every manual you upload.
Buy points
Upload your manuals
 Loading...