

Page 1
SD126
SD126
Hướng Dẫn Sử Dụng
MMBB0224701 (1.0)
User Guide
G
SD126
Page 2
Important Safety Precautions
Caution
Read these simple guidelines. Breaking the rules may be dangerous or illegal. Further detalied information is given in
this user guide.
Violation of the instructions may cause serious injury or death.
G
G
G
G
G
G
Never use an unapproved battery since this
could damage the phone and/or battery and
could cause the battery to explode.
Never place your phone in a microwave
oven as it will cause the battery to
explode.
Do not dispose of your battery by fire or
with hazardous or flammable materials.
Make sure that no sharp-edged items such as
animal’s teeth, nails, come into contact with
the battery. There is a risk of this causing a fire.
Store the battery in a place out of reach of
children.
Be careful that children do not swallow
any parts such as rubber plugs (earphone,
connection parts of the phone, etc.). This
could cause asphyxiation or suffocation.
G
Unplug the power cord and charger during
lightning storms to avoid electric shock or
fire.
G
When riding in a car, do not leave your
phone or set up the hands-free car kit near
to the air bag. If wireless equipment is
improperly installed and the air bag is
activated, you may be seriously injured.
G
Do not use a hand-held phone while driving.
G
Do not use the phone in areas where its
use is prohibited. (For example: aircraft).
G
Do not expose the battery charger or
adapter to direct sunlight or use it in
places with high humidity, such as a
bathroom.
G
Never store your phone in temperatures
less than -15°C or greater than 50°C.
Page 3

Important Safety Precautions
G
Do not use harsh chemicals(such as
alcohol, benzene, thinners, etc.) or
detergents to clean your phone. There is a
risk of this causing a fire.
G
Do not drop, strike, or shake your phone
severely. Such actions may harm the
internal circuit boards of the phone.
G
Do not use your phone in high explosive
areas as the phone may generate sparks.
G
Do not damage the power cord by bending,
twisting, pulling, or heating. Do not use the
plug if it is loose as it may cause a fire or
electric shock.
G
Do not place any heavy items on the power
cord. Do not allow the power cord to be
crimped as it may cause fire or electric
shock.
G
Do not handle the phone with wet hands
while it is being charged. It may cause an
electric shock or seriously damage your
phone.
G
Do not disassemble the phone.
G
Do not place or answer calls while charging
the phone as it may short-circuit the phone
and/or cause electric shock or fire.
G
Only use the batteries, antennas, and
chargers provided and approved by LG.
The warranty will not be applied to
products provided by other suppliers.
G
Only authorized personnel should service
the phone and its accessories. Faulty
installation or service may result in
accidents and consequently invalidate the
warranty.
G
Do not hold or let the antenna come in
contact with your body during a call.
Page 4

Contents
Introduction . . . . . . . . . . . . . . . . . .3
Before You Start . . . . . . . . . . . . .4
FCC RF Exposure Information . . . . . .4
Cautions . . . . . . . . . . . . . . . . . . . . . . . . .6
Phone Components . . . . . . . . . . . . . . .7
Phone Overview . . . . . . . . . . . . . . . . . .8
Onscreen Icons . . . . . . . . . . . . . . . . . .9
Menu Tree . . . . . . . . . . . . . . . . . .10
Using the Battery and
Charger . . . . . . . . . . . . . . . . . . . .11
Installing and Removing the
Battery . . . . . . . . . . . . . . . . . . . . . . . . .11
Charging the Battery . . . . . . . . . . . . .11
Battery Charge Level . . . . . . . . . . . .12
Getting Your Phone Started . .13
Turning the Phone On and Off . . . .13
Signal Strength . . . . . . . . . . . . . . . . . .13
Making Calls . . . . . . . . . . . . . . . . . . . .13
Receiving Calls . . . . . . . . . . . . . . . . . .14
Quick Access to Convenient
Features . . . . . . . . . . . . . . . . . . . .15
Manner Mode . . . . . . . . . . . . . . . . . . .15
Lock Mode . . . . . . . . . . . . . . . . . . . . . .15
Mute Function . . . . . . . . . . . . . . . . . . .16
Caller ID . . . . . . . . . . . . . . . . . . . . . . . .16
Speed Dials . . . . . . . . . . . . . . . . . . . . .16
Entering and Editing
Information . . . . . . . . . . . . . . . . .17
Entering Information Using T9
Text Input . . . . . . . . . . . . . . . . . . . . . . .17
Examples Using T9 Text Input . . . . .18
Examples Using ABC (Multi-tap)
Text Input . . . . . . . . . . . . . . . . . . . . . . .19
To Edit in Viet Mode . . . . . . . . . . . . .20
Key Mapping for English and
Vietnamese Characters . . . . . . . . . .21
Menu Features . . . . . . . . . . . . . .22
General Guidelines to Menu
Access and Settings . . . . . . . . . . . .22
Messages . . . . . . . . . . . . . . . . . . . . .22
1. Write Message . . . . . . . . . . . . . . . .23
2. Inbox . . . . . . . . . . . . . . . . . . . . . . . .23
3. Archive In UIM . . . . . . . . . . . . . . .24
4. Outbox . . . . . . . . . . . . . . . . . . . . . . .24
5. Drafts . . . . . . . . . . . . . . . . . . . . . . . .25
6. Voice . . . . . . . . . . . . . . . . . . . . . . . .25
7. Templates . . . . . . . . . . . . . . . . . . . . .25
8. Delete Messages . . . . . . . . . . . . .25
9. Msg Settings . . . . . . . . . . . . . . . . . .26
Contacts . . . . . . . . . . . . . . . . . . . . . . .26
1. Add New . . . . . . . . . . . . . . . . . . . . .26
2. Search . . . . . . . . . . . . . . . . . . . . . . .27
3. Group Settings . . . . . . . . . . . . . . . .28
4. Group Manager . . . . . . . . . . . . . . .28
5. Speed Dials . . . . . . . . . . . . . . . . . . .28
6. Copy . . . . . . . . . . . . . . . . . . . . . . . . .28
7. Capacity . . . . . . . . . . . . . . . . . . . . . .29
8. Delete Contacts . . . . . . . . . . . . . . .29
Call Manager . . . . . . . . . . . . . . . . . .30
1. Call History . . . . . . . . . . . . . . . . . . .30
2. Call Duration . . . . . . . . . . . . . . . . . .32
3. Call Divert . . . . . . . . . . . . . . . . . . . .32
4. Call Waiting . . . . . . . . . . . . . . . . . . .32
5. Reject List . . . . . . . . . . . . . . . . . . . .32
6. Call Settings . . . . . . . . . . . . . . . . . .33
SD126 1
Page 5

Contents
My Stuff . . . . . . . . . . . . . . . . . . . . . . .34
1. Default Image . . . . . . . . . . . . . . . . .34
2. Default Ringtones . . . . . . . . . . . . .34
Favorites . . . . . . . . . . . . . . . . . . . . . .35
1. Info . . . . . . . . . . . . . . . . . . . . . . . . . . .35
Sound . . . . . . . . . . . . . . . . . . . . . . . .35
Select Profiles . . . . . . . . . . . . . . . . . .35
1. Tones . . . . . . . . . . . . . . . . . . . . . . . . .36
2. Effect Tones . . . . . . . . . . . . . . . . . .36
3. Alerts . . . . . . . . . . . . . . . . . . . . . . . .36
4. Volume . . . . . . . . . . . . . . . . . . . . . . .36
Organizer . . . . . . . . . . . . . . . . . . . . . .37
1. Scheduler . . . . . . . . . . . . . . . . . . . .37
2. To Do . . . . . . . . . . . . . . . . . . . . . . . . .37
3. Anniversary . . . . . . . . . . . . . . . . . . .38
4. Memo . . . . . . . . . . . . . . . . . . . . . . . .38
Tools . . . . . . . . . . . . . . . . . . . . . . . . . .38
1. Game . . . . . . . . . . . . . . . . . . . . . . . . .38
2. Reminder . . . . . . . . . . . . . . . . . . . . .38
3. Alarm . . . . . . . . . . . . . . . . . . . . . . . .39
4. Calculator . . . . . . . . . . . . . . . . . . . .39
5. Stop Watch . . . . . . . . . . . . . . . . . . .40
6. World Time . . . . . . . . . . . . . . . . . . .40
2 SD126
Settings . . . . . . . . . . . . . . . . . . . . . . .40
1. Display . . . . . . . . . . . . . . . . . . . . . . .40
2. Security . . . . . . . . . . . . . . . . . . . . . .43
3.
Ngoân ngöõ
. . . . . . . . . . . . . . . . . . . . .46
4. Entry Method . . . . . . . . . . . . . . . . .46
5. My Phone Number . . . . . . . . . . . .46
6. Version Info. . . . . . . . . . . . . . . . . . .46
7. Airplane Mode . . . . . . . . . . . . . . . .46
Functions Used During a Call .47
Send My Num . . . . . . . . . . . . . . . . . . .47
Mute/Unmute . . . . . . . . . . . . . . . . . . .47
Srch PIM . . . . . . . . . . . . . . . . . . . . . . .47
Store PIM . . . . . . . . . . . . . . . . . . . . . . .47
Srch Sche . . . . . . . . . . . . . . . . . . . . . .48
Adjusting Speaker Mode On . . . . .48
Memo . . . . . . . . . . . . . . . . . . . . . . . . . .48
Accessories . . . . . . . . . . . . . . . .49
Frequently Asked Questions .50
Frequently asked questions . . . . . .50
Before calling for service . . . . . . . .52
Safety Guidelines . . . . . . . . . . .54
TIA Safety Information . . . . . . . . . . .54
Safety Information . . . . . . . . . . . . . . .57
FDA Consumer Update . . . . . . . . . . .59
LIMITED WARRANTY
STATEMENT . . . . . . . . . . . . . . . . . . .67
Page 6

Introduction
Congratulations for choosing the advanced and
compact SD126 cellular phone, designed to operate
with the latest digital mobile communication
technology, Code Division Multiple Access(CDMA).
Along with the many advanced features of the CDMA
system, such as greatly enhanced voice clarity, this
phone offers:
• Paging, messaging, voice mail, and .
• 22-key keypad.
• Extended battery life in talk and standby mode.
• Menu-driven interface with prompts for easy
operation and configuration.
• Bilingual support (English and Vietnamese).
Check Accessories
Your mobile phone comes with a rechargeable battery
and adaptor. Please verify that these accessories are
included.
Important Information
This user’s manual provides important information on
the use and operation of your phone. Please read all
the information carefully prior to using the phone for
the best performance and to prevent any damage to
or misuse of the phone. Any unapproved change or
modification will void your warranty.
SD126 3
Page 7
Before You Start
Safety Instructions
WARNING! To reduce the possibility of electric shock,
do not expose your phone to high humidity areas,
such as the bathroom, swimming pool, etc.
Use only LG-approved batteries and travel chargers to
avoid the damage to the phone. Using other batteries
or chargers voids your warranty and may cause an
explosion.
Do not use batteries and travel chargers for the other
purposes other than their original purpose of using for
the phone.
Always store your phone away from heat. Never store
your phone in settings that may expose it to
temperatures less than -15°C or greater than 50°C,
such as outside during a snowstorm or in your car on
a hot day. Exposure to excessive cold or heat will
result in malfunction, damage and/or catastrophic
failure.
Use caution when using your phone near other
electronic devices. RF emissions from your mobile
phone may affect nearby inadequately shielded
electronic equipment. You should consult with
manufacturers of any personal medical devices such
4 SD126
as pacemakers and hearing aids to determine if they
are susceptible to interference from your mobile
phone. Turn off your phone in a medical facility or at a
gas station.
Never place your phone in a microwave oven as it will
cause the battery to explode.
IMPORTANT! Please read the TIA Safety Information
before using your phone.
FCC RF Exposure Information
WARNING! Read this information before
operating the phone.
In August 1996, the Federal Communications
Commission (FCC) of the United States, with its action
in Report and Order FCC 96-326, adopted an updated
safety standard for human exposure to radio
frequency (RF) electromagnetic energy emitted by
FCC regulated transmitters. Those guidelines are
consistent with the safety standard previously set by
both U.S. and international standards bodies.
The design of this phone complies with the FCC
guidelines and these international standards.
Page 8
CAUTION
Use only the supplied and approved accessories. Use
of unauthorized accessories or modifications could
impair call quality, damage the phone, void your
warranty.
Do not use the phone with damaged accessories. If
the damaged accessories come into contact with the
skin, a minor burn may result. Contact your local
dealer for a replacement of accessories.
Body-worn Operation
This device was tested for typical body-worn
operations with the back of the phone kept 2cm from
the body. To comply with FCC RF exposure
requirements, a minimum separation distance of 2cm
must be maintained between the user’s body and the
back of the phone, including the antenna. Third-party
belt-clips, holsters, and similar accessories containing
metallic components should not be used. Body-worn
accessories that cannot maintain 2cm separation
distance between the user’s body and the back of the
phone, and have not been tested for typical bodyworn operations may not comply with FCC RF
exposure limits and should be avoided.
Vehicle Mounted External Antenna
(optional, if available)
A minimum separation distance of 8 inches (20 cm)
must be maintained between the user/ bystander and
the vehicle mounted external antenna to satisfy FCC
RF exposure requirements.
For more information about RF exposure, visit the FCC
website at www.fcc.gov
.
FCC Part 15 Class B Compliance
This device and its accessories comply with part 15 of
FCC rules. Operation is subject to the following two
conditions: (1) This device and its accessories may
not cause harmful interference, and (2) this device
and its accessories must accept any interference
received, including interference that cause undesired
operation.
Cautions for Battery
• Do not disassemble.
• Do not short-circuit.
• Do not expose to high temperature : 50°C
• Do not incinerate.
SD126 5
Page 9

Before You Start
Battery Disposal
• Please dispose of your battery properly.
• Do not dispose of your battery in fire or with
hazardous or flammable materials.
Charger Cautions
• Using the wrong battery charger could damage
your phone and void your warranty.
• The charger is intended for indoor use only.
Do not expose the battery charger to direct sunlight
or use it in places with high humidity, such as the
bathroom.
Cautions
G
Only use the batteries and chargers provided or
approved by LG. The warranty will not be applied to
products provided by other suppliers.
G
Using the phone in proximity to receiving
equipment (i.e., TV or radio) may cause
interference in this phone.
G
Keep your phone in a safe place when not in use.
G
Only authorized personnel should service the phone
and its accessories. Faulty installation or service
may result in accidents and consequently invalidate
the warranty.
G
This phone has a built-in antenna. As with any
other radio-transmitting device, do not touch the
upper part which antenna is mounted while the
phone is in use.
G
Use only the antenna provided or approved by LG.
Unauthorized antennas, modifications or
attachments may affect the quality of phone call,
damage the phone or result in a violation of FCC
regulations.
G
Do not use the cellular phone if the antenna is
damaged. If the damaged antenna gets in contact
with
the skin, it may cause a slight burn. Please contact
LG Authorized Service Center (ASC) to replace the
damaged antenna.
G
Do not use the cellular phone in areas where its
use is prohibited. (For example: aircrafts).
G
Do not expose the cellular phone to high
temperature or high humidity conditions.
G
Do not expose your cellular phone to water. If this
happens, turn it off immediately and remove the
battery. If the phone does not work, bring it to an
LG Authorized Service Center.
G
Avoid shock or impact on the cellular phone.
6 SD126
Page 10
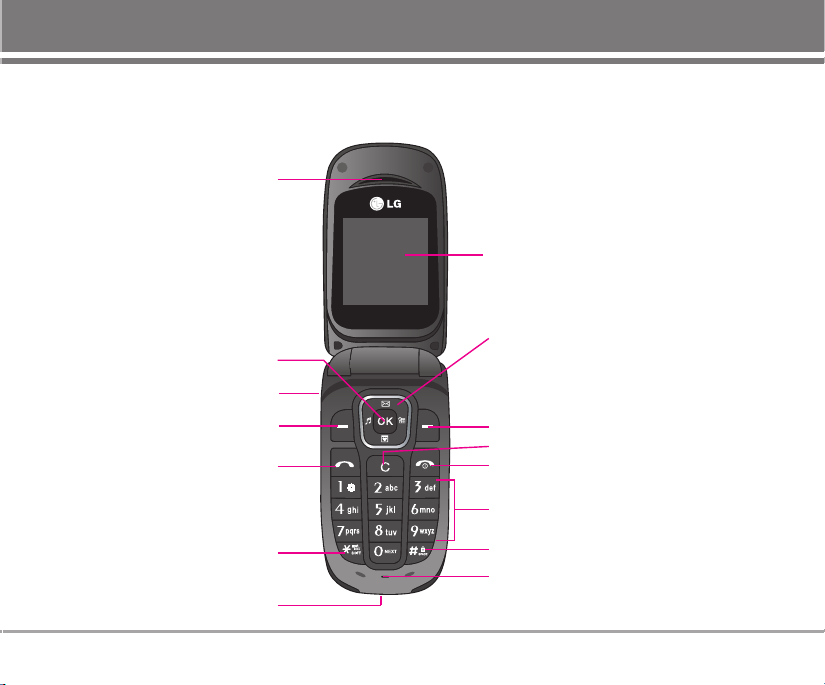
Phone Components
The following shows key components of your mobile phone.
Earpiece
OK Key
Headset Jack
Soft Key 1
CALL Key
LCD Screen
4 Way Navigation
Key
Soft Key 2
Clear Key
END/PWR Key
Alphanumeric Keypad
Vibrate Mode Key
Charger/Data Port
Lock Mode Key
Microphone
SD126 7
Page 11

Phone Overview
Getting Started
LCD Screen
Soft Keys
(the names of the
functions of these
keys appear at the
bottom of the
screen)
CALL Key
END/PWR
Key
Alphanumeric
Keypad
8 SD126
Displays messages & indicator icons
Soft Key 1
Used to display the function setting menu.
Soft Key 2
Accepts the highlighted choice when
navigating through a menu.
Allows user to place or answer calls.
Used to turn power on/off and to end a
call. Using this key, you can return to the
main menu display screen. When you
press once, when a call is received, the
phone stops ringing or vibrating
depending on the mode it is in. Press
twice to reject the call.
These keys enable you to enter
numbers and characters and choose
menu items.
.
Clear Key
Vibrate Mode Key
Lock Mode Key
4 Way
Navigation Key
Press to delete a single space or
character. Press and hold to delete
entire words. Press this key once in
any menu to go back to the previous
menu.
In standby mode, set the vibrate mode
by pressing and holding the key
about 2 seconds.
In standby mode, set the lock mode
by pressing and holding the key
about 2 seconds.
This Navigation key allows quick
access to Messages and Voice
Mail notification messages.
Shortcut, Scheduler,
Profiles.
Page 12
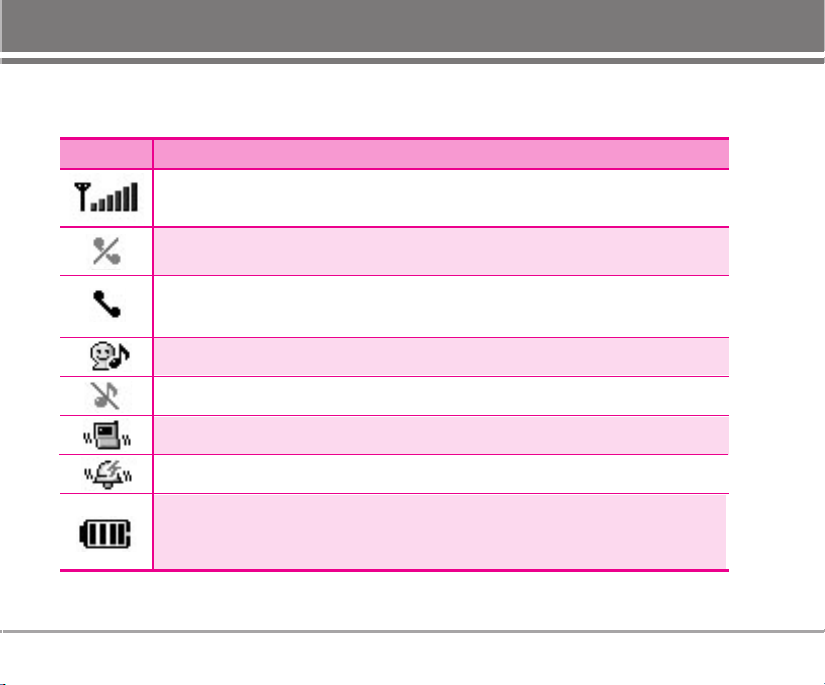
Onscreen Icons
The phone screen displays several onscreen icons which appear when the phone is powered on.
Icons Descriptions
Displays the strength of the signal received by the phone and current signal strength
is indicated by the number of bars displayed on the screen.
No service
The phone is not receiving a system signal.
In use
A call is in progress.
No icon indicates the phone is in standby mode.
*
User Mode.
Silence Mode.
Vibrate Only Mode.
Power Mode.
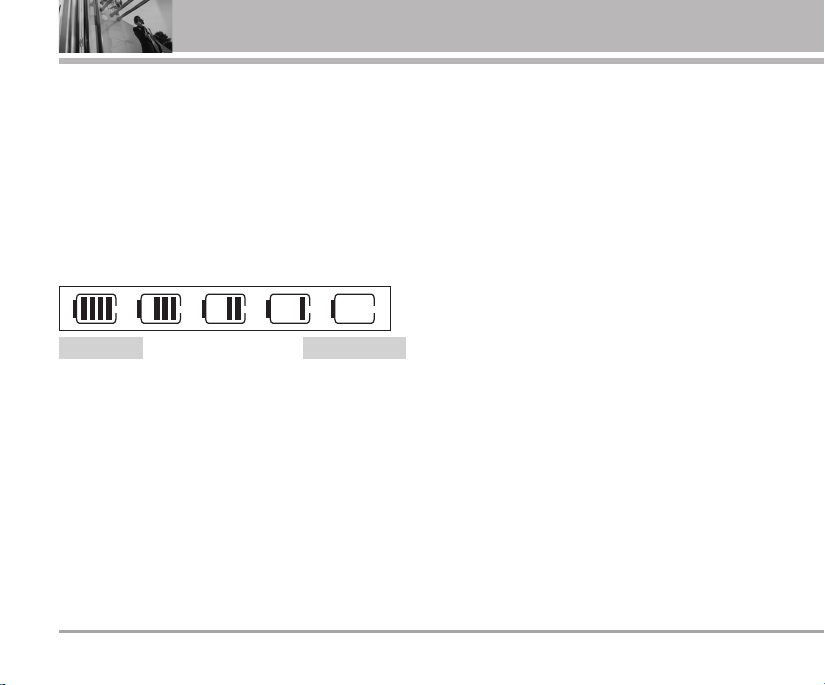
Charge level
Indicates battery charge level.
When fully charged, battery icon indicates charging by twinkling.
SD126 9
Page 13
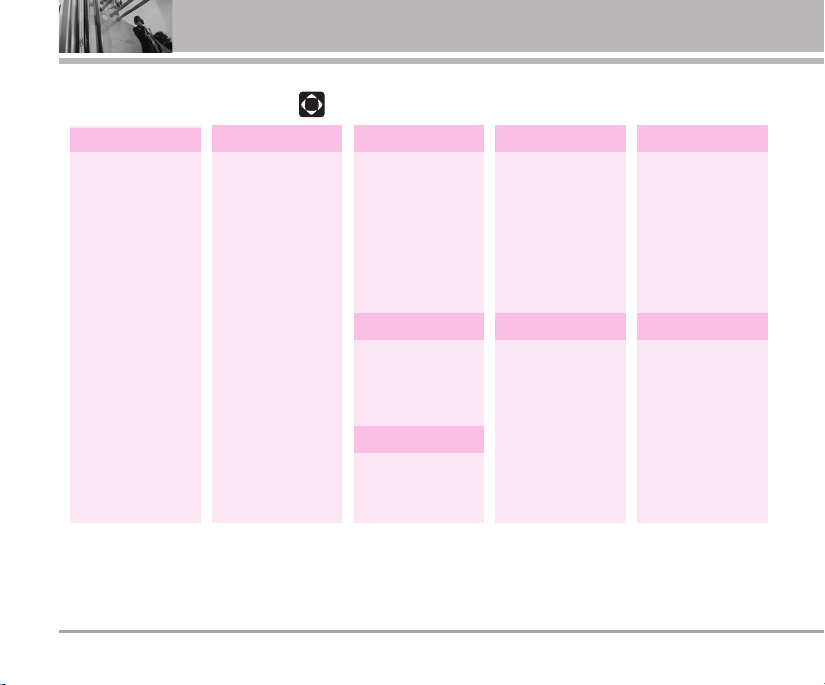
Menu Tree
Press Soft Key 1 Menu. Press to scroll.
Messages
1. Write Message
2. Inbox
3. Archive In UIM
4. Outbox
5. Drafts
6. Voice
7. Templates
8. Delete
Messages
9. Msg Settings
Contacts Call Manager
1. Add New
2. Search
3. Group Settings
4. Group Manager
5. Speed Dials
6. Copy
7. Capacity
8. Delete Contacts
1. Call History
2. Call Duration
3. Call Divert
4. Call Waiting
5. Reject List
6. Call Settings
1. Default Image
2. Default
Ringtones
1. Info
My Stuff
Favorites
Sound
1. Tones
2. Effect Tones
3. Alerts
4. Volume
Organizer
1. Scheduler
2. To Do
3. Anniversary
4. Memo
Tools
1. Game
2. Reminder
3. Alarm
4. Calculator
5. Stop Watch
6. World Time
Settings
1. Display
2. Security
3. Ngoân ngöõ
4. Entry Method
5. My Phone
Number
6. Version Info.
7. Airplane Mode
10 SD126
Page 14
Using the Battery and Charger
Charge the battery fully before the initial use of the
phone.
The phone comes with a rechargeable battery. Keep
the battery charged while not in use in order to
maximize talk and standby time when using the phone.
Installing and Removing the Battery
G
To install, insert the battery into the opening on the
back of the phone, and insert the bottom of battery
into groove at the bottom of the handset. Gently
press down the cover until the latch snaps into place.
G
To remove, push the back cover down. Push the
tab with one hand and lift the top of the battery to
separate.
Charging the Battery
To use the AC adapter charger provided with your
phone:
1. Plug the AC adapter into the electrical outlet.
2. Insert the round end of the adapter into the AC
adapter jack on the bottom of the phone. (Make
sure the battery is installed.)
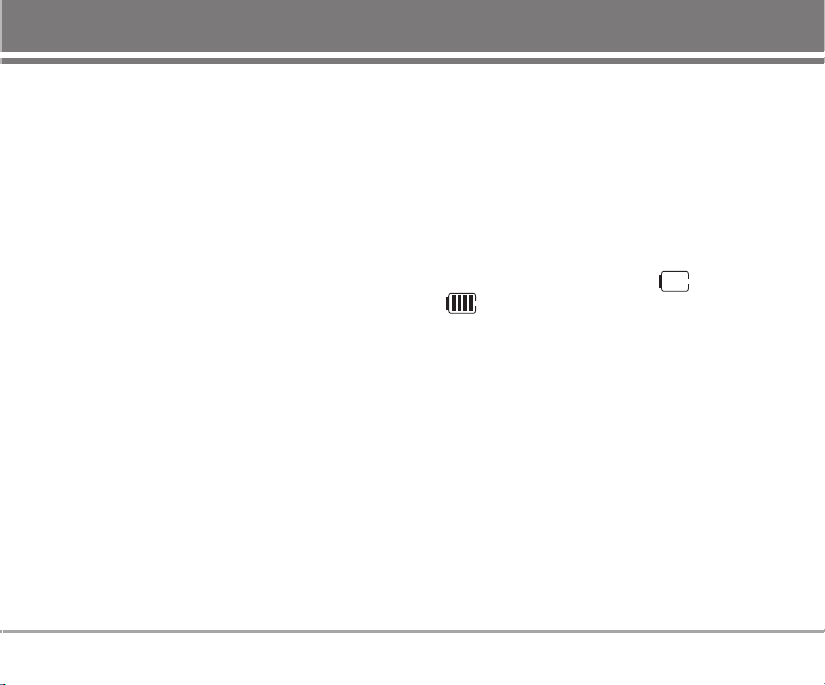
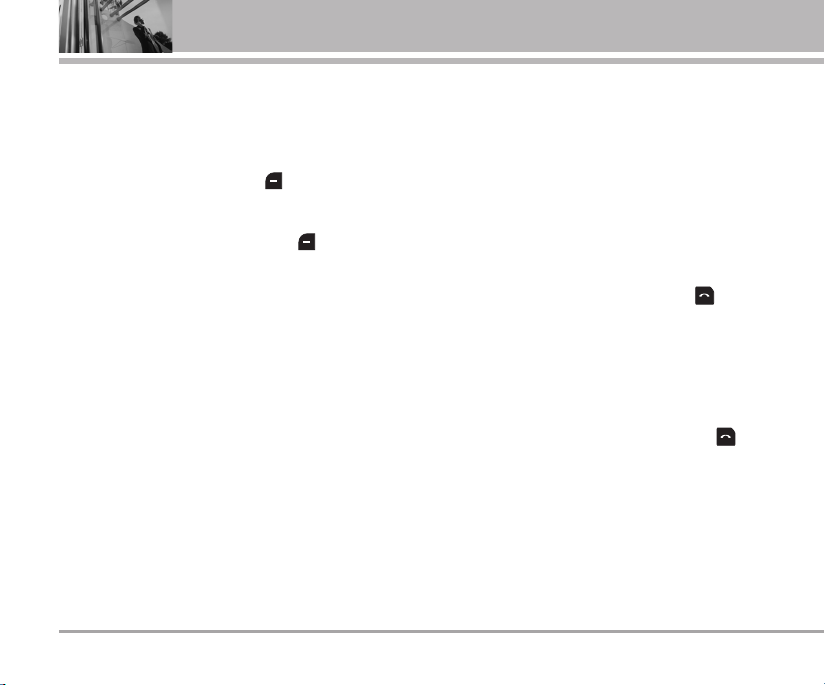
As the phone charges, the battery icon continually
displays a progression from empty ( ) to full
().
It takes about three hours to fully recharge a
completely rundown battery. When fully charged,
battery icon indicates charging by twinkling.
SD126 11
Page 15
Using the Battery and Charger
Battery Charge Level
The battery charge level is shown at the top right of
the LCD screen. When the battery charge level
becomes low, the low battery sensor alerts you in
three ways: sounding an audible tone, blinking the
battery icon, and displaying Recharge the battery If
the battery charge level becomes exceedingly low,
the phone automatically switches off and any function
in progress is not save.
Fully Charged Fully Discharged
12 SD126
Page 16
Getting Your Phone Started
Turning the Phone On and Off
Turning the Phone On
1. Install a charged battery or connect the phone to
an externalpower source such as a cigarette
lighter charger or hands-free car kit.
2. Press for a few seconds until the display turns
off.
NNOO TTEE
Turning the Phone Off
1. Press and hold until the display turns off.
Like any other radio device, avoid any
unnecessary contact with the antenna while your
phone is on.
Signal Strength
Call quality depends on the signal strength in your
area. The signal strength is indicated on the screen as
the number of bars next to the signal strength icon:
The more bars, the better the signal strength. If the
signal quality is poor, move to an open area. If you are
in a building, the reception may be better near a
window.
Making Calls
1. Make sure the phone is turned on. If not, press
for about 3 seconds.
2. Enter the phone number (include the area code if
needed).
3. Press .
lf the phone is locked, enter the Lock Code.
Call Failed - indicates the call did not go through.
4. Press to end the call.
SD126 13
Page 17
Getting Your Phone Started
Correcting Dialing Mistakes
If you make a mistake while dialing a number, press
once to erase the last digit entered or hold down
for at least 2 seconds to delete all digits.
Redialing Calls
Press twice or hold down for about 3
seconds to redial the last number you dialed, missed,
received. The last 120 numbers are stored in the call
history list and you can also select one of these to
redial.
Receiving Calls
1. When the phone rings or vibrates , according to the
answer mode (menu 3-6-1) set, use different
method to answer.
NNOO TTEE
2. Press to end the call.
If you press while the phone is ringing, the
ringing or vibration is muted for that call.
14 SD126
Page 18
Quick Access to Convenient Features
Manner Mode
Use Manner Mode in public places. When Manner
Mode is set, is displayed on the screen, the key
tones are silent, and the phone is set to vibrate.
Vibrate Only Mode Activation
1. From standby mode press for 3 seconds to
switch to Manner mode.
Manner Mode Cancellation
1. From standby mode press for 3 senonds to
switch to User mode.
Lock Mode
Use Lock Mode to prevent others from using your
phone. When Lock Mode is set, your 4-digit password
is required to use the phone.
NNOO TTEE
The Lock Code/password is 0000 when phone
purchased.
Lock Phone Setting
1. Press Menu > Settings > Security.
2. Enter Lock Code.(The default is 0000 when phone
purchased.)
3. Select Lock Phone and press Enable and the
phone is locked.
Lock Mode Quick Activation From standby mode
press for 3 seconds to lock the phone.
Lock Phone Quick Cancellation
1. Press Soft Key 2 Esc then enter your
4-digit password.
The password is 0000 when your phone purchased.
SD126 15
Page 19
Quick Access to Convenient Features
Mute Function
The Mute function prevents the other party from
hearing your voice, but allows you to hear the other
party.
During a call, press Left Soft Key Menu.
In Menu on Call, select Mute.
To enable Unmute, press Left Soft Key Menu and
press Unmute.
Caller ID
Caller ID displays the number of the person calling
when your phone rings. If the caller’s identity is stored
in Phonebook, the name appears with the number.
Check with your service provider to ensure they offer
this feature.
16 SD126
Speed Dials
Speed dials is a convenient feature that allows you to
make phone calls quickly and easily with a few
keystrokes. Your phone recalls the number from your
Phonebook, displays it briefly, and then dials it.
Dialing Speed Dials from 1 to 9
1. Press and hold the Speed Dial number.
OR
Enter the speed dial number and press .
Dialing Speed Dials from 10 to 99
Press the first digit and then press and hold the key
of the last digit.
OR
Enter the first and second digits and press .
Page 20
Entering and Editing Information
Entering Information Using T9 Text Input
You can edit the Banner, Scheduler, Message and
Phone Book using T9 Text Input.
T9 Text is an easy way to write. In this input method,
you only need to press a key once for each letter.
Key Functions
Soft Key 2 : Press to select mode.
- You can select the modes using Soft Key 2:
Viet, T9Ve, T9En, Num, Symbol and Smileys
- Shift Key : Used to change the letter case.
~ (Type Text): In T9 mode, press one key
per letter to enter text.
~ (Type Numbers): In 123 (Numbers)
mode, press once to enter numbers.
(Next): In T9 mode, press to display other
matching words.
(Punctuation): In T9 mode, press to insert
punctuation in a word and complete a sentence.
(Space): Press to complete a word or insert a
space.
(Clear): Press to delete a single space or
character. Press and hold to delete entire
words.
Input Mode
T9 Text Input provides six modes for entering text,
numbers, special characters, punctuation and
smileys.
T9En/T9Ve Mode
Type text using one keystroke per letter. The default is
Viet mode.
Viet (Multi-tap) Mode
Use Viet mode for entering text. This mode is used to
enter both English and Vietnamese characters.
Num (Numbers) Mode
Type numbers using one keystroke per number. To
change to 123 mode in a text entry field, press Soft
Key 2 until 123 mode is displayed.
SD126 17
Page 21
Entering and Editing Information
Symbol/Smileys Mode
Insert special characters, punctuation, or smileys.
You may use any of the special characters. When the
cursor is located where you want the special
character, switch to Symbol/Smileys mode. If you
want to add a smiley, switch to the smileys mode.
Press the Navigation Key to cycle through the
desired characters : To select Character, Press the
assigned number key.
Initial Cap (T9En/T9Ve/Viet)
Only the first letter is capitalized.
Caps Lock (T9EN/T9VE/VIET)
All subsequent letters are capitalized.
Lowercase (T9en/T9ve/viet)
All subsequent letters are lowercase.
18 SD126
Examples Using T9 Text Input
Typing In T9 Mode
When you want to use T9 Mode, check that T9En is
shown at the right bottom of the display. To write the
desired word, press each key once for one letter.
For example, to write “Call the office”, follow these
steps:
1. Press: Soft Key 2 to change letter case to T9En
mode.
2. Press: .
3. Press: to complete the word and add a space.
4. Press:
.
5. Display: Call the office.
As you can see, the word changes after each key
press. Therefore you don’t need to pay much attention
to what happens on the display before you have
keyed in the whole word.
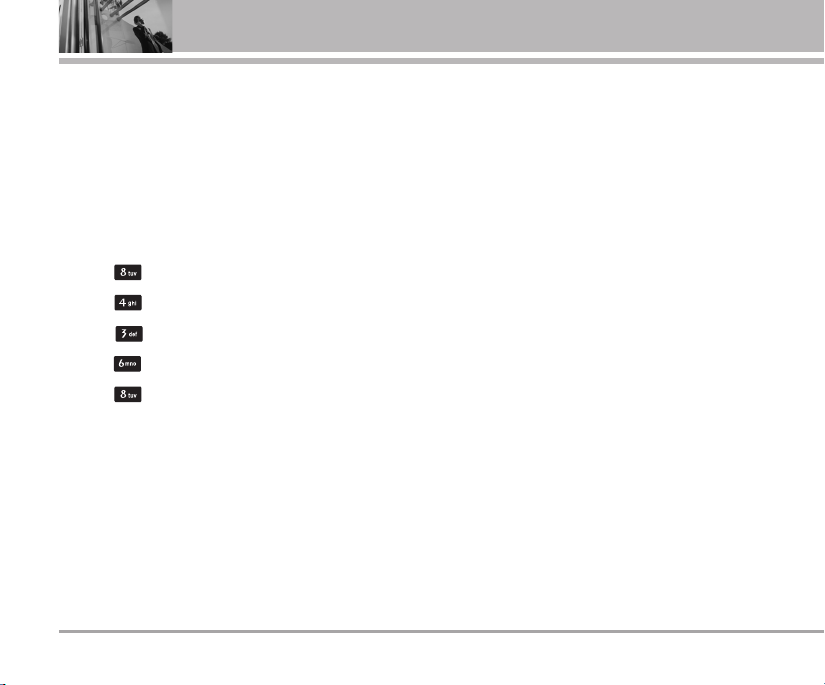
Page 22
Using the NEXT Key
After you have finished typing a word, if the word
displayed is not the word you want, press to
display additional choices.
For example, follow these steps :
1. Press: .
2. Display: Good.
3. Press: .
4. Display: Home, Gone, Hood......
4. Press: Soft Key 2 to change letter case to T9 mode
and then the word Imt will be added to the T9
database.
5. Press: to erase the existing word.
6. Press: .
7. Display: Got.
8. Press: .
9. Display: Imt.
Adding Words to the T9 Database
If a word is not in the T9 database, add it by using Abc
(Multi-tap) mode text entry. The word is automatically
added to the T9 database when you return to T9
mode. For example, follow these steps:
1. Press: Soft Key 2 to change letter case to Abc
(Multi-tap) mode.
2. Press: .
3. Display: Imt.
Examples Using ABC (Multi-tap) Text Input
Typing In ABC (Multi-tap) Mode
For example, to type “LG”, follow these steps:
1. Press: Soft Key 2 to change letter case to Abc
mode.
2. Press: to change to ABC Caps Lock mode.
3. Press: .
4. Display: LG.
SD126 19
Page 23
Entering and Editing Information
To Edit in Viet Mode
Press Soft Key 2, until the soft menu changes to T9Ve or
Viet mode.
Viet mode Editing
To write the desired word in T9Ve mode, press each
key once for one letter or one diacritical mark.
For example, to type "
1. Press once for "V".
2. Press once for "i".
3. Press once for "ê".
4. Press once for ".".
5. Press once for "t".
VVii®®tt
"
20 SD126
Page 24
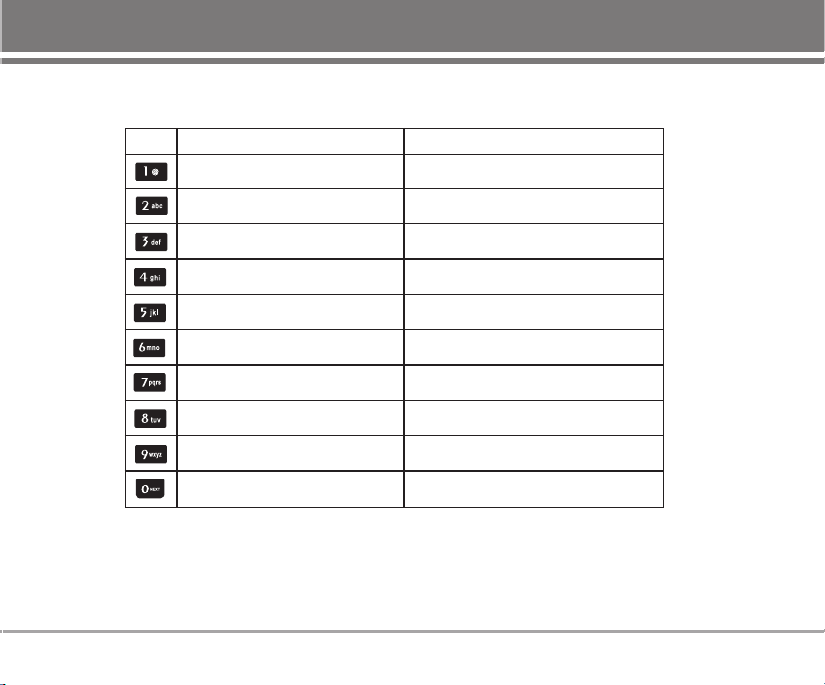
Key Mapping for English and Vietnamese Characters
Key Unshifted characters Shifted characters
.. ,, -- ?? !! `` @@ :: 11
.. ,, -- ?? !! `` @@ :: 11
aa bb cc aaêê aaââ ùù 22
dd ee ff eeââ ññ `` 3
gg hh ii œœ 44
jj kk ll õõ 55
mm nn oo ooââ ôô ïï 66
pp qq rr ss 77
tt uu vv ö
ww xx yy zz 99
00
ö 88
3
AA BB CC AAÊÊ AAÂÂ ÙÙ 2
DD EE FF EEÂÂ ÑÑ `` 33
GG HH II ŒŒ 44
JJ KK LL ÕÕ 55
MM NN OO OOÂÂ ÔÔ ÏÏ
PP QQ RR SS 77
TT UU VV ÖÖ 88
WW XX YY ZZ 99
00
2
66
SD126 21
Page 25
Menu Features
General Guidelines to Menu Access and
Settings
1. Press Soft Key 1 Menu. 9 menu items will appear
on the display screen.
2. Press to go through the list of menu features.
3. Press the corresponding number to the menu item
that you want to select. Then the sub-menu list will
appear on the screen.
4. Press the appropriate key to select the sub-menu
you want to access.
5. Select preferred settings, using the . Press
to go one step backward
while accessing menu or selecting settings.
6. Press to save the settings or to cancel
without saving.
22 SD126
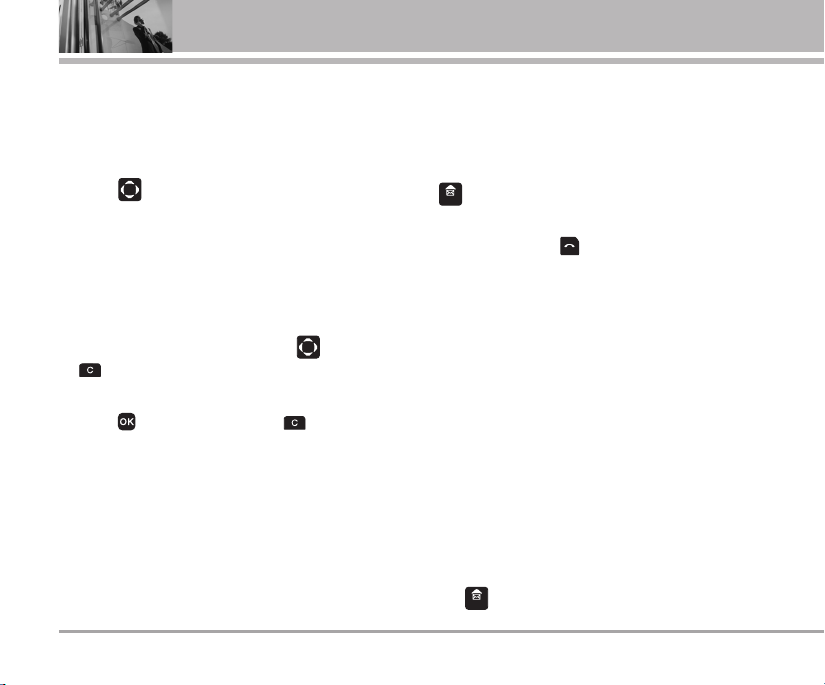
MMeessssaaggeess
Text message, page and Voice Mailbox become
available as soon as the power is on. You can access
the above types of messages using the message Key
.
In addition, you can make a call to the call back
number by pressing during a message check.
The phone can store up to 151 messages (1 voice
message: 150 text messages) with 140 characters per
message in Vietnamese or 160 charaters just in English
character per message. Each vietnamese letter takes 2
- 3 characters based on the complexity(no. of diacritics)
of the character for Ex. viet letter with 1 diacritic takes 2
characters, and with 2 diacritics takes 3 characters.
Users may read and edit messages, saved in the
Outbox during transmission and send them.
However you should check whether your service
provider provides the above features.
The information that is stored in the message is
determined by phone mode and service capability. You
can check types of messages by pressing the message
Key .
Page 26
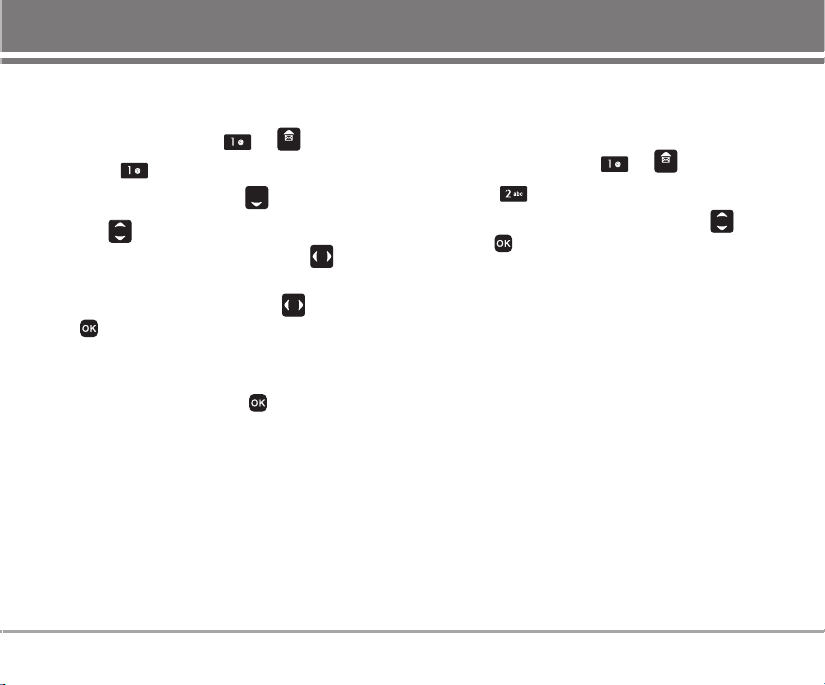
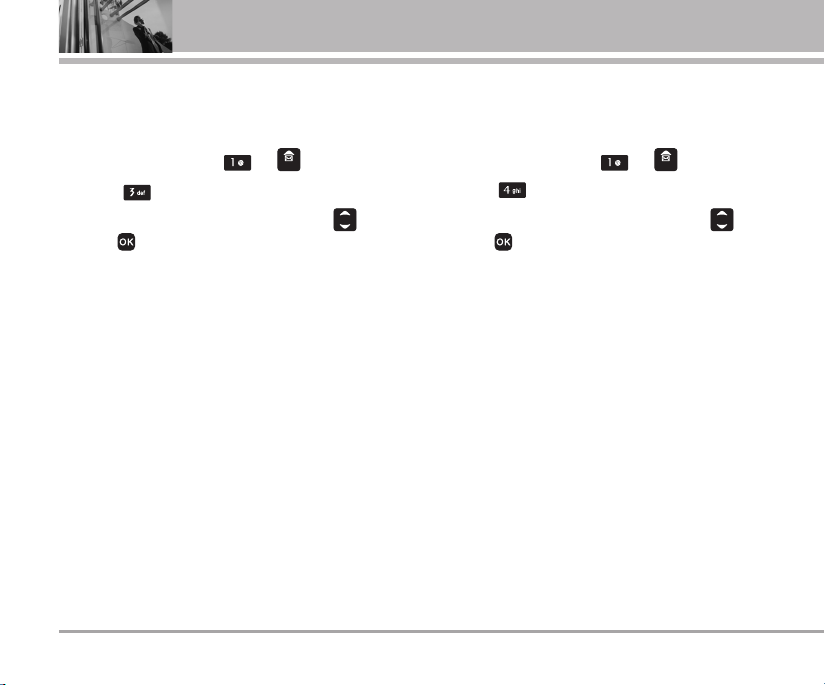
1. Write Message
Allow you to send a text message.
1. Press Soft Key 1 Menu, or .
2. Select Write Message.
3. Enter message, then press .
4. Use to select Save/Priority. Select whether
the message save to outbox by using .
G
Yes /No
5. Select type of message by using , then press
.
G
Normal/Hurry/Urgent
6. Enter destination number or find saved number in
the phone book, then press .
G
Allows you to be certain the message has gone
through. When the message has gone through,
a confirming message is displayed on the
display screen.
2. Inbox
Received text messages may be searched, and the
contents may be viewed.
1. Press Soft Key 1 Menu, or .
2. Select Inbox.
3. After selecting the desired message with ;
press .
4. After viewing the message press Soft Key 1 Option.
G Reply Replies to the received message.
G Forward Forwards a received message to
others. After recipients are entered,
the messages can be forwarded.
G Delete Delete the selected message from
Inbox.
G To Archive Moved the selected messages
from the Inbox to the Archive.
G Delete All Delete all messages stored in
Inbox.
SD126 23
Page 27
Menu Features
3. Archive In UIM
Saved Messages stores what is preferred to save
among message received (Stored in UIM memory).
1. Press Soft Key 1 Menu, or .
2. Select Archive In UIM.
3. After selecting the desired message with ;
press to view.
4. After viewing the message press Soft Key 1 Option.
G Reply Replies to the received message.
G
Forward Forwards a received message to
G
Delete Deletes the selected message.
G
To Inbox Save received messages kept in UIM
G
To Outbox Save sent messages kept in UIM
G
Delete All Delete all messages in this folder.
24 SD126
others destination address(es).
card to Inbox.
card to Outbox.
4. Outbox
Sent messages and Unsent messages may be
searched, and the contents may be viewed.
1. Press Soft Key 1 Menu, or .
2. Select Outbox.
3. After selecting the desired message with ;
press .
4. After viewing the message press Soft Key 1 Option.
G Forward You can modify the message you’ve
got. Then follow the process for
Write.
G
Delete Deletes the selected message.
G
To Archive Move the selected messages from
the Outbox to the Archive.
G
Delete All Delete all messages in this folder.
Page 28
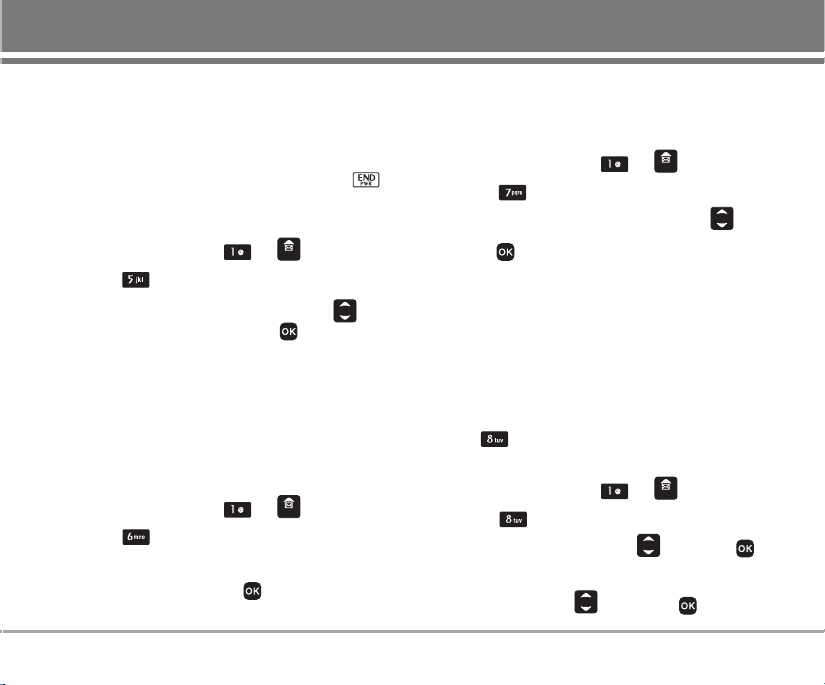
5. Drafts
The text message is saved in Drafts. A total of upto 5
messages can be saved in Drafts. When a user is
interrupted by a call while composing a message,
messages automatically get saved. If you press
during writing messages, message is automatically
saved to Drafts.
1. Press Soft Key 1 Menu, or .
2. Select Drafts.
3. After selecting the desired message with ,
press Soft Key 1 Option or press .
7. Templates
There are 10 predefined phrases included in the
Templates.
1. Press Soft Key 1 Menu, or .
2. Select Templates.
3. After selecting the desired message with .
G Press : To check the contents entered.
G Press Soft Key 1 Edit : To edit the contents entered.
G Press Soft Key 2 Fwd : To forward the contents
selected.
6. Voice
Allows you to view the new voice messages recorded
in the voice mail box. Once you exceed the storage
limit, the old messages will be overwritten. When you
have a new voice message your phone will alert you.
1. Press Soft Key 1 Menu, or .
2. Select Voice.
G To delete information press Soft Key 1 Erase.
To listen information press .
8. Delete Messages
Text messages, page messages are deleted when you
select Delete messages from the Message
Menu screen.
1. Press Soft Key 1 Menu, or .
2. Select Delete messages.
3. Select the item of choice with then press .
G Clear Inbox/Clear Outbox/Clear Archive
YYeess/NNoo
4. Select
with , then press .
SD126 25
Page 29
Menu Features
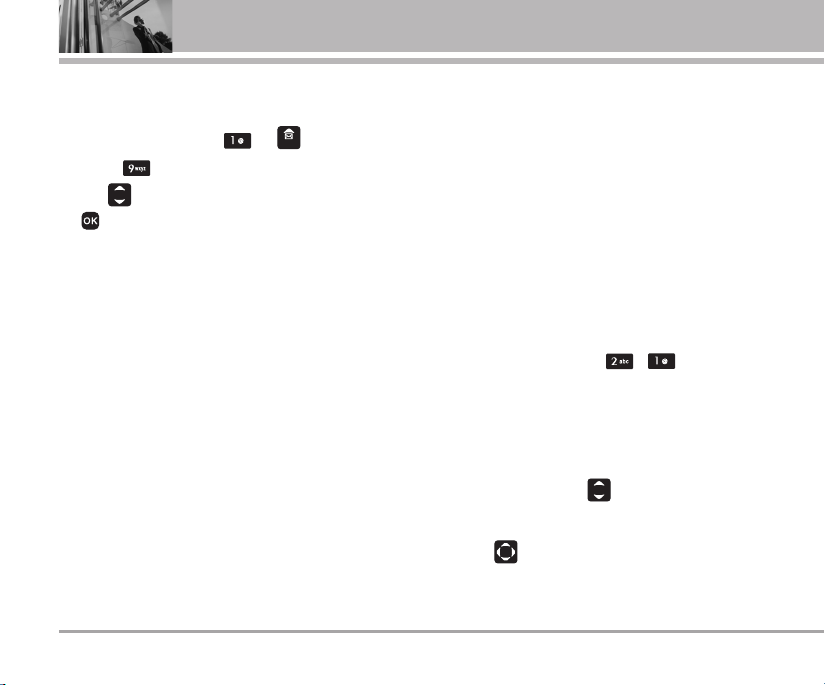
9. Msg Settings
Allows you to configure six settings for messages.
1. Press Soft Key 1 Menu, or .
2. Select Msg Settings.
3. Use to highlight one of the settings and prees
to select it.
G
Priority - (Normal/Hurry/Urgent)
G
Msg Save - (Yes /No)
G
Delivery Report - (Enable/Disable)
G
Vmail Alert - (Num of Messages/
Msg During a call)
G
Msg Text Color - (16 colors)
G
Msg Display - (Only Arrived/All Contents)
26 SD126
CCoonnttaaccttss
Personal Phone Book Memory
The phone has 500 personal phone book entries and
you can dynamically link 4 phone numbers and e-mail
and memo with 24 digit capacity for each phone
number and 64 for e-mail and 40 for memo.
1. Add New
You can save phone numbers, mobile numbers and so
on, up to 500 entries.
1. Press Soft Key 1 Menu, , .
How to save in the Phone
2. Select Phone. (Phone is set as default.)
3. If Phone is selected as a place to be saved in, go
down one step using .
4. Enter the name of person to save.
5. Using , select an item to enter. icon sets
security for each Name, Group, Mobile No., Home
No., Office No., E-mail, Ringtones, Message Tones,
Page 30
Memo, Birthday, Call screen type, Etc No., Fax No.,
and Secret .
6. After entering of information is finished, press
to save.
How to save in UIM Card
2. Select UIM Card. (Select using UIM Card.)
3. If UIM Card is selected as a place to be saved in, go
down one step using .
4. Enter the name of person to save.
5. Enter the telephone number then save.
NNoottee
UIM Card mode where entry is saved in UIM Card
that only name and telephone number may be
entered. For telephone number, maximum of 20 digits
may be entered. (This is item supported by card.)
Speed Dials may not be set when saving in the card.
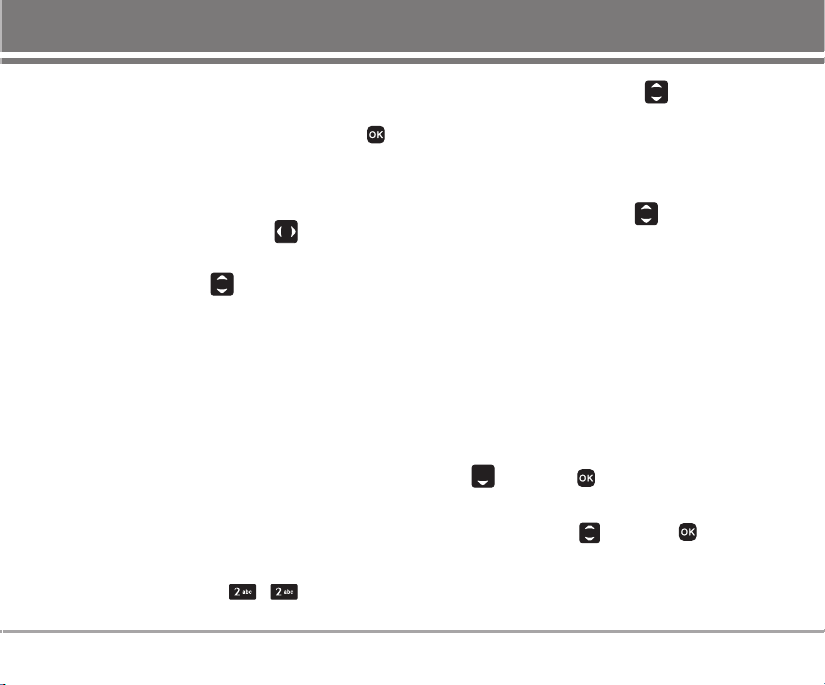
2. Search
To find phone numbers you have stored in the Phone
Book.
1. Press Soft Key 1 Menu, , .
2. Select the name of choice with
and Soft Key 1
Option.
3. The display prompts you to enter the entry name on
the display screen. You can select New Msg,
By Name, By Number, By Group, View All, UIM
Card Only or Delete by using .
NNoottee
Options may be different when selecting UIM Card
Only, Phone List or View All.
- UIM Card Only: New Msg/By Name/By Number/
By Group/View All/Phone List/Delete
- Phone List: New Msg/By Name/By Number/
By Group/View All/UIM Card Only/Delete
- View All: New Msg/By Name/By Number/
By Group/UIM Card Only/Phone List/Delete
4. Press Soft Key 2 SMS to send a message.
G
Enter the contents, and select Save/Priority using
, then press .
NNoottee
At any entry, you may move to another entry by
pressing the . If you press Edit or Soft
Key 1 Option (Delete) you can save or erase or
edit.
SD126 27
Page 31

Menu Features
3. Group Settings
This is a function for changing Group Name and
setting Ring tones by Group.
1. Press Soft Key 1 Menu, , .
2. Select your desired Group using .
Press Soft Key 1 Option : Initialize/Initialize All.
3. Press to edit.
Group Name : Edit the group name.
Group Bell : Set the group ring tone.
SMS Sound : Set the group message tone.
4. Group Manager
Add or delete group members.
1. Press Soft Key 1 Menu, , .
2. Use to highlight the group to add numbers
and press .
3. Press Soft Key 2 Add and use to scroll
through the contacts list, press to select
number to add.
4. After selecting number(s), press Soft Key 2 Add.
5. To delete members from a group, use to highlight it
28 SD126
first, press Soft Key 1 Option and select
Delete/Delete All.
5. Speed Dials
Allows you to view your list of Speed Dials or designate
Speed Dials for numbers entered in your Contacts.
1. Press Soft Key 1 Menu, , .
2. To register, press Add to find information you
want, then press .
NNoottee
Speed Dials may be set up to 99.
6. Copy
Copy One is a function that tranmits saved information
from Phone to UIM Card and vice versa.
1. Press Soft Key 1 Menu, , .
2. Select the item of your choice using , then
press .
Phone -> UIM/UIM -> Phone
3. Search for desired item to transmit when Find
window is displayed.
Page 32

4. Select desired item of your choice using , then
press to select.
5. Press Soft Key 2 Copy to copy.
6. A message indicating completion of transmission
shall be displayed and menu status shall be
displayed back.
7. Capacity
Capacity indicates quantity of phone book presently
saved in the card and the phone. It is indicated as used
quantity/available quantity.
1. Press Soft Key 1 Menu, , .
8. Delete Contacts
To erase all the entries stored in the Names.
1. Press Soft Key 1 Menu, , .
2. Select the name of choice with
3. Press to select the name, then press Soft Key
2 Del.
4. Select Ye s, then press .
.
SD126 29
Page 33

Menu Features
CCaallll MMaannaaggeerr
Allows you to view the 120 most recent phone calls.
Once you exceed the (total) 120-number storage limit,
the oldest Call History record is overwritten. These
calls are divided into 4 types of calls.
NNoottee
Making a Call from Call History
1. From the Call History menu, select Missed,
2. Place a call by selecting the desired entry and
30 SD126
You can view Call History in two ways.
• The key in idle mode, upto 120 most
recent calls including Missed, Received, Dialed
and Memo on Call are displayed.
• In Call History menu, total 120 numbers are
listed under Dialed, Received, Missed and
Numeric Memos.
Received, Dialed or Numeric Memo and press .
press to connect.
1. Call History
1.1 Dialed Calls
Allows you to view list of all Dialed Calls.
1. Press Soft Key 1 Menu, , , .
2. Use to highlight an entry, then
G Press to view the entry.
G Press to place a call to the number.
G Press Soft Key 1 Option to select: Phone Call/
Send Msg/Save to PIM (Edit PIM)/Call Reject/
Delete/Delete All
1.2 Received Calls
Allows you to view list of all Received Calls.
1. Press Soft Key 1 Menu, , , .
2. Use to highlight an entry, then
G Press to view the entry.
G Press to place a call to the number.
G Press Soft Key 1 Option to select: Phone Call/
Send Msg/Save to PIM (Edit PIM)/Call Reject/
Delete/Delete All
Page 34

1.3 Missed Calls
Allows you to view list of all Missed Calls.
1. Press Soft Key 1 Menu, , , .
2. Use to highlight an entry, then
G Press to view the entry.
G Press to place a call to the number.
G Press Soft Key 1 Option to select: Phone Call/
Send Msg/Save to PIM (Edit PIM)/Call Reject/
Delete/Delete All
1.5 Entire History
Allows you to view list of all calls.
1. Press Soft Key 1 Menu, , , .
2. Use to highlight an entry, then
G Press to view the entry.
G Press to place a call to the number.
G Press Soft Key 1 Option to select: Phone Call/
Send Msg/Save to PIM (Edit PIM)/Call Reject/
Delete/Delete All
1.4 Numeric Memos
Allows you to view of quick note(number only) which
saved during the call. While call is in process, press
Soft Key 2 Memo .
1. Press Soft Key 1 Menu, , , .
2. Use to highlight an entry, then
G Press to view the entry.
G Press to place a call to the number.
G Press Soft Key 1 Option to select: Phone Call/
Send Msg/Save to PIM/Call Reject/Delete/
Delete All
1.6 Delete History
1. Press Soft Key 1 Menu, , , .
2. Select the item which it will erase with .
G
Dialed Calls/Received Calls/Missed Calls/
Numeric Memos/Delete All
3. Press .
4. Select Ye s using and then press .
SD126 31
Page 35

Menu Features
2. Call Duration
1. Press Soft Key 1 Menu, , .
2. Use to highlight a call list.
G
All Calls/Dialed Calls/Sent Messages
3. Press Soft Key 1 Del to delete.
YYeess/NNoo
4. Select
with , then press .
3. Call Divert
Allows you to divert the incoming calls to another
phone numbers.
1. Press Soft Key 1 Menu, , .
2. Select the item of choice with , then press .
G All Voice Calls Divert all incoming calls
unconditionally.
G
If Busy Divert calls when the line is busy.
G
If Not Answered Divert when there is no answer
G
Busy/Not Ans. Divert either when the line is busy
or there is no answer.
3. Select Enable/Disable by pressing .
4. If select Enable, you are request to input a new
number in To Num, or assign a predefined number.
32 SD126
Then press .
A connecting message is displayed.
4. Call Waiting
Request the network to notify you when you receive a
new call during a call. (network service)
1. Press Soft Key 1 Menu, , .
2. Select Enable/Disable by using , then press
.
5. Reject List
Allows you to reject the incoming calls from the
predefined numbers or groups.
1. Press Soft Key 1 Menu, , .
2. Enter the four-digit Lock Code.
3. Scroll to select options from then press .
4. After inputing number or selecting group(s), press
to save.
• You can also set the reject number from the Entire
History in standby mode. Press use to
Page 36

highlight a number, then press , select 4 Call
Reject.
and environments.
G Select Enable/Disable and press .
6. Call Settings
Allows you to maintain and set different types of call
details.
1. Press Soft Key 1 Menu, , .
6.1 Answer Mode
Allows you to set the mode of anwering call.
Select an option and press .
• Flip Open: Answering a call immediately when
open the flip.
• Any Key: Press any key except to answer an
incomming call.
• Send Key Only: Only by pressing you can
answer an incomming call.
6.2 Auto Voice Volume
Enable/Disable the function of Audio AGC(Auto Gain
Control) system. This feature provides a better audio
experience by enabling the Audio AGC system to
control the dynamic range and volume of the sending
and receiving voice across different levels of speaker
6.3 Connection Alert
When connecting a call or ending a call, inform you
by making a sound.
G Select Enable/Disable and press .
6.4 Out Of Svc Alert
Alerts you when service changes. When you enter a
service area, the phone displays Entering Service
Area message. When you leave a service area, the
phone displays Leaving Service Area message.
G Select Enable/Disable and press .
6.5 Minute Minder
Alerts you 10 seconds before the end of every minute
during a call.
G Select Enable/Disable and press .
SD126 33
Page 37

Menu Features
MMyy SSttuuffff
Allows you to save and manage the documents of
images, sounds or default in your phone memory.
1. Default Image
With preprogrammend default images, you can
display default image as Idle screen, Incoming call,
Power on, or Power off.
1. Press Soft Key 1 Menu, , .
2. Use to highlight an image and press
View.
3. You can set the selected image as Idle Screen,
Incoming Call, Power On or Power Off Picture by
Presing Option.
34 SD126
2. Default Ringtones
1. Press Soft Key 1 Menu, , .
2. Use to highlight a ringtone and press
Play.
3. You can set the selected ringtone as Incoming Bell,
PowerOn Bell, PowerOff Bell, Reminder Bell or
Alarm Bell by pressing Option.
Page 38

FFaavvoorriitteess
1. Info
With R-UIM' UTK application, you can enjoy various
services.
1. Press Soft Key 1 Menu, , .
2. UTK main menu is displayed. Select the desired
menu with or number key and activate the
menu.
3. After inputting information when necessary, send it
to the server.
SSoouunndd
Sound let you set your phone’s sound settings to your
environment. Each profile contains settings for your
phone’s Alerts, Ring Tone, Ringer Volume, Key Volume
and Message Alert. Just pick the profile that suits
your current environment: Silent mode, Manner mode,
User mode or Power mode.
You can modify the settings in each profile but the
effect will be only in User profile. The "Ringtones" and
"Alerts" settings can be changed in Power mode
Profile. All others are unaffected.
Select Profiles
Select one of the four Profiles Silent Mode, Vibrate
Only, User Mode or Power Mode.
1. In standby mode, press .
2. Select one of four Profiles Silent Mode, Vibrate
Only, User Mode or Power Mode with .
3. Press .
NNoottee
In standby mode, press long to select Vibrate
Only Profile. Press long once again to return
to the previous Profile.
SD126 35
Page 39

Menu Features
1. Tones
1. Press Soft Key 1 Menu, , .
2. Press Soft Key 1 Option to select: Incoming Bell/
PoweOn Bell/PowerOff Bell/Reminder Bell/
Alarm Bell
3. Use to select the melody of choice, then press
.
2. Effect Tones
1. Press Soft Key 1 Menu, , .
2. Use to select a effect tone type Flip/Message.
3. Use to select the sound, then press .
36 SD126
3. Alerts
Allows you to set alert settings.
1. Press Soft Key 1 Menu, , .
2. Select the item of choice with , then press .
G Call Alerts Type/Msg Alerts Type/
Msg Alerts Cycle
3. Select the item of choice with , then press .
4. Volume
Allows you to set various volume settings.
1. Press Soft Key 1 Menu, , .
2. Select the item of choice with , then press .
G Ring Tone/Key Tone/Flip Tone/Earpiece/Alarm
Window/Menu Sound/Power On/Off/Game
3. Adjust the volume with , then press .
Page 40

OOrrggaanniizzeerr
1. Scheduler
Allows you to input your schedule or erase or view. If
you input the time and memo, an alarm rings at the set
time.
1. Press Soft Key 1 Menu, , .
2. Select the date using your keypad, then press .
Moves cursor to the left.
Moves cursor to the right.
Moves to the previous week.
Moves to the next week.
Moves to the previous year.
Moves to the next year.
Moves to the previous month.
Moves to the next month.
3. Press Soft key 1 Option to select.
G Delete/View Daily/View Weekly/
View Monthly/View All/Calendar/Search
Sche/Del13(We)Sche/Clear Past
4. In scheduler view mode, press Soft key 2 Add to add
schedule.
5. Edit the contents and press to select Sta-
/End/Info/Rep.
6. Press .
2. To Do
Up to 40, can be saved.
1. Press Soft Key 1 Menu, , .
2. Press the Soft Key 2 Add.
3. Edit the contents and press to select
Imp/Fin/Per.
4. Press to save.
SD126 37
Page 41

Menu Features
3. Anniversary
1. Press Soft Key 1 Menu, , .
2. Use to highlight the aniversary day and press
.
3. Press Soft Key 2 Add.
4. Enter your anniversary information including:
• Date
• Info (When it is set, it alert you events for the
scheduled time)
• Holi (You can select to set it to be an aniversary or
not).
5. After inputting information, press to save.
4. Memo
Up to 40, can be saved.
1. Press Soft Key 1 Menu, , .
G
Press the Soft Key 1 Option.
G Delete/Search memo/Delete all
G
Press the Soft Key 2 Add.
G Enter a Memo and press .
38 SD126
TToooollss
1. Game
You can enjoy the joyment brought by playing the
fancy game of your phone.
1. Press Soft Key 1 Menu, , .
2. Press twice to enter the game menu.
3. Use to scroll on the menu list, press to
select.
4. Press to back or restart.
2. Reminder
Allows you to set one alarm. The current time is
displayed at the top of the screen when you select an
alarm to set. At the Reminder time, Wake-up Call will be
displayed on the LCD screen and the alarm will sound.
1. Press Soft Key 1 Menu, , .
2. You can change the alarm mode using .
G AlarmOff/+10 min/+30 min/+1 hour/Set time/Daily
3. Use to set alarm time, and select ringer.
Page 42

G Press to select AM/PM, and enter the
number for Hour/Minute.
G Use to select one of the available alarm
ring types.
G Using Soft Key 1 Type, select various ring type.
4. Set the alarm mode for alarm and press to save.
3. Alarm
Allows you to set one alarm. The current time is
displayed at the top of the screen when you select an
alarm to set. At the alarm time, “Morning Call” will be
displayed on the LCD screen and the alarm will sound.
1. Press Soft Key 1 Menu, , .
2. You can change the alarm mode using .
G AlarmOff/Once/Mon~Fri/Mon~Sat/Daily
3. Use to highlight alarm time.
4. Use the keypad to enter the alarm time.
5. Use to highlight Ring, then select a ring type by
pressing .
6. Press to save.
4. Calculator
Calculate simple mathematical computations.
(Can get result up to second decimal place.)
1. Press Soft Key 1 Menu, , .
2. Press and in order.
3. Select (multiplication) using keys.
4. Press and in order.
5. Press .
You will see the result of the calculation 250.
NNoottee
Calculations can be made with up to 32 characters
at one time (e.g., 73+11-13 would be 8 characters).
SD126 39
Page 43

Menu Features
5. Stop Watch
Allows you to measure time and take intermediate
times or lap times using the stop watch.
1. Press Soft Key 1 Menu, , .
2. Press Soft Key 1 Start to start, and press Soft Key 1
Stop to stop.
G You can use the Lap function using Soft Key 2
Lap.
Max. 10 lap time is available. And lap time can be
recorded.
3. Press Soft Key 2 Reset to reset.
6. World Time
Is useful if you need to make a call to another country,
and you are not sure about the time difference.
1. Press Soft Key 1 Menu, , .
2. Select the city you desire by using .
3. Press .
40 SD126
SSeettttiinnggss
The Setup menu has options to customize your phone.
1. Display
Lets you personalise your phone’s display by selecting
different graphics.
1. Main Screens
Allows you to choose the kind of background to be
displayed on main screen.
1. Press Soft Key 1 Menu, , , .
2. Use to select Idle Screen/Incoming Call/
Power On/Power Off.
3. Use to select from different screens and
press .
A confirmation message is displayed.
Page 44

2. Main Clock
Allows you to set the clock of main screen to be
displayed or not.
1. Press Soft Key 1 Menu, , , .
2. Select the item of choice with , then press .
G Theme & Clock/Theme Only/Analog Clock/
Digital Clock
3. Front Screens
Allows you to choose the kind of background to be
displayed on front screen.
1. Press Soft Key 1 Menu, , , .
2. Use to select Idle Screen/Incoming Call/
Power On/Power Off.
3. Use to select from different screens and
press .
A confirmation message is displayed.
4. Front Clock Type
Allows you to set the clock type to be displayed on
front screen.
1. Press Soft Key 1 Menu, , , .
2. Use to select Digital Clock/ Theme & Clock/
Analog Clock then press .
5. Banner
Allows you to compose the greeting note displayed on
the main screen in standby mode.
1. Press Soft Key 1 Menu, , , .
2. Enter a Banner name and then press .
3. Press to select your desired option(s), then
select Align/Shape/Color/BG_Cr for the letters you
entered by using .
4. Press .
SD126 41
Page 45

Menu Features
6. Dialing Font
Dialing Font is a function that sets the size, colour and
font of number displayed on screen when entering
phone number.
1. Press Soft Key 1 Menu, , , .
2. Select the item of choice with then press .
G DialSize : Large/Small
G DialColor : Colorful/Black
G DialFont : Normal/Cute
7. Backlight
Display and buttons are lighted for a designated
length of time, allowing you to use your mobile phone
in the dark with convenience.
1. Press Soft Key 1 Menu, , , .
2. Select the item of your choice by using .
G Manual/Normal
3. Select the item of your choice by using , then
select LCD/Button for the letters you entered by
using .
4. Press .
42 SD126
8. Main Brightness
Allows you to set the brightenss for the LCD screen.
1. Press Soft Key 1 Menu, , , .
2. Adjust the contrast with .
3. Then press to save the contrast setting.
Page 46

2. Security
Prevents unauthorized use of your phone.
NNoottee
2.1 PIN Code Req.
Sets the phone to disable the use of it if incorrect
password is entered for 3 times.
1. Press Soft Key 1 Menu, , .
2. Enter the four-digit Lock Code.
3. Press PIN Code Req..
4. Select Enable/Disable by using , then press
5. After selecting Enable, enter 4 digits PIN number
2.2 New PIN Code
Change PIN Code is a function that enables changing
of the PIN number, which is saved in the card. Initially,
old PIN is confirmed when this function is selected
and, if correct PIN is entered, then followed by
entering new password for 2 times. If the new
The Lock Code/password on your phone is
0000
by default.
.
and press .
password entered for 2 times do not match each
other, a message notifies so and new password shall
be entered again. Initial PIN number differs depending
on the card manufacturer.
1. Press Soft Key 1 Menu, , .
2. Enter the four-digit Lock Code.
3. Press New PIN Code.
2.3 Lock Phone
Keeps your phone from unauthorized use. Once the
phone is locked, it is in restricted mode, until the Lock
Code is entered. This will allow you to receive phone
calls and still make emergency calls. If you need to
modify the Lock Code, you may modify it using the
new Lock Code within the security set menu.
1. Press Soft Key 1 Menu, , .
2. Enter the four-digit Lock Code.
3. Press Lock Phone.
4. Select Enable/Disable by using , then press
.
SD126 43
Page 47

Menu Features
2.4 Lock Outgoing
Limits outgoing calls, and you have the following three
options.
1. Press Soft Key 1 Menu, , .
2. Enter the four-digit Lock Code.
3. Press Lock Outgoing.
4. Select Disable/Outgoing Calls/Int'l Calls by using
, then press .
2.5 Lock Favorites
Helps to keep others using your phone's Favorites
function without permission.
1. Press Soft Key 1 Menu, , .
2. Enter the four-digit Lock Code.
3. Press Lock Favorites.
4. Press Lock Info.
5. Select Enable/Disable by using , then press
.
44 SD126
2.6 Lock Contacts
Allows you to protect your contacts list against
unauthorized use.
1. Press Soft Key 1 Menu, , .
2. Enter the four-digit Lock Code.
3. Press Lock Contacts.
4. Select Enable/Disable by using , then press
.
2.7 Lock Messages
Allows you to protect your messages against
unauthorized use.
1. Press Soft Key 1 Menu, , .
2. Enter the four-digit Lock Code.
3. Press Lock Messages.
4. Select Enable/Disable by using , then press
.
Page 48

2.8 Lock Call History
Allows you to protect your call log against
unauthorized use.
1. Press Soft Key 1 Menu, , .
2. Enter the four-digit Lock Code.
3. Press
4. Select Enable/Disable by using , then press
Lock Call History.
.
2.9 Emergency Num.
You can call emergency numbers, even the phone is
locked or restricted.
To enter 2 emergency numbers:
1. Press Soft Key 1 Menu, , .
2. Enter the four-digit Lock Code.
3. Press Emergency Num..
4. Select Emergency 1/Emergency 2 by using ,
then press Soft Key 1 Edit.
5. Enter an emergency number.
6. Press .
2.0 Change Lockcode
Allows you to enter a new four-digit Lock Code
number.
1. Press Soft Key 1 Menu, , .
2. Enter the four-digit Lock Code.
3. Press Change Lockcode
4. Enter the new password (four-digit).
5. For confirmation, it will ask you to enter the new
password again.
2.*Lockcode Hints
Allows you to inform you of lock code hint.
1. Press Soft Key 1 Menu, , .
2. Enter the four-digit Lock Code.
3. Press Lockcode Hints.
4. Enter the Lock Code Hint, then press .
SD126 45
Page 49

Menu Features
NNggooâânn nnggööõõ
3.
Set the Bilingual feature according to your
preference, choose between English and Vietnamese.
1. Press Soft Key 1 Menu, , .
TTiiªªnngg VVii®®tt
2. Set
/English with , then press .
4. Entry Method
Allows you to set the phone's entry method.
1. Press Soft Key 1 Menu, , .
2. Select T9Ve/Viet/T9En by using , then press
.
5. My Phone Number
Allows you to save and view your phone number and
contact information.
1. Press Soft Key 1 Menu, , .
2. press to Edit/Save.
46 SD126
6. Version Info.
The Phone Info menu provides you with specific
information pertaining to your phone model.
1. Press Soft Key 1 Menu, , .
7. Airplane Mode
When your phone is in Airplane Mode, it cannot send
or receive any calls or access online information. You
may use the phone’s other features, such as Game,
Scheduler, Memo, etc. When Airplane Mode is
enabled, a message “Airplane Mode” is displayed on
the screen.
1. Press Soft Key 1 Menu, , .
2. Select Enable/Disable by using , then press
.
Page 50

Functions Used During a Call
Send My Num
(During a Call : Soft Key 1 Option + )
Allows you to enter your number conveniently when
entering your number in Voice mail during the call.
1. Press the Soft Key 1 Option during the call.
2. Press the key Send My Num.
Mute/Unmute
(During a Call : Soft Key 1 Option + )
This function locks the microphone of your telephone
and prevent sounds from your end being heard by the
person at the other end.
G
To enable Mute Function:
1. Press the Soft Key 1 Option during the call.
2. Press Mute.
G
To disable Mute Function:
1. Repeat the procedure.
Srch PIM
(During a Call : Soft Key 1 Option + )
It allows you to view the list of entries in the Phone
Book you during a call.
1. Press the Soft Key 1 Option during the call.
2. Press the key Srch PIM.
3. Press Soft Key 1 Option.
4. The display prompts you to enter the entry name on
the display screen. You can select New MSG/
Assign Dial(Change Dial)/By Name/By Number/
By Group/UIM Card Only/Phone List/Delete by
using .
Store PIM
(During a Call : Soft Key 1 Option + )
Allows You can save phone numbers, mobile numbers
and so on, during the call.
1. Press the Soft Key 1 Option during the call.
2. Press the key Store PIM.
3. Select number type by using , then press .
SD126 47
Page 51

Menu Features
4. Using , select an item to enter. icon sets
security for each Name, Group, Mobile No., Home
No., Office No., E-mail,Ringtones, Message Tones,
Memo, Birthday, Call screen type, Etc No., Fax No.,
and Secret.
5. After entering of information is finished, press
to save.
Srch Sche
(During a Call : Soft Key 1 Option + )
1. Press the Soft Key 1 Option during the call.
2. Press the key Srch Sche.
3. Press Soft key 1 Option to select.
G View Sche/View To Do/View Anniv/
Search Sche/Go to Date/Delete All
48 SD126
Adjusting Speaker Mode On
(During a Call : Press )
During a call, to activate or cancel speaker quickly,
press .
Memo
(During a Call : Soft Key 2 Memo)
It allows you to note a phone number that the other
person provides you during a call. The number will be
stored in the Numeric Memos.
1. Press the Soft Key 2 Memo during the call.
2. Type the phone number and press to save.
Page 52

Accessories
There are a variety of accessoris available for your mobile phone. You can select these options according to your
personal communication requirements. Consult your local dealer for availability.
Travel Charger
This adaptor allows you to charge the
battery. It supports AC 100~240 Volt,
50~60 Hz outlets.
Battery
SD126 49
Page 53

Frequently Asked Questions
Frequently asked questions
Q : How do I view the list of Dialed calls,
Received calls and Missed calls?
A : Press .
Q : How do I clear Call History ?
A : Press Press Soft Key 1
DDeelleettee
Select
YYeess
Select
Q : How do I view all numbers stored in
memory?
A : Press Soft Key 2
Q : How many events can I add to the
schedule ?
A : Total of 160 events.
50 SD126
DDeelleettee AAllll
or
Press .
CCoonnttaacctt
OOppttiioonn
Press
.
Q : How do I clear past schedule stored in
Scheduler?
A : Press Soft Key 1
OOppttiioonn
Press .
Q : How many Speed Dial numbers can I store?
A : Total of 99 numbers.
Q : How do I send a text message ?
A : Press
Q : How do I clear the call timer (reset the time
used monthly)?
A : Press Soft Key 1
MMaannaaggeerr
CCaallllss
Soft key 1 Del Select
MMeennuu
SScchheedduulleerr
Press Soft Key 1
Delete All Select Ye s
WWrriittee MMeessssaaggee
MMeennuu
CCaallll DDuurraattiioonn
OOrrggaanniizzeerr
.
CCaallll
YYeess
.
AAllll
Page 54

Q : How do I find out my Lock Code ?
A : The Lock Code/Password on your phone is
00000000
by default.
Q : How many groups are there ?
A : In Groups, there are Family/Friend/Team/
Alumni/ETC/Group6/Group7/Group8/Group9/
Group0. You can edit Group title. To change
Group Name.
1. Select group by pressing Soft Key 1
MMeennuu
SSeettttiinnggss
2. Press
CCoonnttaaccttss
and .
EEddiitt
.
GGrroouupp
Q : What is the significance of key ?
A : key is equivalent to pressing Soft Key 1,
in the case of Soft Key 1 is associated with
SSeelleecctt
“
” option.
key is equivalent to pressing Soft Key +
selecting first option of popup menu, in the
case of Soft Key 1 is associated with
OOppttiioonn
“
” option.
key for turning the speaker on/off
during the call properly.
SD126 51
Page 55

Frequently Asked Questions
Before calling for service
Please check to see if any problem which you may have with your phone is described here before taking it for
service or calling a service engineer.
When showing symptoms like:
When “ ” does not disappear
from the screen.
When connection is abrupt or is not
audible in certain areas.
When connection is not made well or
abrupt even when established.
When LCD does not turn on.
52 SD126
Check this!
Check whether it is in service area, and if you continue to see “
” please turn off the power and wait for approximately 2 minutes to
turn it back on. If there is no change, check again after relocating to
other areas.
When frequency environment is unstable in a certain area,
connection may be abrupt and not audible. Relocate to other
areas and try again.
When frequency is unstable or weak, or if there are too many
users, connection may be cut off even after it was established.
Please try again a little later or try after relocating to other areas.
Remove battery and turn on the power after placing it back on.
If there is no change even then, sufficiently charge the battery
and try again.
Page 56

When showing symptoms like:
Check this!
When it echoes while connection is made
with a certain telephone in a certain area.
When the phone is heated.
When the Ringer does not ring, or when
Backlight or LCD blinks only.
Standby duration for battery
gradually becomes shorter.
When usage time of battery becomes
shorter.
Called "Echo Phenomenon," it occurs if connection volume is
too high or caused by special properties(semielectronic telephone
exchange) of the machine on the other end.
If connection is made for a significantly long duration, or game
and Internet and others are used for a long time, the phone may
become hot. This has no effect upon the life of the product or
performance.
Ringer Type may be set as "Silent" or "Light". Please select
"Ring".
Because battery wear out, its life gradually becomes shorter. If
its life becomes shorter over half of that at the time of
purchase, you must purchase a new one.
If time for use of battery is short, it may be due to the user
environment, or large volume of calls, or weak signals.
SD126 53
Page 57

Safety Guidelines
TIA Safety Information
Provided herein is the complete TIA Safety
Information for Wireless Handheld phones. Inclusion
of the text covering Pacemakers, Hearing Aids, and
Other Medical Devices is required in the owner’s
manual for CTIA Certification. Use of the remaining
TIA language is encouraged when appropriate.
Exposure to Radio Frequency Signal
Your wireless handheld portable telephone is a low
power radio transmitter and receiver. When it is ON, it
receives and also sends out radio frequency (RF)
signals.
In August, 1996, the Federal Communications
Commissions (FCC) adopted RF exposure guidelines
with safety levels for hand-held wireless phones.
Those guidelines are consistent with the safety
standards previously set by both U.S. and international
standards bodies:
ANSI C95.1 (1992) *
NCRP Report 86 (1986)
ICNIRP (1996)
Those standards were based on comprehensive and
periodic evaluations of the relevant scientific
54 SD126
literature. For example, over 120 scientists, engineers,
and physicians from universities, government health
agencies, and industry reviewed the available body of
research to develop the ANSI Standard (C95.1).
The design of your phone complies with the FCC
guidelines (and those standards).
Antenna Care
Use only the supplied or an approved replacement
antenna. Unauthorized antennas, modifications, or
attachments could damage the phone and may violate
FCC regulations.
Phone Operation
NORMAL POSITION: Hold the phone as you would
any other telephone with the antenna pointed up and
over your shoulder.
Tips on Efficient Operation
For your phone to operate most efficiently:
Do not touch the antenna unnecessarily when the
phone is in use. Contact with the antenna affects call
quality and may cause the phone to operate at a
higher power level than otherwise needed.
Page 58

Driving
Check the laws and regulations on the use of wireless
telephones in the areas where you drive. Always obey
them. Also, if using your phone while driving, please:
• Give full attention to driving -- driving safely is your
first responsibility;
• Use hands-free operation, if available;
• Pull off the road and park before making or
answering a call if driving conditions so require.
Electronic Devices
Most modern electronic equipment is shielded from
RF signals. However, certain electronic equipment
may not be shielded against the RF signals from your
wireless phone.
Pacemakers
The Health Industry Manufacturers Association
recommends that a minimum separation of six(6”)
inches be maintained between a handheld wireless
phone and a pacemaker to avoid potential
interference with the pacemaker. These
recommendations are consistent with the
independent research by and recommendations of
Wireless Technology Research
Persons with pacemakers:
• Should ALWAYS keep the phone more than six
inches from their pacemaker when the phone is
turned ON;
• Should not carry the phone in a breast pocket
• Should use the ear opposite the pacemaker to
minimize the potential for interference
Hearing Aids
Some digital wireless phones may interfere with some
hearing aids. In the event of such interference, you
may want to consult your service provider (or call the
customer service line to discuss alternatives.)
Optional for each phone manufacturer.
Other Medical Devices
If you use any other personal medical device, consult
the manufacturer of your device to determine if it is
adequately shielded from external RF energy. Your
physician may be able to assist you in obtaining this
information.
SD126 55
Page 59

Safety Guidelines
Health Care Facilities
Turn your phone OFF in health care facilities when any
regulations posted in these areas instruct you to do so.
Hospitals or health care facilities may use equipment
that could be sensitive to external RF energy.
Vehicles
RF signals may affect improperly installed or
inadequately shielded electronic systems in motor
vehicles. Check with the manufacturer or its
representative regarding your vehicle. You should
also consult the manufacturer of any equipment that
has been added to your vehicle.
Posted Facilities
Turn your phone OFF in any facility where posted
notices so require.
Aircraft
FCC regulations prohibit using your phone while in the
air. Switch OFF your phone before boarding an aircraft.
Blasting Areas
To avoid interfering with blasting operations, turn your
phone OFF when in a “blasting area” or in areas
56 SD126
posted: “Turn off two-way radio”. Obey all signs and
instructions.
Potentially Explosive Atmosphere
Turn your phone OFF when in any area with a
potentially explosive atmosphere and obey all signs
and instructions. Sparks in such areas could cause an
explosion or fire resulting in bodily injury or even death.
Areas with a potentially explosive atmosphere are
often, but not always marked clearly. Potential areas
may include: fueling areas (such as gasoline stations);
below deck on boats; fuel or chemical transfer or
storage facilities; vehicles using liquefied petroleum
gas (such as propane or butane); areas where the air
contains chemicals or particles (such as grain, dust, or
metal powders); and any other area where you would
normally be advised to turn off your vehicle engine.
For Vehicles Equipped with an Air Bag
An air bag inflates with great force. DO NOT place
objects, including either installed or portable wireless
equipment, in the area over the air bag or in the air
bag deployment area. If in-vehicle wireless
equipment is improperly installed and the air bag
inflates, serious injury could result.
Page 60

Safety Information
Please read and observe the following information for
safe and proper use of your phone and to prevent
damage. Also, keep the user guide in an accessible
place at all the times after reading it.
Violation of the instructions
may cause minor or serious
damage to the product.
Charger and Adapter Safety
G
The charger and adapter are intended for indoor
use only.
Battery Information and Care
G
Please dispose of your battery properly.
G
The battery does not need to be fully discharged
before recharging.
G
Use only LG-approved chargers specific to your
phone model since they are designed to maximize
battery life.
G
Do not disassemble or short-circuit the battery.
G
Keep the battery’s metal contacts clean.
G
Replace the battery when it no longer provides
acceptable performance. The battery can be
recharged several hundred times before
replacement.
G
Recharge the battery after long periods of non-use
to maximize battery life.
G
Battery life will vary due to usage patterns and
environmental conditions.
G
Use of extended backlighting, MiniBrowser, and
data connectivity kits affect battery life and
talk/standby times.
G
The self-protection function of the battery cuts the
power of the phone when its operation is in an
abnormal state. In this case, remove the battery
from the phone, reinstall it, and turn the phone on.
Explosion, Shock, and Fire Hazards
G
Do not put your phone in a place subject to
excessive dust and keep the minimum required
distance between the power cord and heat
sources.
SD126 57
Page 61

Safety Guidelines
G
Unplug the power cord prior to cleaning your
phone, and clean the power plug pin when it is
dirty.
G
When using the power plug, ensure that it is firmly
connected. If it is not, it may cause excessive heat
or fire.
G
If you put your phone in a pocket or bag without
covering the receptacle of the phone (power plug
pin), metallic articles (such as a coin, paperclip or
pen) may short-circuit the phone. Always cover the
receptacle when not in use.
G
Do not short-circuit the battery. Metallic articles
such as a coin, paperclip or pen in your pocket or
bag may short-circuit the + and – terminals of the
battery (metal strips on the battery) upon moving.
Short-circuit of the terminal may damage the
battery and cause an explosion.
58 SD126
General Notice
G
Using a damaged battery or placing a battery in
your mouth may cause serious injury.
G
Do not place items containing magnetic
components such as a credit card, phone card,
bank book or subway ticket near your phone. The
magnetism of the phone may damage the data
stored in the magnetic strip.
G
Talking on your phone for a long period of time may
reduce call quality due to heat generated during
use.
G
When the phone is not used for a long period time,
store it in a safe place with the power cord
unplugged.
G
Using the phone in proximity to receiving
equipment (i.e., TV or radio) may cause
interference to the phone.
G
Do not use the phone if the antenna is damaged. If
a damaged antenna contacts skin, it may cause a
slight burn. Please contact an LG Authorized
Service Center to replace the damaged antenna.
Page 62

G
Do not immerse your phone in water. If this
happens, turn it off immediately and remove the
battery. If the phone does not work, take it to an LG
Authorized Service Center.
G
The power cord on this product will expose you to
lead, a chemical known to the State of California to
cause (cancer) birth defects or other reproductive
harm. Wash hands after handling.
G
Do not paint your phone.
G
The data saved in your phone might be deleted due
to careless use, repair of the phone, or upgrade of
the software. Please backup your important phone
numbers. (Ring tones, text messages, voice
messages, pictures, and videos could also be
deleted.)
The manufacturer is not liable for damage due to
the loss of data.
G
When you use the phone in public places, set the
ring tone to vibration so as not to disturb others.
G
Do not turn your phone on or off when putting it in
your ear.
FDA Consumer Update
The U.S. Food and Drug Administration’s
Center for Devices and Radiological Health
Consumer Update on Mobile Phones.
1. Do wireless phones pose a health hazard?
The available scientific evidence does not show that
any health problems are associated with using
wireless phones. There is no proof, however, that
wireless phones are absolutely safe. Wireless phones
emit low levels of radiofrequency energy (RF) in the
microwave range while being used. They also emit
very low levels of RF when in the stand-by mode.
Whereas high levels of RF can produce health effects
(by heating tissue), exposure to low level RF that does
not produce heating effects causes no known
adverse health effects. Many studies of low level RF
exposures have not found any biological effects.
Some studies have suggested that some biological
effects may occur, but such findings have not been
confirmed by additional research. In some cases,
other researchers have had difficulty in reproducing
those studies, or in determining the reasons for
inconsistent results.
SD126 59
Page 63

Safety Guidelines
2. What is FDA's role concerning the safety of
wireless phones?
Under the law, FDA does not review the safety of
radiation-emitting consumer products such as
wireless phones before they can be sold, as it does
with new drugs or medical devices. However, the
agency has authority to take action if wireless phones
are shown to emit radiofrequency energy (RF) at a
level that is hazardous to the user. In such a case,
FDA could require the manufacturers of wireless
phones to notify users of the health hazard and to
repair, replace or recall the phones so that the hazard
no longer exists.
Although the existing scientific data do not justify FDA
regulatory actions, FDA has urged the wireless phone
industry to take a number of steps, including the
following:
• Support needed research into possible biological
effects of RF of the type emitted by wireless
phones;
• Design wireless phones in a way that minimizes
any RF exposure to the user that is not necessary
for device function; and
• Cooperate in providing users of wireless phones
60 SD126
with the best possible information on possible
effects of wireless phone use on human health.
FDA belongs to an interagency working group of the
federal agencies that have responsibility for different
aspects of RF safety to ensure coordinated efforts at
the federal level. The following agencies belong to this
working group:
• National Institute for Occupational Safety and Health
• Environmental Protection Agency
• Occupational Safety and Health Administration
• National Telecommunications and Information
Administration
The National Institutes of Health participates in some
interagency working group activities, as well
FDA shares regulatory responsibilities for wireless
phones with the Federal Communications Commission
(FCC). All phones that are sold in the United States
must comply with FCC safety guidelines that limit RF
exposure. FCC relies on FDA and other health
agencies for safety questions about wireless phones.
FCC also regulates the base stations that the wireless
phone networks rely upon. While these base stations
operate at higher power than do the wireless phones
themselves, the RF exposures that people get from
Page 64

these base stations are typically thousands of times
lower than those they can get from wireless phones.
Base stations are thus not the subject of the safety
questions discussed in this document.
3. What kinds of phones are the subject of this
update?
The term “wireless phone” refers here to hand-held
wireless phons with built-in antennas, often called
“cell”, “mobile”, or “PCS” phones. These types of
wireless phones can expose the user to measurable
radiofrequency energy(RF) because of the short
distance between the phone and the user’s head.
These RF exposures are limited by Federal
Communications Commission safety guidelines that
were developed with the advice of FDA and other
federal health and safety agencies. When the phone
is located at greater distances from the user, the
exposure to RF is drastically lower because a
person's RF exposure decreases rapidly with
increasing distance from the source. The so-called
"cordless phones," which have a base unit connected
to the telephone wiring in a house, typically operate at
far lower power levels, and thus produce RF
exposures far below the FCC safety limits.
4. What are the results of the research done already?
The research done thus far has produced conflicting
results, and many studies have suffered from flaws in
their research methods. Animal experiments
investigating the effects of radiofrequency energy (RF)
exposures characteristic of wireless phones have
yielded conflicting results that often cannot be
repeated in other laboratories. A few animal studies,
however, have suggested that low levels of RF could
accelerate the development of cancer in laboratory
animals. However, many of the studies that showed
increased tumor development used animals that had
been genetically engineered or treated with cancercausing chemicals so as to be pre-disposed to
develop ca ncer in the absence of RF exposure. Other
studies exposed the animals to RF for up to 22 hours
per day. These conditions are not similar to the
conditions under which people use wireless phones,
so we don’t know with certainty what the results of
such studies mean for human health.
Three large epidemiology studies have been
published since December 2000. Between them, the
studies investigated any possible association between
the use of wireless phones and primary brain cancer,
glioma, meningioma, or acoustic neuroma, tumors of
SD126 61
Page 65

Safety Guidelines
the brain or salivary gland, leukemia, or other cancers.
None of the studies demonstrated the existence of
any harmful health effects from wireless phone RF
exposures. However, none of the studies can answer
questions about long-term exposures, since the
average period of phone use in these studies was
around three years.
5. What research is needed to decide whether RF
exposure from wireless phones poses a health
risk?
A combination of laboratory studies and
epidemiological studies of people actually using
wireless phones would provide some of the data that
are needed. Lifetime animal exposure studies could be
completed in a few years. However, very large
numbers of animals would be needed to provide
reliable proof of a cancer promoting effect if one
exists. Epidemiological studies can provide data that is
directly applicable to human populations, but 10 or
more years follow-up may be needed to provide
answers about some health effects, such as cancer.
This is because the interval between the time of
exposure to a cancer-causing agent and the time
tumors develop — if they do — may be many, many
62 SD126
years. The interpretation of epidemiological studies is
hampered by difficulties in measuring actual RF
exposure during day-to-day use of wireless phones.
Many factors affect this measurement, such as the
angle at which the phone is held, or which model of
phone is used.
6. What is FDA doing to find out more about the
possible health effects of wireless phone RF?
FDA is working with the U.S. National Toxicology
Program and with groups of investigators around the
world to ensure that high priority animal studies are
conducted to address important questions about the
effects of exposure to radiofrequency energy (RF).
FDA has been a leading participant in the World
Health Organization International Electromagnetic
Fields (EMF) Project since its inception in 1996. An
influential result of this work has been the
development of a detailed agenda of research needs
that has driven the establishment of new research
programs around the world. The Project has also
helped develop a series of public information
documents on EMF issues.
FDA and the Cellular Telecommunications & Internet
Association (CTIA) have a formal Cooperative
Page 66

Research and Development Agreement (CRADA) to
do research on wireless phone safety. FDA provides
the scientific oversight, obtaining input from experts in
government, industry, and academic organizations.
CTIA-funded research is conducted through contracts
to independent investigators. The initial research will
include both laboratory studies and studies of
wireless phone users. The CRADA will also include a
broad assessment of additional research needs in the
context of the latest research developments around
the world.
7. How can I find out how much radiofrequency
energy exposure I can get by using my wireless
phone?
All phones sold in the United States must comply with
Federal Communications Commission (FCC) guidelines
that limit radiofrequency energy (RF) exposures. FCC
established these guidelines in consultation with FDA
and the other federal health and safety agencies. The
FCC limit for RF exposure from wireless telephones is
set at a Specific Absorption Rate (SAR) of 1.6 watts
per kilogram (1.6 W/kg). The FCC limit is consistent
with the safety standards developed by the Institute of
Electrical and Electronic Engineering (IEEE) and the
National Council on Radiation Protection and
Measurement. The exposure limit takes into
consideration the body’s ability to remove heat from
the tissues that absorb energy from the wireless
phone and is set well below levels known to have
effects. Manufacturers of wireless phones must
report the RF exposure level for each model of phone
to the FCC. The FCC website
(http://www.fcc.gov/oet/rfsafety/) gives directions for
locating the FCC identification number on your phone
so you can find your phone’s RF exposure level in the
online listing.
8. What has FDA done to measure the radiofrequency
energy coming from wireless phones ?
The Institute of Electrical and Electronic Engineers
(IEEE) is developing a technical standard for
measuring the radiofrequency energy (RF) exposure
from wireless phones and other wireless handsets
with the participation and leadership of FDA scientists
anring the rate at which RF is deposited in the heads
of wireless phone users. The test method uses a
tissue-simulating model of the human head.
Standardized SAR test methodology is expected to
greatly improve the consistency of measurements
SD126 63
Page 67

Safety Guidelines
made at different laboratories on the same phone.
SAR is the measurement of the amount of energy
absorbed in tissue, either by the whole body or a
small part of the body. It is measured in watts/kg (or
milliwatts/g) of matter. This measurement is used to
determine whether a wireless phone complies with
safety guidelines.
9. What steps can I take to reduce my exposure to
radiofrequency energy from my wireless phone?
If there is a risk from these products--and at this point
we do not know that there is--it is probably very small.
But if you are concerned about avoiding even
potential risks, you can take a few simple steps to
minimize your exposure to radiofrequency energy
(RF). Since time is a key factor in how much exposure
a person receives, reducing the amount of time spent
using a wireless phone will reduce RF exposure.
• If you must condict extended conversationsby
wireless phone every day, you could place more
distance between your body and the source of the
RF, since the exposure level drops off dramatically
with distamce. For example, you could use a
headset and carry the wireless phone away from
your body or use a wireless phone connected to a
64 SD126
remote antenna
Again, the scientific data do not demonstrate that
wireless phones are harmful. But if you are
concerned about the RF exposure from these
products, you can use measures like those described
above to reduce your RF exposure from wireless
phone use.
10. What about children using wireless phones?
The scientific evidence does not show a danger to
users of wireless phones, including children and
teenagers. If you want to take steps to lower
exposure to radiofrequency energy (RF), the measures
described above would apply to children and
teenagers using wireless phones. Reducing the time
of wireless phone use and increasing the distance
between the user and the RF source will reduce RF
exposure.
Some groups sponsored by other national
governments have advised that children be
discouraged from using wireless phones at all. For
example, the government in the United Kingdom
distributed leaflets containing such a recommendation
in December 2000. They noted that no evidence exists
that using a wireless phone causes brain tumors or
Page 68

other ill effects. Their recommendation to limit
wireless phone use by children was strictly
precautionary; it was not based on scientific evidence
that any health hazard exists.
11. What about wireless phone interference with
medical equipment?
Radiofrequency energy (RF) from wireless phones can
interact with some electronic devices. For this reason,
FDA helped develop a detailed test method to
measure electromagnetic interference (EMI) of
implanted cardiac pacemakers and defibrillators from
wireless telephones. This test method is now part of a
standard sponsored by the Association for the
Advancement of Medical instrumentation (AAMI). The
final draft, a joint effort by FDA, medical device
manufacturers, and many other groups, was
completed in late 2000. This standard will allow
manufacturers to ensure that cardiac pacemakers
and defibrillators are safe from wireless phone EMI.
FDA has tested hearing aids for interference from
handheld wireless phones and helped develop a
voluntary standard sponsored by the Institute of
Electrical and Electronic Engineers (IEEE). This
standard specifies test methods and performance
requirements for hearing aids and wireless phones so
that no interference occurs when a person uses a
“compatible” phone and a “compatible” hearing aid
at the same time. This standard was approved by the
IEEE in 2000.
FDA continues to monitor the use of wireless phones
for possible interactions with other medical devices.
Should harmful interference be found to occur, FDA
will conduct testing to assess the interference and
work to resolve the problem.
12. Where can I find additional information?
For additional information, please refer to the
following resources:
• FDA wed page on wireless phones
(http://www.fda.gov/cellphones/)
• Federal Communications Commission(FCC) RF
Safety Program
(http://www.fcc.gov/oet/rfsafety/)
• International Commission on Non-lonizing Radiation
Protection
(http://www.icnirp.de/)
SD126 65
Page 69

Safety Guidelines
• World Health Organization(WHO) International EMF
Project
(http://www.who.int/peh-emf/en/)
• National Radiological Protection Board(UK)
(http://www.hpa.org.uk/radiation/)
66 SD126
Page 70

Nhæîng Âãö Phoìng An Toaìn Cáön Læu YÏNhæîng Âãö Phoìng An Toaìn Cáön Læu YÏ
Âoüc caïc hæåïng dáùn âån giaín naìy. Khäng tuán theo caïc nguyãn tàõc naìy coï thãø seî gàûp nguy hiãøm hoàûc phaûm
luáût. Thäng tin chi tiãút hån coï trong hæåïng dáùn sæí duûng naìy.
●
Khäng sæí duûng pin khäng âæåüc
cháúp nháûn vç noï coï thãø laìm hoíng
âiãûn thoaûi vaì/hoàûc pin vaì coï thãø
laìm cho pin bë näø.
●
Khäng âàût âiãûn thoaûi cuía baûn trong
loì vi soïng vç noï seî laìm näø pin.
●
Khäng væït pin caûnh læía hoàûc âãø
cuìng våïi caïc váût liãûu nguy hiãøm
hoàûc dãù chaïy.
●
Khäng âãø nhæîng váût sàõc caûnh nhæ
ràng, moïng âäüng váût, tiãúp xuïc våïi
pin. Coï nguy cå gáy ra chaïy.
●
Âãø pin åí ngoaìi táöm våïi cuía treí em.
●
Cáön cáøn tháûn traïnh âãø treí em nuäút
báút cæï bäü pháûn gç nhæ laì nuït cao su
(tai nghe, caïc bäü pháûn kãút näúi cuía
âiãûn thoaûi, v.v...) Âiãöu naìy coï thãø
gáy ra ngaût hoàûc ngheût thåí.
Vi phaûm nhæîng hæåïng dáùn naìy coï thãø gáy cháún thæång nghiãûm troüng hoàûc tæí vong.Vi phaûm nhæîng hæåïng dáùn naìy coï thãø gáy cháún thæång nghiãûm troüng hoàûc tæí vong.
●
Ruït dáy âiãûn vaì bäü saûc khi coï caïc
cån seït âãø traïnh bë âiãûn giáût hoàûc
chaïy.
●
Khi laïi xe, khäng âãø âiãûn thoaûi hoàûc
làp dàt bä raïnh tay tuïi khê. Nãúu thiãút
bë khäng dáy âæåüc caìi âàût mäüt caïch
khäng håüp lyï vaì tuïi khê bë kêch hoaût,
baûn coï thãø bë thæång nàûng.
●
Khäng sæí duûng âiãûn thoaûi cáöm tay
khi laïi xe.
●
Khäng sæí duûng âiãûn thoaûi åí nhæîng
nåi bë cáúm. (Vê duû: trãn maïy bay).
●
Khäng âãø bäü naûp pin hoàûc bäü âäøi
âiãûn tiãúp xuïc træûc tiãúp våïi aïnh saïng
màût tråìi hoàûc sæí duûng noï åí nhæîng
nåi coï âäü áøm cao, nhæ laì phoìng
tàõm.
●
Khäng âãø âiãûn thoaûi åí nhiãût âäü dæåïi
- 15°C hay trãn 50°C.
Page 71

Nhæîng Âãö Phoìng An Toaìn Cáön Læu YÏNhæîng Âãö Phoìng An Toaìn Cáön Læu YÏ
●
Khäng sæí duûng caïc hoïa cháút maûnh
(nhæ laì ræåüu, benzen, cháút laìm
loaîng, etc.) hoàûc xaì phoìng âãø lau
chuìi âiãûn thoaûi cuía baûn. Coï nguy
cå gáy ra chaïy.
●
Khäng laìm råi, âáûp, hoàûc làõc maûnh
âiãûn thoaûi. Nhæîng haình âäüng nhæ
thãú coï thãø laìm hoíng caïc baíng
maûch cuía âiãûn thoaûi.
●
Khäng sæí duûng âiãûn thoaûi åí nhæîng
nåi coï nguy cå näø cao vç âiãûn thoaûi
coï thãø phaït ra tia læía.
●
Khäng laìm hoíng dáy âiãûn båíi xoàõn,
keïo, hoàûc âäút dáy. Khäng sæí duûng
phêch càõm nãúu noï bë loíng båíi vç noï
coï thãø gáy ra chaïy hoàûc âiãûn giáût.
●
Khäng âãø váût nàûng trãn dáy nguäön.
Khäng âãø dáy nguäön bë gáúp laûi vç
noï coï thãø gáy chaïy hoàûc âiãûn giáût.
●
Khäng sæí duûng âiãûn thoaûi cuía baûn
khi tay coìn æåït vaì âiãûn thoaûi âang
âæåüc naûp pin. Noï coï thãø gáy ra
âiãûn giáût hoàûc laìm hoíng nàûng âiãûn
thoaûi cuía baûn.
●
Khäng thaïo råìi âiãûn thoaûi.
●
Khäng goüi hoàûc nghe trong khi
naûp båíi vç coï thãø gáy âoaín maûch
âiãûn thoaûi vaì/hoàûc gáy ra âiãûn giáût
hoàûc chaïy.
●
Chè sæí duûng pin, anten vaì bäü naûp
âæåüc cung cáúp båíi LG. Baío haình
seî khäng âæåüc aïp duûng âäúi våïi caïc
saín pháøm âæåüc cung cáúp båíi caïc
nguäön khaïc.
●
Chè nhæîng ngæåìi âæåüc pheïp måïi
nãn sæía âiãûn thoaûi vaì caïc phuû kiãûn
cuía noï. Läùi caìi âàût sæía chæîa coï thãø
gáy ra tai naûn vaì háûu quaí laì laìm
cho baío haình máút giaï trë.
●
Khäng giæî hoàûc âãø anten tiãúp xuïc
våïi cå thãø trong khi goüi.
Page 72

Giåïi Thiãûu. . . . . . . . . . . . 3
Træåïc Khi Bàõt Âáöu. . . . . 4
Thäng Tin vãö Tiãúp Xuïc våïi
FCC RF. . . . . . . . . . . . . . . . . . . .4
Caính baïo . . . . . . . . . . . . . . . . . .6
Caïc Bäü Pháûn cuía Âiãûn Thoaûi . .7
Så Læåüc vãö Âiãûn Thoaûi. . . . . . . .8
Caïc biãøu tæåüng trãn maìn hçnh . .9
Så Âäö Menu . . . . . . . . 10
Sæí Duûng Pin vaì Bäü Saûc 11
Làõp vaì Thaïo Pin. . . . . . . . . . . .11
Naûp Pin . . . . . . . . . . . . . . . . . . .11
Mæïc Baïo Pin. . . . . . . . . . . . . . .12
Bắt Đầu Sử Dụng Điện
Thoại . . . . . . . . . . . . . . 13
Tàõt vaì báût laûi âiãûn thoaûi . . . . . .13
Mæïc Tên Hiãûu . . . . . . . . . . . . . .13
Thực Hiện Cuộc Gọi . . . . . . . .13
Nhận Cuộc Gọi. . . . . . . . . . . . .14
Truy Cập Nhân vào các
Tính Năng Tiện Dụng . 15
Chế Độ Lịch Sự. . . . . . . . . . . .15
Chế Độ Khóa . . . . . . . . . . . . . .15
Chức Năng Tắt Tiếng . . . . . . .16
Nhận dạng số gọi đến . . . . . . .16
Quay Số Nhanh . . . . . . . . . . . .16
Nháûp vaì Sæía Âäøi
Thäng Tin. . . . . . . . . . . 17
Nháûp Thäng Tin Sæí Duûng Chãú
Âäü Nháûp Vàn Baín T9 . . . . . . .17
Vê Duû Sæí Duûng Chãú Âäü Nháûp
Vàn Baín T9. . . . . . . . . . . . . . . .18
Caïc Vê Duû vãö Sæí Duûng Chãú
Âäü Nháûp Vàn Baín ABC
(Nháún phêm nhiãöu láön) . . . . . . .19
Âãø Soaûn Thaío åí Chãú Âäü
Tiãúng Viãût . . . . . . . . . . . . . . . . .20
AÏnh Xaû phêm cho caïc kyï tæû
tiãúng Anh vaì tiãúng Viãût . . . . . . .21
Caïc Tênh Nàng Menu . 22
Hæåïng Dáùn Chung vãö Truy
Cáûp vaì Caìi Âàût Memu . . . . . . .22
Tin nhàõn . . . . . . . . . . . . . . . .22
1. Soaûn tin nhàõn. . . . . . . . . . . .23
2. Hộp thư. . . . . . . . . . . . . . . . .23
3. Lưu trong UIM . . . . . . . . . . .24
4. Häüp thæ âi . . . . . . . . . . . . . . .24
5. Nháp . . . . . . . . . . . . . . . . . .25
6. Thoaûi . . . . . . . . . . . . . . . . . .25
7. Soạn sẵn . . . . . . . . . . . . . . .25
8. Xoïa tin nhàõn. . . . . . . . . . . . .25
9. Caìi âàût tin nhàõn . . . . . . . . . .26
Danh baû . . . . . . . . . . . . . . . . .26
1. Thãm måïi . . . . . . . . . . . . . .26
2. Dò tìm . . . . . . . . . . . . . . . . . .27
3. Caìi âàût nhoïm . . . . . . . . . . . .28
4. Quaín lyï nhoïm. . . . . . . . . . . .28
5. Quay säú nhanh. . . . . . . . . . .28
6. Sao cheïp . . . . . . . . . . . . . . .28
7. Dung læåüng. . . . . . . . . . . . . .29
8. Xoá danh bạ. . . . . . . . . . . . .29
Quaín lyï cuäûc goüi . . . . . . . . . .30
1. Nhật ký c.gọi. . . . . . . . . . . . .30
2. Thời lượng gọi . . . . . . . . . . .32
3. Chuyển hướng c.gọi . . . . . .32
4. Cuộc gọi chờ . . . . . . . . . . . .32
5. Danh sách từ chối . . . . . . . .32
6. Cài đặt c.gọi . . . . . . . . . . . . .33
Thư mục riêng . . . . . . . . . . . .34
1. Hình mặc định . . . . . . . . . . .34
SD126 1
Page 73

2. Chuông mặc định. . . . . . . . .34
Ưa thích . . . . . . . . . . . . . . . . .35
1. Thông tin. . . . . . . . . . . . . . . .35
Âm thanh . . . . . . . . . . . . . . . . 35
Chọn Chế Độ . . . . . . . . . . . . . .35
1. Âm. . . . . . . . . . . . . . . . . . . . .36
2. Âm hiệu ứng. . . . . . . . . . . . .36
3. Báo hiệu . . . . . . . . . . . . . . . .36
4. Âm lượng . . . . . . . . . . . . . . .36
Sổ tay . . . . . . . . . . . . . . . . . . .37
1. Lịch . . . . . . . . . . . . . . . . . . . .37
2. Việc cần làm. . . . . . . . . . . . .37
3. Kỷ niệm. . . . . . . . . . . . . . . . .38
4. Ghi nhớ. . . . . . . . . . . . . . . . .38
Công cụ . . . . . . . . . . . . . . . . .38
1. Trò chơi. . . . . . . . . . . . . . . . .38
2. Nhắc . . . . . . . . . . . . . . . . . . .38
3. Báo thức. . . . . . . . . . . . . . . .39
4. Máy tính . . . . . . . . . . . . . . . .39
5. Bấm giờ . . . . . . . . . . . . . . . .40
6. Giờ quốc tế. . . . . . . . . . . . . .40
Cài đặt . . . . . . . . . . . . . . . . . .40
1. Hiển thị . . . . . . . . . . . . . . . . .40
2. Bảo vệ. . . . . . . . . . . . . . . . . .43
3. Language . . . . . . . . . . . . . . .46
2 SD126
4. Cách nhập . . . . . . . . . . . . . .46
5. Số ĐT chủ . . . . . . . . . . . . . .46
6. Thông tin phiên bản. . . . . . .46
7. Chế độ Máy bay. . . . . . . . . .46
Caïc Chæïc Nàng Sæí Duûng
Trong Khi Goüi . . . . . . . 47
Gæií sä ú mayï chuíí . . . . . . . . . . . .47
Ngắt âm/Bật âm. . . . . . . . . . . .47
Tìm PIM . . . . . . . . . . . . . . . . . .47
Læu PIM . . . . . . . . . . . . . . . . . .47
Tìm lëch . . . . . . . . . . . . . . . . . .48
Âiãöu Chènh Chãú Âäü Loa Báût . .48
Ghi nhåï . . . . . . . . . . . . . . . . . . .48
Phuû kiãûn. . . . . . . . . . . . 49
Nhæîng Cáu Hoíi Thæåìng
Gàûp . . . . . . . . . . . . . . . 50
Caïc cáu hoíi thæåìng gàûp. . . . . .50
Træåïc khi goüi dëch vuû . . . . . . . .52
Nguyãn Tàõc An Toaìn . . . . . . . 54
Thäng Tin An Toaìn TIA . . . . . .54
Thäng Tin vãö An Toaìn. . . . . . .57
Cáûp Nháûn Ngæåìi Tiãu Duìng
FDA. . . . . . . . . . . . . . . . . . . . . .59
Giåïi haûn baío haình . . . . . . . . . 67
Page 74

Giới ThiệuGiới Thiệu
Chúc mừng bạn đã sở hữu điện thoại di động
SD126 nhỏ gọn và hiện đại, được thiết kế để hoạt
động với công nghệ liên lạc di động kỹ thuật số
mới nhất, chuẩn truy cập theo miền mã, CDMA
(Code Division Multiple Access). Cùng với nhiều
tính năng hiện đại của hệ thống CDMA, như là
tính năng lọc thoại đặc biệt nâng cao, điện thoạ
này còn cung cấp các tính năng:
• Nhắn tin, thư thoại, và .
• Bàn phím gồm 22 phím.
• Thời gian sử dụng pin lâu hơn khi nói chuyện
hoặc ở chế độ chờ.
• Giao diện kiểu menu với lợi nhắc để dễ.
• sử dụng và đặt cấu hình.
• Hỗ trợ song ngữ (tiếng Anh và tiếng Việt).
Kiểm Tra Các Phụ KiệnKiểm Tra Các Phụ Kiện
Điện thoại di động của bạn đi kèm với một pin có
thể sạc lại và một bộ sạc.
Vui lòng kiểm tra xem các phụ kiện này đã có
trong bộ điện thoại của bạn chưa.
i
Thäng Tin Quan TroüngThäng Tin Quan Troüng
Hæåïng dáùn sæí duûng naìy cung cáúp thäng tin quan
troüng vãö sæí duûng vaì hoaût âäüng cuía âiãûn thoaûi cuía
baûn. Vui loìng âoüc táút caí caïc thäng tin cáøn tháûn træåïc
khi sæí duûng âiãûn thoaûi âãø coï hiãûu quaí täút nháút vaì
ngàn ngæìa báút kyì sæû hæ haûi hoàûc sæí duûng sai âäúi
våïi âiãûn thoaûi. Báút kyì sæû thay thãú hoàûc thay âäøi naìo
khäng âæåüc cháúp nháûn seî bë máút hiãûu læûc baío haình.
SD126 3
Page 75

Trước Khi Bắt ĐầuTrước Khi Bắt Đầu
Hæåïng Dáùn An ToaìnHæåïng Dáùn An Toaìn
CAÍNH BAÏO! CAÍNH BAÏO! Âãø giaím nguy cå bë âiãûn giáût, khäng
âãø âiãûn thoaûi cuía baûn åí nhæîng nåi coï âäü áøm cao,
nhæ laì phoìng tàõm, bãø båi, v.v...
Chè sæí duûng pin vaì bäü naûp âæåüc cäng nháûn båíi LG
âãø traïnh laìm hæ âiãûn thoaûi cuía baûn. Sæí duûng pin
vaì bäü naûp khaïc seî laìm máút hiãûu læûc baío haì
baûn vaì coï thãø gáy näø.
Khäng sæí duûng pin vaì bäü naûp cho caïc muûc âêch
khaïc ngoaìi muûc âêch chênh cuía chuïng laì sæí duûng
cho âiãûn thoaûi naìy.
Luän âãø âiãûn thoaûi cuía baûn traïnh xa chäù noïng.
Khäng âãø âiãûn thoaûi cuía baûn åí nhæîng nåi maì noï
coï thãø tiãúp xuïc våïi nhiãût âä
50°C, nhæ laì bãn ngoaìi baîo tuyãút hoàûc trong ätä
vaìo ngaìy noïng. Tiãúp xuïc våïi nhiãût âäü quaï laûnh
hoàûc quaï noïng seî gáy ra hoaût âäüng sai chæïc
nàng, hæ haûi vaì/hoàûc läùi nghiãm troüng.
Cáøn tháûn khi sæí duûng âiãûn thoaûi cuía baûn åí gáön caïc
thiãút bë âiãûn tæí khaïc. Bæïc xaû cao táön tæ
cuía baûn coï thãø aính hæåíng tåïi thiãút bë âiãûn tæí khäng
âæåüc baío vãû täút åí gáön. Baûn nãn liãn hãû våïi nhaì saín
xuáút vãö táút caí nhæîng thiãút bë y tãú caï nhán nhæ laì
maïy âiãöu hoìa nhëp tim vaì thiãút bë tråü thênh âãø
xaïc âënh xem chuïng coï bë nhiãùu do âiãûn thoaûi di
âäüng cuía baû
n khäng. Tàõt âiãûn thoaûi cuía baûn åí caïc
ü dæíåïi -20°C hoàûc trãn
4 SD126
nh cuía
ì âiãûn thoaûi
cå såí y tãú hoàûc traûm xàng.
Khäng âàût âiãûn thoaûi cuía baûn trong loì vi soïng vç
noï seî laìm näø pin.
QUAN TROÜNG!QUAN TROÜNG! Vui loìng âoüc Thäng Tin An Toaìn
TIA træåïc khi sæí duûng âiãûn thoaûi cuía baûn.
Thäng Tin vãö Tiãúp Xuïc våïi Thäng Tin vãö Tiãúp Xuïc våïi
FCC RFFCC RF
CAÍNH BAÏO! CAÍNH BAÏO! Âoüc thäng tin naìy træåïc khi sæí duûng
âiãûn thoaûi.
Thaïng 8 nàm 1996, UÍy Ban Truyãön Thäng Liãn
Bang (FCC) cuía Myî, våïi hoaût âäüng trong Baïo Caïo
vaì Chè Thë FCC 96-326, âaî thäng qua mäüt tiãu
chuáøn an toaìn âæåüc cáûp nháût vãö tiãúp xuïc cuía con
ngæåìi våïi nàng læåüng nam chám âiãûn soïng raâiä
(RF) phaït ra tæì caïc bäü phaït âæåüc âiãöu chènh FCC.
Caïc nguyãn tàõc naìy phuì håüp vå
toaìn âæåüc âàût ra træåïc âoï båíi caí cå quan vãö tiãu
chuáøn cuía Myî vaì quäúc tãú.
Thiãút kãú cuía âiãûn thoaûi naìy tuán thuí caïc nguyãn
tàõc FCC vaì caïc tiãu chuáøn quäúc tãú naìy.
ïi tiãu chuáøn an
Page 76

CAÍNH BAÏOCAÍNH BAÏO
Chè sæí duûng caïc phuû kiãûn âæåüc cung cáúp vaì âæåüc
cäng nháûn. Viãûc sæí duûng caïc phuû kiãûn hoàûc thay âäøi
khäng âæåüc pheïp coï thãø aính hæåíng tåïi cháút læåüng
cuäüc goüi, laìm hæ âiãûn thoaûi, máút hiãûu læûc baío haình
cuía baûn. Khäng sæí duûng âiãûn thoaûi våïi mäüt phuû kiãûn
bë hoíng. Nãúu phuû kiãûn bë hoíng tiãúp xuïc våïi da, coï thãø
seî bë boíng nheû. Liãn hãû våïi âaûi lyï gáön baûn âãø thay
thãú phuû kiãûn.
Hoaût Âäüng Gàõn Trãn NgæåìiHoaût Âäüng Gàõn Trãn Ngæåìi
Thiãút bë naìy âæåüc kiãøm tra caïc hoaût âäüng khi âiãûn
thoaûi âæåüc gàõn trãn ngæåìi våïi màût sau cuía âiãûn thoaûi
âãø caïch cå thãø ngæåìi 2cm. Âãø tuán thuí caïc yãu cáöu
khi tiãúp xuïc våïi FCC RF, cáön duy trç mäüt khoaíng
taïch biãût laì 2cm giæîa cå thãø ngæåìi sæí duûng vaì màût
sau cuía âiãûn thoaûi, bao gäöm caí anten. Khäng nãn
sæí duûng keûp dáy læng, bao vaì caïc phuû kiãûn cuía
bãn thæï ba coï chæïa caïc bäü pháûn laìm bàòng kim
loaûi. Caïc phuû kiãûn gàõn våïi ngæåìi khäng thãø duy trç
âæåüc khoaíng caïch biãût 2cm giæîa ngæåìi sæí duûng vaì
màût sau cuía âiãûn thoaûi, vaì chæa âæåüc kiãøm tra caïc
hoaût âäüng khi âiãûn thoaûi âæåüc gàõn trãn ngæåìi coï thãø
khäng tuán thuí nhæîng giåïi haûn vãö tiãúp xuïc våïi FCC
RF vaì nãn traïnh sæí duûng nhæîng phuû kiãûn naìy.
Anten Ngoaìi Gàõn Trãn XeAnten Ngoaìi Gàõn Trãn Xe
(tuìy choün, nãúu coï)
Cáön duy trç mäüt khoaíng taïch biãût täúi thiãøu laì 8 inch
(20 cm) giæîa ngæåìi sæí duûng/ ngæåìi bãn caûnh vaì
xe coï gàõn anten âãø âaïp æïng caïc yãu cáöu vãö tiãúp
xuïc våïi FCC RF.
Âãø coï thãm thäng tin vãö tiãúp xuïc våïi RF, gheï thàm
trang web cuía FCC taûi www.fcc.gov.
Tuán Thuí FCC Pháön 15 Nhoïm BTuán Thuí FCC Pháön 15 Nhoïm B
Thiãút bë naìy vaì caïc phuû kiãûn cuía noï tuán thuí pháön
15 cuía qui âënh FCC. Hoaût âäüng phaíi tuán theo
hai âiãöu kiãûn sau: (1) Thiãút bë naìy vaì caïc phuû kiãûn
cuía noï phaíi khäng gáy nhiãùu coï haûi, vaì (2) thiãút bë
naìy vaì caïc phuû kiãûn cuía noï phaíi cháúp nháûn báút kyì
nhiãùu naìo maì noï nháûn, bao gäöm caí nhiãùu gáy båíi
hoaût âäüng khäng mong muäún.
Caính Baïo âäúi våïi PinCaính Baïo âäúi våïi Pin
• Khäng thaïo råìi.
• Khäng ngàõn maûch.
• Khäng tiãúp xuïc våïi nhiãût âäü cao: 60°C (140°F)
• Khäng âäút.
SD126 5
Page 77

Træåïc Khi Bàõt ÂáöuTræåïc Khi Bàõt Âáöu
Loaûi Boí PinLoaûi Boí Pin
• Xin vui loìng væït boí pin theo âuïng caïch.
• Khäng væït pin vaìo læía hoàûc âãø cuìng våïi caïc
váût liãûu nguy hiãøm hoàûc dãù chaïy.
Caính Baïo âäúi våïi Bäü NaûpCaính Baïo âäúi våïi Bäü Naûp
• Sæí duûng bäü naûp khäng âuïng coï thãø laìm hoíng
âiãûn thoaûi cuía baûn vaì máút hiãûu læûc baío haình.
• Bäü naûp chè âæåüc thiãút âãø sæí duûng trong nhaì.
Khäng âãø bäü naûp pin tiãúp xuïc træûc tiãúp våïi aïnh
saïng màût tråìi hoàûc sæí duûng noï åí nhæîng nåi coï
âäü áøm cao, nhæ laì phoìng tàõm.
Caính baïoCaính baïo
●
Chè sæí duûng pin vaì bäü naûp âæåüc cung cáúp
hoàûc cháúp nháûn båíi LG. Baío haình seî khäng
âæåüc aïp duûng cho nhæîng saín pháøm âæåüc cung
cáúp båíi caïc nguäön khaïc.
●
Sæí duûng âiãûn thoaûi gáön thiãút bë nháûn (nhæ laì
TV hoàûc maïy thu thanh) coï thãø gáy nhiãùu cho
âiãûn thoaûi.
●
Giæî âiãûn thoaûi cuía baûn åí mäüt nåi an toaìn khi
khäng sæí duûng.
●
Chè nhæîng ngæåìi âæåüc pheïp måïi nãn sæía âiãûn
thoaûi vaì caïc phuû kiãûn cuía noï. Läùi caìi âàût hoàûc
6 SD126
sæía chæîa coï thãø gáy ra tai naûn vaì háûu quaí laì
laìm cho baío haình máút giaï trë.
●
Âiãûn thoaûi naìy coï mäüt anten làõp sàôn bãn
trong. Cuîng giäúng nhæ caïc thiãút bë truyãön soïng
vä tuyãún khaïc, khäng såì vaìo pháön trãn nåi coï
gàõn anten trong khi sæí duûng âiãûn thoaûi.
●
Chè sæí duûng anten âæåüc cung cáúp hoàûc cháúp
nháûn båíi LG. Caïc anten, caïc thay âäøi vaì viãûc
gàõn thãm phuû kiãûn khäng âæåüc pheïp coï thãø
laìm hoíng âiãûn thoaûi hoàûc vi phaûm caïc qui âënh
vãö FCC.
●
Khäng sæí duûng âiãûn thoaûi di âäüng nãúu anten
bë hoíng. Nãúu anten bë hoíng tiãúp xuïc våïi da
coï thãø gáy ra boíng nheû. Vui loìng liãn hãû våïi
Trung Tám Dëch Vuû UÍy Quyãön cuía LG (ASC)
âãø thay thãú anten bë hoíng.
●
Khäng sæí duûng âiãûn thoaûi di âäüng åí nhæîng nåi
bë cáúm. (Vê duû: trãn maïy bay).
●
Khäng âãø âiãûn thoaûi di âäüng trong caïc âiãöu
kiãûn nhiãût âäü hoàûc âäü áøm cao.
●
Khäng âãø âiãûn thoaûi di âäüng cuía baûn tiãúp xuïc
våïi næåïc. Nãúu âiãöu naìy xaíy ra, tàõt âiãûn thoaûi
ngay láûp tæïc vaì thaïo råìi pin. Nãúu âiãûn thoaûi
khäng laìm viãûc mang noï tåïi Trung Tám Dëch
Vuû UÍy Quyãön cuía LG .
●
Traïnh âãø âiãûn thoaûi bë va âáûp maûnh.
Page 78

Các Bộ Phận của Điện ThoạiCác Bộ Phận của Điện Thoại
Sau đây là các bộ phận chính của điện thoại di động của bạn.
Tai nghe
Màn hình LCD
Phím OK
Lỗ Cắm Tai Nghe
Phím Mềm 1
Phím CALL
Phím Chế Độ Rung
Cổng nối Bộ Sạc/Dữ Liệu
Phím Điều Hướng 4 Chiều
Phím Mềm 2
Phím Xóa
Phím END / PWR
Bàn Phím Số
Phím Chế Độ Khóa
Micro
SD126 7
Page 79

Træåïc Khi Bàõt ÂáöuTræåïc Khi Bàõt Âáöu
Så Læåüc vãö Âiãûn ThoaûiSå Læåüc vãö Âiãûn Thoaûi
Màn hình LCD
Các Phím Mềm
(tên các tính
năng của các
phím này xuất
hiện ở dưới
cùng của màn
hình)
Phím CALL
Phím END/
PWR
Bàn Phím Số
8 SD126
Hiển thị tin nhắn và biểu tượng
chỉ thị.
Phím Mềm 1
Được sử dụng để hiển thị menu cài
đặt tính năng.
Phím Mềm 2
Chấp nhận lựa chọn được đánh
dấu khi điều hướng qua một menu.
Cho phép người sử dụng thực hiện
hoặc trả lời cuộc gọi.
Sử dụng để tắt/bật và để kết thúc
một cuộc gọi. Sử dụng phím này,
bạn có thể trở về màn hình hiển thị
menu chính. Khi bạn nhấn một lần,
khi nhận m
dừng chuông hoặc rung tùy thuộc
vào chế độ điện thoại. Nhấn hai lần
để từ chối cuộc gọi.
Các phím này cho phép bạn nhập số
và các ký tự và chọn các mục menu.
ột cuộc gọi, điện thoại sẽ
Phím Xóa
Phím Chế
Độ Rung
Phím Chế
Độ Khóa
Phím Điều
Hướng 4
Chiều
Nhấn để xóa một dấu cách hoặc một
ký tự đơn. Nhấn và giữ để xóa tất
cả các chữ. Nhấn phím này một lần
trong menu bất kỳ để trở về menu
trước đó.
Ở chế độ chờ, đặt chế độ rung bằng
cách nhấn và giữ phím này
khoảng 2 giây.
Ở chế độ chờ, đặt chế độ khóa bằng
cách nhấn và giữ phím
khoảng 2 giây.
Phím Điều Hướng này cho phép truy
cập nhanh vào
tin nhắn thông báo Thư Thoại.
Phím Tắt,
Tin Nhắn và các
Lập Biểu, Chế Độ.
trong
trong
Page 80

Các biểu tượng trên màn hìnhCác biểu tượng trên màn hình
Màn hình điện thoại hiển thị một vài biểu tượng trên màn hình, các biểu tượng này xuất hiện khi điện
thoại được bật.
Các Biểu
Tượng
Hiển thị mức tín hiệu nhận được bởi điện thoại và mức tín hiệu hiện thời
được chỉ thị bởi số vạch được hiển thị trên màn hình.
Không có dịch vụ
Điện thoại không nhận được tín hiệu của hệ thống.
Đang sử dụng
Đang có cuộc gọi.
* Không có biểu tượng chỉ thị điện thoại đang ở chế độ chờ.
Chế độ người dùng.
Chế độ im lặng.
Chế độ Chỉ Rung.
Chế độ mạnh.
Mức sạc
Chỉ báo mức sạc pin.
Khi sạc đầy, b iểu tượng pin chỉ báo sạc bằng nhấp nháy.
Mô Tả
SD126 9
Page 81

Sơ Đồ MenuSơ Đồ Menu
Nhấn Phím Mềm 1 Menu. Nhấn để cuộn.
Tin nhắn
1. Soạn tin nhắn
2. Hộp thư
3. Lưu trong UIM
4. Hộp thư đi
5. Nháp
6. Thoại
7. Soạn sẵn
8. Xoá tin nhắn
9. Cài đặt tin nhắn
10 SD126
Danh bạ
1. Thêm mới
2. Dò tìm
3. Cài đặt nhóm
4. Quản lý nhóm
5. Quay số nhanh
6. Sao chép
7. Dung lượng
8. Xoá danh bạ
Quản lý cuộc gọi
1. Nhật ký c.gọi
2. Thời lượng gọi
3. Chuyển hướng
c.gọi
4. Cuộc gọi chờ
5. Danh sách từ
chối
6. Cài đặt c.gọi
Thư mục riêng
1. Hình mặc định
2. Chuông mặc
định
Ưa thích
1. Thông tin
Âm thanh
1. Âm
2. Âm hiệu ứng
3. Báo hiệu
4. Âm lượng
Sổ tay
1. Lịch
2. Việc cần làm
3. Kỷ niệm
4. Ghi nhớ
Công cụ
1. Trò chơi
2. Nhắc
3. Báo thức
4. Máy tính
5. Bấm giờ
6. Giờ quốc tế
Cài đặt
1. Hiển thị
2. Bảo vệ
3. Language
4. Cách nhập
5. Số ĐT chủ
6. Thông tin phiên
bản
7. Chế độ Máy
bay
Page 82

Sử Dụng Pin và Bộ SạcSử Dụng Pin và Bộ Sạc
Naûp âáöy pin træåïc khi sæí duûng âiãûn thoaûi láön âáöu.
Âiãûn thoaûi âi keìm våïi mäüt pin coï thãø naûp laûi. Giæî
pin âæåüc naûp khi khäng sæí duûng âãø coï thåìi gian
goüi vaì chåì täúi âa.
Làõp vaì Thaïo PinLàõp vaì Thaïo Pin
●
Âãø làõp pin, âæa pin vaìo khe håí trãn màût sau
cuía âiãûn thoaûi, vaì cheìn âáöu dæåïi pin vaìo raînh
åí âáöu dæåïi cuía âiãûn thoaûi. Nheû nhaìng áún voí
xuäúng cho tåïi khi láùy vaìo âuïng vë trê.
●
Âãø thaïo pin, âáøy voí xuäúng phêa dæåïi. Nháún tab
bàòng mäüt tay vaì nháúc pháön trãn cuía pin lãn
âãø tháo råìi.
Naûp PinNaûp Pin
Âãø sæí duûng bäü naûp AC âæåüc cung cáúp cuìng våïi
âiãûn thoaûi cuía baûn:
1. Càõm bäü naûp AC vaìo nguäön âiãûn.
2. Càõm âáöu cuäúi coï hçnh troìn cuía bäü naûp vaìo äø
càõm bäü naûp AC åí dæåïi cuìng cuía âiãûn thoaûi.
(Âaím baío ràòng pin âaî âæåüc làõp.)
Khi âiãûn thoaûi naûp, biã
hiãøn thë phaït triãøn tæì mæïc hãút pin ( ) tåïi âáöy
( ).
Máút khoaíng ba tiãúng âãø naûp âáöy mäüt pin âaî hãút
âiãûn hoaìn toaìn. Khi naûp âáöy, biãøu tæåüng pin chè
baïo naûp bàòng nháúp nhaïy.
øu tæåüng pin liãn tuûc âæåüc
SD126 11
Page 83

Sử Dụng Pin và Bộ SạcSử Dụng Pin và Bộ Sạc
Mức Báo PinMức Báo Pin
Mức sạc pin được hiển thị ở bên phải phía trên
cùng của màn hình LCD.
Khi mức báo sạc pin tiến tới mức thấp, cảm biến
pin yếu sẽ báo cho bạn theo ba cách: phát âm
báo, biểu tượng pin nháp nháy, và hiển thị chữ
Sạ lại pin Nếu mức sạc pin trở nên quá thấp, điện
thoại sẽ tự động tắt và bất kỳ tính năng nào đang
sử dụng sẽ không được lư
Đã Sạc Đầy Đã Xả Hoàn Toàn
u.
12 SD126
Page 84

Bắt Đầu Sử Dụng Điện ThoạiBắt Đầu Sử Dụng Điện Thoại
Tắt và bật lại điện thoạiTắt và bật lại điện thoại
Bật Điện ThoạiBật Điện Thoại
1. Lắp pin đã được sạc hoặc kết nối điện thoại
với nguồn điện bên ngoài như là bộ sạc cắm
trên ôtô hoặc bộ phụ kiện rảnh tay sử dụng
trên ôtô.
2. Nhấn trong vài giây cho tới khi màn hình
tắt.
Læu yï
Giống như bất kỳ thiết bị sử dụng sóng radio
nào khác, tránh tiếp xúc không cần thiết với
anten trong khi điện thoại đang bật.
Tắt Điện ThoạiTắt Điện Thoại
Nhấn và giữ cho tới hi màn hình tắt.
Mức Tín HiệuMức Tín Hiệu
Chất lượng cuộc gọi phụ thuộc vào mức tín hiệu
trong vùng của bạn.
Mức tín hiệu được chỉ báo trên màn hình bởi số
vạch cạnh biểu tượng mức tín hiệu:
Càng nhiều vạch mức tín hiệu càng mạnh.
Nếu chất lượng tín hiệu kém, hãy đi ra bên
ngoài.
Nếu bạn ở trong một tòa nhà, khu vực gần cửa
sổ có thể nhận sóng tốt hơn.
Thực Hiện Cuộc GọiThực Hiện Cuộc Gọi
1. Đảm bảo điện thoại được bật. Nếu không
nhấn trong khoảng 3 giây.
2. Nhập số điện thoại (bao gồm cả mã vùng,
nếu cần).
3. Nhấn
Nếu điện thoại bị khóa, nhập mã khóa vào.
Cuộc Gọi Bị Lỗi - cho biết không thực hiện
được cuộc gọi.
4. Nhấn để kết thúc cuộc gọi
.
SD126 13
Page 85

Bắt Đầu Sử Dụng Điện ThoạiBắt Đầu Sử Dụng Điện Thoại
Sửa Lỗi Quay SốSửa Lỗi Quay Số
Nếu bạn nhập nhầm số trong khi quay số, nhấn
một lần để xóa chữ số vừa nhập hoặc giữ
trong ít nhất 2 giây để xóa tất cả các chữ
số.
Quay Số LạiQuay Số Lại
Nhấn hai lần hoặc nhấn và giữ trong
khoảng 3 giây để quay lại số bạn đã quay, bị
nhỡ, hoặc đã nhận gần đây nhất.
120 số điện thoại gần đây nhất được lưu trong
danh sách lịch sử cuộc gọi và bạn cũng có thể
chon một trong những số này để quay số lại.
Nhận Cuộc GọiNhận Cuộc Gọi
1. Khi điện thoại đổ chuông hoặc rung, theo chế
độ trả lời (menu 3-6-1) được đặt, sử dụng chế
độ khác để trả lời.
Læu yï
Nếu bạn nhấn trong khi điện thoại đang
đổ chuông, chuông hoặc rung sẽ tắt cho
cuộc gọi đó.
2. Nhấn để kết thúc cuộc gọi
14 SD126
Page 86

Truy Cập Nhân vào các Tính Năng Tiện DụngTruy Cập Nhân vào các Tính Năng Tiện Dụng
Chế Độ Lịch SựChế Độ Lịch Sự
Sử dụng Chế Độ Lịch Sự ở những nơi công
cộng. Khi Chế Độ Lịch Sự được đặt, sẽ hiển
thị trên màn hình, các âm phím sẽ tắt, và điện
thoại được đặt để rung.
Kích Hoạt Chế Độ Chỉ RungKích Hoạt Chế Độ Chỉ Rung
1. Ở chế độ chờ nhấn
để chuyển sang Chế Độ Lịch Sự.
Hủy Chế Độ Lịch SựHủy Chế Độ Lịch Sự
1. Ở chế độ chờ nhấn
để chuyển sang Chế Độ Người Sử Dụng.
trong khoảng 3 giây
trong khoảng 3 giây
Chế Độ KhóaChế Độ Khóa
Sử dụng Chế Độ Khóa để ngăn không cho người
khác sử dụng điện thoại của bạn.
Khi Chế Độ Khóa được đặt, cần có mật khẩu gồm
4 chữ số để sử dụng điện thoại.
Læu yï
Mật khẩu/mã khóa là 0000 khi mua điện thoại.
Khóa Cài Đặt Điện ThoạiKhóa Cài Đặt Điện Thoại
1. Nhấn Menu > Cài đặt > Bảo vệ.
2. Nhập Mã Khóa.(Mã khóa mặc định là 0000
khi mua điện thoại.)
3. Chọn Khóa Điện Thoại và nhấn Bật và điện
thoại sẽ được khóa.
Kích Hoạt Nhanh Chế Độ Khóa ở chế độ chờ
nhấn
thoại.
Hủy Nhanh Khóa Điện ThoạiHủy Nhanh Khóa Điện Thoại
1. Nhấn Phím Mềm Phải
Mật khẩu mặc định là 0000 khi mua điện
trong khoảng 3 giây để khóa điện
Thoát sau đó nhập
mật khẩu gồm 4 chữ số của bạn.
thoại.
SD126 15
Page 87

Truy Cập Nhân vào các Tính Năng Tiện DụngTruy Cập Nhân vào các Tính Năng Tiện Dụng
Chức Năng Tắt TiếngChức Năng Tắt Tiếng
Chức năng Tắt Tiếng ngăn không cho người
ở đầu dây đằng kia nghe thấy giọng của bạn,
nhưng bạn vẫn nghe thấy người đó nói.
Trong khi gọi, nhấn Phím Mềm Trái
Trong Menu trên Cuộc Gọi, chọn Ngắt âm.
Để bật Bật tiếng, nhấn Phím Mềm Trái
và nhấn Bật âm.
Menu.
Menu
Nhận dạng số gọi đếnNhận dạng số gọi đến
ID Người Gọi hiển thị số người đang gọi cho
bạn khi điện thoại đổ chuông.
Nếu nhận dạng của người gọi này được lưu
trong Sổ điện thoại, tên của người này sẽ hiển
thị cùng với số điện thoại.
Hãy kiểm tra với nhà cung cấp dịch vụ để biết
họ có cung cấp tính năng này không.
16 SD126
Quay Số NhanhQuay Số Nhanh
Quay số nhanh là một tính năng tiện lợi cho phép
bạn thực hiện cuộc gọi một cách nhanh chóng và
đơn giản bằng một vài lần bấm phím.
Điện thoại của bạn gọi lại số điện thoại từ Sổ điện
thoại, hiển thị nó, và sau đó quay số.
Gọi đến các Số Quay Số Nhanh từ 1 đến 9
1. Nhấn và giữ số Quay Số Nhanh.
HOẶ
C
Nhập quay số nhanh và nhấn .
Gọi đến các Số Quay Số Nhanh từ 10 đến 99
Nhấn chữ số đầu tiên và sau đó nhấn và giữ
phím chữ số cuối cùng.
HOẶC
Nhập chữ số đầu tiên và chữ số thứ hai sau
đó nhấn .
Page 88

Nhập và Sửa Đổi Thông TinNhập và Sửa Đổi Thông Tin
Nhập Thông Tin Sử Dụng Chế Độ Nhập Thông Tin Sử Dụng Chế Độ
Nhập Văn Bản T9Nhập Văn Bản T9
Bạn có thể sửa đổi Biểu Ngữ, Lập Biểu, Tin Nhắn
và Sổ Điện Thoại sử dụng Chế Độ Nhập Văn
Bản T9.
Văn Bản T9 là một cách đơn giản để ghi.
Ở chế độ nhập liệu này, bạn chỉ cần nhấn phím
một lần cho mỗi chữ.
Các Tính Năng Phím
Phím Mềm 2 : Nhân đê chon chê đ
- Bạn có thể chọn các chế độ sử dụng Phím
Mềm 2: T9En, 123, Ký Hiệu, Mặt Cười, Viet
và T9Ve
- Phím Shift
thường/in hoa.
~ (Nhập Chữ): Trong chế độ T9, nhấn
~ (Nhập Số): Trong chế độ 123 (Số),
(Tiếp): Trong chế độ T9, nhấn để hiển thị
các từ ăn khớp khác.
(Dấu): Trong chế đọ T9, nhấn để nhập dấu
trong một từ và kết thúc câu.
: Được sử dụng để đổi kiểu chữ
một phím cho mỗi chữ để nhập văn
bản.
nhấn một lần để nhập các chữ số.
ô.
(Dấu Cách): Nhấn để kết thúc một từ hoặc
chèn một dấu cách.
(Xóa): Nhấn để xóa một dấu cách hoặc
một ký tự đơn. Nhấn và giữ để xóa tất cả
các chữ.
Chế độ nhập liệuChế độ nhập liệu
Chế Độ Nhập Văn Bản T9 cung cấp sau cách
nhập chữ, số, các ký tự đặc biệt, dấu và mặt
cười.
Chế Độ T9En / T9VeChế Độ T9En / T9Ve
Nhập văn bản sử dụng một lần bấm cho mỗi chữ.
Chế độ Viet là chế độ mặc định.
Chế Độ Viet (Nhiều lần bấm)Chế Độ Viet (Nhiều lần bấm)
Sư dung chê đô Viet đê nhâp văn ban.
Chê đô nay đươc sư dung đê nhâp ca cac ky tư
tiêng Anh va tiêng Viêt.
Chế Độ SốChế Độ Số
Nhập các số sử dụng một lần bấm cho mỗi chữ
số. Để chuyển sang chế độ 123 trong trường
nhập chữ, nhấn Phím Mềm và giữ cho tới khi chế
độ 123 được hiển thị.
SD126 17
Page 89

Nhập và Sửa Đổi Thông TinNhập và Sửa Đổi Thông Tin
Chê dô Ky Hiêu/Măt CươiChê dô Ky Hiêu/Măt Cươi
Chèn các ký tự đặc biệt, dấu câu, hoặc mặt
cười.
Bạn có thể sử dụng một ký tự bất kỳ trong số
các ký tự đặc biệt này.
Khi con trỏ ở vị trí mà bạn muốn chèn ký tự đặc
biệt, chuyển sang chế độ Ký Hiệu/Mặt Cười.
Nếu bạn muốn thêm một mặt cười, hãy chuyể
sang chế độ mặt cười.
Nhấn Phím Điều Hướng để quay vòng tới
các ký tự mong muốn: Để chọn Ký Tự, Nhấn
phím số được chỉ định.
Chữ Đầu In Hoa (T9En/T9Ve/Viet)
Chỉ chữ đầu tiên được in hoa.
Chữ In Hoa (T9EN/T9VE/VIET)
Tất cả các chữ tiếp theo được in hoa.
Chữ thường (T9en/T9ve/viet)
Tất cả các chữ tiếp theo là chữ thường.
18 SD126
Vê Duû Sæí Duûng Chãú Âäü Nháûp Vê Duû Sæí Duûng Chãú Âäü Nháûp
Vàn Baín T9Vàn Baín T9
Nhập Văn Bản ở Chế Độ T9Nhập Văn Bản ở Chế Độ T9
Khi bạn muốn sử dụng Chế Độ T9, kiểm tra xem
T9En có được hiển thị ở dưới cùng bên phải của
n
màn hình không. Để nhập từ bạn muốn, nhấn mỗi
phím một lần cho một từ.
Ví dụ, để nhập “Call the office”, theo các bước
này:
1. Nhấn: Phím Mềm 2 để chuyển kiểu chữ thành
chế độ T9En.
2. Nhấn:
3. Nhấn: để kết thúc từ và chèn một dấu
cách.
4. Nhấn:
5. Hiển thị: Call the office.
Như bạn có thể thấy, từ thay đổi sau mỗi lần nhấn
phím. Do vậy, bạn không cần phải chú ý nhiều
tới những gì hiển thị trên màn hình trước khi bạn
nhập toàn bộ từ.
.
.
Page 90

Sử dụng Phim TIẾP THEOSử dụng Phim TIẾP THEO
Sau khi bạn đã kết thúc nhập một từ, nếu từ được
hiển thị không phải là từ mà bạn muốn, nhấn
để hiển thị các lựa chọn khác.
Ví dụ, theo các bước này:
1. Nhấn:
2. Hiển thị: Good.
3. Nhấn:
4. Hiển thị: Home, Gone, Hood......
.
.
Bổ sung Từ vào Cơ Sở Dữ Liệu T9Bổ sung Từ vào Cơ Sở Dữ Liệu T9
Nếu một từ không có trong cơ sở dữ liệu T9,
thêm nó vào bằng cách sử dụng việc nhập từ
bằng chế độ Abc (Nhiều lần nhấn).
Từ được tự động bổ sung vào cơ sở dữ liệu T9
khi bạn trở lại chế độ T9.
Ví dụ, theo các bước này:
1. Nhấn: Phím Mềm 2 để chuyển kiểu chữ thành
chế độ Abc (nhiều lần nhấ
2. Nhấn:
3. Hiển thị: Imt.
4. Nhấn: Phím Mềm 2 để đổi kiểu chữ thành chế
độ T9 và sau đó từ Imt sẽ được bổ sung vào
n).
.
cơ sở dữ liệu T9.
5. Nhấn:
6. Nhấn:
7. Hiển thị: Got.
8. Nhấn:
9. Hiển thị: Imt.
để xóa từ hiện thời.
.
.
Các Ví Dụ về Sử Dụng chế độ Các Ví Dụ về Sử Dụng chế độ
nhập văn bản ABC (Nhấn phím nhập văn bản ABC (Nhấn phím
nhiều lần)nhiều lần)
Nhập Chữ Ở Chế Độ ABC (Nhiều lần Nhập Chữ Ở Chế Độ ABC (Nhiều lần
nhấn)nhấn)
Ví dụ, để nhập “LG”, theo các bước này:
1. Nhấn: Phím Mềm 2 để chuyển kiểu chữ thành
chế độ Abc.
2. Nhấn:
Hoa.
3. Nhấn: .
4. Hiển thị: LG.
để đổi sang chế độ ABC Chữ In
SD126 19
Page 91

Nhập và Sửa Đổi Thông TinNhập và Sửa Đổi Thông Tin
Để Soạn Thảo ở Chế Độ Tiếng Để Soạn Thảo ở Chế Độ Tiếng
ViệtViệt
Nhấn Phím Mềm 2, cho tới khi menu mềm đổi
thành chê đô T9Ve hoăc chế độ Viet.
Soạn thảo ở chế độ VietSoạn thảo ở chế độ Viet
Để nhập từ mong muốn trong chế độ T9Ve, nhấn
mỗi phím một lần cho mỗi chữ hoặc dấu.
Ví dụ, để nhập “Việt”
1. Nhấn
2. Nhấn một lần cho “i”.
3. Nhấn một lần cho “ê”.
4. Nhấn một lần cho “.”.
5. Nhấn một lần cho “t”.
một lần cho “V”.
20 SD126
Page 92

Ánh Xạ phím cho các ký tự tiếng Anh và tiếng ViệtÁnh Xạ phím cho các ký tự tiếng Anh và tiếng Việt
PhêmPhêm
Cac ky tư không ân ShiftCac ky tư không ân Shift Cac ky tư có ân ShiftCac ky tư có ân Shift
. , - ? ! ` @ : 1
a b c aê aâ ù 2
d e f eâ ñ ` 3
g h i œ 4
j k l õ 5
m n o oâ ô ï 6
p q r s 7
t u v ö 8
w x y z 9
0
. , - ? ! ` @ : 1
A B C AÊ AÂ Ù 2
D E F EÂ Ñ ` 3
G H I Π4
J K L Õ 5
M N O OÂ Ô Ï 6
P Q R S 7
T U V Ö 8
W X Y Z 9
0
SD126 21
Page 93

Các Tính Năng MenuCác Tính Năng Menu
Hướng Dẫn Chung về Truy Cập Hướng Dẫn Chung về Truy Cập
và Cài Đặt Menuvà Cài Đặt Menu
1. Nhấn Phím Mềm 1 Menu. 9 mục menu sẽ
xuất hiện trên màn hình hiển thị.
2. Nhấn
năng menu.
3. Nhấn số tương ứng với mục menu mà bạn
muốn chọn. Sau đó danh sách menu phụ sẽ
xuất hiện trên màn hình.
4. Nhấn phím thích hợp để chọn menu phụ mà
bạn muốn truy cập.
5. Chọn cài đặt mà bạn thích, sử dụng .
Nhấn để trở về một bước trước trong khi
truy cập menu hoặc chọn cài đặt.
6. Nhấn để lưu cài đặt hoặc để hủy
không lưu.
22 SD126
để duyệt qua danh sách các tính
Tin nhắnTin nhắn
Tin nhắn chữ, tin nhắn từ máy nhắn tin và Hộp
Thư Thoại sẽ có ngay sau khi bật máy. Bạn có
thể truy cập vào các loại tin nhắn trên sử dụng
Phím tin nhắn
Ngoài ra, bạn có thể thực hiện một cuộc gọi để
trả lời số gọi lại bằng cách nhấn
xem tin nhắn.
Điện thoại có thể lưu tối đa 151 tin nhắn (1 tin
nhắn thoại: 150 tin nhắn văn bản) với 140 ký tự
trên mỗi tin nhắn bằng tiếng Việt hoặc 160 ký tự
chỉ bằng tiếng Anh cho mỗi tin nhắn. Mỗi chữ
tiếng Việt chiếm 2 - 3 ký tự dựa theo tính phức tạp
(số dấu) của ký tự ví dụ chữ tiếng Việt có 1 dấu
chiế
m 2 ký tự, và có 2 dấu 3 ký tự.
Người sử dụng có thể đọc và sửa đổi tin nhắn,
lưu trong trong Hộp Thư Đi trong khi truyền và
gửi chúng.
Tuy nhiên bạn nên kiểm tra xem nhà cung cấp
dịch vụ có cung cấp các tính năng trên không.
Thông tin được lưu trong tin nhắn được xác định
bởi chế độ điện thoại và khả năng của dịch vụ.
Bạn có thể kiểm tra loại tin nhắn bằng cách nh
Phím tin nhắn .
.
trong khi
ấn
Page 94

1. 1. Soạn tin nhắnSoạn tin nhắn
Cho phép bạn gửi tin nhắn văn bản.
1. Nhấn Phím Mềm 1 Menu,
2. Chọn
Soạn tin nhắn.
3. Nhập tin nhắn, sau đó nhấn
4. Sử dụng để chọn Lưu/Ưu tiên. Chọn lưu
hoặc không lưu tin nhắn vào hộp thư đi bằng
cách sử dụng .
●
Có / Ko
5. Chọn loại tin nhắn bằng cách sử dụng ,
sau đó nhấn .
●
Thường / Gấp / Khẩn
6. Nhập số điện thoại đích hoặc tìm số điện
thoại đã lưu trong sổ điện thoại, sau đó nhấn
.
●
Cho bạn biết tin nhắn đã được gửi đi chưa.
Khi tin nhắn đã được gửi đi, một thông báo
xác nhận sẽ hiển thị trên màn hình.
hoặc .
.
2.2. Hộp thư Hộp thư
Có thể tìm kiếm các tin nhắn văn bản đã nhận, và
có thể xem nội dung.
1. Nhấn Phím Mềm 1 Menu,
2. Chọn
Hộp thư.
3. Sau khi chọn tin nhắn bạn muốn bằng ;
nhấn .
4. Sau khi xem tin nhắn này, nhấn Phím Mềm 1
T.chọn.
G Trả lời Tr ả lời lại tin nhắn nhận được.
G Chuyền tiếp Gửi tiếp một tin nhắn nhận được
cho người khác. Sau khi những
người nhận đã được nhập, các
tin nhắn có thể được gửi tiếp.
G Xóa Xóa tin nhắn đã chọn từ Hộp thư
đến.
G Đến lưu Trữ Chuyển tin nhắn được chọn từ
Hộp thư đến tới Lưu trữ.
G Xóa toàn bộ Cả Xóa tất cả tin nhắn được lưu
trong Hộp thư đến.
hoặc .
SD126 23
Page 95

Các Tính Năng MenuCác Tính Năng Menu
3. Lưu trong UIM3. Lưu trong UIM
Thư mục Tin Nhắn Đã Lưu những tin nhắn được
ưu tiên để lưu trong những tin nhắn đã nhận
(Được lưu trong bộ nhớ UIM).
1. Nhấn Phím Mềm 1 Menu,
2. Chọn
Lưu trong UIM.
3. Sau khi chọn tin nhắn bạn muốn bằng
nhấn để xem.
4. Sau khi xem tin nhắn này, nhấn Phím Mềm 1
T.chọn.
G Trả lời Trả lời lại tin nhắn nhận được.
G Chuyển Gửi tiếp một tin nhắn đã nhận đến
tiếp
địa chỉ đích của những người khác.
G Xóa Xóa tin nhắn đã chọn.
G Đến Hộp thư đến Lưu các tin nhắn đã nhận
được giữ lại trong thẻ vào Hộp thư đến.
G Đến Hộp thư đi Lưu các tin nhắn đã gửi được
giữ lại trong thẻ vào Hộp thư đi.
G Xóa toàn Cả Xóa tất cả tin nhắn được lưu
bộ
trong thư mục này.
24 SD126
hoặc .
;
4. Hộp thư đi4. Hộp thư đi
Có thể tìm kiếm các tin nhắn Đã gửi và các tin
nhắn Chưa gửi, và có thể xem nội dung của
chúng.
1. Nhấn Phím Mềm 1 Menu,
2. Chọn
Hộp thư đi.
3. Sau khi chọn tin nhắn bạn muốn bằng ;
nhấn .
4. Sau khi xem tin nhắn này, nhấn Phím Mềm 1
T.chọn.
G Chuyển Bạn có thể sửa đổi tin nhắn bạn có.
tiếp
Sau đó theo các bước để Viết.
G Xóa Xóa tin nhắn đã chọn.
G Đến lưu Trữ Chuyển tin nhắn được chọn từ
Hộp thư đi tới Lưu trữ.
G Xóa toàn C ả Xóa tất cả tin nhắn được lưu
bộ
trong thư mục này.
hoặc .
Page 96

5. 5. NhápNháp
Có thể lưu tổng cộng tới 5 tin nhắn trong Nháp.
Khi một người sử dụng bị gián đoạn bởi một
cuộc gọi, các tin nhắn được tự động lưu. Nếu
bạn nhấn trong khi soạn tin nhắn, tin nhắn tự
động được lưu vào Nháp.
1. Nhấn Phím Mềm 1 Menu,
2. Chọn
3. Sau khi chọn tin nhắn mong muốn bằng
nhấn Phím Mềm 1 T.chọn hoặc nhấn .
Nháp.
hoặc .
,
7. 7. Soạn sẵnSoạn sẵn
Có 10 cụm từ soạn trước trong Mẫu.
1. Nhấn Phím Mềm 1 Menu,
2. Chọn
3. Sau khi chọn tin nhắn bạn muốn bằng
G Nhấn : Để kiểm tra nội dung đã nhập.
G Nhấn Phím Mềm 1 Sửa đổi : Để sửa đổi nội
dung đã nhập.
G Nhấn Phím Mềm 2 Gửi tiếp: Để gửi tiếp nội
dung đã chọn.
Mẫu.
hoặc .
.
6. 6. ThoạiThoại
Cho phép bạn xem tin nhắn thoại mới được lưu
trong hộp thư thoại. Khi bạn vượt quá giới hạn bộ
nhớ, các tin nhắn cũ sẽ bị ghi đè. Khi bạn có một
tin nhắn thoại mới điện thoại sẽ báo cho bạn.
1. Nhấn Phím Mềm 1 Menu,
2. Chọn Thoại.
G Để xóa thông tin nhấn Phím Mềm 1 Xóa.
Để nghe thông tin nhấn .
hoặc .
8. 8. Xóa tin nhắnXóa tin nhắn
Các tin nhắn chữ, tin nhắn gửi từ máy nhắn tin
sẽ bị xóa khi bạn chọn Xóa tin nhắn từ
màn hình Menu Tin Nhắn.
1. Nhấn Phím Mềm 1 Menu,
2. Chọn
3. Chọn mục bạn muốn bằng
G
Tất cả hộp thư đến / Tất cả hộp thư đi / Tất cả bộ
nhớ lưu
Xóa tin nhắn.
.
hoặc .
, sau đó nhấn
SD126 25
Page 97

Các Tính Năng MenuCác Tính Năng Menu
4. Chọn Có/Không bằng , sau đó nhấn .
9. 9. Cài đặt tin nhắnCài đặt tin nhắn
Cho phép bạn cấu hình sáu cài đặt cho tin nhắn.
1. Nhấn Phím Mềm 1 Menu,
2. Chọn
3. Sử dụng
nhấn để chọn cài đặt này.
●
●
●
●
●
●
Cài đặt tin nhắn.
để đánh dấu một cài đặt và
Ưu tiên - (Thường / Gấp / Khẩn)
Lưu tin - (Có / Ko)
Báo gửi tin - (Bật / Tắt)
Báo Vmail - (Số tin / Tin khi gọi)
Mầu chữ - (16 màu)
Hiển thị tin - (Chỉ tới / Toàn nội dung)
26 SD126
hoặc .
Danh bạDanh bạ
Bộ Nhớ Sổ Điện Thoại Cá NhânBộ Nhớ Sổ Điện Thoại Cá Nhân
Điện thoại có 500 muc nhâp sổ điện thoại cá nhân
và bạn có thể liên kết linh hoạt 4 số điện thoại và
e-mail và ghi nhớ với khả năng 24 chữ số cho mỗi
số điện thoại, 64 cho e-mail và 40 cho ghi nhớ.
1. 1. Thêm mớiThêm mới
Bạn có thể lưu các số điện thoại, số điện thoại di
động, v.v.., nhiều nhất là 500 mục nhập.
1. Nhấn Phím Mềm 1 Menu,
◆
Làm thế nào để lưu trong Điện ThoạiLàm thế nào để lưu trong Điện Thoại
2. Chọn Điện Thoại. (Điện thoại được đặt làm
mặc định.)
3. Nếu Điện Thoại được chọn làm nơi để lưu,
hãy xuống một bước sử dụng .
4. Nhập tên của người sẽ lưu.
5. Sử dụng , chọn một mục để vào biểu
tượng đặt bảo mận cho mỗi Tên, Nhóm, Số
Điện Thoại Di Động, Số Nhà Riêng, Số Cơ
Quan, email, Nhạc Chuông, Âm Báo Tin
, .
Page 98

Nhắn, Ghi Nhớ, Sinh Nhật, Ảnh, Số Khác.,
Số Fax, và Bí Mật.
6. Sau khi nhập xong thông tin, nhấn
◆
Làm thế nào để vào Thẻ UIMLàm thế nào để vào Thẻ UIM
2. Chọn Thẻ UIM. (Chọn sử dụng
để lưu.
Thẻ UIM.)
3. Nếu Thẻ UIM được chọn làm nơi để lưu, hãy
xuống một bước sử dụng .
4. Nhập tên của người sẽ lưu.
5. Nhập số điện thoại vào sau đó lưu.
Læu yï
Chế độ Thẻ UIM nơi mục nhập được lưu trong
Thẻ UIM chỉ có thể nhập tên và số điện thoại.
Đối với số điện thoại, có thể nhập tối đa 20 chữ
số. (Đây là mục được hỗ trợ bởi thẻ.) Quay Số
Nhanh có thể không đặt được khi lưu trong thẻ.
2. 2. Dò tìmDò tìm
Để tìm một số điện thoại mà bạn đã lưu trong Sổ
Điện Thoại.
1. Nhấn Phím Mềm 1 Menu, , .
2. Chọn tên bạn muốn bằng
và Phím Mềm
1 T.chọn.
3. Sẽ hiển thị lời nhắc bạn nhập tên mục nhập
trên màn hình. Bạn có thể chọn Tin nhắn
mới, Theo tên, Theo số, Theo nhóm,
D.sách ĐT, Chỉ thẻ UIM hoặc Xóa bằng cách
sử dụng
Læu yï
- Chỉ thẻ UIM: Tin nhắn mới / Theo tên / Theo số /
- D.sách ĐT: Tin nhắn mới / Theo tên / Theo số /
- Xem tất cả: Tin nhắn mới / Theo tên / Theo số /
.
Cac tuy chon co thê khac nhau khi chon Chỉ thẻ
UIM, D.sách ĐT hoăc Xem tất cả.
Theo nhóm / Xem tất cả / D.sách ĐT / Xóa
Theo nhóm / Xem tất cả / Chỉ thẻ UIM / Xóa
Theo nhóm / Chỉ thẻ UIM / D.sách ĐT / Xóa
4. Nhấn Phím Mềm 2 SMS để gửi tin nhắn.
●
Nhập nội dung, và chọn Lưu/Ưu Tiên sử
dụng , sau đó nhấn .
Læu yï
Trong mục nhập bất kỳ, bạn có thể chuyển đến
một mục nhập khác bằng cách nhấn
bạn nhấn
(Xóa) bạn có thể lưu, xóa hoặc sửa đổi.
Sửa hoặc Phím Mềm 1 T.c họn
. Nếu
SD126 27
Page 99

Các Tính Năng MenuCác Tính Năng Menu
3. Cài đặt nhóm3. Cài đặt nhóm
Đây là một tính năng để đổi Tên Nhóm và cài đặt
kiểu Chuông theo Nhóm.
1. Nhấn Phím Mềm 1 Menu,
2. Chọn Nhóm bạn muốn sử dụng
Nhấn Phím Mềm 1 T.c h ọn : Khởi tạo /
Khởi tạo tất cả.
3. Nhấn
Tên nhóm: Sửa Đổi tên nhóm.
Chuông nhóm: Đặt nhạc chuông cho nhóm.
Âm SMS: Đặt âm báo tin nhắn cho nhóm.
để sửa đổi.
, .
.
4. 4. Quản lý nhómQuản lý nhóm
Thêm hoặc xóa các thành viên của nhóm.
1. Nhấn Phím Mềm 1 Menu, , .
2. Sử dụng
nhấn .
3. Nhấn Phím Mềm 2 Địa chỉ và sử dụng
để di chuyển qua danh sách liên hệ, nhấn
để chọn số để thêm.
28 SD126
để chọn nhóm để thêm số và
4. Sau khi chọn (các) số điện thoại, nhấn Phím
Mềm 2 Địa chỉ.
5. Để xóa các thành viên trong một nhóm, sử
dụng để chọn nhóm này trước, nhấn Phím
Mềm 1 T.chọn và chọn Xóa/Xóa tất cả.
5. 5. Quay số nhanhQuay số nhanh
Cho phép bạn xem danh sách Quay Số Nhanh
hoặc gán Quay Số Nhanh cho các số điện thoại
được nhập trong Danh Bạ.
1. Nhấn Phím Mềm 1 Menu,
2. Để đăng ký, nhấn
bạn muốn, sau đó nhấn .
Læu yï
Quay Số Nhanh có thể được cài tối đa 99 số.
Địa chỉ để tìm thông tin
, .
6. 6. Sao chépSao chép
Sao Chép Một là tính năng chuyển thông tin đã
lưu từ Điện Thoại sang Thẻ UIM và ngược lại.
1. Nhấn Phím Mềm 1 Menu, , .
Page 100

2. Chọn mục bạn muốn bằng cách sử dụng ,
sau đó nhấn .
ĐT -> UIM / UIM -> ĐT
3. Tìm mục bạn muốn chuyển khi cửa sổ Tìm
hiển thị.
4. Chọn mục bạn muốn bằng cách sử dụng
sau đó nhấn để chọn.
5. Nhấn Phím Mềm 2 Sao chép để sao chép.
6. Một thông báo cho biết đã hoàn tất chuyển dữ
liệu sẽ hiển thị và tình trạng menu sẽ được
hiển thị trở lại.
7. 7. Dung lượngDung lượng
Dung lượng cho biết số lượng của sổ điện thoại
hiện được lưu trong thẻ nhớ và điện thoại.
Được chỉ báo dưới dạng số lượng được sử dụng/
số lượng còn trống.
1. Nhấn Phím Mềm 1 Menu,
, .
8. 8. Xoá danh bạ Xoá danh bạ
Để xóa tất cả các mục nhập được lưu trong
Danh Bạ.
1. Nhấn Phím Mềm 1 Menu,
2. Chọn tên bạn muốn bằng
,
3. Nhấn
Mềm 2 Xóa.
4. Chọn Có, sau đó nhấn
để chọn tên, sau đó nhấn Phím
.
.
, .
SD126 29
 Loading...