

OWNER’S MANUAL
AIR CONDITIONER
Read this owner’s manual thoroughly before operating
the appliance and keep it handy for reference at all
times.
TYPE: WALL MOUNTED
ENGLISH TÜRKÇE
5401156193 Rev.: d
www.lg.com
Copyright © 2018 - 2020 LG Electronics Inc. All Rights Reserved
TABLE OF CONTENTS
SAFETY INSTRUCTIONS ..........................3
IMPORTANT SAFETY INSTRUCTIONS .......................4
Disposal of Your Old Appliance ......................................8
OPERATION ................................................9
Notes for Operation........................................................9
Parts and Functions ....................................................... 9
Wireless Remote Control ............................................. 10
Restarting the Air Conditioner Automatically ................15
Using the Mode Function ............................................. 15
Using the Jet Mode Function .......................................17
Using the Fan Speed Function ....................................18
Using the Air Flow Direction Function ..........................18
Setting the On/Off Timer ..............................................19
Using the Sleep Function (Optional) ............................ 20
Using the Simple Timer Function (Optional) ................20
Using the Energy Display Function (Optional) ............. 21
Using the Light Off Function (Optional) ........................21
Using the Comfort Air Function (Optional) ...................21
Using the Energy Saving Function (Optional) .............. 22
Using the Energy Control Function (Optional) .............22
Using Special Functions ..............................................23
This manual may contain images or
content different from the model you
purchased.
This manual is subject to revision by
the manufacturer.
SMART FUNCTIONS ................................26
LG ThinQ Application ................................................... 26
Smart Diagnosis...........................................................28
MAINTENANCE .........................................30
Clean the Air Filter .......................................................32
Clean the Micro Dust and Triple Filter (Optional) .........33
TROUBLESHOOTING ..............................34
SAFETY INSTRUCTIONS
The following safety guidelines are intended to prevent unforeseen risks or
damage from unsafe or incorrect operation of the appliance.
The guidelines are separated into ‘WARNING’ and ‘CAUTION’ as described
below.
ENGLISH
This symbol is displayed to indicate matters and operations that can
cause risk. Read the part with this symbol carefully and follow the
instructions in order to avoid risk.
WARNING
This indicates that the failure to follow the instructions can cause serious
injury or death.
CAUTION
This indicates that the failure to follow the instructions can cause the minor
injury or damage to the product.
The following symbols are displayed on indoor and outdoor units.
This symbol indicates that this appliance uses a flammable refrigerant. If
the refrigerant is leaked and exposure to an external ignition source, there
is a risk of fire.
This symbol indicates that the Operation Manual should be read carefully.
FRANÇAIS ESPAÑOL
This symbol indicates that a service personnel should be handling this
equipment with reference to the Installation Manual.
This symbol indicates that information is available such as the Operating
Manual or Installation Manual.
3
IMPORTANT SAFETY INSTRUCTIONS
WARNING
To reduce the risk of explosion, fire, death, electric shock, injury or scalding
to persons when using this product, follow basic precautions, including the
following:
Children in the Household
This appliance is not intended for use by persons (including children) with reduced
physical, sensory or mental capabilities, or lack of experience and knowledge,
unless they have been given supervision or instruction concerning use of the
appliance by a person responsible for their safety. Children should be supervised to
ensure that they do not play with the appliance.
For use in Europe:
This appliance can be used by children aged from 8 years and above and persons
with reduced physical, sensory or mental capabilities or lack of experience and
knowledge if they have been given supervision or instruction concerning use of
the appliance in a safe way and understand the hazards involved. Children shall
not play with the appliance. Cleaning and user maintenance shall not be made by
children without supervision.
Installation
• Do not install the air conditioner on an unstable surface or in a place where there
is danger of it falling.
• Contact an authorized service center when installing or relocating the air
conditioner.
• Install the panel and the cover of the control box safely.
• Do not install the air conditioner in a place where flammable liquids or gases such
as gasoline, propane, paint thinner, etc., are stored.
• Make sure that the pipe and the power cable connecting the indoor and outdoor
units are not pulled too tight when installing the air conditioner.
• Use standard circuit breaker and fuse that conform to the rating of the air
conditioner.
• Do not input air or gas into the system except with the specific refrigerant.
• Use non-flammable gas (nitrogen) to check for leak and to purge air; using
compressed air or flammable gas may cause fire or explosion.
• The indoor/outdoor wiring connections must be secured tightly, and the cable
should be routed properly so that there is no force pulling the cable from the
connection terminals. Improper or loose connections can cause heat generation
or fire.
• Install dedicated electric outlet and circuit breaker before using the air conditioner.
• Do not connect the ground wire to a gas pipe, a lightning rod, or a telephone
ground wire.
• Keep any required ventilation openings clear of obstruction.
4
• Means for disconnection must be incorporated in the fixed wiring in accordance
with the wiring rules.
Operation
• Be sure to use only those parts listed in the service parts list. Never attempt to
modify the equipment.
• Make sure that children do not climb on or hit the outdoor unit.
• Dispose of the batteries in a place where there is no danger of fire.
• Use only the refrigerant specified on the air conditioner label.
• Cut off the power supply if there is any noise, smell, or smoke coming from the air
conditioner.
• Do not leave flammable substances such as gasoline, benzene, or thinner near
the air conditioner.
• Contact an authorized service center when the air conditioner is submerged by
flood waters.
• Do not use the air conditioner for an extended period of time in a small place
without proper ventilation.
• In the event of a gas leak (such as Freon, propane gas, LP gas, etc.) ventilate
sufficiently before using the air conditioner again.
• To clean the interior, contact an authorized service center or dealer. Using harsh
detergents may cause corrosion or damage to the unit.
• Be sure to ventilate sufficiently when the air conditioner and a heating appliance
such as a heater are used simultaneously.
• Do not block the inlet or outlet of air flow.
• Do not insert hands or other objects through the air inlet or outlet while the air
conditioner is operating.
• Make sure that the power cable is neither dirty, loose, nor broken.
• Never touch, operate, or repair the air conditioner with wet hands.
• Do not place any objects on the power cable.
• Do not place a heater or other heating appliances near the power cable.
• Do not modify or extend the power cable. Scratches or peeling insulation on the
power cables may result in fire or electric shock, and should be replaced.
• Cut off the power supply immediately in the event of a blackout or a thunderstorm.
• Take care to ensure that power cable could not be pulled out or damaged during
operation.
• Do not touch refrigerant pipe, water pipe and any internal parts while the unit is
operating or immediately after operation.
ENGLISH
FRANÇAIS ESPAÑOL
Maintenance
• Before cleaning or performing maintenance, disconnect the power supply and
wait until the fan stops.
• Do not clean the appliance by spraying water directly onto the product.
5
Technical Safety
• Installation or repairs made by unauthorized persons can pose hazards to you
and others.
• Any person who is involved with working on or breaking into a refrigerant circuit
should hold a current valid certificate from an industry-accredited assessment
authority, which authorizes their competence to handle refrigerants safely in
accordance with an industry recognized assessment specification.
• Servicing shall only be performed as recommended by the equipment
manufacturer. Maintenance and repair requiring the assistance of other skilled
personnel shall be carried out under the supervision of the person competent in
the use of flammable refrigerants.
• The information contained in the manual is intended for use by a qualified service
technician who is familiar with the safety procedures and equipped with the proper
tools and test instruments.
• Failure to read and follow all instructions in this manual can result in equipment
malfunction, property damage, personal injury and/or death.
• The appliance shall be installed in accordance with national wiring regulations.
• When the power cord is to be replaced, the replacement work shall be performed
by authorized personnel using only genuine replacement parts.
• This appliance must be properly grounded to minimize risk of electric shock.
• Do not cut or remove the grounding prong from the power plug.
• Attaching the earth wire to the power outlet cover screw does not ground the
appliance unless the cover screw is metal, uninsulated, and the power outlet is
grounded through house wiring.
• If you have any doubt whether the air conditioner is properly grounded, have the
power outlet and circuit checked by a qualified electrician.
• The refrigerant and insulation blowing gas used in the appliance require special
disposal procedures. Consult a service agent or a similarly qualified person before
disposing of them.
• If the supply cord is damaged, it must be replaced by the manufacturer, its service
agent or similarly qualified person in order to avoid a hazard.
• The appliance shall be stored in a well-ventilated area where the room size
corresponds to the room area as specified for operation.
• The appliance shall be stored in a room without continuously operating open
flames (for example an operating gas appliance) and ignition sources (for
example an operating electric heater).
• The appliance shall be stored so as to prevent mechanical damage from
occurring.
6
CAUTION
To reduce the risk of minor injury to persons, malfunction, or damage to
the product or property when using this product, follow basic precautions,
including the following:
Installation
• Do not install the air conditioner in an area where it is directly exposed to sea
wind (salt spray).
• Install the drain hose properly for the smooth drainage of water condensation.
• Exercise caution when unpacking or installing the air conditioner.
• Do not touch the leaking refrigerant during installation or repair.
• Transport the air conditioner with two or more people or use a forklift.
• Install the outdoor unit such that it is protected from direct sunlight. Do not place
the indoor unit in a place where it is directly exposed to sunlight via the windows.
• Safely dispose of packing materials such as screws, nails or batteries using
proper packaging after installation or repair.
• Install the air conditioner in a place where the noise from the outdoor unit or the
exhaust fumes will not inconvenience the neighbors. Failure to do so may result in
conflict with the neighbors.
Operation
ENGLISH
FRANÇAIS ESPAÑOL
• Remove the batteries if the remote control is not to be used for an extended
period of time.
• Make sure that the filter is installed before operating the air conditioner.
• Be sure to check if there is a refrigerant leak after installing or repairing the air
conditioner.
• Do not place any object on the air conditioner.
• Never mix different types of batteries, or old and new batteries for the remote
control.
• Do not let the air conditioner run for a long time when humidity is very high or
when a door or a window has been left open.
7
• Stop using the remote control if there is a fluid leak in the battery. If your clothes
or skin are exposed to the leaking battery fluid, wash off with clean water.
• Do not expose people, animals, or plants to the cold or hot wind from the air
conditioner for extended periods of time.
• If the leaking battery fluid has been swallowed, rinse the inside of the mouth
thoroughly and consult a doctor.
• Do not drink the water drained from the air conditioner.
• Do not use the product for special purposes, such as preserving foods, works
of art, and etc. It is an air conditioner for consumer purposes, not a precision
refrigeration system. There is risk of damage or loss of property.
• Do not recharge or disassemble the batteries.
Maintenance
• Never touch the metal parts of the air conditioner when removing the air filter.
• Use a sturdy stool or ladder when cleaning, maintaining, or repairing the air
conditioner at a height.
• Never use strong cleaning agents or solvents when cleaning the air conditioner or
spray water. Use a smooth cloth.
Disposal of Your Old Appliance
• All electrical and electronic products should be disposed of separately from
the municipal waste stream via designated collection facilities appointed
by the government or the local authorities. Waste electrical and electronic
products should be delivered to collection points established by the
municipalities or you should request your seller to take your waste electrical
and electronic product when you buy a new model of the same product and
when the seller delivers it to your address.
• The correct disposal of your old appliance will help prevent potential
negative consequences for the environment and human health.
• The product bearing this symbol may include hazardous substances.
Hazardous substances in the products may cause environmental pollution
and injury/death.
• EEE Complies with Directive.
• For more detailed information about disposal of your old appliance, please
contact your city office, waste disposal service or the shop where you
purchased the product. (www.lg.com/global/recycling)
8
OPERATION
6
7
Notes for Operation
Suggestion for Energy Saving
• Do not over-cool the space. This may be harmful for your health and may consume more
electricity.
• Block sunlight with blinds or curtains while you are operating the air conditioner.
• Keep doors or windows closed tightly while you are operating the air conditioner.
• Adjust the direction of the air flow vertically or horizontally to circulate indoor air.
• Speed up the fan to cool or warm indoor air quickly, within a short period of time.
• Open windows regularly for ventilation. The indoor air quality may deteriorate if the air
conditioner is used for long durations.
• Clean the air filter once every 2 weeks. Dust and impurities collected in the air filter may
block the air flow or reduce the unit performance.
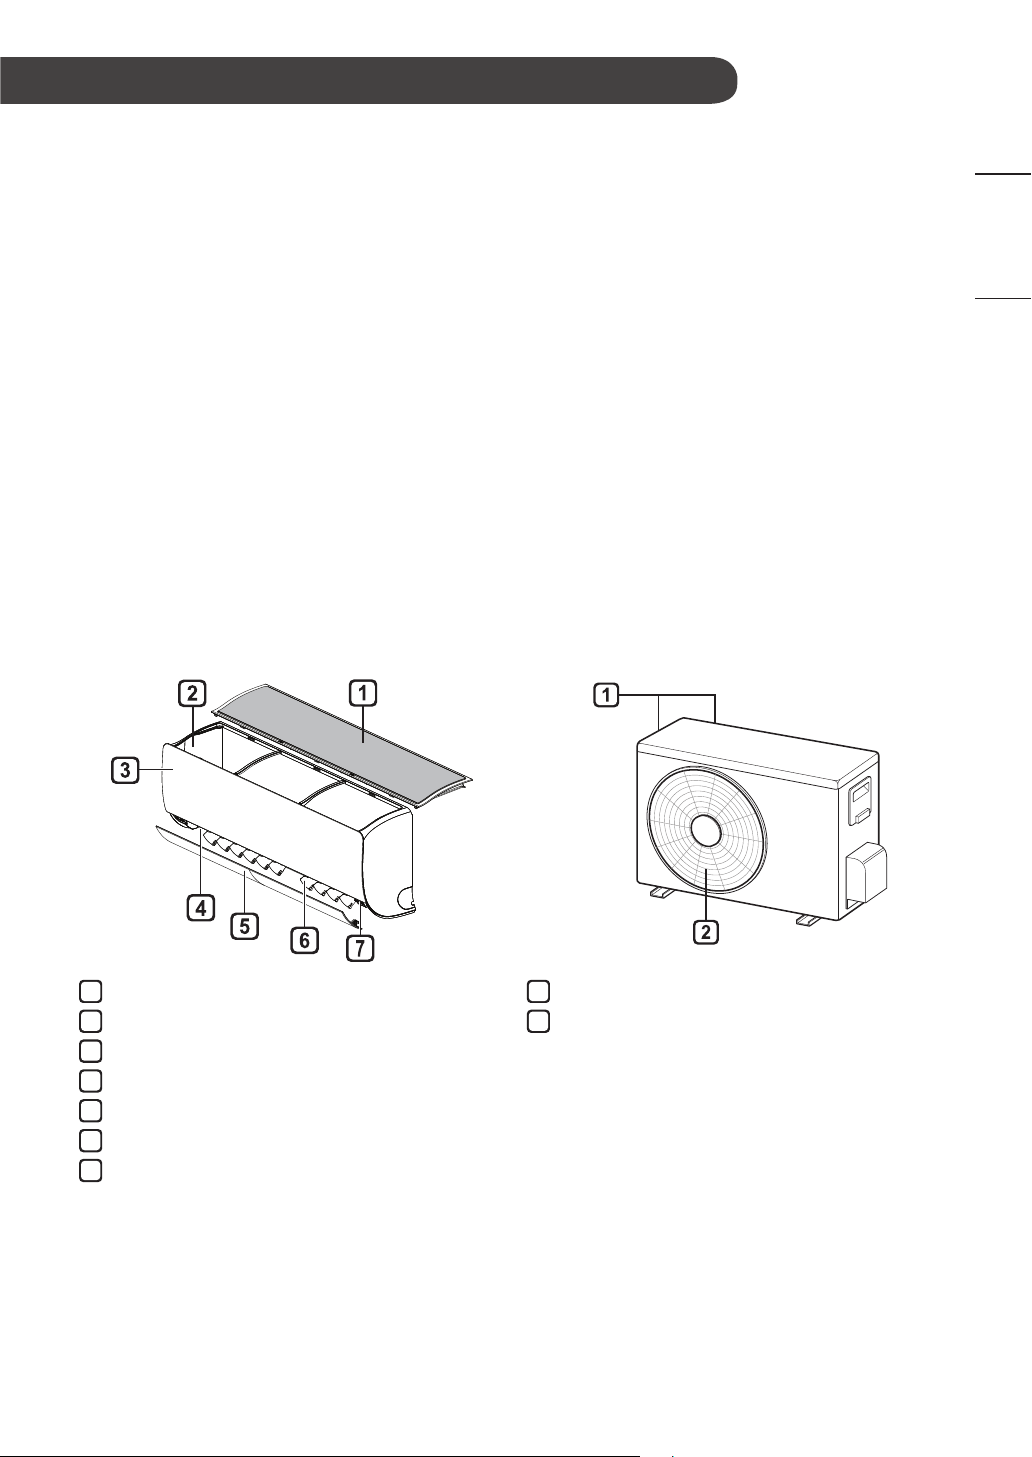
Parts and Functions
Indoor Unit Outdoor Unit
ENGLISH
FRANÇAIS ESPAÑOL
1
Air Filter
2
Air Intake
3
Front Cover
4
Air Outlet
5
Air Deflector (Horizontal Vane)
1
Air Intake Vents
2
Air Outlet Vents
Air Deflector (Vertical Louver)
On/Off Button
NOTE
• The number and location of operation lamps may vary according to the model of the air
conditioner.
• The feature may be changed according to the type of model.
9
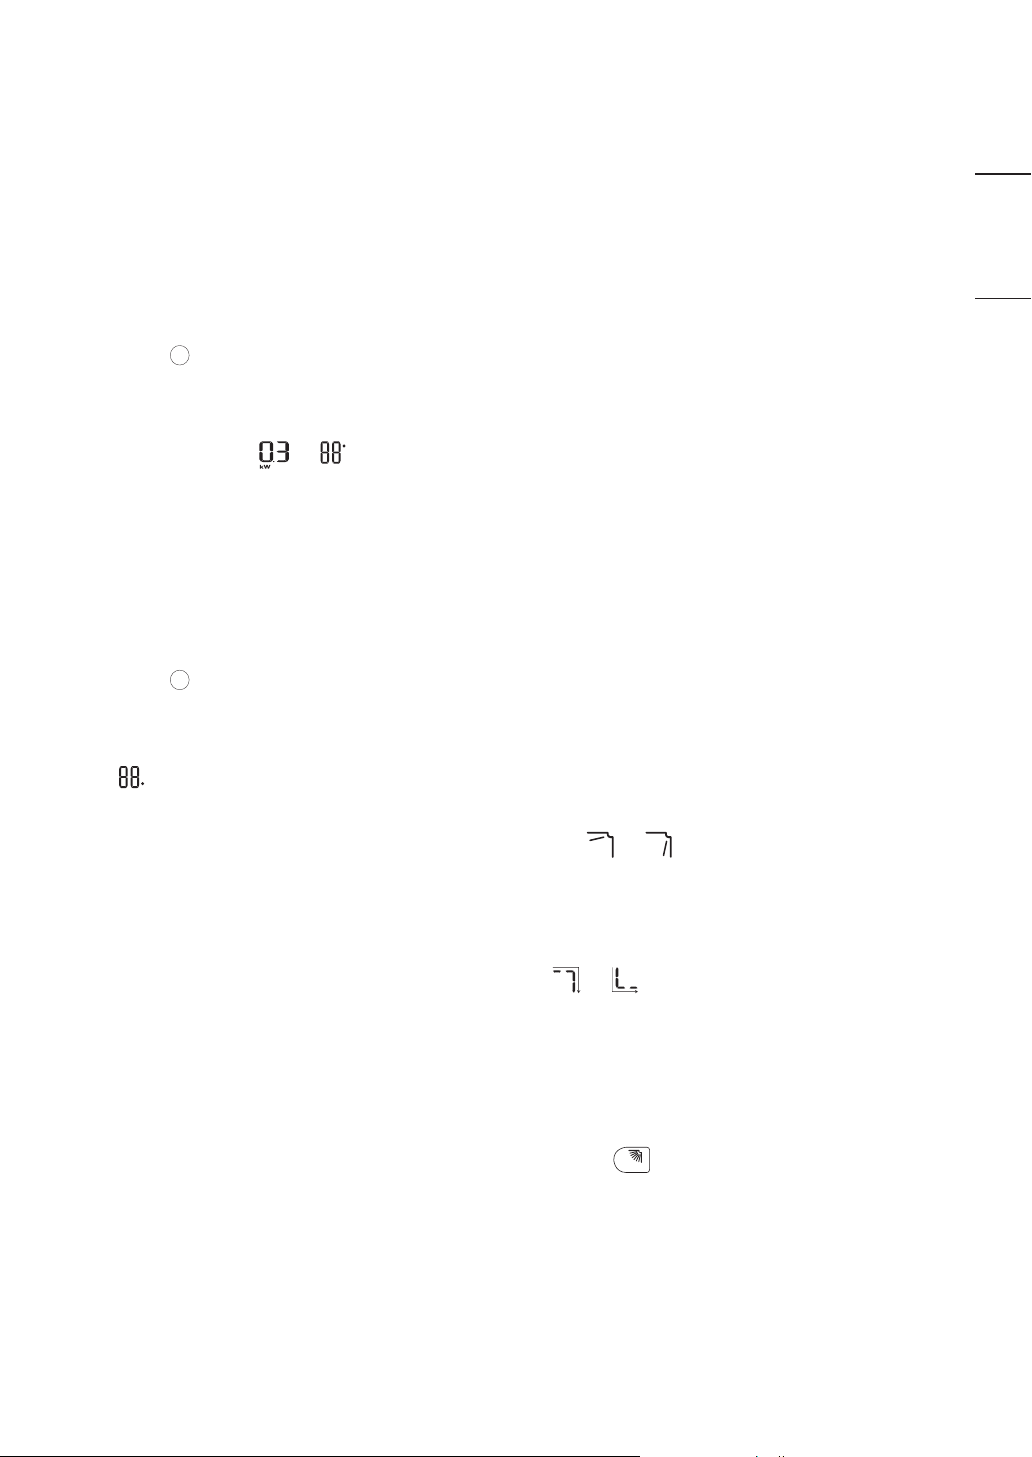
Wireless Remote Control
SWING
kW [3 s]
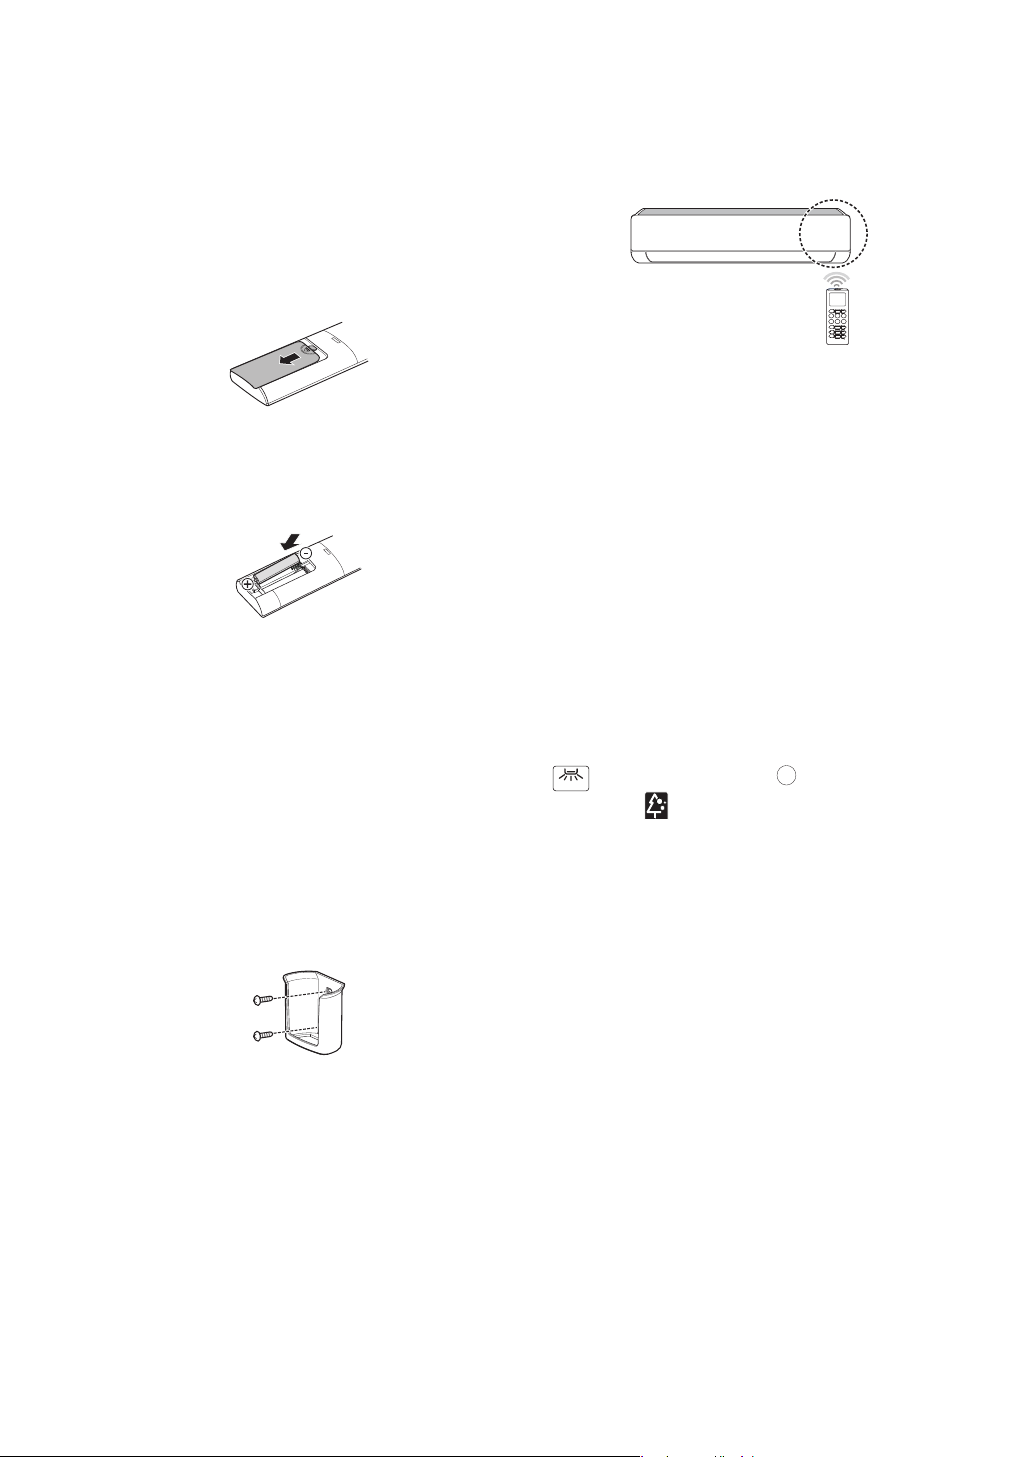
Inserting Batteries
If the display screen of the remote control
begins to fade, replace the batteries. Insert
AAA (1.5 V) batteries before using the
remote control.
Remove the battery cover.
1
Operating Method
Point the remote control towards the
signal receiver at the right side of the air
conditioner to operate it.
NOTE
Insert the new batteries and make
2
sure that the + and - terminals of the
batteries are installed correctly.
Installing the Remote Control
Holder
To protect the remote control, install the
holder where there is no direct sunlight.
Choose a safe and easily accessible
1
location.
Fix the holder by fastening 2 screws
2
firmly with a screwdriver.
• The remote control may operate other
electronic devices if it is directed towards
them. Make sure to point the remote
control towards the air conditioner signal
receiver.
• For proper operation, use a soft cloth to
clean the signal transmitter and receiver.
• In case of a function not provided in
the product, no buzzer sound occurs
from the product when a button for
such function on the remote control is
pressed except for Air Flow Direction (
), Energy Display (
function ( ).
), Air Purification
10
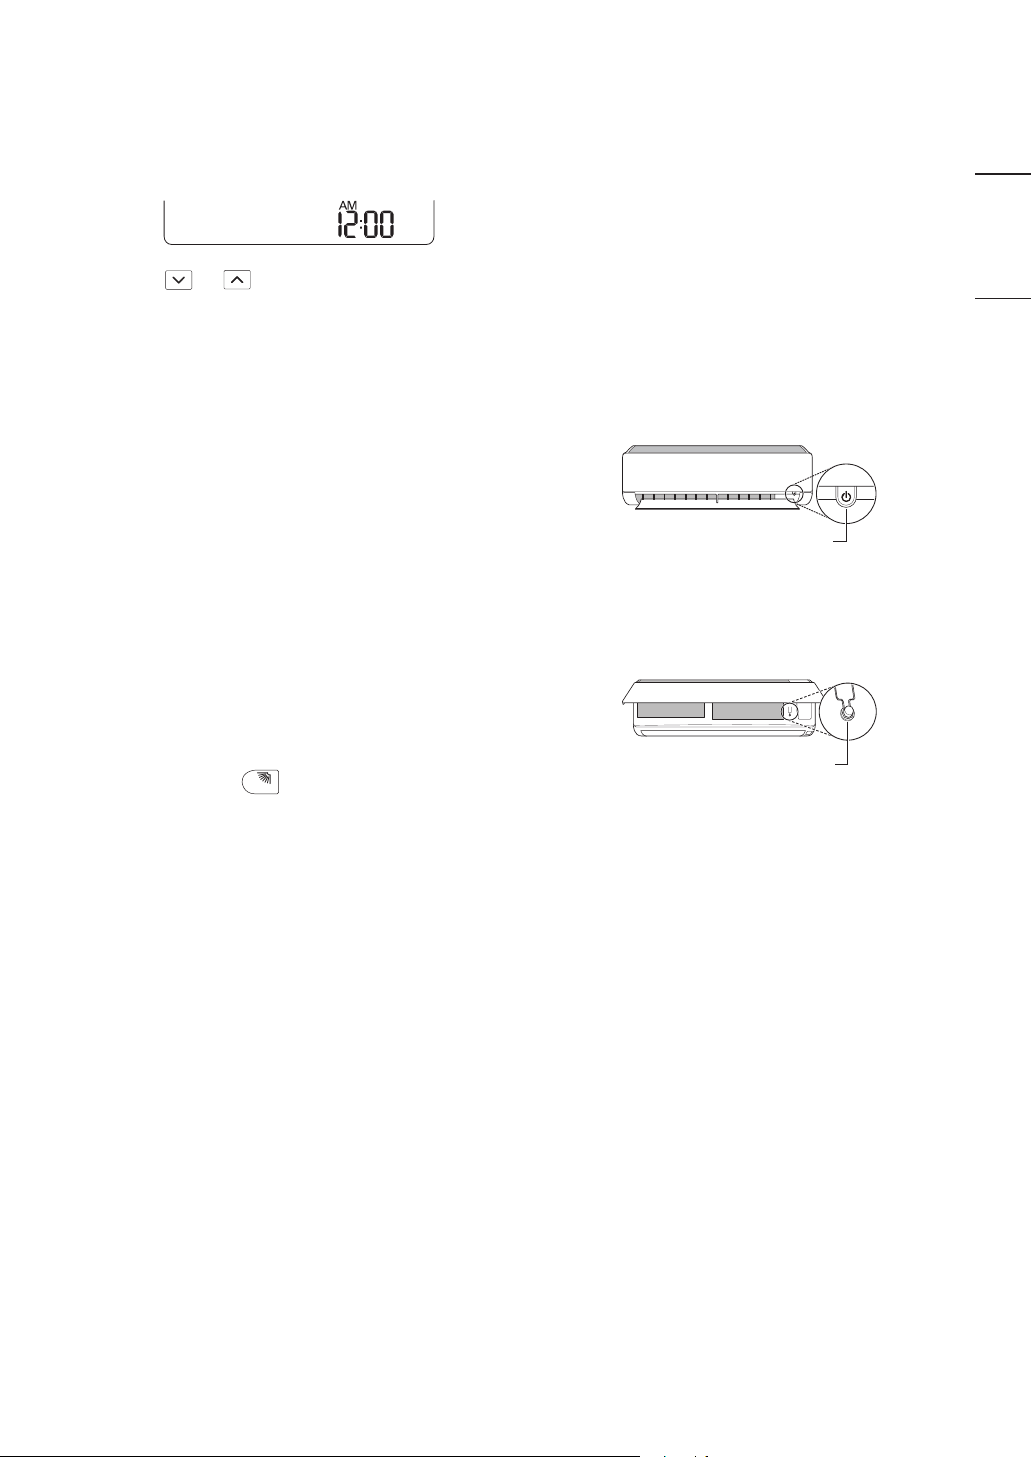
Setting the Current Time
℃↔℉ [5 s]
SWING
ON/OFF
Insert batteries.
1
• The icon below blinks at the bottom of
the display screen.
Press or button to select the
2
minutes.
Press SET/CANCEL button to finish.
3
NOTE
Operating the Air Conditioner
without the Remote Control
You can use the ON/OFF button of the
indoor unit to operate the air conditioner
when the remote control is unavailable.
Open the front cover (Type2) or
1
horizontal vane (Type1).
Press the ON/OFF button.
2
Type1
ENGLISH
FRANÇAIS ESPAÑOL
• The On/Off Timer is available after setting
the current time.
Using the °C/°F Conversion
Function (Optional)
This function changes unit between °C and
°F
• Press and hold
seconds.
button about 5
ON/OFF
Type2
NOTE
• The stepping motor may be broken, if the
horizontal vane opens rapidly.
• The fan speed is set to high.
• The feature may be changed according
to the type of model.
• The temperature cannot be altered when
using this emergency ON/OFF button.
• For cooling-only models, the temperature
is set to 22 °C
• For cooling & heating models, the
temperature is set from 22 °C to 24 °C
11
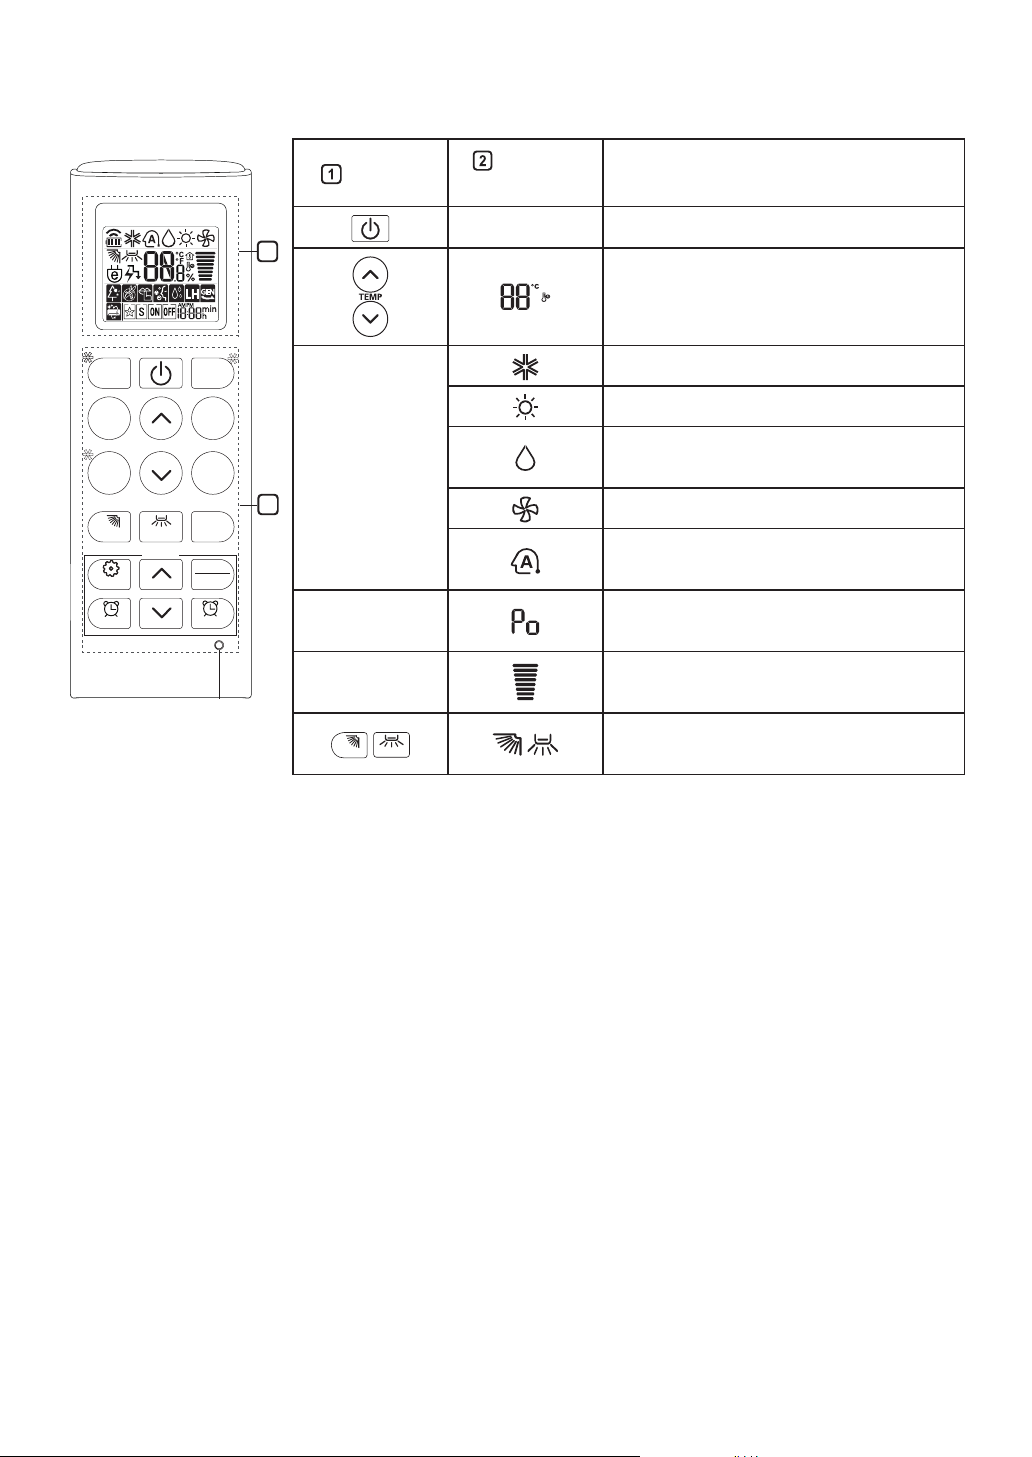
Using Wireless Remote Control
RESET
SWING
SWING
You can operate the air conditioner more conveniently with the remote control.
*
MODE
TEMP
*
kW [3 s]
SWING
SWING
℃↔℉ [5 s]
SET UP
FUNC.
TIMER CANCEL
FAN
SPEED
JET
MODE
ROOM
TEMP
DIAGNOSIS [5 s]
SET
CANCEL
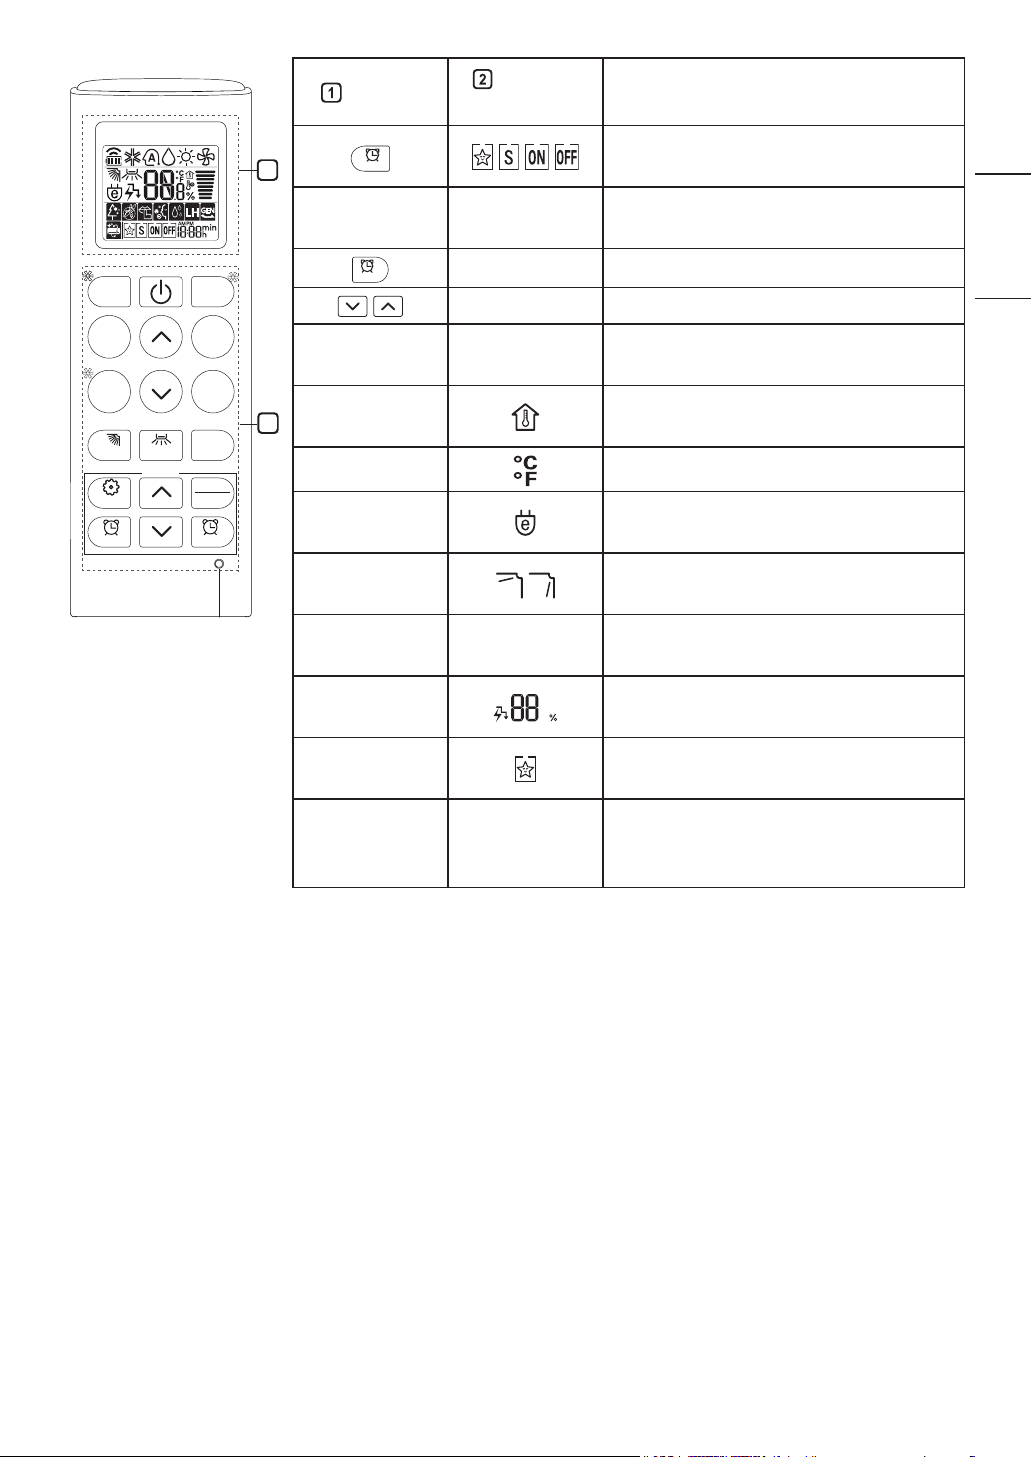
Button
Display
Screen
Description
- To turn on/off the air conditioner.
2
To adjust the desired room
temperature in cooling, heating or
auto changeover mode.
*
To select the cooling mode.
To select the heating mode.
To select the dehumidification
MODE
1
mode.
To select the fan mode.
To select the auto changeover/
auto operation mode.
JET
MODE
FAN
SPEED
To change room temperature
quickly.
To adjust the fan speed.
To adjust the air flow direction
vertically or horizontally.
12
NOTE
• * buttons may be changed according to the type of model.
RESET
Button
TIMER
CANCEL
Display
Screen
Description
*
MODE
TEMP
*
kW [3 s]
SWING
SWING
℃↔℉ [5 s]
SET UP
FUNC.
TIMER CANCEL
FAN
SPEED
JET
MODE
ROOM
TEMP
DIAGNOSIS [5 s]
SET
CANCEL
2
SET/
CANCEL
*
*LIGHT
OFF
1
TEMP
ROOM
°C↔°F [5 s]
*ENERGY
SAVING
*COMFORT
AIR
kW [3 s] -
*ENERGY
CTRL
-
automatically at desired time.
To set/cancel the special functions
and timer.
- To cancel the timer settings.
- To adjust time.
-
To set the brightness of the display
on the indoor unit.
To display the room temperature.
To change unit between °C and °F
To minimize power consumption.
To adjust the air flow to deflect
wind.
To set whether or not to display
information regarding energy.
To bring the effect of the power
saving.
ENGLISH
FRANÇAIS ESPAÑOL
To turn on/off air conditioner
*COMFORT
SLEEP
DIAGNOSIS
[5 s]
To make a comfortable sleeping
environment.
-
To conveniently check
maintenance information of a
product.
13
*
RESET
FUNC.
MODE
TEMP
*
kW [3 s]
SWING
SWING
℃↔℉ [5 s]
SET UP
FUNC.
TIMER CANCEL
FAN
SPEED
JET
MODE
ROOM
TEMP
DIAGNOSIS [5 s]
SET
CANCEL
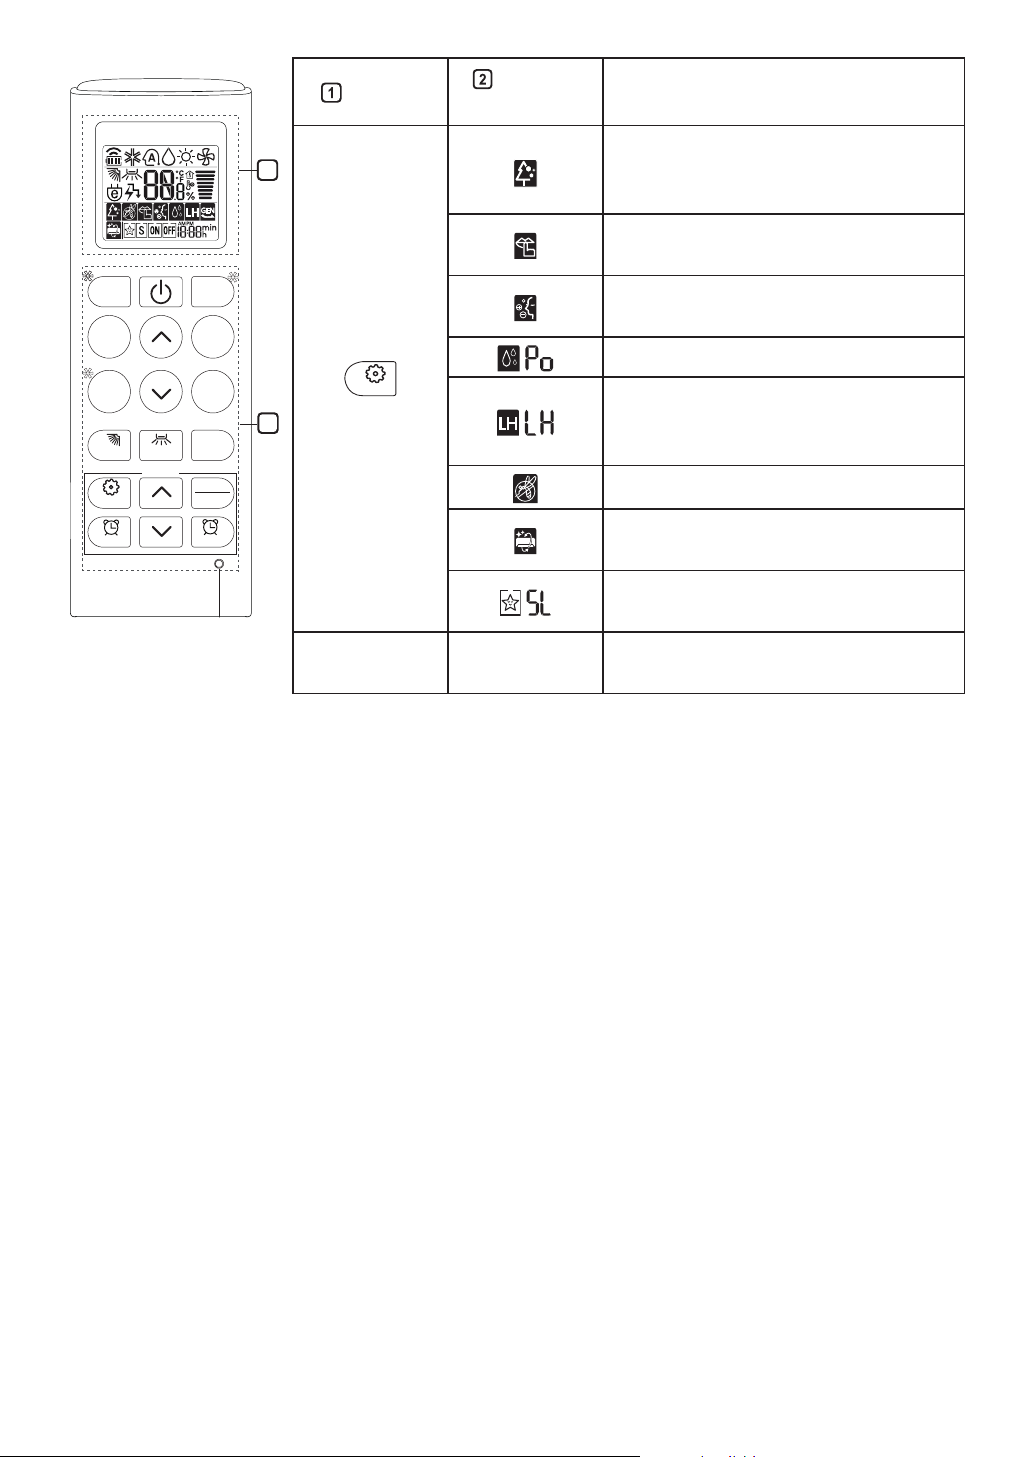
Button
Display
Screen
Description
The Ion generator uses millions
2
of ions to help improve indoor air
quality.
To reduce noise from outdoor
units.
*
To keep your skin moisturized by
generating ion clusters.
To lower indoor humidity quickly.
To maintain a minimum room
1
temperature and prevent objects in
the room from freezing.
To scare away a mosquito.
To remove moisture generated
inside the indoor unit.
RESET -
environment.
To initialize the remote control
settings.
NOTE
• Some functions may not be supported, depending on the model.
• * buttons may be changed according to the type of model.
• Press the SET/CANCEL button to operate the selected FUNC.
To make a comfortable sleeping
14
Restarting the Air
ON/OFF
Using the Mode Function
Conditioner Automatically
When the air conditioner is turned on again
after a power failure, this function restores
the previous settings.
Disabling Auto Restart
Open the front cover (Type2) or
1
horizontal vane (Type1).
Press the ON/OFF button and hold it for
2
6 seconds, then the unit will beep twice
and the lamp will blink twice 4 times.
• To re-enable the function, press
the ON/OFF button and hold it for 6
seconds. The unit will beep twice and
the lamp will blink 4 times.
Type1
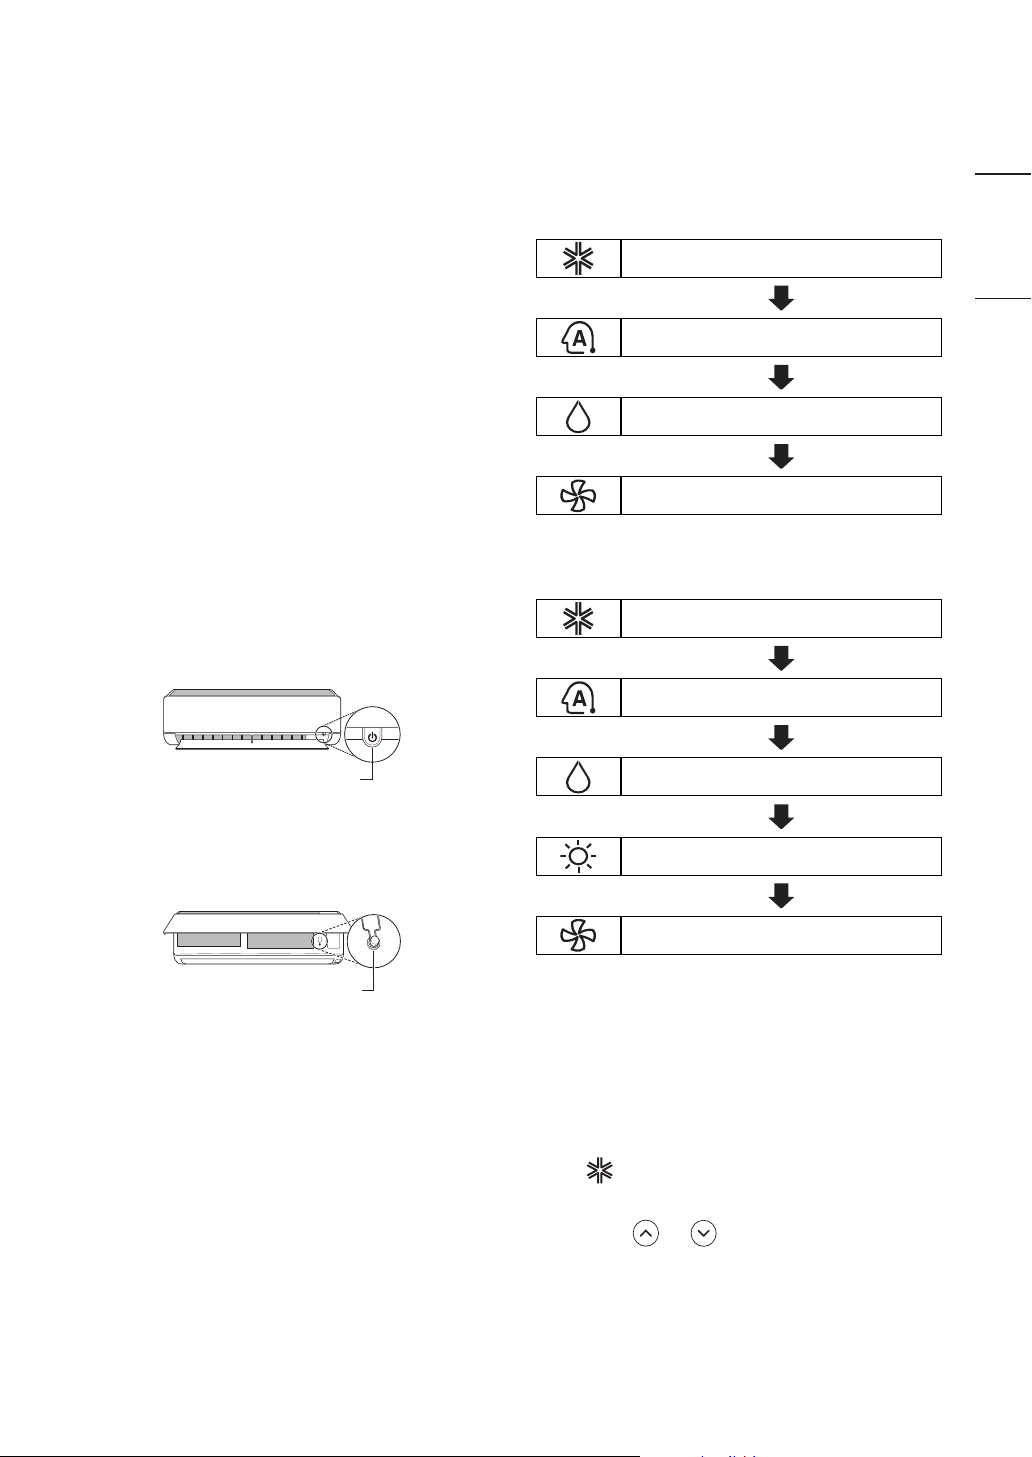
This function allows you to select the
desired function.
ENGLISH
Cooling Only Model
Cooling Mode
FRANÇAIS ESPAÑOL
Auto Operation(AI) Mode
Dehumidification Mode
Fan Mode
Cooling & Heating Model
Cooling Mode
ON/OFF
Type2
NOTE
• The feature may be changed according
to the type of model.
• If you press and hold the ON/OFF button
for 3 – 5 seconds, instead of 6 seconds,
the unit will switch to the test operation.
In the test operation, the unit blows out
strong cooling air for 18 minutes and then
returns to factory default settings.
Auto Changeover Mode
Dehumidification Mode
Heating Mode
Fan Mode
Cooling Mode
Turn the appliance on.
1
Press MODE button repeatedly to
2
select the Cooling Mode.
is displayed on the display screen.
•
Press or button to set the desired
3
temperature.
15
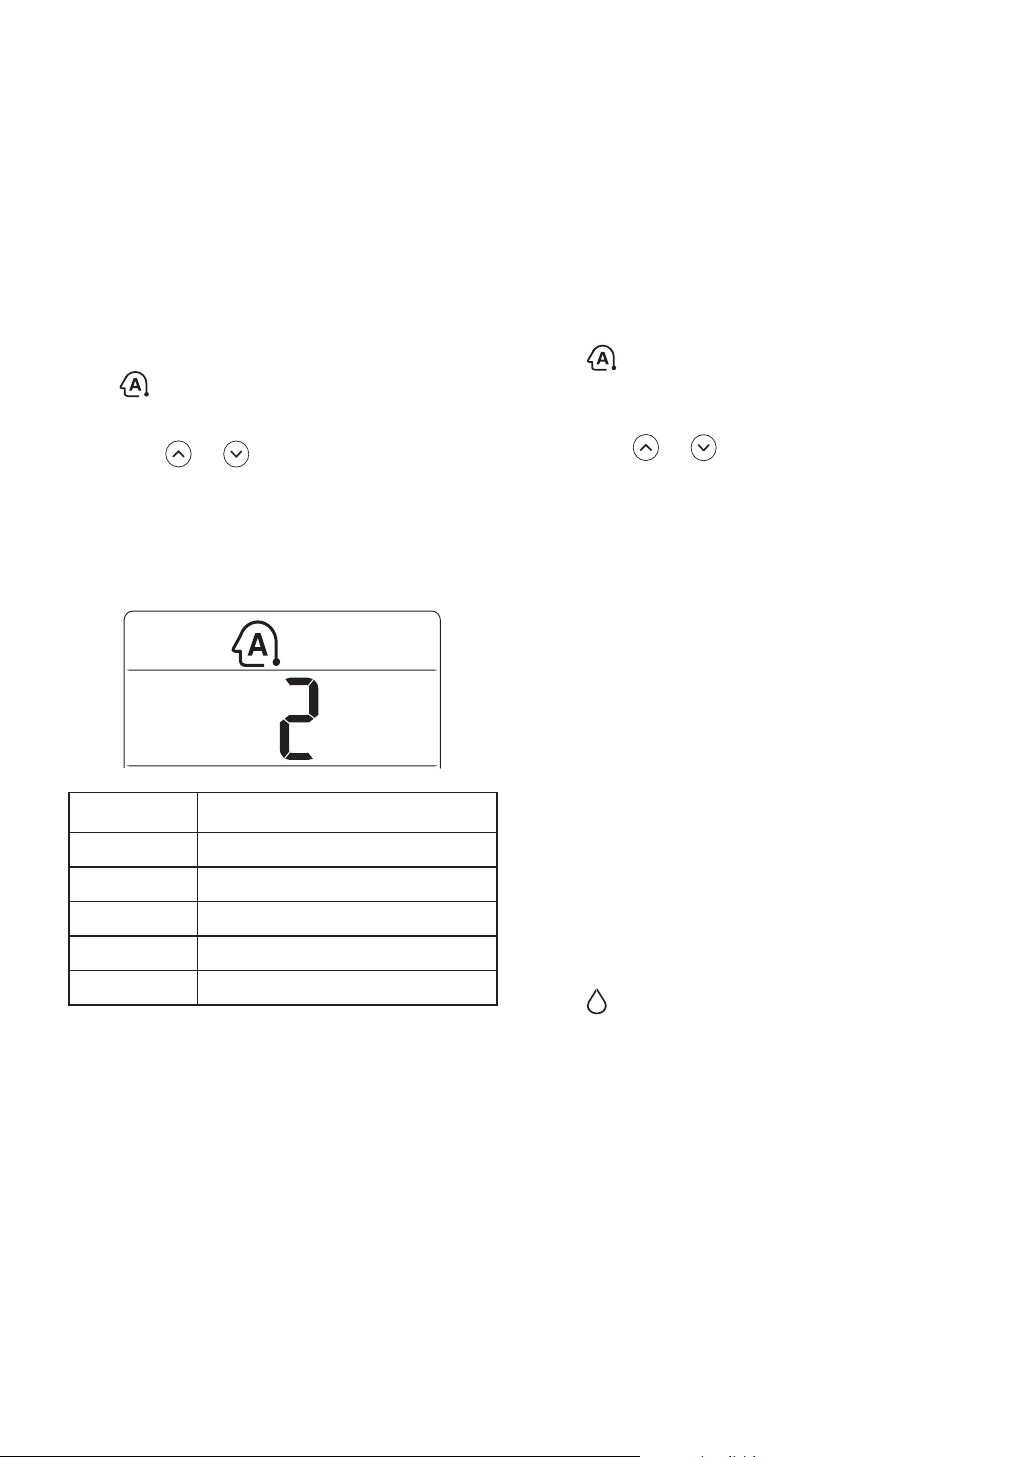
Auto Operation (Artificial
Intelligence)
Cooling Only Model
This mode automatically sets the fan
speed and temperature depending on the
room temperature.
Turn the appliance on.
1
Press MODE button repeatedly to
2
select the Auto Operation.
•
is displayed on the display screen.
Press or button to select
3
the desired operation code if the
temperature is higher or lower than the
desired temperature.
Auto Changeover Mode
Cooling & Heating Model
This mode changes the mode
automatically to maintain the set
temperature at ±2 °C
Turn the appliance on.
1
Press MODE button repeatedly to
2
select the Auto Changeover Mode.
is displayed on the display screen.
•
Press or button to set the desired
3
temperature.
Press FAN SPEED button to adjust the
4
fan speed.
Code Description
2 Cold
1 A little cold
0 Maintain room temperature
-1 A little hot
-2 Hot
NOTE
• In this mode, you cannot adjust the fan
speed, but you can set the air deflector to
rotate automatically.
Dehumidification Mode
This mode removes excess moisture from
a highly humid environment or during the
rainy season, in order to prevent mildew
from setting in. This mode adjusts the
room temperature and the fan speed
automatically to maintain the optimal level
of humidity.
Turn the appliance on.
1
Press MODE button repeatedly to
2
select the Dehumidification Mode.
is displayed on the display screen.
•
NOTE
• In this mode you cannot adjust the room
temperature, it is adjusted automatically.
• The room temperature is not displayed
on the display screen.
16
• In the dehumidification mode,
compressor and indoor fan may not
operate when the room temperature is
below 24 °C
Heating Mode
Using the Jet Mode
Turn the appliance on.
1
Press MODE button repeatedly to
2
select the Heating Mode.
is displayed on the display screen.
•
Press or button to set the desired
3
temperature.
NOTE
•
will be displayed on the indoor unit
when defrosting is operating.
• Furthermore, this indication will be
displayed on the indoor unit:
− When preheating is operating.
− When the room temperature has been
reached to the set temperature.
Function
Changing Room Temperature
Quickly
This function allows you to cool indoor
air quickly during the summer or warm it
quickly during winter.
• Cooling & Heating model : The Jet Mode
function is available with Cooling, Heating
and Dehumidification Mode.
• Cooling Only model : The Jet Mode
function is available with Cooling,
Dehumidification, Fan, Auto Operation
Mode and Air Purification function.
Turn the appliance on.
1
Press MODE button repeatedly to
2
select the desired mode.
Press JET MODE button.
3
ENGLISH
FRANÇAIS ESPAÑOL
Fan Mode
This mode only circulates the indoor air
without changing the room temperature.
Turn the appliance on.
1
Press MODE button repeatedly to
2
select the Fan Mode.
is displayed on the display screen.
•
Press FAN SPEED button to adjust the
3
fan speed.
is displayed on the display screen.
•
NOTE
• Jet Heating Mode is not available on
some models.
• In Jet Cooling Mode, strong air blows out
for 30 minutes.
• After 30 minutes later, setting
temperature is maintaining 18 °C
If you want to change the temperature,
Press or button to set the desired
temperature.
• In Jet Heating Mode, strong air blows out
for 30 minutes.
• After 30 minutes later, setting
temperature is maintaining 30 °C
If you want to change the temperature,
Press or button to set the desired
temperature.
• This function may operate differently from
the remote control display.
17
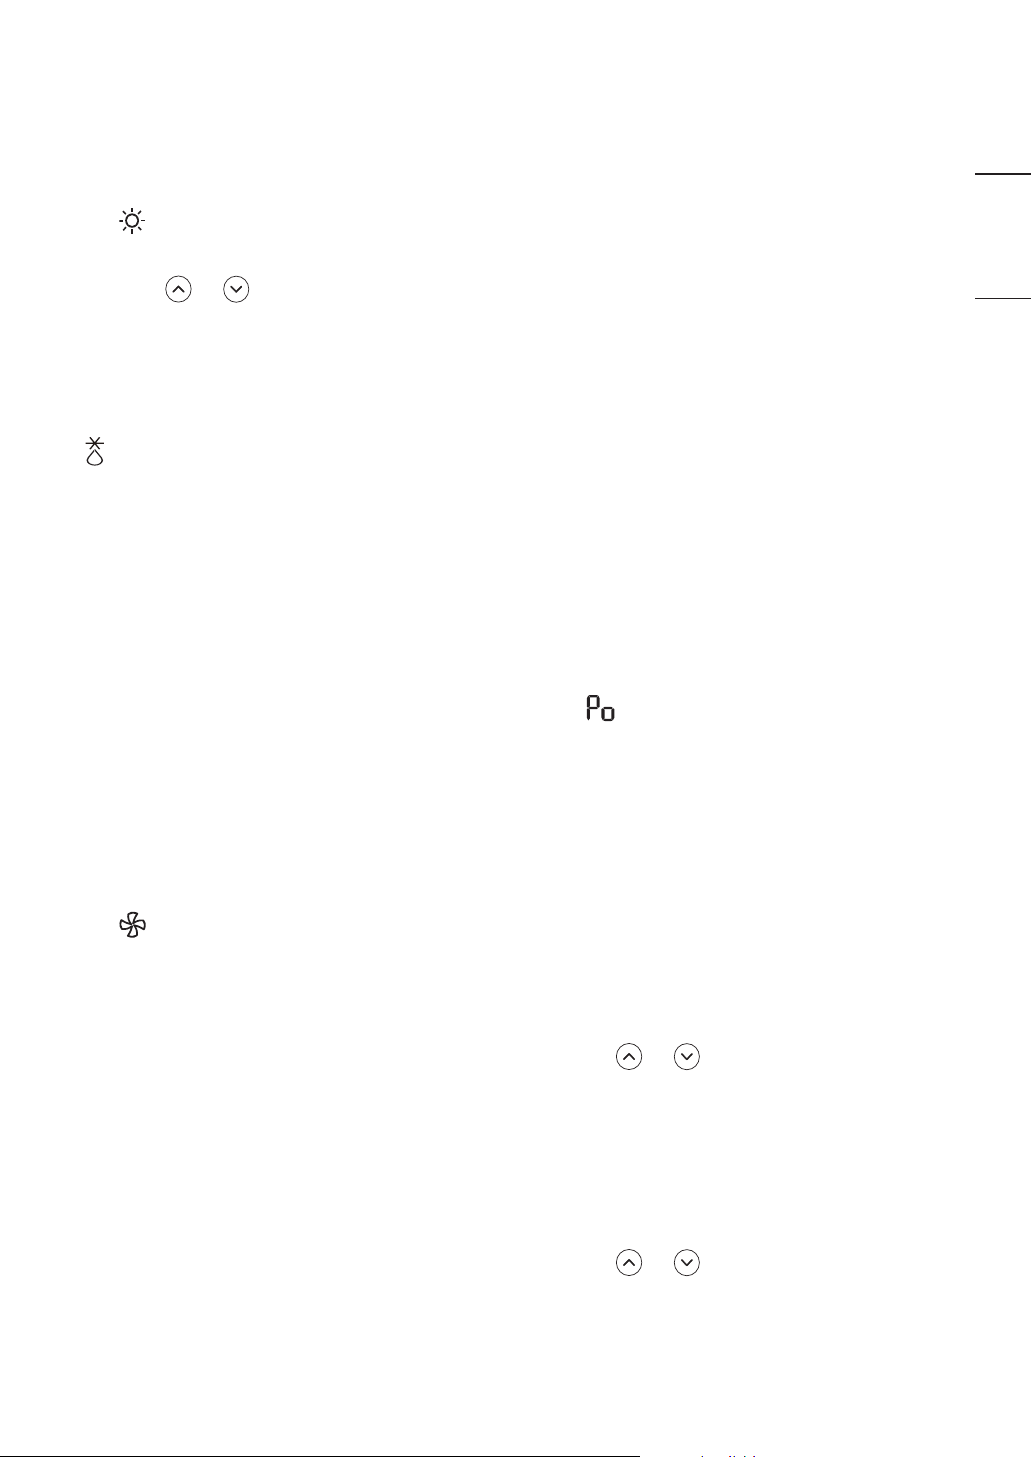
Using the Fan Speed
→ →
→ → → →
SWING
SWING
SWING
SWING
Using the Air Flow Direction
Function
Adjusting the Fan Speed
• Press FAN SPEED button repeatedly to
adjust the fan speed.
Display Screen Speed
High
Medium - High
Medium
Medium - Low
Low
- Natural Wind
NOTE
• The fan speed of Natural Wind adjusts
automatically.
Function
This function adjusts the direction of the air
flow vertically (horizontally).
• Press
select the desired direction.
− Select
the air flow automatically.
NOTE
• Adjusting the air flow direction
horizontally may not be supported,
depending on the model.
• Adjusting the air deflector arbitrarily may
cause product failure.
• If you restart the air conditioner, it
starts to operate with the previously set
direction of air flow, so the air deflector
may not match the icon displayed on the
remote control. When this occurs, press
or
of the air flow again.
(
) button repeatedly and
( ) to adjust the direction of
button to adjust the direction
• The fan speed icons are displayed on
some indoor units.
• Indoor unit display is displayed only
5 seconds and return to the setting
temperature on some models.
• This function may operate differently from
the remote control display.
18
Setting the On/Off Timer
TIMER
TIMER
TIMER
TIMER
CANCEL
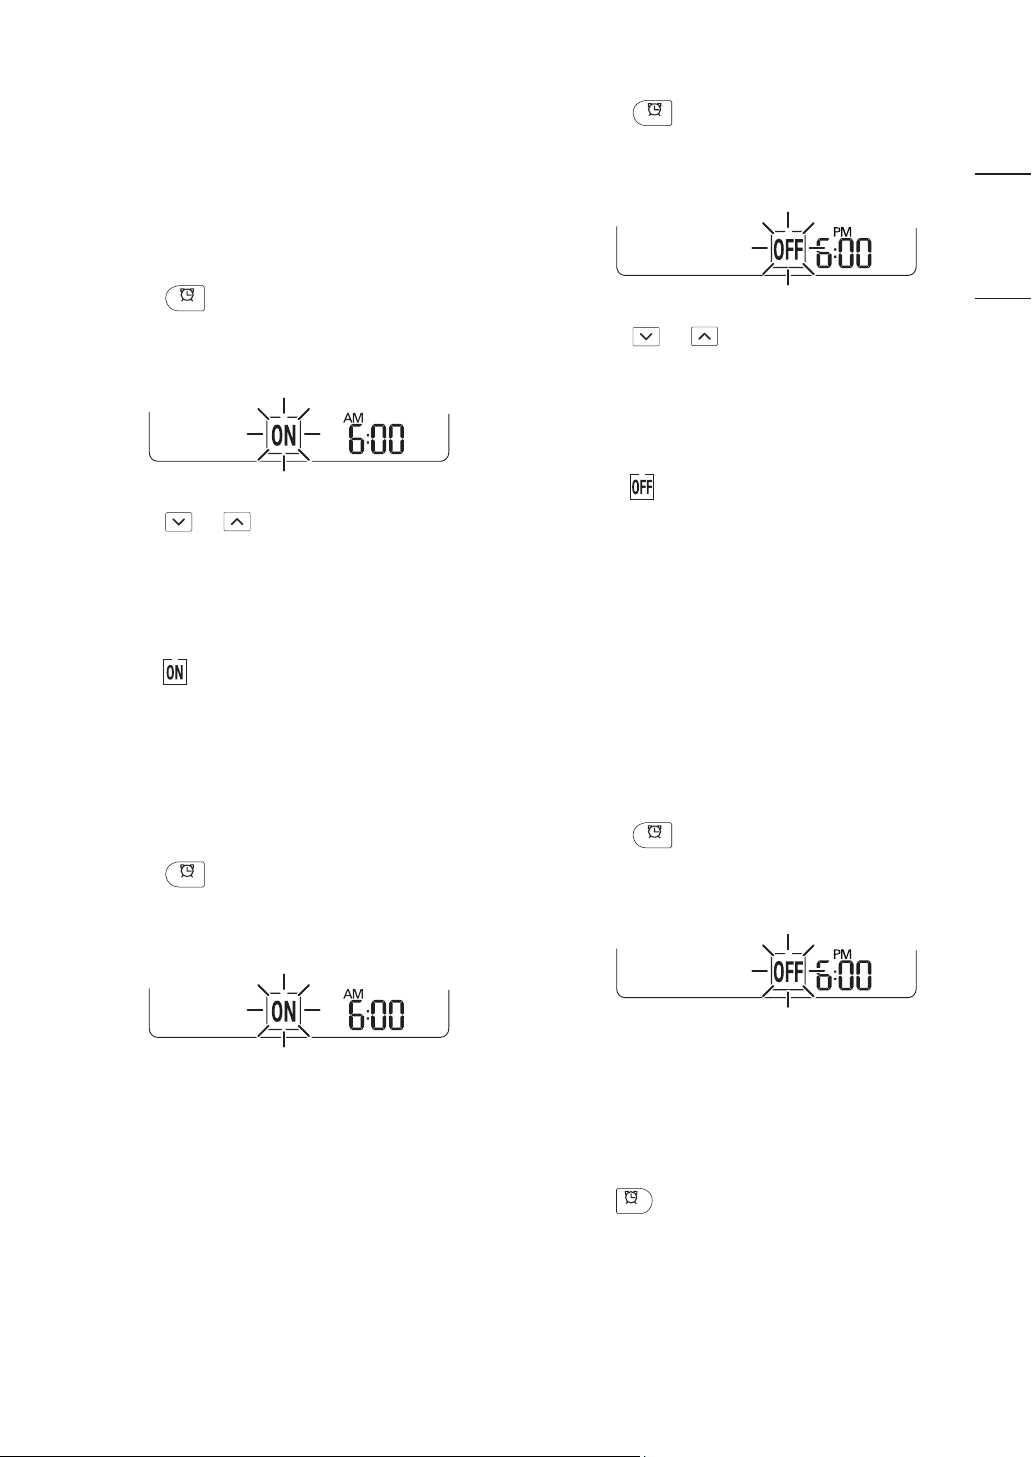
Setting the Off Timer
This function sets the air conditioner to turn
on/off automatically at desired time.
On/Off Timer can be set together.
Setting the On Timer
Press
1
• The icon below blinks at the bottom of
the display screen.
Press or button to select the
2
minutes.
Press SET/CANCEL button to finish.
3
• After setting the timer, current time
and
display screen indicating that the
desired time is set.
button repeatedly.
icon are displayed on the
Press
1
• The icon below blinks at the bottom of
the display screen.
Press or button to select the
2
minutes.
Press SET/CANCEL button to finish.
3
• After setting the timer, current time
and
display screen indicating that the
desired time is set.
NOTE
• This function is disabled when you set
Simple Timer.
button repeatedly.
icon are displayed on the
ENGLISH
FRANÇAIS ESPAÑOL
Canceling the On Timer
Press
1
• The icon below blinks at the bottom of
the display screen.
Press SET/CANCEL button to cancel
2
the setting.
button repeatedly.
Canceling the Off Timer
Press
1
• The icon below blinks at the bottom of
the display screen.
Press SET/CANCEL button to cancel
2
the setting.
button repeatedly.
Canceling the Timer Setting
• Press
settings.
button to cancel all timer
19
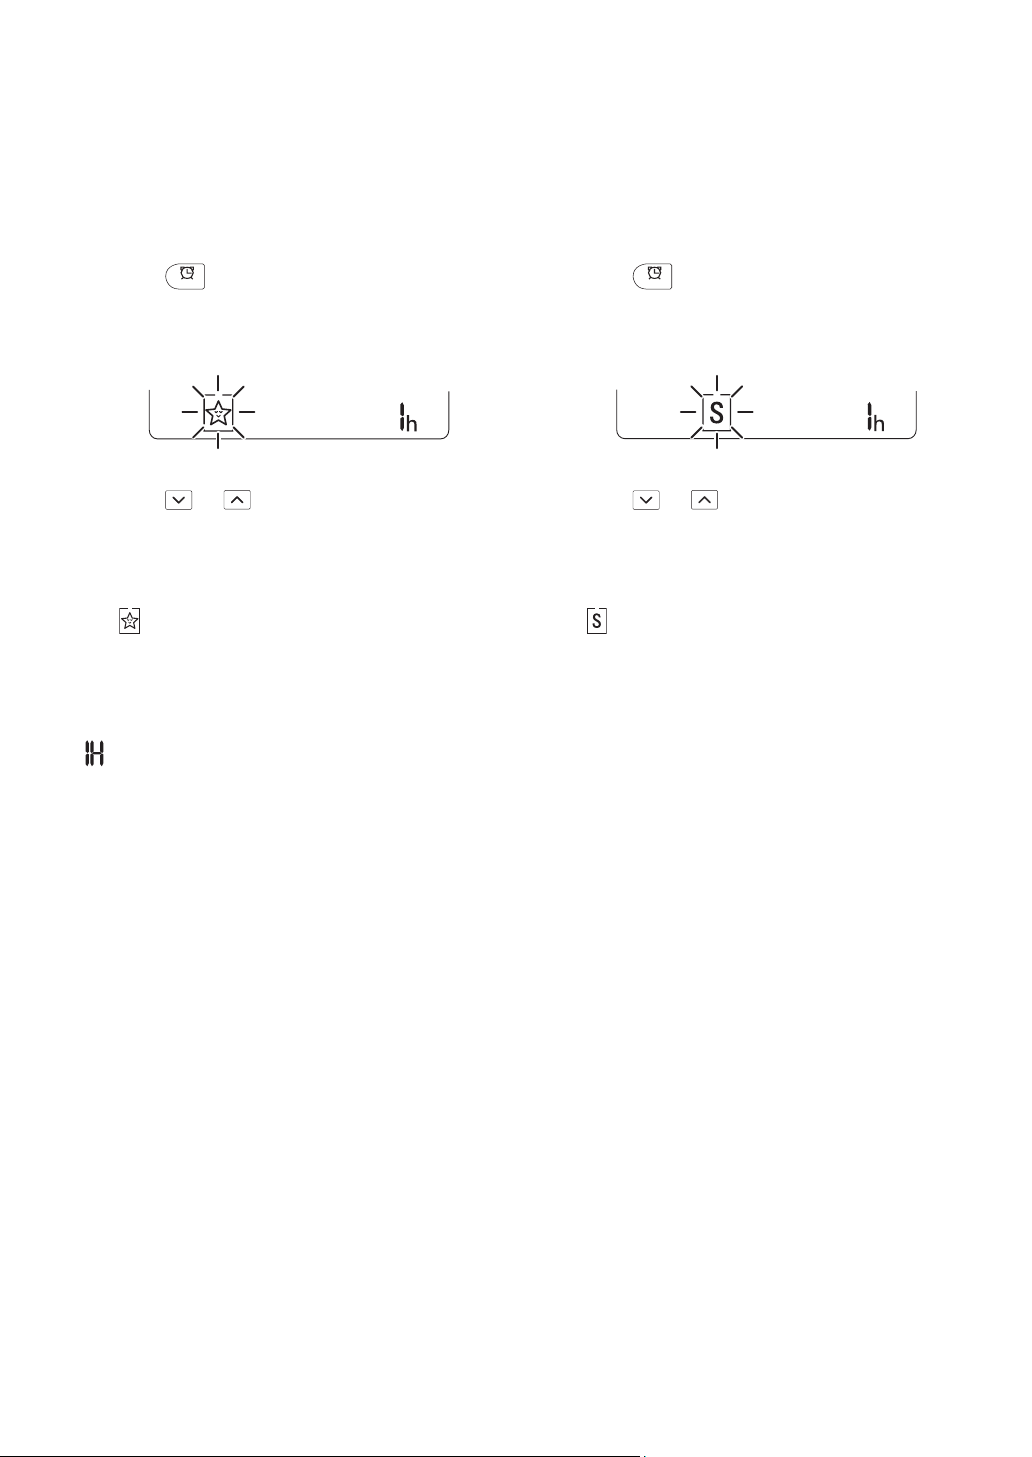
Using the Sleep Function
TIMER
TIMER
Using the Simple Timer
(Optional)
This function turns off the air conditioner
automatically when you go to sleep.
Turn the appliance on.
1
Press
2
• The icon below blinks at the bottom of
the display screen.
Press or button to select the hour
3
(up to 7 hours).
Press SET/CANCEL button to finish.
4
•
is displayed on the display screen.
button repeatedly.
Function (Optional)
This function turns off the air conditioner
automatically when you go to sleep.
Turn the appliance on.
1
Press
2
• The icon below blinks at the bottom of
the display screen.
Press or button to select the hour
3
(up to 7 hours).
Press SET/CANCEL button to finish.
4
•
is displayed on the display screen.
button repeatedly.
NOTE
•
is displayed on some indoor units.
• Indoor unit display is displayed from
1H to 7H which is displayed only 5
seconds and then return to the setting
temperature.
• In the Cooling and Dehumidification
Mode, the temperature increases by
1 °C after 30 minutes and additional 1
°C after another 30 minutes for a more
comfortable sleep.
• The temperature increases up to 2 °C
from the preset temperature.
• Although the remark for fan speed on the
display screen may be changed, the fan
speed is adjusted automatically.
NOTE
• This function is disabled when you set
Off Timer.
20
Using the Energy Display
kW [3 s]
kW
kWh
kW [3 s]
kW
kWh
SWING
Using the Light Off Function
Function (Optional)
This function displays the amount of
electricity generated on the indoor display
as the product operates.
Display the Current Energy Usage
Turn the appliance on.
1
Press
2
seconds.
• The instantaneous power
consumption (
for a while on some indoor units.
Display the Cumulative Energy
Usage (Optional)
Turn the appliance on.
1
Press
2
seconds twice.
button and hold it about 3
or
button and hold it about 3
) is displayed
(Optional)
Display Screen Brightness
You can set the brightness of the indoor
unit display screen.
• Press LIGHT OFF button.
NOTE
• Turn on/off the Display screen.
Using the Comfort Air
Function (Optional)
Comfort Vane Operation
This function conveniently sets the vane
to a preset position to deflect the supply
air away from blowing directly onto the
occupants in the room.
Turn the appliance on.
1
ENGLISH
FRANÇAIS ESPAÑOL
• The cumulative power consumption (
) is displayed for a while on some
indoor units.
NOTE
• It is not displayed on the wireless remote
control.
• kW refers to instantaneous power
consumption.
• kWh refers to cumulative power
consumption.
• If it is more than 99 kWh, which is the
range of expression, maintain it as 99
kWh.
• Power off resets its value.
• Display wattage under 10 kW(h) with
0.1 kW(h) unit, and display one over 10
kW(h) with 1 kW(h) unit.
• The actual power may differ from the
power displayed.
Press COMFORT AIR button
2
repeatedly and select the desired
direction.
or is displayed on the display
•
screen.
NOTE
•
or is displayed on some indoor
units.
• This function is disabled when you press
MODE or JET MODE button.
• This function is disabled and auto swing
of vertical direction is set up when you
press
• When this function is off, the horizontal
vane operates automatically depending
on the set mode.
button.
21
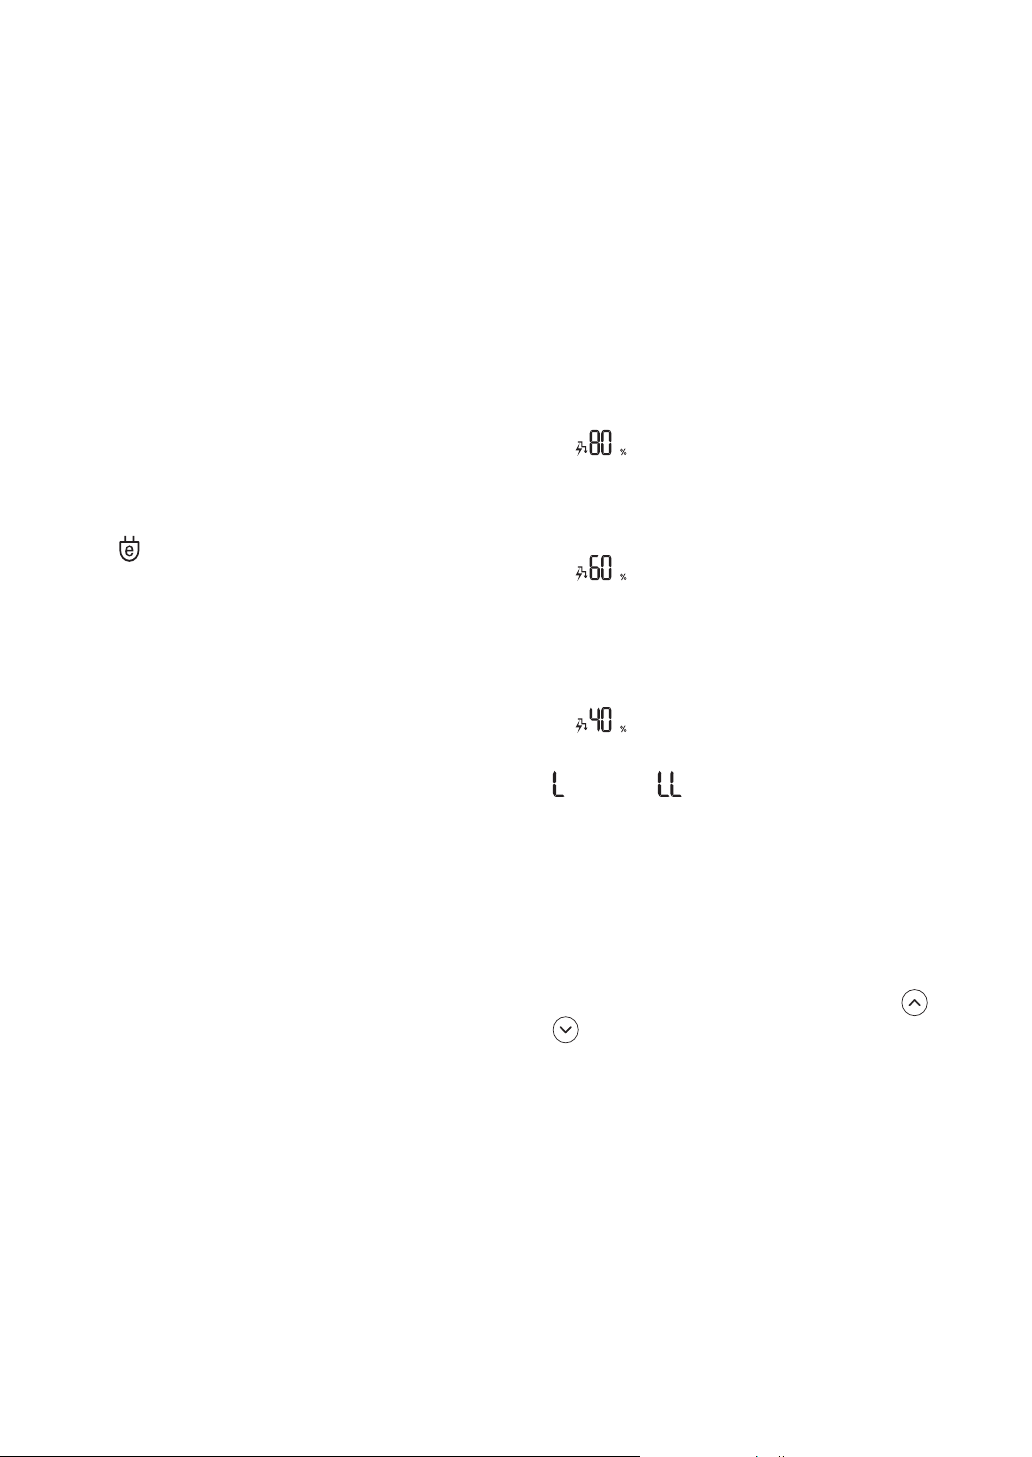
Using the Energy Saving
Using the Energy Control
Function (Optional)
This function minimizes power
consumption during Cooling and increases
the set temperature to the optimal level
for a more comfortable environment. The
temperature automatically settles at 22 °C
if desired temperature is below 22 °C The
temperature remains constant if it is above
22 °C
Turn the appliance on.
1
Press MODE button repeatedly to
2
select the Cooling Mode.
Press ENERGY SAVING button.
3
•
is displayed on the display screen.
Function (Optional)
Turn the appliance on.
1
Press ENERGY CTRL button.
2
• Press ENERGY CTRL button
repeatedly to select each step.
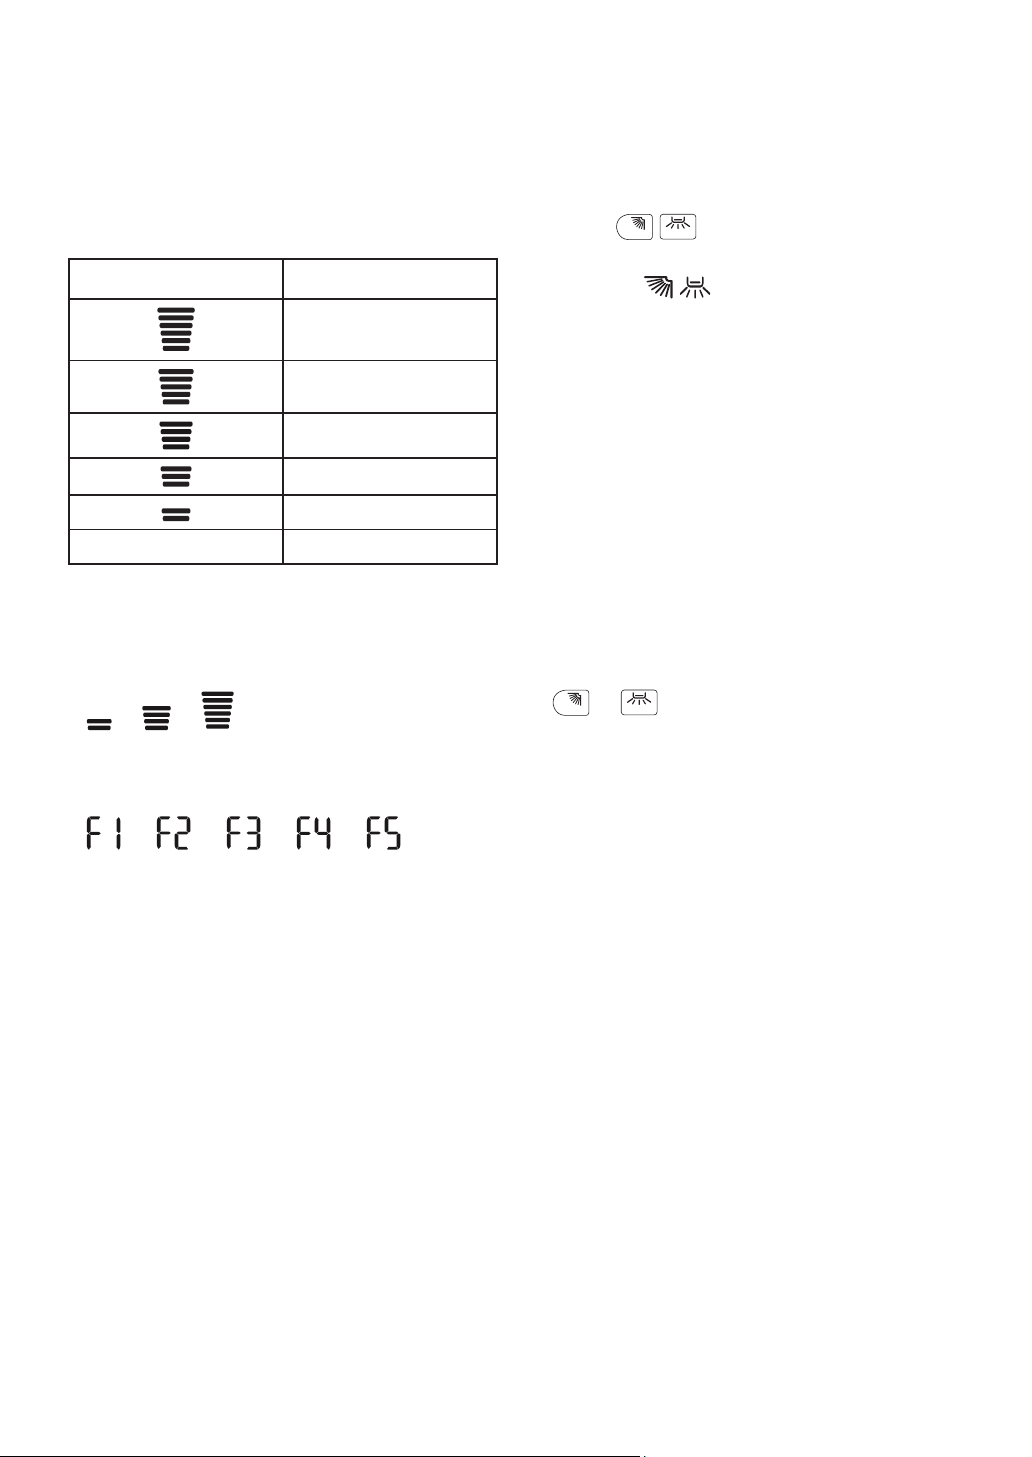
NOTE
• 1 step : The power Input is decreased by
20 % compared to rated power input.
−
is displayed on the display
screen.
• 2 step : The power Input is decreased by
40 % compared to rated power input.
−
is displayed on the display
screen.
• 3 step (Optional) : The power Input is
decreased by 60 % compared to rated
power input.
−
is displayed on the display
screen.
•
(1 step), (2 step) is displayed on
some indoor units.
• This function is available with Cooling
Mode.
• Capacity may decrease when Energy
Control mode is selected.
• Desired temperature is displayed about 5
seconds if you press FAN SPEED,
button.
• Room temperature is displayed about
5 seconds if you press ROOM TEMP
button.
or
22
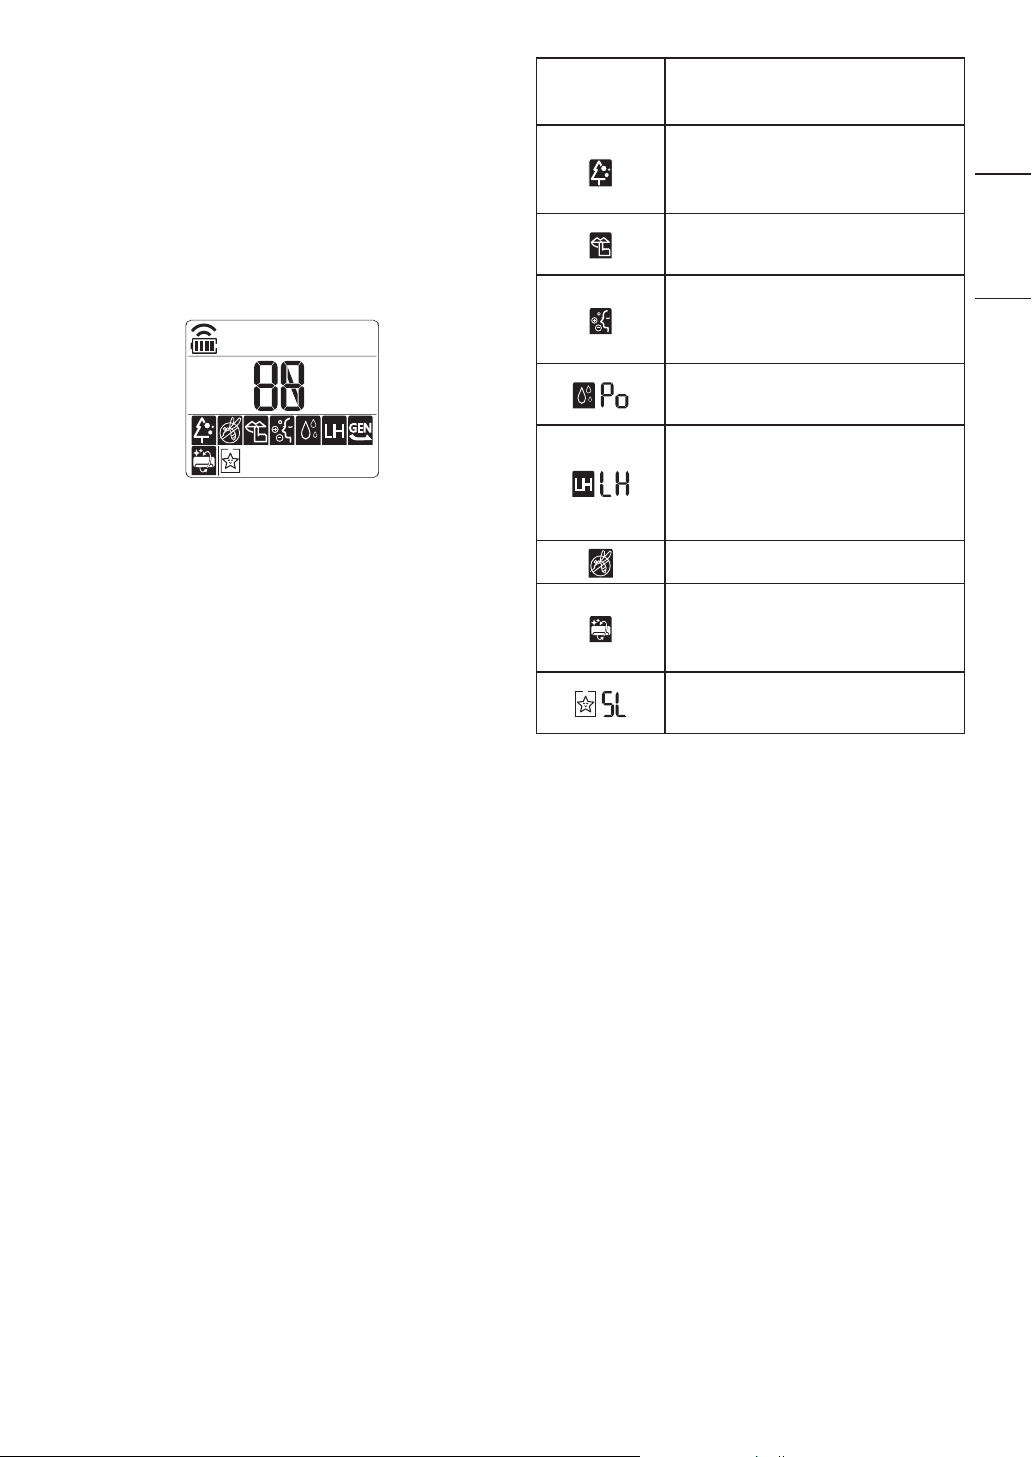
Using Special Functions
Turn the appliance on.
1
Press FUNC button repeatedly to select
2
the desired function.
Press SET/CANCEL button to finish.
3
Display
Screen
Description
The Ion generator uses
millions of ions to help
improve indoor air quality.
To reduce noise from
outdoor units.
ENGLISH
To keep your skin
moisturized by generating
ion clusters.
NOTE
• Some functions may not be supported,
depending on the model.
To lower indoor humidity
quickly.
To maintain a minimum
room temperature and
prevent objects in the room
from freezing.
To scare away a mosquito.
To remove moisture
generated inside the indoor
unit.
To make a comfortable
sleeping environment.
FRANÇAIS ESPAÑOL
• Some functions may operate differently
from the remote control display.
23
Canceling Special Functions
Using the Silent Function
Press FUNC button repeatedly to select
1
the desired function.
Press SET/CANCEL button to cancel
2
the function.
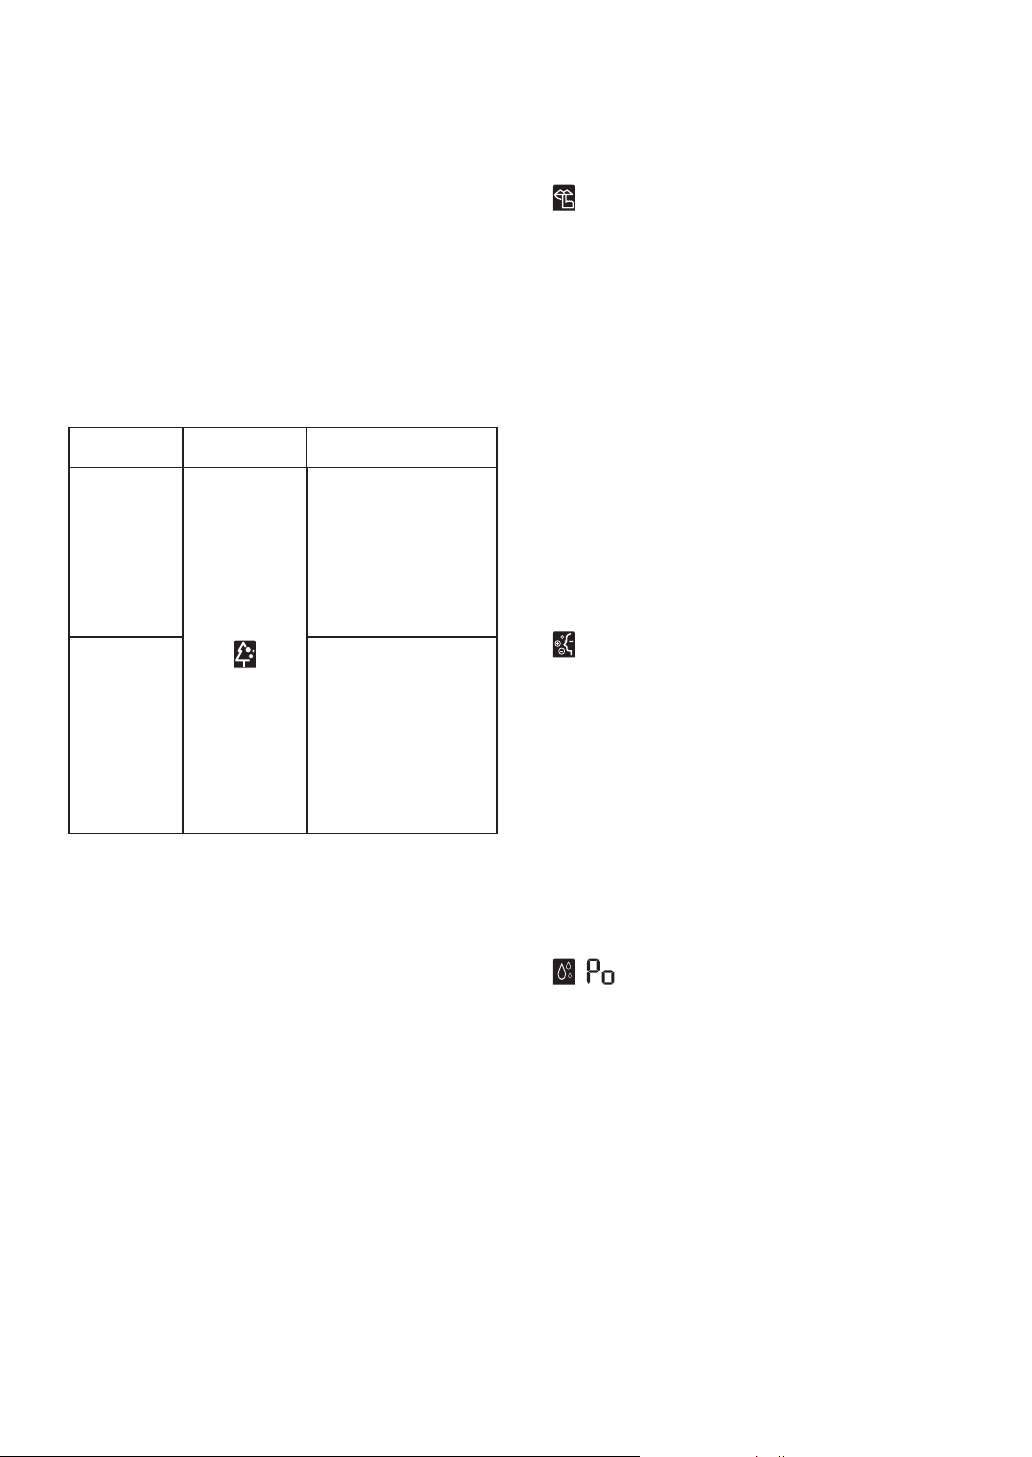
Using the Air Purification Function
These functions supply clean and fresh air
by ion particles and the filter.
Function
Ionizer
Plasma
Display Description
Ion particles
from Ionizer
sterilize the aerial
bacteria and
other harmful
substances.
It removes
microscopic
contaminants
from the intake
air completely to
supply clean and
fresh air.
This function prevents potential claims by
neighbors, reducing noise from outdoor
units.
•
is displayed on the display screen.
NOTE
• This function is disabled when you press
MODE or ENERGY CTRL or JET MODE
button.
• This function is available with Cooling,
Heating, Auto Changeover, Auto
Operation Mode.
Using the Ion Care Function
This function keeps your skin moisturized
by generating ion clusters which is
absorbed into the surface of skin.
•
is displayed on the display screen
about 3 seconds.
NOTE
• This function is available with Cooling,
Fan Mode and Air Purification function.
NOTE
• You can use this function without turning
the air conditioner on.
• Both the plasma lamp and the cooling
lamp light up while Smoke Away/Plasma
is in operation on some models.
• Do not touch ionizer during operation.
• This function may operate differently from
the remote control display.
24
Using the Jet Dry Function
This function maximizes the performance
of dehumidification.
•
, are displayed on the display
screen.
NOTE
• This function is available with Cooling,
Dehumidification, Auto Operation, Fan
Mode and Air Purification function.
• This function is not available with Sleep
function.
• This function is disabled when you press
MODE button.
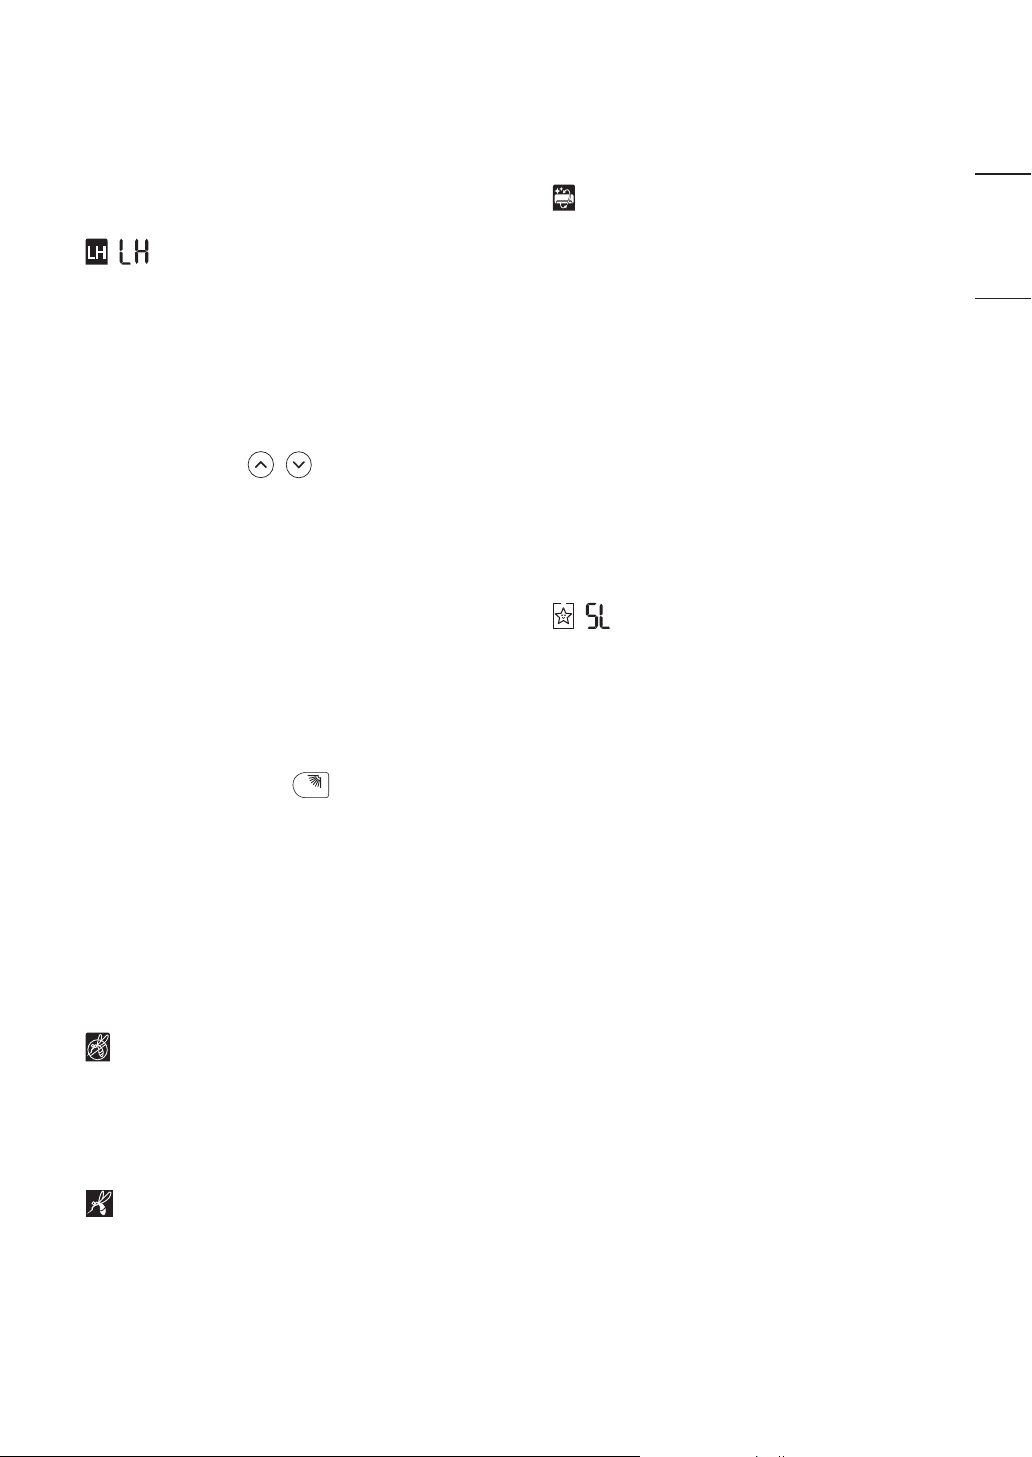
Using the Low Heating Function
SWING
Using the Auto Clean Function
This function operates the heating system
to maintain a minimum room temperature
and prevent objects in the room from
freezing where there is no permanent
resident, such as a vacation.
•
, are displayed on the display
screen.
NOTE
• This function is available with Heating
Mode.
• During LH operation, when you press
buttons such as
, , MODE, FAN
SPEED, and then return to Heating
Mode.
• If JET MODE button is pressed during
LH operation, this function is disabled
and Power Heating Mode is operated
immediately. (only for power heating
model)
In the Cooling and Dehumidification Mode,
moisture is generated inside the indoor
unit. This function removes such moisture.
•
is displayed on the display screen.
NOTE
• Some functions cannot be used while the
Auto Clean function is in operation.
• If you turn off the unit, the fan continues
to run for 30 minutes and cleans the
inside of the indoor unit.
Using the Comfort Sleep Function
This function operates the air conditioner
automatically to make the comfortable
sleep environment.
•
, are displayed on the display
screen.
ENGLISH
FRANÇAIS ESPAÑOL
• In case an error occurred, operation can
be interrupted for the protection of the
product.
• COMFORT AIR and
button cannot
be used while the LH function is in
operation.
Using the Mosquito Away
Function
This function fans away mosquitos by
generating a high-frequency wave.
•
is displayed on the display screen.
NOTE
• You can use this function without turning
the air conditioner on.
•
is displayed on some indoor units.
NOTE
• This function is available with Cooling
Mode.
• The vane stops swing and sets indirect
airflow angle, after 30 minutes from
start even though the room temperature
doesn’t decrease to optimal temperature
to sleep.
• It is possible that a comfortable sleep
environment is different according to the
people.
25
SMART FUNCTIONS
LG ThinQ Application
This feature is only available on models
with the or ThinQ logo.
The LG ThinQ application allows you to
communicate with the appliance using a
smartphone.
LG ThinQ Application Features
Communicate with the appliance from a
smartphone using the convenient smart
features.
Smart Diagnosis
If you experience a problem while using
the appliance, this smart diagnosis feature
will help you diagnose the problem.
Settings
Allows you to set various options on the
appliance and in the application.
Before Using LG ThinQ
Application
Check the distance between the
1
appliance and the wireless router (Wi-Fi
network).
• If the distance between the appliance
and the wireless router is too far,
the signal strength becomes weak.
It may take a long time to register or
installation may fail.
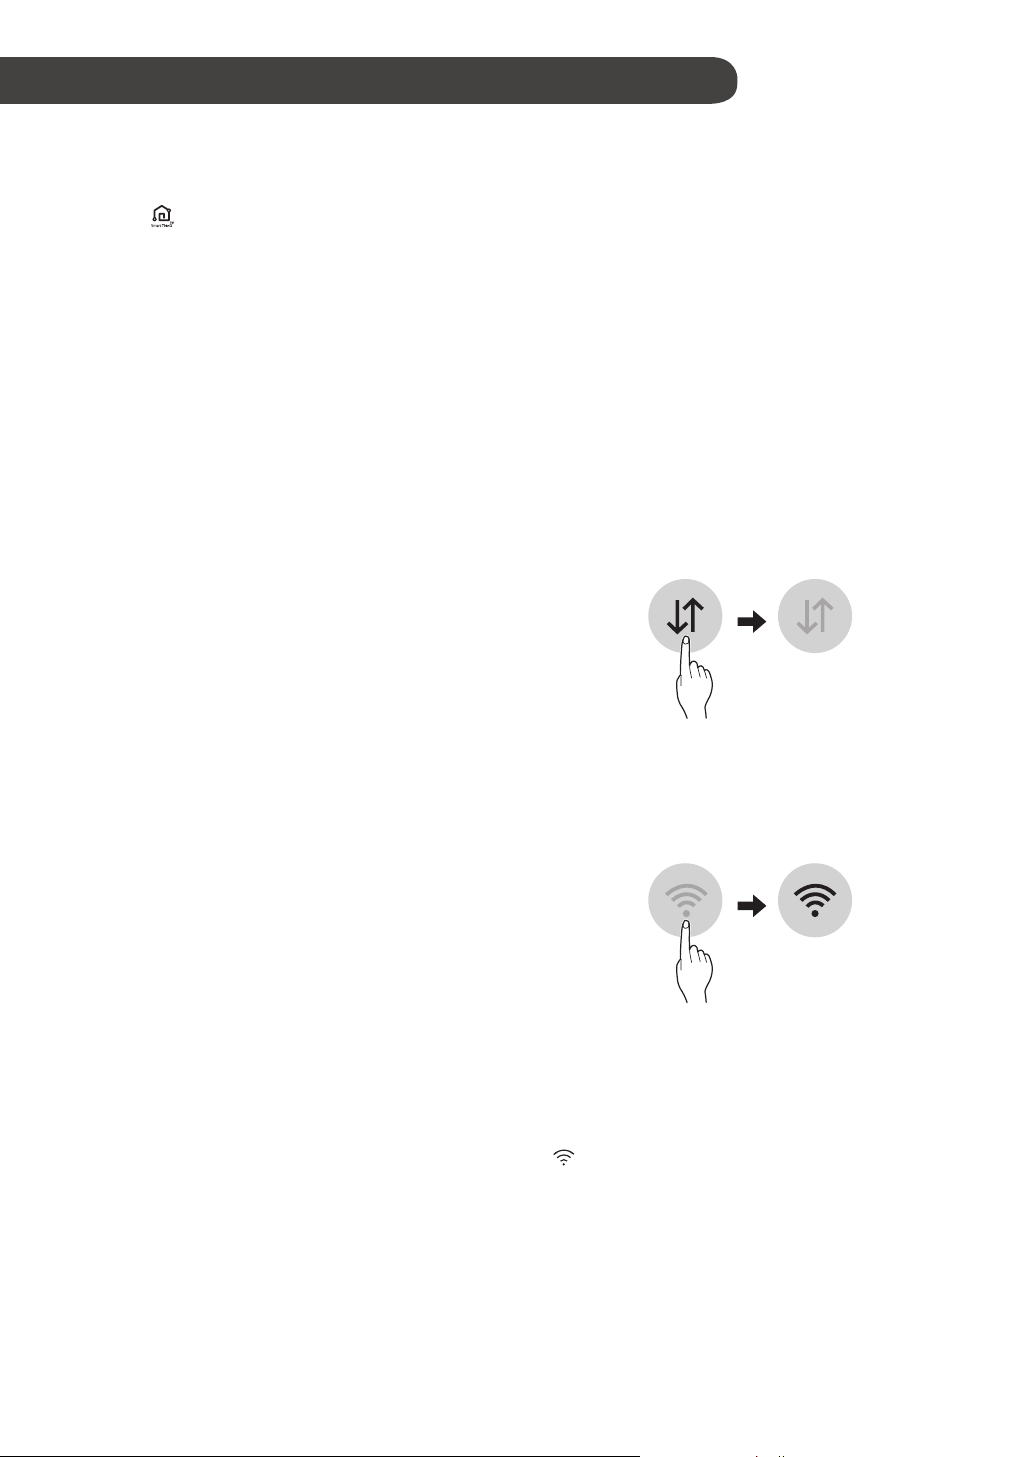
Turn off the Mobile data
2
or Cellular Data on your smartphone.
NOTE
• If you change your wireless router,
internet service provider, or password,
delete the registered appliance from
the LG ThinQ application and register it
again.
• The application is subject to change for
appliance improvement purposes without
notice to users.
• Functions may vary by model.
Connect your smartphone to the
3
wireless router.
NOTE
• To verify the Wi-Fi connection, check that
icon on the control panel is lit.
26

• The appliance supports 2.4 GHz Wi-Fi
networks only. To check your network
frequency, contact your Internet service
provider or refer to your wireless router
manual.
• LG ThinQ is not responsible for any
network connection problems or any
faults, malfunctions, or errors caused by
network connection.
• If the appliance is having trouble
connecting to the Wi-Fi network, it may
be too far from the router. Purchase a WiFi repeater (range extender) to improve
the Wi-Fi signal strength.
Installing the LG ThinQ
Application
Search for the LG ThinQ application from
the Google Play Store or Apple App Store
on a smartphone. Follow instructions to
download and install the application.
Open Source Software Notice
Information
To obtain the source code under GPL,
LGPL, MPL, and other open source
licenses, that is contained in this product,
please visit http://opensource.lge.com.
ENGLISH
FRANÇAIS ESPAÑOL
• The Wi-Fi connection may not connect or
may be interrupted because of the home
network environment.
• The network connection may not work
properly depending on the Internet
service provider.
• The surrounding wireless environment
can make the wireless network service
run slowly.
• The appliance cannot be registered due
to problems with the wireless signal
transmission. Unplug the appliance and
wait about a minute before trying again.
• If the firewall on your wireless router is
enabled, disable the firewall or add an
exception to it.
• The wireless network name (SSID)
should be a combination of English
letters and numbers. (Do not use special
characters.)
In addition to the source code, all referred
license terms, warranty disclaimers
and copyright notices are available for
download.
LG Electronics will also provide open
source code to you on CD-ROM for a
charge covering the cost of performing
such distribution (such as the cost of
media, shipping, and handling) upon email
request to opensource@lge.com. This
offer is valid for a period of three years
after our last shipment of this product. This
offer is valid to anyone in receipt of this
information.
• Smartphone user interface (UI) may
vary depending on the mobile operating
system (OS) and the manufacturer.
• If the security protocol of the router
is set to WEP, you may fail to set
up the network. Please change it to
other security protocols (WPA2 is
recommended) and register the product
again.
27

Smart Diagnosis
This feature is only available on models
with the or logo.
Use this feature to help you diagnose and
solve problems with your appliance.
NOTE
• For reasons not attributable to LGE’s
negligence, the service may not operate
due to external factors such as, but not
limited to, Wi-Fi unavailability, Wi-Fi
disconnection, local app store policy, or
app unavailability.
• The feature may be subject to change
without prior notice and may have a
different form depending on where you
are located.
Using LG ThinQ to Diagnose
Issues
If you experience a problem with your
Wi-Fi equipped appliance, it can transmit
troubleshooting data to a smartphone
using the LG ThinQ application.
Using Audible Diagnosis to
Diagnose Issues
Follow the instructions below to use the
audible diagnosis method.
• Launch the LG ThinQ application and
select the Smart Diagnosis feature in
the menu. Follow the instructions for
audible diagnosis provided in the LG
ThinQ application.
Plug the power plug in the outlet
1
properly.
Place the mouthpiece of your
2
smartphone close to the or logo.
Press and hold the DIAGNOSIS [5 s]
3
button for 5 seconds or longer while
holding the smartphone mouthpiece
to the logo until the data transfer is
complete.
• Keep the smartphone in place
until the data transfer has finished.
Time remaining for data transfer is
displayed.
• Launch the LG ThinQ application and
select the Smart Diagnosis feature
in the menu. Follow the instructions
provided in the LG ThinQ application.
After the data transfer is complete,
4
the diagnosis will be displayed in the
application.
NOTE
• For best results, do not move the phone
while the tones are being transmitted.
• Be sure to keep ambient noise to a
minimum or the phone may not correctly
receive the buzzer beeps from the indoor
unit.
28

Wireless LAN Module Specifications
Model LCW-003
Frequency
Range
Output
Power(Max)
2412 to 2472 MHz
IEEE 802.11b:18.37 dBm
IEEE 802.11g:17.67 dBm
IEEE 802.11n:17.67 dBm
Wireless function S/W version : V 1.0
For consideration of the user, this device
should be installed and operated with a
minimum distance of 20 cm between the
device and the body.
Declaration of Conformity
Hereby, LG Electronics declares that the
radio equipment type Air conditioner is in
compliance with Directive 2014/53/EU. The
full text of the EU declaration of conformity
is available at the following internet
address:
ENGLISH
FRANÇAIS ESPAÑOL
http://www.lg.com/global/support/cedoc/
cedoc#
LG Electronics European Shared Service
Centre B.V.
Krijgsman 1
1186 DM Amstelveen
The Netherlands
29

MAINTENANCE
WARNING
• Before cleaning or performing maintenance, disconnect the power supply and wait
until the fan stops.
If the air conditioner will not be used for an extended period of time, dry the air
conditioner to maintain it in best condition. Clean the product regularly to maintain optimal
performance and to prevent possible breakdown.
• Dry the air conditioner in Fan mode for 3 to 4 hours and disconnect the power. There
may be internal damage if moisture is left in its components.
• Before using the air conditioner again, dry the inner components of the air conditioner in
Fan mode for 3 to 4 hours. This will help to remove the odor generated from moisture.
Air Filter
• The feature may be changed according to the type of model.
30

Type Description Interval
Air filter Clean with a vacuum or hand wash. 2 weeks
Triple filter Clean with a vacuum or brush.
Micro dust
filter
Ionizer
(Optional)
Clean with a vacuum or brush.
Use dry cotton bud to remove any dust.
Clean the Indoor unit surface by using a soft, dry cloth. Regularly
Have a professional clean the condensate drain pan. Once a year
Indoor unit
Have a professional clean the condensate drain pipe.
Replace the remote control batteries. Once a year
Have a professional clean the heat exchanger coils and
the panel vents. (Consult with technician.)
Have a professional clean the fan. Once a year
Outdoor unit
Have a professional clean the condensate drain pan. Once a year
Have a professional verify that all the fan assembly is
firmly tightened.
Clean the electric components with air. Once a year
Every 3
months
Every 6
months
Every 6
months
Every 4
months
Once a year
Once a year
ENGLISH
FRANÇAIS ESPAÑOL
NOTE
• Never use water that is higher than 40 °C when you clean the filters. It may cause
deformation or discoloration.
• Never use volatile substances when you clean the filters. They may damage the surface
of the product.
• Do not wash the Micro dust filter with water, because the filter can be damaged
(Optional).
• Do not wash the Triple filter with water, because the filter can be damaged (Optional).
31

Clean the Air Filter
Clean the air filters once every 2 weeks, or
more, if necessary.
NOTE
• The air filter can be broken when it is
bent.
• When the air filter is not assembled
correctly, dust and other substances can
enter into the indoor unit.
Push down hooks to assemble the air
7
filter.
Check the side of the front cover for
8
correct assembly of the air filter.
Type1
If you look at the indoor unit from above it,
can assemble the top filter easily.
Turn off the power to the unit.
1
Hold the knobs of the air filter, lift it up
2
slightly.
Remove it from the indoor unit.
3
Type2
Turn off the power to the unit.
1
Open the front cover.
2
• Lift up both sides of the cover slightly.
Hold the knobs of the air filters, pull
3
them down slightly and remove them
from the indoor unit.
Clean the filters with a vacuum cleaner
4
or with lukewarm water with neutral
detergent.
Dry the filters in the shade.
5
Clean the filter with a vacuum cleaner
4
or with lukewarm water with neutral
detergent.
Dry the filter in the shade.
5
Insert the hooks of the air filter into the
6
front cover.
32
Insert the hooks of the air filters into the
6
front cover.
Check the side of the front cover for
7
correct assembly of the air filters.

Clean the Micro Dust and
Triple Filter (Optional)
Turn off the power to the unit.
1
Remove the air filters from the indoor
2
unit.
Insert the Micro dust and Triple filter.
5
Type1
ENGLISH
Remove the Micro dust and Triple filter
3
from the indoor unit.
Type1
Type2
Clean the filter with a vacuum cleaner.
4
Type2
Assemble the air filters.
6
Check the side of the front cover for
7
correct assembly of the air filters.
NOTE
• The feature and location of Micro dust
and Triple filter may vary according to the
type of model.
FRANÇAIS ESPAÑOL
33

TROUBLESHOOTING
Self-diagnosis Function
This product has a built-in self-diagnosis function. If an error occurs, the lamp of the indoor
unit will blink in 2 second intervals. If this occurs, contact your local dealer or service
center.
Before Calling for Service
Please check the following before you contact the service center. If the problem persists,
contact your local service center.
Symptoms Possible Causes & Solution
Burning smell and strange sounds are coming from the unit.
• Turn off the air conditioner, switch OFF, or disconnect the power
supply, and contact the service center.
Water leaks from the indoor unit even when the humidity level
is low.
• Turn off the air conditioner, switch OFF, or disconnect the power
supply, and contact the service center.
The air
conditioner
does not work
normally.
The power cable is damaged or it is generating excessive heat.
• Turn off the air conditioner, switch OFF, or disconnect the power
supply, and contact the service center.
A switch, a circuit breaker (safety, ground), or a fuse is not
operated properly.
34
• Turn off the air conditioner, switch OFF, or disconnect the power
supply, and contact the service center.
The unit generates an error code from its self-diagnosis.
• Turn off the air conditioner, switch OFF, or disconnect the power
supply, and contact the service center.

Symptoms Possible Causes & Solution
The air conditioner is unplugged.
• Check whether the power cord is plugged into the outlet or the
power isolators are switched on.
A fuse exploded, or the power supply is blocked.
• Replace the fuse or check if the circuit breaker has tripped.
ENGLISH
The air
conditioner
does not work.
A power failure has occurred.
• Turn off the air conditioner when a power failure occurs.
• When the power is restored, wait 3 minutes, and then turn on the
air conditioner.
The voltage is too high or too low.
• Check if the circuit breaker has tripped.
The air conditioner was turned off automatically at a preset
time.
• Turn the air conditioner on.
The battery setting in the remote controller is incorrect.
• Make sure that the batteries are inserted correctly in your remote
controller.
• If the batteries are placed correctly, but the air conditioner still
does not operate, replace the batteries and try again.
FRANÇAIS ESPAÑOL
35

Symptoms Possible Causes & Solution
Air is not circulating properly.
• Make sure that there are no curtains, blinds, or pieces of furniture
blocking the front of the air conditioner.
The air filter is dirty.
• Clean the air filter once every 2 weeks.
• See “Clean the Air Filter” for more information.
The room temperature is too high.
• In summer, cooling the indoor air fully may take some time. In this
case, select the Jet Mode to cool the indoor air quickly.
Cold air is escaping from the room.
• Make sure that no cold air is escaping through the ventilation
The air
points in the room.
conditioner
does not emit
cool air.
The desired temperature is higher than the current
temperature.
• Set the desired temperature to a level lower than the current
temperature.
The fan speed
cannot be
adjusted.
The temperature
cannot be
adjusted.
There is a heating source nearby.
• Avoid using heat generators like electric ovens or gas burners
while the air conditioner is in operation.
Fan Mode is selected.
• During Fan Mode, air blows from the air conditioner without
cooling or heating the indoor air.
• Switch the operation mode to cooling operation.
Outside temperature is too high.
• The cooling effect may not be sufficient.
The Jet Mode, or Auto Operation Mode is selected.
• In some operation modes, you cannot adjust the fan speed. Select
an operation mode in which you can adjust the fan speed.
The Fan Mode or Jet Mode is selected.
• In some operation modes, you cannot adjust the temperature.
Select an operation mode in which you can adjust the
temperature.
36

Symptoms Possible Causes & Solution
The air conditioner is suddenly turned off.
• The Timer Function may have timed out, which turns the unit off.
The air
Check the timer settings.
conditioner
stops during
operation.
A power failure has occurred during operation.
• Wait for the power to come back. If you have the Auto Restart
function enabled, your unit will resume its last operation several
minutes after power is restored.
ENGLISH
FRANÇAIS ESPAÑOL
The indoor unit
is still operating
even when the
unit has been
turned off.
The air outlet on
the indoor unit
is discharging
mist.
Water leaks
from the
outdoor unit.
There is noise
or vibration.
The Auto Clean function is being operated.
• Allow the Auto Clean function to continue since it removes any
remaining moisture inside the indoor unit. If you do not want this
feature, you can turn the unit off.
The cooled air from the air conditioner makes mist.
• When the room temperature decreases, this phenomenon will
disappear.
In the heating operations, condensed water drops from the
heat exchanger.
• This symptom requires installing a drain hose under the base pan.
Contact the installer.
A clicking sound can be heard when the unit starts or stops
due to movement of the reversing valve.
Creaking sound: The plastic parts of the indoor unit creak
when they shrink or expand due to sudden temperature
changes.
Flowing or Blowing sound: This is the flow of refrigerant
through the air conditioner.
• These are normal symptoms. The noise will stop.
37

Symptoms Possible Causes & Solution
Odors (such as cigarette smoke) may be absorbed into the
The indoor unit
gives off an
odor.
indoor unit and discharged with airflow.
• If the smell does not disappear, you need to wash the filter. If
this does not work, contact the service center to clean your heat
exchanger.
When Heating Mode starts, the vane is almost closed, and no
air comes out, even though the outdoor unit is operating.
• This symptom is normal. Please wait until the unit has generated
The air
conditioner
does not emit
warm air.
enough warm air to blow through the indoor unit.
The outdoor unit is in Defrosting Mode.
• In Heating Mode, ice/frost is built up on the coils when the outside
temperature falls. This function removes a layer of frost on the coil,
and it should finish in approximately 15 minutes.
Outside temperature is too low.
• The heating effect may not be sufficient.
38

Symptoms Possible Causes & Solution
The password for the Wi-Fi that you are trying to connect to is
incorrect.
Your home
appliance and
smartphone is
not connected
to the Wi-Fi
network.
• Find the Wi-Fi network connected to your smartphone and remove
it, then register your appliance on LG SmartThinQ.
Mobile data for your smartphone is turned on.
• Turn off the Mobile data of your smartphone and register the
appliance using the Wi-Fi network.
The wireless network name (SSID) is set incorrectly.
• The wireless network name (SSID) should be a combination of
English letters and numbers. (Do not use special characters.)
The router frequency is not 2.4 GHz.
• Only a 2.4 GHz router frequency is supported. Set the wireless
router to 2.4 GHz and connect the appliance to the wireless router.
To check the router frequency, check with your Internet service
provider or the router manufacturer.
The distance between the appliance and the router is too far.
• If the distance between the appliance and the router is too far, the
signal may be weak and the connection may not be configured
correctly. Move the location of the router so that it is closer to the
appliance.
ENGLISH
FRANÇAIS ESPAÑOL
NOTE
• Some functions may not be supported, depending on the model.
39

Memo

KULLANICI EL KİTABI
KLİMA
Kullanmadan önce bu el kitabını dikkatli bir şekilde
okuyun ve ileride başvurmak üzere kolayca
ulaşabileceğiniz bir yerde tutun.
TİP: DUVAR TİPİ
www.lg.com
Telif Hakkı © 2018 - 2020 LG Electronics Inc. Tüm hakları saklıdır

İÇİNDEKİLER
Talimatları okumanız kurulumu
kolaylaştıracak ve ürünün doğru
ve güvenli şekilde kurulmasını
sağlayacaktır.
Bu el kitabında üretici tarafından
değişiklik yapılabilir.
GÜVENLİK TALİMATLARI .........................3
Önemli Güvenlik Talimatları ...........................................4
Eski cihazınızın atılması ................................................8
KULLANIM ...................................................9
Kullanım için Notlar ........................................................ 9
Parçalar ve İşlevleri........................................................9
Kablosuz Uzaktan Kumanda........................................10
Klimanın Otomatik Olarak Başlatılması .......................15
Mod İşlevini Kullanma .................................................. 15
Jet Mod İşlevini Kullanma ............................................17
Fan Hız İşlevini Kullanma ............................................18
Hava Akım Yönü İşlevini Kullanmak ............................18
Açma/Kapama Zamanlayıcısını Ayarlama ................... 19
Uyku İşlevini Kullanma (İsteğe Bağlı) ..........................20
Temel Zamanlayıcı İşlevini Kullanma (İsteğe Bağlı) ....20
Enerji Gösterge İşlevini Kullanma (İsteğe Bağlı)..........21
Işıkları Kapatma İşlevini Kullanma (İsteğe Bağlı).........21
Konforlu Hava İşlevini Kullanma (İsteğe Bağlı) ............ 21
Enerji Tasarrufu İşlevini Kullanma (İsteğe Bağlı) .........22
Enerji Denetim İşlevini Kullanma (İsteğe Bağlı) ........... 22
Özel İşlevlerin Kullanılması .......................................... 23
SMART ÖZELLİKLERİ .............................26
LG ThinQ Uygulaması .................................................26
Smart Diagnosis (Akıllı Tanılama) ................................ 28
BAKIM ........................................................30
Hava Filtresinin Temizlenmesi .....................................32
Mikro toz filtresi ve Üçlü Filtreyi temizleyin
(İsteğe Bağlı)................................................................33
SORUN GİDERME ....................................34
Teknik Özellikler ........................................................... 40
GARANTİ ŞARTLARI ..................................................41

GÜVENLİK TALİMATLARI
Aşağıdaki güvenlik kurallarıyla görünmeyen tehlikeleri veya ürünün güvenli
olmayan ya da yanlış kullanımından kaynaklanan hasarların önlenmesi
amaçlanmıştır.
Kurallar aşağıda tanımlandığı şekilde "UYARI" ve "DİKKAT" olarak ayrılmıştır.
ENGLISH
Bu sembol tehlikeye neden olabilecek sorunları ve kullanımları belirtmek
için gösterilir. Bu sembolün bulunduğu kısmı dikkatli bir şekilde okuyun
ve tehlikeden kaçınmak için talimatları uygulayın.
UYARI
Bu sembol talimatların uygulanmamasının ciddi yaralanma veya ölüme
neden olabileceğini gösterir.
DİKKAT
Bu sembol talimatların uygulanmamasının yaralanmaya veya ürünün hasar
görmesine neden olabileceğini gösterir.
Aşağıdaki semboller iç mekan ve dış mekan ünitelerinde yer alır.
Bu semboller, bu cihazda yanıcı bir soğutucu madde kullanıldığını gösterir.
Soğutucu kaçağı söz konusu olması ve harici bir tutuşturucu kaynağa
maruz kalması durumunda yangın riski söz konusudur.
Bu sembol, Kullanım Kılavuzunun dikkatli bir şekilde okunması gerektiğini
gösterir.
TÜRKÇE ESPAÑOL
Bu sembol, bu ekipmanın, Montaj Kılavuzu referans olarak kullanılarak, bir
servis elemanı tarafından monte edilmesi gerektiğini gösterir.
Bu sembol, Kullanım Kılavuzu ya da Montaj Kılavuzunda ilgili bilgilerin yer
aldığını gösterir.
3

Önemli Güvenlik Talimatları
UYARI
Ürün kullanılırken patlama, yangın, ölüm, elektrik çarpması, yaralanma veya
yanma riskini azaltmak için aşağıdakiler de dahil olmak üzere temel önlemleri
uygulayın:
Evde Bulunan Çocuklar
Gözetim altında veya cihazın güvenli şekilde nasıl kullanılacağına ilişkin talimatları
almış ve meydana gelen tehlikeleri anlamışlar ise 8 yaşından büyük çocuklar, sınırlı
fiziksel, algısal veya zihinsel becerileri olan kişiler ve deneyim ve/veya bilgi eksikliği
olan kişiler tarafından bu cihaz kullanılabilir.
Avrupa'da Kullanım:
Bu cihaz 8 yaşından büyük çocuklar tarafından gözetimde bulunulursa veya cihazın
güvenli şekilde nasıl kullanılacağına ilişkin talimatları almış ve meydana gelen
tehlikeleri anlamışlar ise sınırlı fiziksel, algısal veya zihinsel becerileri olan kişiler
ve deneyim ve/veya bilgi eksikliği olan kişiler tarafından kullanılabilir. Çocuklar
cihaz ile oynamamalıdır. Temizleme ve bakım gözetim altında tutulmadan çocuklar
tarafından yapılmamalıdır.
Kurulum
• Klimayı sabit olmayan yüzeye veya düşme tehlikesi bulunan yerlere kurmayın.
• Klimayı kurarken veya yerini değiştirirken yetkili servis merkezi ile iletişim kurun.
• Paneli kurun ve güvenlik kutusunu dikkatli şekilde kapatın.
• Benzin, propan, tiner vb yanıcı sıvıların veya gazların bulunduğu yerlere klimayı
kurmayın.
• Klimayı kurarken iç mekan ve dış mekan ünitelerini birbirine bağlayan boru ve güç
kablolarının çok çekilmediğinden emin olun.
• Klimanın derecesini karşılayan standart devre kesici ve sigorta kullanın.
• Sistem içine özel soğutucu dışında hava veya gaz girmesine izin vermeyin.
• Sızıntı veya tasfiye havasını kontrol etmek için yanıcı olmayan gaz (nitrojen)
kullanın, basınçlı hava veya yanabilir gaz kullanmak yangına veya patlamaya
neden olabilir.
• İç mekan/dış mekan bağlantıları sıkıca sağlamlaştırılmış olmalıdır ve kablo,
bağlantı terminallerinden kablonun çekilmeyeceği şekilde doğru şekilde
dolaşmamalıdır. Uygun olmayan ve gevşek bağlantılar ısı üretimine veya yangına
neden olabilir.
• Klimayı kullanmadan önce bağlı elektrik çıkışını ve devre kesiciyi kurun.
• Topraklama telini gaz borusuna, yakalama ucuna veya telefon topraklama teline
bağlamayın.
• Gerekli tüm havalandırma açıklıkları için herhangi bir engelleme olmadığından
emin olun.
4

• Bağlantı kesme yöntemi, kablo tesisatı kurallarına uygun olarak sabit kablo
tesisatında gerçekleştirilmelidir.
Kullanım
• Yalnızca servis parça listesinde listelenen parçaları kullandığınızdan emin olun.
Asla ekipmanı değiştirmeye çalışmayın.
• Çocukların dış mekan ünitesine tırmanmadığından veya çarpmadığından emin
olun.
• Pilleri yangın tehlikesinin olmadığı yere atın.
• Yalnızca klima etiketinin üzerinde belirtilen soğutucuyu kullanın.
• Klimadan ses, koku veya duman gelmesi halinde güç kaynağını kesin.
• Klimanın yanında benzin, benzen veya tiner gibi yanıcı maddeler bırakmayın.
• Su taşması nedeniyle klimanın ıslanması halinde yetkili servis merkezi ile iletişime
geçin.
• Klimayı uzun süre uygun havalandırma olmayan küçük alanlarda kullanmayın.
• Gaz kaçağı halinde (Freon, propan gazı, LP gazı vb) klimayı yeniden
kullanmadan önce etkili şekilde havalandırın.
• Klimanın içini temizlemek için yetkili servis merkezi veya bayi ile iletişime geçin.
Sert deterjanların kullanılması ünitenin aşınmasına veya hasar görmesine neden
olabilir.
• Klima ve ısıtıcı gibi ısıtma cihazı aynı anda kullanıldığında yeterli şekilde
havalandırdığınızdan emin olun.
• Hava akışının girişini veya çıkışını engellemeyin.
• Klima çalışıyorken hava girişi veya çıkışına elinizle veya diğer nesnelerle
müdahale etmeyin.
• Güç kablosunun kirli, gevşek veya bükülmüş olmadığından emin olun.
• Elleriniz ıslakken asla klimaya dokunmayın, çalıştırmayın veya tamir etmeyin.
• Güç kablosunun üzerine herhangi bir eşya koymayın.
• Güç kablosunun yanına ısıtıcı veya diğer ısıtıcı cihazlar yerleştirmeyin.
• Güç kablosunu değiştirmeyin veya uzatmayın. Güç kablosunun üzerindeki
yırtılmalar veya soyulmalar yangına veya elektrik çarpmasına neden olabilir ve
değiştirilmelidir.
• Elektrik kesilmesi veya fırtına olması durumunda güç kaynağını hemen kesin.
• Çalıştırma esnasında güç kablosunun kopmayacağından veya hasar
görmeyeceğinden emin olunuz.
• Soğutucu akışkan borusu yada herhangi iç ünite parçasına ünite çalışırken
dokunmayınız.
ENGLISH
TÜRKÇE ESPAÑOL
Bakım
• Temizlemeden veya bakım yapmadan önce, güç kaynağının bağlantısını kesin ve
fanlar durana kadar bekleyin.
• Ürüne doğrudan su püskürterek temizlemeyin.
5

Teknik Güvenlik
• Yetkili olmayan kişiler tarafından yapılan kurulum veya tamirler size ve diğer
kişilere zarar verebilir.
• Soğutucu devresi üzerinde çalışan herkesin sektör tarafından tanınmış
değerlendirme niteliklerine uygun olarak soğutucu üzerinde çalışma yetkinliklerini
onaylayan, sektör tarafından kabul edilen bir değerlendirme yetkili kurumu
tarafından düzenlenmiş geçerli bir sertifika sahibi olması gereklidir.
• Servis işlemleri sadece ekipman üreticisi tarafından tavsiye edildiği şekilde
gerçekleştirilmelidir. Farklı ustalıklara sahip diğer çalışanların desteğini gerektiren
bakım ve onarım işlemleri yanıcı soğutucuların kullanımı konusunda yetkin olan
bir kişinin gözleminde gerçekleştirilmelidir.
• El kitabında bulunan bilgilerin güvenlik prosedürlerini bilen ve uygun araç ve test
aletlerine sahip yetkili servis teknisyeni tarafından kullanılması amaçlanmıştır.
• Bu el kitabındaki tüm talimatların okunmaması veya uygulanmaması ekipmanın
hatalı çalışma, hasarlanma, kişisel yaralanma ve/veya ölümle sonuçlanabilir.
• Cihaz ulusal kablolama düzenlemelerine uygun şekilde kurulmalıdır.
• Güç kablosunun yenilenmesi gerektiğinde, yenileme işi yalnızca orijinal yedek
parçalar kullanılarak yetkili personel tarafından yapılmalıdır.
• Cihaz elektrik çarpmasını önlemek için uygun şekilde topraklanmış olmalıdır.
• Yerleştirme ucunu güç kaynağından kesmeyin veya çıkarmayın.
• Kapak vidası metal, yalıtımsız ve duvar yuvası evin elektrik tesisatı ile
topraklanmadıkça adaptör toprak terminalini duvar yuvası kapak vidasına
bağlamak cihazın topraklanmış olmasını sağlamaz.
• Klimanın doğru şekilde topraklanmış olup olmadığından emin değilseniz, yetkili bir
elektrikçinin duvar yuvasını ve akımı kontrol etmesini sağlayın.
• Cihazda kullanılan soğutucu ve yalıtımlı üfleme gazı özel imha prosedürleri
gerektirmektedir. İmha etmeden önce servis temsilcisine veya yetkili bir kişiye
danışın.
• Güç Kablosu hasar gördüyse, tehlikeyi önlemek için üretici veya servis temsilcisi
veya benzer şekilde yetkili bir kişi tarafından değiştirilmelidir.
• Cihaz, oda büyüklüğünün çalışma için belirtilmiş olan büyüklüğe uygun olduğu iyi
bir şekilde havalandırılan bir yerde depolanmalıdır.
• Cihazlar sürekli olarak çalışan açık alevlerin (örneğin çalışmakta olan bir gazlı
cihaz) ve tutuşturucu kaynakların (örneğin çalışmakta olan bir elektrikli ısıtıcı) söz
konusu olmadığı bir şekilde depolanmalıdır.
• Cihaz, mekanik hasar almayacak şekilde depolanmalıdır.
6

DİKKAT
Kişilerin yaralanması, ürünün düzgün şekilde çalışmaması veya hasar gelme
tehlikesini azaltmak için bu ürünü kullanırken aşağıdakiler dahil olmak üzere
temel önlemleri uygulayın:
Kurulum
• Klimayı doğrudan denizden gelen rüzgara (tuz serpintisi) maruz kalan alanlara
kurmayın.
• Su yoğunlaşmasının düzgün şekilde tahliye olması için tahliye hortumu takın.
• Klimanın paketini açarken ve kurarken dikkat edin.
• Kurulum veya tamir sırasında sızan soğutucuya dokunmayın.
• Klimayı iki veya daha fazla kişi ile taşıyın veya forklift kullanın.
• Dış mekan ünitesini doğrudan güneş ışığına maruz gelmeyecek şekilde kurun. İç
mekan ünitesini, pencerelerden güneş ışığına maruz kalmayacak şekilde kurun.
• Kurulum veya tamirden sonra uygun paketleme araçlarını kullanarak vida, çivi
veya pil gibi paketleme malzemelerini güvenli şekilde imha edin.
• Klimayı dış mekan ünitesinden gelen ses veya atım dumanı komşuları rahatsız
etmeyecek yere kurun. Dikkat edilmemesi komşularınızla sorun yaşamanıza
neden olabilir.
Kullanım
ENGLISH
TÜRKÇE ESPAÑOL
• Uzaktan kumanda uzun süredir kullanılmıyorsa pillerini çıkarın.
• Klima çalıştırılmadan önce filtrenin kurulduğundan emin olun.
• Klima kurulduktan veya tamir edildikten sonra soğutucunun sızmadığından emin
olun.
• Klimanın üzerine herhangi bir eşya koymayın.
• Uzaktan kumanda için farklı tür pilleri veya eski ve yeni pilleri asla karıştırarak
kullanmayın.
• Nem çok yüksek olduğunda veya kapı ya da pencere açık bırakıldığında klimayı
uzun süre çalıştırmayın.
7

• Pilde sıvı sızıntısı olduğunda, uzaktan kumandayı kullanmayın. Kıyafetleriniz veya
cildiniz sızan pil sıvısına maruz kaldıysa, temiz suyla yıkayın.
• İnsanların, hayvanların veya bitkilerin uzun süre klimadan gelen sıcak veya soğuk
havaya maruz kalmasını engelleyin.
• Sızan pil sıvısını yuttuysanız, ağzınızın içini bol suyla yıkan ve bir doktora danışın.
• Klimadan tahliye edilen suyu içmeyin.
• Ürünü yemek, sanat eserleri saklamak vb. özel amaçlar için kullanmayın. Klima,
hassas soğutma sistemi değil, tüketici amaçlıdır. Hasar veya kayıp tehlikesi vardır.
• Pilleri yeniden şarj etmeyin veya parçalamayın.
Bakım
• Hava filtresini kaldırırken klimanın metal parçalarına asla dokunmayın.
• Klimayı yüksekte temizlerken bakım yaparken veya tamir ederken sağlam bir
tabure veya merdiven kullanın.
• Klimayı temizlerken güçlü temizlik malzemeleri veya çözücüler kullanmayın,
doğrudan su püskürtmeyin. Yumuşak bir bez kullanın.
Eski cihazınızın atılması
• Tüm elektrikli ve elektronik atıklar, devlet ya da yerel yetkililer tarafından
belirlenen toplama merkezlerinde ayrı olarak imha edilmelidir. Atık eletrikli
ve elektronik aletler belediyeler tarafından kurulan toplama noktalarına
teslim edilmeli veya aldığınız yeni ürünü satıcınız adresinize teslim ederken,
satıcınızdan atık elektrikli ve elektronik aletinizi teslim almasını istemelisiniz.
• Atık ürünün doğru imhası çevre ve insan sağlığı üzerindeki potansiyel
olumsuz sonuçların engellenmesine yardımcı olacaktır.
• Bu işareti içeren ürünler tehlikeli madde içerebilir. Ürünler içerisindeki
tehlikeli maddeler çevre kirlenmesine veya yaralanma/ölüme sebebiyet
verebilir.
• AEEE Yönetmeliğine Uygundur.
• Eski ürününüzün imhası hakkında daha fazla bilgi için lütfen belediyeniz ya
da ürünü aldığını mağaza ile iletişime geçiniz. (www.lg.com/global/recycling)
8

KULLANIM
6
7
Kullanım için Notlar
Enerji Tasarrufu için Öneriler
• İç mekanı aşırı derecede soğutmayın. Sağlığınız için zararlı olabilir veya daha fazla
elektrik tüketimine neden olabilir.
ENGLISH
• Klimayı çalıştırırken panjur veya perdelerle güneş ışığını engelleyin.
• Klimayı çalıştırırken kapıları ve pencereleri sıkıca kapatın.
• İç mekan havasının yatay veya dikey olarak akmasını sağlamak için, hava akımının
yönünü ayarlayın.
• Kısa süre içinde iç mekan havasını hızlı şekilde ısıtmak veya soğutmak için fanı
hızlandırın.
• İç mekan havasını havalandırmak için düzenli olarak pencereleri açmak uzun süreli
kullanıldığında klimanın bozulmasına neden olabilir.
• Hava filtresini 2 haftada bir temizleyin. Hava filtresinde toplanan toz ve kirler hava akışını
engelleyebilir veya cihaz performansını düsürebilir.
Parçalar ve İşlevleri
İç Mekan Ünitesi Dış Mekan Ünitesi
TÜRKÇE ESPAÑOL
1
Hava Filtresi
2
Hava Girişi
3
Ön Kapak
4
Hava Çıkışı
5
Hava Deflektörü (Yatay panel)
1
Hava Giriş Delikleri
2
Hava Çıkış Delikleri
Hava Deflektörü (Dikey hava deliği)
Açma/Kapama Düğmesi
NOT
• Kullanım lambalarının sayısı ve konumu klimanın modeline göre değişiklik gösterebilir.
• Modelin türüne göre özellikler değişebilir.
9

Kablosuz Uzaktan Kumanda
SWING
kW [3 s]
Pillerin Takılması
Uzaktan kumandanın gösterge ekranı
zayıflamaya başladığında, pilleri değiştirin.
Uzaktan kumandayı kullanmadan önce
AAA (1,5 V) pil takın.
Pil kapağını çıkarın.
1
Kullanım yöntemi
Çalıştırmak için uzaktan kumandayı
klimanın sağ tarafındaki sinyal alıcısına
doğru tutun.
NOT
Yeni pilleri takın ve pilin + ve -
2
kutuplarının doğru şekilde takıldığından
emin olun.
Uzaktan Kumanda Tutucusunun
Takılması
Uzaktan kumandayı korumak için,
doğrudan güneş ışığının olmadığı bir yere
tutucuyu takın.
Güvenli ve kolayca erişilebilir bir yer
1
seçin.
Tutucuyu, tornavida ile 2 vidayla
2
sıkarak sabitleyin.
• Uzaktan kumanda, diğer elektronik
cihazlara doğru tutulursa onları
çalıştırabilir. Uzaktan kumandayı klimanın
sinyal alıcısına doğru tuttuğunuzdan
emin olun.
• Doğru şekilde kullanım için, sinyal
aktarıcısı ve alıcısını temizlemek için
yumuşak bir bez kullanın.
• Üründe sağlanmayan bir işlev söz
konusu olduğunda, uzaktan kumanda
üzerinde bu işlev için bir düğmeye
basıldığında, Hava Akım Yönü (
Enerji Ekranı (
( ) hariç bir alarm sesi oluşmaz.
), Hava Temizleme işlevi
),
10

Saatin Ayarlanması
℃↔℉ [5 s]
SWING
ON/OFF
Pilleri takın.
1
• Gösterge ekranının altındaki
aşağıdaki simge yanıp söner.
Dakikaları seçmek için veya
2
düğmelerine basın.
Bitirmek için SET/CANCEL
3
düğmelerine basın.
NOT
Uzaktan Kumanda Olmadan
Klimayı Çalıştırma
Uzaktan kumanda olmadığında klimayı
çalıştırmak için iç mekan ünitesinin ON/
OFF düğmesini kullanabilirsiniz.
Ön kapağı (Tip2) veya yatay paneli
1
(Tip1) açın.
ON/OFF düğmesine basın.
2
Tip1
ENGLISH
TÜRKÇE ESPAÑOL
• Geçerli saati ayarladıktan sonra
Zamanlayıcıyı Açma/Kapama
kullanılabilir.
°C/°F Dönüştürme İşlevini
Kullanma (İsteğe Bağlı)
Bu işlev birimleri °C ve °F arasında
değiştirir.
• 5 saniye boyunca
tutun.
düğmesine basılı
ON/OFF
Tip2
NOT
• Yatay panel hızlıca açılırsa adımlı motor
kırılabilir.
• Fan hızı hızlı olarak ayarlıdır.
• Modelin türüne göre özellikler değişebilir.
• Sıcaklık bu acil ON/OFF düğmesi
kullanılırken değiştirilemez.
• Yalnızca soğutucu modeller için sıcaklık
22 °C olarak ayarlanmıştır.
• Yalnızca soğutucu ve ısıtıcı modeller
için sıcaklık 22 °C ila 24 °C olarak
ayarlanmıştır.
11

Kablosuz Uzaktan Kumandanın Kullanılması
RESET
SWING
SWING
Klimayı uzaktan kumanda ile daha rahat kullanabilirsiniz.
*
MODE
TEMP
*
kW [3 s]
SWING
SWING
℃↔℉ [5 s]
SET UP
FUNC.
TIMER CANCEL
FAN
SPEED
JET
MODE
ROOM
TEMP
DIAGNOSIS [5 s]
SET
CANCEL
Düğme
Gösterge
Ekranı
Tanım
- Klimayı açma/kapama için.
2
Soğutma, ısıtma veya otomatik
değiştirme modunda istenilen oda
sıcaklığına ayarlamak için.
*
Soğutma modunu seçmek için.
Isıtma modunu seçmek için.
MODE
1
Nem alma modunu seçmek için.
Fan modunu seçmek için.
Otomatik değiştirme/otomatik
kullanım modunu seçmek için.
JET
MODE
FAN
SPEED
Hızlı bir şekilde oda sıcaklığını
değiştirmek için.
Fan hızını ayarlamak için.
Hava akım yönünü yatay veya
dikey olarak ayarlamak için.
NOT
• * modelin türüne göre düğmeler değişebilir.
12

RESET
Düğme
TIMER
CANCEL
Gösterge
Ekranı
Tanım
*
MODE
TEMP
*
kW [3 s]
SWING
SWING
℃↔℉ [5 s]
SET UP
FUNC.
TIMER CANCEL
FAN
SPEED
JET
MODE
ROOM
TEMP
DIAGNOSIS [5 s]
SET
CANCEL
2
SET/
CANCEL
*
*LIGHT
OFF
1
ROOM
TEMP
°C↔°F [5 s]
*ENERGY
SAVING
*COMFORT
AIR
kW [3 s] -
-
-
otomatik olarak açma/kapama için.
Özel işlevleri ve zamanlayıcıyı
ayarlamak/iptal etmek için.
Zamanlayıcı ayarlarını iptal etmek
için.
- Zamanı ayarlamak için.
-
İç mekan ünitesinin ekran
parlaklığını ayarlamak için.
Oda sıcaklığını göstermek için.
Birimleri °C ve °F arasında
değiştirmek için.
Enerji tüketimini en aza indirmek
için.
Hava akımını rüzgar yönüne
ayarlamak için.
Enerji ile ilgili bilginin gösterilip
gösterilmeyeceğini ayarlamak için.
ENGLISH
TÜRKÇE ESPAÑOL
Klimayı istenilen zamanda
*ENERGY
CTRL
*COMFORT
SLEEP
DIAGNOSIS
[5 s]
Güç tasarrufunu etkinleştirmek
için.
-
Rahat uyku ortamı oluşturmak için.
Ürünün bakım bilgisini kolay bir
şekilde kontrol etmek için.
13

RESET
Düğme
FUNC.
Gösterge
Ekranı
Tanım
İyon oluşturucu, iç mekan hava
2
kalitesinin geliştirilmesine yardımcı
olmak için milyonlarca iyon
kullanır.
Dış mekan ünitesinden gelen sesi
*
*
azaltmak için.
MODE
TEMP
*
kW [3 s]
SWING
SWING
℃↔℉ [5 s]
SET UP
FUNC.
TIMER CANCEL
FAN
SPEED
JET
MODE
ROOM
TEMP
DIAGNOSIS [5 s]
SET
CANCEL
İyon demetleri oluşturarak
cildinizin nemlenmesini sağlamak
için.
1
İç mekan nemini hızlı bir şekilde
azaltmak için.
Minimum oda sıcaklığını korumak
ve odadaki nesnelerin donmasını
engellemek için.
Sivrisinekleri uzak tutmak için fan.
İç mekan ünitesinin içinde üretilen
nemi kaldırmak için.
RESET -
Rahat uyku ortamı oluşturmak için.
Uzaktan kumanda ayarlarını
başlatmak için.
NOT
• Bazı işlevler modele bağlı olarak desteklenmeyebilir.
• * modelin türüne göre düğmeler değişebilir.
• Seçilen FUNC'ın çalıştırılması için SET/CANCEL düğmesine
basın.
14

Klimanın Otomatik Olarak
ON/OFF
Mod İşlevini Kullanma
Başlatılması
Elektrik kesintisinden sonra klima yeniden
başlatıldığında, bu işlev önceki ayarları
kaydeder.
Otomatik Yeniden Başlatmanın
Devre Dışı Bırakılması
Ön kapağı (Tip2) veya yatay paneli
1
(Tip1) açın.
ON/OFF düğmesine basın ve 6 saniye
2
basılı tutun ardından üniteden iki
defa bip sesi duyulur ve lamba 4 defa
boyunca iki kez yanıp söner.
• İşlevi yeniden etkinleştirmek için, ON/
OFF düğmesine 6 saniye boyunca
basılı tutun. Üniteden iki defa bip sesi
duyulur ve lamba 4 defa yanıp söner.
Tip1
Bu işlev istenilen işlevi seçmenizi sağlar.
Yalnızca Soğutma Modeli
Soğutma Modu
Otomatik Kullanım (AI) Modu
Nem Alma Modu
Fan Modu
Soğutma ve Isıtma Modeli
Soğutma Modu
Otomatik Değiştirme Modeli
ENGLISH
TÜRKÇE ESPAÑOL
ON/OFF
Tip2
NOT
• Modelin türüne göre özellikler değişebilir.
• 6 saniye yerine, 3-5 saniye boyunca ON/
OFF düğmesine basılı tutarsanız, ünite
test kullanıma döner. Test kullanımında,
ünite 18 dakika boyunca güçlü soğuk
hava üfler ve ardından fabrika ayarlarına
geri döner.
Nem Alma Modu
Isıtma Modu
Fan Modu
Soğutma Modu
Cihazı açın.
1
Soğutma Modunu seçmek için MODE
2
düğmesine arka arkaya basın.
Işareti gösterge ekranında
•
gösterilir.
İstenile sıcaklığa ayarlamak için
3
veya düğmesine basın.
15

Otomatik Kullanım (Yapay Zeka)
Otomatik Değiştirme Modeli
Yalnızca Soğutma Modeli
Bu modda, fan hızı ve sıcaklık oda
sıcaklığına bağlı olarak otomatik olarak
ayarlanır.
Cihazı açın.
1
Otomatik Kullanım Modunu seçmek için
2
MODE düğmesine arka arkaya basın.
•
işareti gösterge ekranında
gösterilir.
Sıcaklık istenilen sıcaklıktan yüksek
3
veya az ise istenilen kullanım kodunu
seçmek için veya düğmesine
basın.
Kod Tanım
2 Soğuk
Soğutma ve Isıtma Modeli
Bu mod ayarlanan sıcaklığı ±2 °C'de
tutmak için modu otomatik olarak değiştirir.
Cihazı açın.
1
Otomatik Değiştirme Modunu seçmek
2
için MODE düğmesine arka arkaya
basın.
işareti gösterge ekranında
•
gösterilir.
İstenile sıcaklığa ayarlamak için
3
veya düğmesine basın.
Fan hızını ayarlamak için FAN SPEED
4
düğmesine basın.
Nem Alma Modu
Bu mod aşırı nemli ortamlarda veya
yağmurlu mevsimlerde nemi önler. Bu
mod en iyi nem seviyesinin otomatik
olarak korunmasını sağlamak üzere oda
sıcaklığını ve fan hızını ayarlar.
Cihazı açın.
1
1 Biraz soğuk
0 Oda sıcaklığını koru
-1 Biraz sıcak
-2 Sıcak
NOT
• Bu modda fan hızını ayarlayamazsınız
ancak hava deflektörünün otomatik
olarak dönmesini sağlarsınız.
16
Nem Alma Modu seçmek için MODE
2
düğmesine arka arkaya basın.
işareti gösterge ekranında
•
gösterilir.
NOT
• Bu modda oda sıcaklığını
ayarlayamazsınız, otomatik olarak
ayarlanır.
• Oda sıcaklığı gösterge ekranında
gösterilmez.
• Nem giderme modunda oda sıcaklığı 24
°C’nin altında olduğu zaman, kompresör
ve iç mekan fanı çalışmayabilir.

Isıtma Modu
Cihazı açın.
1
Isıtma Modunu seçmek için MODE
2
düğmesine arka arkaya basın.
işareti gösterge ekranında
•
gösterilir.
İstenile sıcaklığa ayarlamak için
3
veya düğmesine basın.
NOT
• Buz çözme işlemi gerçekleştirilirken iç
mekan ünitesinde
• Ayrıca iç mekan ünitesinde bu gösterge
görüntülenir:
görüntülenir.
Jet Mod İşlevini Kullanma
Oda Sıcaklığını Hızlıca Değiştirme
Bu işlev yaz mevsiminde iç mekanı hızlıca
soğutmanızı veya kış mevsiminde hızlıca
ısıtmanızı sağlar.
• Soğutma ve Isıtma Modeli: Jet Modu
işlevi Soğutma, Isıtma ve Nem Alma
Modu ile bulunur.
• Yalnızca Soğutma Modeli: Jet Modu
işlevi; Soğutma, Nem Alma, Fan,
Otomatik Kullanım Modu ve Hava
Temizleme işlevi ile birlikte bulunur.
Cihazı açın.
1
İstenilen modu seçmek için MODE
2
düğmesine arka arkaya basın.
ENGLISH
TÜRKÇE ESPAÑOL
− Ön ısıtma gerçekleştirilirken.
− Oda sıcaklığı ayarlanan sıcaklığa
ulaştığında.
Fan Modu
Bu mod, oda sıcaklığını değiştirmeden
sadece iç mekandaki havanın akmasını
sağlar.
Cihazı açın.
1
Fan Modunu seçmek için MODE
2
düğmesine arka arkaya basın.
işareti gösterge ekranında
•
gösterilir.
Fan hızını ayarlamak için FAN SPEED
3
düğmesine basın.
JET MODE düğmesine basın.
3
işareti gösterge ekranında
•
gösterilir.
NOT
• Bazı modellerde Jet Isıtma Modu
kullanılmaz.
• Jet Soğutma Modu, güçlü hava 30 dakika
boyunca üflenir.
• 30 dakika sonra ayar sıcaklığı 18 C’de
kalır.
Sıcaklığı değiştirmek istiyor iseniz,
istenilen scaklığı ayarlamak için veya
düğmelerine basınız.
• Jet Isıtma Modu, güçlü hava 30 dakika
boyunca üflenir.
• 30 dakika sonra ayar sıcaklığı 30 C’de
kalır.
Sıcaklığı değiştirmek istiyor iseniz,
istenilen scaklığı ayarlamak için veya
düğmelerine basınız.
• Bu işlev uzaktan kumanda ekranından
farklı çalışabilir.
17

Fan Hız İşlevini Kullanma
→ →
→ → → →
SWING
SWING
SWING
SWING
Hava Akım Yönü İşlevini
Fan Hızını Ayarlama
• Fan hızını ayarlamak için arka arkaya
FAN SPEED düğmesine basın.
Gösterge Ekranı Hız
Yüksek
Orta Yüksek
Orta
Orta Düşük
Düşük
- Doğal Rüzgarın
NOT
• Doğal Rüzgarın fan hızı otomatik olarak
ayarlanır.
• Fan hız simgeleri bazı iç mekan
ünitelerinde gösterilir.
Kullanmak
Bu işlev hava akım yönünü dikey olarak
ayarlar (dikey olarak).
•
(
) düğmesine arka arkaya basın
ve istenilen yönü seçin.
− Hava akım yönünü otomatik olarak
değiştirmek için
NOT
• Hava akım yönünün yatay olarak
değiştirilmesi modele bağlı olarak
desteklenmeyebilir.
• Hava deflektörünün gelişigüzel
değiştirilmesi ürünün hatalı çalışmasına
neden olabilir.
• Klimayı yeniden başlatırsanız, önceden
ayarlanan hava akım yönünde çalışmaya
başlar, bu durumda hava deflektörü
uzaktan kumandada görünen simge
ile eşleşmeyebilir. Bu durum meydana
geldiğinde, hava akım yönünü yeniden
ayarlamak için
basın
( ) seçin.
veya
düğmesine
• İç mekan ünite ekranı yalnızca 5 saniye
görüntülenir ve bazı modellerde ayarlı
sıcaklığa döner.
• Bu işlev uzaktan kumanda ekranından
farklı çalışabilir.
18

Açma/Kapama
TIMER
TIMER
TIMER
TIMER
CANCEL
Kapama Zamanlayıcısını Ayarlama
Zamanlayıcısını Ayarlama
Bu işlev klimanın istenilen zamanda
otomatik olarak açılıp/kapanmasını ayarlar.
Açma/Kapama Zamanlayıcı birlikte
ayarlanabilir.
Açma Zamanlayıcısını Ayarlama
Arka arkaya
1
• Gösterge ekranının altındaki
aşağıdaki simge yanıp söner.
Dakikaları seçmek için veya
2
düğmelerine basın.
Bitirmek için SET/CANCEL
3
düğmelerine basın.
düğmesine basın.
Arka arkaya
1
• Gösterge ekranının altındaki
aşağıdaki simge yanıp söner.
Dakikaları seçmek için veya
2
düğmelerine basın.
Bitirmek için SET/CANCEL
3
düğmelerine basın.
• Zamanlayıcıyı ayarladıktan sonra,
istenilen zamanın ayarlandığını
gösteren geçerli zaman ve
gösterge ekranında gösterilir.
NOT
• Bu işlev Temel Zamanlayıcıyı
ayarladığınızda devre dışı olur.
düğmesine basın.
ENGLISH
TÜRKÇE ESPAÑOL
simgesi
• Zamanlayıcıyı ayarladıktan sonra,
istenilen zamanın ayarlandığını
gösteren geçerli zaman ve
gösterge ekranında gösterilir.
simgesi
Açma Zamanlayıcısını İptal Etme
Arka arkaya
1
• Gösterge ekranının altındaki
aşağıdaki simge yanıp söner.
Ayarlamayı iptal etmek için SET/
2
CANCEL düğmelerine basın.
düğmesine basın.
Kapama Zamanlayıcısını İptal
Etme
Arka arkaya
1
• Gösterge ekranının altındaki
aşağıdaki simge yanıp söner.
Ayarlamayı iptal etmek için SET/
2
CANCEL düğmelerine basın.
düğmesine basın.
Zamanlayıcı Ayarını İptal Etme
• Tüm zamanlayıcı ayarlarını iptal etmek
için
düğmesine basın.
19

Uyku İşlevini Kullanma
TIMER
TIMER
Temel Zamanlayıcı İşlevini
(İsteğe Bağlı)
Bu işlev siz uyuduğunuzda otomatik olarak
klimayı kapatır.
Cihazı açın.
1
Arka arkaya
2
• Gösterge ekranının altındaki
aşağıdaki simge yanıp söner.
Saati seçmek için (7 saate kadar)
3
veya düğmesine basın.
Bitirmek için SET/CANCEL
4
düğmelerine basın.
•
işareti gösterge ekranında
gösterilir. gösterilir.
düğmesine basın.
Kullanma (İsteğe Bağlı)
Bu işlev siz uyuduğunuzda otomatik olarak
klimayı kapatır.
Cihazı açın.
1
Arka arkaya
2
• Gösterge ekranının altındaki
aşağıdaki simge yanıp söner.
Saati seçmek için (7 saate kadar)
3
veya düğmesine basın.
Bitirmek için SET/CANCEL
4
düğmelerine basın.
•
işareti gösterge ekranında
gösterilir. gösterilir.
düğmesine basın.
NOT
• Bazı iç mekan ünitelerinde
• İç mekan ünite ekranı, yalnızca 5 saniye
boyunca, 1 saatten 7 saate kadar
gösterilir ve ardından ayarlı sıcaklığa geri
döner.
• Soğutma ve Nemlendirme Modunda,
daha rahat bir uyku için sıcaklık 30
dakika sonra 1 °C artar ve sonraki 30
dakikada 1 °C daha artar.
• Sıcaklık ön ayarlanan sıcaklıktan 2 °C'ye
kadar artar.
• Gösterge ekranı üzerinden fan hızı işareti
değişse de, fan hızı otomatik olarak
ayarlanır.
gösterilir.
NOT
• Bu işlev Kapama Zamanlayıcısını
ayarladığınızda devre dışı olur.
20

Enerji Gösterge İşlevini
kW [3 s]
kW
kWh
kW [3 s]
kW
kWh
SWING
Işıkları Kapatma İşlevini
Kullanma (İsteğe Bağlı)
Bu işlev ürün çalıştığında iç mekan
ekranında üretilen elektrik miktarını
gösterir.
Geçerli Enerji Kullanımını
Gösterme
Cihazı açın.
1
3 saniye boyunca
2
tutun.
• Anlık güç tüketimi (
bazı iç mekan ünitelerinde bir süre
gösterilir.
Toplam Enerji Kullanımını
Gösterme (İsteğe Bağlı)
Cihazı açın.
1
düğmesine basılı
veya
Kullanma (İsteğe Bağlı)
Gösterge Ekranı Parlaklığı
İç mekan ünitesinin gösterge ekranı
parlaklığını ayarlayabilirsiniz.
• LIGHT OFF düğmesine basın.
NOT
• Ekranı açın/kapatın.
)
Konforlu Hava İşlevini
ENGLISH
TÜRKÇE ESPAÑOL
Kullanma (İsteğe Bağlı)
Konforlu Panel Kullanımı
Bu işlev sağlanan havayı doğrudan
odadakilerin üzerine üflemesini önleyerek
başka yöne üflenmesini sağlamak üzere
paneli ön ayarlı konuma ayarlar.
İki defa 3 saniye boyunca
2
düğmesine basılı tutun.
• Toplam güç tüketimi (
mekan ünitelerinde bir süre gösterilir.
NOT
• Kablosuz uzaktan kumandada
gösterilmez.
• kW anlık güç tüketimlerini belirtir.
• kWh toplam güç tüketimlerini belirtir.
• Belirtme aralığı olan 99 kWs'ten fazlaysa,
99 kWs olarak tutun.
• Şalterin kapatılması değeri sıfırlar.
• 10 kW(s)'ın altındaki watt değerlerini 0,1
kW(s) birimle, 10 kW(s)'ın üzerindekileri 1
kW(s) birimle gösterir.
• Gerçek güç gösterilen güçten farklı
olabilir.
) bazı iç
Cihazı açın.
1
COMFORT AIR düğmesine arka
2
arkaya basın ve istenilen yönü seçin.
veya işareti gösterge ekranında
•
gösterilir.
NOT
• Bazı iç mekan ünitelerinde
gösterilir.
• Bu işlev MODE veya JET MODE
düğmesine bastığınızda devre dışı kalır.
• Bu işlev devre dışı kalır ve
düğmesine bastığınızda otomatik dikey
hava dolaşımına ayarlanır.
• Bu işlev kapatıldığında, yatay panel
otomatik olarak ayarlanan moda göre
çalışır.
veya
21

Enerji Tasarrufu İşlevini
Enerji Denetim İşlevini
Kullanma (İsteğe Bağlı)
Bu işlev Soğutma sırasında güç tüketimini
azaltır ve daha rahat bir ortam için
ayarlanan sıcaklığı daha iyi bir seviyeye
arttırır. İstenilen sıcaklık 22 °C altındaysa
sıcaklık otomatik olarak 22 °C'de sabitlenir.
Sıcaklık 22 °C'nin üzerindeyse sabit kalır.
Cihazı açın.
1
Soğutma Modunu seçmek için MODE
2
düğmesine arka arkaya basın.
ENERGY SAVING düğmesine basın.
3
•
işareti gösterge ekranında
gösterilir.
Kullanma (İsteğe Bağlı)
Cihazı açın.
1
ENERGY CTRL düğmesine basın.
2
• Her bir adımı seçmek için arka arkaya
ENERGY CTRL düğmesine basın.
NOT
• 1. adım: Güç girdisi, nominal güç girdisi
ile karşılaştırıldığında 20 % azalır.
−
işareti gösterge ekranında
gösterilir.
• 2. adım: Güç girdisi, nominal güç girdisi
ile karşılaştırıldığında 40 % azalır.
−
işareti gösterge ekranında
gösterilir.
• 3. adım (İsteğe Bağlı): Güç girdisi,
nominal güç girdisi ile karşılaştırıldığında
60 % azalır.
−
işareti gösterge ekranında
gösterilir.
•
(1. adım), (2. adım) bazı iç mekan
ünitelerinde gösterilir.
• Bu işlev Soğutma Modunda bulunur.
• Enerji Denetim modu seçildiğinde
kapasite azalabilir.
• FAN SPEED,
sn boyunca basarsanız, istenilen sıcaklık
gösterilir.
• ROOM TEMP düğmesine 5 sn boyunca
basarsanız, oda sıcaklığı gösterilir.
veya düğmesine 5
22

Özel İşlevlerin Kullanılması
Cihazı açın.
1
İstenilen modu seçmek için FUNC
2
düğmesine arka arkaya basın.
Bitirmek için SET/CANCEL
3
düğmelerine basın.
Gösterge
Ekranı
Tanım
İyon oluşturucu, iç
mekan hava kalitesinin
geliştirilmesine yardımcı
olmak için milyonlarca iyon
kullanır.
Dış mekan ünitesinden
gelen sesi azaltmak için.
İyon demetleri oluşturarak
cildinizin nemlenmesini
sağlamak için.
ENGLISH
TÜRKÇE ESPAÑOL
NOT
• Bazı işlevler modele bağlı olarak
desteklenmeyebilir.
• Bazı işlevler uzaktan kumanda
ekranından farklı çalışabilir.
İç mekan nemini hızlı bir
şekilde azaltmak için.
Minimum oda sıcaklığını
korumak ve odadaki
nesnelerin donmasını
engellemek için.
Sivrisinekleri uzak tutmak
için fan.
İç mekan ünitesinin içinde
üretilen nemi kaldırmak için.
Rahat uyku ortamı
oluşturmak için.
23

Özel İşlevlerin İptal Edilmesi
Sessiz İşlevini Kullanma
İstenilen modu seçmek için FUNC
1
düğmesine arka arkaya basın.
Bu işlevi iptal etmek için SET/CANCEL
2
düğmesine basın.
Hava Nemlendirme Yönü İşlevini
Kullanmak
Bu işlevler iyon demetleri ve filtreleme ile
temiz ve ferah hava sağlar.
İşlev Gösterge Tanım
İyonizerin
iyon demetleri
havadaki
İyonizer
bakterileri ve
diğer zararlı
bileşenleri
sterilize eder.
Bu işlevlerden komşulardan gelebilecek
olası şikayetleri dış mekan ünitelerin sesini
azaltarak önler.
•
işareti gösterge ekranında gösterilir.
NOT
• Bu işlev MODE veya ENERGY
CTRL veya JET MODE düğmelerine
bastığınızda devre dışı kalır.
• Bu işlev Soğutma, Isıtma, Otomatik
Değiştirme, Otomatik Kullanım Modu ile
kullanılabilir.
İyon Bakım İşlevini Kullanmak
Bu işlev cilt yüzeyi tarafından emilen
iyon parçacıkları üreterek cildinizin nemli
kalmasını sağlar.
•
işareti gösterge ekranında gösterilir
yaklaşık 3 saniye.
Tamamen temiz
ve taze hava
sağlamak için
Plazma
NOT
• Bu işlevi klimayı açmadan
kullanabilirsiniz.
• Bazı modellerde Dumanı Uzaklaştırma/
Plazma kullanılıyorken hem plazma
lambaları hem de soğutma lambaları
yanar.
• Kullanım sırasında iyonizere
dokunmayın.
• Bu işlev uzaktan kumanda ekranından
farklı çalışabilir.
giriş havasından
mikroskobik
bileşenleri yok
eder.
NOT
• Bu işlev, Soğutma, Fan Modu ve Hava
Temizleme işlevi ile birlikte bulunur.
Jet Kurutma İşlevini Kullanma
Bu işlev nem alma performansını en üst
seviyeye çıkarır.
•
, işareti gösterge ekranında
gösterilir.
NOT
• Bu işlev Soğutma, Nem Alma, Otomatik
Kullanım, Fan Modu ve Hava Temizleme
işlevi ile birlikte bulunur.
• Bu işlev Uyku işlevi ile kullanılamaz.
• Bu işlev MODE düğmesine bastığınızda
devre dışı olur.
24

Donma koruması İşlevini
SWING
Kullanma
Otomatik Temizleme İşlevini
Kullanma
Bu işlev tatil evi gibi sürekli yaşayanların
olmadığı yerlerde minimum oda
sıcaklığını korumak ve odadaki nesnelerin
donmalarını önlemek üzere ısıtma
sistemini kullanır.
•
, işareti gösterge ekranında
gösterilir.
NOT
• Bu işlev Isıtma Modu ile kullanılır.
• LH kullanımında,
, , MODE, FAN
SPEED gibi düğmelere bastığınızda
Isıtma Moduna geri döner.
• LH kullanımında, JET MODE düğmesine
basılırsa, bu işlev devre dışı bırakılır
ve Güçlü Isıtma Modu çalışır. (yalnızca
güçlü ısıtma modeli için)
• Bir hatanın meydana gelmesi halinde,
kullanım ürünün korunması için
durdurulabilir.
• LH işlevi kullanılıyorken COMFORT AIR
ve
düğmeleri kullanılamaz.
Sivrisinek Önleyici İşlevi Kullanma
Bu işlev yüksek frekanslı dalga üreterek
sivrisinekleri uzaklaştırır.
Soğutma ve Nem Alma modunda, nem iç
mekan ünitesinin içinde üretilir. Bu işlev
nemi kaldırır.
•
işareti gösterge ekranında gösterilir.
NOT
• Otomatik Temizleme işlevinin kullanıldığı
sırada bazı işlevler kullanılamayabilir.
• Gücü kapattığınızda, fan 30 dakika çalışır
ve iç mekan ünitesinin içini temizler.
Konforlu Uyku İşlevini Kullanma
Bu işlev konforlu uyku ortamı oluşturmak
için otomatik olarak klimayı çalıştırır.
•
, işareti gösterge ekranında
gösterilir.
NOT
• Bu işlev Soğutma Modunda bulunur.
• Kanat dönmeyi durdurur ve oda sıcaklığı
uyku için en iyi sıcaklığa düşmese bile
başladıktan 30 dakika sonra doğrudan
olmayan hava akışı açısını ayarlar.
• Konforlu uyku ortamı bazı kişiler için zor
olabilir.
ENGLISH
TÜRKÇE ESPAÑOL
•
işareti gösterge ekranında gösterilir.
NOT
• Bu işlevi klimayı açmadan
kullanabilirsiniz.
• Bazı iç mekan ünitelerinde
gösterilir.
25

SMART ÖZELLİKLERİ
LG ThinQ Uygulaması
Bu özellik sadece veya ThinQ logosuna
sahip modellerde mevcuttur.
LG ThinQ uygulaması bir akıllı telefon
kullanarak cihaz ile iletişim kurulabilmesini
sağlar.
LG ThinQ Uygulama Özellikleri
Bir akıllı telefonda kullanışlı akıllı özellikleri
kullanarak cihazla iletişim kurun.
Smart Diagnosis (Akıllı Tanılama)
Cihazı kullanırken bir sorun yaşamanız
halinde bu akıllı tanı özelliği sorunu
tanılamanıza yardım edecek.
Ayarlar
Cihazda ve uygulamada çeşitli seçenekleri
ayarlamanıza olanak tanır.
NOT
LG ThinQ Uygulamasını
Kullanmadan Önce
Cihaz ile kablosuz router (Wi-Fi ağ)
1
arasındaki mesafeyi kontrol edin.
• Cihaz ile kablosuz router arasındaki
mesafe çok uzaksa sinyal gücü zayıf
olabilir. Kayıt işlemi uzun sürebilir ya
da kurulum başarısız olabilir.
Akıllı telefonunuzda Mobil veri veya
2
Hücresel Veri özelliğini kapatın.
Akıllı telefonunuzu kablosuz router’ınıza
3
bağlayın.
• Kablosuz router cihazınızı ya da Internet
servis sağlayıcınızı veya parolanızı
değiştirirseniz kayıtlı cihazı LG ThinQ
uygulamasından silin ve yeniden
kaydedin.
• Uygulama, kullanıcılara herhangi
bir bildirimde bulunmadan cihazın
geliştirilmesi amacıyla değiştirilebilir.
• Fonksiyonlar modelden modele değişir.
NOT
• Wi-Fi bağlantısını doğrulamak için
kumanda panosundaki
yanıp yanmadığını kontrol edin.
simgesinin
26

• Cihaz sadece 2.4 GHz Wi-Fi ağlarını
destekler. Ağ frekansınızı kontrol etmek
için internet servis sağlayıcınız ile iletişim
kurun ya da kablosuz router kullanım
kılavuzuna göz atın.
• LG ThinQ herhangi bir ağ bağlantısı
sorunundan ya da ağ bağlantısı kaynaklı
herhangi bir hata, arıza ya da sorundan
sorumlu değildir.
• Cihazın Wi-Fi ağına bağlanmasında
sorun varsa bunun nedeni
yönlendiriciden çok uzakta olması olabilir.
Wi-Fi sinyal gücünü geliştirmek için bir
Wi-Fi repeater (menzil genişletici) satın
alın.
• Ev ağ ortamı nedeniyle Wi-Fi bağlantısı
kurulamayabilir ya da kesintiye
uğrayabilir.
• Internet servis sağlayıcıya bağlı olarak
ağ bağlantısı doğru şekilde çalışmıyor
olabilir.
• Kablosuz ağın çevresindeki ortam,
kablosuz ağın yavaş bir şekilde
çalışmasına neden olabilir.
• Kablosuz sinyal aktarımı sorunları
nedeniyle cihaz kayıt olamıyor. Cihazı
fişten çıkarın ve yeniden denemeden
önce yaklaşık bir dakika bekleyin.
LG ThinQ Uygulamasını Kurma
Bir akıllı telefonda Google Play Store ya
da Apple App Store kullanarak LG ThinQ
uygulamasını arayın. Uygulamayı indirip
yüklemek için talimatları takip edin.
Açık Kaynaklı Yazılım Bildirimi
Bilgileri
GPL, LGPL, MPL ve bu ürünün içerdiği
diğer açık kaynaklı lisanslar altında
kaynak kodu elde etmek için lütfen http://
opensource.lge.com adresini ziyaret edin.
Kaynak koduna ek olarak, adı geçen tüm
lisans koşulları, garanti feragatnameleri
ve telif hakkı bildirimleri indirilmek üzere
mevcuttur.
Ayrıca LG Electronics, opensource@
lge.com adresine gönderilen e-posta
taleplerinin üzerine bu tür bir hizmetin
maliyetini (ortam, gönderi ve taşıma
masrafı gibi) kapsayan bir ücret
karşılığında açık kaynak kodunu CD-ROM
ile de sağlar. Bu teklif, bu ürünün son
gönderiminden sonraki üç yıllık süre için
geçerlidir. Bu teklif, bu bilgileri alan herkes
için geçerlidir.
ENGLISH
TÜRKÇE ESPAÑOL
• Kablosuz router’ınızdaki güvenlik duvarı
etkinleştirilmişse güvenlik duvarını devre
dışı bırakın ya da bir istisna tanımlayın.
• Kablosuz ağ adı (SSID) İngilizce harfler
ve rakamların kombinasyonundan
oluşmalıdır. (Özel karakterler
kullanmayın).
• Akıllı telefon kullanıcı arayüzü (UI) mobil
işletim sistemi (OS) ve üreticiye bağlı
olarak değişebilir.
• Router cihazınızın güvenlik protokolü
WEP olarak ayarlanırsa ağ kurulumu
başarısız olabilir. Lütfen başka bir
güvenlik protokolü (WPA2 tavsiye edilir)
kullanın ve ürününüzü yeniden kaydedin.
27

Smart Diagnosis (Akıllı
Tanılama)
Bu özellik sadece veya logosuna
sahip modellerde mevcuttur.
Cihazınızdaki sorunları tanılamanıza ve
çözmenize yardım etmesi için bu özelliği
kullanın.
NOT
• LGE’nin ihmalinden kaynaklanmayan
nedenler için hizmet, bunlarla sınırlı
olmamak üzere Wi-Fi bulunmaması,
Wi-Fi bağlantısının kesilmesi, yerel
uygulama mağazası politikası veya
uygulama bulunmaması gibi dış faktörler
nedeniyle işlem gerçekleştirmeyebilir.
• Özellik, önceden bildirilmeden değişikliğe
tabi tutulabilir ve konumunuza bağlı
olarak farklı bir biçime sahip olabilir.
Sorunları Tanılamak için İşitilebilir
Tanılama Kullanımı
İşitilebilir tanılama yöntemini kullanmak için
aşağıdaki talimatları uygulayın.
• LG ThinQ uygulamasını başlatıp
menüde Smart Diagnosis özelliğini
seçin. LG ThinQ uygulamasında
işitilebilir tanılama için sağlanan
talimatları uygulayın.
Elektrik fişini prize doğru şekilde takın.
1
Akıllı telefonunuzun mikrofonunu
2
veya logolarına yaklaştırın.
Veri aktarımı tamamlanana kadar akıllı
3
telefonun mikrofonunu logoya tutarak
DIAGNOSIS [5 s] düğmesine 5 saniye
veya daha uzun süre boyunca basılı
tutun.
Sorunları Tanılamak için LG ThinQ
Kullanımı
Wi-Fi donanımlı cihazınızla sorun
yaşamanız halinde sorun giderme verilerini
LG ThinQ uygulamasını kullanarak bir
akıllı telefona iletebilir.
• LG ThinQ uygulamasını başlatıp
menüde Smart Diagnosis özelliğini
seçin. LG ThinQ uygulamasında
sağlanan talimatları uygulayın.
• Akıllı telefonu veri aktarımı bitene
kadar aynı şekilde tutun. Veri transferi
için kalan süre gösterilir.
Veri transferi tamamlandıktan sonra,
4
uygulamada tanı görüntülenecek.
NOT
• En iyi sonuçlar için, tonlar aktarılırken
telefonunuzu hareket ettirmeyin.
• Ortam gürültüsünün en az seviyede
olduğundan emin olun aksi halde telefon
iç mekan ünitesinden uyarıları doğru
şekilde alamaz.
28

Kablosuz LAN Modülü Teknik
Özellikleri
Model LCW-003
Frekans
Aralığı
Çıkış Gücü
(Maks.)
2412 – 2472 MHz
IEEE 802.11b:18.37 dBm
IEEE 802.11g:17.67 dBm
IEEE 802.11n:17.67 dBm
Kablosuz fonksiyonu S/W sürümü: V 1.0
Cihazın, cihaz ile vücut arasında en az 20
cm mesafe olacak şekilde kurulması ve
kullanılmasına kullanıcı tarafından dikkat
edilmelidir.
Uygunluk Beyanı
LG Electronics radyo ekipmanı tipi
Klimanın 2014/53/EU numaralı
yönetmelikle uyumlu olduğunu beyan eder.
EU uygunluk beyanının tam metnine şu
adresten ulaşılabilir:
ENGLISH
TÜRKÇE ESPAÑOL
http://www.lg.com/global/support/cedoc/
cedoc#
LG Electronics European Shared Service
Centre B.V.
Krijgsman 1
1186 DM Amstelveen
Hollanda
29

BAKIM
UYARI
• Temizlemeden veya bakım yapmadan önce, güç kaynağının bağlantısını kesin ve
fanlar durana kadar bekleyin.
Klima uzun bir süre kullanılmayacaksa, iyi durumda kalması için klimayı kurutun. En
iyi performansı sürdürmek ve olası bozulmaları engellemek için ürünü düzenli şekilde
temizleyin.
• 3 ila 4 saat boyunca Fan modunda klimayı kurutun ve gücü kapatın. Bileşenlerde nem
kalması içinde hasara neden olabilir.
• Klimayı yeniden kullanmadan önce, klimanın iç bileşenlerini 3 ila 4 saat Fan modunda
kurutun. Bu işlemin yapılması nem yüzünden meydana gelen kokunun ortadan
kalkmasına yardımcı olur.
Hava Filtresi
• Modelin türüne göre özellikler değişebilir.
30

Tip Tanım Aralık
Hava Filtresi Elektrik süpürgesi veya elde yıkayarak temizleyin. 2 hafta
Üçlü filtre Elektrik süpürgesi veya fırça ile temizleyin. 3 ayda bir
Mikro toz
filtresi
Elektrik süpürgesi veya fırça ile temizleyin. 6 ayda bir
ENGLISH
İyonizer
(İsteğe Bağlı)
İç Mekan
Ünitesi
Dış Mekan
Ünitesi
NOT
Tozları temizlemek için kuru kulak temizleme çubuğu
kullanın.
Yumuşak, kuru bir bez kullanarak iç mekan ünitesinin
yüzeyini temizleyin.
Kondensat drenaj tavasını temizlemek için uzman
birinden yardım alın.
Kondensat drenaj borusunu temizlemek için uzman
birinden yardım alın.
6 ayda bir
Düzenli
Olarak
Yılda bir kez
4 ayda bir
Uzaktan kumanda pillerini yenileyin. Yılda bir kez
Isı değişim bobinini ve panel kanatlarını temizlemek için
uzman birinden yardım alın. (Teknisyene danışın.)
Yılda bir kez
Fanı temizlemek için uzman birinden yardım alın. Yılda bir kez
Kondensat drenaj tavasını temizlemek için uzman
birinden yardım alın.
Tüm fan takımının iyice sıkılaştırılmış olduğunu bir
uzmana kontrol ettirin.
Yılda bir kez
Yılda bir kez
Elektrik bileşenlerini hava ile temizleyin. Yılda bir kez
TÜRKÇE ESPAÑOL
• Filtreleri temizlerken en fazla 40 °C sıcaklıkta su kullanın. Aksi halde deformasyona veya
renginin solmasına neden olabilir.
• Filtreleri temizlerken asla uçucu maddeler kullanmayın. Ürünün yüzeyine hasar verebilir.
• Mikro toz filtresini su ile yıkamayın, filtre hasar görebilir (İsteğe bağlı).
• Üçlü filtreyi su ile yıkamayın, filtre hasar görebilir (İsteğe bağlı).
31

Hava Filtresinin
Temizlenmesi
Hava filtrelerini 2 haftada bir veya
gerekiyorsa daha kısa süre içinde
temizleyin.
NOT
• Hava filtresi büküldüğünde kırılabilir.
• Hava filtresi doğru şekilde monte
edilmediğinde, iç mekan ünitesinin içine
toz ve diğer bileşenler girebilir.
Hava filtresini birleştirmek için
7
kancalara bastırın.
Hava filtresini doğru şekilde takmak için
8
ön kapağın yanlarını kontrol edin.
Tip2
Tip1
İç mekan ünitesinin üzerinden bakarsanız,
üstteki filtreyi kolaylıkla takabilirsiniz.
Gücü kapatın ve güç kablosunu prizden
1
çekin.
Hava filtresinin tutma kollarından tutun,
2
yavaşça kaldırın.
İç mekan ünitesinden çıkarın.
3
Elektrikli süpürgeyle veya nötr deterjanlı
4
ılık su ile filtreleri temizleyin.
Gücü kapatın ve güç kablosunu prizden
1
çekin.
Ön kapağı açın.
2
• İki taratfaki kapakları yavaşça kaldırın.
Hava filtresinin tutma kollarından
3
tutun, yavaşça yukarı doğru çekin ve iç
mekan ünitesinden çıkarın.
Elektrikli süpürgeyle veya nötr deterjanlı
4
ılık su ile filtreleri temizleyin.
Filtreleri gölgede kurumaya bırakın.
5
Hava filtrelerinin kancalarını ön kapağa
6
takın.
Filtreyi gölgede kurumaya bırakın.
5
Hava filtresinin kancalarını ön kapağa
6
takın.
32
Hava filtrelerini doğru şekilde takmak
7
için ön kapağın yanlarını kontrol edin.

Mikro toz filtresi ve Üçlü
Filtreyi temizleyin (İsteğe
Bağlı)
Gücü kapatın ve güç kablosunu prizden
1
çekin.
İç mekan ünitesinden hava filtrelerini
2
çıkarın.
Mikro toz filtresi ve Üçlü filtreyi iç
3
üniteden çıkarın.
Tip1
Tip2
Mikro toz filtresi ve Üçlü filtreyi takın.
5
Tip1
Tip2
Hava filtrelerini takın.
6
Hava filtrelerini doğru şekilde takmak
7
için ön kapağın yanlarını kontrol edin.
ENGLISH
TÜRKÇE ESPAÑOL
Filtreleri elektrikli süpürgeyle temizleyin.
4
NOT
• Mikro toz filtresi ile Üçlü filtrenin özellikleri
ve konumu, klimanın modeline göre
değişiklik gösterebilir.
33

SORUN GİDERME
Otomatik Tanılama İşlevi
Bu ürünün otomatik tanılama işlevi bulunmaktadır. Hata meydana geldiğinde, iç mekan
ünitesindeki lamba 2 saniye aralıkla yanıp söner. Bu durum meydana geldiğinde, yerel
satıcınızla veya servis merkezi ile iletişime geçin.
Servisi Aramadan Önce
Servis merkeziyle iletişime geçmeden önce aşağıdakileri kontrol edin. Sorun devam
ederse, yerel servis merkezinizle iletişime geçin.
Belirtiler Olası Nedenler ve Çözüm
Üniteden yanık kokusu ve normal olmayan sesler geliyor.
• Klimayı kapatın, güç kablosunu prizden çekin veya güç kaynağı
bağlantısını kesin ve servis merkezi ile iletişime geçin.
Nem seviyesi düşük olduğunda bile iç mekan ünitesinden su
sızıyor.
• Klimayı kapatın, güç kablosunu prizden çekin veya güç kaynağı
bağlantısını kesin ve servis merkezi ile iletişime geçin.
Klima normal
şekilde
çalışmıyor.
Güç kablosu hasar görmüş veya aşırı sıcaklık üretiyor.
• Klimayı kapatın, güç kablosunu prizden çekin veya güç kaynağı
bağlantısını kesin ve servis merkezi ile iletişime geçin.
Düğme, devre kesici (güvenlik, topraklı) veya sigorta düzgün
çalışmıyor.
• Klimayı kapatın, güç kablosunu prizden çekin veya güç kaynağı
bağlantısını kesin ve servis merkezi ile iletişime geçin.
Ünite otomatik tanılamada bir hata kodu üretiyor.
• Klimayı kapatın, güç kablosunu prizden çekin veya güç kaynağı
bağlantısını kesin ve servis merkezi ile iletişime geçin.
34

Belirtiler Olası Nedenler ve Çözüm
Klima prize takılı değil.
• Güç kablosunun prize takılı olup olmadığını veya güç yalıtıcılarının
açık olup olmadığını kontrol edin.
Sigorta patladı veya güç kaynağı engellendi.
• Sigortayı değiştirin veya devre kesicinin atıp atmadığını kontrol
edin.
Güç kesintisi meydana geldi.
• Güç kesintisi meydana geldiğinde klimayı kapatın.
ENGLISH
TÜRKÇE ESPAÑOL
Klima
çalışmıyor.
• Güç geldiğinde, 3 dakika bekleyin ve klimayı açın.
Voltaj çok yüksek veya çok düşük.
• Devre kesicinin atıp atmadığını kontrol edin.
Ön ayarlanan sürede klima otomatik olarak kapandı.
• Klimayı açın.
Uzaktan kumandada pil ayarı yanlış.
• Pillerin uzaktan kumandanıza doğru şekilde yerleştirildiğinden
emin olun.
• Piller doğru şekilde yerleştirildiyse ancak klima hala çalışmıyorsa,
pilleri değiştirin ve yeniden deneyin.
35

Belirtiler Olası Nedenler ve Çözüm
Hava doğru şekilde dönmüyor.
• Klimanın önünü kapatan perde, panjur veya mobilya parçası
olmadığından emin olun.
Hava filtresi kirli.
• Hava filtresini 2 haftada bir temizleyin.
• Daha fazla bilgi için "Hava Filtresinin Temizlenmesi" bölümüne
bakın.
Oda sıcaklığı çok yüksek.
• Yaz mevsiminde, iç mekan havasını tamamen soğutmak biraz
zaman alabilir. Bu durumda, iç mekan havasını hızlıca değiştirmek
için Jet Modu seçin.
Soğuk hava odadan çıkıyor.
Klima soğuk
hava üflemiyor.
Fan hızı
ayarlanmıyor.
• Odadaki havalandırma deliklerinden soğuk havanın
çıkmadığından emin olun.
İstenilen sıcaklık mevcut sıcaklıktan daha yüksek.
• İstenilen sıcaklığı geçerli sıcaklıktan daha düşük bir seviyeye
ayarlayın.
Yakınlarda ısı kaynağı var.
• Klima çalışıyorken elektrikli fırın veya gazlı yakıcılar gibi ısı
üreticiler kullanmaktan kaçının.
Fan Modu seçildi.
• Fam Modu sırasında, iç mekan havasını ısıtmadan veya
soğutmadan klima hava üfler.
• Kullanım modunu soğutucu kullanımına getirin.
Dış mekan sıcaklığı çok yüksek.
• Soğutma etkisi yeterli olmayabilir.
Jet Modu veya Otomatik Kullanım Modu seçili.
• Bazı kullanım modlarında, fan hızını ayarlayamazsınız. Fan hızını
ayarlayabileceğiniz kullanım modu seçin.
Sıcaklık
ayarlanmıyor.
36
Fan Modu veya Jet Modu seçili.
• Bazı kullanım modlarında, sıcaklığı ayarlayamazsınız. Sıcaklığı
ayarlayabileceğiniz kullanım modu seçin.

Belirtiler Olası Nedenler ve Çözüm
Klima aniden durdu.
• Üniteyi kapatan Zamanlayıcı İşlevinin süresi dolmuştur.
Klima, kullanım
sırasında
duruyor.
Zamanlayıcı ayarlarını kontrol edin.
Kullanım sırasında elektrik kesintisi meydana geldi.
• Elektriğin gelmesini bekleyin. Otomatik Yeniden Başlatma işlevi
etkinse, üniteniz elektrik geldikten bir kaç dakika sonra son
işlemine devam eder.
ENGLISH
TÜRKÇE ESPAÑOL
Güç kapalı bile
olsa, iç mekan
ünitesi hala
çalışıyor.
İç mekan
ünitesindeki
hava çıkışından
sis çıkıyor.
Dış mekan
ünitesinden su
sızıyor.
Ses veya
titreşim var.
Otomatik Temizleme işlevi çalışıyor.
• İç mekan ünitesinin içindeki nem ortadan kalkana kadar
Otomatik Temizleme işlevinin çalışmasını bekleyin. Bu özelliği
istemiyorsanız, üniteyi kapatabilirsiniz.
Klimadan gelen soğuk hava sis yapıyor.
• Oda sıcaklığı azaldığında, bu durum ortadan kalkar.
Isıtma işlemlerinde, ısı dönüştürücüden yoğunlaşmış su
damlar.
• Bu durum taban tepsisinin altına tahliye hortumu kurmanızı
gerektirir. Tesisatçı ile iletişime geçin.
Ünitenin başlaması veya durması sırasında geri dönen valf
nedeniyle tıklama sesi duyulabilir.
Cızırtılı ses: Hızlı ısı değişiklikleri nedeniyle büzüldüğünde veya
genişlediğinde iç mekan ünitesinin içindeki plastik parçalar
çıtırdayabilir.
Akma veya Üfleme sesi: Bu soğutucu sıvının klimadan akışıdır.
• Bunlar normal belirtilerdir. Ses duracaktır.
37

Belirtiler Olası Nedenler ve Çözüm
Kokular (sigara dumanı gibi) iç mekan ünitesi tarafından
İç mekan
ünitesinden
koku geliyor.
çekilebilir ve hava akışı ile tahliye edilebilir.
• Koku kaybolmazsa, filtreyi yıkamanız gereklidir. Bu işe yaramazsa,
ısı dönüştürücünüzü temizlemesi için servis merkezi ile iletişime
geçin.
Isıtma Modu başlatıldığında, panel neredeyse kapalıdır ve dış
mekan ünitesi çalışıyor olsa bile hava çıkmaz.
• Bu normal bir belirtidir. Lütfen ünite iç mekan ünitesinin üfleyecek
kadar ılık hava üretmesini bekleyin.
Klima ılık hava
üflemiyor.
Dış mekan ünitesi Buz Giderme Modundadır.
• Isıtma modunda, dış mekan sıcaklığı düştüğünde, bobinler
üzerinde buz/don meydana gelir. Bu işlev bobin üzerindeki
donmayı kaldırır ve yaklaşık 15 dakika içinde bitirir.
Dış mekan sıcaklığı çok düşük.
• Isıtma etkisi yeterli olmayabilir.
38

Belirtiler Olası Nedenler ve Çözüm
Bağlanmaya çalıştığınız Wi-Fi için girilen parola doğru değil.
• Akıllı telefonunuzun bağlı olduğu Wi-Fi ağını bulun ve kaldırın,
ardından LG SmartThinQ uygulamasında cihazınızı kayıt edin.
Akıllı telefonunuzda Mobil veri açık.
• Akıllı telefonunuzda Mobil Veri özelliğini kapatın ve Wi-Fi ağını
kullanarak cihazı kayıt edin.
Kablosuz ağ adı (SSID) hatalı bir şekilde ayarlanmış.
Beyaz eşyanız
ve akıllı
telefonunuz Wi-
Fi ağına bağlı
değil.
• Kablosuz ağ adı (SSID) İngilizce harfler ve rakamların
kombinasyonundan oluşmalıdır. (Özel karakterler kullanmayın).
Router frekansı 2.4 GHz değil.
• Sadece 2.4 GHz router frekansı desteklenir. Kablosuz router
frekansını 2.4 GHz olarak ayarlayın ve cihazı kablosuz router'a
bağlayın. Router frekansını kontrol etmek için Internet servis
sağlayıcınıza ya da router üreticisine başvurun.
Cihaz ile router arasında mesafe çok fazla.
• Cihaz ile router arasındaki mesafe çok fazlaysa sinyal zayıf olabilir
ve bağlantı doğru şekilde yapılandırılmayabilir. Router'ı cihaza
daha yakın olacağı bir yere yerleştirin.
ENGLISH
TÜRKÇE ESPAÑOL
NOT
• Bazı işlevler modele bağlı olarak desteklenmeyebilir.
39

Teknik Özellikler
Modeller
İç Ünite
Dış Ünite
Soğutma
Kapasitesi
Isıtma Kapasitesi
Sezonsal Enerji
Verimlilik Oranı
Yıllık enerji tüketimi
(kWh/yıl)
Çekilen Akım (A)
Elektrik Girişi Φ / V / Hz
Nem Alma
Kapasitesi
Btu/h.
Btu/h.
Soğutma
(SEER)
Isıtma
(SCOP)
Soğutma
Isıtma
Soğutma
Isıtma
W
W
ℓ /h
Ses Seviyesi dB(A)
Kullanılacak
Sigorta
İç Ünite Net Ağırlığı kg
Dış Ünite Net
Ağırlığı
• Şirketinizdeki geliştirme faaliyetlerinden dolayı ürün özelliklerinin, haber verilmeksizin
değiştirilme hakkı tarafımızda saklıdır.
• Anma değeri için TS EN 14511 de T1 iklim şartları ile tarif edilen koşullar esas alınmıştır.
• İç ve dış ortam sıcaklıklarının standartlarda esas alınan değerlerin dışına çıkması
durumunda klimanızın ısıtma ve soğutma kapasitelerinin etkilenmesi doğaldır.
• Ürünün üzerinde bulunan işaretlemelerde veya ürünle birlikte verilen diğer basılı
dokümanlarda beyan edilen değerler, ilgili standartlara göre laboratuvar ortamında elde
edilen değerlerdir. Bu değerler, ürünün kullanım ve ortam şartlarına göre değişebilir.
• Satın almış olduğunuz ürünün kullanım ömrü 10 yıldır. Bu, ürünün fonksiyonunu yerine
getirebilmesi için gerekli yedek parça bulundurma süresidir.
40
A
kg

GARANTİ ŞARTLARI
1. Garanti süresi,malın teslim tarihinden itibaren başlar ve 2 Yıldır.
2. Malın bütün parçaları dahil olmak üzere tamamı firmamızın garantisi kapsamındadır.
3. Malın garanti süresi içerisinde arızalanması durumunda, tamirde geçen süre garanti
süresine eklenir. Malın tamir süresi en fazla 20 iş günüdür.
Bu süre, mala ilişkin arızanın servis istasyonuna, servis istasyonunun olmaması
durumunda, malın satıcısı, bayii, acentası, temsilciliği, ithalatcısı veya imalatçısındanüreticisinden birisine bildirim tarihinden itibaren başlar. Sanayi malının arızasının 10
iş günü içerisinde giderilmemesi halinde, imalatçı-üretici veya ithalatçı; malın tamiri
tamamlanıncaya kadar, benzer özelliklere sahip başka bir malını tüketicinin kullanımına
tahsis etmek zorundadır.
4. Malın garanti süresi içerisinde, gerek malzeme ve işçilik, gerekse montaj hatalarından
dolayı arızalanması halinde, işçilik masrafı, değiştirilen parça bedeli ya da başka
herhangi bir ad altında hiçbir ücret talep etmeksizin tamiri yapılacaktır.
5. Garanti belgesi ile ilgili olarak çıkabilecek sorunlar için T.C.
Gümrük ve Ticaret Bakanlığı, Tüketicinin Korunması ve Piyasa
Gözetim Genel Müdürlüğü’ne başvurulabilir.
6. Malın ayıplı olduğunun anlaşılması durumunda tüketici; Satılanı geri vermeye hazır
olduğunu bildirerek sözleşmeden dönme,
ENGLISH
TÜRKÇE ESPAÑOL
- Satılanı alıkoyup ayıp oranında satış bedelinden indirim isteme,
- Aşırı bir masraf gerektirmediği takdirde, bütün masrafları satıcıya ait olmak üzere
satılanın ücretsiz onarılmasını isteme,
- İmkân varsa, satılanın ayıpsız bir misli ile değiştirilmesini isteme, seçimlik
haklarından birini kullanabilir. Satıcı, tüketicinin tercih ettiği bu talebi yerine getirmekle
yükümlüdür. Ücretsiz onarım veya malın ayıpsız misli ile değiştirilmesi hakları üretici
veya ithalatçıya karşı da kullanılabilir.
Bu hakların yerine getirilmesi konusunda satıcı, üretici ve ithalatçı müteselsilen
sorumludur.
Üretici veya ithalatçı, malın kendisi tarafından piyasaya sürülmesinden sonra ayıbın
doğduğunu ispat ettiği takdirde sorumlu tutulmaz. Ücretsiz onarım veya malın
ayıpsız misli ile değiştirilmesinin satıcı için orantısız güçlükleri beraberinde getirecek
olması hâlinde tüketici, sözleşmeden dönme veya ayıp oranında bedelden indirim
haklarından birini kullanabilir.
41

Orantısızlığın tayininde malın ayıpsız değeri, ayıbın önemi ve diğer seçimlik haklara
başvurmanın tüketici açısından sorun teşkil edip etmeyeceği gibi hususlar dikkate
alınır. Ücretsiz onarım veya malın ayıpsız misli ile değiştirilmesi haklarından birinin
seçilmesi durumunda bu talebin satıcıya, üreticiye veya ithalatçıya yöneltilmesinden
itibaren azami yirmi iş günü . Ancak, bu Kanunun 58 inci maddesi uyarınca çıkarılan
yönetmelik eki listede yer alan mallara ilişkin, tüketicinin ücretsiz onarım talebi,
yönetmelikte belirlenen azami tamir süresi içinde yerine getirilir. Aksi hâlde tüketici
diğer seçimlik haklarını kullanmakta serbestîr.Tüketicinin sözleşmeden dönme veya
ayıp oranında bedelden indirim hakkını seçtiği durumlarda, ödemiş olduğu bedelin
tümü veya bedelden yapılan indirim tutarı derhâl tüketiciye iade edilir.Seçimlik
hakların kullanılması nedeniyle ortaya çıkan tüm masraflar, tüketicinin seçtiği hakkı
yerine getiren tarafça karşılanır. Tüketici bu seçimlik haklarından biri ile birlikte
11/1/2011 tarihli ve 6098 sayılı Türk Borçlar Kanunu hükümleri uyarınca tazminat da
talep edebilir.
7. Kullanım hatalarına ilişkin bilgi.
- Tüketicinın malı tanıtma ve kullanma kılavuzunda yer alan hususlara aykırı olarak
kullanmasından kaynaklanan arızalar garanti kapsamı dışındadır. Arızalarda
kullanım hatasının bulunup bulunmadığının, yetkili servis istasyonları, yetkili servis
istasyonunun mevcut olmaması halinde sırasıyla; malın satıcısı, ithalatçısı veya
üreticisinden birisi tarafından mala ilişkin azami tamir süresi ferisinde düzenlenen
raporla belirlenmesi ve bu raporun bir nüshasının tüketiciye verilmesi zorunludur.
8. Arızalarda kullanım hatasının bulunup bulunmadığının, yetkili servis istasyonları, yetkili
servis istasyonunun mevcut olmaması halinde sırasıyla; malın satıcısı, ithalatçısı veya
üreticisinden birisi tarafından mala ilişkin azami tamir süresi içerisinde düzenlenen
rapora ilişkin olarak bilirkişi tarafından tespit yapılması talebiyle uyuşmazlığın parasal
değerini dikkate alarak tüketici hakem heyetine veya tüketici mahkemesine başvurabilir.
42

Notlar

Gebze Organize Sanayi Bölgesi
hsan Dede Cad. No:139
Gebze, Kocaeli, Türkiye
41480
 Loading...