

LG RL2 Owner’s Manual
OWNER’S MANUAL
MFL71382202
HIGH POWER
SPEAKER SYSTEM
Please read this manual carefully before operating your set and retain it for future
reference.
MODEL
RL2
1901_Rev01
Copyright © 2019 LG Electronics Inc. All Rights Reserved.
www.lg.com
Getting Started2
Safety Information
1
Getting Started
CAUTION: TO REDUCE THE RISK OF ELECTRIC
SHOCK DO NOT REMOVE COVER (OR BACK)
NO USER-SERVICEABLE PARTS INSIDE REFER
SERVICING TO QUALIFIED SERVICE PERSONNEL.
WARNING: TO PREVENT FIRE OR ELECTRIC SHOCK
HAZARD, DO NOT EXPOSE THIS PRODUCT TO RAIN
OR MOISTURE.
CAUTION: The apparatus should not be exposed to
water (dripping or splashing) and no objects lled
with liquids, such as vases, should be placed on the
apparatus.
WARNING: Do not install this equipment in a
conned space such as a book case or similar unit.
CAUTION: Do not use high voltage products around
this product. (ex. Electrical swatter) This product may
malfunction due to electrical shock.
CAUTION
RISK OF ELECTRIC SHOCK
DO NOT OPEN
This lightning ash with arrowhead
symbol within an equilateral
triangle is intended to alert the
user to the presence of uninsulated
dangerous voltage within the
product’s enclosure that may be of
sufcient magnitude to constitute
a risk of electric shock to persons.
The exclamation point within an
equilateral triangle is intended
to alert the user to the presence
of important operating and
maintenance (servicing)
instructions in the literature
accompanying the product.
CAUTION: Do not block any ventilation openings.
Install in accordance with the manufacturer’s
instructions.
Slots and openings in the cabinet are provided
for ventilation and to ensure reliable operation of
the product and to protect it from over heating.
The openings shall never be blocked by placing
the product on a bed, sofa, rug or other similar
surface. This product should not be placed in a builtin installation such as a bookcase or rack unless
proper ventilation is provided or the manufacturer’s
instruction has been adhered to.
NOTICE: For safety marking information including
product identication and supply ratings, please refer
to the main label on the bottom or the other surface
of the product.
CAUTION concerning the Power Cord
The Power Plug is the disconnecting device. In case
of an emergency, the Power Plug must remain readily
accessible.
Check the specication page of this owner’s manual
to be certain of the current requirements.
Do not overload wall outlets. Overloaded wall outlets,
loose or damaged wall outlets, extension cords, frayed
power cords, or damaged or cracked wire insulation
are dangerous. Any of these conditions could result
in electric shock or re. Periodically examine the
cord of your device, and if its appearance indicates
damage or deterioration, unplug it, discontinue use of
the device, and have the cord replaced with an exact
replacement part by an authorized service center.
Protect the power cord from physical or mechanical
abuse, such as being twisted, kinked, pinched, closed
in a door, or walked upon. Pay particular attention to
plugs, wall outlets, and the point where the cord exits
the device.
CAUTION: The ventilation should not be impeded by
covering the ventilation openings with items, such as
newspapers, table-cloths, curtains, etc.
CAUTION: The apparatus could be used in tropical
and moderate climates.
CAUTION: The MAINS plug or the appliance coupler
is used as the disconnect device, the disconnect
device shall remain readily operable.
CAUTION: No naked ame sources, such as lighted
candles, should be placed on the apparatus.
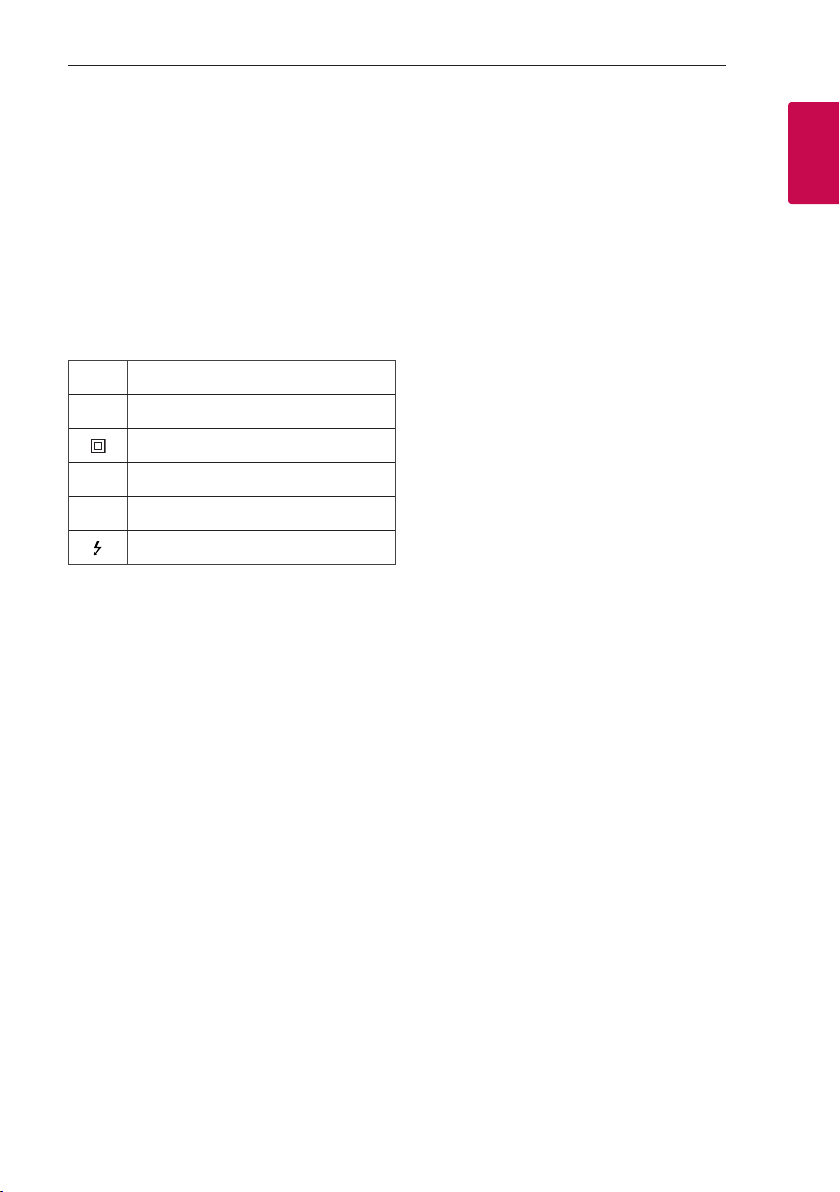
Symbols
Refers to alternating current(AC).
~
Refers to direct current(DC).
0
Refers to class II equipment.
Refers to stand-by.
1
Refers to “ON” (power).
!
Refers to dangerous voltage.
Getting Started 3
1
Getting Started

Getting Started4
Precautions on handling a
battery
yThis unit has a built-in valve regulated lead-acid
1
Getting Started
rechargeable battery. (12 V/7.0 Ah)
yDo not use the battery in a closed room or near
re.
yCharge the battery under the charging condition
specied.
yIf any corrosion of the terminals, leakage or
deformation of the case of the battery is found, do
not use the battery.
yIf the battery leaks, while protecting your hands or
clothing, remove the battery from the device and
should be extremely careful not to infect the skin
or eyes.
yIf the battery leaks and the liquid inside spills on
the skin or clothing, immediately wash it off with
plenty of clean water.
If the liquid splashes into eyes, immediately ush
the eyes with plenty of clean water and consult a
doctor.
yAvoid mixed usage of batteries differing in type,
manufacturer or history of use.
yDo not throw the battery in re nor heat the
battery.
yDo not short of battery terminals.
yDo not attempt to disassemble, remodel or
destroy the battery.
yDo not place the battery near a child.
yThe battery can be replaced. If you need to charge
your battery more and more frequently, it might be
time to replace it. The battery should be serviced
by LG Electronics customer care center.
yCharge fully before storing a battery which has
not been in use for a long period and turn ON/OFF
switch off (OFF). Store the battery in a cool, dry
place.
yDuring storage of the battery, charge it at least
once every three months. If the battery is stored
for a long period without being charged, its battery
life may be shortened.
yThe used battery must be recycled or disposed of
separately from household waste.

Table of Contents
Table of Contents 5
1 Getting Started
2 Safety Information
4 – Precautions on handling a battery
6 Unique Features
6 Playable file Requirement
6 – Music file requirement
6 – Compatible USB Devices
6 – USB device requirement
7 Top Panel
8 Rear Panel
9 Carrying the unit
10 Charging Battery
2 Connecting
11 AC Power Cord Connection
12 Optional Equipment Connection
12 – AUX IN Connection
12 – USB Connection
3 Operating
13 Basic Operations
13 – USB Operations
14 Using BLUETOOTH® wireless technology
14 – Listening to music stored on the Bluetooth
devices
17 Radio Operations
17 – Listening to the radio
17 – Presetting the Radio Stations
17 – Deleting all the saved stations
18 Sound adjustment
18 – Setting the sound mode
19 Other Operations
19 – Using Microphone
21 – LIGHTING
22 – Auto power down
22 – Auto function change
4 Troubleshooting
23 Troubleshooting
23 – General
5 Appendix
24 General specifications
25 Maintenance
25 – Handling the Unit
25 Trademarks and Licenses
1
2
3
4
5

Getting Started6
Unique Features
BLUETOOTH®
1
Listens to music stored on your Bluetooth device.
Getting Started
Carrying the unit
The unit has wheels and a handle so you can easily
move the unit.
Playable file
Requirement
Music file requirement
MP3/WMA le compatibility with this unit is limited
as follows.
y Sampling frequency : within 32 to 48 kHz (MP3),
within 32 to 48 kHz (WMA)
y Bit rate : within 32 to 320 kbps (MP3),
40 to 192 kbps (WMA)
y Maximum les : 999
y Maximum folders : 99
y File extensions : “.mp3”/ “.wma”
y Certain MP3/WMA les may not be played
depending on the type or format of the le.
Compatible USB Devices
y MP3 Player : Flash type MP3 player.
y USB Flash Drive :
Devices that support USB2.0 or USB1.1.
y The USB function of this unit does not support all
USB devices.
USB device requirement
y Devices which require additional program
installation when you have connected it to a
computer, are not supported.
y Do not extract the USB device while in operation.
y For a large capacity USB, it may take longer than a
few minute to be searched.
y To prevent data loss, back up all data.
y If you use a USB extension cable or USB hub, the
USB device is not recognized.
y Using NTFS le system is not supported. (Only
FAT(16/ 32) le system is supported.)
y This unit recognizes up to 999 les.
y External HDD, SSD, Card readers, Locked devices,
or hard type USB devices are not supported.
y USB port of the unit cannot be connected to PC.
The unit cannot be used as a storage device.
y Some USB may not work with this unit.
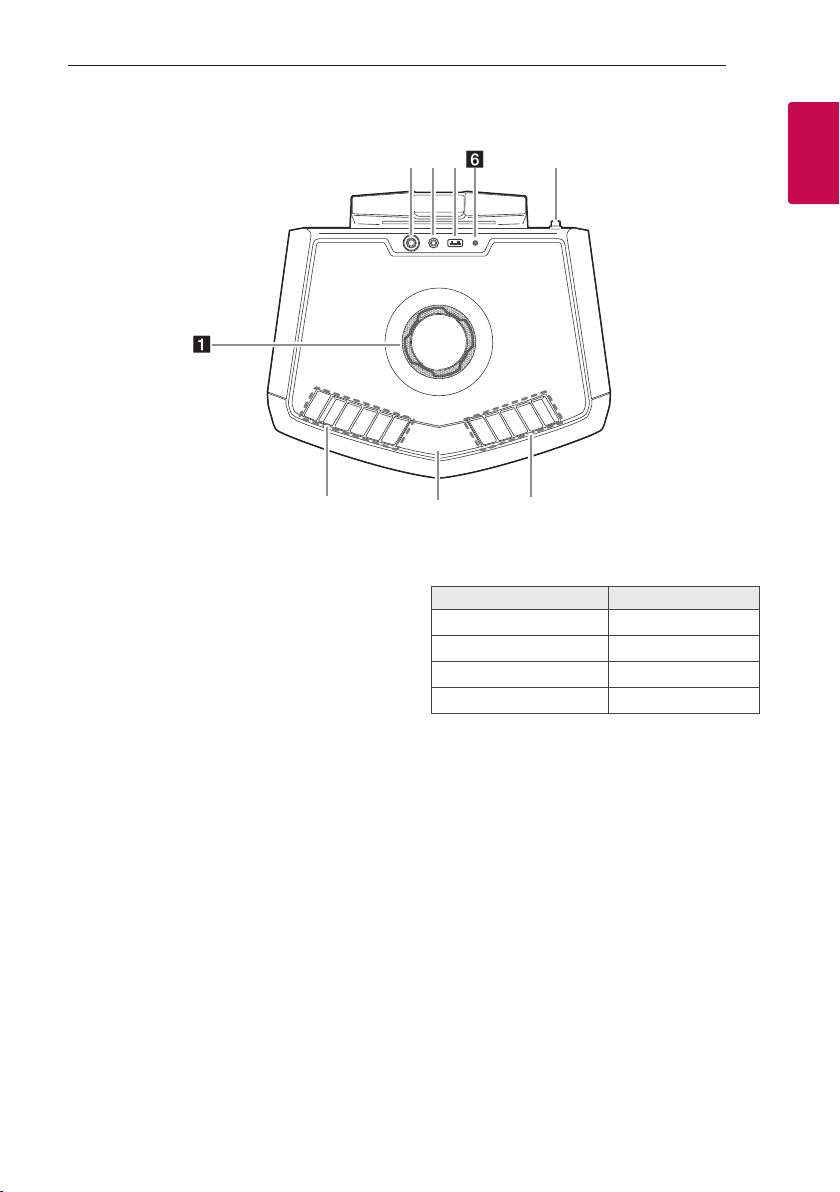
Top Panel
Getting Started 7
a
b
a MASTER VOLUME / MULTI JOG
- Adjusts speaker volume.
- Selects vocal effects.
b 1 (Standby)
Turns the power on or off.
MIC (Microphone) VOL. (Volume)
Adjusts microphone volume with MASTER
VOLUME / MULTI JOG.
VOCAL EFFECTS
Selects various vocal effects mode.
MIC ECHO / VOICE CANCELLER
- Selects ECHO mode.
- You can reduce the vocal tones during music
playback from various input sources by pressing
and holding.
KEY CHANGER
Changes the key to suit your vocal range with
MASTER VOLUME / MULTI JOG.
LIGHTING
Selects the lighting mode.
c Display window
i
fgh
c
d F (Function)
Selects the function and input source.
Input source / Function Display
USB USB
AUX (3.5 mm) input AUX
Bluetooth BT
Radio FM
C/V (Skip/Search)
- Skips backward or forward.
- Searches for a section within a le.
- Selects the radio stations.
N (Play/Pause) PRESET
- Starts or pauses playback.
- Chooses a preset number for a radio station.
- Stores radio stations.
SOUND EFFECT / REPEAT
- Chooses sound impressions.
- Listens to your les repeatedly or randomly by
pressing and holding.
e FM antenna
f BATTERY
Battery charging indicator
g USB port
You can play sound les by connecting the USB
device.
h AUX IN
Connects a portable device.
i MIC (Microphone) jack
Connects a microphone.
e
d
1
Getting Started

Getting Started8
Rear Panel
1
Getting Started
a Power ON/OFF switch
Switches the unit ON or OFF.
(Battery can be charged even when this unit is in
off (OFF) status.)
b AC in socket
a b
Note
,
Fully charge the device before using.
 Loading...