


SIMPLE MANUAL
ENGLISH
HDD / DVD RECORDER
Please read this manual carefully before operating
your set and retain it for future reference.
RH735C / RH733C / RH732C / RH731C
1 Getting Started
Getting Started2
Safety Information
1
Getting Started
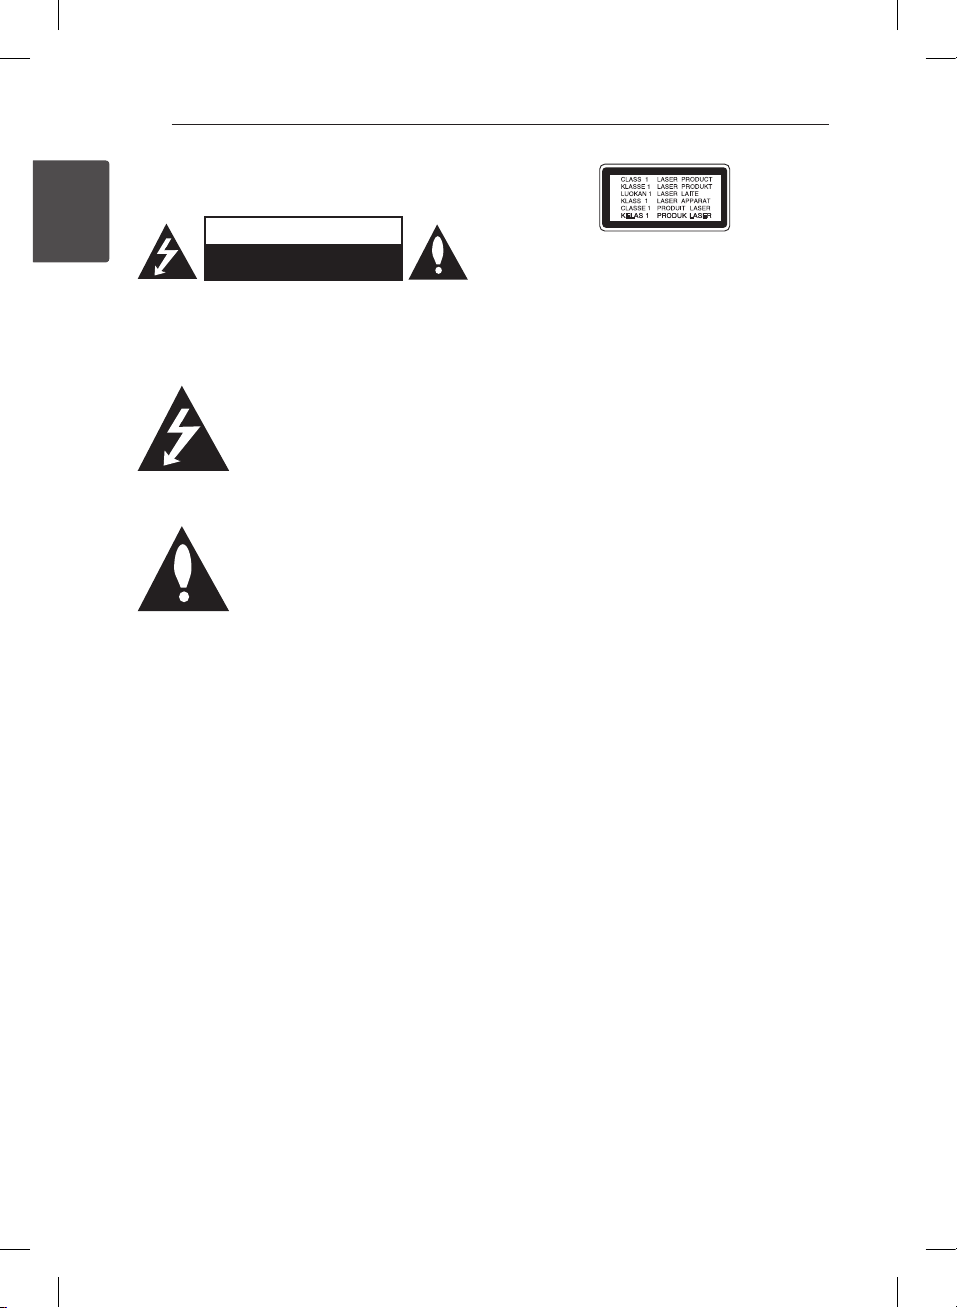
CAUTION: TO REDUCE THE RISK OF ELECTRIC
SHOCK DO NOT REMOVE COVER (OR BACK) NO
USER-SERVICEABLE PARTS INSIDE REFER SERVICING
TO QUALIFIED SERVICE PERSONNEL.
enclosure that may be of sucient magnitude to
constitute a risk of electric shock to persons.
instructions in the literature accompanying the
product.
WARNING: TO PREVENT FIRE OR ELECTRIC SHOCK
HAZARD, DO NOT EXPOSE THIS PRODUCT TO RAIN
OR MOISTURE.
WARNING: Do not install this equipment in a
conned space such as a book case or similar unit.
CAUTION: Do not block any ventilation openings.
Install in accordance with the manufacturer’s
instructions.
Slots and openings in the cabinet are provided for
ventilation and to ensure reliable operation of the
product and to protect it from over heating. The
openings shall be never be blocked by placing
the product on a bed, sofa, rug or other similar
surface. This product shall not be placed in a builtin installation such as a bookcase or rack unless
proper ventilation is provided or the manufacturer’s
instruction has been adhered to.
CAUTION
RISK OF ELECTRIC SHOCK
DO NOT OPEN
This lightning ash with arrowhead
symbol within an equilateral triangle
is intended to alert the user to the
presence of uninsulated dangerous
voltage within the product’s
The exclamation point within an
equilateral triangle is intended
to alert the user to the presence
of important operating and
maintenance (servicing)
CAUTION: This product employs a Laser System.
To ensure proper use of this product, please read
this owner’s manual carefully and retain it for future
reference. Shall the unit require maintenance,
contact an authorized service centre.
Use of controls, adjustments or the performance of
procedures other than those specied herein may
result in hazardous radiation exposure.
To prevent direct exposure to laser beam, do not
try to open the enclosure.
CAUTION concerning the Power Cord
Most appliances recommend they be placed upon
a dedicated circuit;
That is, a single outlet circuit which powers only
that appliance and has no additional outlets or
branch circuits. Check the specication page of this
owner’s manual to be certain. Do not overload wall
outlets. Overloaded wall outlets, loose or damaged
wall outlets, extension cords, frayed power cords, or
damaged or cracked wire insulation are dangerous.
Any of these conditions could result in electric
shock or re. Periodically examine the cord of your
appliance, and if its appearance indicates damage
or deterioration, unplug it, discontinue use of the
appliance, and have the cord replaced with an
exact replacement part by an authorized service
centre. Protect the power cord from physical or
mechanical abuse, such as being twisted, kinked,
pinched, closed in a door, or walked upon. Pay
particular attention to plugs, wall outlets, and
the point where the cord exits the appliance. To
disconnect power from the mains, pull out the
mains cord plug. When installing the product,
ensure that the plug is easily accessible.
Getting Started 3
This device is equipped with a portable battery or
accumulator.
Safety way to remove the battery or the
battery from the equipment: Remove the
old battery or battery pack, follow the steps
in reverse order than the assembly. To prevent
contamination of the environment and bring on
possible threat to human and animal health, the
old battery or the battery put it in the appropriate
container at designated collection points. Do
not dispose of batteries or battery together with
other waste. It is recommended that you use
local, free reimbursement systems batteries and
accumulators. The battery shall not be exposed to
excessive heat such as sunshine, re or the like.
CAUTION: The apparatus shall not be exposed to
water (dripping or splashing) and no objects lled
with liquids, such as vases, shall be placed on the
apparatus.
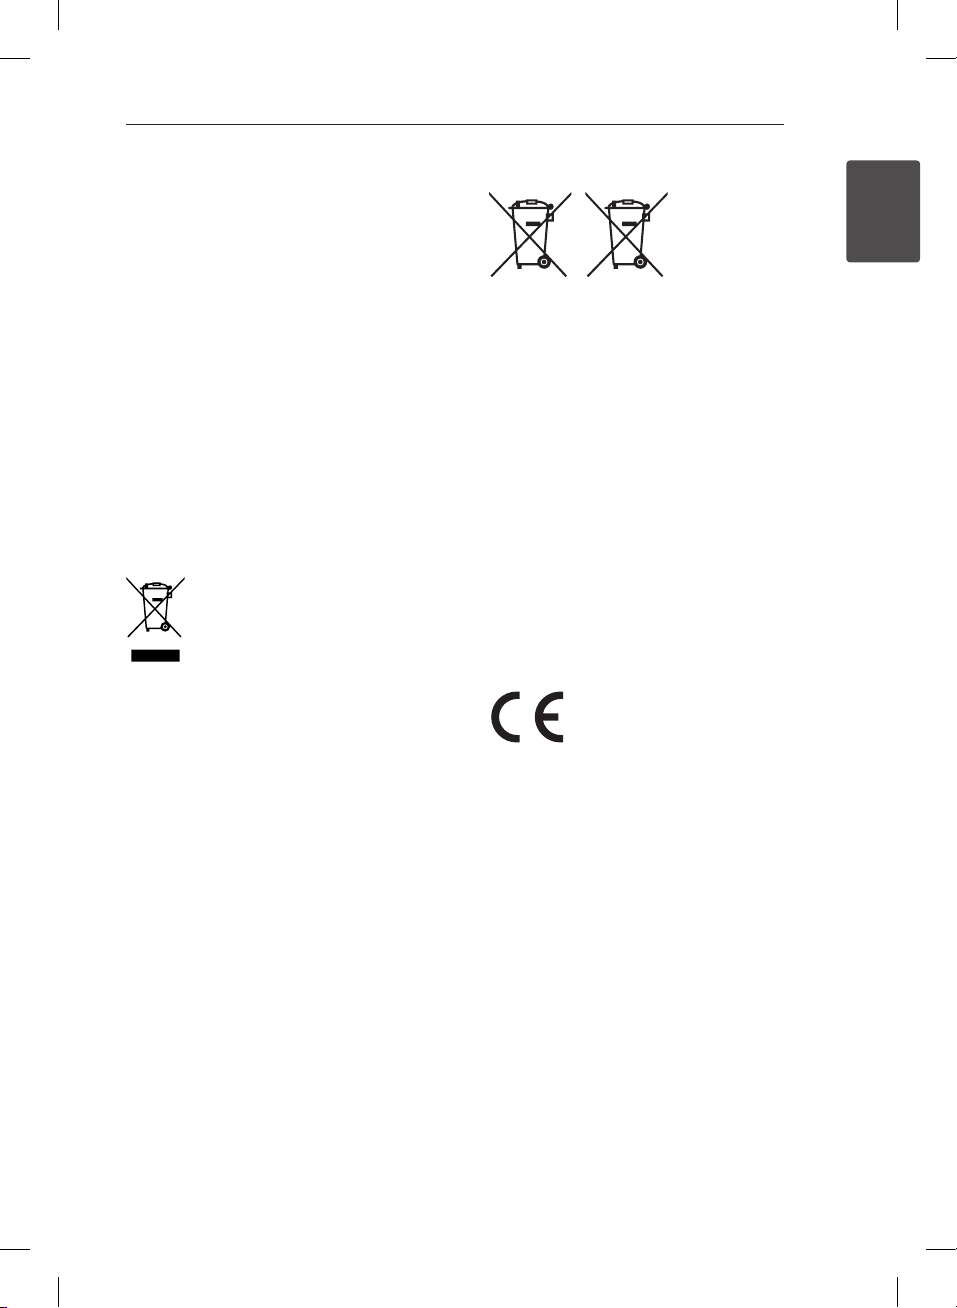
Disposal of your old appliance
1. All electrical and electronic products
should be disposed of separately
from the municipal waste stream
via designated collection facilities
appointed by the government or the
local authorities.
2. The correct disposal of your old
appliance will help prevent potential
negative consequences for the
environment and human health.
3. For more detailed information about
disposal of your old appliance,
please contact your city office, waste
disposal service or the shop where
you purchased the product.
Disposal of waste batteries/accumulators
1
Getting Started
Pb
1. This symbol may be combined with chemical
symbols for mercury(Hg), cadmium(Cd) or
lead(Pb) if the battery Contains more that
0.0005% of mercury,0.002% of cadmium or
0.004% of lead.
2. All batteries/accumulators should be disposed
separately from the municipal waste stream via
designated collection facilities appointed by the
government or the local authorities.
3. The correct disposal of Your old batteries/
accumulators will help to prevent potential
negative consequences for the environment,
animal and human health.
4. For more detailed information about disposal of
Your old batteries/accumulators, please contact
Your city office, waste disposal service or the
shop where You purchased the product.
LG Electronics hereby declares that this/these
product(s) is/are in compliance with the essential
requirements and other relevant provisions of
Directive 2004/108/EC, 2006/95/EC, 2009/125/EC
and 2011/65/EU.
Contact oce for compliance of this product :
LG Electronics Inc.
EU Representative, Krijgsman 1,
1186 DM Amstelveen, The Netherlands
yPlease note that this is NOT a Customer Service
contact point. For Customer Service Information,
see Warranty Card or contact the dealer that you
purchased this product.
Getting Started4
Notes on Copyrights
yRecording equipment should be used only for
lawful copying and you are advised to check
1
Getting Started
carefully what is lawful copying in the area
in which you are making a copy. Copying of
copyright material such as lms or music is
unlawful unless permitted by a legal exception
or consented to by the rights owner.
yThis product incorporates copyright protection
technology that is protected by U.S. patents
and other intellectual property rights. Use of
this copyright protection technology must be
authorized by Rovi Corporation, and is intended
for home and other limited viewing uses only
unless otherwise authorized by Rovi Corporation.
Reverse engineering or disassembly is prohibited.
yCONSUMERS SHOULD NOTE THAT NOT ALL
HIGH DEFINITION TELEVISION SETS ARE FULLY
COMPATIBLE WITH THIS PRODUCT AND MAY
CAUSE ARTIFACTS TO BE DISPLAYED IN THE
PICTURE. IN CASE OF 625 PROGRESSIVE SCAN
PICTURE PROBLEMS, IT IS RECOMMENDED
THAT THE USER SWITCH THE CONNECTION
TO THE ‘STANDARD DEFINITION’ OUTPUT. IF
THERE ARE QUESTIONS REGARDING OUR TV SET
COMPATIBILITY WITH THIS MODEL 625p UNIT
PLEASE CONTACT OUR CUSTOMER SERVICE
CENTRE.
yMany DVD discs are encoded with copy
protection. Because of this, you should only
connect your player directly to your TV, not to a
VCR. Connecting to a VCR results in a distorted
picture from copy-protected discs.
yUnder the U.S. Copyright laws and Copyright
laws of other countries, unauthorized recording,
use, display, distribution, or revision of television
programs, videotapes, DVDs, CDs and other
materials may subject you to civil and/or criminal
liability.
Important Notice for TV colour
system
The colour system of this player diers according to
currently playing discs.
For example, when the player plays the disc
recorded in the NTSC colour system, the image is
output as an NTSC signal.
Only the multi system colour TV can receive all
signals output from the player.
yIf you have a PAL colour system TV, you will see
just distorted images when using discs or video
contents recorded in NTSC.
yThe multi system colour TV changes the colour
system automatically according to input signals.
In case that the colour system is not changed
automatically, turn it o and then on to see
normal images on screen.
yEven if the disc recorded in NTSC colour system
are well displayed on your TV, these may not be
recorded correctly on your recorder.
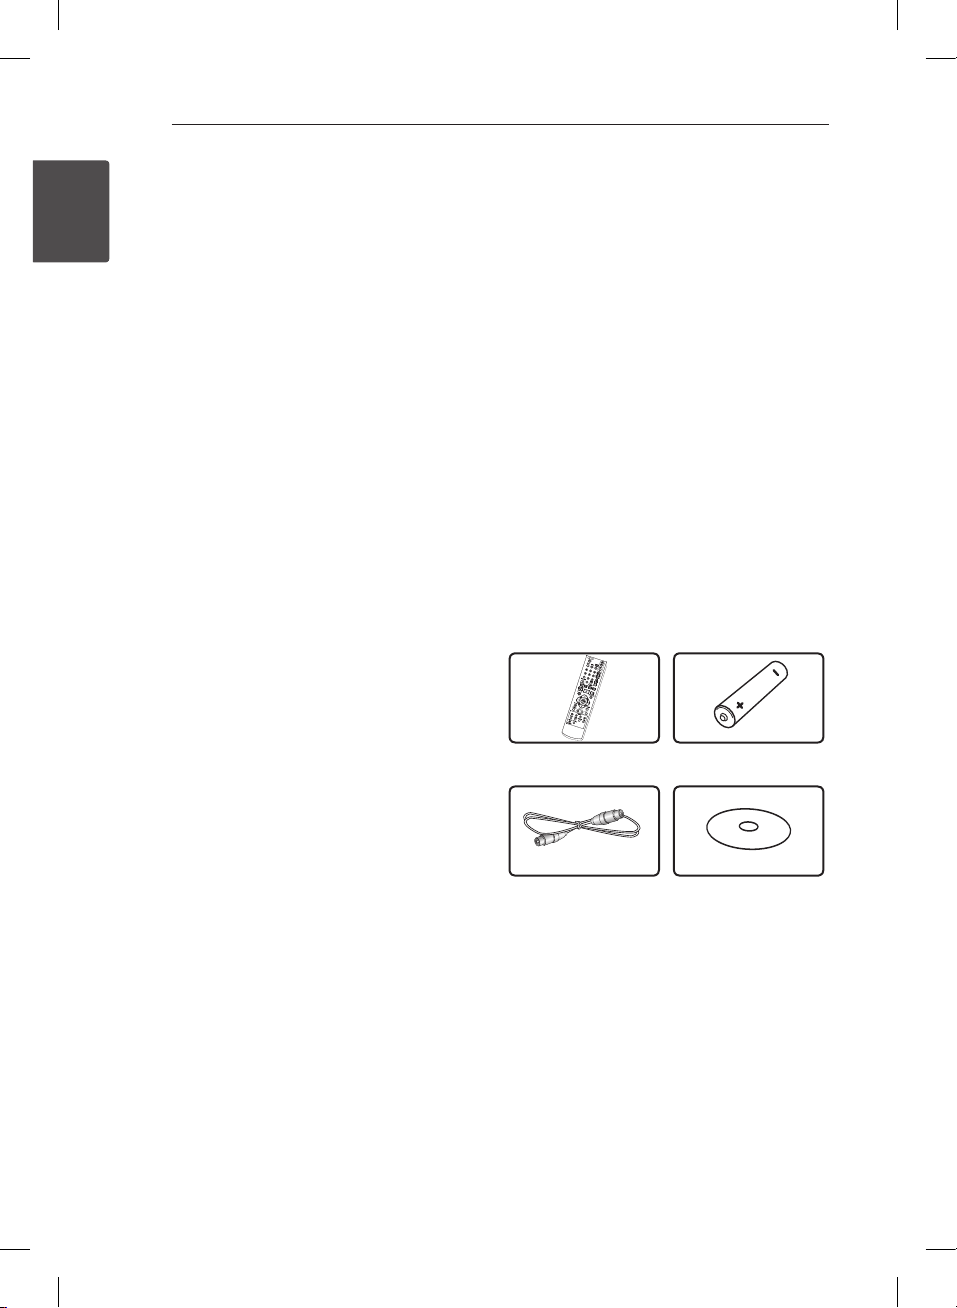
Supplied Accesorries
Remote control (1) Battery (1)
RF cable (1) CD manual

Table of Contents 5
Table of Contents
1 Getting Started
2 Safety Information
4 – Supplied Accesorries
6 Introduction
6 – Playable Discs and symbols used in
this manual
6 – About the “7” symbol display
6 – Regional Code
7 – Compatibility Notes
7 – AVCHD (Advanced Video Codec High
Definition)
7 – System Requirements
8 – Recordable Discs
8 – Recommended recordable DVD discs
8 – File compatibility
10 Remote control
11 Main Unit
12 Connections to Your TV
12 – Antenna connection to your TV and
this unit
12 – Video/Audio (Left/Right) Connection
13 – HDMI Connection
13 – Resolution Setting
3 Operating
16 General Playback
16 – Playing a disc
17 – Playing a file on Linked Devies
18 – Basic operations for video and audio
content
18 – Basic operations for photo content
19 On-Screen display
19 – Displaying content information on-
screen
19 Using the Recording title Copy
4 Troubleshooting
22 Troubleshooting
22 – General
22 – Resetting the unit
23 – Playback
23 – Recording
24 – HDMI
24 – Customer Support
24 – Open source software notice
5 Appendix
25 Trademarks and Licenses
25 About the internal hard disk drive
26 Specifications
1
2
3
4
5
2 System Setting
14 Auto Set Up
15 Home Menu Overview
15 – Basic button operations
15 Settings
15 – Adjust the Setup Settings

Getting Started6
Introduction
1
Playable Discs and symbols used in this manual
Getting Started
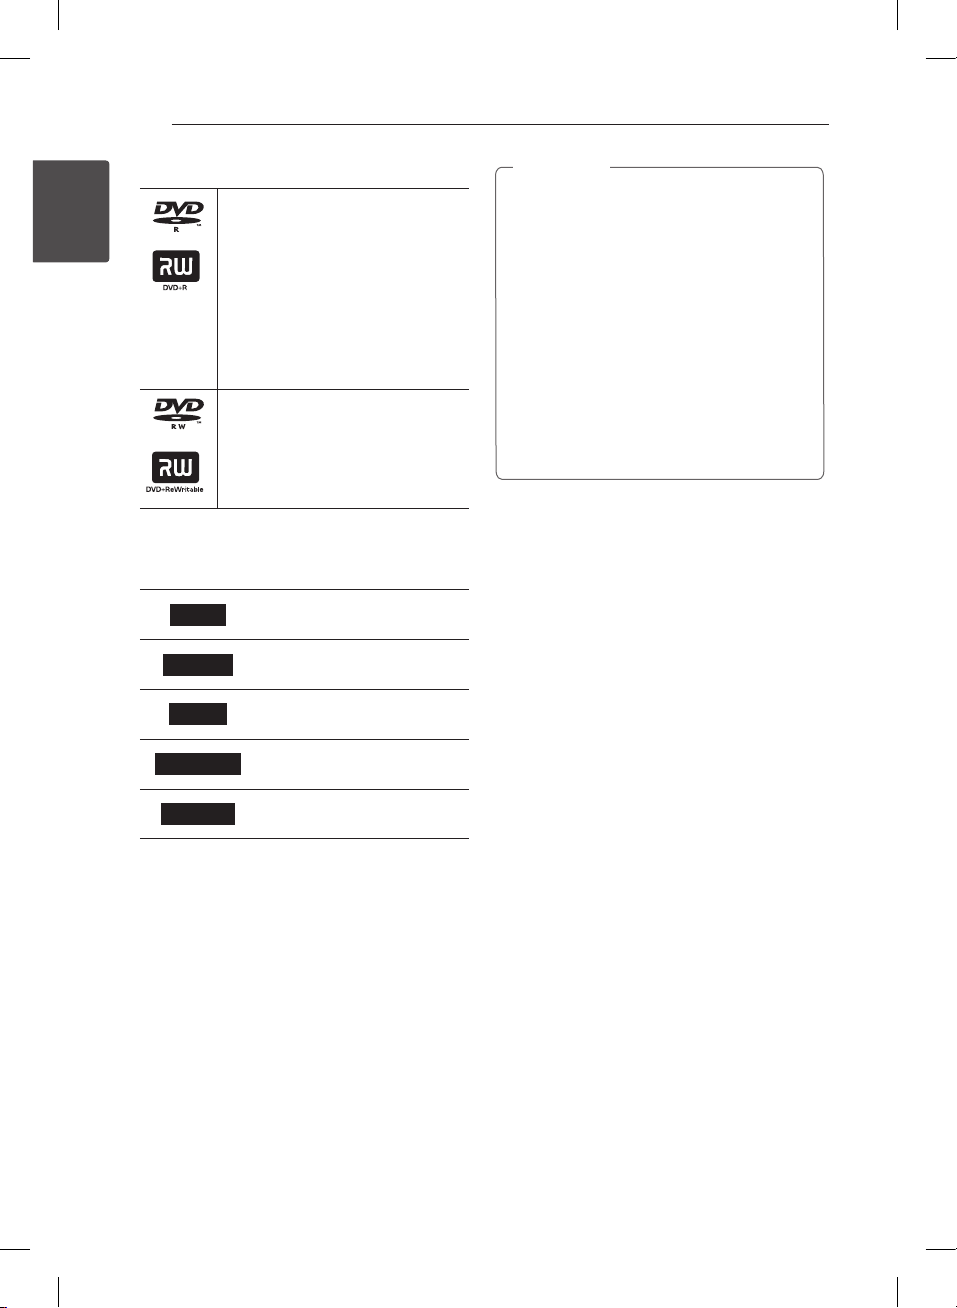
Media/Term Logo Symbol Description
yDiscs such as movies that can be purchased or
DVD-ROM
DVD-R
DVD-RW
DVD+R
DVD+RW
(12 cm, 8 cm)
DVD-RW (VR)
(12 cm)
Audio CD
(12 cm)
CD-R/RW
(12 cm, 8 cm)
HDD –
r
o
y
u
i
r
t
y
u
i
REC
rented.
yVideo mode and nalized only
ySupports the dual layer disc also
Finalized AVCHD format
yDVD±R/RW discs that contain Video, Audio or
Photo les.
yISO 9660+JOLIET, UDF and UDF Bridge format
VR mode and nalized only
Audio CD
yCD-R/RW discs that contain Video, Audio or
Photo les.
yISO 9660+JOLIET, UDF and UDF Bridge format
Titles recorded via this unit
Note –
Caution –
,
>
Indicates special notes and operating features.
Indicates cautions for preventing possible damages
from abuse.
About the “7” symbol display
“7” may appear on your TV display during operation and indicates that the function explained in this
owner’s manual is not available on that specic media.
Regional Code
This unit has a regional code printed on the rear of the unit. This unit can play only DVD discs labelled same
as the rear of the unit or “ALL”.

Getting Started 7
Note
,
yDepending on the conditions of the
recording equipment or the CD-R/RW (or
DVD±R/RW) disc itself, some CD-R/RW (or
DVD±R/RW) discs cannot be played on the
unit.
yDo not attach any seal or label to either side
(the labeled side or the recorded side) of a
disc.
yDo not use irregularly shaped CDs (e.g.,
heart-shaped or octagonal). Doing so may
result in malfunctions.
yDepending on the recording software & the
nalization, some recorded discs (CD-R/RW,
DVD±R/RW) may not be playable.
yDVD-R/RW, DVD+R/RW and CD-R/RW discs
recorded using a personal computer or a
DVD or CD Recorder may not play if the
disc is damaged or dirty, or if there is dirt or
condensation on the Recorder’s lens.
yIf you record a disc using a personal
computer, even if it is recorded in a
compatible format, there are cases in which
it may not play because of the settings of
the application software used to create the
disc. (Check with the software publisher for
more detailed information.)
yThis player requires discs and recordings to
meet certain technical standards in order
to achieve optimal playback quality. Prerecorded DVDs are automatically set to
these standards. There are many dierent
types of recordable disc formats (including
CD-R containing MP3 or WMA les) and
these require certain pre-existing conditions
to ensure compatible playback.
yCustomers should note that permission
is required in order to download MP3 /
WMA les and music from the Internet.
Our company has no right to grant such
permission. Permission should always be
sought from the copyright owner.
Compatibility Notes
yViewing high-denition content and up-
converting standard DVD content may require a
HDMI-capable input or HDCP-capable DVI input
on your display device.
ySome DVD discs may restrict the use of some
operation commands or features.
yYou can use a USB device that is used to store
some disc related information. The disc you are
using will control how long this information is
retained.
AVCHD (Advanced Video
Codec High Definition)
yThis player can playback AVCHD format discs.
These discs are normally recorded and used in
camcorders.
yThe AVCHD format is a high denition digital
video camera format.
yThe MPEG-4 AVC/H.264 format is capable of
compressing images at higher eciency than
the conventional image compressing format.
ySome AVCHD discs use the “x.v.Color” format.
yThis player can playback AVCHD discs using
“x.v.Color” format.
ySome AVCHD format discs may not be played,
depending on the recording condition.
yAVCHD format discs need to be nalized.
y“x.v.Color” oers a wider colour range than
normal DVD camcorder discs.
System Requirements
For high denition video playback:
yHigh denition display that has HDMI input jacks.
yHDMI or HDCP capable DVI input on your display
device is required for some content (as specied
by disc authors).
yFor up-conversion of standard denition DVD, a
HDMI or HDCP capable DVI input on your display
device is required for copy-protected content.
For Dolby® Digital Plus, Dolby TrueHD audio
playback:
yAn amplier/receiver with a built-in (Dolby
Digital, Dolby Digital Plus, Dolby TrueHD or DTS).
yMain, centre, surround speakers and subwoofer
as necessary for chosen format.
For CI+ CAM, It takes more than 3 minutes to
authenticate at the rst time.
If you are using more 2 CI+ CAM, there could be
a failure in authentication when you change CI+
CAM, (It is a normal operation).
Please insert CAM again when the failure is
occurred.
1
Getting Started
Getting Started8
Recordable Discs
DVD-R/ DVD+R(DL):
-Format is available (only 1 time),
1
Getting Started
with UDF type
-Record is available over and over
(Multi-session is supported)
-You may need to nalize a disc to
play it with dierent unit. Once a
disc is nalized, you can‘t record
any more.
DVD-RW/ DVD+RW:
-Format is available repeatedly,
with UDF type
-Record is available over and over
(Single-session is supported).
Recommended recordable DVD
discs
DVD-R
DVD-RW
DVD+R
DVD+R(DL)
DVD+RW
Mitsubishi (8x, 16x), Verbatim
(8x, 16x)
Mitsubishi (8x, 16x), Verbatim
(8x, 16x), JVC (4x), Maxell (4x)
Mitsubishi (8x, 16x), Verbatim
(8x, 16x)
Verbatim (8x, 4x), MKM (8x, 4x),
CMC (4x), RITEK (4x)
Mitsubishi (8x, 16x), HP (4x),
Verbatim (4x), Ricoh (4x)
Note
,
yIf a DVD-RW/DVD+RW discs is recorded
using a personal computer or other DVD
recorder, you cannot format the disc using
this recorder. So if you want to use the disc
on this recorder, you must format the disc
using the original recorder.
yWhile recording, in case of DVD-R/+R disc,
there may be noise from the unit. But it is
not a problem.
yRecordable DVD is used only for Recorded
Title Copy.
yRecorded Title is copied as TS Format File to
Recordable DVD. So Disc copied on this unit
may not played on other player or recorder.
File compatibility
Overall
Available File extensions: “.jpg”, “.jpeg”, “.png”, “.avi”,
“.divx ”, “.mpg”, “.mpeg”, “.mkv ”, “.mp4”, “.ts”, “.mp3”, “.wma”,
“.m4a”
yThe le name is limited to 128 characters.
yDepending on the size and number of the les, it
may take several minutes to read the contents on
the media.
Maximum Files/Folder: Less than 2000 (total
number of les and folders)
CD-R/RW, DVD±R/RW:
ISO 9660+JOLIET, UDF and UDF Bridge format
MOVIE
Available resolution: 1920 x 1080 (W x H) pixels
Playable subtitle: SubRip (.srt / .txt), SAMI (.smi),
SubStation Alpha (.ssa/.txt), MicroDVD (.sub/.txt),
SubViewer 1.0 (.sub), SubViewer 2.0 (.sub/.txt), DVD
Subtitle System (.txt), TMPlayer (.txt)
Playable Codec format: “DIVX 3.11”, “DIVX4”, “DIVX5”,
“DIVX6”, “MPEG4 PART2”, “MPEG4 VISUAL”
“XVID” (Standard playback only), H.264/MPEG-4 AVC,
MPEG2 PS, MPEG2 TS
y“DIVX3”, “DIVX4”, “DIVX5”, “DIVX6”, “XVID”, “MPEG4
PART2”, “MPEG4 VISUAL” : Less than 720 x 576
(resolution) and 5Mpbs (Bitrate)
Playable Audio format: “Dolby Digital”, “DTS”, “MP3”,
“WMA”, “AAC”
yNot all the WMA and AAC Audio formats are
compatible with this unit.

Getting Started 9
yMPEG2 Audio Codec are not supported on this
unit.
yDTS is only available when this unit is connected
to the equipment supporting DTS.
Sampling frequency: within 32 - 48 kHz (WMA),
within 32 - 48 kHz (MP3)
Bit rate: within 20 - 320 kbps (WMA),
within 32 - 320 kbps (MP3)
Note
,
yHD movie les contained on the CD or USB
1.0/1.1 may not be played properly. DVD or
USB 2.0 are recommended to play back HD
movie les.
yThis unit supports H.264/MPEG-4 AVC prole
Main, High at Level 4.1.
yThis unit does not support the le that
are recorded with GMC
are video encoding techniques in MPEG4
standard, like DivX or XVID.
*1 GMC – Global Motion Compensation
*2 Qpel – Quarter pixel
yHD movie les that need high performance
playback could react slowly.
yThe total playback time indicated on the
screen may not be correct for .ts les.
1
or Qpel
*
2
. Those
*
PNG File
y64bits : Less than 1M pixel, Max width 4096 pixel
y32bits : Less than 2M pixel, Max width 4096 pixel
Note
,
Depending on the size and number of the
JPEG les, it may take several minutes to read
the contents of the media.
Thumbnail image:
JPG File : Less than 16M pixel, Max width 6000 pixel
PNG File : Less than 16M pixel, Max width 4096 pixel
yThis unit just supports Baseline JPG and 32bits
PNG in thumbnail.
1
Getting Started
MUSIC
Sampling frequency: between 8 - 48 kHz (WMA),
within 32 kHz - 48 kHz (MP3)
Bit rate: between 32 - 320 kbps (MP3) and
between 8 - 320 kbps (WMA)
Note
,
The total playback time indicated on the
screen may not be correct for VBR les.
PHOTO
Recommended size:
JPG File
yBaseline JPG : Less than 16M pixel, Max width
6000 pixel
yProgressive JPG : Less than 4M pixel,
Max width 6000 pixel

Getting Started10
Remote control
1
Getting Started
Replacement of battery
• • • • • • a • • • • • •
(POWER): Switches the player
1
ON or OFF.
INPUT: Changes the input for
recording (Tuner or AV mode).
MUTE (@): Mutes the sound.
(OPEN/CLOSE): Opens and
B
closes the disc tray.
0-9 numerical buttons: Selects
numbered options in a menu.
DISC MENU/REC.LIST: Accesses
menu on a disc or switches
between recording list menu.
TITLE/Q.MENU: Displays the DVD
title menu or sets options menu, if
available.
TV (TV Control Buttons): Refer
to the maual on the supplied CDROM disc.
VOL (-/+): Adjusts the sound level
of the unit.
• • • • • • b • • • • •
c/v
backward or forward.
C/V
next or previous chapter / track /
le.
Z
z
M
TIME SHIFT: Activates pause live
TV/playback (timeshift) for a live
TV programme.
(R03)
(SCAN): Searches
(SKIP): Goes to the
(STOP): Stops playback.
(PLAY): Starts playback.
(PAUSE): Pauses playback.
• • • • • • c • • • • •
HOME (n): Displays or exits the
[Home Menu].
INFO/MENU (m): Displays or
exits On-Screen Display.
Direction buttons: Selects an
option in the menu.
ENTER (b): Acknowledges menu
selection.
BACK (1): Exits the menu or
returns to the previous screen.
EXIT: Exits a menu or hides onscreen information.
• • • • • • d • • • • •
CH LIST: Displays the Channel list.
CH/PAGE (
or down through memorized
programmes or previous or next
viewing page.
FAV: Displays the favourite
programme list.
Coloured (R, G, Y, B) buttons:
Use to navigate screen menus.
GUIDE: Displays the programme
guide menu.
TEXT: Switches between teletext
mode and normal TV viewing.
TIMER REC.: Displays [Timer
Recording] menu.
REC. (X): Starts recording.
REPEAT (h): Repeats a desired
section or sequence.
TV/RADIO: Switches between TV
and radio channel.
SUBTITLE: Selects a subtitle
language.
S/W
): Scans up
Remove the battery cover on the
rear of the Remote Control, and
insert a R03 (size AAA) battery
with 4 and 5 matched correctly.

Main Unit
Getting Started 11
1
Getting Started
Disc Tray
a
Display window
b
Remote Sensor
c
(Open/Close)
d R
(Play/Pause)
e T
ANTENNA IN
a
HDMI OUT (TO TV)
b
OPTICAL (DIGITAL AUDIO OUT)
c
VIDEO IN/2CH AUDIO IN (Left/Right)
d
Connect the audio/video output of an external
source.
AC IN connector
e
Connect the supplied power cord.
(Stop)
f I
/I (Power)
g 1
USB Port
h
ANTENNA OUT (TO TV)
f
COMMON INTERFACE
g
Slot for external Conditional Access (CA)module and smart card used to decode
scrambled channels. This device works with CI
or CI+ CAM.
VIDEO OUT
h
2CH AUDIO OUT (Left/Right)
i

Getting Started12
TV
Connections to Your
TV
1
Getting Started
Antenna connection to your
TV and this unit
Connect one end of the RF cable to ANTENNA
OUT(TO TV) jack on the unit and other end to
ANTENNA IN jack on your TV. Passes the signal from
the ANTENNA IN jack to your TV/monitor.
Connect the CATV line or Terrestrial TV antenna to
the ANTENNA IN jack on the unit. If you want to use
an indoor antenna, use one with a signal amplier
rated at 5V, 100 mA and set [Antenna 5V] to [ON] in
the setup menu.
ANTENNA
Rear of this unit
Video/Audio (Left/Right)
Connection
Connect the VIDEO OUT jack on the unit to the
video in jack on the TV using the video cable
supplied. Connect the Left and Right AUDIO OUT
jacks on the unit to the audio left/right in jacks on
the TV using the supplied audio cables.
Rear of this unit
Video/Audio Cable
TV
TV
RF Cable
TV

Getting Started 13
HDMI Connection
If you have a HDMI TV or monitor, you can connect
it to this unit using a HDMI cable (Type A, High
Speed HDMI™ Cable). Connect the HDMI jack on
the unit to the HDMI jack on a HDMI compatible TV
or monitor.
Rear of this unit
HDMI Cable
TV
TV
Resolution Setting
The player provides several output resolutions for
HDMI OUT jacks. You can change the resolution
using [Setting] menu.
1. Press HOME (n).
2. Use a/d to select the [Settings] and press
ENTER (b). The [Settings] menu appears.
3. Use w/s to select [PICTURE] option then press
or ENTER (b) to move to the second level.
d
4. Use w/s to select the [Resolution] option then
press ENTER (b) to move to the third level.
1
Getting Started
Set the TV’s source to HDMI (refer to TV’s Owner’s
manual).
5. Use w/s to select the desired resolution then
press ENTER (b) to confirm your selection.
Note
,
If your TV is NTSC SYSTEM, resolution can be
set only for AUTO mode.

2 System Setting
System Setting14
Auto Set Up
You can reset the recorder to all its factory settings.
The [Auto Set up] menu appears on the screen after
the factory settings.
Step 1. Language Selection
Use
w/s/a/d
screen display, and press ENTER (b).
2
System Setting
Step 2. Screen Size Setting
Use
a/d
(b).
Step 3. Country Selection
Use
w/s/a/d
ENTER (b).
to select a language for the on-
to select a screen size, and press ENTER
to select a country, and press
Step 5. Auto Tuning
1. Use
and press ENTER (b).
2. While the Start option is selected, and press
ENTER (b) to begin the channel search.
The recorder automatically searches for and
saves the programmes.
If you select [Stop], the [Auto Tuning] function
will be skipped.
3. Press ENTER (b).
to select the [Antenna] or [Cable]
w/s
Step 4. Password Setting
Input the new password using numerical buttons.
Enter it again to verify.
Step 6. Setting is complete
Check all the settings that you have set in the
previous steps.
Press ENTER (b) while [Complete] is highlighted to
nish the auto set up settings.

System Setting 15
Home Menu Overview
To access numerous functions of the unit, press
HOME (n) on the remote.
Basic button operations
HOME (n): Accesses or removes the Home Menu.
w/s/a/d
ENTER (b): Acknowledges menu selection.
BACK (1): Exits the menu.
[DTV] - You can watch digital broadcasts.
[Movie] - Plays video contents.
[Photo] - Plays photo contents.
[Music] - Plays audio contents.
[AV] - You can watch video from external input
mode. When you use the recording mode, you
can’t enter the AV mode.
[Settings] - Adjusts the system settings.
: Used to navigate on-screen displays.
Settings
Adjust the Setup Settings
You can change the settings of the player in the
[Settings] menu.
1. Press HOME (n).
2. Use
(b). The [PICTURE] menu appears.
3. Use
press ENTER (b) to move to the second level.
to select [Settings] and press ENTER
a/d
to select the first setup option, and
w/s
2
System Setting
4. Use
press ENTER (b) to move to the third level.
5. Use
ENTER (b) to conrm your selection.
to select a second setup option, and
w/s
to select a desired setting, and press
w/s

3 Operating
Operating16
General Playback
Playing a disc
DVD AVCHD ACD
1. Press B (OPEN/CLOSE), and place a disc on the
disc tray.
2. Press B (OPEN/CLOSE) to close the disc tray.
For most Audio CD, DVD, AVCHD and DVD-ROM
discs, playback starts automatically.
3. Press HOME (n).
4. Select [Movie], [Photo] or [Music] using
3
Operating
and press ENTER (b).
5. Select the disc icon using
ENTER (b).
Note
,
Playback functions described in this manual
are not always available in every les and
media. Some functions can be restricted
depending on many factors.
a/d
a/d
, and press
To stop playback
Press Z (STOP) during playback.
To pause playback
Press M (PAUSE) during playback.
Press z (PLAY) to resume playback.
To scan forward or backward
Press c or v to play fast forward or fast reverse
during playback.
You can change the various playback speeds by
pressing c or v repeatedly.
,
To slow down the playing speed
While the playback is paused, press v to play at
slow motion.
To skip to the next/previous
chapter/track/file
During playback, press C or V to go to the
next chapter/track/le or to return to the beginning
of the current chapter/track/le.
Press C twice briey to step back to the previous
chapter/track/le.
In case of movie le, press C one time. You can
play previous le.

Operating 17
Playing a file on Linked Devies
This unit can play video, audio and photo les
contained in the USB device.
1. Insert a USB device into the USB port until it fits
into place.
2. Press HOME (n).
3. Select [Movie], [Photo] or [Music] using
and press ENTER (b).
4. Select the [ (USB)] option using
, and press ENTER (b).
d
5. Select a file using
(PLAY) or ENTER (b) to play the file.
6. Withdraw the USB device carefully after exiting
the USB mode.
w/s/a/d
a/d
w/s/a/
, and press
z
To control movie playback
You can control playback and set options while
watching videos.
During playback, press INFO/MENU (m).
,
a Progress bar - Selects the desired point and
plays.
b Playback control - Refer to the basic operation
for video.
c Option - Sets options for the Screen Size or
video play.
d List - Stops playback and returns to the list.
To control photo view
Controls playback and sets options while viewing
pictures in full screen.
a Slideshow - Displays photos as a slideshow.
b BGM - Plays background music.
c yRotation - Rotates the picture.
yEnlargement - Enlarges the picture.
d Option - Sets options for viewing photo.
e List - Stops playback and returns to the list.
3
Operating
Operating18
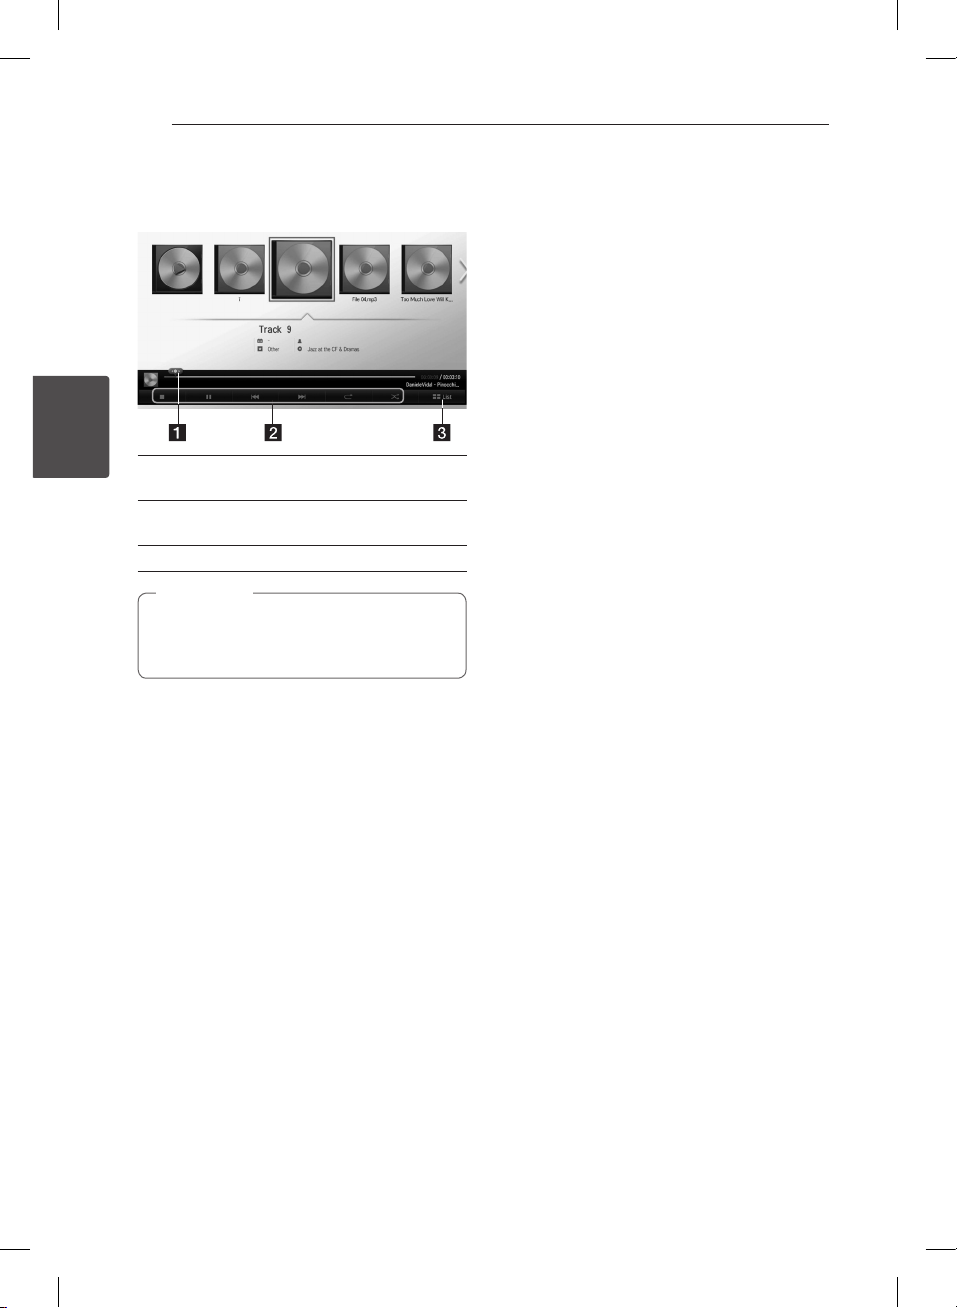
To control music playback
Controls play and sets options while listening to a
music.
3
a Progress bar - Selects the desired point and
Operating
plays.
b Playback control - Refer to the basic operation
for audio and advanced playback.
c [List] - Returns to the list.
Note
,
When you move the progress bar to desired
point during playback, some les may not be
moved to exact point or play next le back.
Basic operations for video and
audio content
To scan forward or backward
(Movie les)
Press c or v to play fast forward or fast
reverse during playback.
You can change the various playback speeds by
pressing c or v repeatedly.
To skip to the next/previous file
(Movie/Music les)
During playback, press C or V to go to the
next le or to step back to the previous le.
Basic operations for photo
content
To play a slide show
Press [Slide Show d] on the Photo view screen.
To stop a slide show
Press [Slide Show Z] on the Photo view screen.
To skip to the next/previous photo
While viewing a photo in full screen, press a or d
on the remote control to go to the previous or next
photo.
To stop playback
Press Z (STOP) or while playback.
To pause playback
Press M (PAUSE) button on the remote control or M
(PAUSE) on the screen while playback.
Press z (PLAY) button on the remote control or
(PLAY) icon on the screen to resume playback.
z
To resume playback
(Movie les)
The unit records the point where you stopped
during playback. When you play the le again on
the list, the option will be appeared on the le.
To resume the playback, Select [YES] and press
ENTER (b).

Operating 19
On-Screen display
You can display and adjust various information and
settings concerning the content.
Displaying content information
on-screen
DVD AVCHD
1. During playback, press INFO/MENU (m) to
show various playback information.
a Title – current title number/total number of
titles
b Chapter – current chapter number/total
number of chapters
c Time – elapsed playing time/total playback
time
d Audio – selected audio language or channel
e Subtitle – selected subtitle
f Angle – selected angle/total number of
angles
2. Select an option using
3. Use
a/d
4. Press BACK (1) to exit the On-Screen display.
,
yIf no button is pressed for a few seconds,
the on-screen display disappears.
yA title number cannot be selected on some
discs.
yAvailable items may dier depending on
discs or titles.
.
w/s
to adjust the selected option value.
Note
Using the Recording
title Copy
You can copy recording title from to the other
storage device.
Preparations:
yInsert a blank DVD disc in the DVD deck and
close the disc tray.
yInsert a external HDD to the USB port until it ts
into place.
1. Press HOME (n).
2. Use
w/s/a/d
Disc icon, on the HOME menu and press ENTER
(b).
3. Press green (G) colored button to display the
[Linked Device List] menu.
If you want to copy the recorded title on disc,
internal HDD or external HDD, please select the
desired device.
4. Use
w/s
to copy, and press ENTER (b).
5. Press blue (B) colored button.
6. Use
w/s/a/d
then press ENTER (b). (shows icon)
to select [Recorded TV] or
to select a storage device you want
to select a recording title
3
Operating

Operating20
7. Press green (G) colored button to display the
[Device Selection] menu.
8. Use
or [ USB] and press ENTER (b) for target
device.
9. (Disc only)
Use
3
Operating
SP, LP or EP] and press ENTER (b).
There are four preset copying quality modes:
[XP] – Highest quality setting, gives about 1
hour of recording time on a DVD (4.7 GB).
[SP] – Default quality, sucient for many
applications, gives about 2 hours of recording
time on a DVD (4.7 GB).
[LP] – Slightly lower video quality, gives about
3 hours of recording time on a DVD disc (4.7
GB).
[EP] – Low video quality, gives about 4 hours of
recording time on a DVD (4.7 GB).
to select [ DISC], [ HDD]
w/s
to select a desired Rec Mode Set [XP,
w/s
11.
(Disc only)
It starts to copy to DVD after preparing video.
After completing copy to DVD, you can see the
copy list.
12. Press BACK (1) to exit the copy list.
10. Use
a/d
to start copying.
to select [Yes], and press ENTER (b)

Note
,
yCopying speed may vary depending on the
le size, number of les.
yIt is unable to do copy during the recording.
yIf a reserved recording is started during
taking a copy, the recording is discontinued
then a notication pops up.
yThe name of copied les can be dierent
from that of original les.
yIt might not be copied if it is copy-protected
contents.
ySuccessful copying contents also depend
on disc’s capability.
yNot supported resolution on the setting
menu turns disabled.
yIf you use the disc copy during timeshift,
the timeshift is terminated automatically.
yIf there is not enough disc space, the
recording may not be run totally.
yIf you want disc copy, use only the disc
which is formatted on this unit.
yThe external USB HDD for record has to be
formatted in NTFS.
yWith the purpose of the title backup, the
copy not like recording, can deal with
maximum 2000 titles.
yDisc rewritten on other recorder or personal
computer may not recognized (played) on
this unit.
yDisc copied on this unit may not recognized
(played) on other player or recorder.
yIf you unplug the USB memory during disc
copy, Emergency may stop.
yRed indicates that the recording will not
be done to end of the selected titles. If you
uncheck the title you’ve checked before, the
Red changes to Green. you can record the
selected titles in Green signal.
yBy using VBR (Variable Bitrate) Encoding
mode, the actual recording time may vary
compared to displayed recording time.
yIf you want to copy recordings less than 15
seconds, it may not be recorded in the DISC.
Operating 21
3
Operating

4 Troubleshooting
Troubleshooting22
Troubleshooting
General
Symptom Cause & Solution
The Power does not turn on. yPlug the power cord into the wall outlet securely.
The unit does not start
playback.
The angle cannot be changed. yMulti-angles are not recorded on the DVD Video being played.
4
The channel is not found or
stored.
Troubleshooting
The remote control does not
work properly.
yInsert a playable disc. (Check the disc type, color system, and regional
code.)
yPlace the disc with the playback side down.
yPlace the disc on the disc tray correctly inside the guide.
yClean the disc.
yCancel the Rating function or change the rating level.
yThe angle cannot be changed for the titles recorded on this unit.
yCheck your antenna connection.
yThe remote control is not pointed at the remote sensor of the unit.
yThe remote control is too far from the unit.
yThere is an obstacle in the path between the remote control and the
unit.
yThe battery in the remote control are exhausted.
yThe remote’s manufacturer code returned to the default setting when
you replaced the battery. Reset the code.
Resetting the unit
Symptom Cause & Solution
If you observe any of the
following symptoms.
You can reset the unit as
follows.
yThe unit is plugged in, but the power will not turn on or o.
yThe front panel display is not working.
yThe unit is not operating normally.
yPress and hold the POWER (1/I ) button for at least ve seconds. This
will force the unit to power o then turn the unit back on.
yUnplug the power cord, wait at least ve seconds, and then plug it in
again.

Playback
Symptom Cause & Solution
Cannot play a disc recorded
using this unit on other unit.
The subtitle language cannot
be changed or turned o.
Cannot play Movie/Photo/
Music les.
yFinalize the disc.
yCheck the disc compatibility of the unit.
yPlace the disc on the disc tray correctly inside the guide.
yDiscs recorded with copy-once material cannot be played on other
players.
ySubtitles are not recorded on the DVD Video being played.
yThe subtitle cannot be changed for the titles recorded on this unit.
yIn case of Movie, refer to subtitle formats.
yCheck the Audio/Video format.
yCheck the sampling frequency or bitrate.
Recording
Troubleshooting 23
Symptom Cause & Solution
Cannot record or does not
record successfully.
Timer record does not record
successfully.
You cannot enter a timer
programme when.
If two or more timer programs
overlap.
yCheck the remaining space on the HDD.
yIf your source is copy-protected, you cannot record it using this
recorder.
yClock is not set to correct time.
yThe start time of the timer recording is past.
yWhen setting the recording programme, make sure you set the
recorder’s built-in tuner, not the TV’s built-in tuner.
yIf the HDD is damaged, the recording may not complete successfully.
yIf you set two timer recordings at the same time, one of that proceeds
after another does. Second Timer recording may proceed in a minute.
yIn the case that two channels is recording.
yThe time you’re trying to set has already passed.
yThere are already 30 timer programs set.
yThe earlier programme takes priority.
yIn the case a reserved recording is stared during recording two
channels and a user uses another menu, the reserved recording
cannot be operated.
4
Troubleshooting

Troubleshooting24
HDMI
Symptom Cause & Solution
The connected HDMI device
does not display any picture.
The connected HDMI device
does not output sound.
4
Troubleshooting
Customer Support
You can update the Player using the latest software to enhance the products operation and/or add new
features. To obtain the latest software for this player (if updates have been made), please visit http://www.
lg.com or contact LG Electronics customer care centre.
yTry disconnecting then reconnecting the HDMI cable.
yTry switching the power of the HDMI device o then back on.
yThe video input of the connected device is set correctly for this unit.
yThe HDMI cable you are using is fully HDMI-compliant. Using a non-
standard cable may result in no picture being output.
yNot all HDCP-compatible DVI devices will work with this unit.
ySome HDMI-compatible devices do not output sounds
(check the manual that came with the connected device).
yIf your TV is not capable of handling 96 kHz sampling frequency, set
the [Sampling Freq.] option to [48 kHz] on the setup menu. When this
choice is made, this unit will automatically convert any 96 kHz signals
to 48 kHz so your system can decode them.
yIf your TV is not equipped with Dolby Digital and MPEG decoder, set
the [Dolby Digital] and [MPEG] options to [PCM] on the setup menu.
Open source software notice
To obtain the corresponding source code under GPL, LGPL and other open source licenses, please visit
http://opensource.lge.com. All referred license terms, warranty disclaimers and copyright notices are
available to download with the source code.

5 Appendix
Appendix 25
Trademarks and
Licenses
Manufactured under license from Dolby
Laboratories. Dolby and the double-D symbol
are trademarks of Dolby Laboratories.
The terms HDMI and HDMI High-Denition
Multimedia Interface, and the HDMI logo are
trademarks of HDMI Licensing LLC in the United
States other countries.
“DVD Logo” is a trademark of DVD Format/Logo
Licensing Corporation.
DivX®, DivX Certied® and associated logos are
trademarks of Rovi Corporation or its subsidiaries,
and are used under license.
About the internal
hard disk drive
The internal hard disk drive (HDD) is a fragile piece
of equipment. Please use the unit following the
guidelines below to protect against possible HDD
failure.
yDo not move the unit while it is on.
yInstall and use a unit on a stable, levelled surface.
yDo not use the player in excessively hot or
humid places, or in places that may be subject
to sudden changes in temperature. Sudden
changes in temperature can cause condensation
to form inside the player. This can be a cause of
HDD failure.
yWhile the unit is powered on, do not unplug
from the wall socket or switch the electricity o
from the breaker switch.
yDo not move the player immediately after
switching it o. If you need to move the player,
please follow the steps below:
1. After the message “OFF” is shown in the
display, wait at least two minutes.
2. Unplug from the wall socket.
3. Move the player.
yIf there’s a power failure while the player is on,
there is a chance that some data on the HDD will
be lost.
yThe HDD is very delicate. If used improperly or
in an unsuitable environment, it is possible that
the HDD will fail after a few years of use. Signs
of problems include playback unexpectedly
freezing and noticeable block noise (mosaic) in
the picture.
yHowever, sometimes there will be no warning
signs of HDD failure.
yIf the HDD fails, playback of content will not
be possible. In this case, contact the LG service
center by following methods.
Web: http://www.lg.com
yThe manufacturer disclaims responsibility for loss
of data contained in internal HDD.
yThere are some capacities in HDD reserved for
the le system and timeshift.
5
Appendix

Appendix26
Specifications
General
Power requirements AC 200-240 V, 50/60 Hz
Power consumption 50 W
Dimensions (W x H x D) Approx. 430 x 55.5 x 270 mm without foot
Net Weight (Approx.) 3.46 kg
Operating temperature 5 °C to 35 °C
Operating humidity 5 % to 90 %
Television system: DVB-T/C Standard Compliant
TV Recording
Recording format TS ( Transport Stream format)
Recordable media Hard Disk Drive (
Connectors
HDMI OUT (video/audio) 19 pin (HDMI standard, Type A)
OPTICAL (DIGITAL AUDIO OUT) 3 V (p-p), Optical jack x 1
5
Appendix
ANTENNA IN Antenna input, 75 Ω
VIDEO IN / OUT 1.0 Vp-p 75 ohms, sync negative, RCA jack x 1
AUDIO IN / OUT 2.0 Vrms more than 47 kohms, RCA jack (L, R) x 1
USB Port 4 pin (USB 2.0 standard) x 1
500 GB/320 GB/250 GB/160 GB
), USB 2.0 HDD
System
Laser Semiconductor laser
wavelength 405 nm / 650 nm
Signal system Standard PAL/NTSC colour TV system
Frequency response 20 Hz to 20 kHz (48 kHz, 96 kHz, 192 kHz sampling)
Signal-to-noise ratio More than 100 dB (Analogue OUT connectors only)
Harmonic distortion Less than 0.008%
Dynamic range More than 95 dB
Bus Power Supply (USB) DC 5 V 0 500 mA
yDesign and specications are subject to change without notice.


An extended Owner's Manual that contains
information on the advanced features is located
on the CD-ROM provided in an electronic version.
To read these les, you will need to use a Personal
Computer (PC) equipped with a CD-ROM drive.
 Loading...