

Page 1

ENGLISH
LG
Wireless Remote Controller
LG
IMPORTANT
• Please read this installation manual completely
before installing the product.
• Installation work must be performed in
accordance with the national wiring standards
by authorized personnel only.
• Please retain this installation manual for future
reference after reading it thoroughly.
Owner's & Installation Manual
Visit us at : http://www.lgservice.com
Models: PQWRHSF0
PQWRCSF0
ENGLISH ITALIANO ESPAÑOL FRANÇAIS DEUTSCH
Page 2

2 Wireless Remote Controller
Wiress Remote Controller Owner’s & Installation Manual
TABLE OF CONTENTS
■ Safety Precautions..............................................................3~4
■ Part Description ..................................................................5~6
■ Installation Method .................................................................7
■ How to use the Mode Selection Button...........................8~18
• Cooling Operation ....................................................................................8
• Auto-Operation .........................................................................................9
• Auto Changeover Operation(Heat Pump Model Only) ........................10
• Healthy Dehumidification Operation ....................................................11
• Heating Operation(Heat pump model only) .........................................12
• Jet Cool Operation .................................................................................13
• NANO PLASMA Purification Operation ................................................14
• 2nd F Operation......................................................................................15
• Additional features...........................................................................16~18
• Setting the Central-Control Address ...................................................18
Page 3
Safety Precautions
Owner’s & Installation Manual 3
ENGLISH
■ Installation
■ Operation
Safety Precautions
• The installation requires expert skills, and it should be installed by the service center or other shops specialized
in the installation and recognized by our company.
• For all the problems arising after installation by someone who has no relevant qualifications, LG will not provide
free service.
• The following safety cautions are provided to prevent unexpected dangers or losses.
: If the user does not follow the mandatory items, it may result in serious injury or death.
: If the user does not follow the mandatory items, it may cause personal injury or property
damage.
: Warning and Caution are to call the user’s attention to the possible danger. Read and follow
them carefully in order to prevent a safety accident.
: Warning and Caution are indicated in this guide and the product itself to help protect the users
from danger.
WARNING
CAUTION
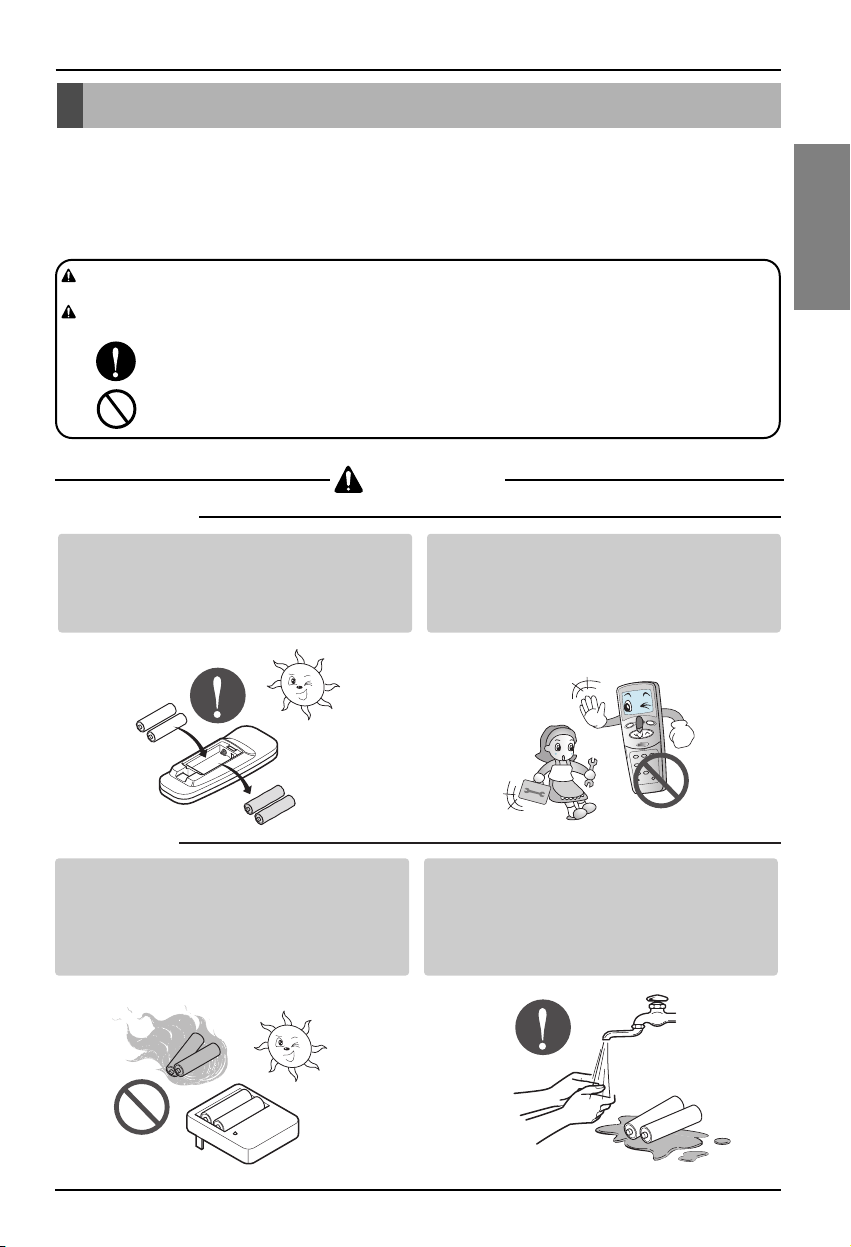
WARNING
Do not recharge or disassemble the batteries. Do
not dispose of batteries in a fire.
They may burn or explode.
If the liquid from the batteries gets onto your skin
or clothes, wash it well with clean water. Do not
use the remote if the batteries have leaked.
The chemicals in batteries could cause burns or
other health hazards.
Replace the all batteries in the remote control
with new ones of the same type. Do not mix old
and new batteries or different types of batteries.
There is risk of fire or explosion
Do not disassemble, repair, or modify the product
at your discretion in order to prevent fire or an
electric shock.
Page 4
Safety Precautions
4 Wireless Remote Controller
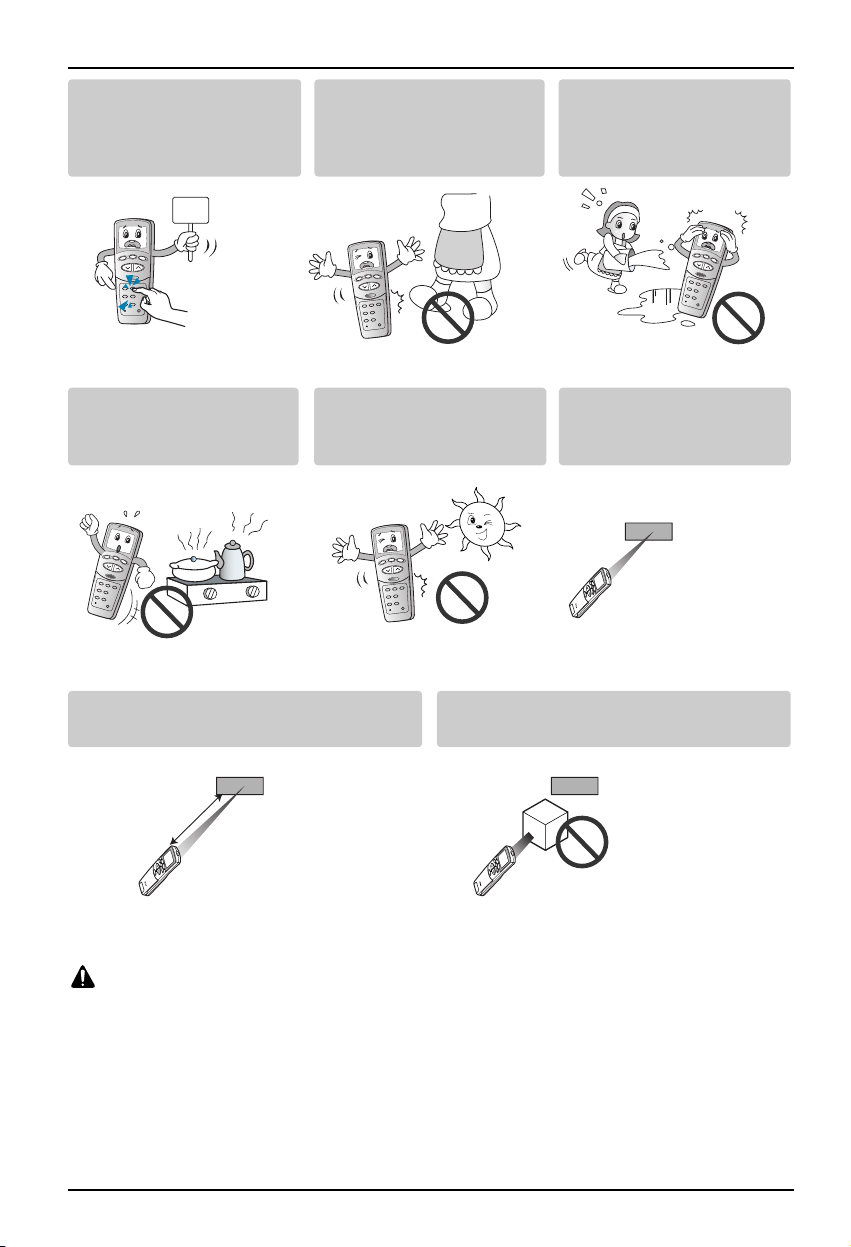
Push the button at one time.
There will be no operation if
you Several buttons at one
time.
Do not drop or throw the
remote Controller. Do not give
any strong impact and Put
your foot it.
Do not use this at the moisture
and Humidity places.
Do not use this at heating and
Firing conditions.
Do not place the remote
controller in a location exposed
to direct sunlight
Aim at the signal receptor on
the wiress remote controller so
as to operate
Only
One
Signal receptor
Signal receptor
7m
Signal receptor
The remote control signal can be received at a
distance of up to about 7m
Be sure that there are no obstructions between
the remote controller and the signal receptor
Block a strong light over the signal receptor with a curtain or etc. so as to prevent the abnormal operation.
(ex:electronic quick start, ELBA, inverter type fluorescent lamp)
CAUTION
Page 5
Part Description
Owner’s & Installation Manual 5
ENGLISH
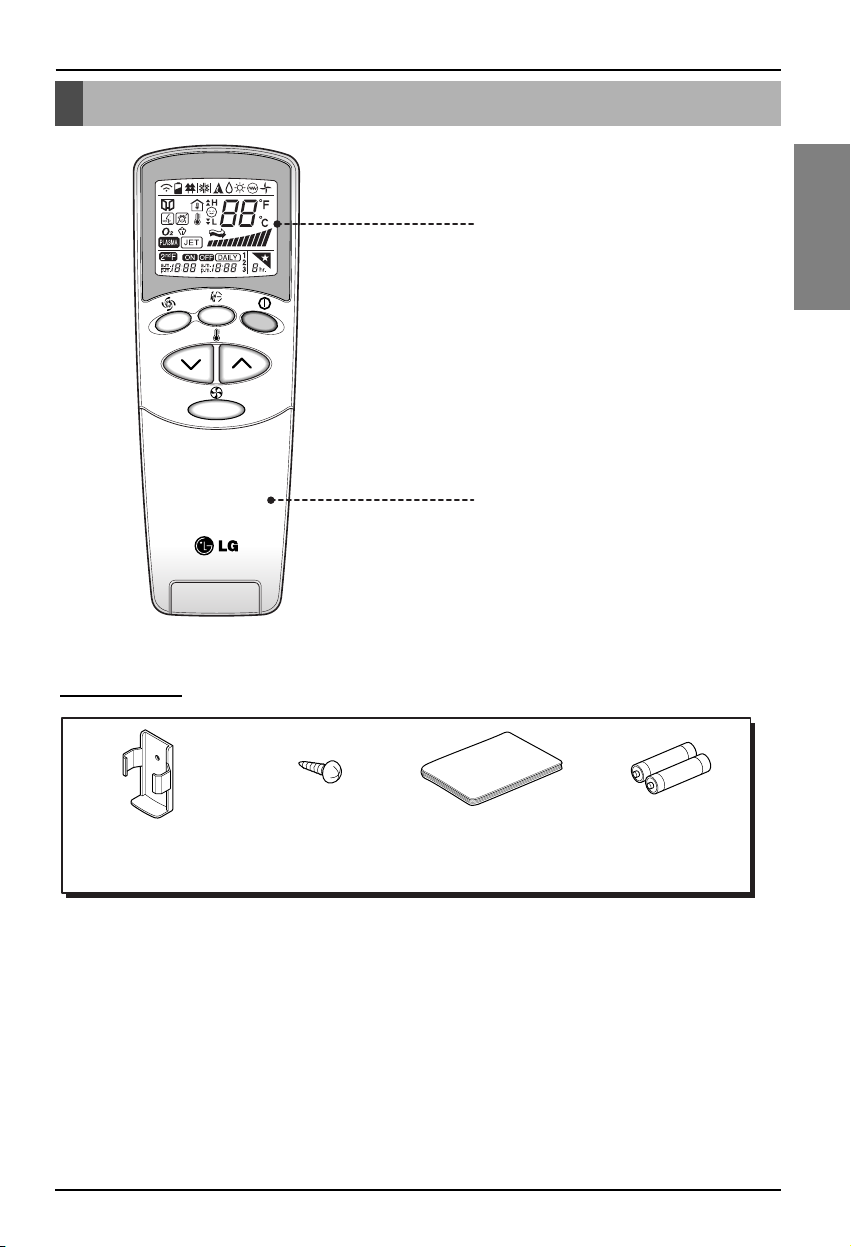
Flip-up door(Closed)
Wireless Remote Controller
LCD Screen
Part Description
Accessory
Holder(1EA) Fixing Screw (2EA) User / Installation
Manual
AAA(1.5V)
Batteries(2EA)
Page 6
Part Description
6 Wireless Remote Controller
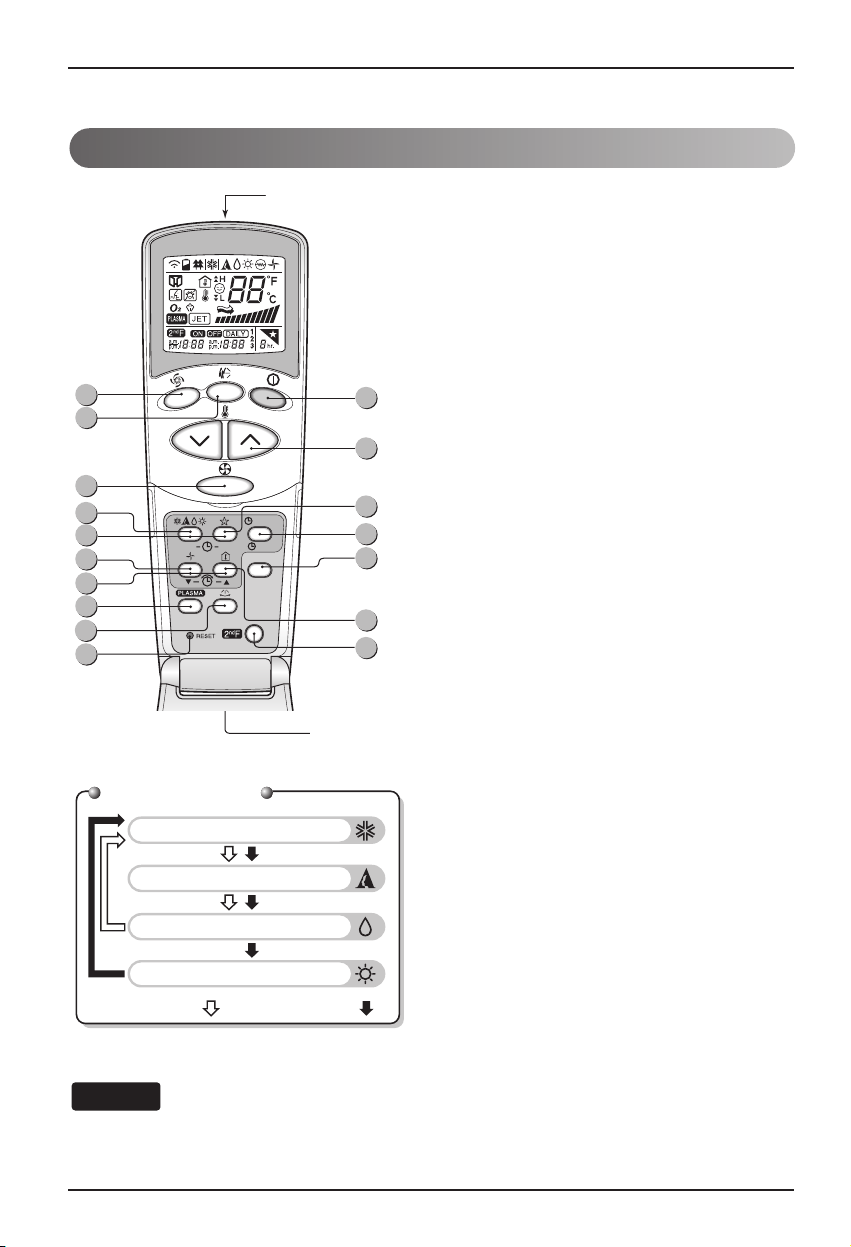
Wireless Remote Controller
1. Start/Stop Button
Operation starts when this button is pressed.
2. Operation Mode Selection Button
Used to select the operation mode.
3. Room Temperature Setting Buttons
Used to select the room temperature.
4. Indoor Fan Speed Selector
Used to select fan speed in four steps low,
medium, high and Chaos.
5. Jet Cool
Speed cooling/heating operates super high fan
speed.
6. Chaos Swing Button
Used to stop or start louver movement and set
the desired up/down airflow direction.
7. On/Off Timer Buttons
Used to set the time of starting and stopping
operation.
8. Time Setting Button
Used to adjust the time.
9. Timer Set/Cancel Button
Used to set the timer when the desired time is
obtained and to cancel the Timer operation.
10. Sleep Mode Auto Button
Used to set Sleep Mode Auto operation.
11. Air Circulation Button
Used to circulate the room air without cooling or
heating.
12. Room Temperature Button
Used to set the desired horizontal airflow
direction.
13. Plasma
Used to start or stop the plasma-purification
function.
14. Horizontal Airflow Direction Control Button
Used to set the desired horizontal airflow
direction.
15. Reset Button
Initialize remote controller.
16. 2nd F Button
Used prior to using modes printed in blue at the
bottom of buttons.
17. Auto Clean
Used to set Auto Clean mode.
To use the functions printed in blue at the bottom of the buttons press 2
nd
F button first and then the required function
button. Pressing the 2ndF button activates the blue printed function of the respective button. To cancel the function
press the 2nd F button again else it will automatically cancel if remains idle after 10 seconds.
NOTE
Signal transmitter
5
6
4
11
2
7
ON
OFF
CANCEL
SET
AUTO CLEAN
8
13
14
15
Flip-up door
(opened)
Operation Mode
Cooling Operation
Auto Operation or Auto Changeover
Healthy Dehumidification Operation
Heating Operation
•
Cooling Model( ), Heat Pump Model( )
10
17
12
16
1
3
9
Page 7

Installation Method
Owner’s & Installation Manual 7
ENGLISH
How to mount on a wall
How to insert batteries
Installation Method
To insert the remote control to the holder.
Use the screws to secure the holder to the wall or attach the holder side of indoor unit.
1
2
1. Remove the cover from the back of the
remote controller.
• Slide the cover according to the arrow
direction.
2. Insert two batteries.
• Be sure that the (+) and (-) directions are
correct.
• Be sure that both batteries are new.
3. Re-attach the cover.
• Slide the cover into back position.
• Do not use
rechargeable batteries
such batteries are
different from standard
dry cells in shape,
dimensions, and
performance.
• Change the batteries
with a new one if the
remote control does not
work properly after
using for an extended
length of time.
Wall
Insert Pull
Page 8

How to use the Mode Selection Button
8 Wireless Remote Controller
How to use the Mode Selection Button
Cooling Operation
ON
Cooling
Healthy
Dehumidification
Auto
Heating
(Heat pump model only)
To lower the temperature
To raise the temperature
Open the door on the Remote Controller. To select Cooling
Operation, press the Operation Mode Selection button.
Each time the button is pressed, the operation mode is shifted
in the direction of the arrow.
Set the temperature lower than the room temperature.
The temperature can be set within a range of 18°C~30°C in
1°C.
You can select the fan speed in four
steps-low, medium, high, or CHAOS. Each
time the button is pressed, the fan speed
mode is shifted.
Natural wind by the CHAOS logic
❏ For more fresh feeling, press the Indoor Fan Speed Selector and set CHAOS mode. In this mode, the wind
blows like natural breeze by automatically changing fan speed according to the CHAOS logic.
Press the Start/Stop button.
The unit will respond with beep sound.
1
2
3
4
Page 9

How to use the Mode Selection Button
Owner’s & Installation Manual 9
ENGLISH
Auto Operation
ON
Cooling
Healthy
Dehumidification
Auto
Heating
(Heat pump model only)
To lower the temperature
To raise the temperature
Press the Start/Stop button.
The unit will respond with beep
sound.
Open the door on the Remote Controller. To select Auto
Operation, press the Operation Mode Selection button.
Each time the button is pressed, the operation mode is
shifted in the direction of the arrow.
The temperature and fan speed are automatically set by the
electronic controls based on the actual room temperature. If
you want to change the set temperature, press the Room
Temperature Setting buttons. The set temperature will be
changed considering room temperature.
DURING AUTO OPERATION:
❏ You cannot switch the indoor fan speed. It has already been set by the Fuzzy rule.
❏ If the system is not operating as desired, manually switch to another mode. The system will not
automatically switch from the cooling mode to the heating mode, or from heating to cooling, then you must
set the mode and the desired temperature again.
❏ During Auto Operation, pressing the chaos swing button makes the horizontal louvers swing up and down
automatically. If you want to stop auto-swing, press the chaos swing button again.
1
2
3
Page 10

Auto changeover operation(Heat pump model only)
ON
Cooling
Healthy
Dehumidification
Auto
changeover
Heating
(Heat pump model only)
To lower the temperature
To raise the temperature
How to use the Mode Selection Button
10 Wireless Remote Controller
Press the Start/Stop button.
The unit will respond with
a beep.
Open the door of the remote controller. To select Auto Changeover
Operation, press the Operation Mode Selection button.
Each time the button is pressed, the operation mode is shifted in the
direction of the arrow.
1
2
Close the door of the remote controller. Set the temperature
lower than the room temperature. The temperature can be
set within a range of 18°C~30°C at intervals of 1°C.
Set the fan speed again with the door
of the remote controller still closed.
You can select the fan speed in four
steps-low, medium, high and CHAOS.
Each time the button is pressed, the
fan speed mode is shifted.
3
4
During Auto changeover Operation
The air conditioner changes the operation mode automatically to keep indoor temperature. When room
temperature vary over ±2°C with respect to setting temperature, air conditioner keeps the room
temperature within ±2°C with respect to setting temperature by auto changeover mode.
Page 11

Owner’s & Installation Manual 11
ENGLISH
How to use the Mode Selection Button
Healthy Dehumidification Operation
ON
Cooling
Healthy
Dehumidification
Auto
Heating
(Heat pump model only)
Press the Start/Stop button.
The unit will respond with beep
sound.
Open the door on the Remote Controller. To select Healthy
Dehumidification Operation, press the Operation Mode
Selection button.
Each time the button is pressed, the operation mode is shifted
in the direction of the arrow.
Set the fan speed. You can select the fan
speed in four steps - low, medium, high, or
CHAOS. Each time the button is pressed,
the fan speed mode is shifted.
DURING HEALTHY DEHUMIDIFICATION OPERATION:
❏ If you select the dehumidification mode on the operation selection button, the A/C starts to run the
dehumidification function, automatically setting the room temp. and air volume to the best condition for
dehumidification based on the sensed room temp.
In this case, the setting temp. is not displayed in the Remote Controller and you are not able to control
the room temp. either.
❏ During the healthy dehumidification function, the air volume is automatically set according to the
algorithm responding to the current room temp. and makes the room condition healthy and
comfortable even in the high humidity season.
NATURAL WIND BY THE CHAOS LOGIC
❏ For more fresh feeling, press the Indoor Fan Speed Selector and set
CHAOS mode. In this mode, the wind blows like natural breeze by
automatically changing fan speed according to the CHAOS logic.
1
2
3
Page 12

12 Wireless Remote Controller
How to use the Mode Selection Button
Heating Operation(Heat pump model only)
ON
Cooling
Healthy
Dehumidification
Auto
Heating
(Heat pump model only)
To lower the temperature
To raise the temperature
Press the Start/Stop button.
The unit will respond with
beep sound.
Open the door on the Remote Controller. To select Heating
Operation, press the Operation Mode Selection button.
Each time the button is pressed, the operation mode is
shifted in the direction of the arrow.
NATURAL WIND BY THE CHAOS LOGIC
❏ For more fresh feeling than other fan speed, press the Indoor Fan Speed Selector and set to CHAOS
mode. In this mode, the wind blows like natural breeze by automatically changing fan speed according to
the CHAOS logic.
1
2
Set the temperature higher than the room temperature.
The temperature can be set within a range of 16°C~30°C in
1°C.
Set the fan speed again. You can
select the fan speed in four steps–low,
medium, high, or CHAOS. Each time
the button is pressed, the fan speed
mode is shifted.
3
4
Page 13

Owner’s & Installation Manual 13
ENGLISH
How to use the Mode Selection Button
Jet Cool Operation
or or
Press the Start/Stop button.
The unit will respond with
beep sound.
Press the Jet Cool button to operate the
speed cooling mode and the unit will
operate in super high fan speed on cooling
mode for 30 minutes.
To cancel the Jet Cool mode, press the Jet Cool button or
the fan button or the room temperature setting button again
and the unit will operate in high fan speed in cooling mode
1
2
3
❏ During the JET COOL function at any moment, the A/C starts to blow the cool air at
extremely high speed for 30 minutes setting the room temp. automatically to 18°C. It is
especially used to cool the room temperature in the shortest time.
❏ In order to return to the normal cooling mode from the Jet Cool mode, you just press either
the operation mode selection button, air volume selection or temp. setting button or the
JET COOL button again.
NOTICE
Page 14

14 Wireless Remote Controller
How to use the Mode Selection Button
NANO PLASMA Purification Operation (Optional)
PLASMA Air Purifying Operation only
Press the Start/Stop button.
The unit will respond with beep sound.
Open the door on the Remote
Controller. Press the PLASMA air
purifying operation ON/OFF button.
Operation will start when the button
is pressed and stop when the button
is pressed again.
Set the fan speed. You can select the fan speed in
four steps-low, medium, high or CHAOS.
Each time the button is pressed, the fan speed
mode is shifted.
❈ Air purifying operation (PLASMA) is
available in Heating or any other operations.
1
2
3
If you press the PLASMA button, NANO PLASMA
air purifying operates.
Each time the button ( ) is pressed, the fan
speed mode is shifed.
Page 15

Owner’s & Installation Manual 15
ENGLISH
How to use the Mode Selection Button
2nd F Operation
ON
OFF
CANCEL
AUTO CLEAN
SET
AUTO CLEAN
ON
OFF
CANCEL
SET
Press the Start/Stop button.
The unit will respond with
beep sound.
Open the door of the Remote Controller and press the 2
nd
F
button to operate functions printed in blue at bottom of
buttons.
(Check the indication of 2ndfunction on Remote Controller
display.)
These buttons operate the timer setting as follows:
2
nd
function goes off in a short time automatically or when the
button is pressed again.
For more details refer to the functions in next page.
1
2
3
Page 16

16 Wireless Remote Controller
Additional features
Additional features
Sleep Mode
1. Press the Sleep Mode Auto button to set the time you want the unit to turn off automatically.
2. The Timer is programmed in one-hour increments by pressing the Sleep Mode Auto button 1 to 7 times.
The sleep mode is available for 1 to 7 times.
To alter the time period in steps of 1 hour, press the Sleep Mode Button while aiming at air conditioner.
3. Make sure the Sleep Mode Auto LED lights up.
To cancel the Sleep Mode, press the sleep Mode Auto button several times until the star
( ) disappears from the operation display.
The Sleep Mode will be operated at low fan speed (cooling) or medium fan speed (heat pump only) for quiet
sleeping.
IN COOLING MODE: The temperature will automatically rise by 1°C over the next 30 minutes and by 2°C in 1
hour for comfortable sleeping.
NOTICE
1. Time can be set only when you have pressed the Reset button. If you have just replaced the batteries,
the Reset button should be pressed to reset the time.
2. Press 2
nd
F button and check if 2ndF icon is on.
3. Press the Time Setting buttons until the desired time is set.
4. Press the Timer SET button.
Check the indicator for A.M. and P.M.
NOTICE
Setting the Time
CANCEL
SET
Page 17

Owner’s & Installation Manual 17
ENGLISH
Additional features
Delay Start/Pre-Set Stop
1. Make sure the time is set correctly on the Remote Controller display.
2. Press 2ndF button.
3. Press the ON/OFF Timer buttons to turn Timer on or off.
4. Press the Time Setting buttons until the desired time is set.
5. Press the selected on/off setting by pressing the Timer SET button while aiming the Remote Controller
at the signal receptor.
To cancel the setting the timer.
Press the Timer Cancel button while aiming Remote Controller at the signal receptor.
(The timer lamp on the air conditioner and the display will go out.)
ON
OFF
CANCEL
SET
CANCEL
SET
Vertical Airflow Direction Control (Optional)
The up/down airflow (Vertical Airflow) can be adjusted by using the remote controller.
1. Press the Start/Stop button to start the unit.
2. Press Chaos Swing button and the louvers will swing up and down.
Press the Chaos Swing button again to set the vertical louver at the desired airflow direction.
❏ If you press the CHAOS swing button, the horizontal airflow direction is changed automatically based on the
CHAOS algorithm to distribute the air in the room evenly and at the same time to make the human body feel
more comfortable, as if enjoying a natural breeze.
❏ Always use the remote controller to adjust the up/down airflow direction. Manually moving the vertical airflow
direction louver by hand, could damage the air conditioner.
❏ When the unit is shut off, the up/down airflow direction louver will close the air outlet vent of the system.
NOTICE
Horizontal Airflow Direction Control (Optional)
The left/right(Horizontal Airflow) can be adjusted by using the remote control.
Press the Start/Stop button to start the unit.
Open the door on the remote control. Press the Airflow Direction Start/Stop button and the
louvers will swing left and right. Press the Horizontal Airflow Direction Control Button again to
set the horizontal louver at the desired airflow direction.
Delay off timer Delay on timer Delay off and on timer Delay on and off timer
Page 18

18 Wireless Remote Controller
Additional features
AUTO CLEAN
Air Circulation Mode
Circulates the room air without cooling or heating.
1. Press the Start/Stop button. The unit will respond with a beep.
2. Open the door on the remote controller. Press the Air Circulation button. Close the door on the remote
controller. Now each time that you press the Indoor Fan Speed Selector, the fan speed is shifted from
low to CHAOS and back to low again.
Fan speed is on low. Fan speed is on medium. Fan speed is on high.CHAOS Air
CHAOS Air economizes power consumption and prevents overcooling. The fan speed is automatically changed from
high to low or vice versa, depending on the ambient temperature.
NOTICE
Auto Clean (Optional)
1. Whenever you press the Auto Clean button, Auto Clean Function will be reserved and
cancelled.
2. Auto Clean function works before and after cooling or dehumidification mode. For
details, refer to the below points.
3. When the unit is started after the reservation of Auto Clean ,the Cool Start function
operates and indoor Fan is started after 20 seconds.
4. When you press Start/Stop button to turn off the unit after the you have reserved Auto
Clean function, the air-conditioner circulates the indoor air in the Auto Clean mode with
no more Cooling or Dehumidification operation. For Cooling only model, it lasts for 30
minutes for Heat pump model, for 16 minutes.
5. If you press the auto clean button again during the product operation , Auto Clean
function will be cancelled.
❏ During Auto Clean function, moistures left in indoor units after Cooling Operation or Healthy
Dehumidification Operation can be removed.
❏ During Auto Clean function, only Start/Stop button, Plasma button and Auto Clean button are
available.
NOTICE
Page 19

Owner’s & Installation Manual 19
ENGLISH
Setting the Central-Control Address
Setting the Central-Control Address
ON
OFF
CANCEL
AUTO CLEAN
SET
(00, ...., 90, A0, ...., F0)
(00, ...., 09, 0A, ...., 0F)
(Address No.3 indoor-unit
of Second Group)
To lower the temperature
To raise the temperature
When RESET button is pressed once with JET COOL button
held, ’00’ will be shown on the LCD DISPLAY and it’ll enter
into the address set mode.
1
Whenever you press the Temperature Increase(UP) button,
the group address number also increases.(Left-digit)
And whenever you press the Temperature Decrease(DOWN)
button, the indoor-unit address number also increases.
(Right-digit) (Control scope of Group Address No. and
Indoor-unit Address No. : 00~FF)
2
When you press the START/STOP button on your
remote-controller directed toward the receiver of indoor-unit
after setting address, the address would be set.
3
When you press RESET button after completing address
setup, the address setup function will be cancelled.
In the state of cancellation, LCD display shows the initial
standby mode.
4
❏ You are recommended to follow below procedure to check indoor-unit address with
remote-controller.
Press RESET button once with the wind direction button( ) of remote-controller held.
The LCD DISPLAY on remote-controller shows ’88’. When you press START/STOP button
on your remote-controller directed toward the receiver of indoor-unit at this time, the display
LED of indoor-unit lights at the initial set address.
NOTICE
Page 20

20 Wireless Remote Controller
 Loading...