

Page 1

OWNER’S MANUAL
Safety and Reference
LED TV*
*Disclaimer
LG LED TV applies LCD screen with LED backlights.
Please read this manual carefully before operating your TV and retain it for future
reference.
MT49S
www.lg.com
Page 2

Table of contents
Licenses -------------------------------------------3
ENGLISH
ENG
Open source software notice information 3
Preparing -----------------------------------------3
Lifting and moving the TV -------------------4
Setting up the TV -------------------------------4
Using the joystick button --------------------5
Mounting on a table ---------------------------5
Mounting on a wall ----------------------------6
Connections (notications) -----------------7
Remote control ---------------------------------8
Maintenance -------------------------------------9
Troubleshooting--------------------------------9
Specications --------------------------------- 10
2
Page 3
Licenses
A
A
<
Supported licenses may dier by model. For more information
about licenses, visit www.lg.com.
Open source software notice information
To obtain the source code under GPL, LGPL, MPL, and other open
source licenses, that is contained in this product, please visit http://
opensource.lge.com.
In addition to the source code, all referred license terms, warranty
disclaimers and copyright notices are available for download.
LG Electronics will also provide open source code to you on CD-ROM
for a charge covering the cost of performing such distribution (such
as the cost of media, shipping, and handling) upon email request to
opensource@lge.com. This oer is valid for three (3) years from the
date on which you purchased the product.
Preparing
NOTE
y Image shown may dier from your TV.
y Your TV’s OSD (On Screen Display) may dier slightly from that
shown in this manual.
y The available menus and options may dier from the input
source or product model that you are using.
y New features may be added to this TV in the future.
y The TV can be placed in standby mode in order to reduce the
power consumption. And the TV should be turned o if it
will not be watched for some time, as this will reduce energy
consumption.
y The energy consumed during use can be signicantly reduced
if the level of brightness of the picture is reduced, and this will
reduce the overall running cost.
y The items supplied with your product may vary depending on
the model.
y Product specications or contents of this manual may be
changed without prior notice due to upgrade of product
functions.
y For an optimal connection, HDMI cables and USB devices should
have bezels less than 10 mm thick and 18 mm width. Use an
extension cable that supports USB 2.0 if the USB cable or USB
memory stick does not t into your TV’s USB port.
B
y Use a cer tied cable with the HDMI logo attached. If you do
not use a certied HDMI cable, the screen may not display or a
connection error may occur.
y Recommended HDMI cable types
- High-Speed HDMI®/™ cable
- High-Speed HDMI®/™ cable with Ethernet
B
*A < 10 mm
18 mm
*B
ENGENGLISH
CAUTION
y Do not use any unapproved items to ensure the safety and
product life span.
y Any damage or injuries caused by using unapproved items are
not covered by the warranty.
y Some models have a thin lm attached on to the screen and this
must not be removed.
3
Page 4
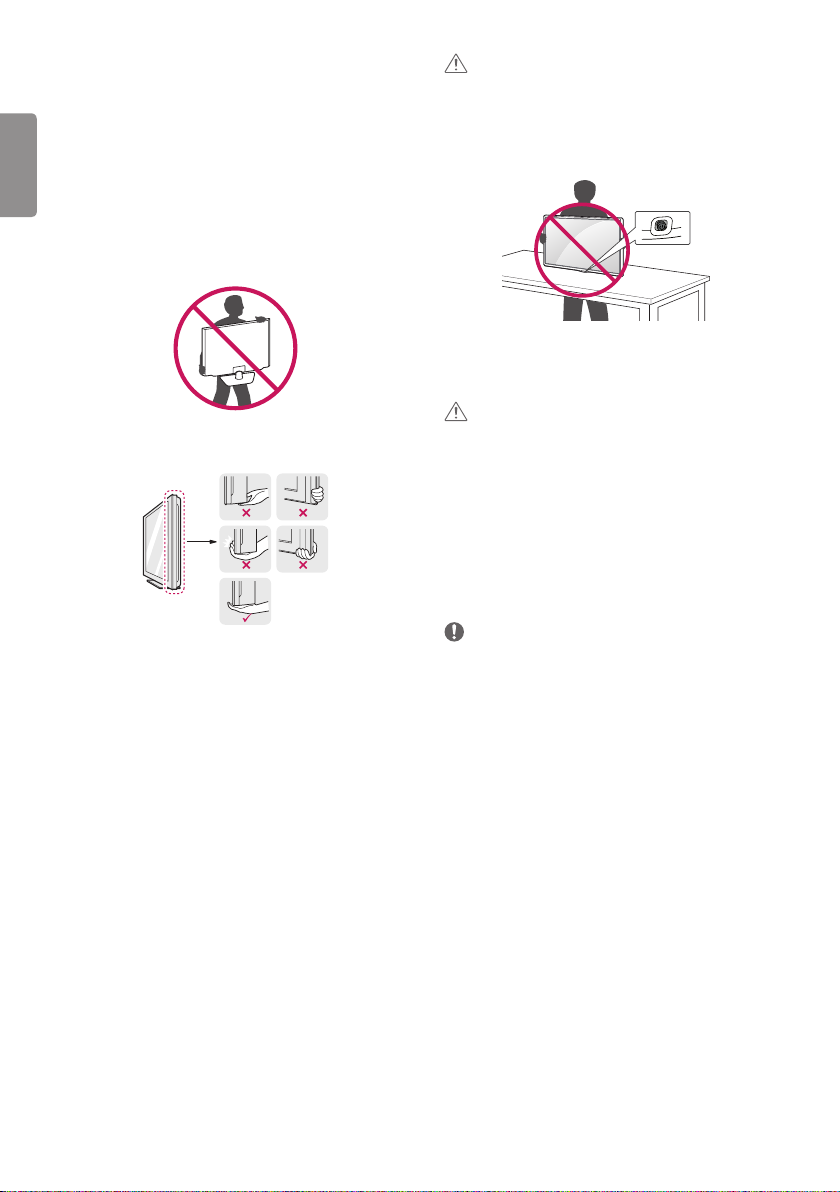
Lifting and moving the TV
Please note the following advice to prevent the TV from being
scratched or damaged and for safe transportation regardless of its
ENGLISH
type and size.
ENG
y It is recommended to move the TV in the box or packing material
that the TV originally came in.
y Before moving or lifting the TV, disconnect the power cord and
all cables.
y When holding the TV, the screen should face away from you to
avoid damage.
y Hold the top and bottom of the TV frame rmly. Make sure not to
hold the transparent part, speaker, or speaker grill area.
y When transpor ting the TV, do not expose the TV to jolts or
excessive vibration.
y When transpor ting the TV, keep the TV upright, never turn the TV
on its side or tilt towards the left or right.
y Do not apply excessive pressure to cause exing /bending of
frame chassis as it may damage screen.
CAUTION
y Avoid touching the screen at all times, as this may result in
damage to the screen.
y When handling the TV, be careful not to damage the protruding
joystick button.
Setting up the TV
CAUTION
y When attaching the stand to the TV set, place the screen facing
down on a cushioned table or at surface to protect the screen
from scratches.
y Do not c arry the monitor upside-down by holding the stand
body (or stand base) as this may cause it to fall o, resulting in
damage or injury.
y Do not apply foreign substances (oils, lubricants, etc.) to the
screw parts when assembling the product. (Doing so may
damage the product.)
NOTE
y Lift up the latch at the bottom of the stand base and detach the
stand base from the TV.
4
Page 5
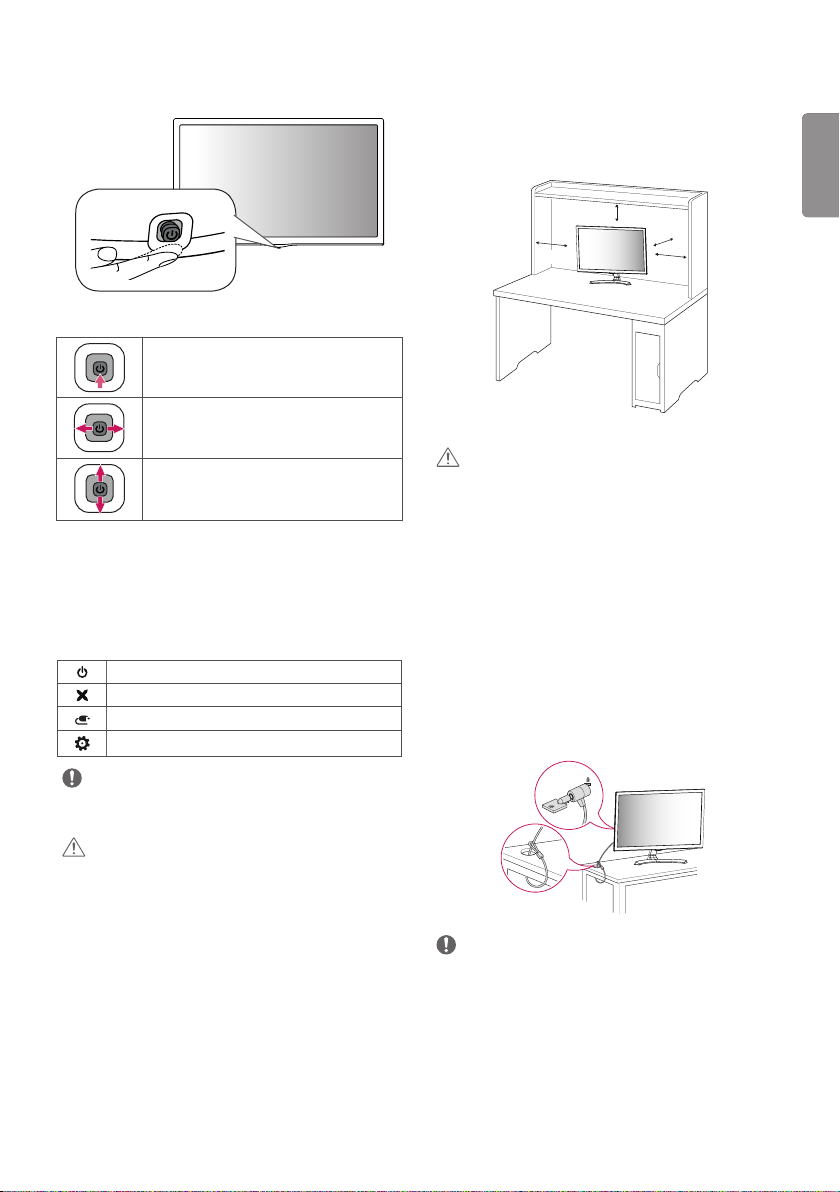
Using the joystick button
You can simply operate the TV functions, using the button.
Basic functions
Mounting on a table
y Image shown may dier from your TV.
1 Lift and tilt the TV into its upright position on a table.
• Leave a 100 mm (minimum) space from the wall for proper
ventilation.
100 mm
100 mm
100 mm
100 mm
ENGENGLISH
Power On (Press)
Power O (Press and hold)
Volume Control
Programmes Control
1 All running apps will close, and any recording in progress will
stop.
1
Adjusting the menu
When the TV is turned on, press the joystick button one time. You
can adjust the menu items using the button.
Turns the power o.
Clears on-screen displays and returns to TV viewing.
Changes the input source.
Accesses the settings menu.
NOTE
y If you press the joystick button rst, you may not be able to adjust
the volume level and saved programmes.
CAUTION
y When your nger over the joystick button and push it to the up,
down, left or right, be careful not to press the joystick button.
2 Connect the AC-DC Adapter and Power Cord to a wall outlet.
CAUTION
y Do not place the TV near or on sources of heat, as this may result
in re or other damage.
y Please be sure to connect the TV to the AC/DC power adapter
before connecting the TV’s power plug to a wall power outlet.
Using the kensington security system
(This is not available for all models.)
y Image shown may dier from your TV.
The Kensington security system connector is located at the rear of
the TV. For more information of installation and using, refer to the
manual provided with the Kensington security system or visit http://
www.kensington.com. Connect the Kensington security system cable
between the TV and a table.
NOTE
y The Kensington security system is optional. You can obtain
additional accessories from most electronics stores.
5
Page 6
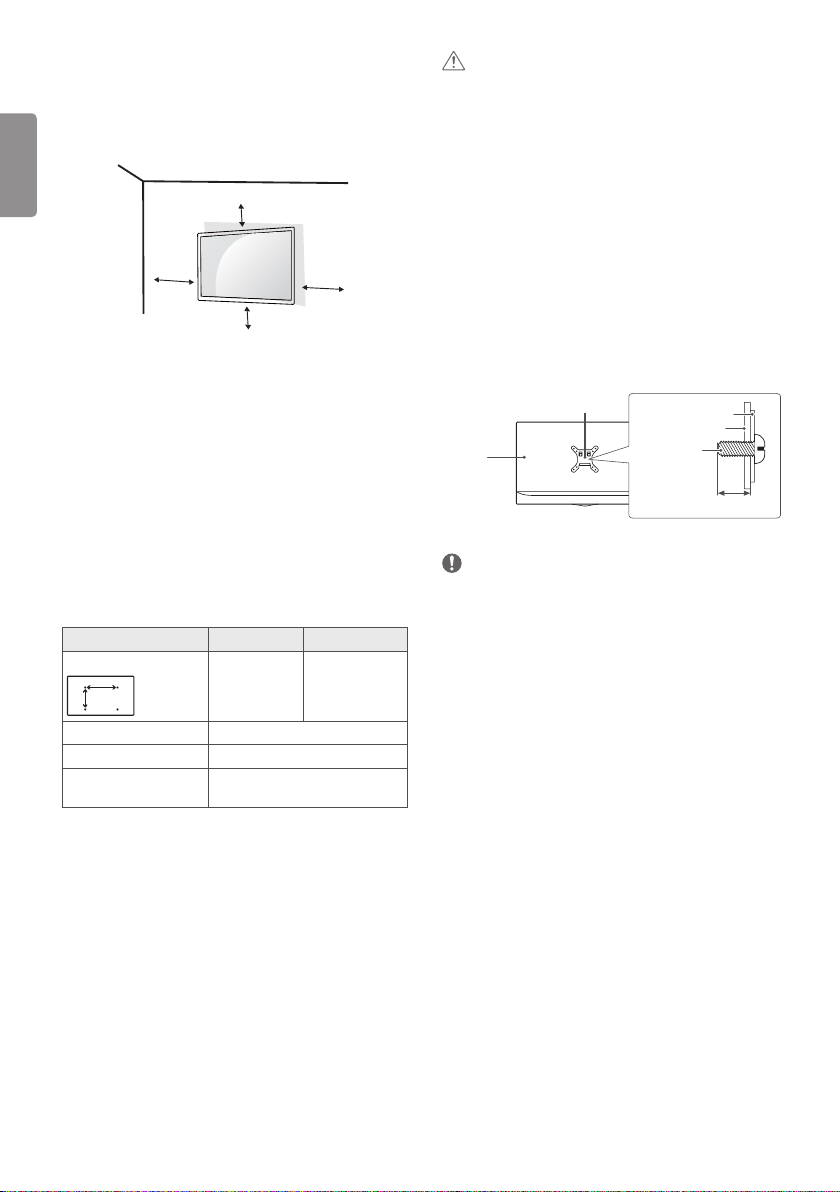
Mounting on a wall
A
For proper ventilation, allow a clearance of 100 mm on each side and
from the wall. Detailed installation instructions are available from
your dealer, see the optional Tilt Wall Mounting Bracket Installation
ENGLISH
ENG
and Setup Guide.
100 mm
100 mm
100 mm
If you intend to mount the TV to a wall, attach Wall mounting
interface (optional parts) to the back of the TV.
When you install the TV using the wall mounting interface (optional
parts), attach it carefully so it will not drop.
1 If you use screw longer than standard, the TV might be
damaged internally.
2 If you use improper screw, the product might be damaged and
drop from mounted position. In this case, LG Electronics is not
responsible for it.
100 mm
CAUTION
y Must use the enclosed screw in the box. (Depending on model)
y Disconnec t the power rst, and then move or install the TV.
Otherwise electric shock may occur.
y If you install the TV on a ceiling or slanted wall, it may fall and
result in severe injury.
y Use an authorized LG wall mount and contact the local dealer or
qualied personnel.
y Do not over tighten the screws as this may cause damage to the
TV and void your warranty.
y Use the screws and wall mounts that meet the VESA standard. Any
damages or injuries by misuse or using an improper accessory are
not covered by the warranty.
y Screw length from outer surface of back cover should be under
8 mm.
Wall mount Pad
Back Cover
Wall mount Pad
Back Cover
Standard screw
: M4 x L10
Max.8 mm
Separate purchase (Wall mounting
bracket)
Model 24MT49S 28MT49S
Wall mount (A x B) (mm)
B
Standard screw M4 x L10
Number of screws 4
Wall mount bracket
(optional)
6
75 x 75 100 x 100
RW120
NOTE
y Use the screws that are listed on the VESA standard screw
specications.
y The wall mount kit includes an installation manual and necessary
parts.
y The wall mount bracket is optional. You can obtain additional
accessories from your local dealer.
y The length of screws may dier depending on the wall mount. Be
sure to use the proper length.
y For more information, refer to the instructions supplied with the
wall mount.
Page 7
Connections (notications)
Connect various external devices to the TV and switch input modes
to select an external device. For more information about an external
device’s connection, refer to the manual supplied with each device.
Available external devices are: HD receivers, DVD players, VCRs, audio
systems, USB storage devices, PC, camcorders or cameras, gaming
devices, and other external devices.
NOTE
y The external device connection may dier from the model.
y Connect external devices to the TV regardless of the order of the
TV port.
y If you record a TV programme on a DVD recorder or VCR, make
sure to connect the TV signal input cable to the TV through a DVD
recorder or VCR. For more information of recording, refer to the
manual provided with the connected device.
y Refer to the external equipment’s manual for operating
instructions.
y If you connect a gaming device to the TV, use the cable supplied
with the gaming device.
y In PC mode, there may be noise associated with the resolution,
vertical pattern, contrast or brightness. If noise is present, change
the PC output to another resolution, change the refresh rate
to another rate or adjust the brightness and contrast on the
PICTURE menu until the picture is clear.
y In PC mode, some resolution settings may not work properly
depending on the graphics card.
Antenna connection
Connect the TV to a wall antenna socket with an RF cable (75 Ω).
y Use a signal splitter to use more than 2 TVs.
y If the image qualit y is poor, install a signal amplier properly to
improve the image quality.
y If the image qualit y is poor with an antenna connected, try to
realign the antenna in the correct direction.
y An antenna cable and converter are not supplied.
y Suppor ted DTV Audio: MPEG, Dolby Digital, Dolby Digital Plus,
HE-AAC
Satellite dish connection
(Only satellite models)
Connect the TV to a satellite dish to a satellite socket with a satellite
RF cable (75 Ω).
ENGENGLISH
CI module connection
View the encrypted (pay) services in digital TV mode.
y Check if the CI module is inser ted into the PCMCIA card slot in the
right direction. If the module is not inserted properly, this can
cause damage to the TV and the PCMCIA card slot.
y If the TV does not display any video and audio when CI+ CAM is
connected, please contact to the Terrestrial/Cable/Satellite Service
Operator.
PC connection
When connecting your PC to the HDMI input, set the HDMI input’s
Input Label to PC.
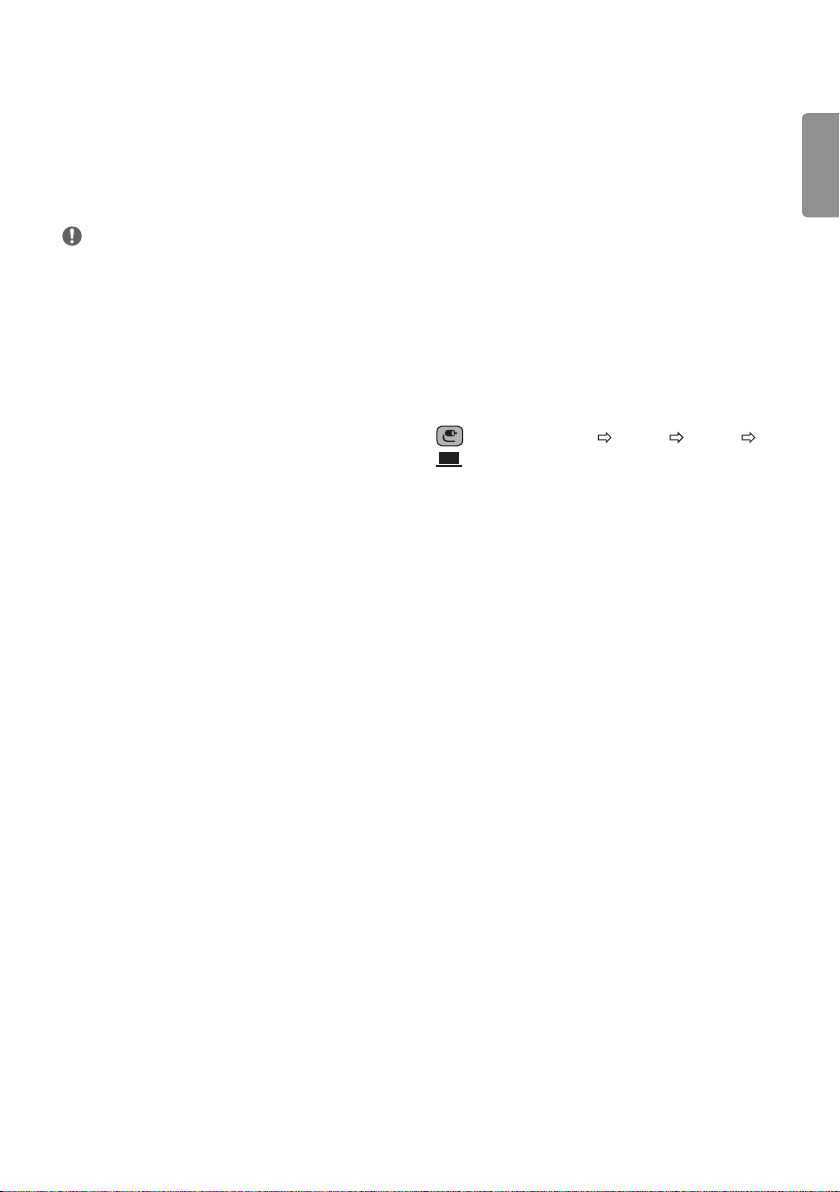
(Inputs) (Remote control) All Inputs EDIT ICON
PC
Other connections
Connect your TV to external devices. For the best picture and audio
quality, connect the external device and the TV with the HDMI cable.
Some separate cable is not provided.
y Suppor ted HDMI Audio format:
Dolby Digital / Dolby Digital Plus (32 kHz, 44.1 kHz, 48 kHz),
DTS (44.1 kHz, 48 kHz),
PCM (32 kHz, 44.1 kHz, 48 kHz, 96 kHz, 192 kHz)
(Depending on model)
7
Page 8

Remote control
1
2
1
(Some buttons and services may not be provided depending on
ENGLISH
models or regions.)
ENG
The descriptions in this manual are based on the buttons on the
remote control. Please read this manual carefully and use the TV
correctly.
To replace batteries, open the battery cover, replace batteries (1.5
V AAA) matching the and ends to the label inside the
compartment, and close the battery cover. To remove the batteries,
perform the installation actions in reverse.
CAUTION
y Do not mix old and new batteries, as this may damage the remote
control.
y The remote control will not be included for all sales market.
Make sure to point the remote control toward the remote control
sensor on the TV.
* To use the button, press and hold for more than 3 seconds.
(POWER) Turns the TV on or o.
Selects Radio, TV and DTV programme.
(INPUT) Changes the input source.
(Q.Settings) Accesses the Quick Settings.
By zooming in on the selected area, you can view it in
full screen.
(SEARCH) Search for content such as TV programmes, movies
and other videos, or perform a web search by entering text in the
search bar.
Recalls your preferred subtitle in digital mode.
Number buttons Enters numbers.
Alphabet buttons Enters letters.
Accesses the saved programme list.
(Space) Opens an empty space on the screen keyboard.
Shows programme guide.
Returns to the previously viewed programme.
* You can access apps or Live TV using the number
buttons corresponding to the features.
Adjusts the volume level.
Views the information of the current programme and
screen.
(MUTE) Mutes all sounds.
Scrolls through the saved programmes.
Moves to the previous or next screen.
, Streaming Service buttons Connects to the Video
Streaming Service.
(HOME) Shows the Home menu.
- Pressing and holding the button shows the previous history.
Shows the list of Programmes and Recommended.
Returns to the previous level.
Clears on-screen displays and returns to TV viewing.
Teletext buttons ( ) These buttons are used for
teletext.
currently watching.
Navigation buttons (up/down/left/right) Scrolls through
menus or options.
(Only Time Machine
Control buttons ( ) Controls media contents.
menus.
* Provides content related to the program you are
Selects menus or options and conrms your input.
Audio descriptions function will be enabled.
Starts to record and displays record menu.
Ready
supported model)
Returns to LIVE TV.
, , , These access special functions in some
8
Page 9

Maintenance
Cleaning your TV
Clean your TV regularly to keep the best performance and to extend
the product lifespan.
y Make sure to turn the power o and disconnect the power cord
and all other cables rst.
y When the TV is left unattended and unused for a long time,
disconnect the power cord from the wall outlet to prevent
possible damage from lightning or power surges.
Screen, frame, cabinet and stand
To remove dust or light dirt, wipe the surface with a dry, clean, and
soft cloth.
To remove major dirt, wipe the surface with a soft cloth dampened
in clean water or a diluted mild detergent. Then wipe immediately
with a dry cloth.
y Avoid touching the screen at all times, as this may result in
damage to the screen.
y Do not push, rub, or hit the screen surface with your ngernail or a
sharp object, as this may result in scratches and image distortions.
y Do not use any chemicals as this may damage the product.
y Do not spray liquid onto the surface. If water enters the TV, it may
result in re, electric shock, or malfunction.
Power cord
Remove the accumulated dust or dirt on the power cord regularly.
Troubleshooting
Cannot control the TV with the remote control.
y Check the remote control sensor on the product and try again.
y Check if there is any obstacle between the product and the remote
control.
y Check if the batteries are still working and properly installed (
to , to ).
No image display and no sound is produced.
y Check if the product is turned on.
y Check if the power cord is connected to a wall outlet.
y Check if there is a problem in the wall outlet by connecting other
products.
The TV turns o suddenly.
y Check the power control settings. The power supply may be
interrupted.
y Check if the Sleep Timer / T imer Power Off is activated in the
Timers settings.
y Check if the Auto Power Off is activated in the General Eco
Mode settings. (Depending on model)
y If there is no signal while the TV is on, the TV will turn o
automatically after 15 minutes of inactivity.
When connecting to the PC (HDMI), 'No Signal' or ‘Invalid
Format’ is displayed.
y Turn the TV o/on using the remote control.
y Reconnec t the HDMI cable.
y Restar t the PC with the TV on.
ENGENGLISH
Preventing “Image burn” or “Burn-in” on
your TV screen
y If a xed image displays on the TV screen for a long period of time,
it will be imprinted and become a permanent disgurement on
the screen. This is “image burn” or “burn-in” and not covered by
the warranty.
y If the aspec t ratio of the TV is set to 4:3 for a long period of time,
image burn may occur on the letterboxed area of the screen.
y Avoid displaying a xed image on the TV screen for a long period
of time (2 or more hours for LCD) to prevent image burn.
9
Page 10

Specications
0197
Product specications may be changed without prior notice due to upgrade of product functions.
ENGLISH
ENG
Models
24MT49S 556 x 392.7 x 143.4 556 x 345.2 x 54.7 3.5 3.2 25 W 19 V 2.0 A
28MT49S 641.5 x 444.0 x 178.8 641.5 x 396.3 x 59.5 5.0 4.5 28 W 19 V 2.0 A
Wireless module specication
y As band channels can var y per country, the user cannot change or adjust the operating frequency. This product is congured for the regional
frequency table.
y For consideration of the user, this device should be installed and operated with a minimum distance of 20 cm between the device and the
body.
* "IEEE 802.11ac" is not available in all countries.
Dimensions (W x H x D) (mm) Weight (kg)
With stand Without stand With stand Without stand
Wireless LAN module(LGSWFAC71) Specication
Wireless LAN (IEEE 802.11a/b/g/n/ac)
Frequency Range Output Power(Max.)
2400 to 2483.5 MHz
5150 to 5725 MHz
5725 to 5850 MHz (Not for EU)
Power consumption
(Outgoing condition)
13 dBm
16.5 dBm
10 dBm
Power
requirement
10
Page 11

AC/DC Adapter
Environment
condition
(Depending on country)
Television system
Channel coverage
(Band)
Maximum number of
storable programmes
External antenna
impedance
Manufacturer: Lien Chang
Model: LCAP16B-E, LCAP21C
Manufacturer: Honor
Model: ADS-45FSN-19 19040GPG,
ADS-45SN-19-3 19040G
In: AC 100 – 240 V ~ 50/60 Hz
Out: DC 19 V 2.1 A
CI module Size (W x H x D) 100.0 mm x 55.0 mm x 5.0 mm
Operating Temperature 0 °C to 40 °C
Operating Humidity Less than 80 %
Storage Temperature -20 °C to 60 °C
Storage Humidity Less than 85 %
Digital TV Analogue TV
DVB-T
DVB-T2
DVB-C
PAL/SECAM, B/G, D/K, I
SECAM L
DVB-S/S2
DVB-S/S2 DVB-C DVB-T/T2
VHF III: 174 ~ 230 MHz
950 ~ 2150 MHz 46 ~ 890 MHz
UHF IV: 470 ~ 606 MHz
UHF V: 606 ~ 862 MHz
46 ~ 862 MHz
S Band II: 230 ~ 300 MHz
S Band III: 300 ~ 470 MHz
6000 2000
75 Ω
ENGENGLISH
11
Page 12

WARNING!
Never place a television set in an unstable location. A television
set may fall, causing serious personal injury or death. Many
injuries, particularly to children, can be avoided by taking simple
ENGLISH
precautions such as:
ENG
y Using cabinets or stands recommended by the manufacturer of
the television set.
y Only using furniture that can safely support the television set.
y Ensuring the television set is not overhanging the edge of the
supporting furniture.
y Not placing the television set on tall furniture (for example,
cupboards or bookcases) without anchoring both the furniture
and the television set to a suitable support.
y Not placing the television set on cloth or other materials that
may be located between the television set and supporting
furniture.
y Educating children about the dangers of climbing on furniture to
reach the television set or its controls.
If your existing television set is being retained and relocated, the
same considerations as above should be applied.
Symbols
Refers to alternating current(AC).
Refers to direct current(DC).
Refers to class II equipment.
Refers to stand-by.
Refers to “ON” (power).
12
Refers to dangerous voltage.
Page 13

Record the model number and serial number
of the TV.
Refer to the label on the back cover and
quote this information to your dealer when
requiring any service.
MODEL
SERIAL
 Loading...